Loading ...
Loading ...
Loading ...
3. Connect the wire coloured brown to
the terminal either marked with the
“L“ or coloured red.
4. Check that no cut, or stray strands of
wire is present and the cord clamp
(E) is secure over the outer sheath.
Make sure the electricity supply
voltage is the same as that indicated
on the appliance rating plate.
5. Switch on the appliance.
The appliance is supplied with a 13 amp
fuse (B). In the event of having to change
the fuse in the plug supplied, a 13 amp
ASTA approved (BS 1362) fuse must be
used.
WARNING!
A cut off plug inserted into a
13 amp socket is a serious
safety (shock) hazard. Ensure
that it is disposed of safely.
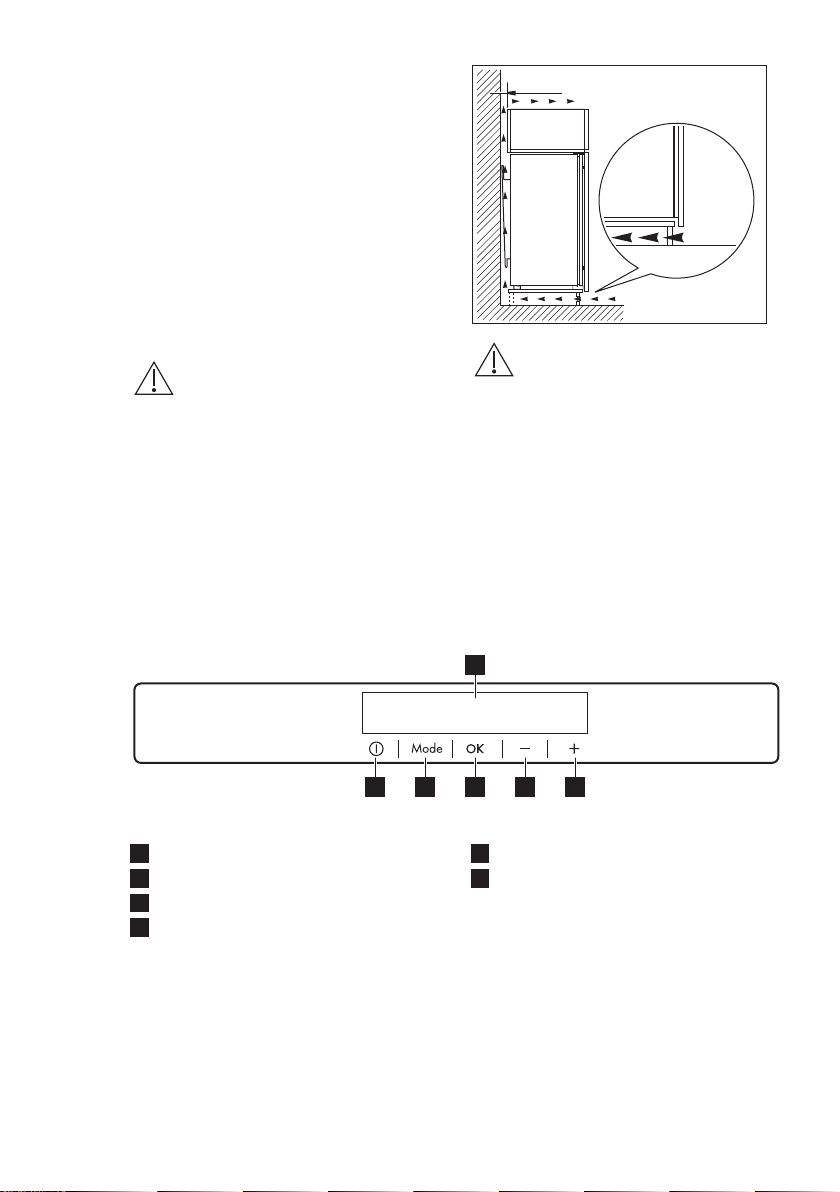
3.4 Ventilation requirements
The airflow behind the appliance must
be sufficient.
5 cm
min.
200 cm
2
min.
200 cm
2
CAUTION!
Refer to the assembly
instructions for the
installation.
4. OPERATION
4.1 Control Panel
56 4 3 2
1
1
Display
2
Temperature warmer button
3
Temperature colder button
4
OK
5
Mode
6
ON/OFF
It is possible to change predefined
sound of buttons by pressing together
Mode and temperature colder button for
a few seconds. Change is reversible.
ENGLISH 7
Loading ...
Loading ...
Loading ...