Loading ...
Loading ...
Loading ...
E-10
FILTER INSTALLATION
4
Fill in the usage
start date and
place on the unit as
guide for when the
fi lters should be
replaced.
Date Label
Unplug the unit before installing
or adjusting the fi lters.
PREPARATION FOR
USE
1
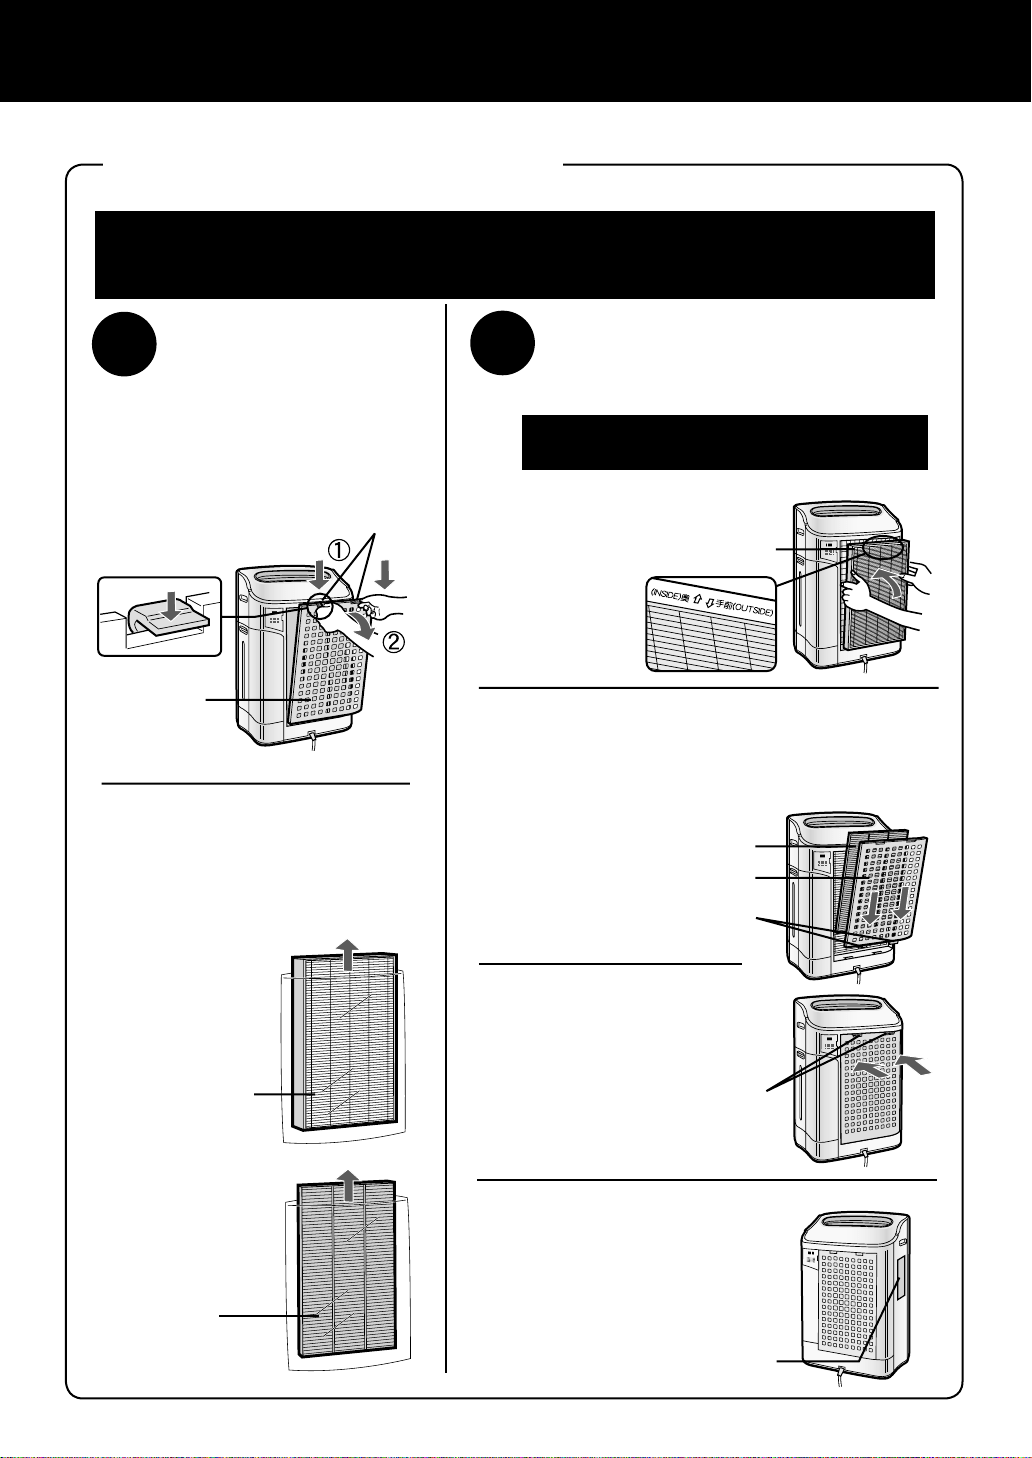
Remove the Back Panel.
Gently push down on the tabs,
then tilt and remove the back
panel.
Install the fi lters
To maintain the quality of the fi lters, they are packed in plastic bags and placed in
the unit. Be sure to remove the fi lters from the plastic bags and replace the fi lters in
the unit before initial use.
Remove the fi lters
2
Remove the Washable
Deodorizing fi lter (black)
and True HEPA fi lter
(white) from the plastic
bags.
Back Panel
True HEPA filter
(white)
Washable
Deodorizing
fi lter (black)
True HEPA fi lter
2
Insert the Back Panel’s 2 bottom tabs
(left and right) into the small holes in the
unit, and slide the Washable Deodorizing
fi lter between the True HEPA fi lter and
the Back Panel.
3
Gently push in the
upper tabs (left
and right) to lock
in place.
1
2
Tabs on the top
Washable Deodorizing fi lter
Back Panel
Bottom tabs
Upper tabs
1
I
nstall the True HEPA fi lter.
Please make sure that the True HEPA
fi lter is placed in proper orientation.
Installing the fi lter backwards
will affect the performance of
the unit.
KC-860UEng.indd10KC-860UEng.indd10 2009/12/2814:07:142009/12/2814:07:14
Loading ...
Loading ...
Loading ...