Loading ...
Loading ...
Loading ...
08
T
hrough your wall
Installation Instructions\\\
F
urther to your various ducting options, below are some tips on how to
correctly duct your rangehood:
– Alw
ays use correctly sized ducting – DO NOT reduce the size of the ducting
– Alw
ays use solid ducting
– Alw
ays use non-flammable ducting
– Alw
ays duct to the outside atmosphere
– Do no
t use flexible ducting
– Do no
t duct into the ceiling space- always vent to the outside atmosphere.
–
A
void sharp 90 degree bends as much as possible, use 45 degree bends
instead wherever possible
– Duct t
o the outside atmosphere using the shortest duct run possible
– Us
e cylindrical ducting whenever possible
Positioning the rangehood
Ins
tallation heights
–
Ov
er gas and electric cookers, Residentia Group recommends our
rangehoods to be mounted at a height of between 600-800mm above the
cooking surface.
–
Electric cook
tops must have a minimum height of 600mm from the
underside of the rangehood to the cooktop face.
–
Gas cook
tops must have a minimum of 650mm from the burner to the
underside of the rangedhood.
–
Ov
er open flame grillers or barbecues, the Gas Regulations require the
filters of the rangehood to be at least 1200mm above the cooking surface.
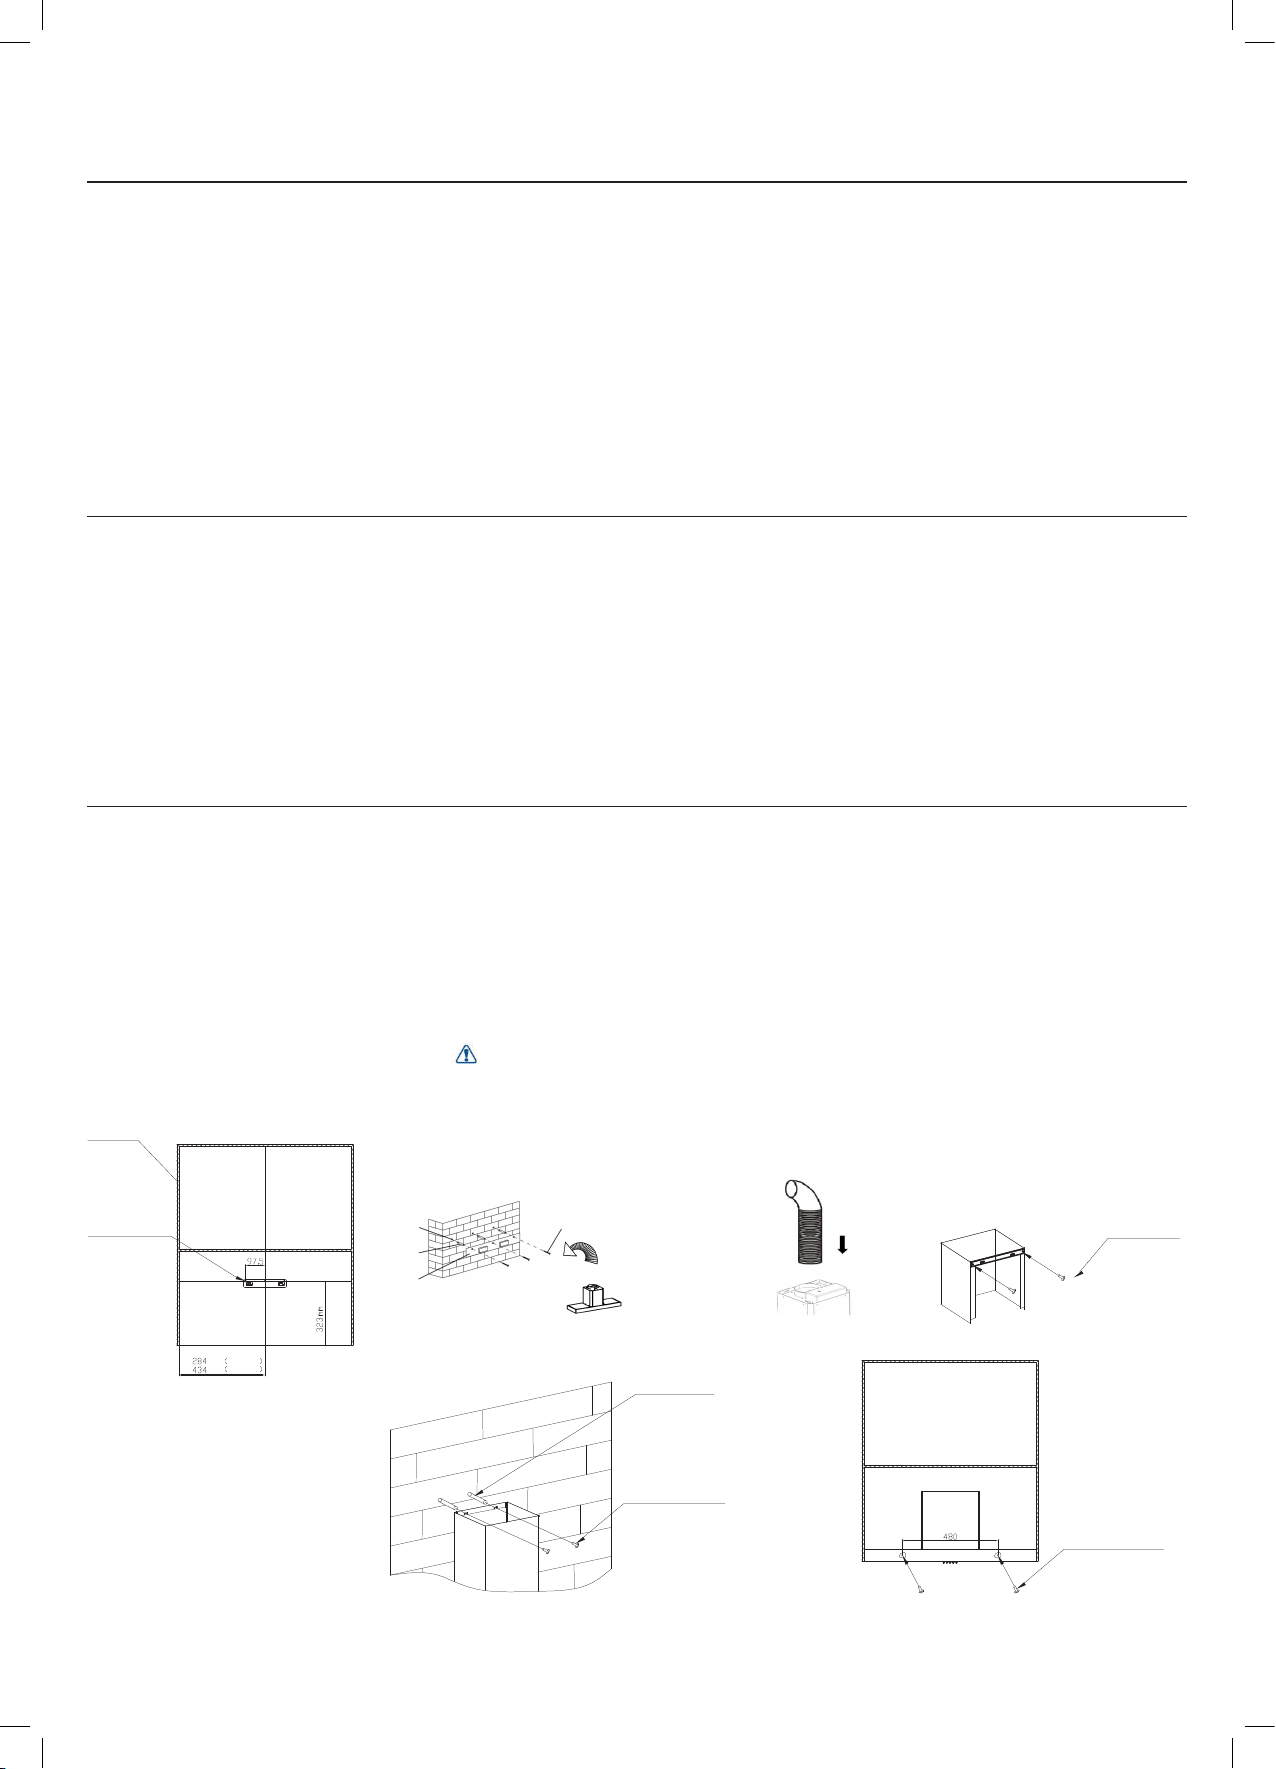
Installing the rangehood
Important! . if you need the safety screws fixed into the hood,please mark ,
drill and tighten the hood with screw plug and screw(ST4mm X 30mm),you
will need to remove the grease filters first.( See Pic E )
Wall plug
W
all bracket
Holes on wall
Exh
aust pipe
Cooker hood
Screw
(ST4 x 30mm)
Warning: Failure
to install the screws or fixing device in accordance
with these instructions may result in electrical hazards.
The warning shall be in the same part of the instructions that include
details of how to mount the equipment.
D
etermine your installation height , drill 3 holes to install the wall bracket
with 3 x Wall Plugs and 3 x Screw ST4x30mm onto the wall ensuring that
it is secured in a level position . (SEE Pic A)
When finish, hang the hood onto the hook. (SEE Pic A)
Attach the extensible 200mm tube to the hood. (SEE Pic B)
Fix the chimney bracket with the chimney with 2 x Screw ST4x8mm
(SEE Pic C)
Attached the chimney to the hood , mark and drill 2 holes to fix
the bracket on the wall. (SEE Pic D)
–
–
–
–
–
RIH60W
MM
MM
RIH90W
*Screw*
(ST4 x 30mm)
Cabinet
Pic A
Pic B
(ST4 x 8mm)
*Screw*
Pic C
2222Wall plug
*Screw*
(ST4 x 30mm)
2×
2×
Pic D
(ST4 x 30mm)
*Screw*
2×
Pic E
Loading ...
Loading ...
Loading ...