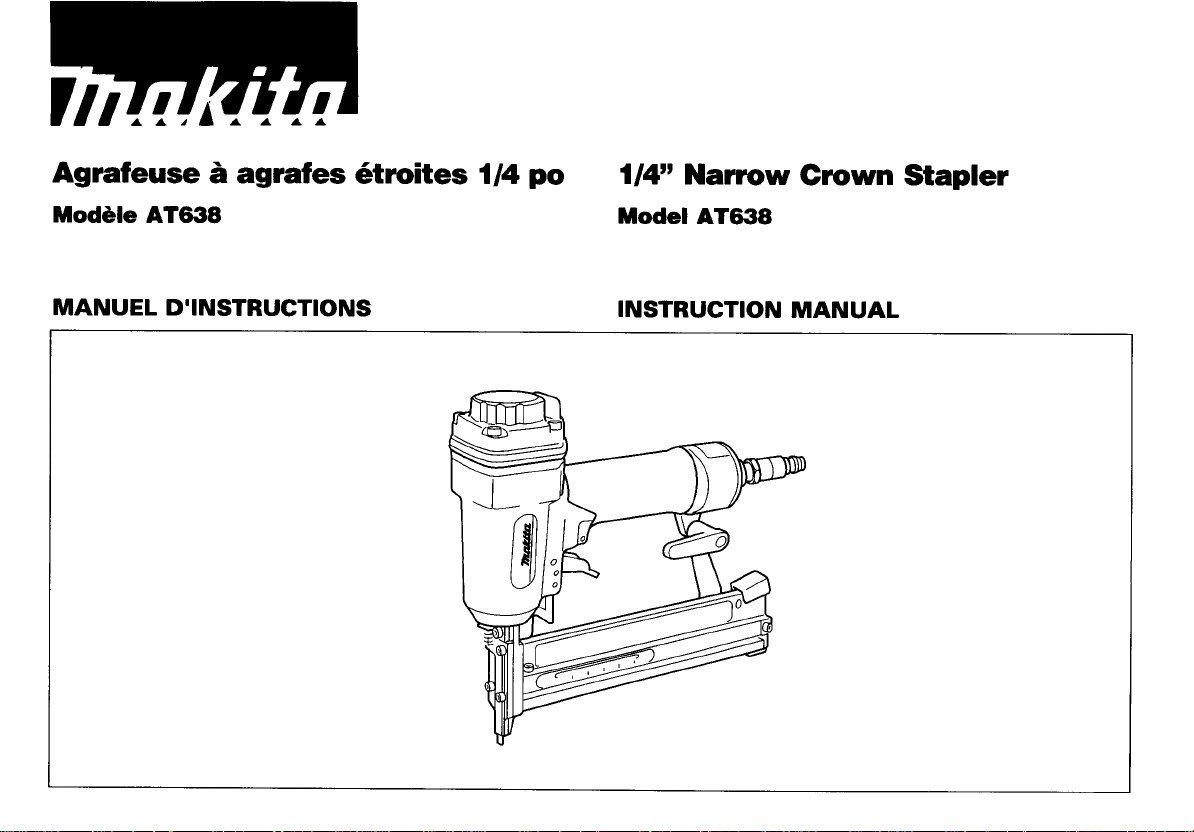
Agrafeuse
a
agrafes etroites 1/4
PO
Mod&le
AT638
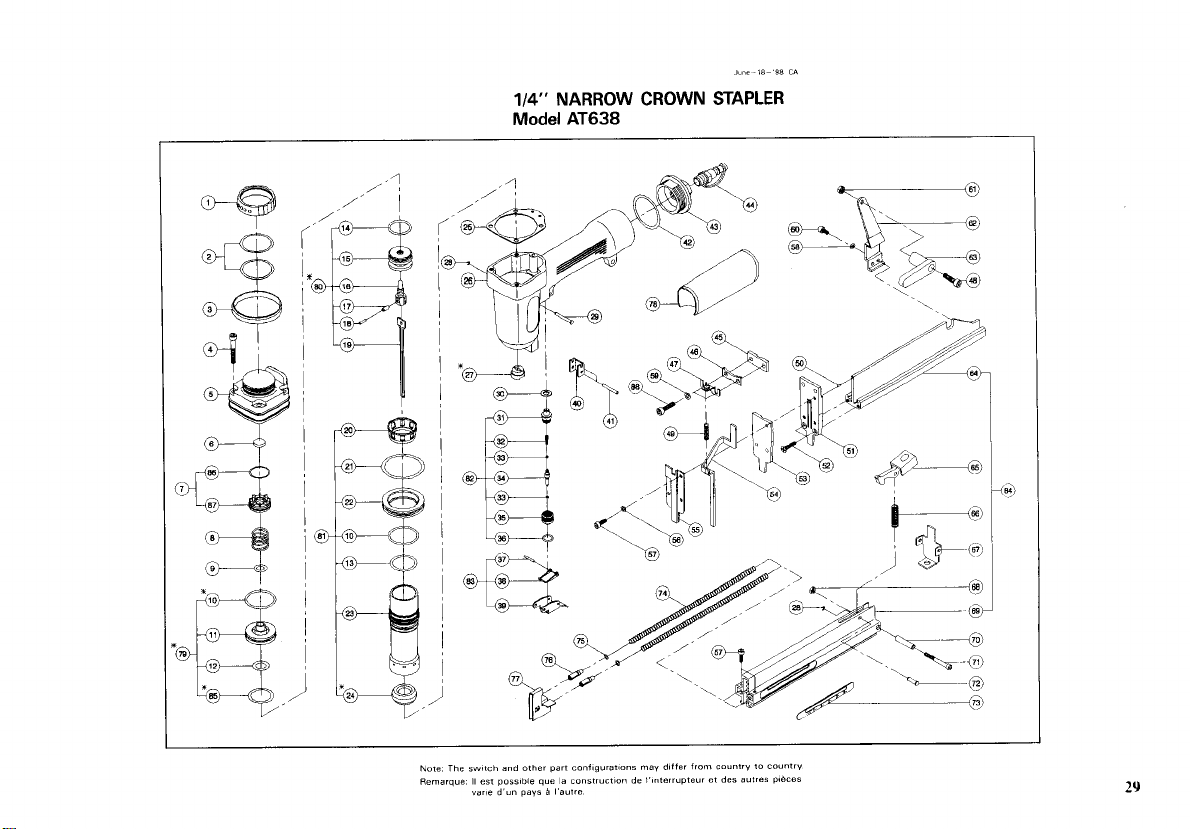
Model
AT638
1/4” Narrow Crown Stapler
MANUEL D’INSTRUCTIONS INSTRUCTION MANUAL
PRECAUTIONS TRES IMPORTANTES
VOUS DEVEZ TOUJOURS SUIVRE LES PRECAUTIONS ELE-
D'ACCIDENT, ET NOTAMMENT LES SUIVANTES:
IMPORTANT SAFETY INSTRUCTIONS
CAUTIONS SHOULD ALWAYS BE FOLLOWED TO REDUCE
ING:
AVERTISSEMENT: LORSQUE VOUS UTlLlSEZ CET OUTIL, WARNING: WHEN USING THIS TOOL, BASIC SAFETY
PRE-
MENTAIRES DE SECURITE AFlN DE REDUIRE LES RISQUES THE
RISK
OF
PERSONAL INJURY, INCLUDING THE FOLLOW-
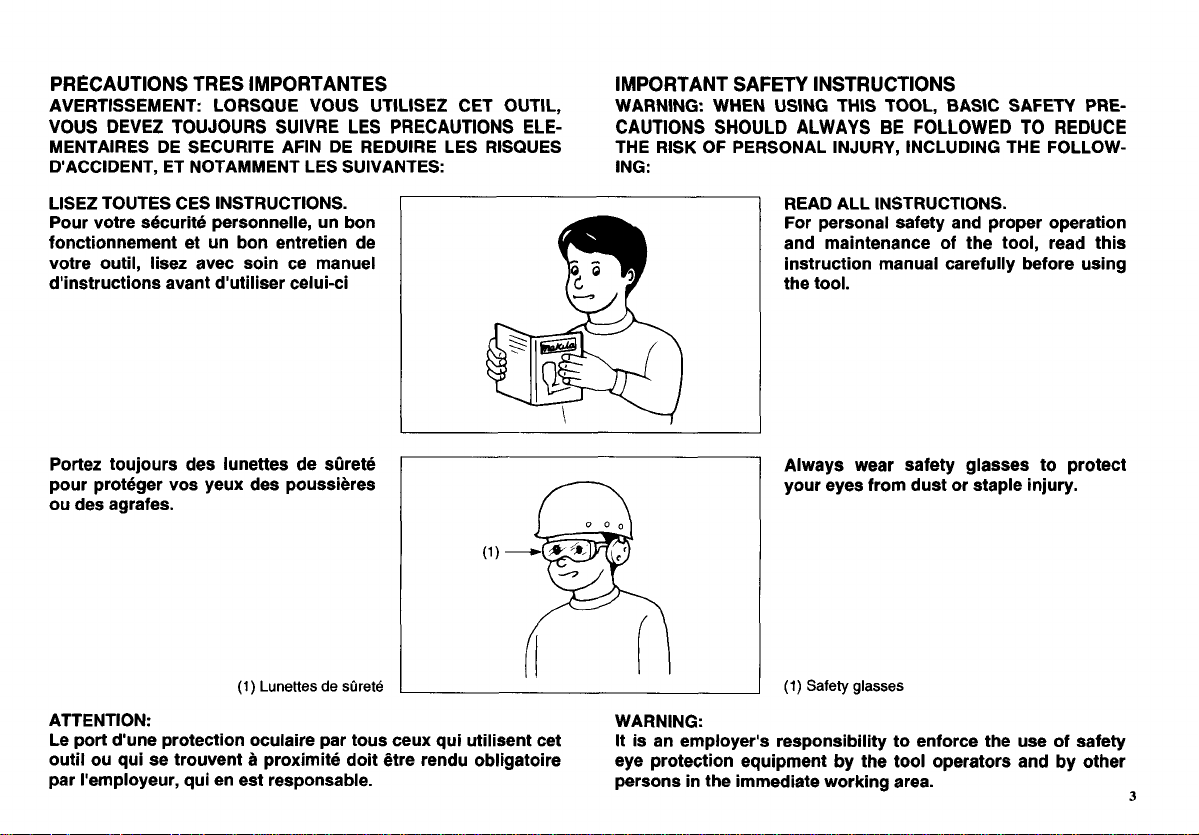
LISEZ TOUTES CES INSTRUCTIONS.
Pour votre s6curit6 personnelle, un bon
fonctionnement et un bon entretien de
votre outil, lisez avec soin ce manuel
d'instructions avant d'utiliser celui-ci
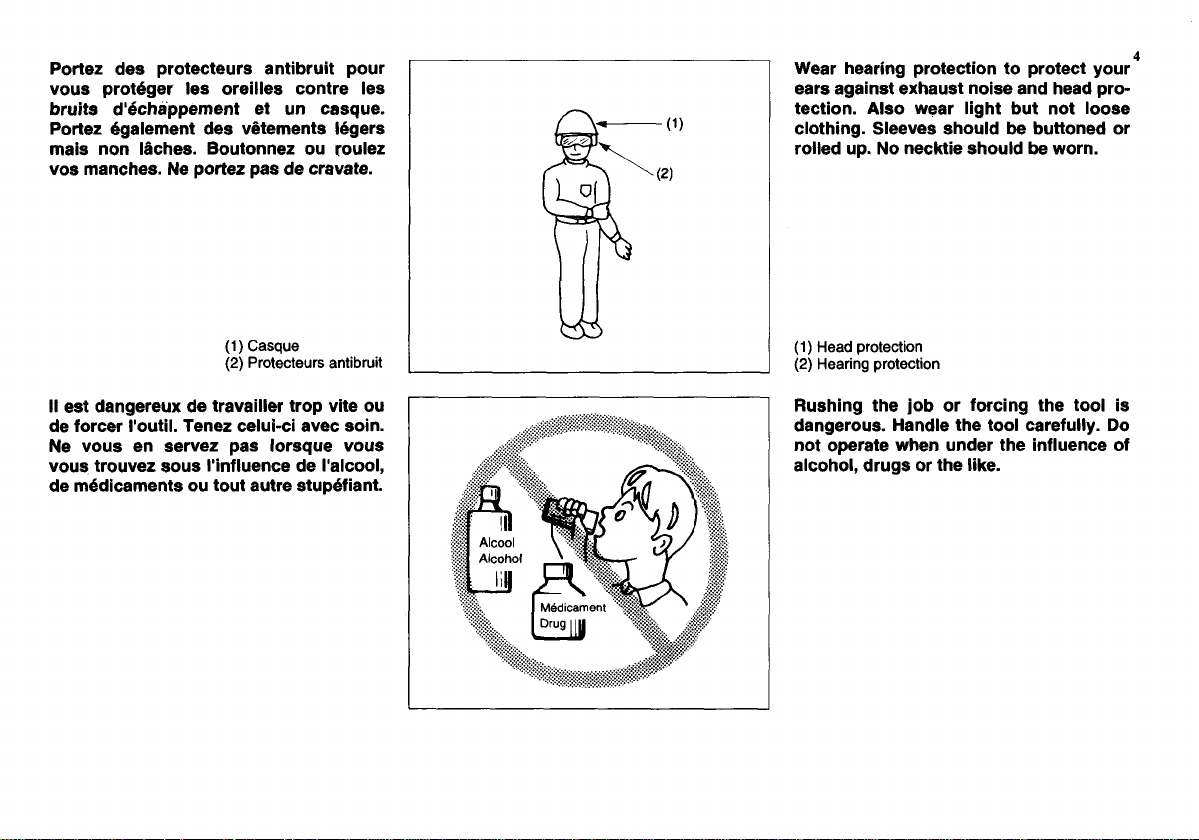
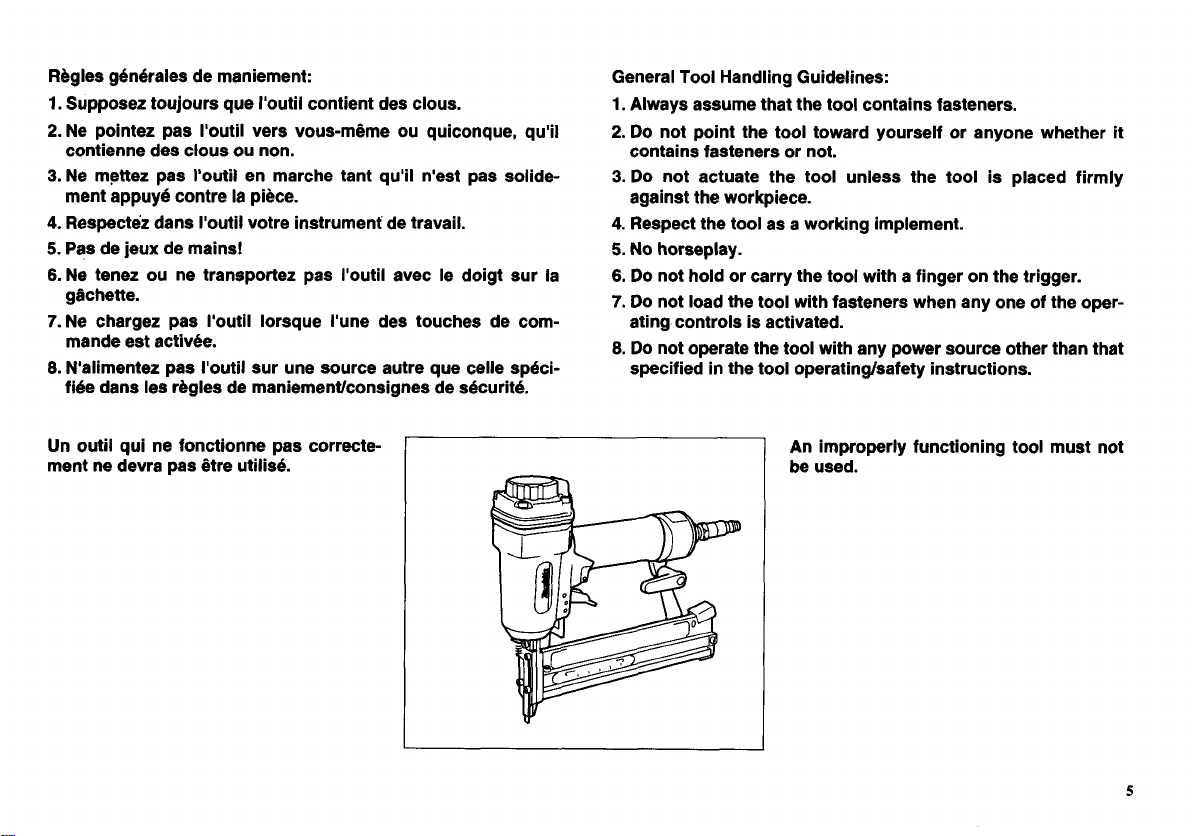
Portez
toujours
des
lunettes de sOrete
pour proteger vos yeux des poussieres
ou
des agrafes.
(1)
Lunettes de sOret6
I
READ ALL INSTRUCTIONS.
For personal safety and proper operation
and maintenance of the tool, read this
instruction manual carefully before using
the tool.
Always wear safety glasses to protect
your eyes from dust or staple injury.
(1)
Safety glasses
ATTENTION: WARNING:
Le
port d'une protection oculaire par tous ceux qui utilisent cet
outil ou qui
se
trouvent
a
proximite doit &re rendu obligatoire
par I'employeur, qui en est responsable.
It is an employer's responsibility to enforce the use of safety
eye protection equipment by the tool operators and by other
persons in the immediate working area.
3
-ay!l
aqa
JO
ship 'loqoqe
40
aauaniju!
aqt
iapun uaqM atemdo aou
oa
-Allniareo
loot
aqa
alpueH -snora6uep
s!
iooa
aqa 6u!s~oj
JO
qo!
aut
6u!qsnu
RPgles generales de maniement:
1.
Supposez toujours que I'outil contient des clous.
2.
Ne pointez pas I'outil vers vous-m6me ou quiconque, qu'il
3.
Ne mettez pas I'outil en marche tant qu'il n'est pas solide-
4.
Respectez dans I'outil votre instrument de travail.
5.
Pas de jeux de mains!
6.Ne tenez ou ne transportez pas I'outil avec le doigt sur la
ggchette.
7.Ne charger pas I'outil lorsque I'une des touches de com-
mande est activ6e.
8.
N'alimentez pas I'outil sur une source autre que celle sp6ci-
fibe dans les rbgles de maniementlconsignes de s6curit6.
contienne des clous ou non.
ment appuye contre
la
piece.
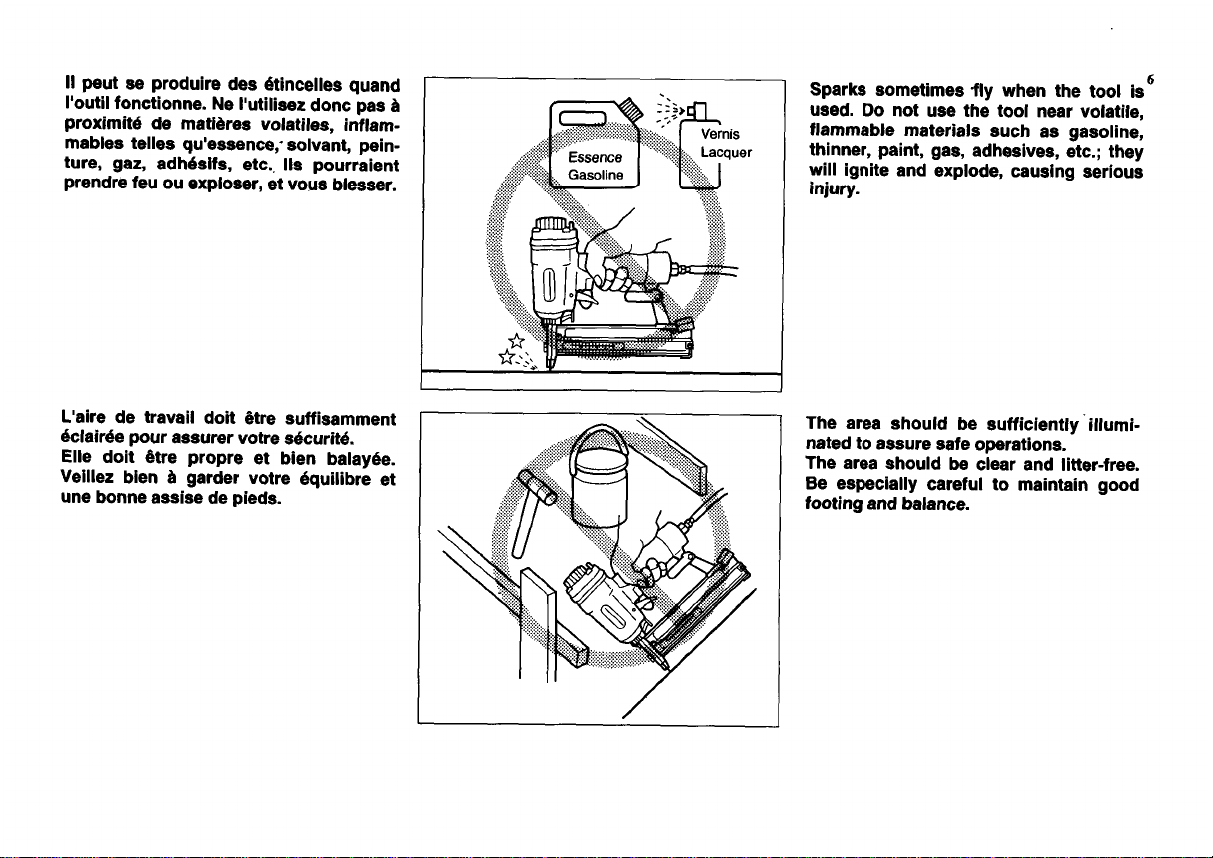
Un outil qui ne fonctionne pas correcte-
ment ne devra
pas
etre utilis6.
General
Tool
Handling Guidelines:
1.
Always assume that the tool contains fasteners.
2.
Do
not point the tool toward yourself
or
anyone whether
it
3.
Do
not actuate the tool unless the tool is placed firmly
4.
Respect the tool as a working implement.
5.
No
horseplay.
6.
Do
not hold
or
carry the tool with a finger on the trigger.
7.
Do
not load the tool with fasteners when any one of the oper-
8.
Do
not operate the tool with any power source other than that
contains fasteners
or
not.
against the workpiece.
ating controls
is
activated.
specified in the tool operatingsafety instructions.
An improperly functioning tool must not
be used.
5
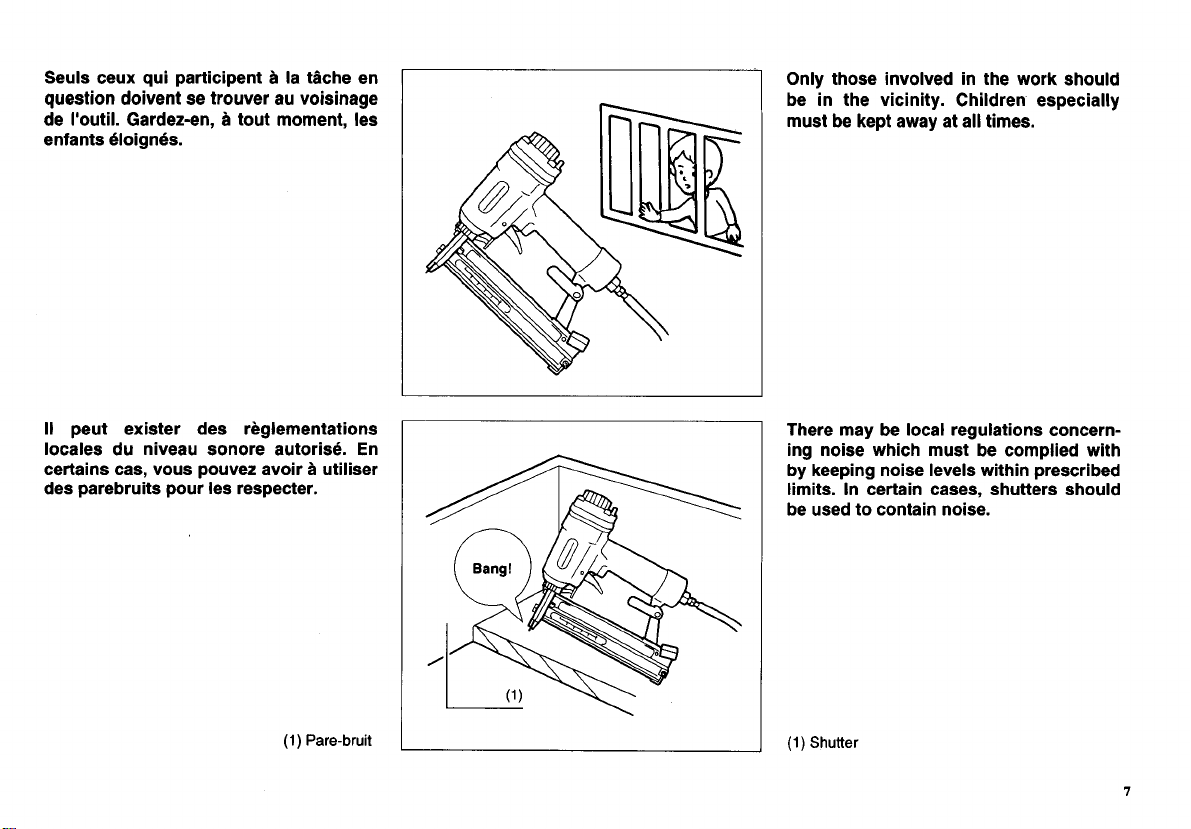
Seuls ceux qui participent
B
la
tlche en
question doivent se trouver au voisinage
de I'outil. Gardez-en,
a
tout moment, les
enfants 6loign6s.
II
peut exister des reglementations
locales du niveau sonore autoris6. En
certains cas, vous pouvez avoir
B
utiliser
des parebruits pour les respecter.
(1)
Pare-bruit
Only those involved in the work should
be in the vicinity. Children especially
must be kept away at all times.
There may
be
local regulations concern-
ing noise which must be complied with
by keeping noise levels within prescribed
limits. In certain cases, shutters should
be used to contain noise.
(1)
Shutter
7
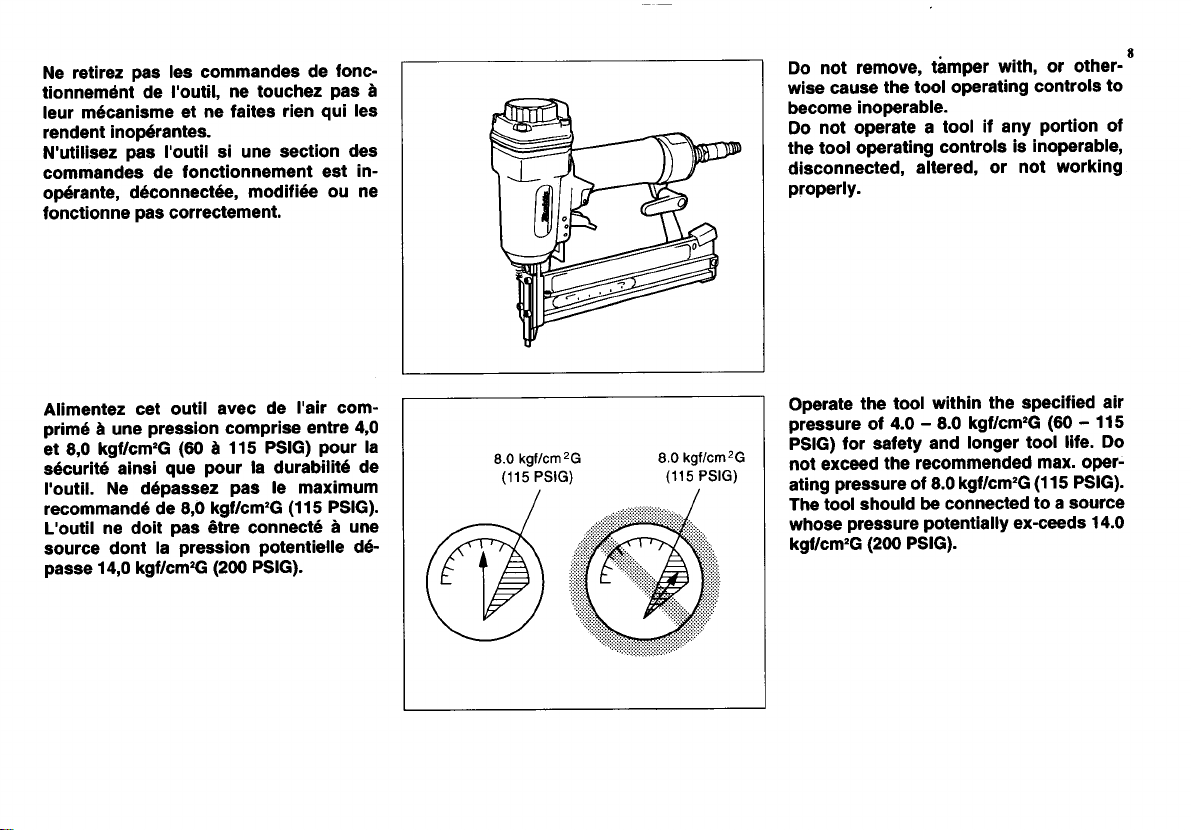
N'utilisez jamais I'outil avec autre chose
que de I'air comprime.
Si
vous utilisez
du gaz en bonbonne (gaz carbonique,
oxygene, azote, hydrogene, air, etc.) ou
du gaz combustible (hydrogene, propane,
acetylene, etc.) comme source d'alimen-
tation, I'outil explosera et
il
provoquera
des blessures graves.
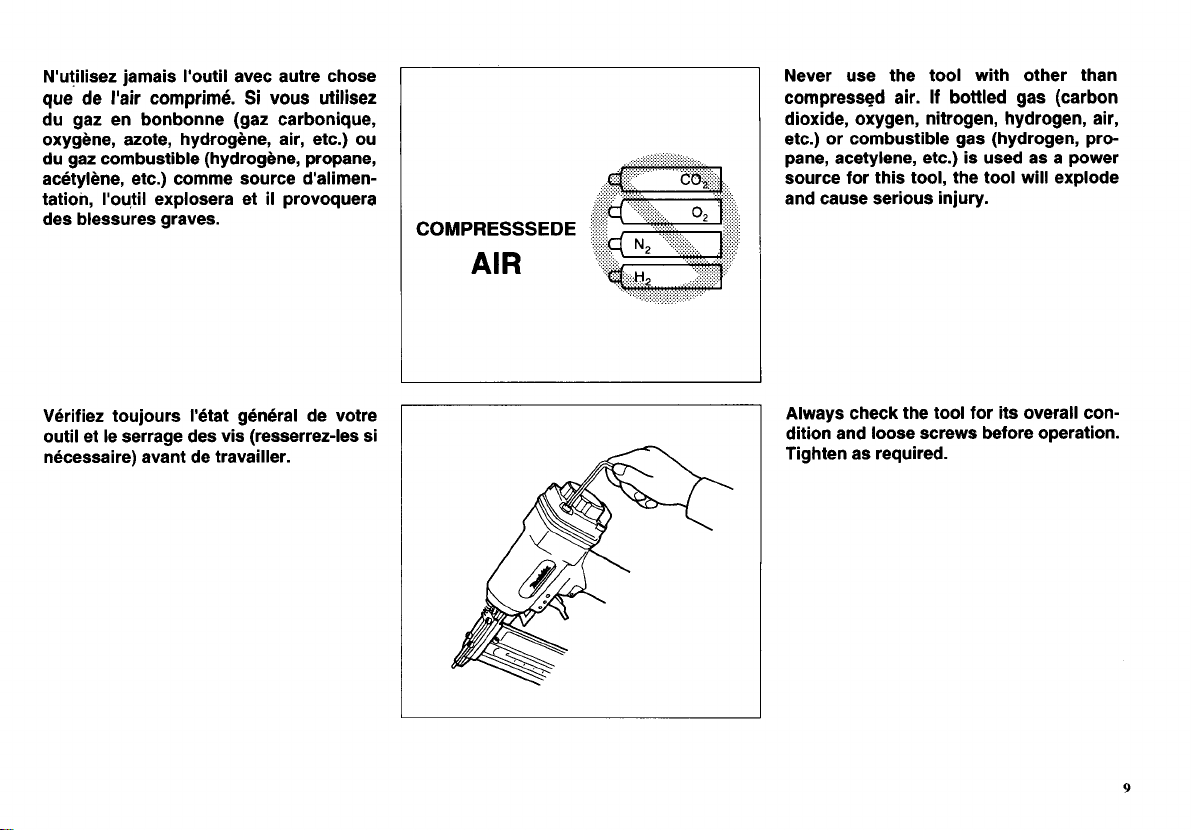
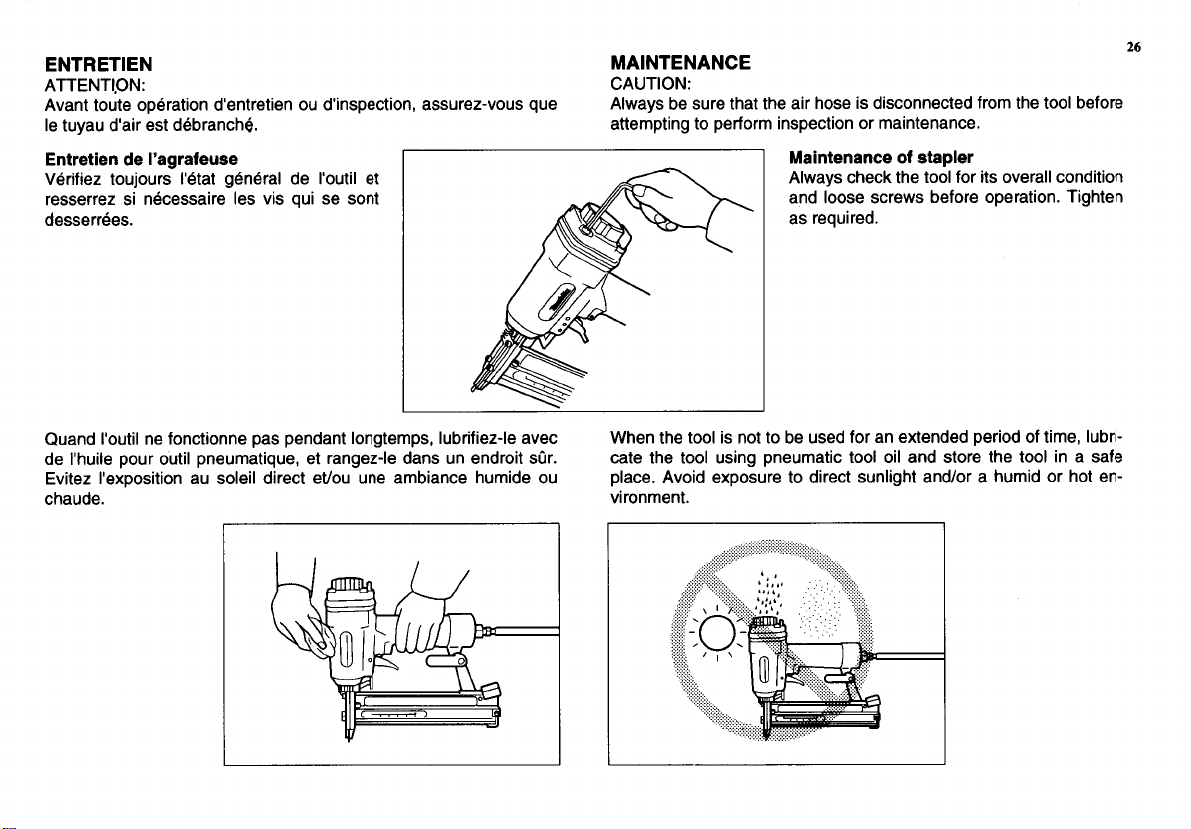
Verifiez toujours IUtat general de votre
outil et le serrage des vis (resserrez-les si
necessaire) avant de travailler.
COMPRESSSEDE
AIR
Never use the tool with other than
compressed air.
If
bottled gas (carbon
dioxide, oxygen, nitrogen, hydrogen, air,
etc.) or combustible gas (hydrogen, pro-
pane, acetylene, etc.) is used as a power
source for this tool, the tool will explode
and cause serious injury.
Always check the tool for its overall con-
dition and loose screws before operation.
Tighten as required.
9
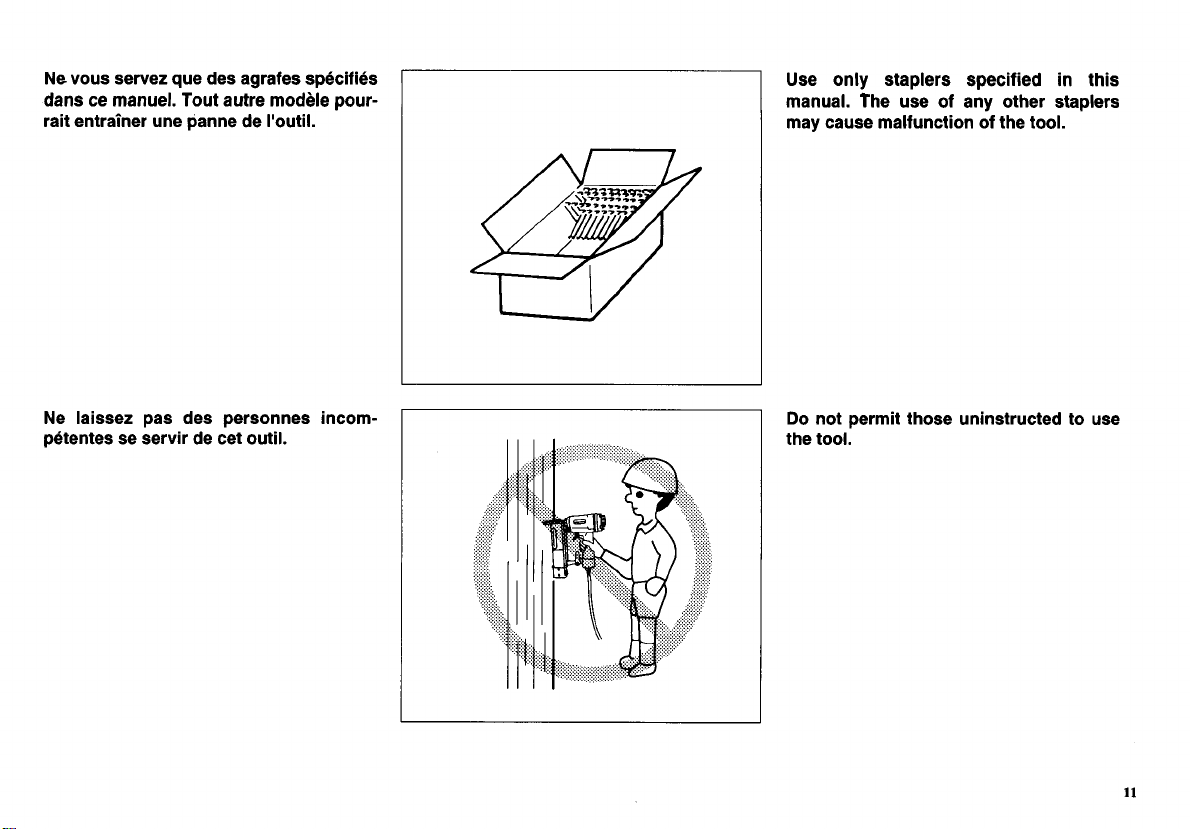
Ne vous servez que
des
agrafes specifies
dans ce manuel. Tout autre modele pour-
rait entrainer une panne de I'outil.
Ne laissez pas des personnes incom-
I
Use only staplers specified in this
manual. The use
of
any other staplers
may cause malfunction of the tool.
Do
not permit those uninstructed to use
the tool.
11
*6u!qaiea
JO
Gu!yra! uappns
s!
araqi
j!
ra6uep iuaA
-ard
08
asoq
r!e
aqi amaas pue ‘suo!ieaol
araqi arns ayew
‘looi
aqi
qip
aaueleq
rnoA u!esu!eu pue Gu!iooj rnoA qaieM
q6!q
U!
6U!yJOM UaqM
MOlW
aU0
OU
S!
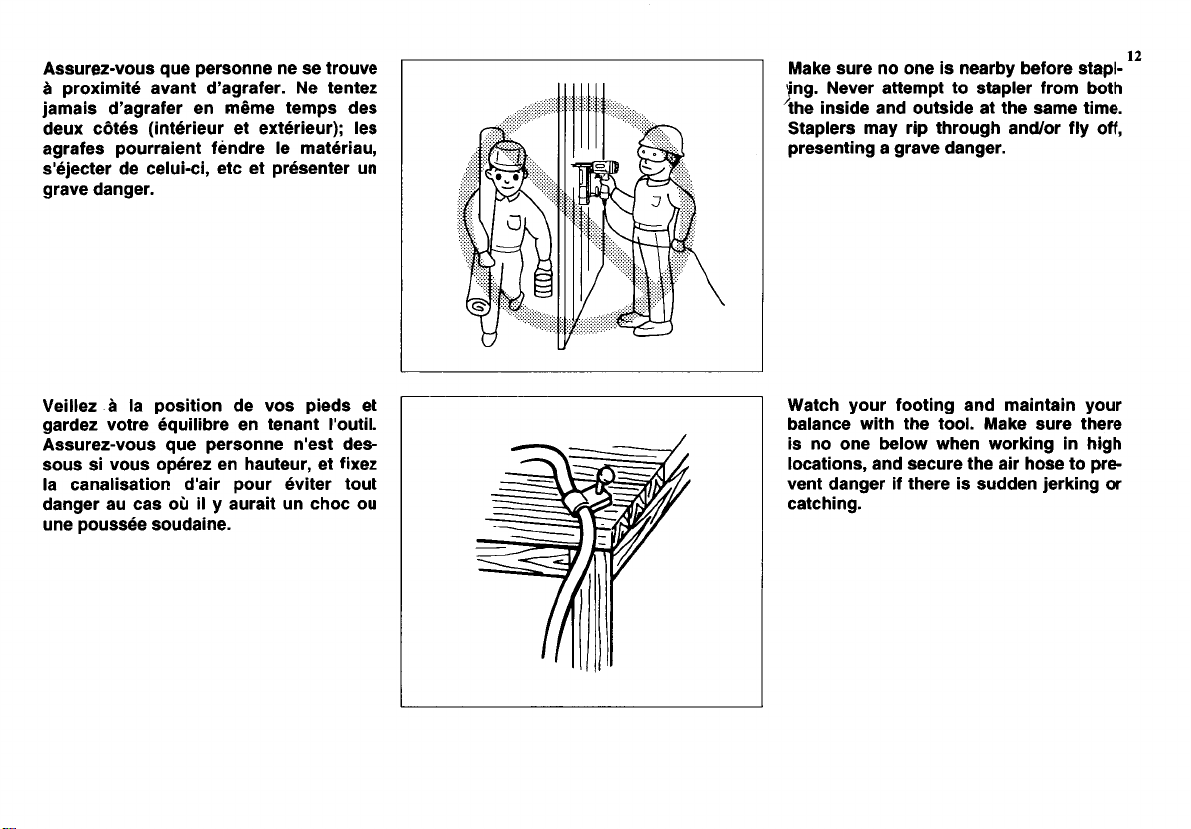
-ra6uep aner6 e Gu!iuasard
maw!) aues aqa le ap!qno pue aplsu! aqi
-Ideas arojaq Aqieau
s!
auo ou arns ayew
‘NO
Alj
JO/pue q6norqi
d!J
Aeu SJaldelS
410q
worj
raldws
0)
sduaue JaAaN .Sui
ZI
-au!epnos aassnod aun
no
aoqa
un yerne
A
I!
no
sea ne ra6uep
inoi rai!A? JnOd r!e,p uo!ies!ieuea el
zax!# ia ‘rnainey ua zarado snoA
!s
snos
-sap )sa,u auuosrad anb snoA-zarnssv
-I!ino,i iueuai ua arq!l!nb? arioA zapre6
)a spa!d
SOA
ap uo!i!sod el
e
zaii!ah
-ra6uep aAeJ6
un raiuasard )a ala ‘!a-!niaa ap rapa!?,s
‘ne!rgeu a1 arpuq iua!errnod sajerlje
sal f(rna!r?)xa ia rna!rasu!) saiga xnap
sap sduai augur ua rajer6e,p s!eue!
zaiuai aN -rajerBe,p iueAe ?)!u!xord
e
annoit as au aUUOSJad anb snoA-zarnssv
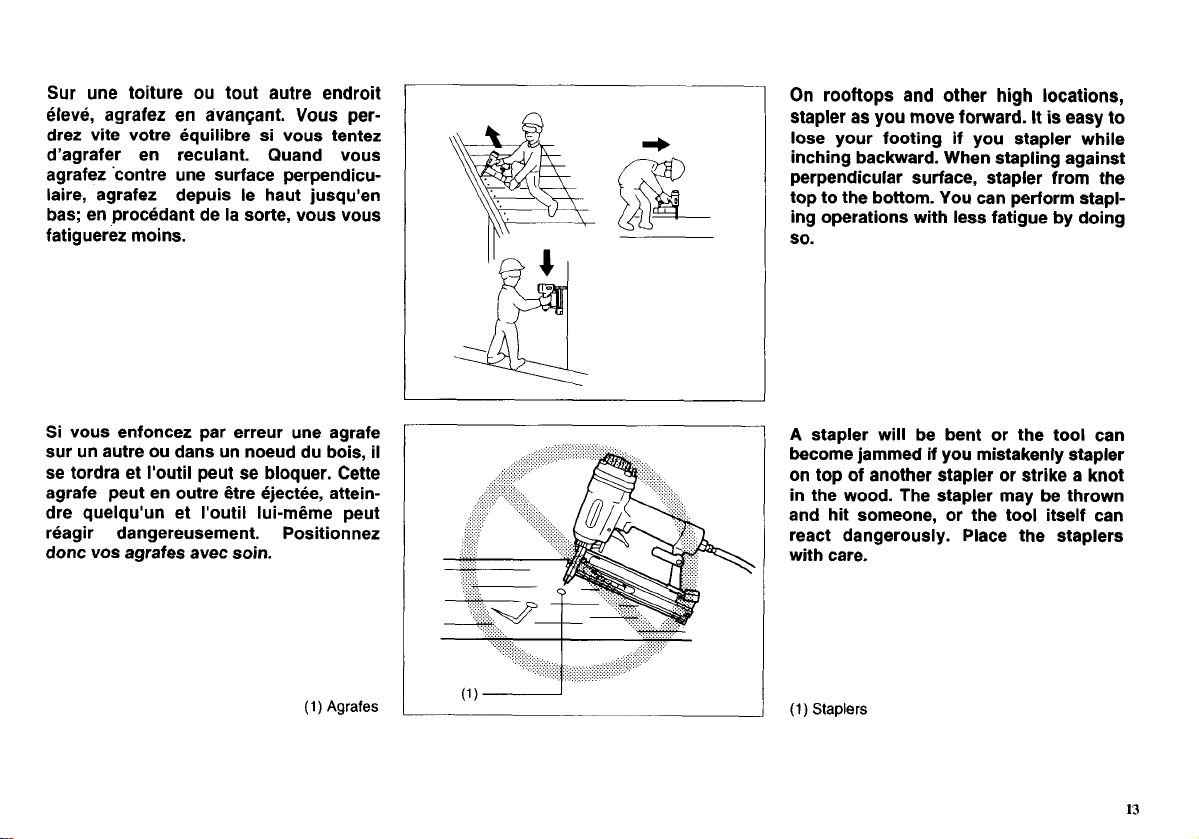
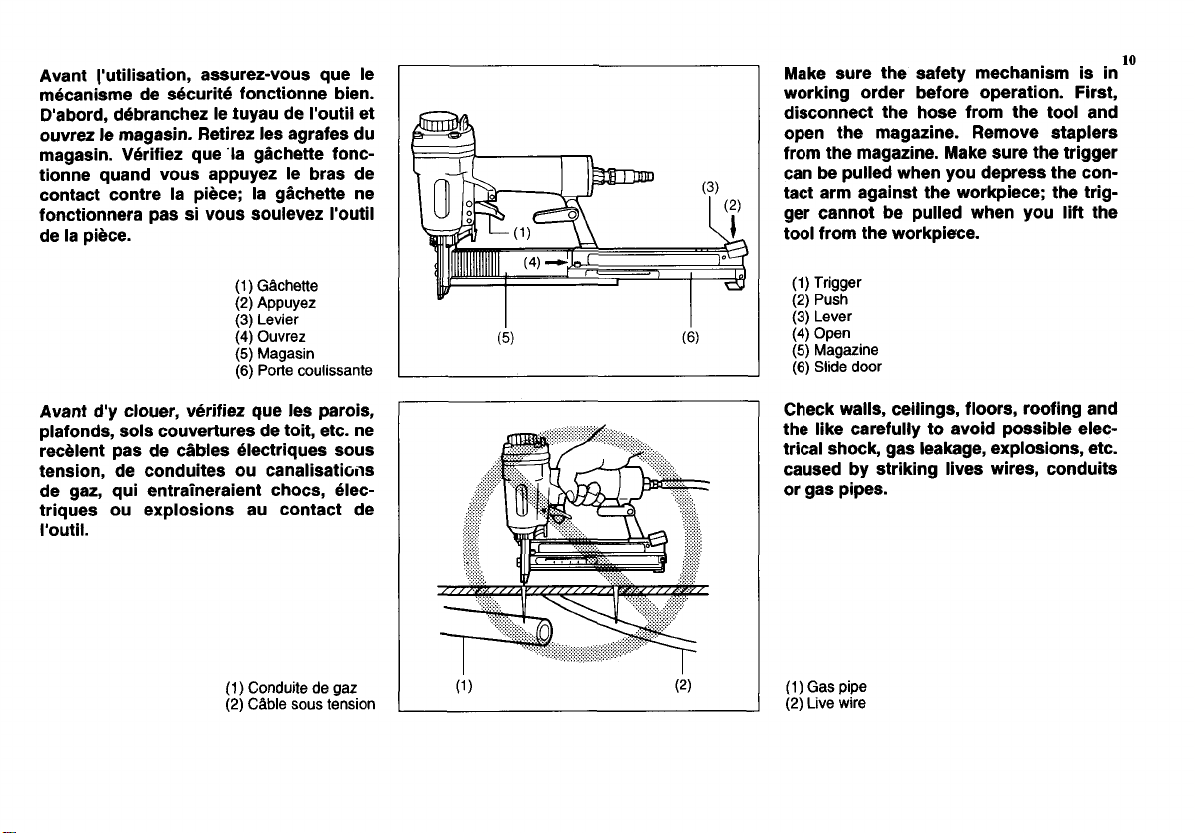
Sur une toiture ou tout autre endroit
eleve, agrafez en avanqant. Vous per-
drez vite votre equilibre si vous tentez
d'agrafer en reculant. Quand vous
agrafez 'contre une surface perpendicu-
laire, agrafez depuis le haut jusqu'en
bas; en procedant de la sorte, vous vous
fatiguerez moins.
Si vous enfoncez par erreur une agrafe
sur un autre ou dans un noeud du bois,
il
se tordra et I'outil peut se bloquer. Cette
agrafe peut en outre Qtre ejectee, attein-
dre quelqu'un et I'outil lui-mQme peut
reagir dangereusement. Positionnez
donc vos agrafes avec soin.
(1)
Agrafes
On rooftops and other high
locations,
stapler
as
you move forward.
It
is
easy to
lose your footing if you stapler while
inching backward. When stapling against
perpendicular surface, stapler from the
top to the bottom. You can perform stapl-
ing operations with less fatigue by doing
so.
A
stapler will be bent
or
the tool can
become jammed if you mistakenly stapler
on top of another stapler or strike a knot
in the wood. The stapler may be thrown
and hit someone, or the tool itself can
react dangerously. Place the staplers
with care.
(1)
Staplers
13
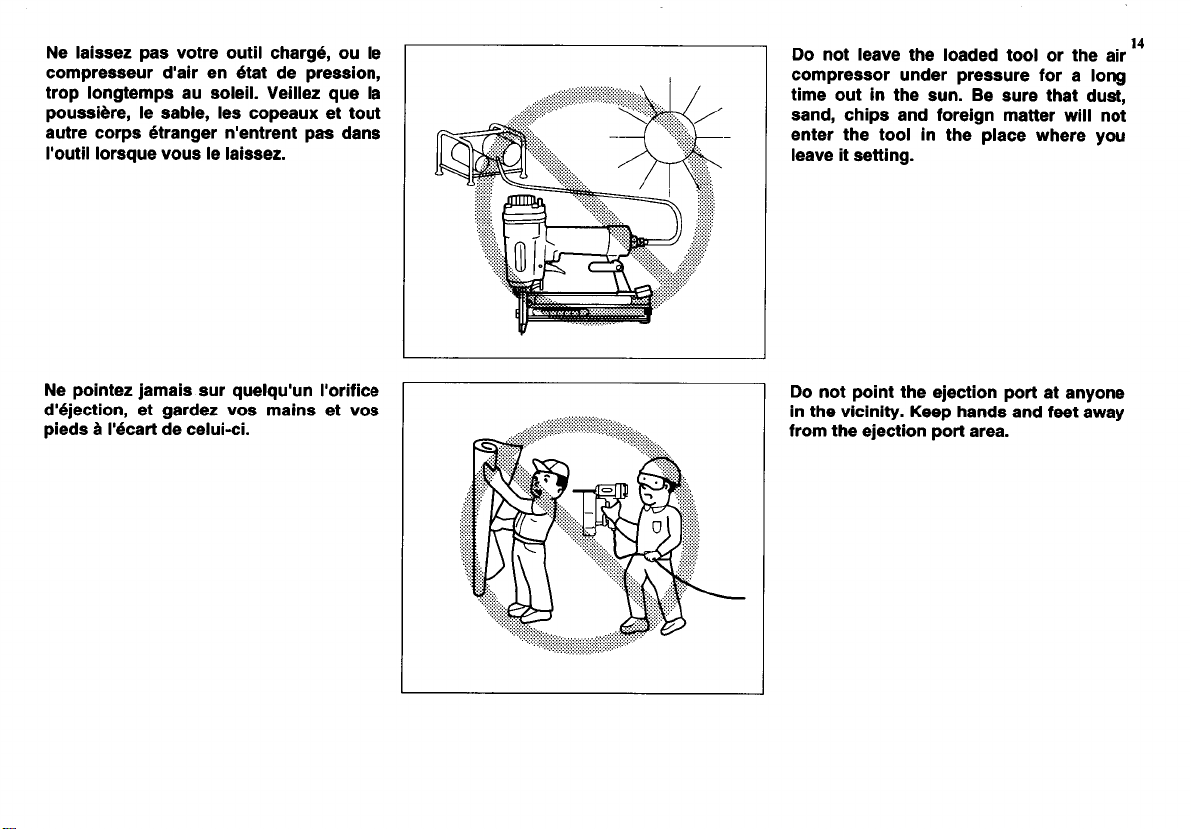
-eale uod uo!iaa!a
ayi
uorj
ABMB
iwj
pue spuey daay
.&!U!~A
ayi
u!
auoAue
ie
uod uo!iae!a
aui
iu!od iou
oa
-6u!uas
I!
meal
noA
araqnn
weid
aui
u!
iooi
aui
raiua
iou
ii!~
raueu
u6!aroj pue sd!ya ‘pues
‘isnp
ieui
erns
ag
-uns
aut
u! &no
aqi
6uoi
e
108
arnssard rapun rossarduoa
r!e
ayi
io
loot
papeoi
aui
weal
iou
oa
VI
I
aa!j!ro,i
un,nbianb ins s!eue! zaiuiod
a~
.zass!ei
el
snoA anbsrol I!ino,l
suep sed iuartua,u ra6ueri? sdroa arine
inoi
ia
xneadoa
sal
‘aiqes
ai
‘arg!ssnod
el
enb
zaii!a~
‘ipios
ne sduei6uoi doli
‘uo!ssard ap lei? ua r!e,p rnassarduoa
ai
no ‘p61eqa i!ino
~J~OA
sed
zass!ei
a~
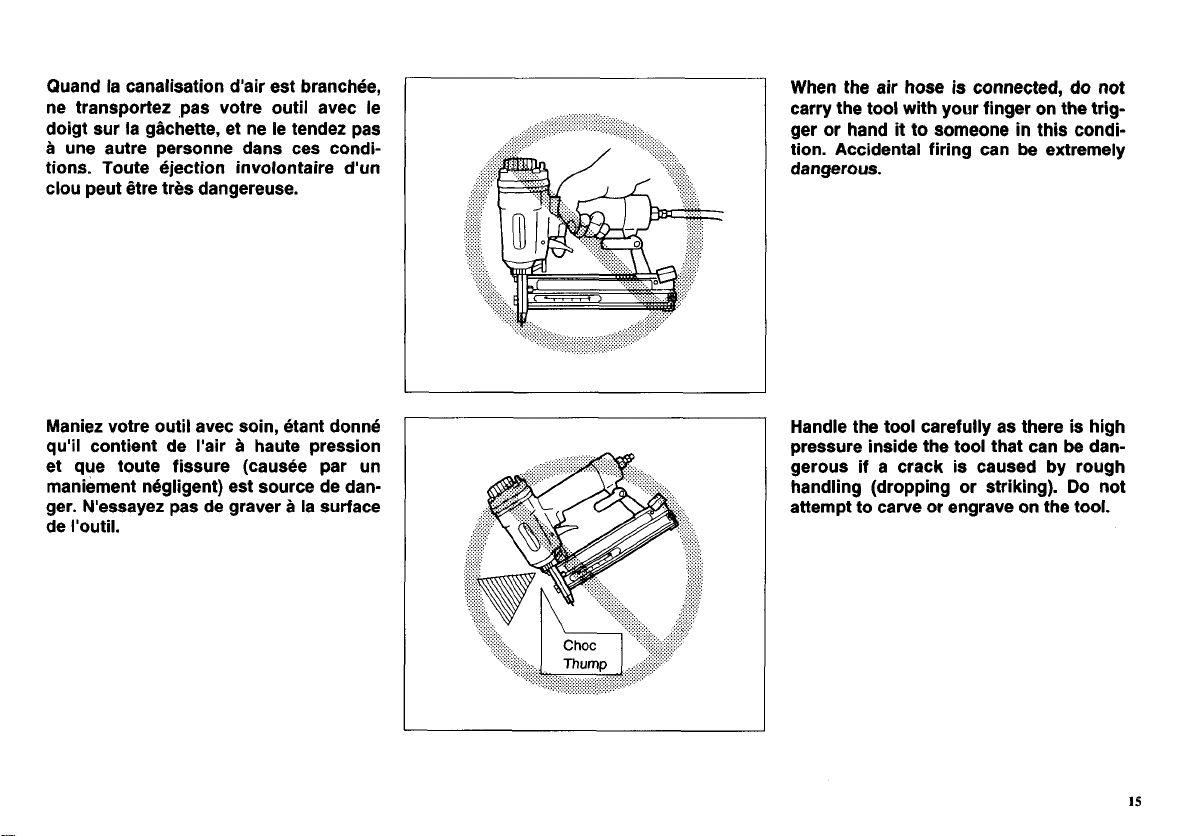
Quand la canalisation d'air est branchee,
ne transportez ,pas votre outil avec le
doigt sur la gbhette, et ne
le
tendez pas
a
une autre personne dans ces condi-
tions. Toute ejection involontaire d'un
clou peut Qtre tres dangereuse.
qu'il contient de I'air
a
haute pression
et que toute fissure (causee par un
maniement negligent) est source de dan-
ger. N'essayez pas de graver
a
la surface
de I'outil.
When the air hose
is
connected, do not
carry the tool with your finger on the trig-
ger or hand
it
to someone in this condi-
tion. Accidental firing can
be
extremely
dangerous.
Handle the tool carefully as there
is
high
pressure inside the tool that can
be
dan-
gerous if a crack
is
caused by rough
handling (dropping or striking).
Do
not
attempt to carve or engrave on the tool.
1s
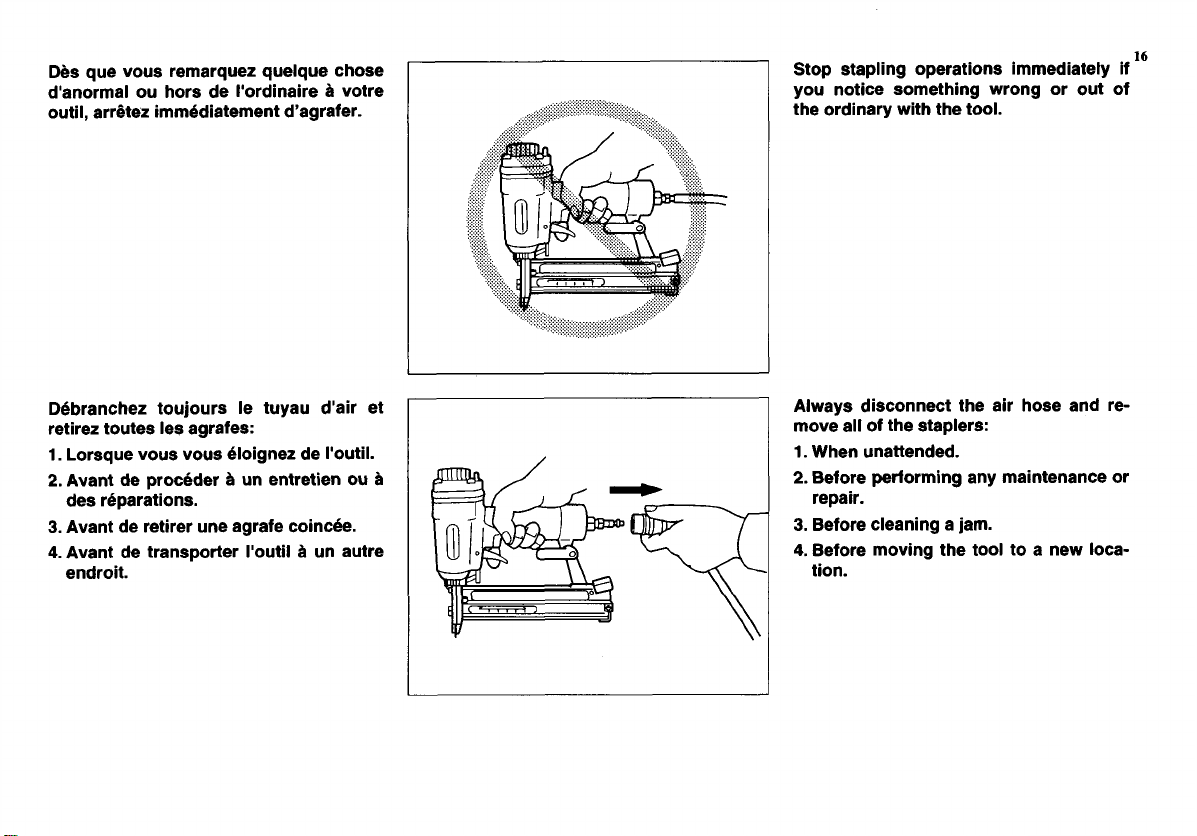

Effectuez toute operation de nettoyage
ou d'entretien juste apres vous Qtre servi
de I'outil. Maintenez celui-ci en condition
parfaite. Graissez e parties mobiles afin
d'empecher la rouille et de reduire I'usure
due
a
la friction. Essuyezen avec soin la
poussiere.
N'utilisez pas cet outil s'il ne porte pas
une etiquette d'avertissement lisible.
Ne modifiez pas I'outil sans autorisation
de Makita.
Faites inspecter periodiquement votre
outil par un atelier Makita
ou
un centre de
service autorise.
Pour garantir la SECURITE et la FIA-
BlLlTE du produit, confiez toute opera-
tion d'entretien et de reparation exclu-
sivement
a
un Centre de service autorise
Makita ou un Centre de service usine
Makita, et utilisez toujours des pieces de
rechange MAKITA.
CONSERVE2 CES INSTRUCTIONS.
Perform cleaning and maintenance fight
after finishing the
job.
Keep the tool in
tip-top condition. Lubricate
moving
parts
to prevent rusting and minimize friction
related wear. Wipe
off
all dust from the
parts.
Do
not operate this tool if it does not con-
tain a legible WARNING LABEL.
Do
not modify tool without authorization
from Makita.
Ask Makita's Factory or Authorized ser-
vice center for periodical inspection of
the tool.
To maintain product SAFETY and RELIA-
BILITY, maintenance and repairs should
be performed by Makita Authorized or
Factory Service Centers, always using
Makita replacement parts.
SAVE THESE INSTRUCTIONS.
17
3Sn
aNV SN0113nl4lSNI NOIlVllVlSNI
1001
SI
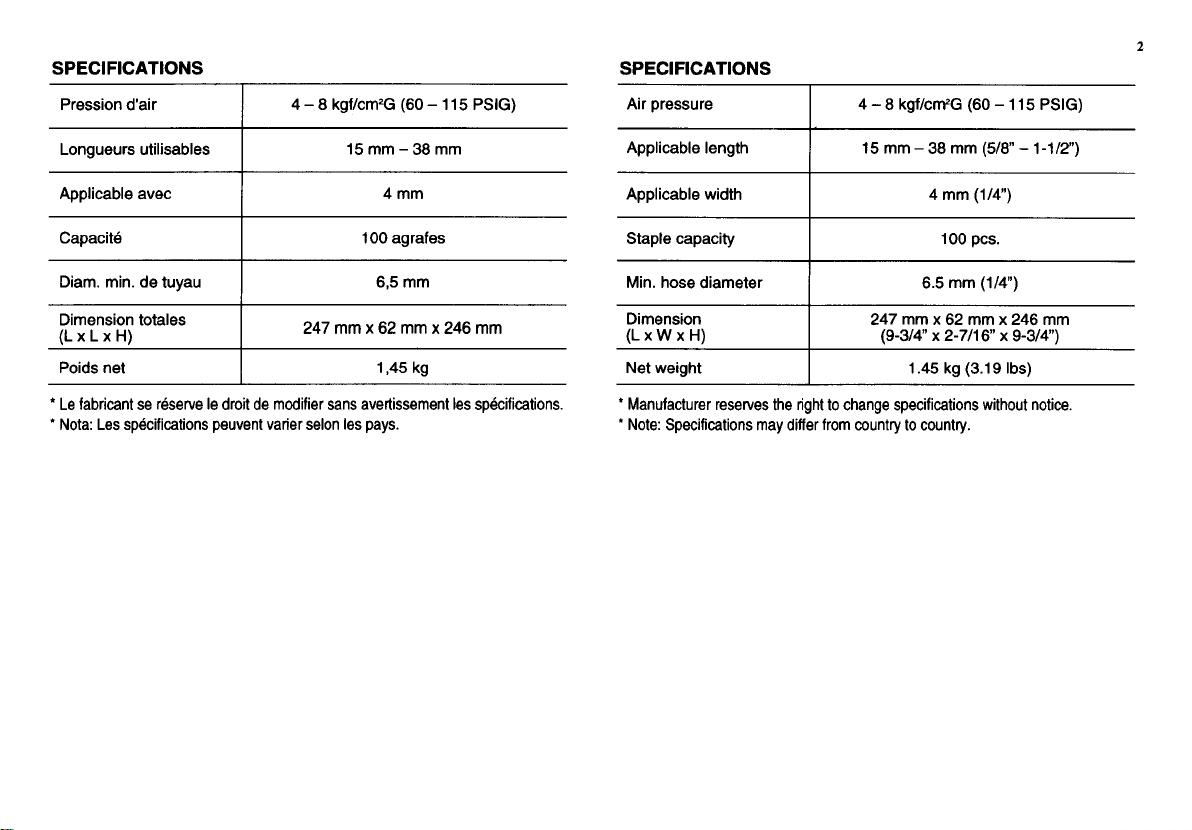
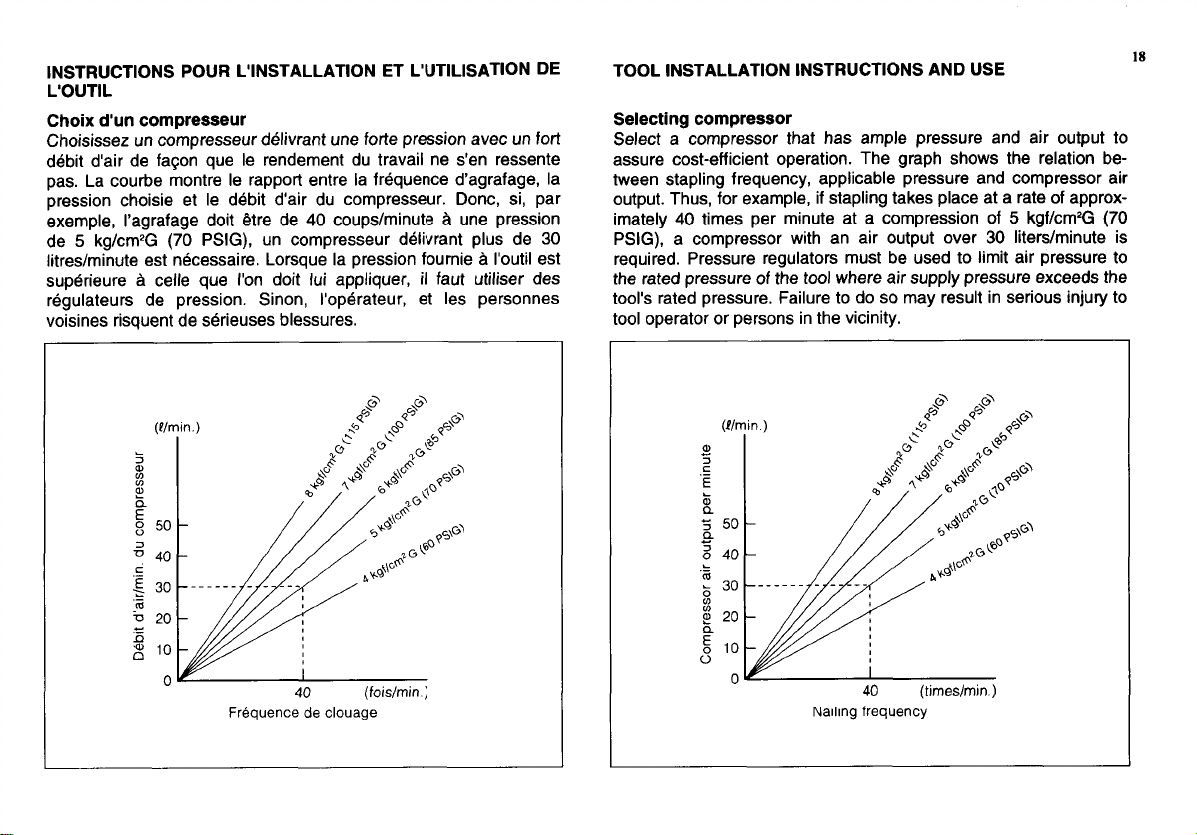
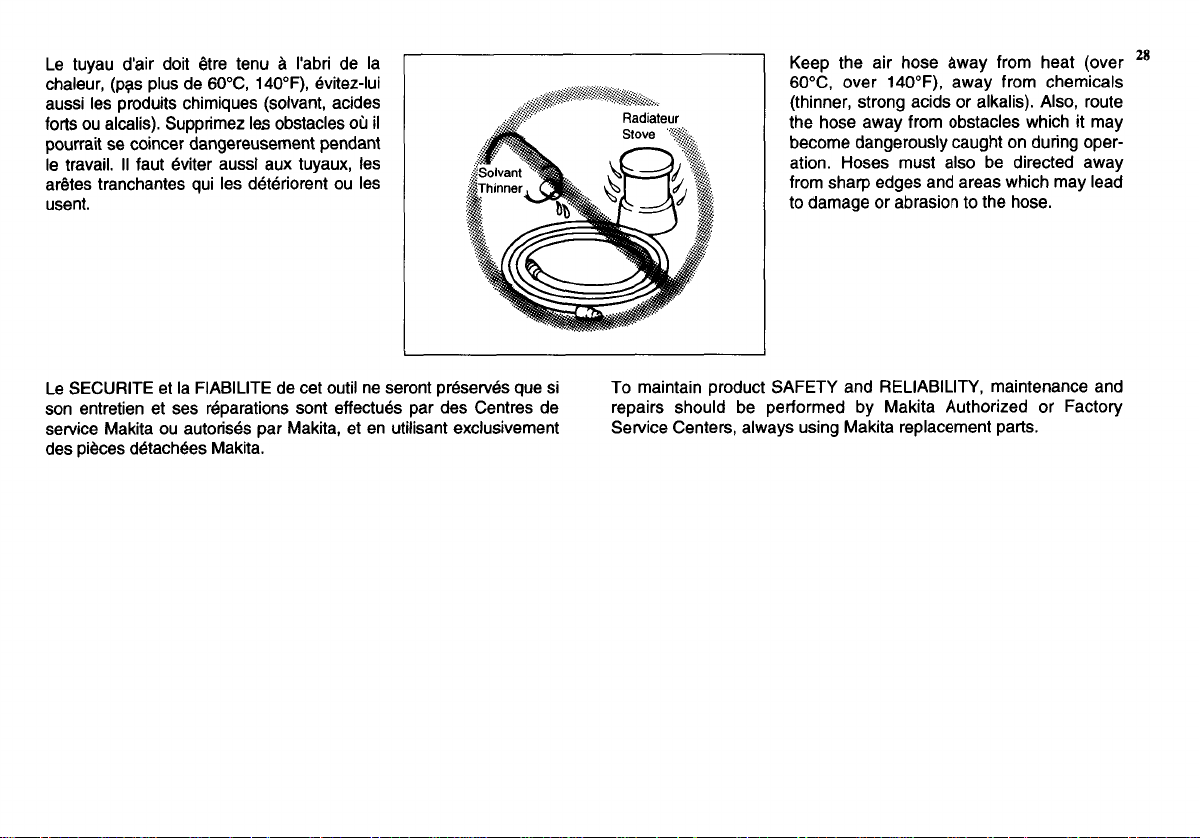
Choix d'un tuyau d'air
Utilisez un tuyau aussi gros et aussi court
que possible pour assurer un agrafage con-
tinu et efficace. Lorsqu'on choisit une pres-
sion d'air de
5
kgf/cm2G
(70
PSIG), un tuyau
d'air de diametre interieur superieur
a
6,5
mm et une longueur inferieure
a
20
m
sont recommandes lorsque I'on agrafe
a
un intervalle de
0,5
seconde entre chaque
agrafe. Les tuyaux d'arrivee d'air doivent
supporter une pression continue minimale
de
10,7
kgf/cm*G
(150
PSIG) ou
150%
du
maximum de la pression produite dans le
systeme, la plus forte de ces deux pressions
devant 6tre choisie.
ATTENTION: CAUTION:
Selecting air hose
Use an air hose as large and as
short
as possible
to
assure continuous, efficient
stapling operation. With an air pressure
of
5
kgf/cm*G
(70
PSIG), an air hose with an
internal diameter of over
6.5
mm
(1/4")
and a
length of less than
20
m
(6.6
ft.) is recom-
mended when the interval between each
stapling is 0.5 seconds. Air supply hoses
shall have a minimum working pressure rat-
ing of
10.7
kgf/cm2G
(150
PSIG) or
150
per-
cent of the maximum pressure produced in
the system whichever is higher.
Un debit d'air peu eleve du compresseur ou une canalisation trop
longue ou mince pour la frequence d'agrafage risque d'entrainer une
diminution de la puissance d'enfoncement.
Low air output of the compressor, or a long or smaller diameter air
hose in relation
to
the stapling frequency may cause a decrease in
the driving capability of the
tool.
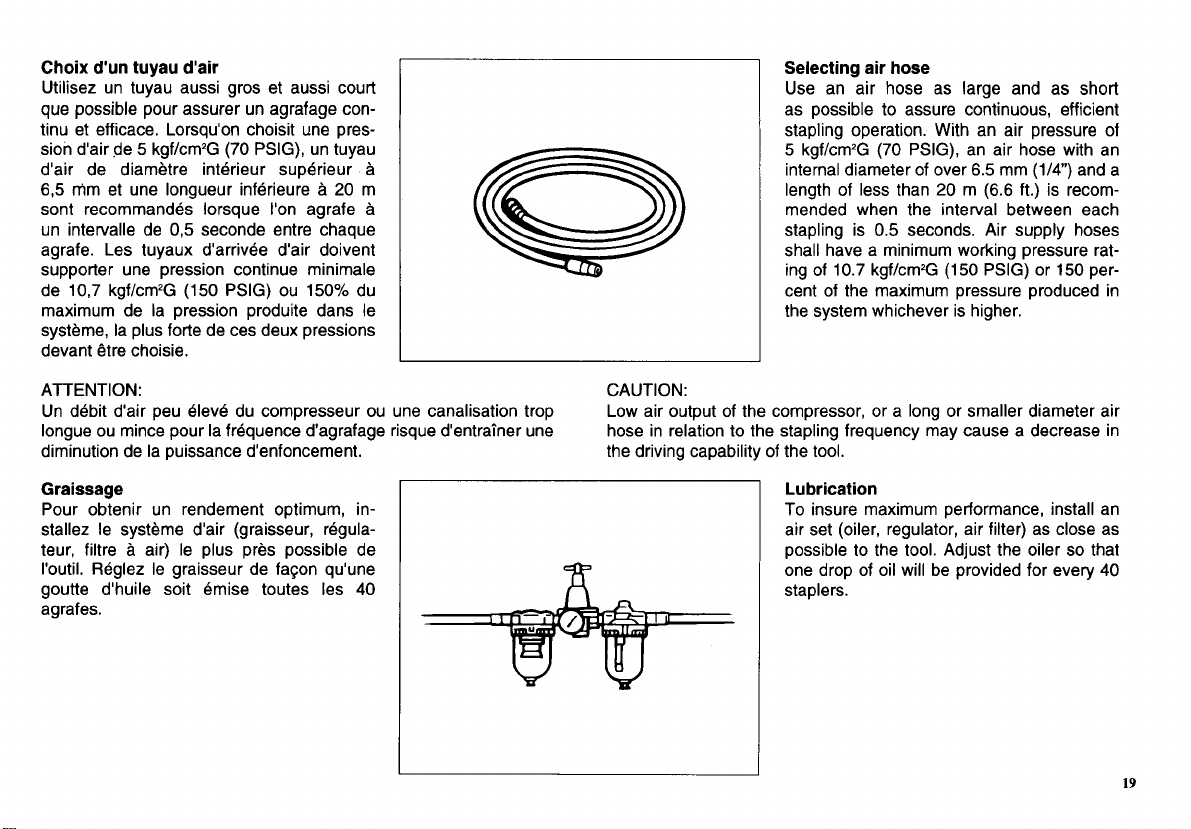
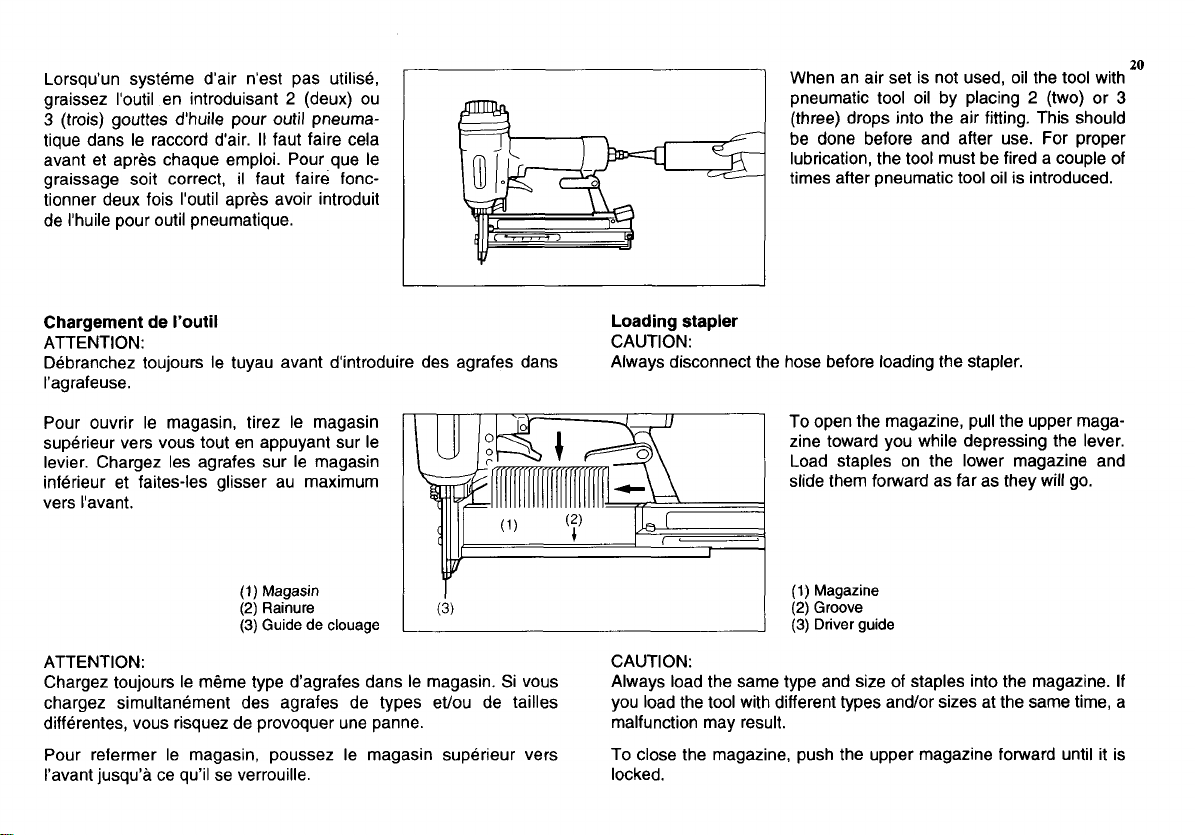
Graissage
Pour obtenir un rendement optimum, in-
stallez le systeme d'air (graisseur, regula-
teur, filtre
a
air) le plus pres possible de
I'outil. Reglez le graisseur de faGon qu'une
goutte d'huile soit emise toutes les
40
agrafes.
?r
Lubrication
To
insure maximum performance, install an
air set (oiler, regulator, air filter) as close as
possible
to
the
tool.
Adjust the oiler
so
that
one drop
of
oil will be provided for every
40
staplers.
19

Branchement du tuyau d'air
ATTENTION: CAUTION:
Quand vous raccordez le tuyau d'air, ne dirigez pas I'outil vers vous-
m6me ni vers d'autres personnes dans le voisinage.
Connecting air hose
Do not point the tool toward yourself or anyone in the vicinity when
connecting the air hose.
Engagez I'embout du tuyau sur le raccord
d'air de I'outil. Verifiez que I'embout est bien
verrouille sur le raccord d'air. Un systeme de
raccordement de tuyau doit 6tre installe sur
I'agrafeuse ou pres de I'agrafeuse de faGon
que le reservoir d'air se vide des que
I'on
decon-necte le systeme.
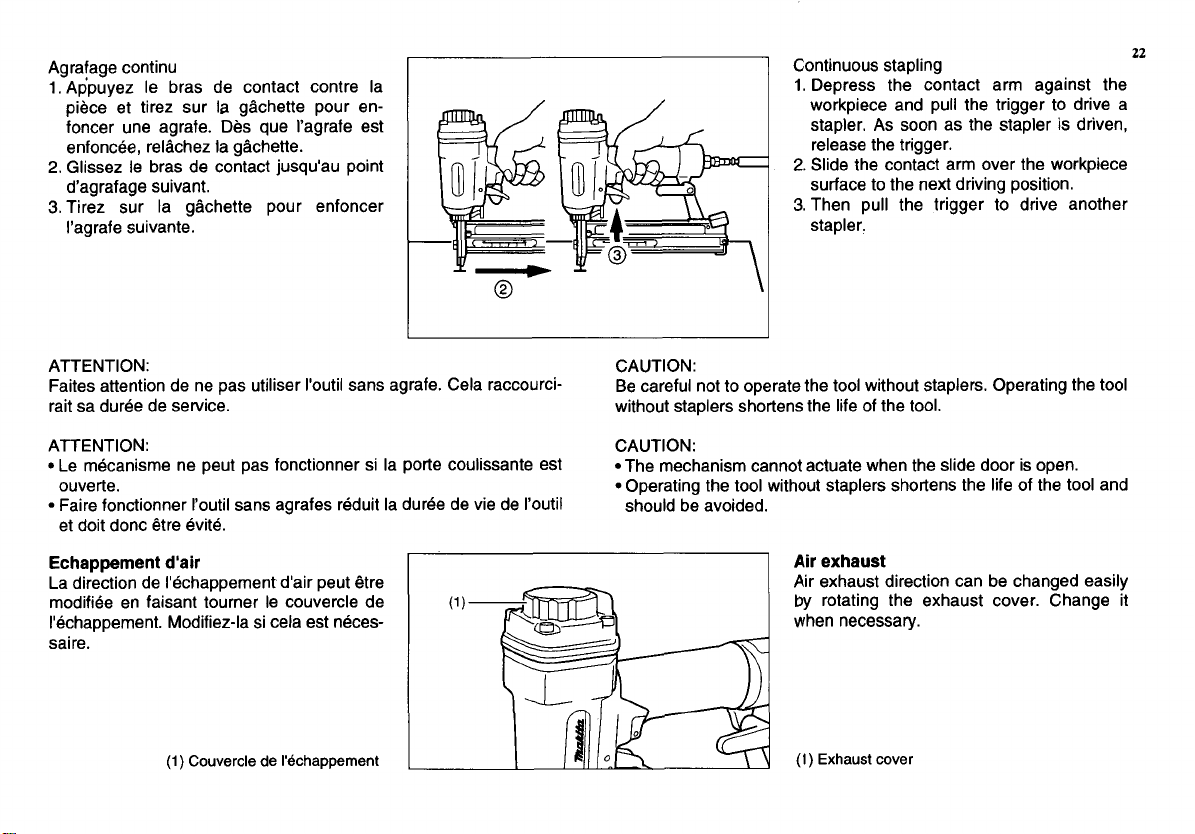
Utilisation
Agrafage intermittent
1.
Appuyez le bras de contact contre la
piece.
2.
Tirez sur la ggchette pour enfoncer une
agrafe. Pour enfoncer I'agrafe suivant,
relichez la gichette et levez I'outil de la
piece. Puis, recommencez.
Cette methode vous permettra un agrafage
prudent et extrgmement precis.
I
I
Tirez sur la gechette apres
Pull
the trigger after depress-
avoir appuy6 le bras de con- ing the contact arm against
tact contre la piece. the workpiece.
Slip the air socket of the air hose onto the
air fitting on the stapler. Be sure that the air
socket locks firmly into position when in-
stalled onto the air fitting.
A
hose coupling
must be installed on or near the tool in such
a way that
the
pressure reservoir will dis-
charge at the time the air supply coupling is
disconnected.
Operation
Intermittent stapling
1.
Depress the contact arm against the work-
piece.
2.
Pull the trigger to drive a stapler. To drive
another stapler, release the trigger and lift
the tool from the workpiece. Then repeat
this procedure.
Use this method when you wish to drive a
stapler carefully and very accurately.
21
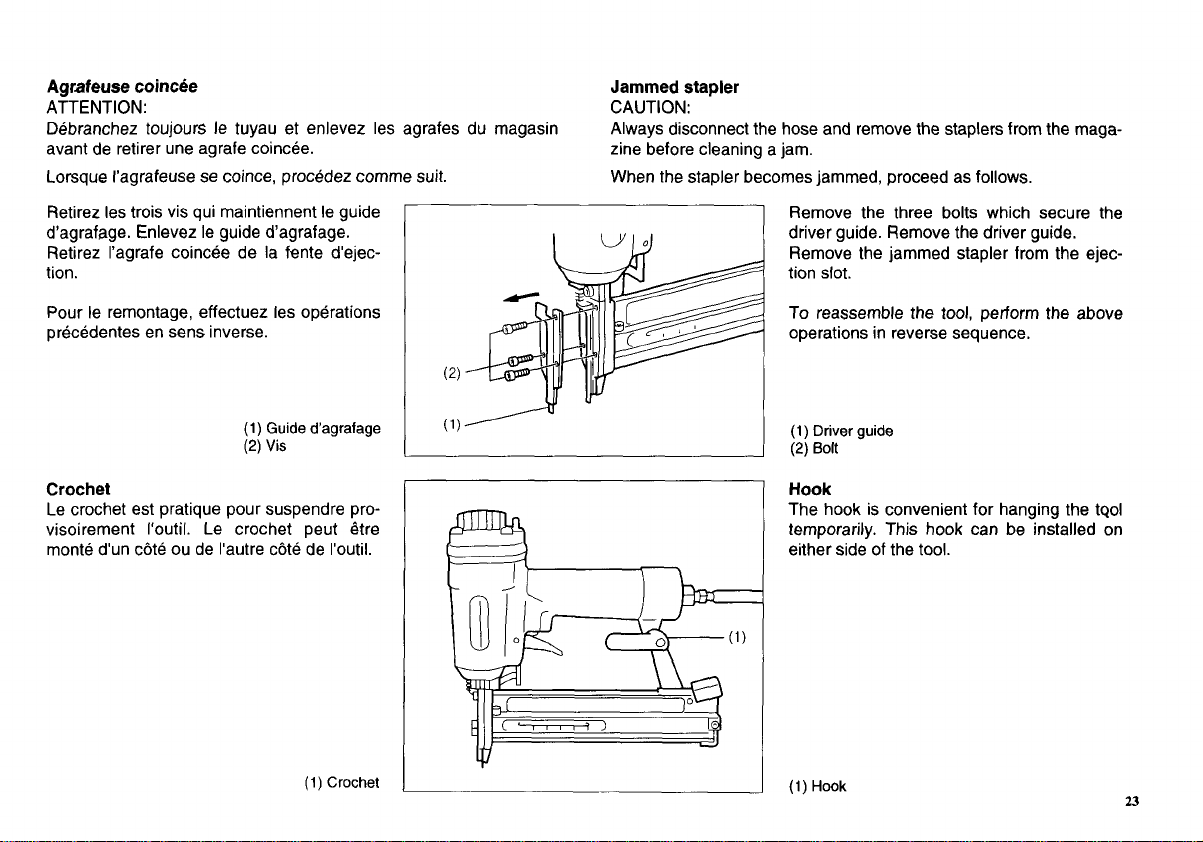
Agrafeuse
coincee
Jammed stapler
ATTENTION: CAUTION:
Debranchez toujours le tuyau et enlevez les agrafes du magasin
avant de retirer une agrafe coincee.
Always disconnect the hose and remove the staplers from the maga-
zine before cleaning a jam.
(1)
Guide d'agrafage
(2)
Vis
Lorsque I'agrafeuse se coince, procedez comme suit.
When the stapler becomes jammed, proceed as follows.
(1)
Driver
guide
(2)
Bolt
Retirez les trois vis qui maintiennent le guide
d'agrafage. Enlevez le guide d'agrafage.
Retirez I'agrafe coincee de
la
fente d'ejec-
tion.
Pour le remontage, effectuez les operations
precedentes en sens inverse.
Crochet
Le crochet
E
Remove the three bolts which secure the
driver guide. Remove the driver guide.
Remove the jammed stapler from the ejec-
tion slot.
To reassemble the tool, perform the above
operations in reverse sequence.
pratique pour suspendre pro-
visoirement I'outil. Le crochet peut &e
monte d'un c8te ou de I'autre c6te de I'outil.
(1)
Crochet
Hook
The hook is convenient for hanging the
201
temporarily. This hook can be installed on
either side of the tool.
(1)
Hook
23
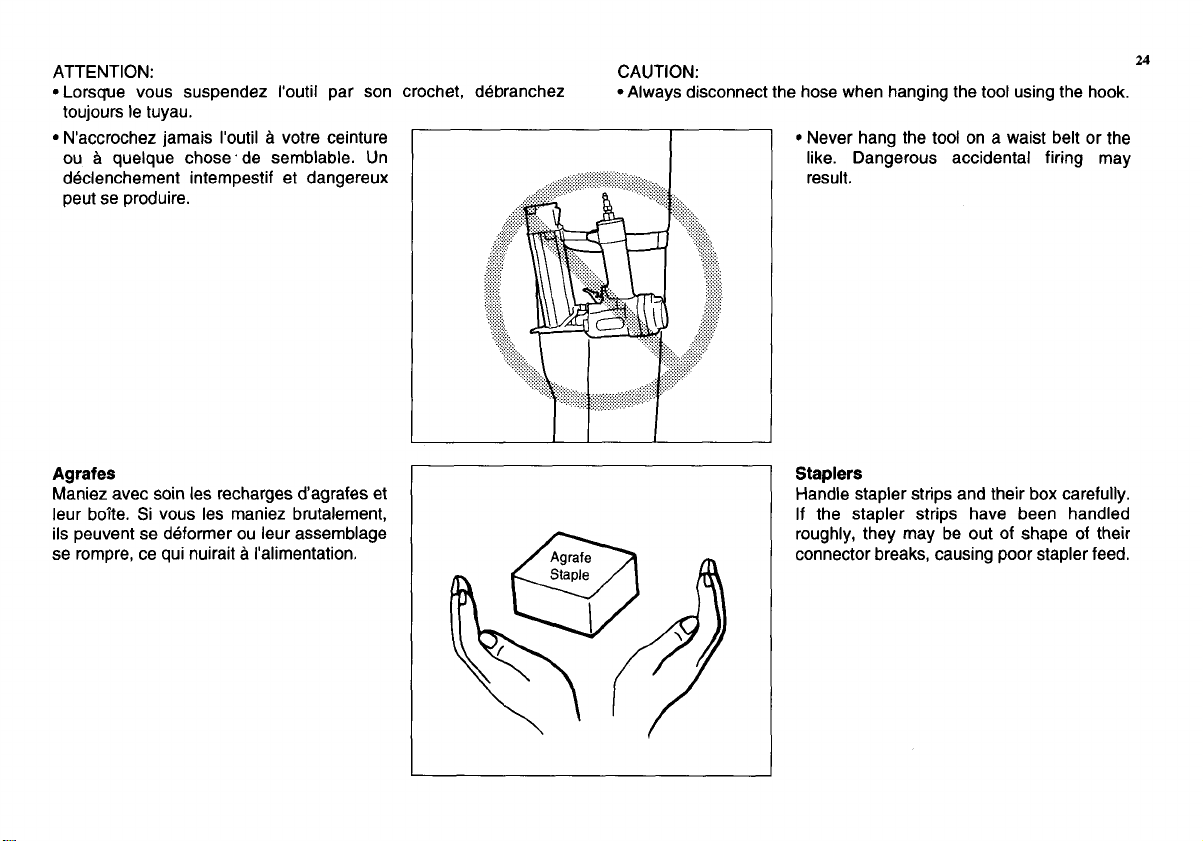
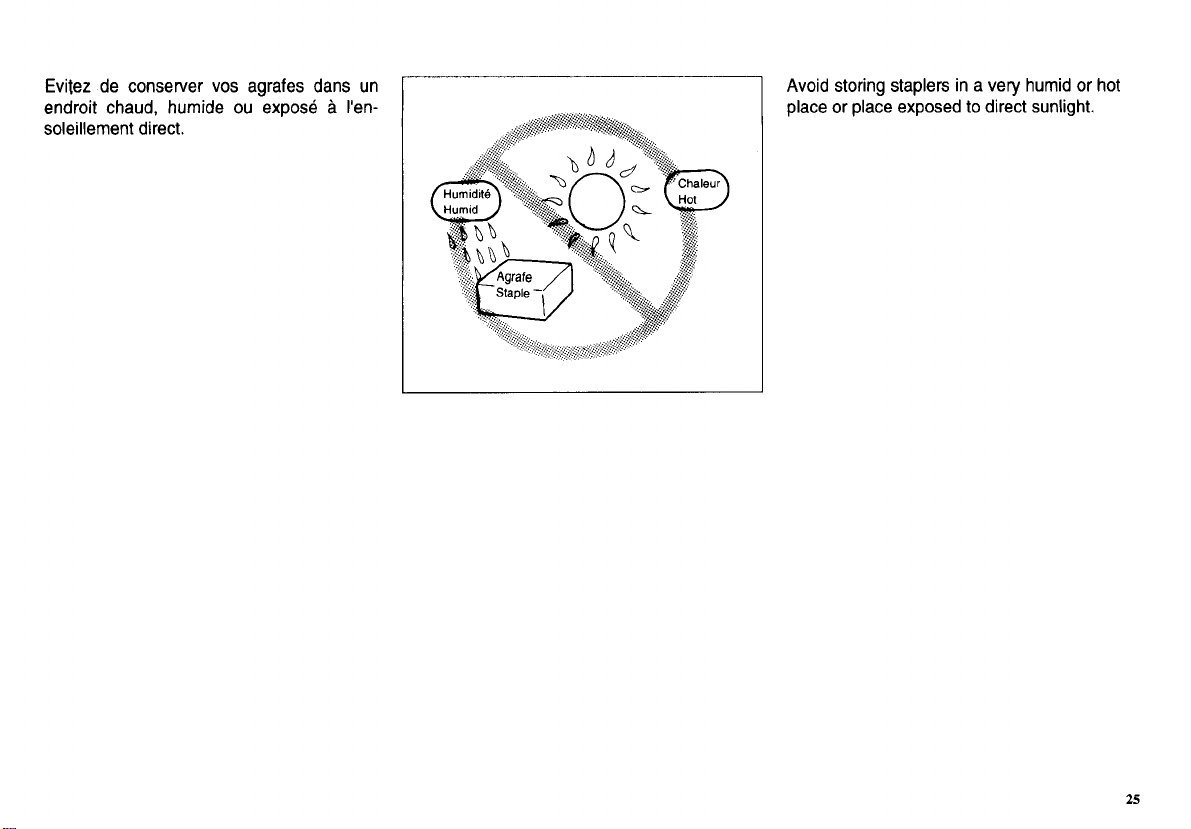
Evitez de conserver
vos
agrafes dans un
endroit chaud, humide ou expose
a
I'en-
soleillement direct.
I
Avoid storing staplers in a very humid or hot
place or place exposed
to
direct sunlight.
25
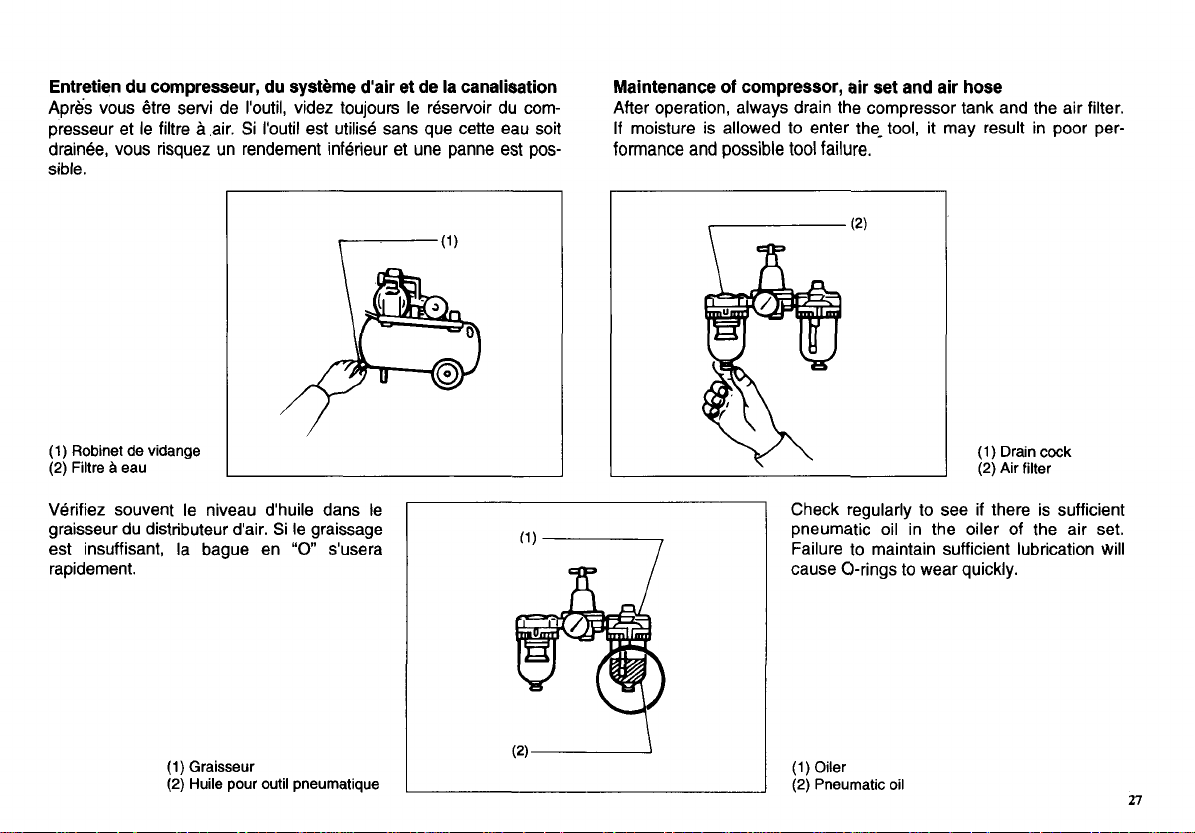
Entretien du compresseur, du systeme d’air et de
la
canalisation
Apres
vous &re servi de I’outil, videz toujours le reservoir du com-
presseur et le filtre
a
,air. Si I’outil est utilise sans que cette eau soit
drainee, vous risquez un rendement inferieur et une panne est pos-
sible.
Maintenance
of
compressor, air set and air hose
After operation, always drain the compressor tank and the air filter.
If
moisture is allowed
to
enter the- tool, it may result in poor per-
formance and possible
tool
failure.
(1)
Robinet de vidange
(2)
Filtre
&
eau
Verifiez souvent le niveau d’huile dans le
graisseur du distributeur d’air. Si le graissage
est insuffisant, la bague en
“0
s’usera
rapidement.
(1)
Graisseur
(2)
Huile pour outil pneumatique
(1)
Drain
cock
(2)
Air filter
Check regularly
to
see
if
there is sufficient
pneumatic oil in the oiler of the air set.
Failure
to
maintain sufficient lubrication
will
cause O-rings
to
wear quickly.
(1)
Oiler
(2)
Pneumatic oil
27
June
IS-
98
‘A
1/4”
NARROW CROWN
STAPLER
Model
AT638
Note
The
Switch
and
Other part
configurations
may dlffer from
Country
10
COuntrV
Remarque
I1
est
possible
que
la
construction
de
l’interrupteur
el
des
autres
Pieces
varie
d’un
pays
B
I’autre

aiine.1
e
sAed un,p iuaiien sa3aid Saline sap la inaidnllaiui,l ap suoiie3ipads sal anb
alqissod
isa
11
anbiewat]
Aiiuno3
01
hdiuno3
woij
iajjip
Aew
suoiie3ipads lied iaqio pue
tpiiMs
aql
aioN
22-9
M3tl3s
311s
3AlVA
ISIlVHHM
S'MZ
ONltl-0
EIS'PZ
3Nltl-C
ASSV
3NIZWW
us
t13OOlU
US
MlVA
tl3ODlM
us
t13aNIlA3
US
NOlSld
US
NOlSld
3lVA
aflH
dltlO 3aNW
tl3HSnd
t13010H ONltldS
S21d
E"-0
DNltldS tl3a333
at1voanm
P1rS
P
Nld
d3lS
LE.*
M3tl3s
tl33VdS
'OVW
tl3ddn
PW
lflN
NOW
LIMO3
lrvl
ONltldS
tlWlY3113
'OW
d3MOl
YOOH
1138
ltlOddnS
9W
UlN NOW
8-P
M3t13S
I1'hSX
H3HSVM
88
L8
98
9s
P8
E8
28
18
08
6L
8L
LL
9L
91
PL
OL
ZL
LL
OL
69
69
L9
99
s9
P9
E9
19
19
09
69
62
82
LZ
92
92
PZ
CZ
U
12
02
61
81
Ll
91
91
P1
€1
21
11
01
6
8
1
9
9
P
E
2
1
3NIH3VVV 3NIH3VW
3NIH3VW
NOlldlt13S30
wy,
OC
V3
86.--fl-heW

Makita Corporation