Loading ...
Loading ...
Loading ...
5
REMOTE CONTROL BATTERY INSTALLATION/
REPLACEMENT INSTRUCTIONS
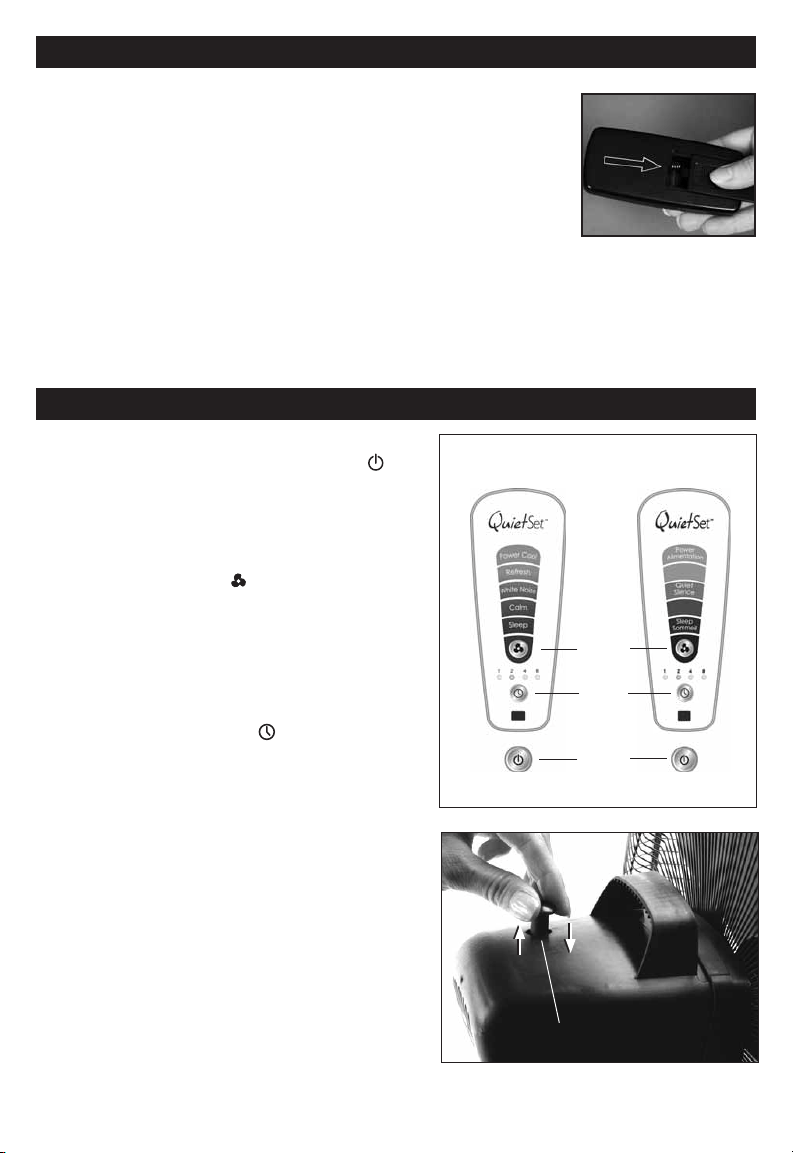
A. Remove battery door by sliding downward in direction of
arrow.
B. Insert 2 AAA batteries into the remote following the directional
guides in the recessed slots (Fig. 9). Batteries are included.
C. Replace battery door by sliding upward opposite of arrow
direction until door snaps in place.
NOTE: DO NOT MIX OLD AND NEW BATTERIES. DO NOT MIX ALKALINE,
STANDARD (CARBON-ZINC) OR RECHARGEABLE (NICKEL-CADMIUM) BATTERIES.
SEE RECYCLERS IN YOUR AREA FOR PROPER DISPOSAL OF BATTERIES.
ASSEMBLY INSTRUCTIONS (continued)
Fig. 9
ON/OFF
To turn fan on, press the Power button (
)
located at the bottom of the control panel
(Fig. 10).
SPEED CONTROL
To adjust the speed up or down, press
the Fan Speed button (
) repeatedly to
increase level (Fig. 10).
TIMER
Choose from 1, 2, 4, or 8 hour settings by
performing the following function (Fig. 10):
• 1 hour:
Press the Timer button (
) once.
• 2 hours:
Press the Timer button twice.
• 4 hours:
Press the Timer button a third time.
•
8 hours:
Press the Timer button a fourth time.
Press the Timer button a fifth time to turn the
Timer feature off.
OSCILLATION
• Oscillation Knob is located on the top panel of
the Motor Assembly behind the Carry Handle.
• To START fan oscillation, push the Oscillation
Knob DOWN.
• To STOP fan oscillation, pull the Oscillation
Knob UP.(Fig. 11).
FAN OPERATIONFAN OPERATION
HS-1655, HS-1665 SERIES FAN OPERATION
Model HS-1655,
HS-1665
Model HS-1655C,
HS-1665C
Oscillation knob
Up/
OFF
Down/
ON
Power
Timer
Speed
Fig. 11
Fig. 10
Loading ...
Loading ...
Loading ...