Loading ...
Loading ...
Loading ...
12 INSTALLATION INSTRUCTIONS
INSTALLATION INSTRUCTIONS
Low
High
Low
Off
the fixed gas supply outlet�
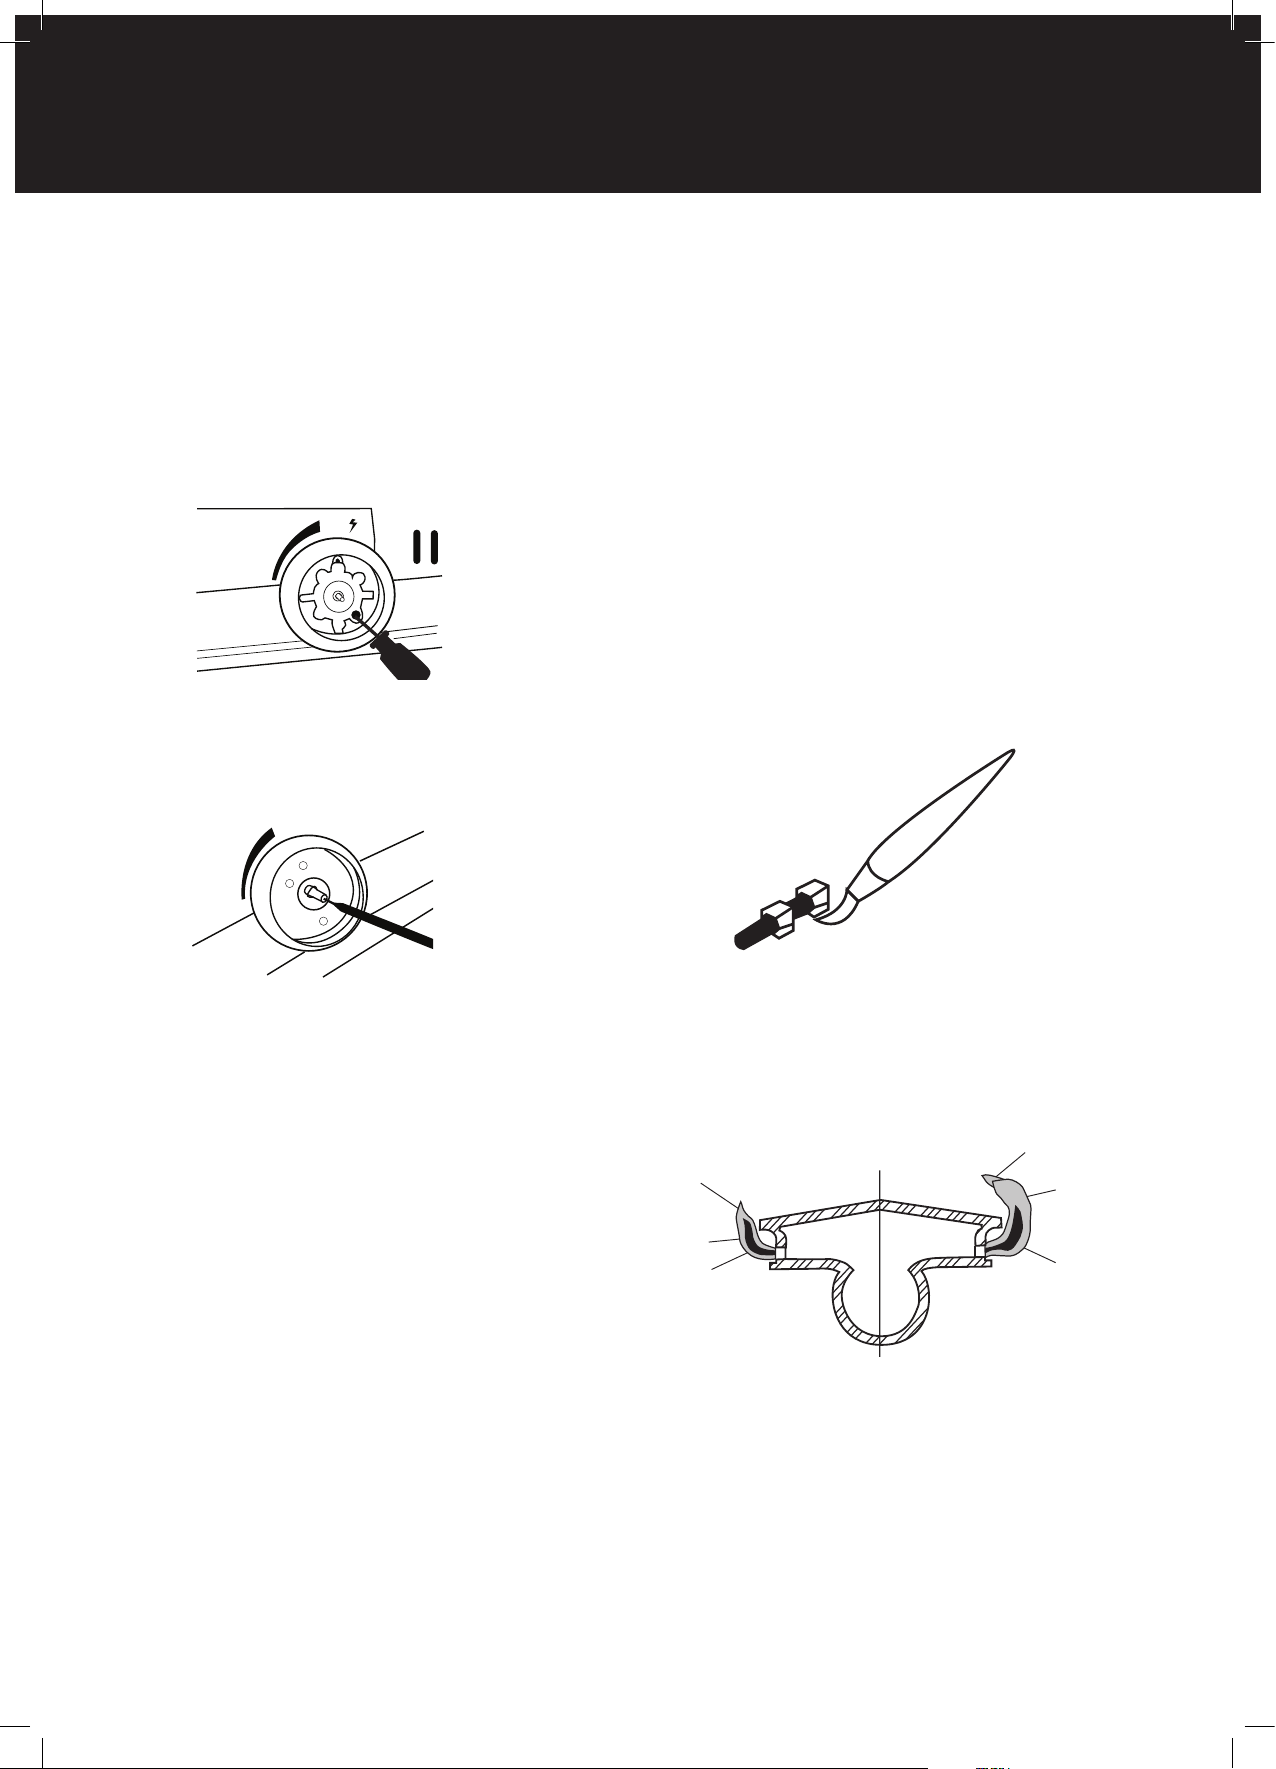
Turn down adjustment
• When converting to natural gas the turndown setting
will need to be adjusted to give a satisfactory flame on
low setting on each burner�
• Remove knob from valve shafts� For ignition valve the
low flame adjustment screw is located on the lower
right hand corner of the front of the valve body�
• Fully insert and rotate a flat bladed screwdriver to
adjust turndown�
• For non-igntion valves the screw is located inside the
knob spindle� Use a 2�5mm wide flat blade screwdriver
full inserted and make a
3
/4 turn counter clockwise�
• After leak testing light one burner and set to high�
• One burner at a time turn the valve shaft to lowest
setting observe the flame to ensure a small steady
flame in achieved�
• Repeat for the other burners�
• Turn off burners and replace control knobs, ensuring
the knob is in the correct orientation when valve is in
“OFF” position�
Secure All Joints And Leak Test
Never use a naked flame to check for gas leaks. The gas
leak testing procedure should be conducted every time a
gas cylinder is refilled and reconnected to the appliance,
or after any new gas connection is made.
In a small container, mix up a solution of water and
detergent or soap� Mix the solution well�
For LPG/propane make sure that the gas supply valve on the
gas cylinder is turned on� For Natural Gas make sure that
the gas shutoff valve is on�
Make sure that the gas control valves on the appliance are
all turned off�
Using a brush or spray bottle apply the solution to the gas
line and each joint in the gas line�
Bubbling of the solution will indicate that there is a leak
present� Re-tighten or re-seal any joints that are leaking�
If a leak persists contact your distributor or the
manufacturer for assistance�
Check Proper Burner Operation
Following operating instructions, light each burner and
check for a clear blue flame with just a tip of yellow� Excess
yellow tipping can be adjusted using the burner adjustment
screw on the side of the burner� Turn the screw in an anti-
clockwise rotation to reduce the yellow�
Yellow tipping
Right Wrong
Yellow tipping
Light blue
Dark blue
Dark blue
Light blue
Loading ...
Loading ...
Loading ...