Loading ...
Loading ...
Loading ...
7
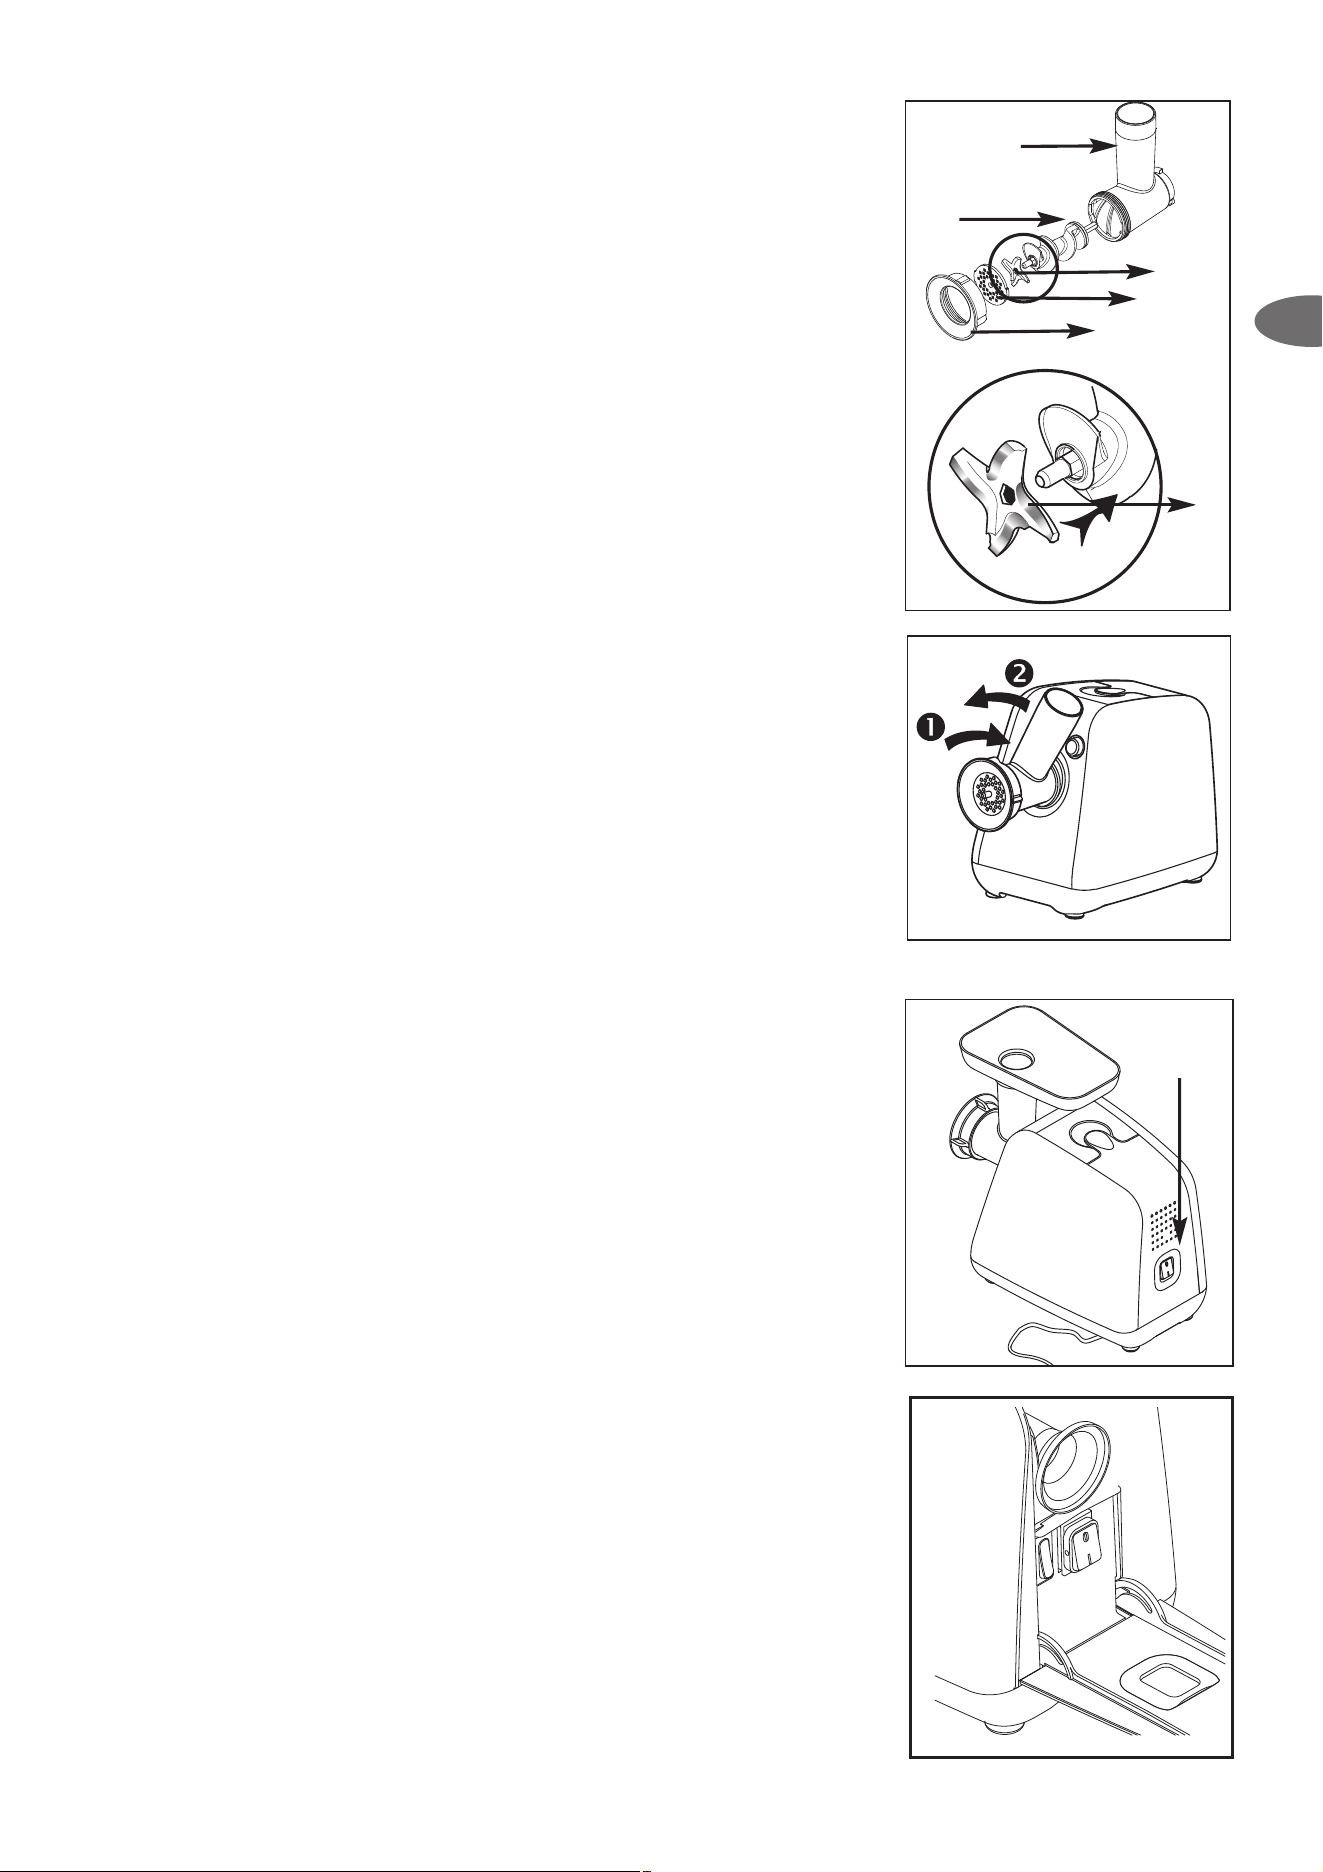
If clogging occurs:
• Set the switch to the “0” position to stop the chopping unit.
• Open the accessory storage door.
• Press the “reverse” switch to release the food and then close the door
and start again using the main switch to finish chopping.
IMPORTANT: Wait for the appliance to come to a complete stop
before pressing switches.
Assembling the chopping unit
• Introduce the screw (6) (long shaft first) into the chopping unit (5).
• Position the blade (7) on the short shaft of the screw setting the cutting
edges facing outside on the grid side.
• Place the selected grid (8) on the blade and slot the two lugs into the
two slots of the unit.
• Screw in the nut (9) fully without sticking.
• Check assembly. The axis must neither be loose nor stick in rotation.
If loose or stuck, repeat assembly operations.
Fitting the chopping unit on the appliance
Make sure the appliance is switched off at the mains or unplugged.
• Tilt the chopping unit to the right.
• Fully engage the chopping unit into the motor unit and turn to the left,
then engage the tray.
• Close the door.
• Plug in the appliance.
Chopping
• Prepare the ingredients to be chopped, first removing bones, cartilage
and sinews.
• Cut the meat into pieces (about 2x2 cm) and place them on the feeder
tray.
• For maximum efficiency, cut the pieces to a smaller size than the
funnel.
• Put a bowl under the chopping unit.
• Set the switch on the rear of the appliance to “I”.
• Introduce the pieces of meat into the chopping unit and push in using
the pusher (2) if necessary. Never push using your fingers.
• Do not use your appliance for more than 14 minutes at a time.
I
6
5
7
8
9
7
GB
Loading ...
Loading ...
Loading ...