Loading ...
Loading ...
Loading ...
5
2-Port USB 3.0 PCI-E Host Card
www.insigniaproducts.com
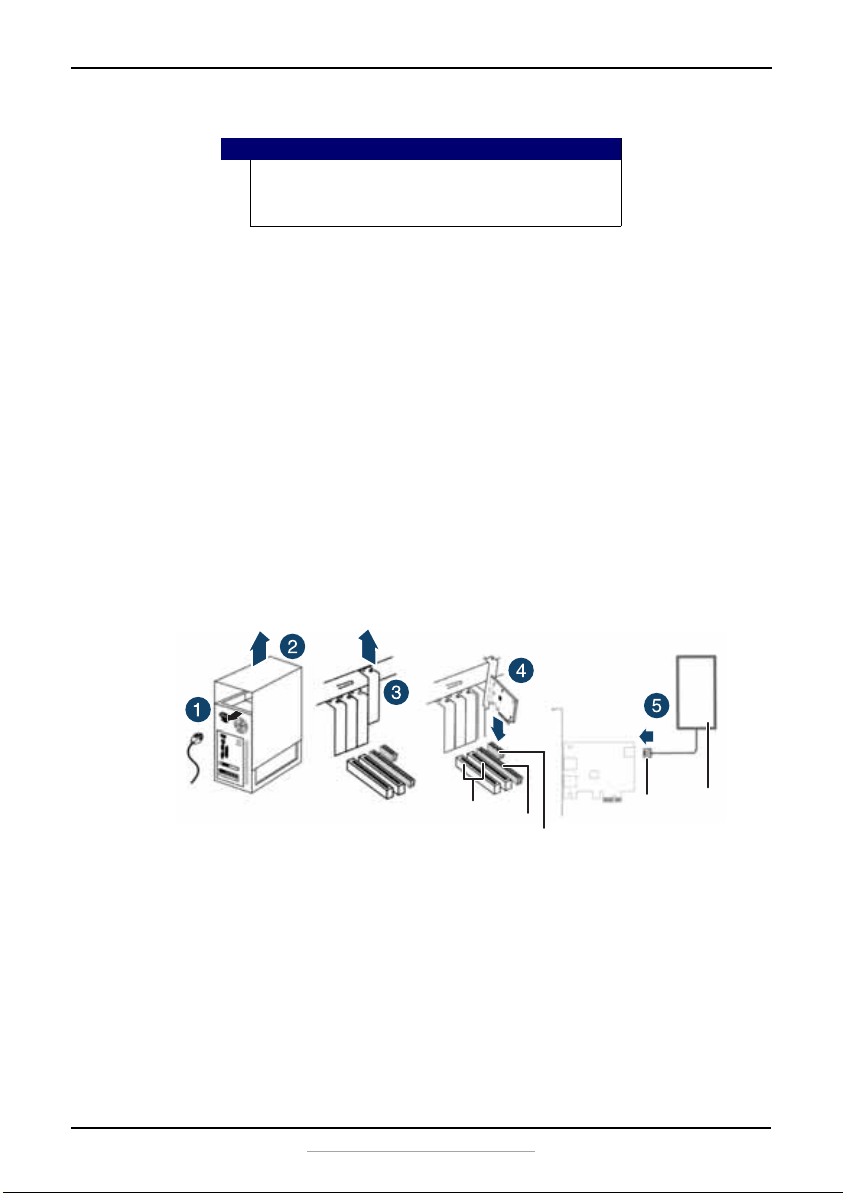
To install the card:
1 Turn off your computer and unplug the power cord and all cables.
2 Remove your computer's case cover. See your computer's user guide
for information about removing the cover.
3 Locate an available PCI Express slot, remove the screw that secures the
backplate (the small piece of metal that covers the opening for the PCI
card on the back panel of your computer), then remove the backplate.
If you are using a slim desktop computer, attach the included short
backplate prior to installation.
To change backplates, remove the screws that secure the standard
backplate to the PCI card, remove the standard backplate, then attach
the short backplate with the screws you removed.
4 Carefully insert the adapter into the PCIe x1 slot, seating it firmly into
the slot. Do not touch the metal connector on the adapter.
5 Connect an available floppy 4-pin power plug from your PC's power
supply to the adapter card's 4-pin power connector.
6 Secure the adapter to the case using the screw you removed from the
backplate.
7 Reinstall your computer's case cover.
8 Plug in the power cord and other cables, and then turn on your
computer.
Caution
PC components often have sharp metal edges. To prevent injury,
exercise caution when removing/installing components from
your PC, especially when exerting force.
PCI slot x16
PCIe slot
x16
PCIe slot
x1
4-pin
floppy
power
Power
supply
NS-PCIEC8_17-0492_V1_ENG.fm Page 5 Thursday, July 13, 2017 11:56 AM
Loading ...
Loading ...
Loading ...