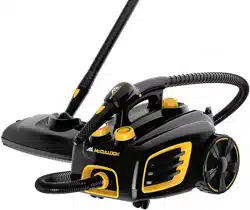
These features and accessories are included with your Canister Steam System. To obtain additional parts, refer to Product Support on Page 19 of this manual.
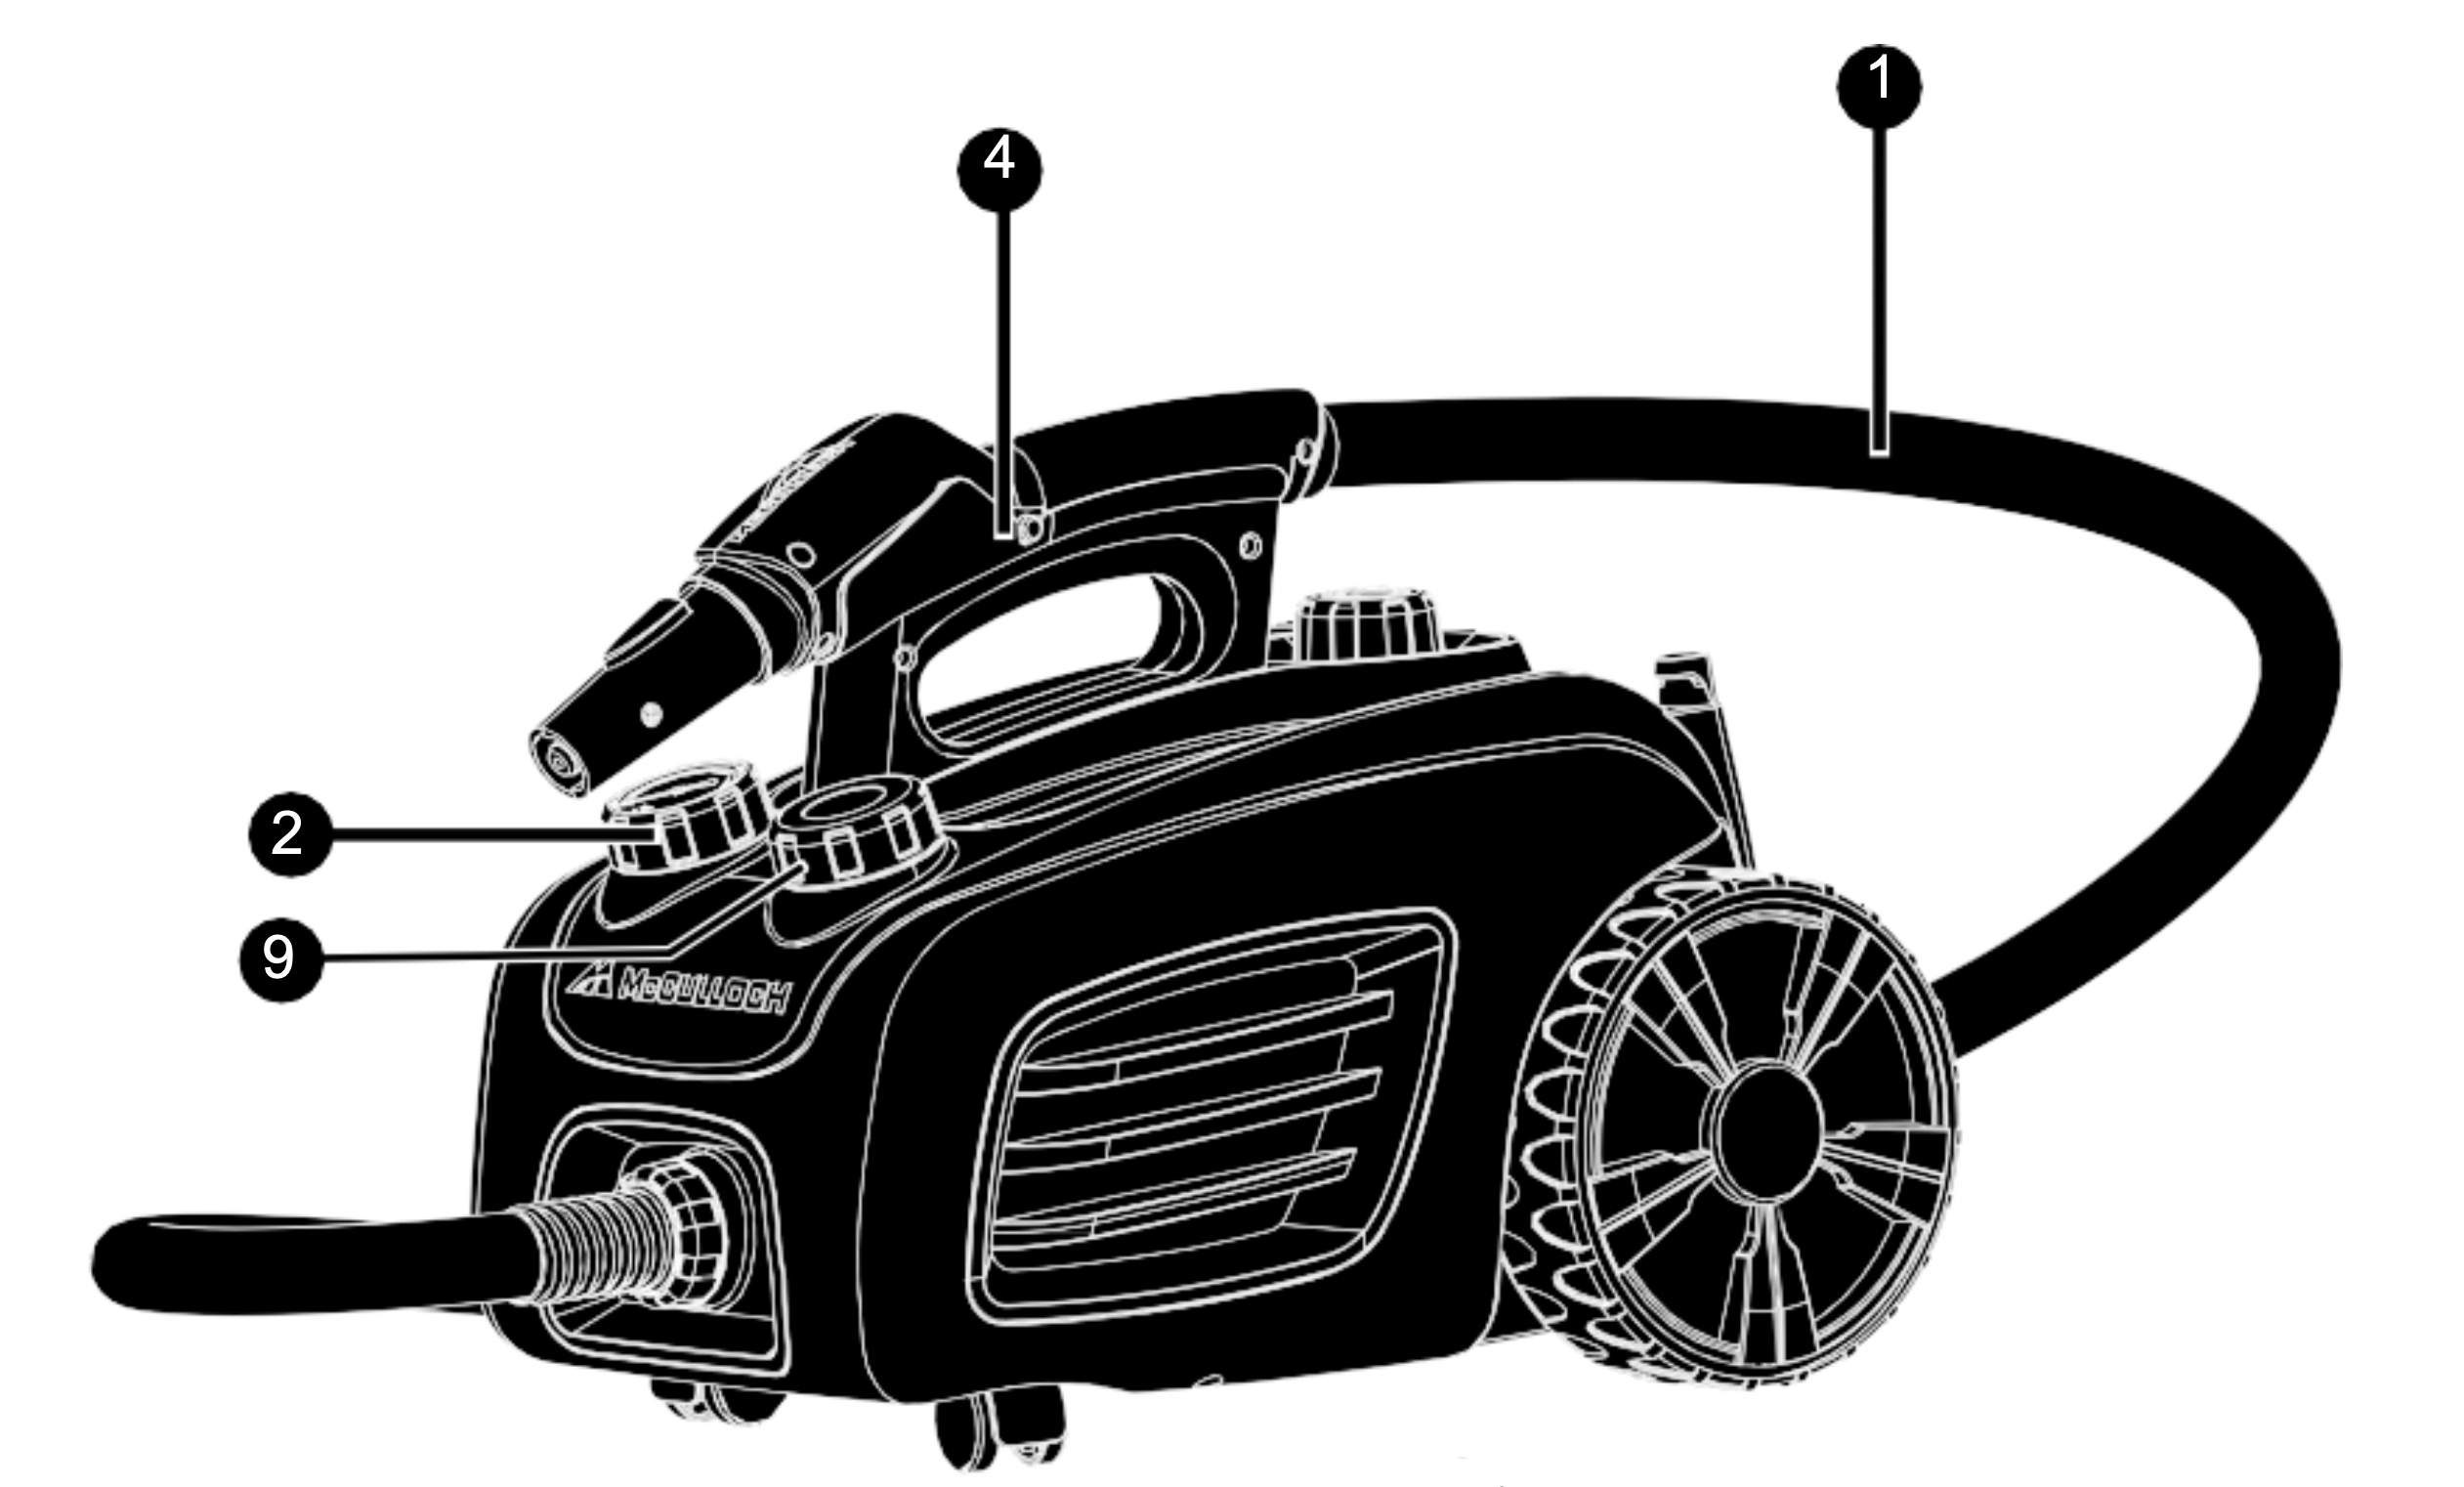
UNIT FEATURES
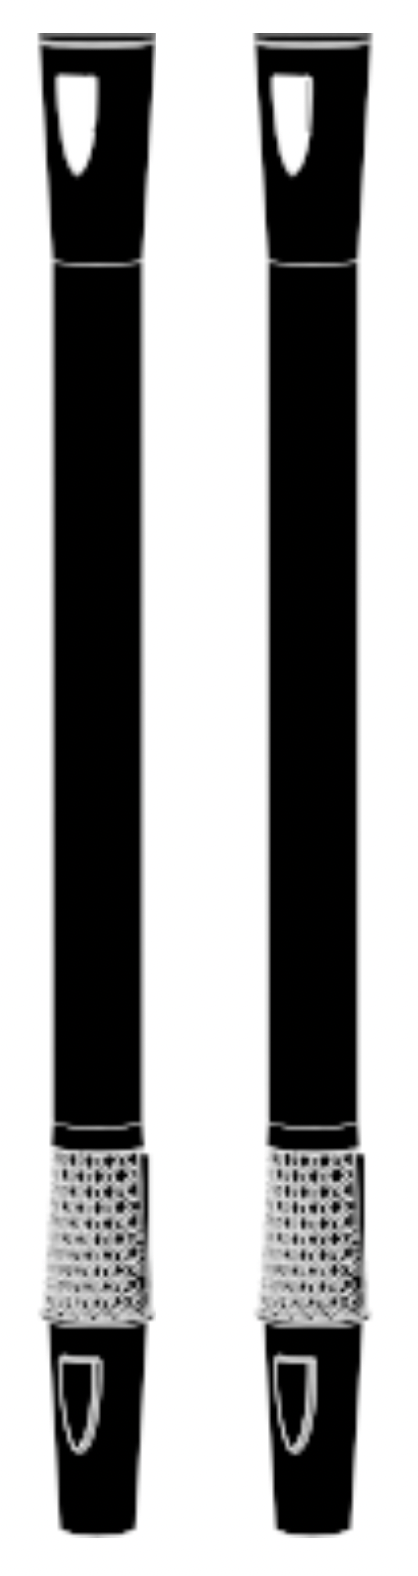
10' Steam Hose
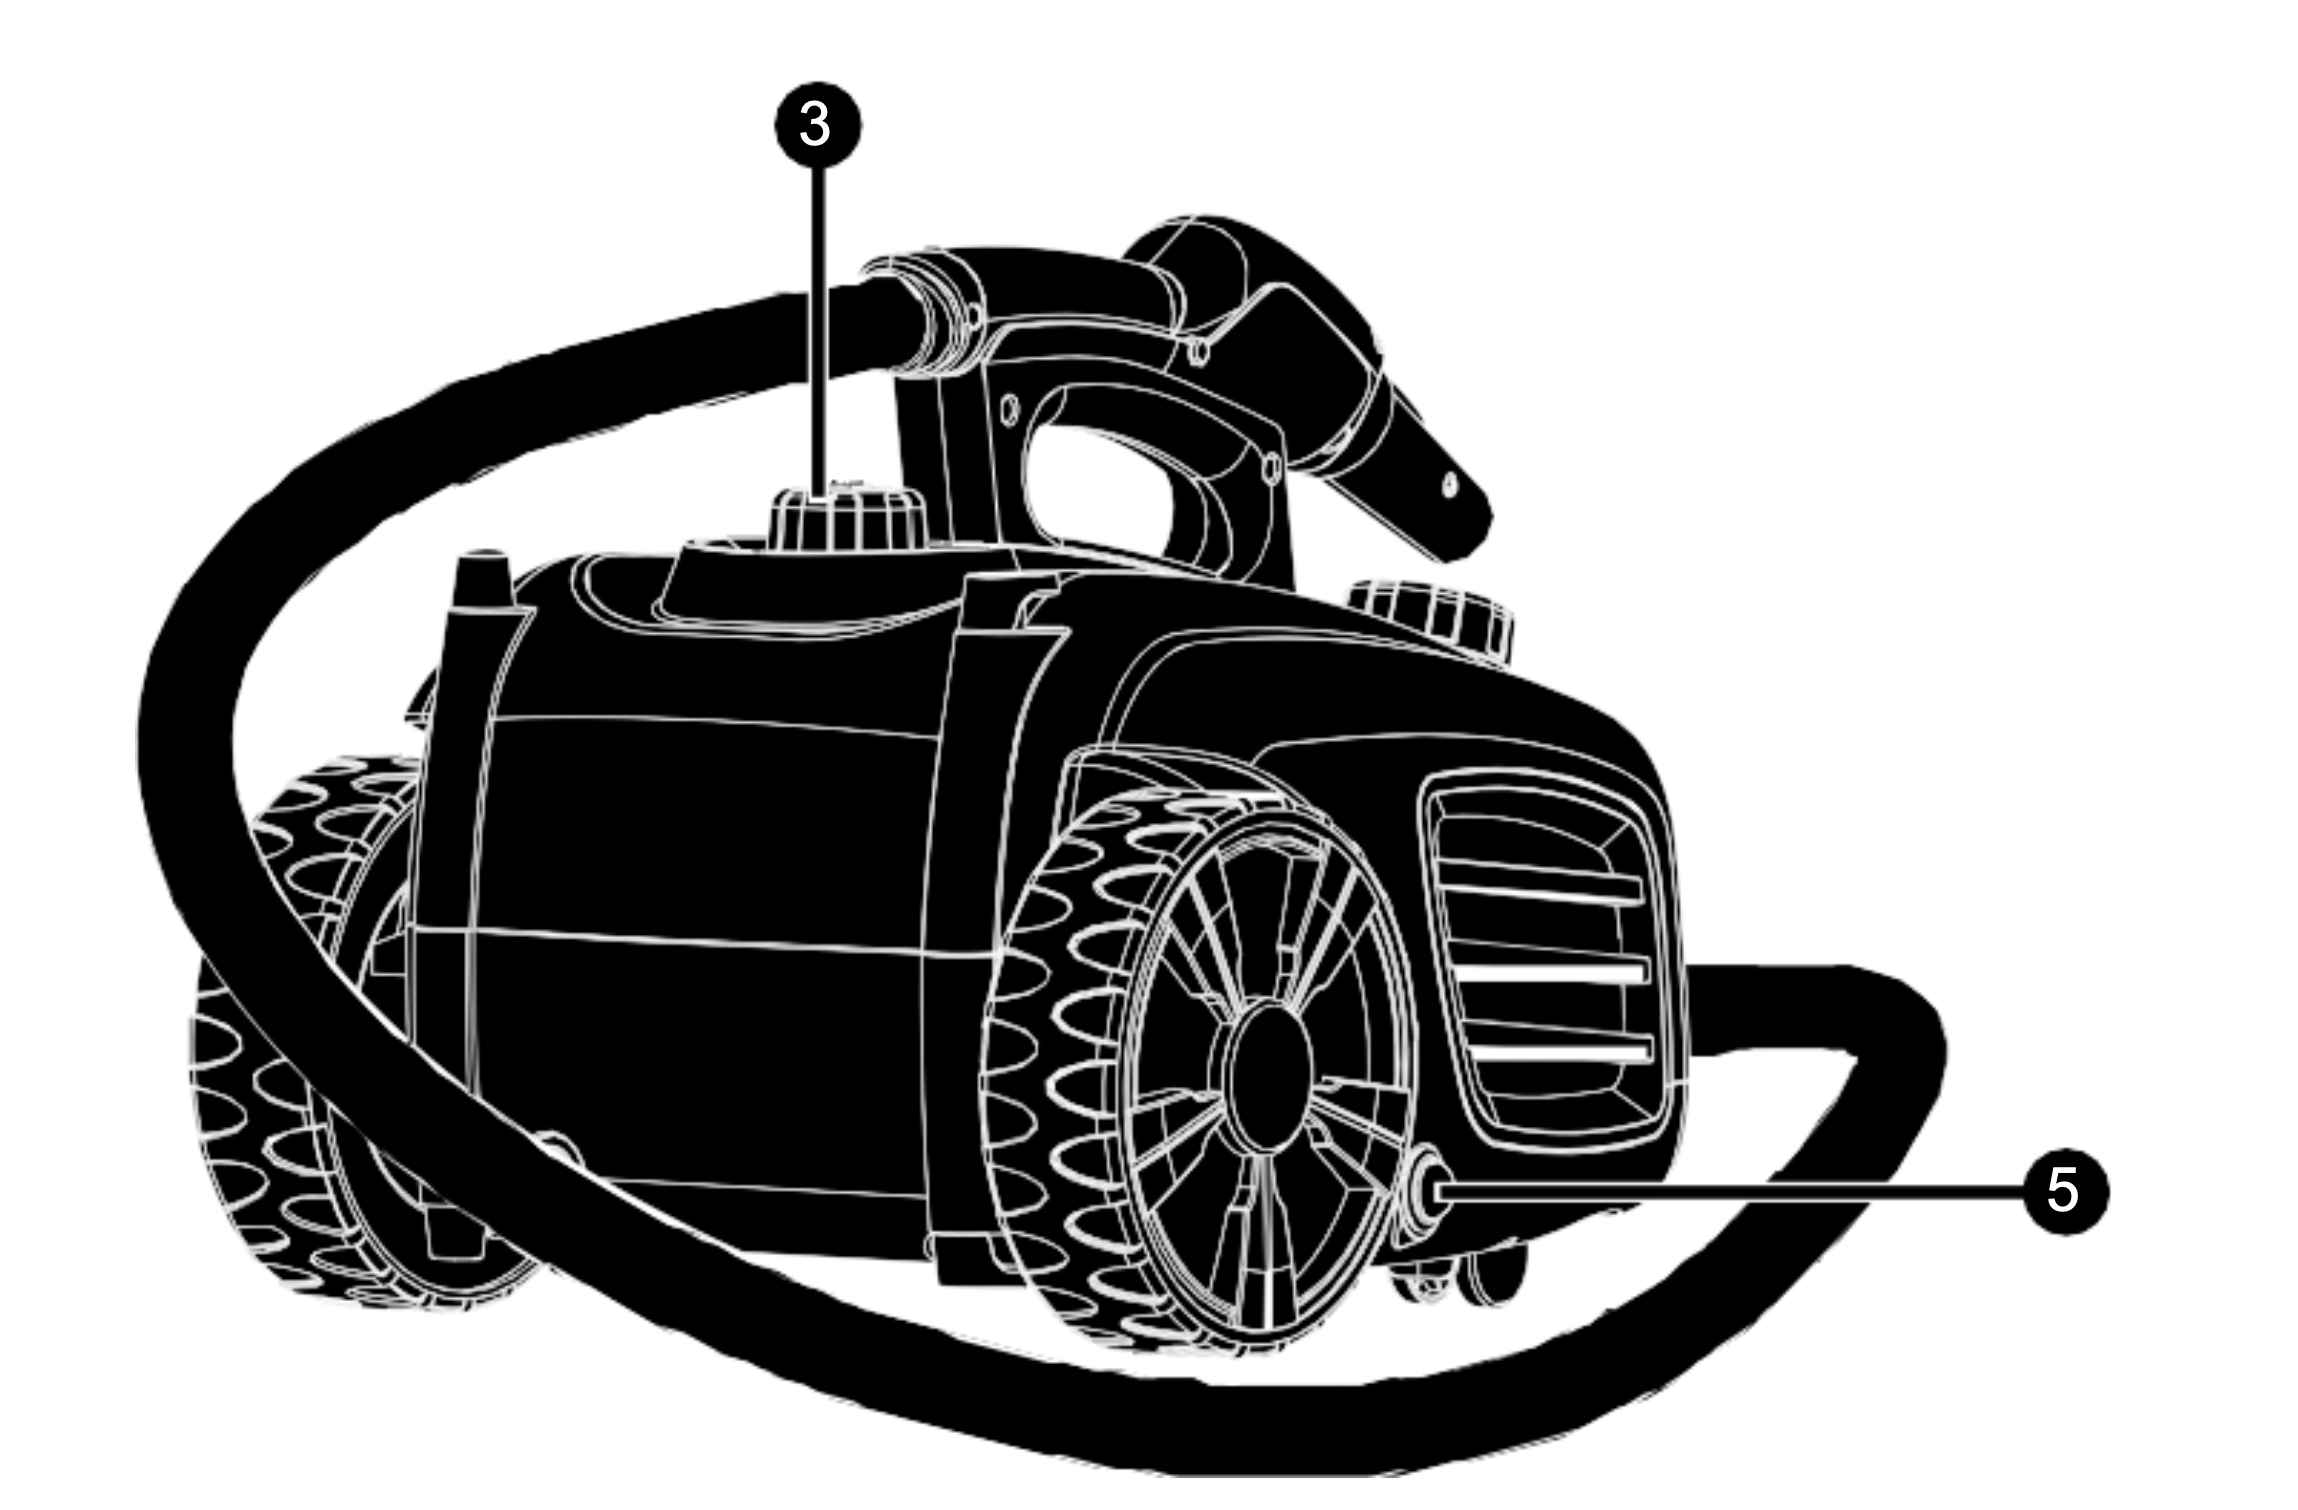
Pressure Gauge
Boiler Cap
Steam Handle Cradle
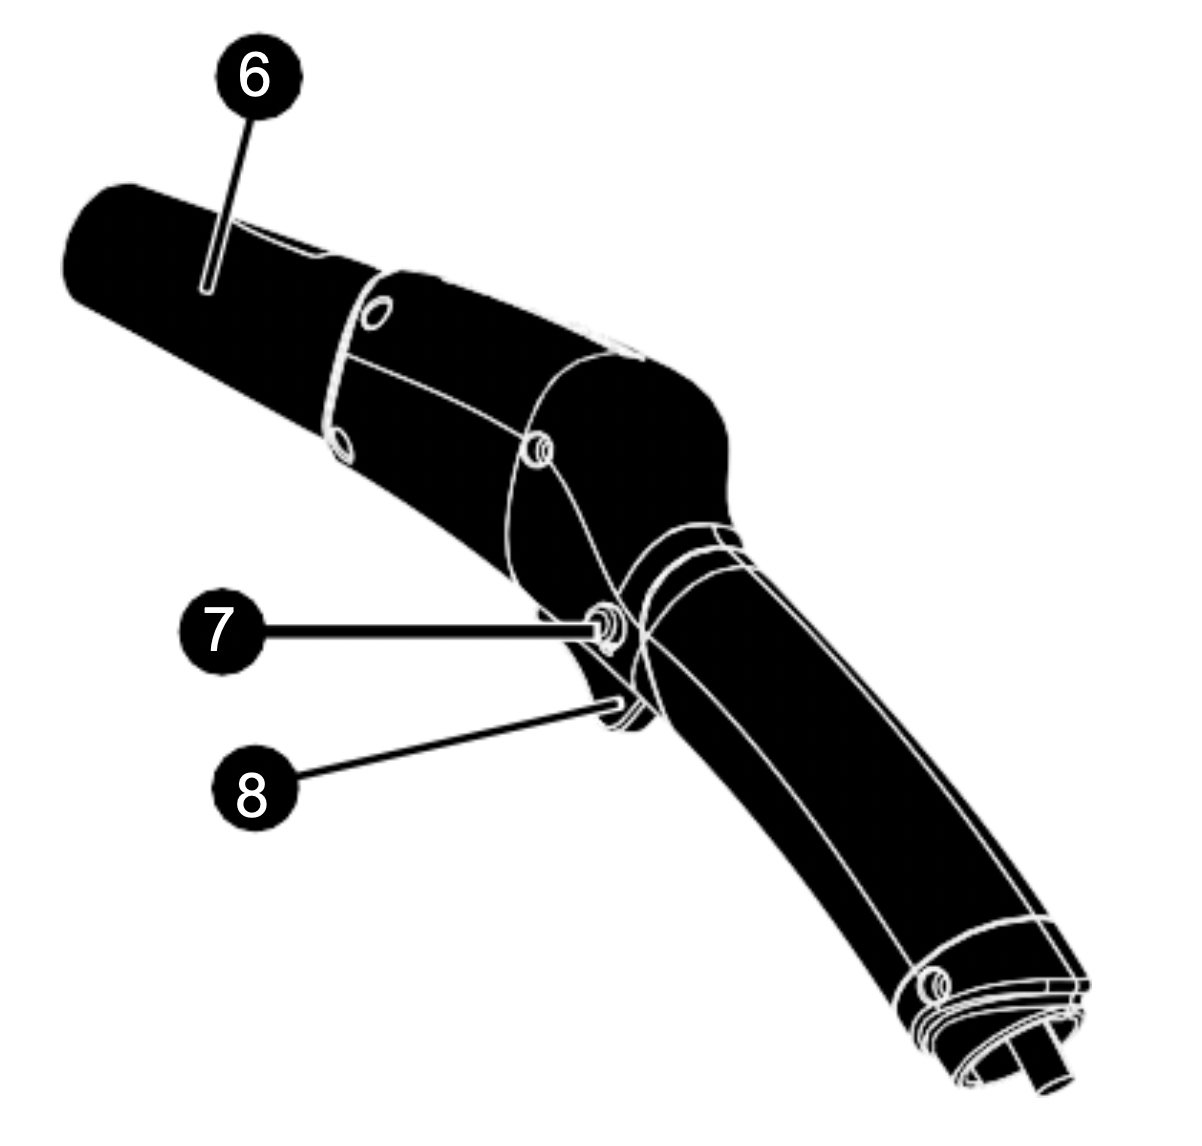
Illuminated On/Off Switch
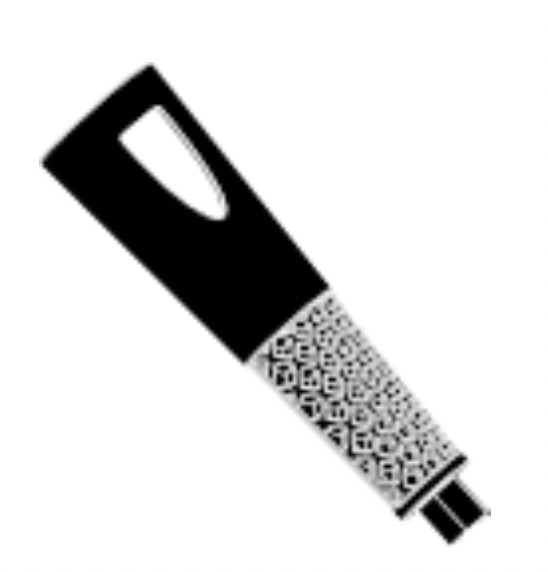
Steam Nozzle
Steam TriggerLock
SteamTrigger
Steam AdjustmentKnob
The 10' Steam Hose (1) safely channels the flow of steam from the Boiler to the Steam Nozzle.
The Pressure Gauge (2) measures the pressure in the Boiler.
The Boiler Cap (3) is designed to safely contain steam inside the Boiler. The Boiler Cap must be unscrewed and removed in order to fill the Boiler with water.
The Steam Handle Cradle (4) functions as a convenient holder for the Steam Nozzle.
The Illuminated On/Off Switch (5) illuminates when the unit is powered On.
The Steam Nozzle (6) emits a flow of hot, penetrating steam whenever the Steam Trigger is pressed and held.
The Steam Trigger Lock (7) locks Steam Trigger to "on" position for continuous steam.
The Steam Trigger (8) is pressed and held in order to start the flow of steam from the Steam Nozzle, then released when you wish to stop.
The Steam Adjustment Knob (9) adjusts steam intensity.
16.5" Extension Wands A1375-002
Microfiber Mop Pad A1375-100
Scrubbing Mop Pad A1375-101
5.5" Jet Nozzle A1230-001
4" Triangle Brush A1230-002 6" x 4.5" Large Brush A1230-003
1.5" Nylon Utility Brushes A1230-005
1.5" Brass Utility Brush A1230-006
Angled Nozzle A1375-001
3" Scraper A1230-009
13" x 8.5" Large Mop Head A1375-003-A Bristle BrushAttachment A1375-004
Storage Bag A1375-010
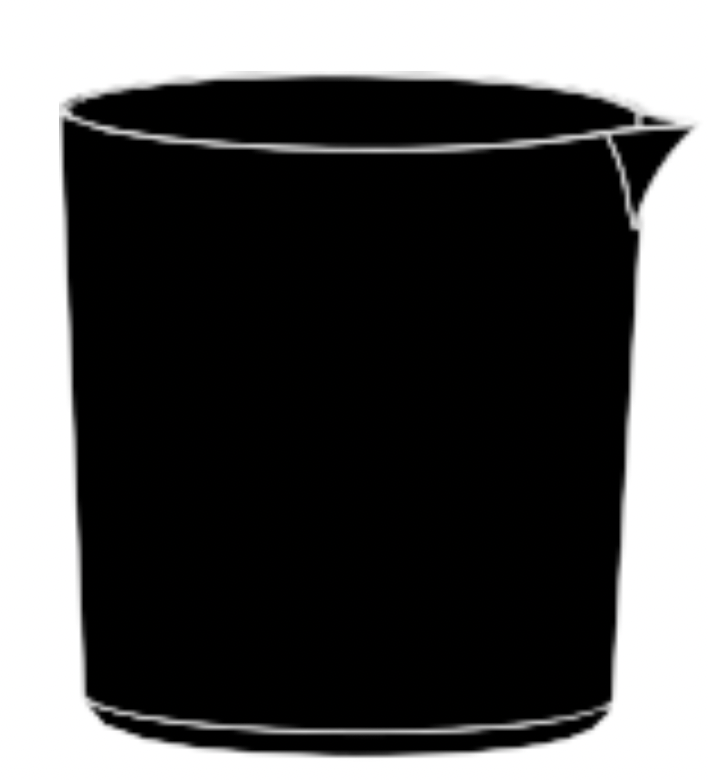
Fill Cup A275-015
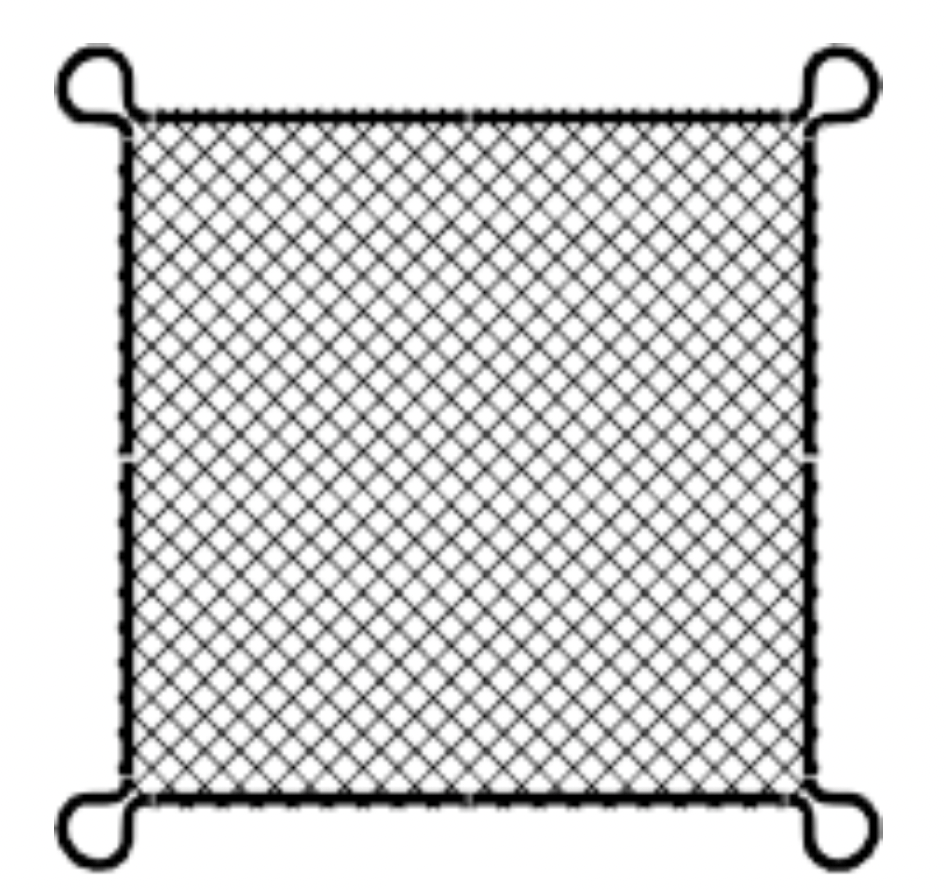
Accessory Net A1375-005
2.5" Round Brush A1350-001
2.5" Round Scrub Pads A1230-007
ACCESSORIES
2 - 16.5" Extension Wands
Microfiber Mop Pad
Scrubbing Mop Pad
5.5" Jet Nozzle
Triangle Brush
Large Brush
2 - 1.5" Nylon Utility Brushes
1.5" Brass Utility Brush
Angled Nozzle
3" Scraper
13" x 8.5" Large Mop Head
Bristle BrushAttachment
Storage Bag
Fill Cup
Accessory Net
2.5" Round Brush
2 - 2.5" Round Scrub Pads
The 16.5" Extension Wands (1) connect to the Steam Nozzle. Used with mop attachment or for high or hard-to-reach places.
The Microfiber Mop Pad (2) attach to the Mop Head, and are designed for removing scuffs and stains from hard floors. The Pads are reusable and machine washable.
The Scrubbing Mop Pad (3) attach to the Mop Head, and are designed for removing scuffs and stains from hard floors. The Pads are reusable and machine washable.
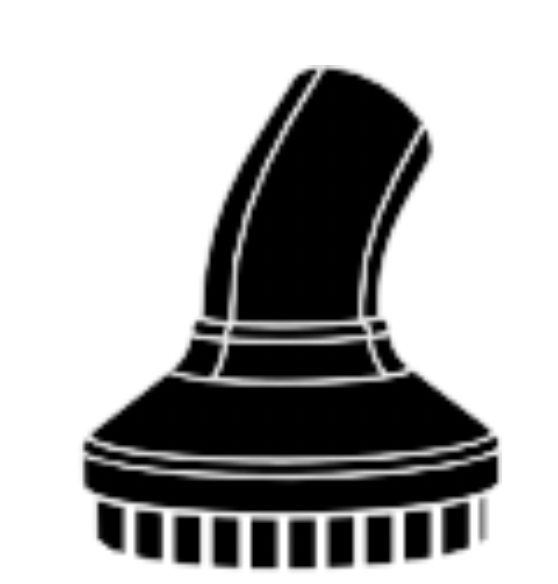
The 5.5" Jet Nozzle (4) focuses the flow of steam from the Steam Nozzle, and serves as the base to which the Utility Brushes and Angled Nozzle connect.
The Triangle Brush (5) connects to the Steam Nozzle or Extension Wands, and is designed for cleaning corners and other difficult angles.
The Large Brush (6) attaches to the Triangle Brush to cover large surfaces.
The 1.5" Nylon Utility Brush (7) connects to the Jet Nozzle, providing extra scrubbing power for removing exceptionally tough dirt and stains.
The 1.5" Brass Utility Brush (8) connects to the Jet Nozzle and is designed for removing tough stuck-on grease and grime from durable surfaces such as ovens and grills.
The Angled Nozzle (9) is designed for reaching difficult angles and areas that the Straight Nozzle may not completely reach.
The 3" Scraper (10) attaches to the Steam Nozzle to scrape off stuck on grime.
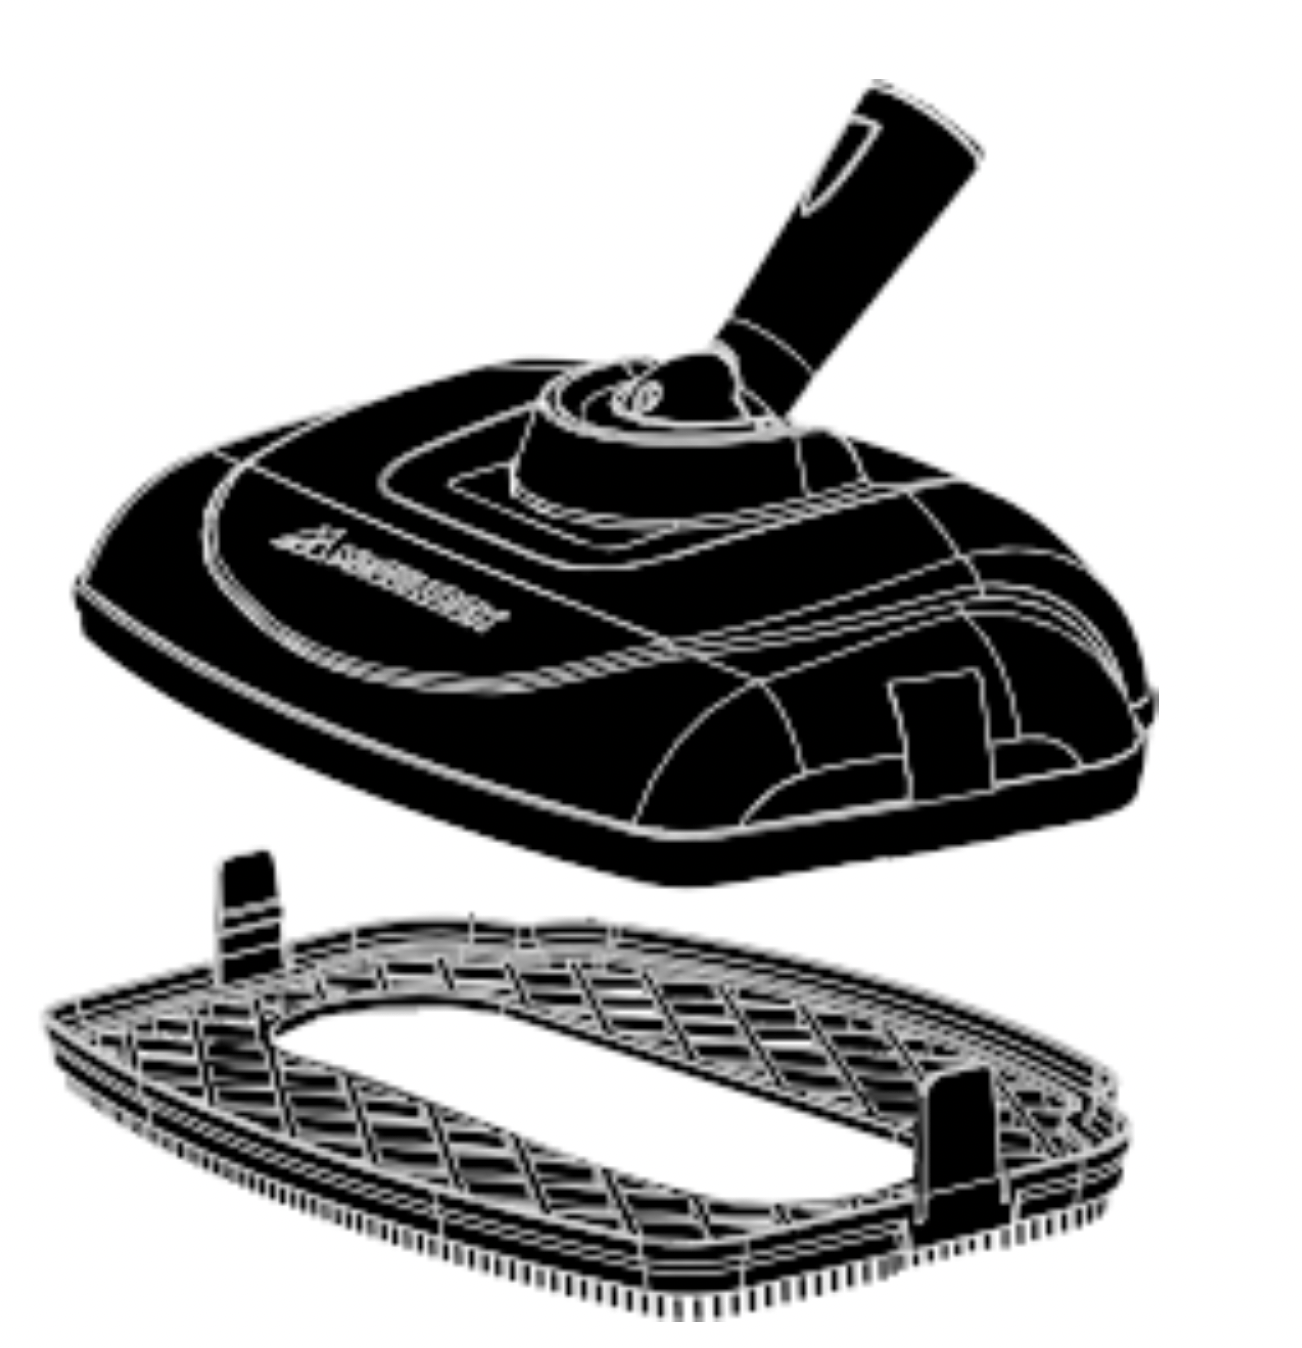
The 13" x 8.5" Large Mop Head (11) attaches to Extension Wands to clean garage floors, decks or any other extra large surface areas.
The Bristle Brush Attachment (12) attaches to Large Mop Head to scrub away stubborn spots on floors.
The Storage Bag (13) stores all attachments neatly on one convenient bag.
The Fill Cup (14) is used to fill Boiler without spills.
The Accessory Net (15) stores brushes and other small accessories.
The 2.5" Round Brush (16) connects to the Jet Nozzle to scrub especially tough stains. The Round Brush functions similar to the Nylon Utility Brush, only designed to more efficiently scrub larger surface areas.
The 2.5" Round Scrub Pad (17) connects to the Jet Nozzle and is designed to scrub tough dirt and scuffs from surfaces.
Assembling Your Canister Steam System
STEAM MOPPING ACCESSORIES
WARNING: Do not try to connect accessories while unit is emitting steam.
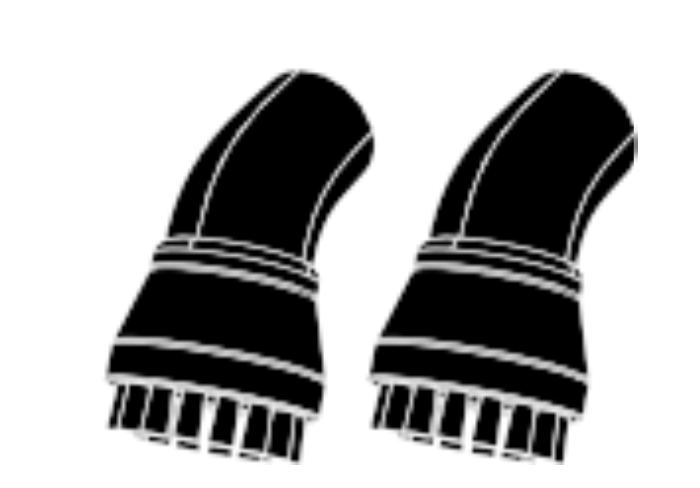
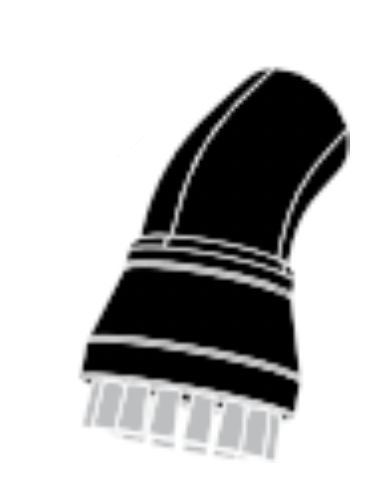
EXTENSION WANDS
Select one of the Extension Wands. Insert end (A) of Wand onto Steam Nozzle (B) with yellow lock/release button slightly off center with hole. Fully insert and rotate wand slightly to allow button to snap into hole.
Using the same instruction, attach remaining Extension Wand to the first Wand. Both Extension Wands should now be connected to the Steam Nozzle.
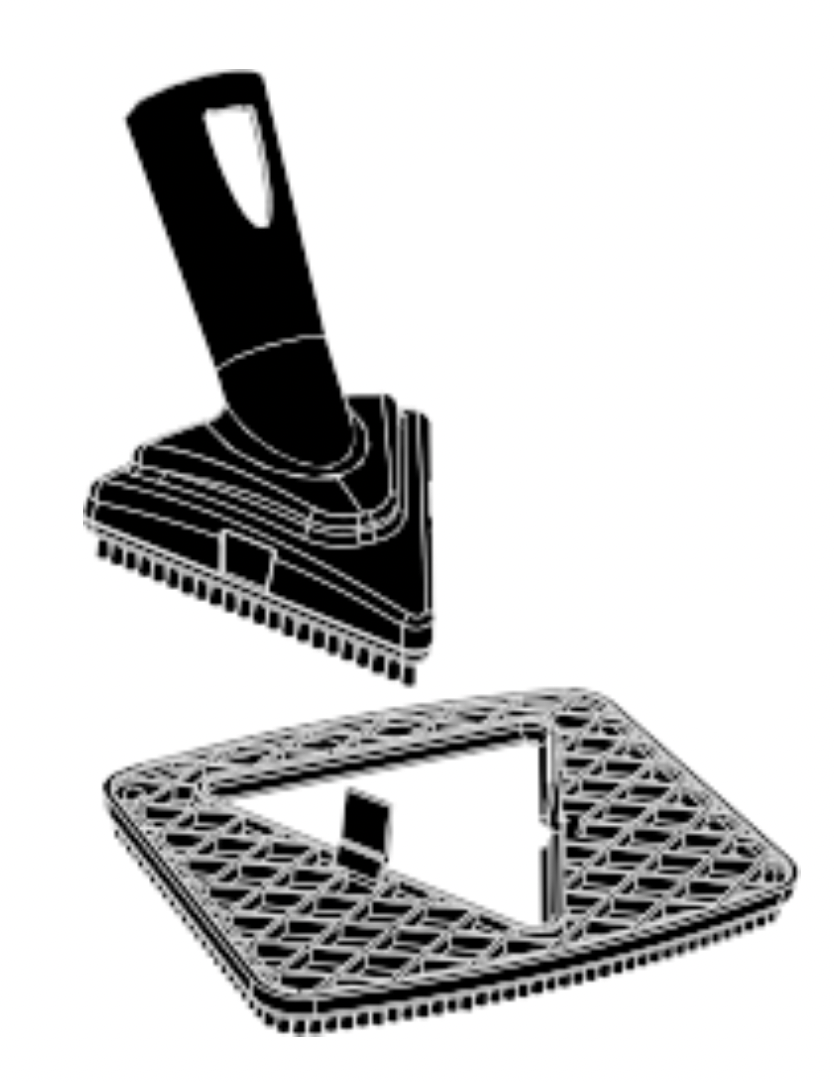
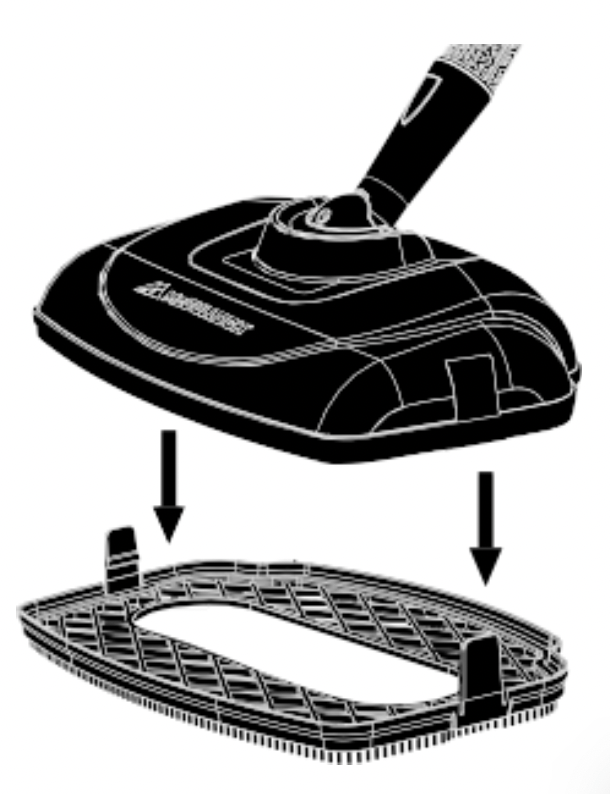
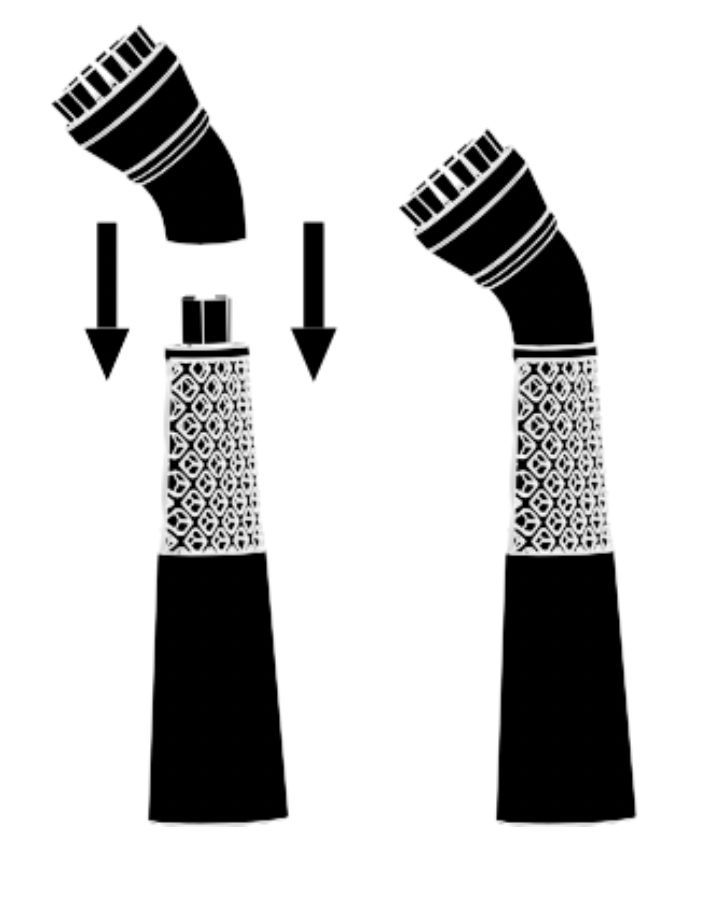
MOPHEAD
Align Mop Head with open end of Extension Wand, so that hole in Mop Head aligns with yellow lock/release button on Wand.
Press down on yellow lock/release button. While continuing to hold button down, slide Mop Head onto Extension Wand (See figure 1-A). Fully insert and rotate wand slightly until button snaps through hole (See figure 1-B).
NOTE: Do not use excessive force when mopping or using Extension Wands as this may cause the Wands to break.
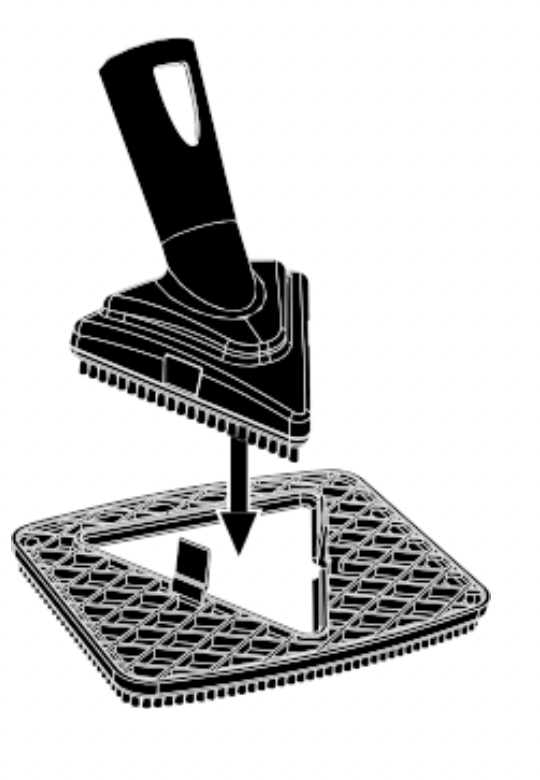
BRISTLE BRUSH ATTACHMENT
Align Mop Head with Bristle Brush Attachment, so that the release tabs (A) on the Bristle Brush align with the sides of the Mop Head (B).
Firmly press the Bristle Brush Attachment onto Mop Head untilit securely snaps into place. Note: Do not use Bristle Brush Attachment with Microfiber or Scrubbing Mop Pad.
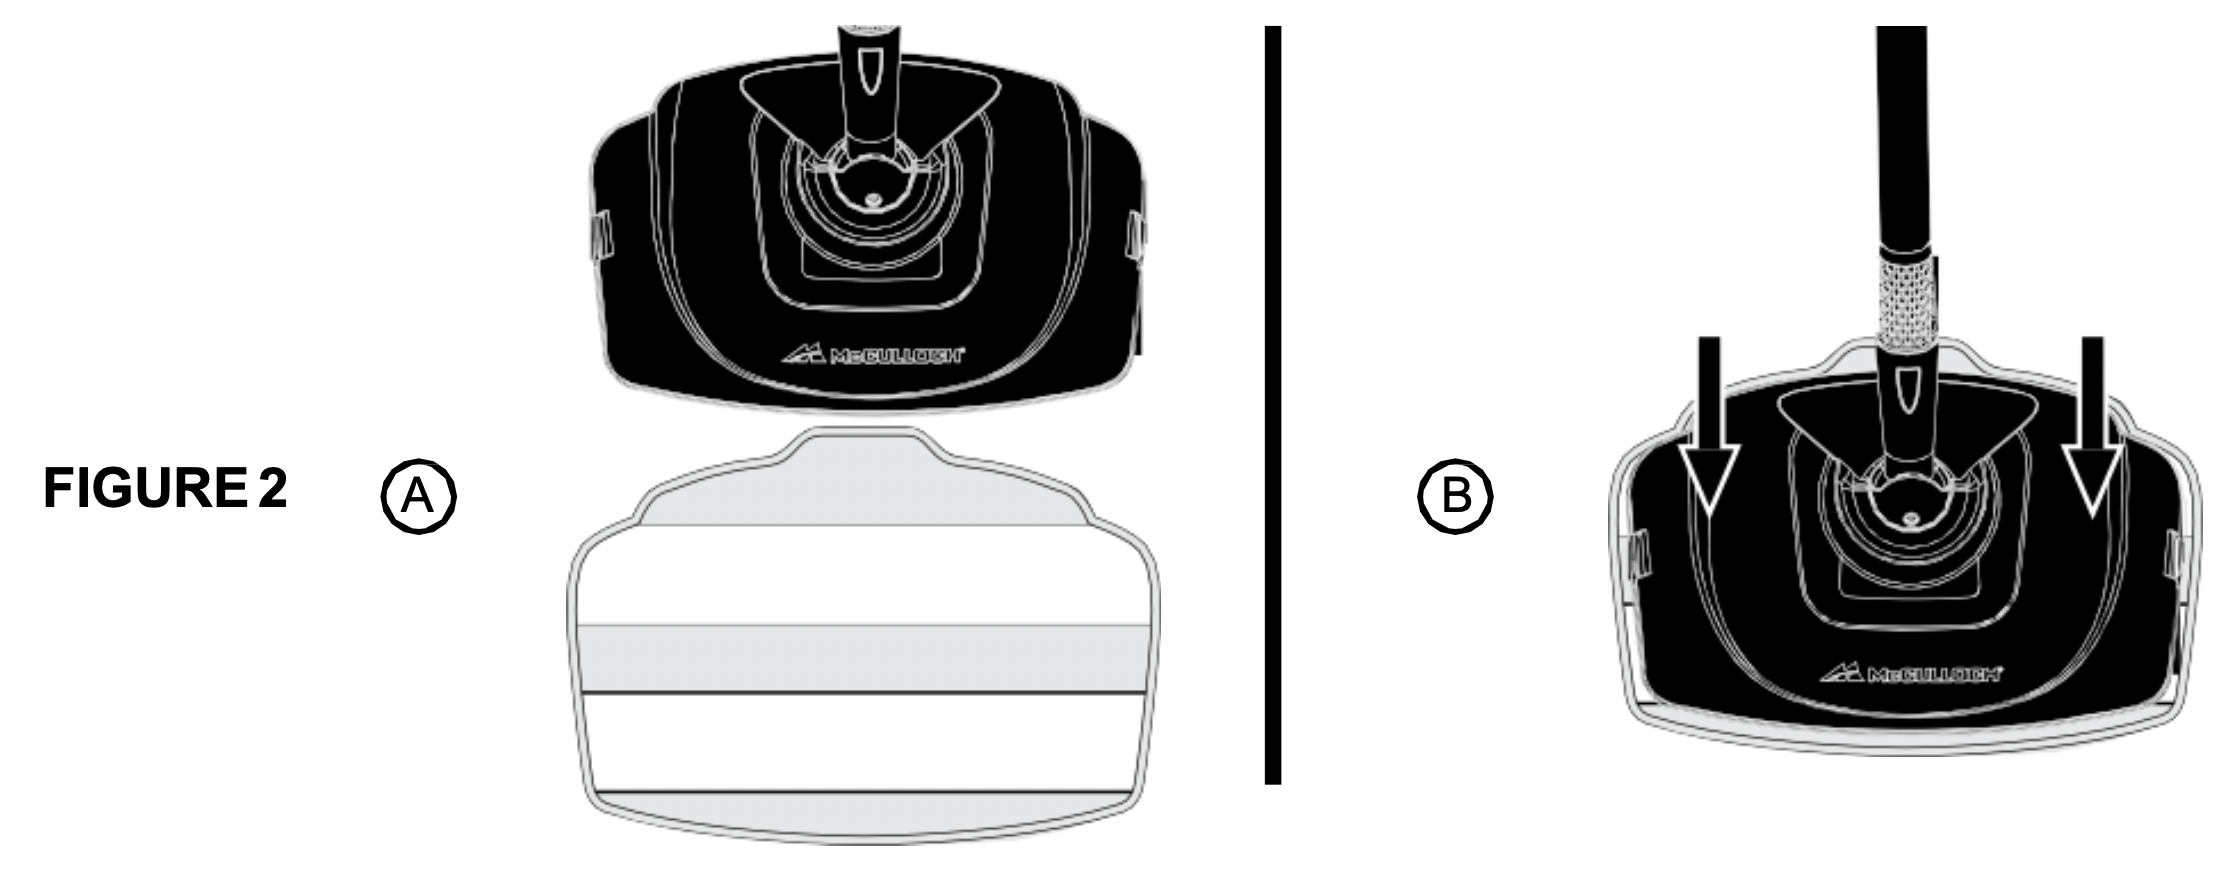
MICROFIBER PADS
Lay one Microfiber Pad on flat surface, with two fastener strips facing upward.
Align Mop Head with Microfiber Pad. Make sure Mop Head is oriented with Pad as shown, and centered as best as possible (See figure 2-A).
Press Mop Head firmly down onto Microfiber Pad. Fastener strips will adhere to Pad Grips on underside of Mop Head. Pad should now be attached and ready for use (See figure 2-B).
CAUTION: Use care when handling a recently used Microfiber Pad, as it may still be hot.
NOTE: Microfiber Pads are machine washable. To avoid picking up lint, washing separately from other fabrics is recommended. Only use liquid detergent. Avoid using any fabric softeners or bleach. Air drying is recommended; machine drying on a low heat or air dry setting is acceptable as well.
The Mop Head and Microfiber Pads are perfect for use on these hard floor surfaces:
Sealed Hardwood
Stained Concrete
Sealed Laminate
Linoleum
Glazed Ceramic
Granite
Marble
Vinyl
Tile
IMPORTANT: Do not use on unsealed hardwood or unglazed ceramic surfaces. Surfaces that are not properly sealed may be warped or damaged by exposure to heat and moisture.
Care should also be taken when steaming sealed hardwood floors, as prolonged exposure to steam in a single spot may cause damage and discoloration. To avoid this, keep the Mop Head in constant motion on these surfaces.
Steam may remove the sheen from some floors that have been treated with wax.
Extremely rough textured floors may tear or damage Microfiber Pads.
Before steaming any flooring, it is recommended to consult the manufacturer’s guidelines. For flooring in question, always test on a small inconspicuous area before proceeding.
STEAM CLEANING ACCESSORIES
WARNING: Do not connect accessories while unit is emitting steam.
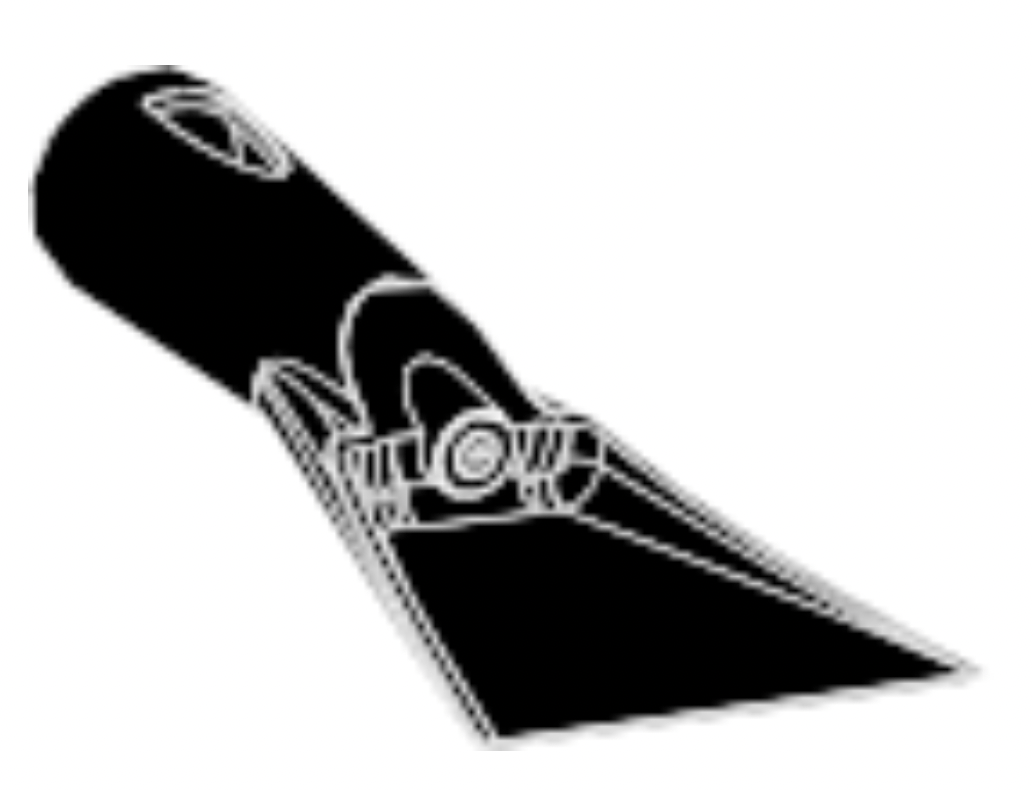
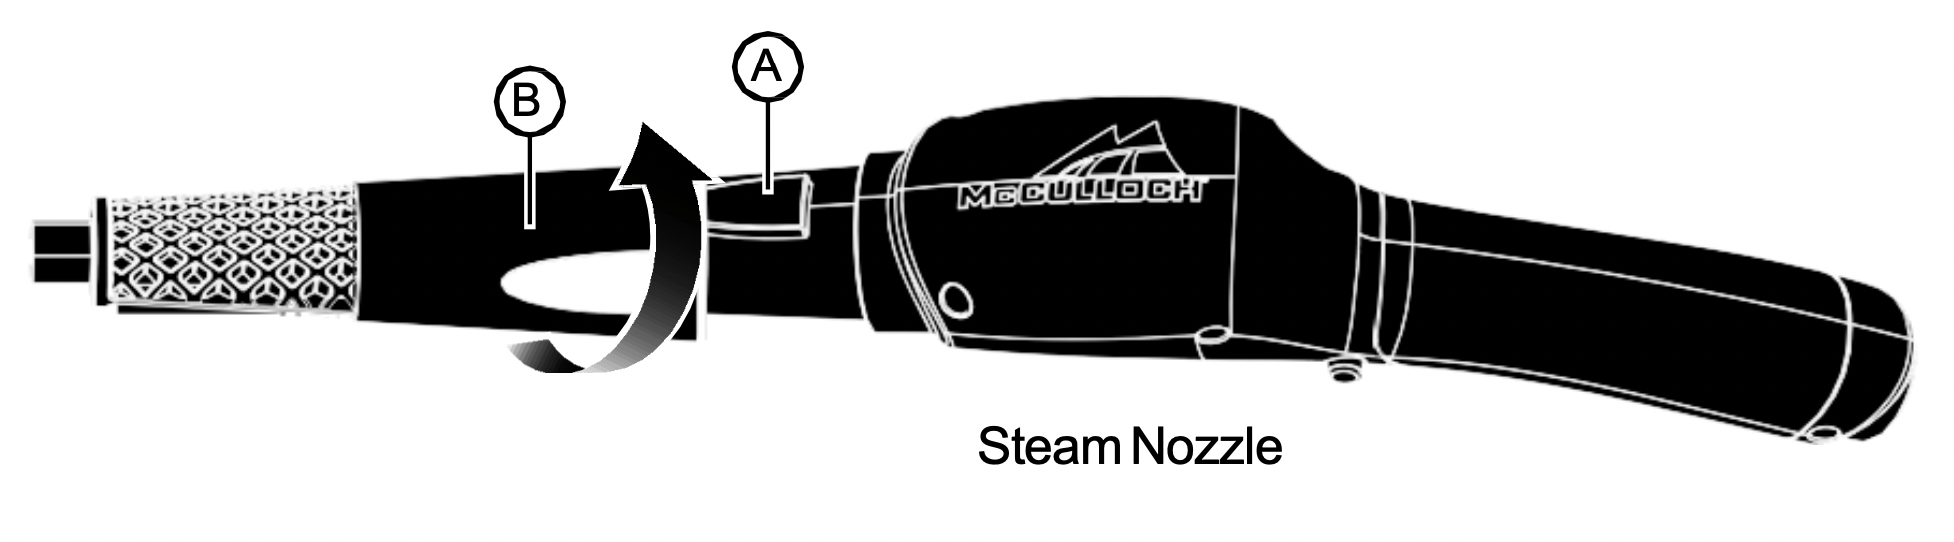
JET NOZZLE / SCRAPER / TRIANGLE BRUSH
Select one of the three accessories (Jet Nozzle shown as example) and push onto the Steam Nozzle (A).
Rotate accessory until the yellow lock/release button snaps into the accessory hole (B).
NOTE: The Jet Nozzle, Scraper and Triangle Brush can be connected to the end of an Extension Wand for reaching high or difficult spots. Connect the Extension Wand (or Wands) as outlined on Page 8, then connect your desired accessory to the Wand in the same way as you would normally connect to the Steam Nozzle.
UTILITY BRUSHES / ANGLED NOZZLE / SCRUBPAD
NOTE: Accessories connect to the Jet Nozzle, not the Main Nozzle.
Firmly press accessories onto tip of Jet Nozzle. Press it on as far as possible to prevent steam leakage.
To remove accessories, simply grip it firmly and pull it off Jet Nozzle.
LARGE BRUSH
NOTE: Large Brush connects to the Triangle Brush, not the Jet Nozzle.
Place Large Brush over the Triangle Brush, and firmly press it on to the Triangle Brush until it snaps into place.
To remove Large Brush, simply grip it firmly and pull it off of the Triangle Brush.
Accessory Recommendations
[IMAGE]
NOTE: Before cleaning electrical appliances, check and follow appliance manufacturer’s cleaning guidelines. Never apply to electrical parts.
NOTE: Some delicate surfaces, such as painted wood or stainless steel may be scratched or damaged by the bristle of the brushes, especially the Brass Utility Brush. Use careful judgment when deciding what surface to clean with any of the brushes. If you are unsure if a surface will be damaged, it is recommended that you test a small inconspicuous spot before proceeding.
Using Your Canister Steam System
FILLING BOILER
Place Canister Steam System on a flat, level surface.
Make sure illuminated On/Off Switch is turned to “Off” and grounded power cord is unplugged from electrical outlet. Warning: If unit has been in use, always use the following safety precautions before removing the Boiler cap to add water: Allow unit to cool for 20 minutes or until pressure gauge is at zero. Press and hold Steam Trigger to release ALL remaining steam. WARNING: Failure to follow these precautions may result in burns from escaping steam when the Boiler Cap is removed.
Cautiously unscrew and remove Boiler Cap. WARNING: Water may be hot.
Drain any water remaining inside Boiler. NOTE: The Boiler should be emptied after each use – this will help minimize mineral build-up and prevent over-filling.
Using the Fill Cup, fill the unit with 48 oz (1,420 ml) of water. NOTE: In order to significantly reduce mineral build-up and prolong the life of your Canister Steam System, use of distilled or de-mineralized water in the unit is highly recommended. Refer to Page 16 for more information about mineral build-up. WARNING: Caution should always be used when pouring water into the Boiler. Do not look directly down into fill hole when filling. Keep your free hand and any children or pets at a safe distance.
Replace Boiler Cap, ensuring that it is screwed on tightly to prevent hot steam from escaping and causing injury.
GENERAL OPERATION
NOTE: Be sure that Boiler has been filled and that all desired accessories areconnected before following these steps.
For first time use, remove protective plastic cover from electrical plug. Plug power cord into a electrical outlet.
Switch Lighted On/Off Switch to “On” position.
The pressure gauge indicates the operating pressure of the steam cleaner. Once the needle is in the green section, the unit is ready to begin steaming. During use and as steam is released, pressure will drop. This may cause the needle to move down in the green section. This is a normal condition. As long as the needle is in the green section, the product is operating normally. If the needle is continuously in the yellow or red section, please contact Consumer Service at 1-800-711-6617.
Direct Nozzle (and any connected accessory) towards surface you desire to steam, and press Steam Trigger. To sanitize surfaces, point Nozzle, press Trigger and hold approximately 1/2 inch from surface for at least 5 seconds. This will insure that you have killed germs and bacteria. CAUTION: Always be sure that Nozzle and any accessory are pointed in a safe direction (away from yourself, other people, pets, and plants) before pressing Steam Trigger.
Keep Steam Trigger pressed for a continuous flow of steam. You may also hold the Steam Trigger, then push the Steam Trigger Lock to lock it down. This will allow a continuous flow of steam without need of holding the Steam Trigger down manually. Steam output can be adjusted by simply turning the Steam Adjustment Knob.
Using a back-and-forth motion over the area you are steaming will further enhance the cleaning process. Wipe steamed areas with a clean cloth to remove loosened dirt and grime. Wiping the area while it is still wet is recommended, but use caution when wiping surfaces such as metal that may still be hot.
Once steaming tasks are complete, turn the unit “Off” and unplug. Follow steps under Proper Storage procedure on Page 16 of this manual.
STEAM MOPPING
NOTE: Be sure that Boiler has been filled and that all steam mopping accessoriesare connected before following these steps.
It is recommended to sweep or vacuum hard floors before mopping.
Follow Steps 1-3 of General Operation section above. Refer to Page 9 for a listing of hard floor surfaces that are recommended for cleaning with the Canister Steam System.
For best results, use a continuous back-and-forth motion over floor surface, pushing the Mop Head away and pulling it back towards you. Work your way backwards over the floor, in order to avoid walking over freshly mopped areas. NOTE: To avoid warping or damage caused by heat and moisture, do not use on unsealed hardwood or unglazed ceramic surfaces. Steam may remove the sheen from some floors that have been treated with wax.
The Microfiber Pad will absorb dirt and moisture during mopping. However, when you are finished you may find some residual moisture has been left behind. In this case, it is recommended to allow floor time to air-dry. A fan may be directed towards mopped area to facilitate drying.
Storage & Care
PROPER STORAGE
Preparing your Canister Steam System for storage is quick and simple. When you have finished your steaming tasks, follow the steps listed below.
Turn unit “Off” and unplug power cord.
Allow unit to completely cool (at least 30 minutes).
Press and hold Steam Trigger to release all remaining steam.
Remove all accessories from unit.
Carefully remove Boiler Cap.
Drain any remaining water from Boiler into a sink or tub – this will help to minimize mineral build-up and prevent over-filling during your next use. Replace Boiler Cap loosely.
Store accessories. Utility Brushes can be conveniently stored in the Accessory Net. Remaining accessories can be stored in the Storage Bag.
Store Canister Steam System in a cool, dry location.
MINERAL BUILD-UP
A common maintenance need for steam appliances is the removal of build-up caused by high mineral content in many municipal water supplies. This mineral build-up may limit the effectiveness and reduce the life of your Canister Steam System.
The best way to minimize mineral build-up is to use distilled or de-mineralized water when using your Canister Steam System. If you are unable to use distilled water, it is recommended that the following procedure be followed monthly to remove any mineral build-up:
Turn unit “Off” and unplug power cord.
Allow unit to completely cool (at least 30 minutes).
Press and hold Steam Trigger to release all remaining steam.
Remove all accessories from unit.
Carefully remove Boiler Cap.
Drain water from Boiler into a sink or tub.
Slowly pour 8 oz of vinegar into Boiler.
Allow to stand for 40 minutes.
Drain vinegar from Boiler.
Rinse Boiler with fresh water, drain and repeat until vinegar odor dissipates.
Troubleshooting
PROBLEM
POSSIBLE CAUSE
SOLUTION
Unit fails to heat up.
Unit is not plugged in.
Plug power cord into electrical outlet.
Household circuit breaker / ground fault interrupter has tripped or blown a fuse.
Reset circuit breaker / ground fault interrupter, or replace fuse. If you need assistance, contact a licensed electrician.
Unit is damaged or otherwise in need of repair.
Immediately cease usage and unplug. Contact Consumer Service for further assistance (see Page 19 for details).
Boiler is empty.
Refer to Filling Boiler procedure on Page 13.
Mineral build-up in unit.
Refer to Mineral Build-up section on Page 16 for cleaning procedure.
Steam output is weak or intermittent.
Water level in Boiler is running low.
Refer to Filling Boiler procedure on Page 13.
Mineral build-up in unit.
Refer to Mineral Build-up section on Page 16 for cleaning procedure.
Excessive amount of water in steam.
NOTE: Unit produces wet steam – it is normal for steam to contain some amount of water.
Water condensation in Steam Hose.
Point nozzle towards sink, tub or ground and shake while pressing Steam Trigger. Continue until excess water is released.
Boiler has been overfilled.
Filling the Boiler with more than 48 oz. (1,420 ml.) of water interferes withsteam production, resulting in water condensation insteam.
Always fill unit with correct amount of water. (see Page 13 for details)
Accessories do not stayfirmly connected to Steam Nozzle.
Accessories not properly installed.
Check to make sure that accessories are properly connected, per procedures on Pages 8-11.
Floor surfaces appear cloudy or streaky after steaming.
#1 Can you clean sofa cushions and neck area with this?
Yes you can use this on a couch. If a little water spatters it will dry soon enough. If you could not steam upholstery or bedding they would not be able to sell many of these! The previous answer is incorrect.
Yes, you can use this machine to clean caked grease on car parts and also use it to clean upholstery and carpets. Be careful around vehicle paintwork because it will strip paint!
The best thing about this cleaner is that it only uses water/steam. Actually if you added cleaners or chemicals of any kind to the tank, you would probably damage it because it's also recommended that you use distilled water rather than regular tap water.
Yes, that and car interiors and floors of all types. Use distilled water and remember to always empty the tank after every use . I use it on my stainless steel cooking range to get rid by of the buildup of grease
Have not used it to clean the full carpet but have used for spot and used it to removed large area of wax. I will be using it to clean a small bedroom carpet and seats in my car.
#7 Does this machine get the grease off the stove and exhaust fan area? Will appreciate it if you can share your experience.
It did work for my exhaust fan but I didn’t thoroughly clean it. If you have a big grease build up, you’re gonna be there a while cleaning it. Light to medium grease residue will not be a problem.