Loading ...
Loading ...
Loading ...
11
GLASS TOUCH-ACTIVATED
ELECTRONIC DOUBLE OVEN CONTROL
Electronic Control Keypads
When pressing any control keypad function on the Electronic
Oven Control, use the pad of your finger to press the desired
function. Hold down the keypad a few seconds, or until the
desired function appears in the display.
When entering multiple functions within one setting, pause briefly
between each control keypad command. If a command keypad is
pressed several times repeatedly, the keypad may briefly stop
working. Wait a few seconds, and the keypad should function
again as normal.
Display
When the oven is in use, after preheat, the display shows the
oven temperature and time of day. During Timed Cooking, the
display shows a timed countdown.
When power is first supplied to the range, or if a power failure
occurs, “12:00” will appear in the display. See the “Clock”
section to set the time of day.
When the oven is not in use, the display shows the time of day.
Start
The Start keypad begins any oven function except the Timer,
Control Lock and Sabbath Mode. If not pressed within 5 seconds
after pressing a keypad, “Set temp or Push Start” will appear on
the oven display as a reminder. If not pressed within 2 minutes
after pressing a keypad, the oven display will return to inactive
mode (time of day) and the programmed function will be
canceled.
If a function has been started and a different function is selected,
“Set temp or Push Start” will appear in the display after
5 seconds. If the Start keypad is not pressed within 2 minutes,
the oven display will return to the active/already started function.
Control Lock
The Control Lock feature shuts down the control panel keypads
to avoid unintended use of the oven.
The control cannot be locked if the oven is in use or the oven
temperature is 400°F (205°C) or above. The current time of day
will remain in the display when the control is locked.
The Control Lock is preset unlocked, but can be locked.
When the control is locked, only the Timer Set/off and Oven Light
pads will function.
To Lock/Unlock Control: Before locking, make sure the oven,
the Timer and Timed Cooking are off. Press and hold the START
keypad for 5 seconds until “CONTROL LOCKED” appears on the
display. “Locked” will remain in the display. Repeat to unlock and
remove “LOCKED” from the display.
Off
The Off keypad stops any oven function except for the Warm
Zone, Clock, Timer and Control Lock.
Clock
The clock can be set to display time in a 12-hour or 24-hour
format. The clock is factory preset for the 12-hour format. See
“Clock” in the “Options” section to change the format.
1. Press CLOCK SET/START.
2. Press “3” on the number keypad for AM or “6” on the number
keypad for PM.
3. Press number keypads to set time of day.
4. Press CLOCK SET/START. The time of day is now set.
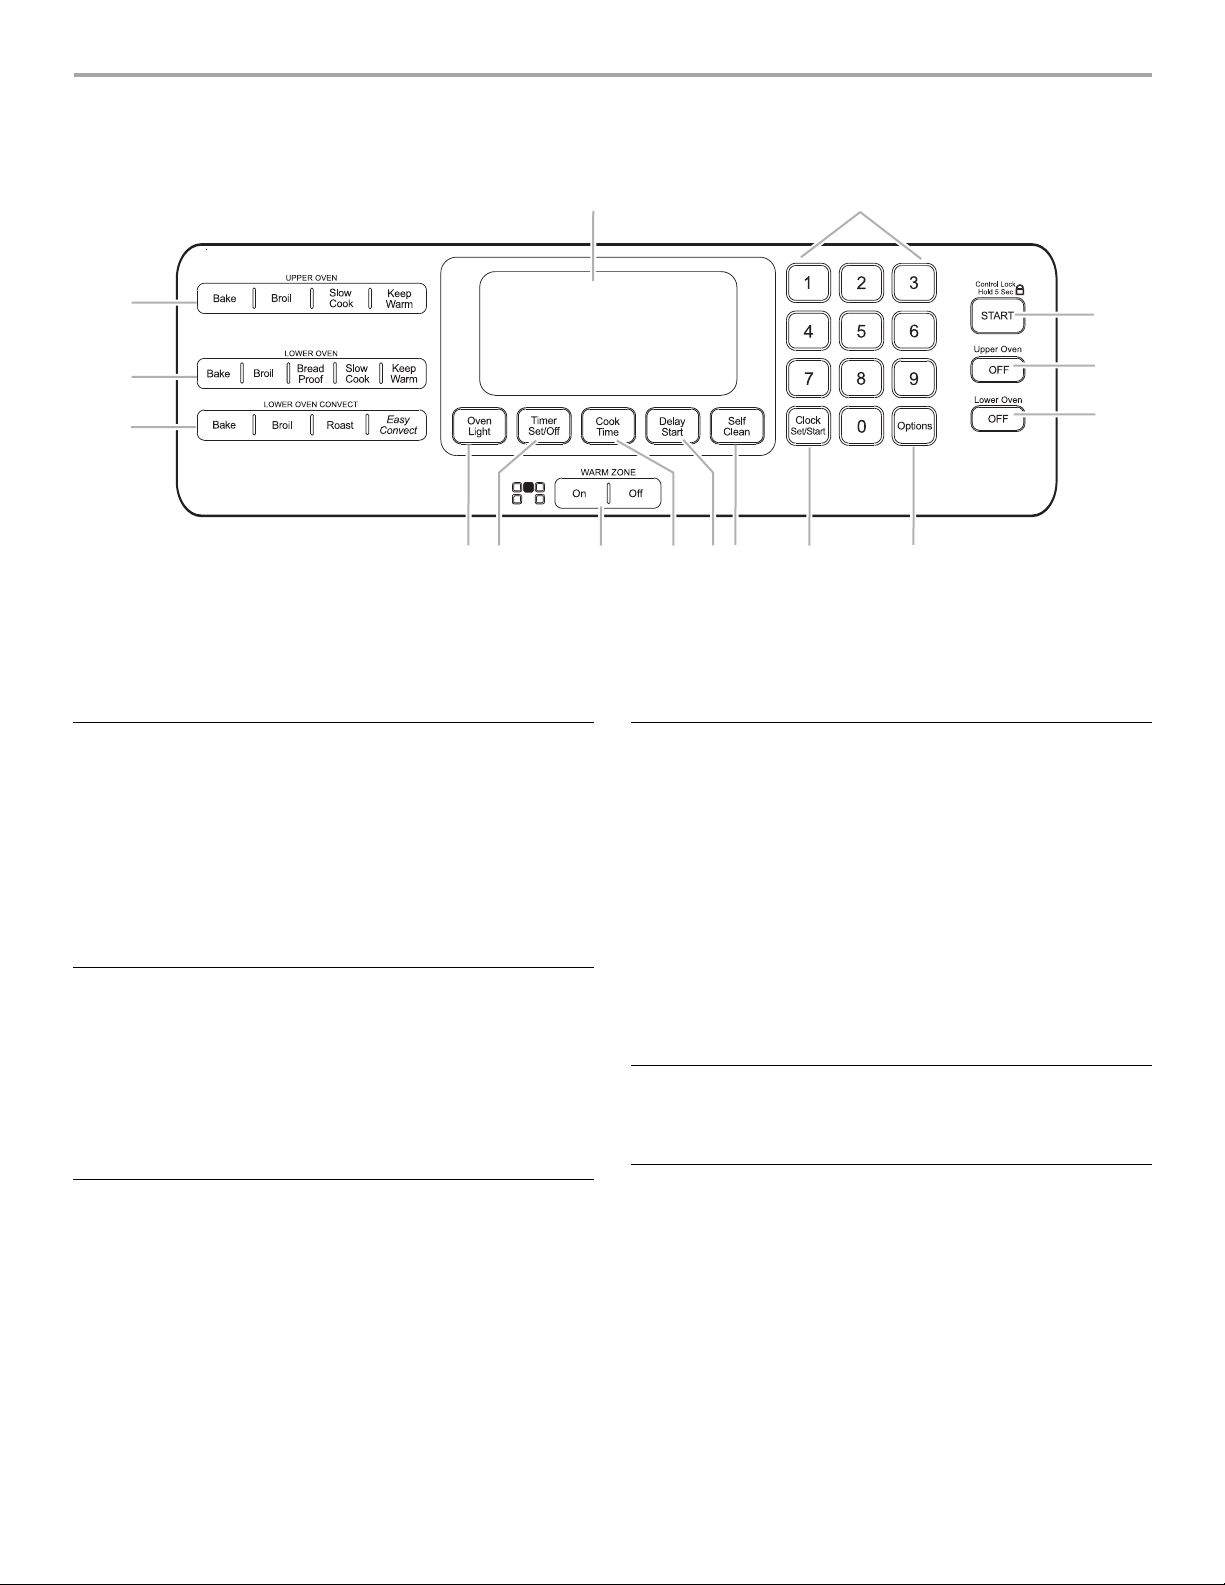
A. Lower oven convect settings
B. Lower oven settings
C. Upper oven settings
D. Display screen
E. Number keys
F. St a rt /contro l l ock
G. Upper oven off
H. Lower oven off
I. Options selection keypad
J. Clock set/start
K. Self-clean
L. Delay start
M. Cook time (length of cooking time)
N. Warm zone
O. Timer set/off
P. Ove n lig h t
A
B
C
D
E
F
G
H
IJ
KLM
N
O
P
Loading ...
Loading ...
Loading ...