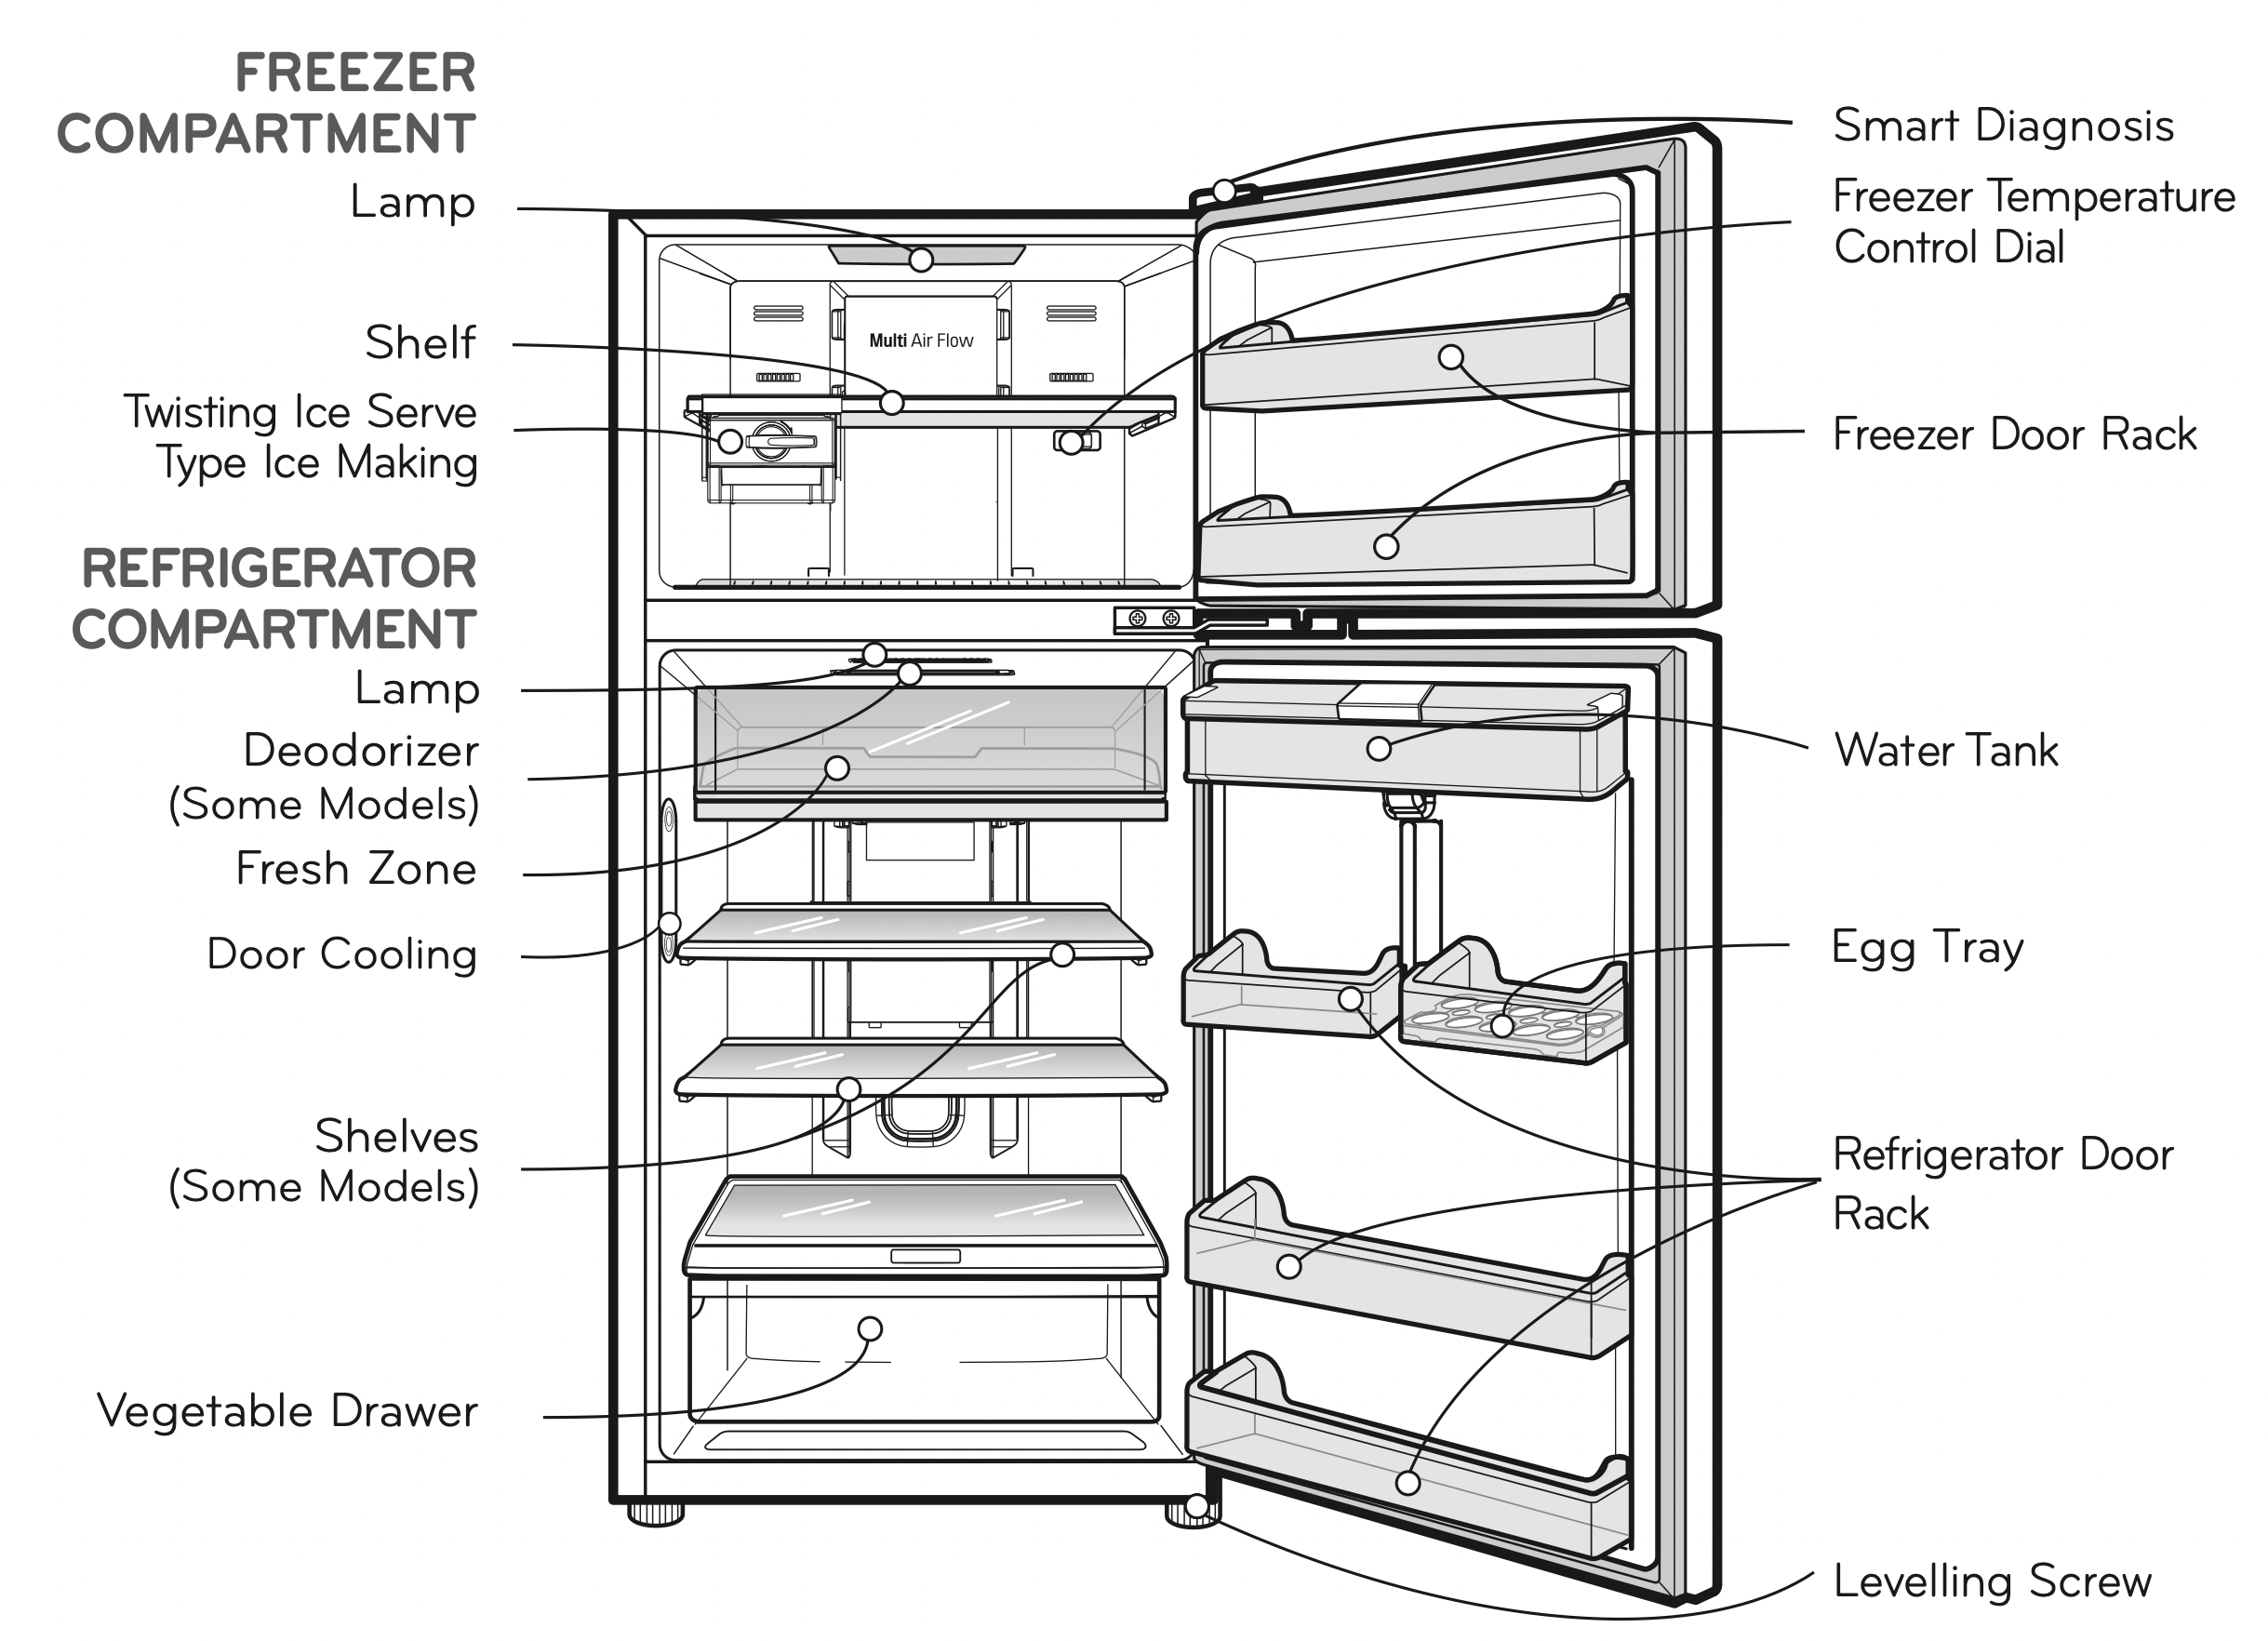
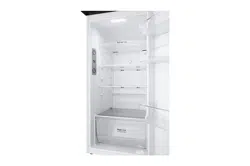
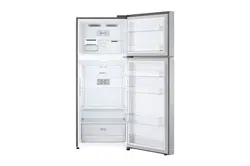
NOTE: This guide covers several different models. The refrigerator you have purchased may have some or all of the features shown above.
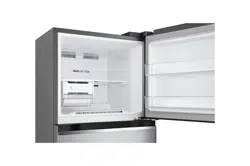
DISPENSER MODEL
NOTE: This guide covers several different models. The refrigerator you have purchased may have some or all of the features shown above.
OPERATIONS
STARTING
When your refrigerator is first installed, allow it 3-4 hours to stabilize at normal operating temperatures prior to filling it with fresh or frozen foods.
If operation is interrupted, wait 5 minutes before restarting.
BEFORE SETTING THE TEMPERATURE
The temperature of the refrigerator is kept constant regardless of changes in room temperature. It is recommended that, once set, the temperature settings(the controls for the refrigerator and freezer compartments) not be changed unless necessary.
This refrigerator has one temperature control button for the refrigerator compartment and one temperature control dial for the freezer compartment.
The default setting of the temperature control button for the refrigerator compartment is ‘3°C’. The default setting of the temperature control dial in the freezer compartment is '3'.
This dial controls the air flow balance between the Freezer and Refrigerator compartment. it does not control the cycling of the compressor.
This refrigerator has a temperature sensor in the refrigerator compartment. It will start and stop the compressor automatically as required to meet the target temperature set in the Refrigerator compartment.
DOOR ALARM
When the door of the refrigerator or the freezer is open for 1 minute, an alarm will sound three times. It the door remains open, the alarm will repeat every 30 seconds.
SELF TEST
Your refrigerator contains a built in diagnostic capability. If it develops a malfunction in certain areas, it will display an error code to assist the repair technician. While an error code is displayed, other control and display functions will not operate.
If an error code is displayed, contact a service center. Do not disconnect the power cord from the outlet.
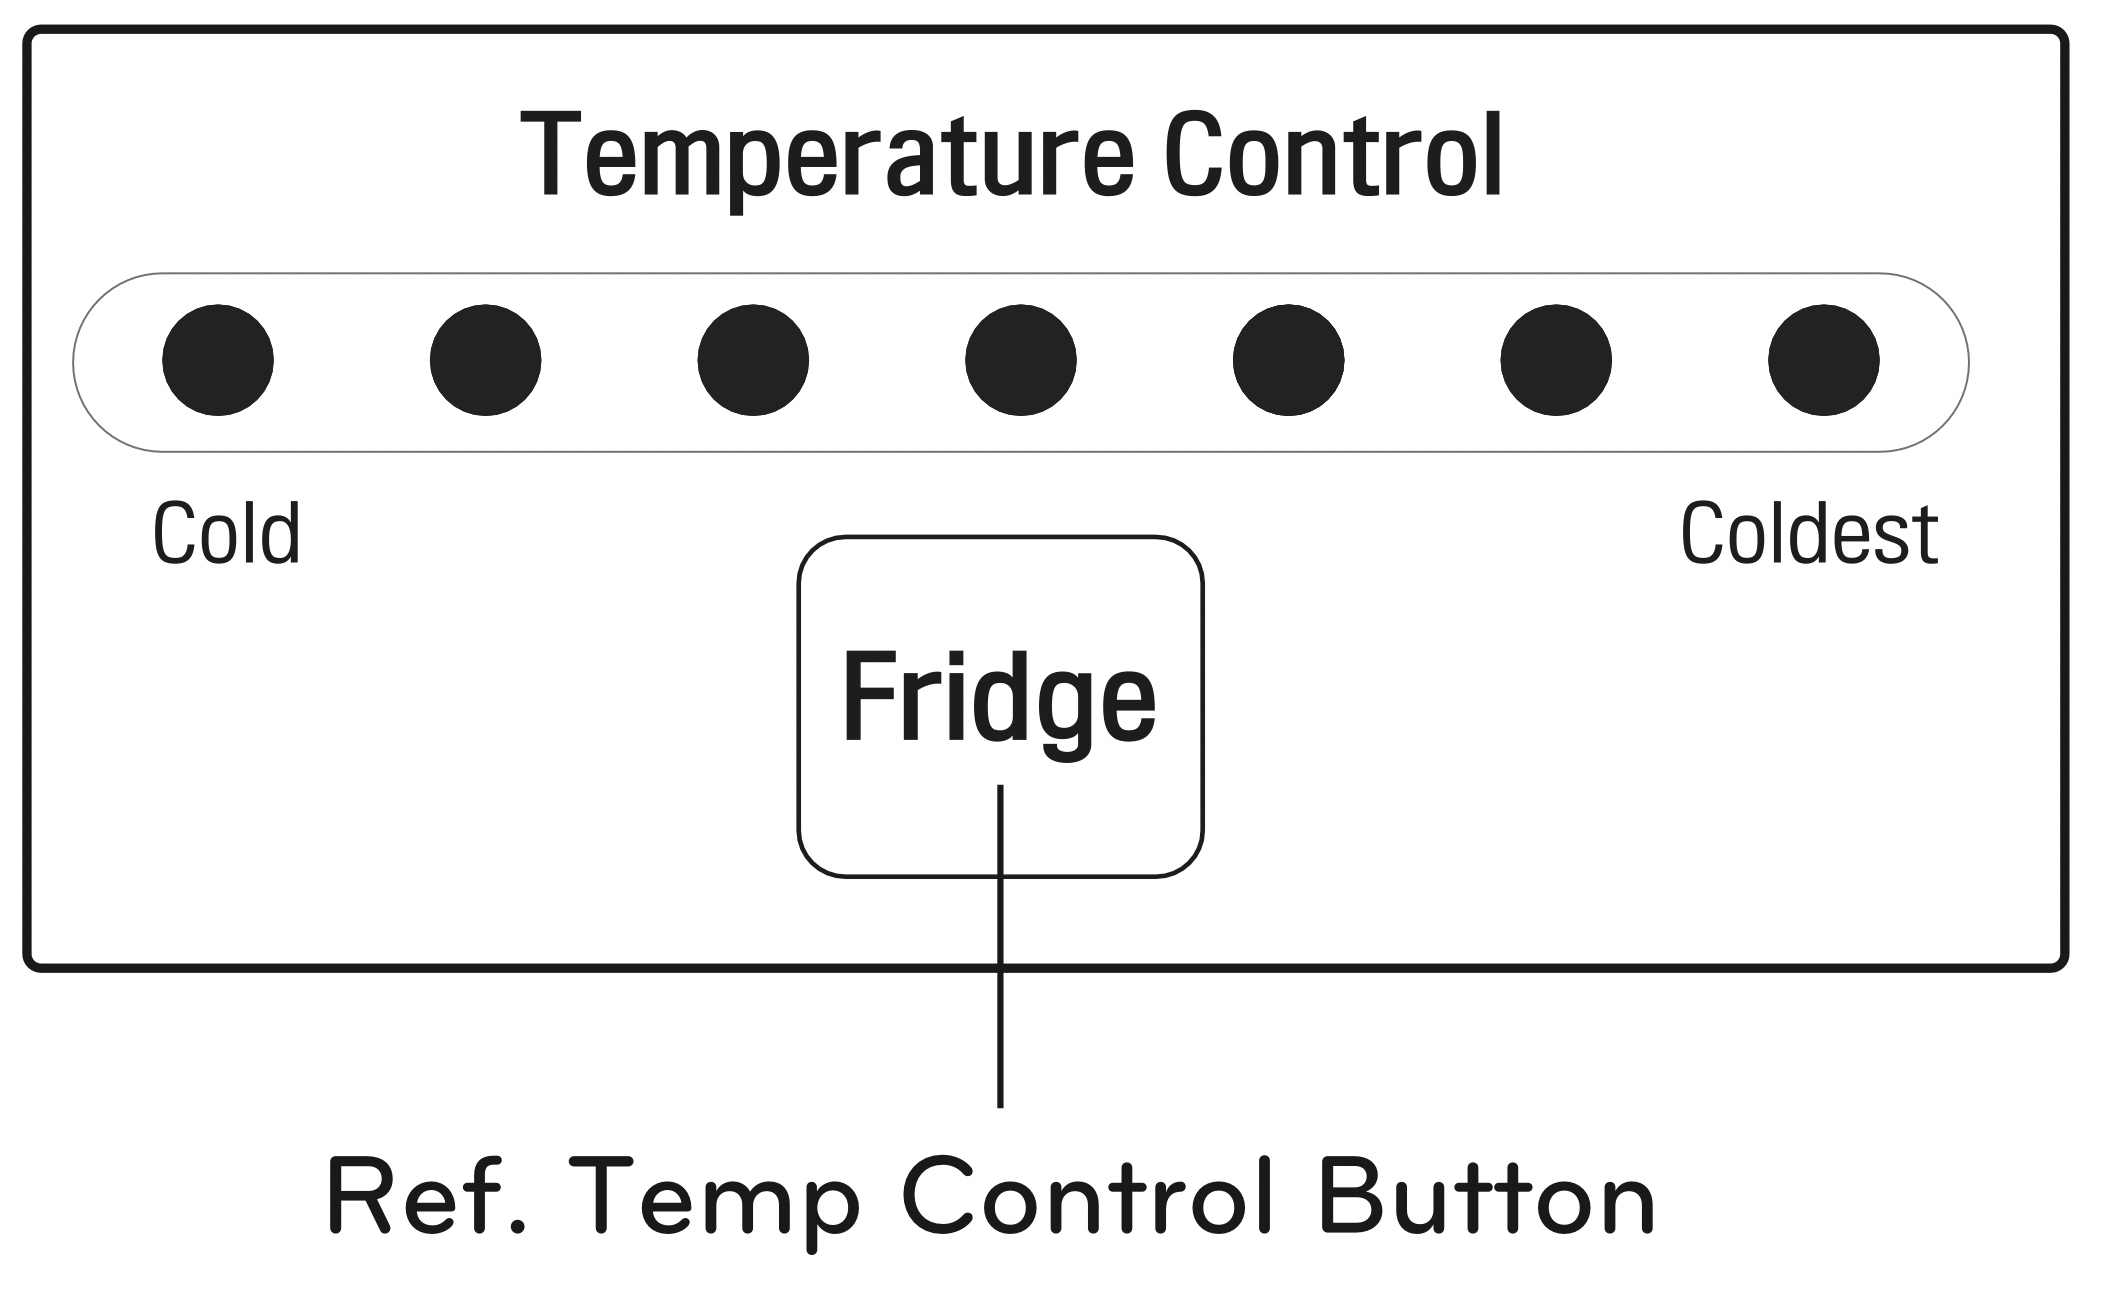
CONTROLS FOR REFRIGERATOR COMPARTMENT
FOR INTERNAL CONTROLLER MODEL
The default setting of the temperature control button for the refrigerator compartment is NORMAL (middle LED).
To control the refrigerator target temperature, press the REF.TEMP CONTROL button.
Whenever the button is pressed, the LED indicator will increase accordingly.
The temperature is set in 7 steps, from Cold to Coldest cooling.
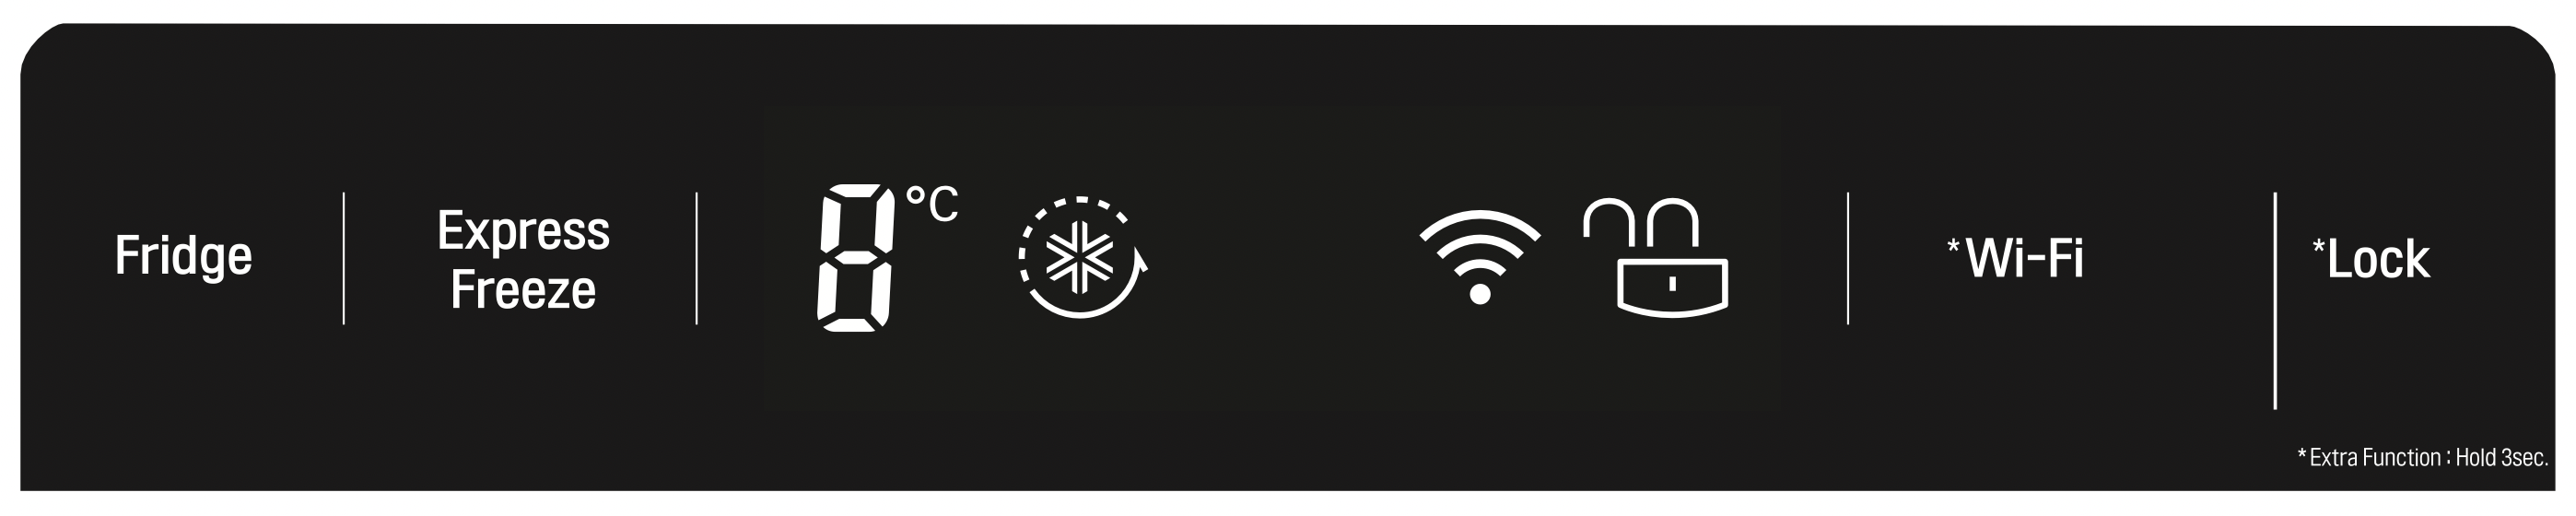
FOR EXTERNAL CONTROLLER MODEL
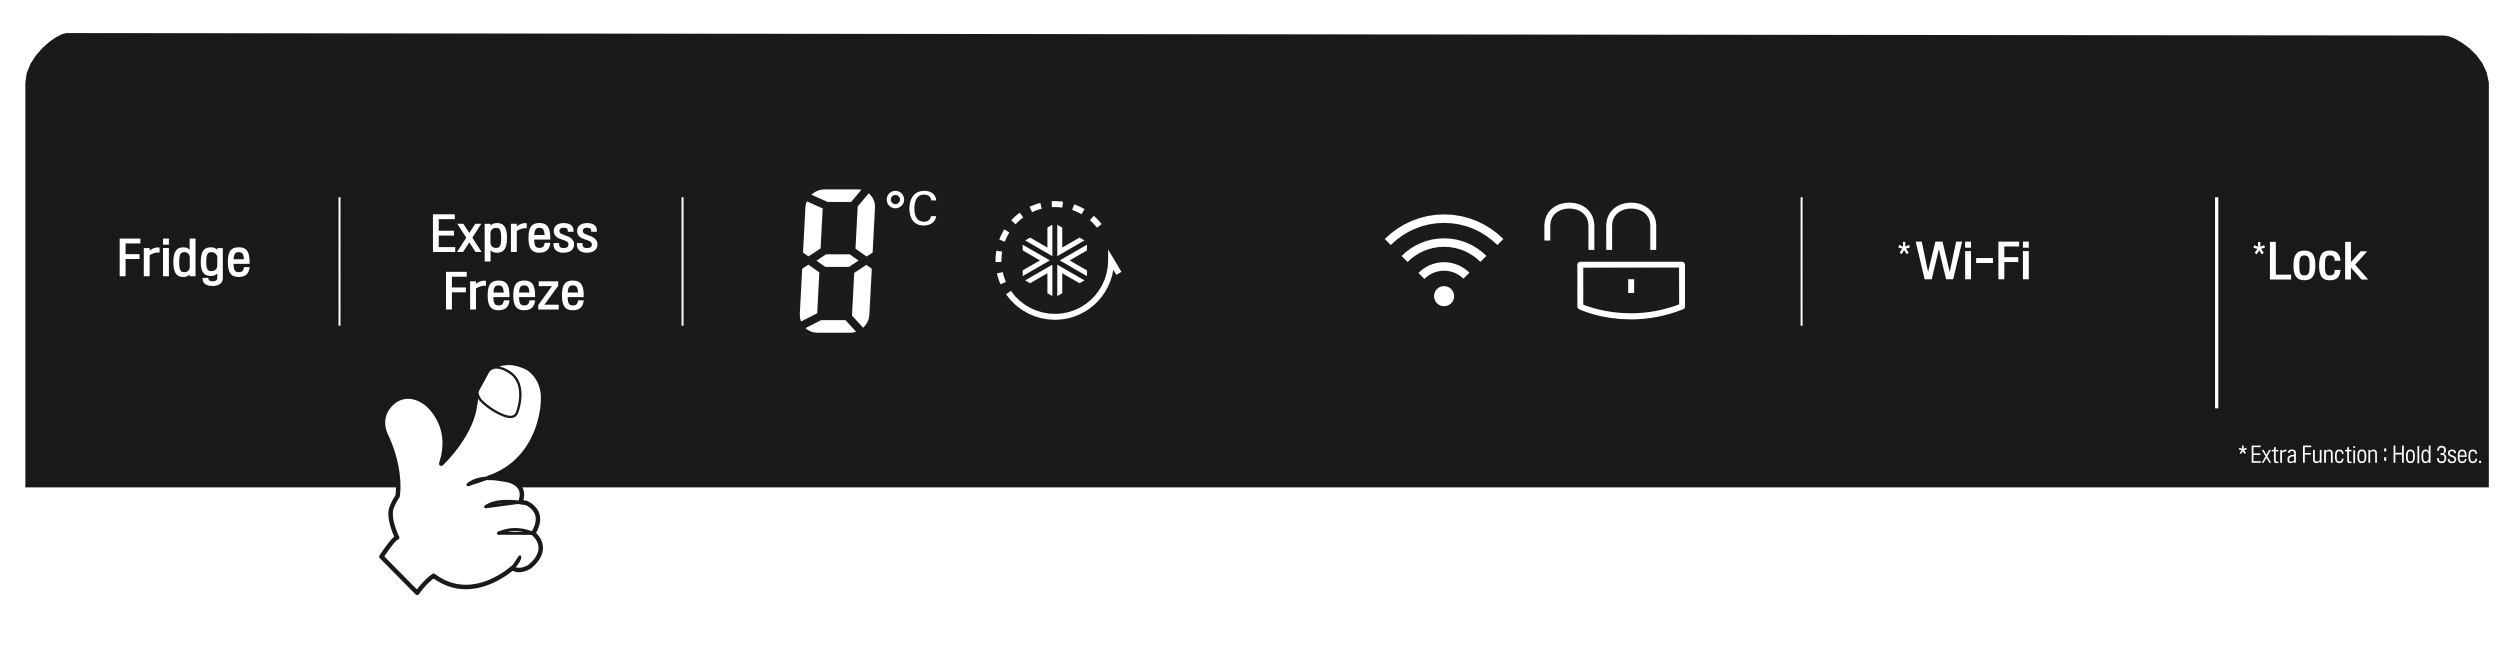
Press 'Fridge' button to control refrigerator temperature.
Whenever pressing the button, the LED emits light.
The number showing up on the LED luminesce indicate the temperature of refrigerator compartment.
You can select the desired setting point seven steps, from '0o C' to '6o C' by touch Fridge button.
EXPRESS FREEZE
The Express Freeze feature operates when the refrigerator first turn on. The compressor and circulating fan operate at maximum cooling capacity to quickly lower the refrigerator temperature. It shuts off automatically.
If warm food is placed into the refrigerator, Express Freeze can be started with the button on the control panel. Express Freeze will shut off when the temperature reaches the proper level or it can be shut off manually by touching the Express Freeze button.
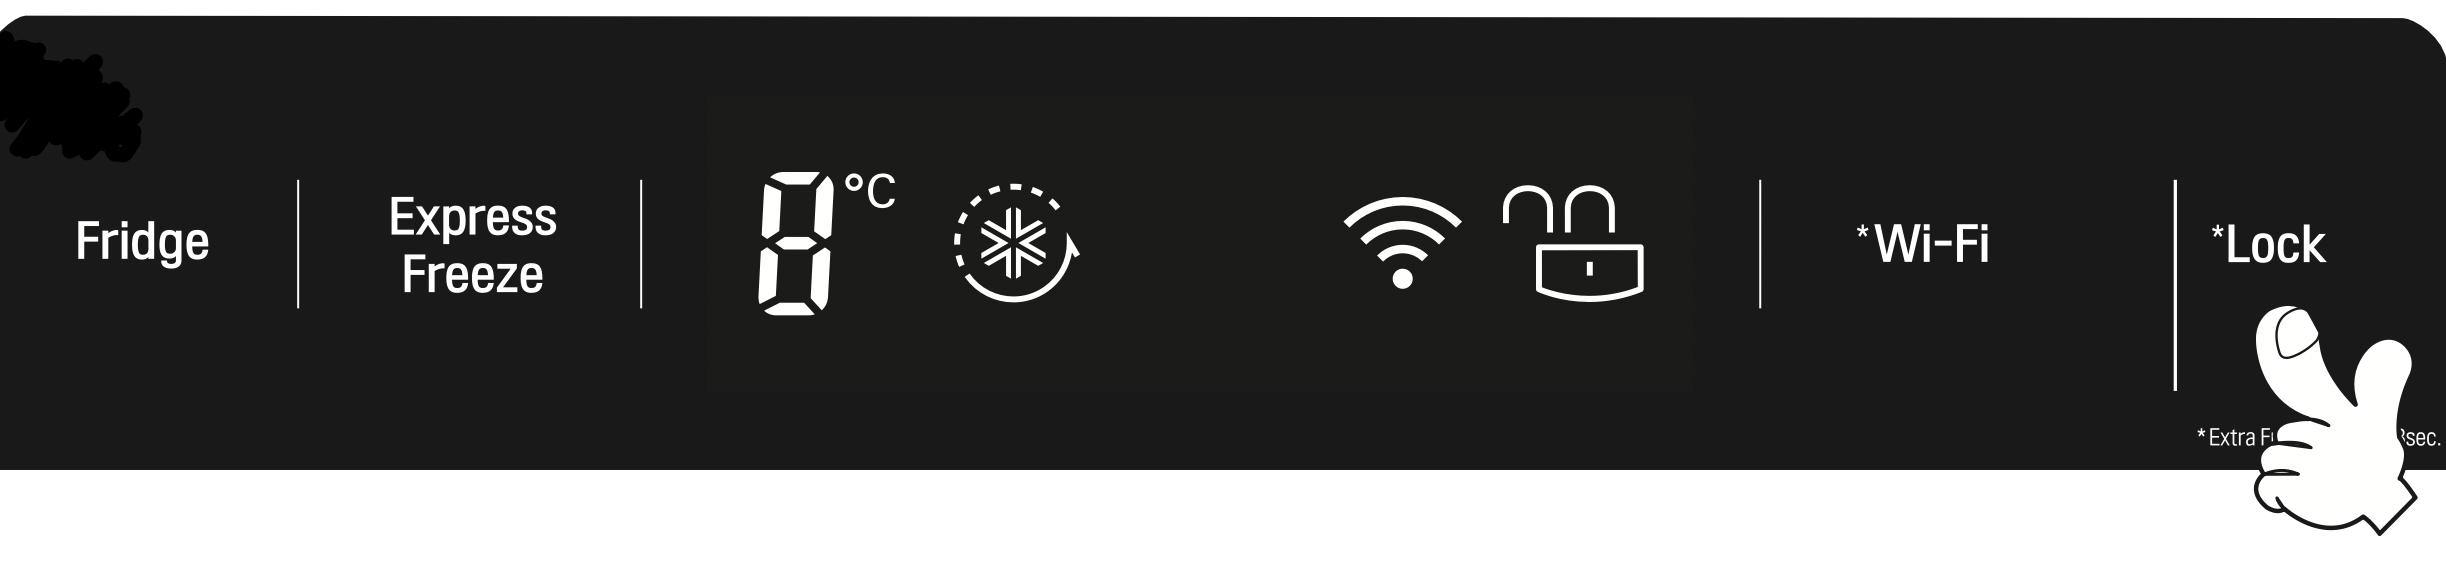
LOCK
Touch and hold the Lock button for 3 seconds to lock the Lock.
When it is locked, the Lock LED will be on and the other button will not operate. To unlock, touch and hold the Lock button for 3 seconds again.
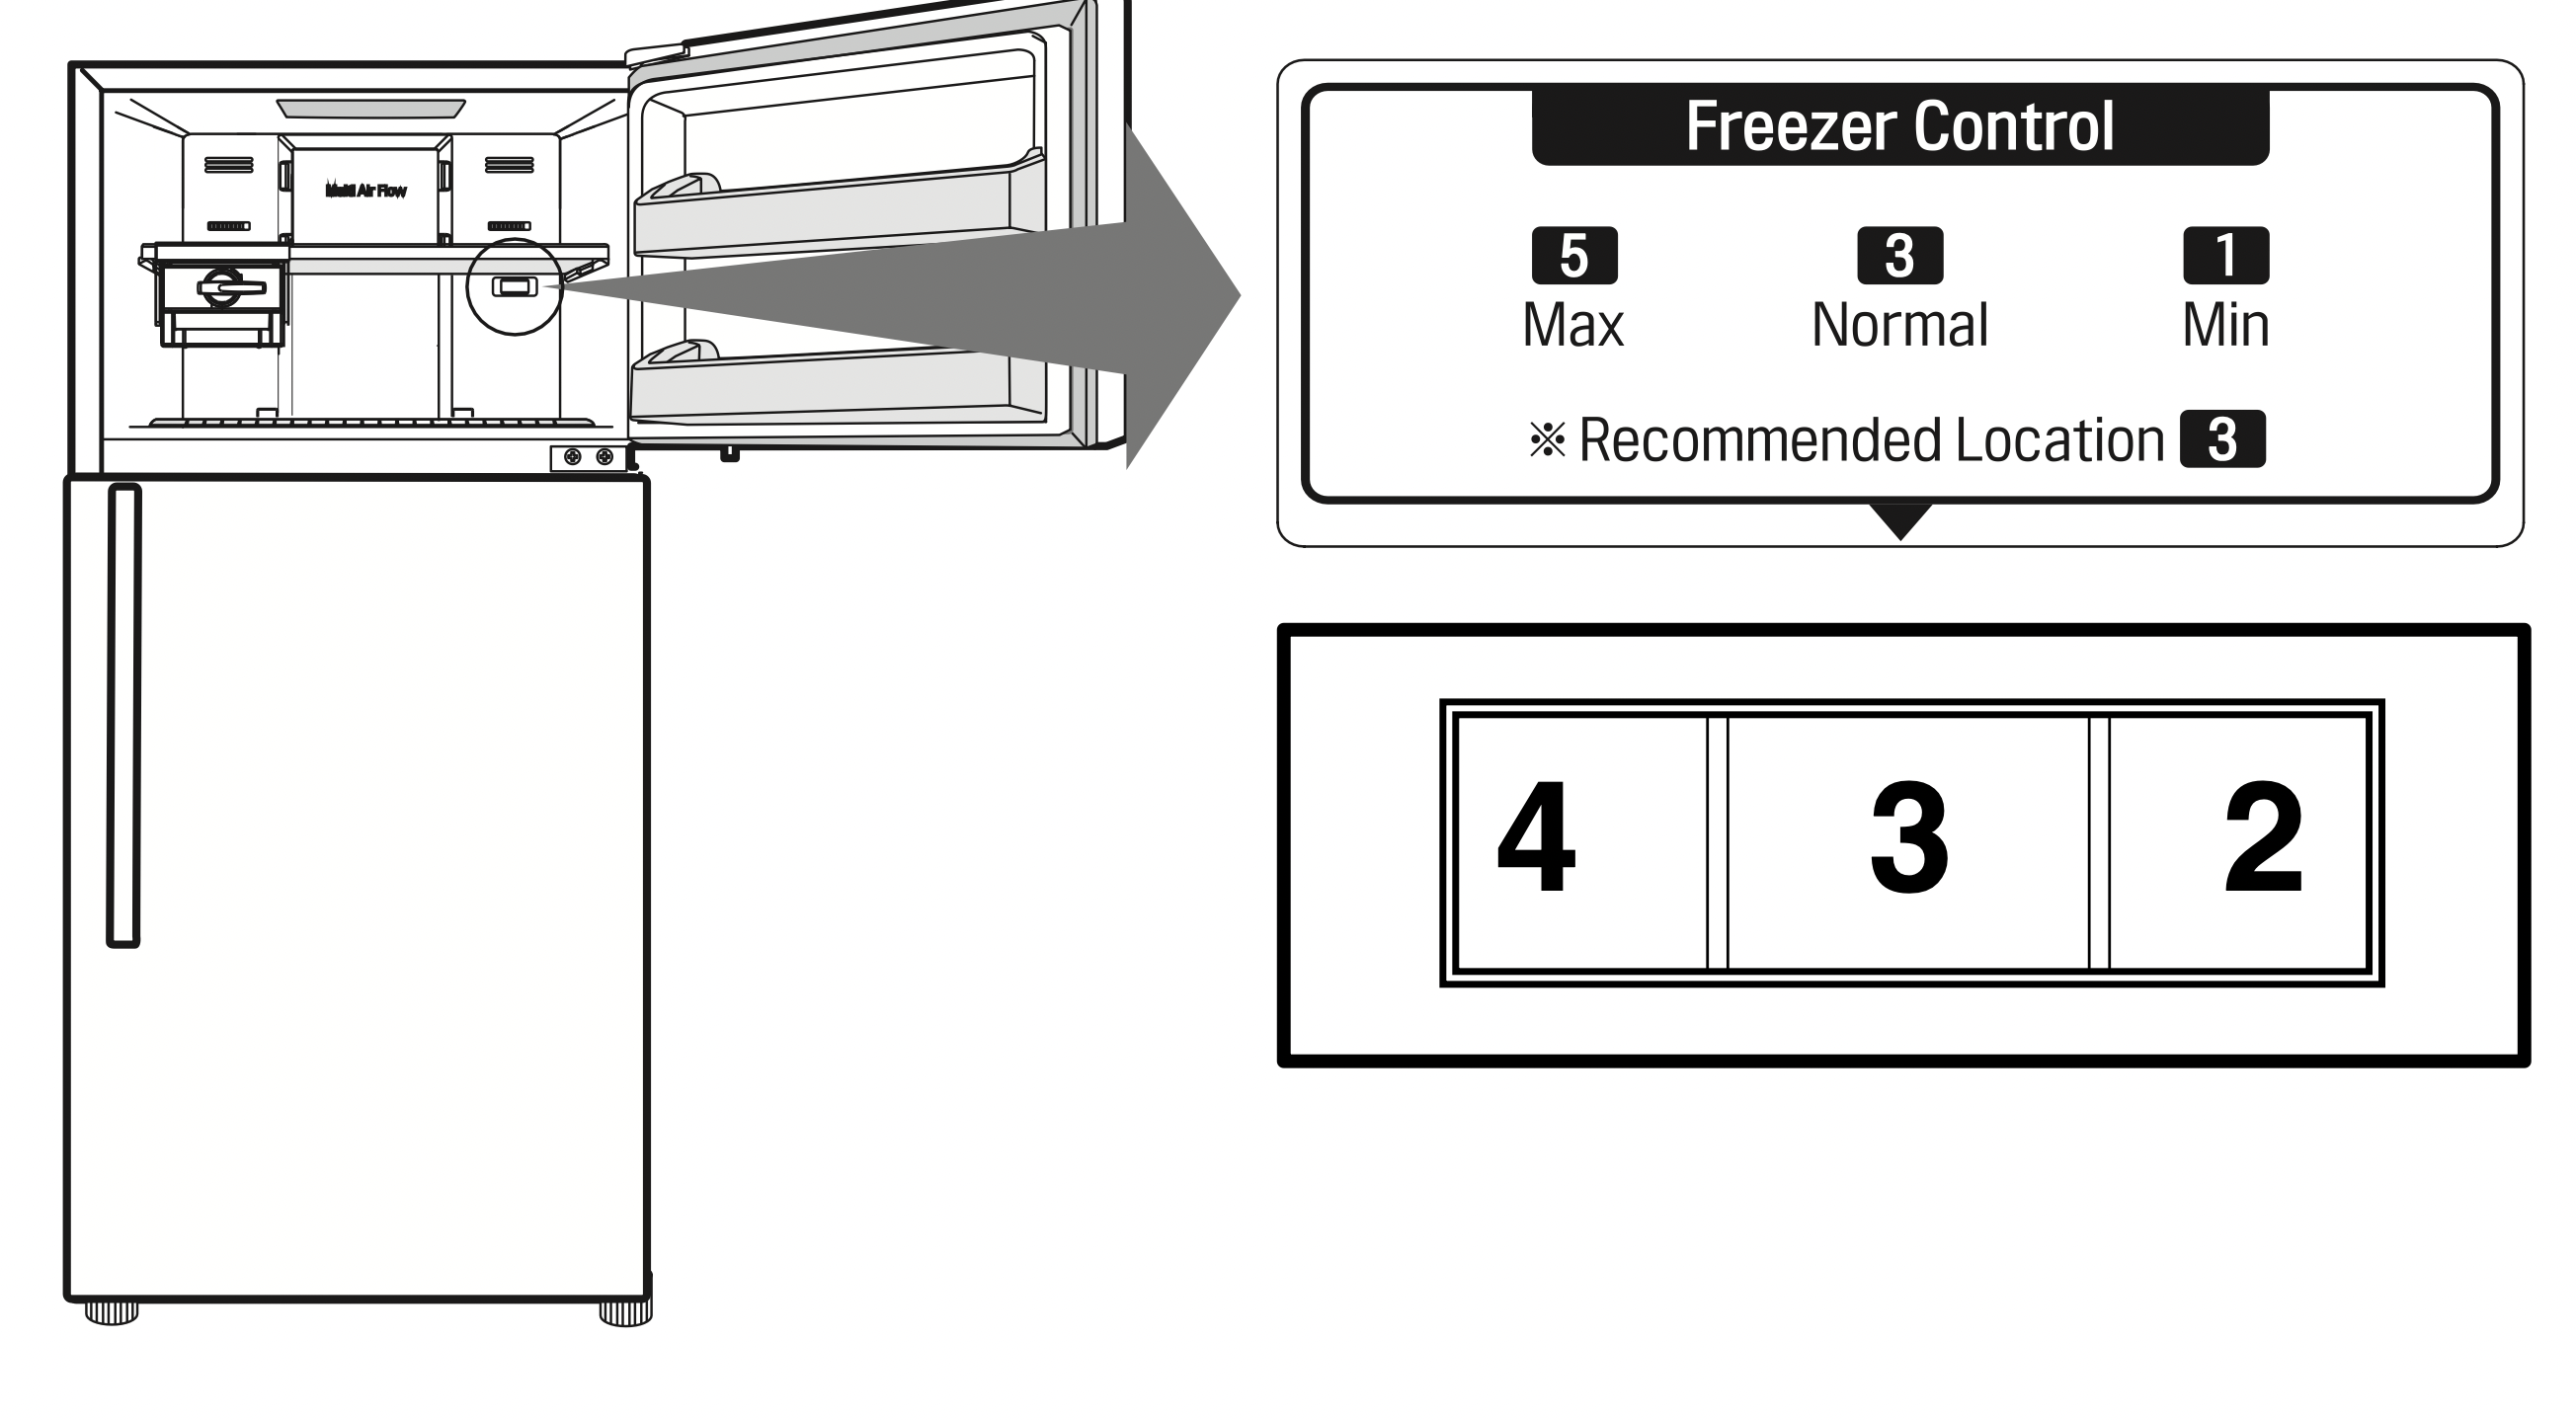
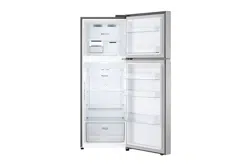
CONTROLS FOR FREEZER COMPARTMENT
To lower the temperature in the freezer, turn the knob to the right and set to a higher number. To raise the temperature in the freezer, turn the knob to the left and set to a smaller number.
If the freezer compartment is not cold enough in Summer, adjust the control for the freezer to High ( 6 ~ 7 ). This may cause the temperature in the
refrigerator compartment to become warmer. Should this be the case adjust the setting in the refrigerator to a higher number as the temperature of the refrigerator and freezer compartment is controlled with a fixed amount of cooled ar.
The setting knob 7 is for quick freezing in the freezer compartment . The compressor may operate continuously and the refrigerator temperature will become warmer when set to this number. When the freezer becomes sufficiently colder, adjust the knob back to the mid setting.
ICE MAKING
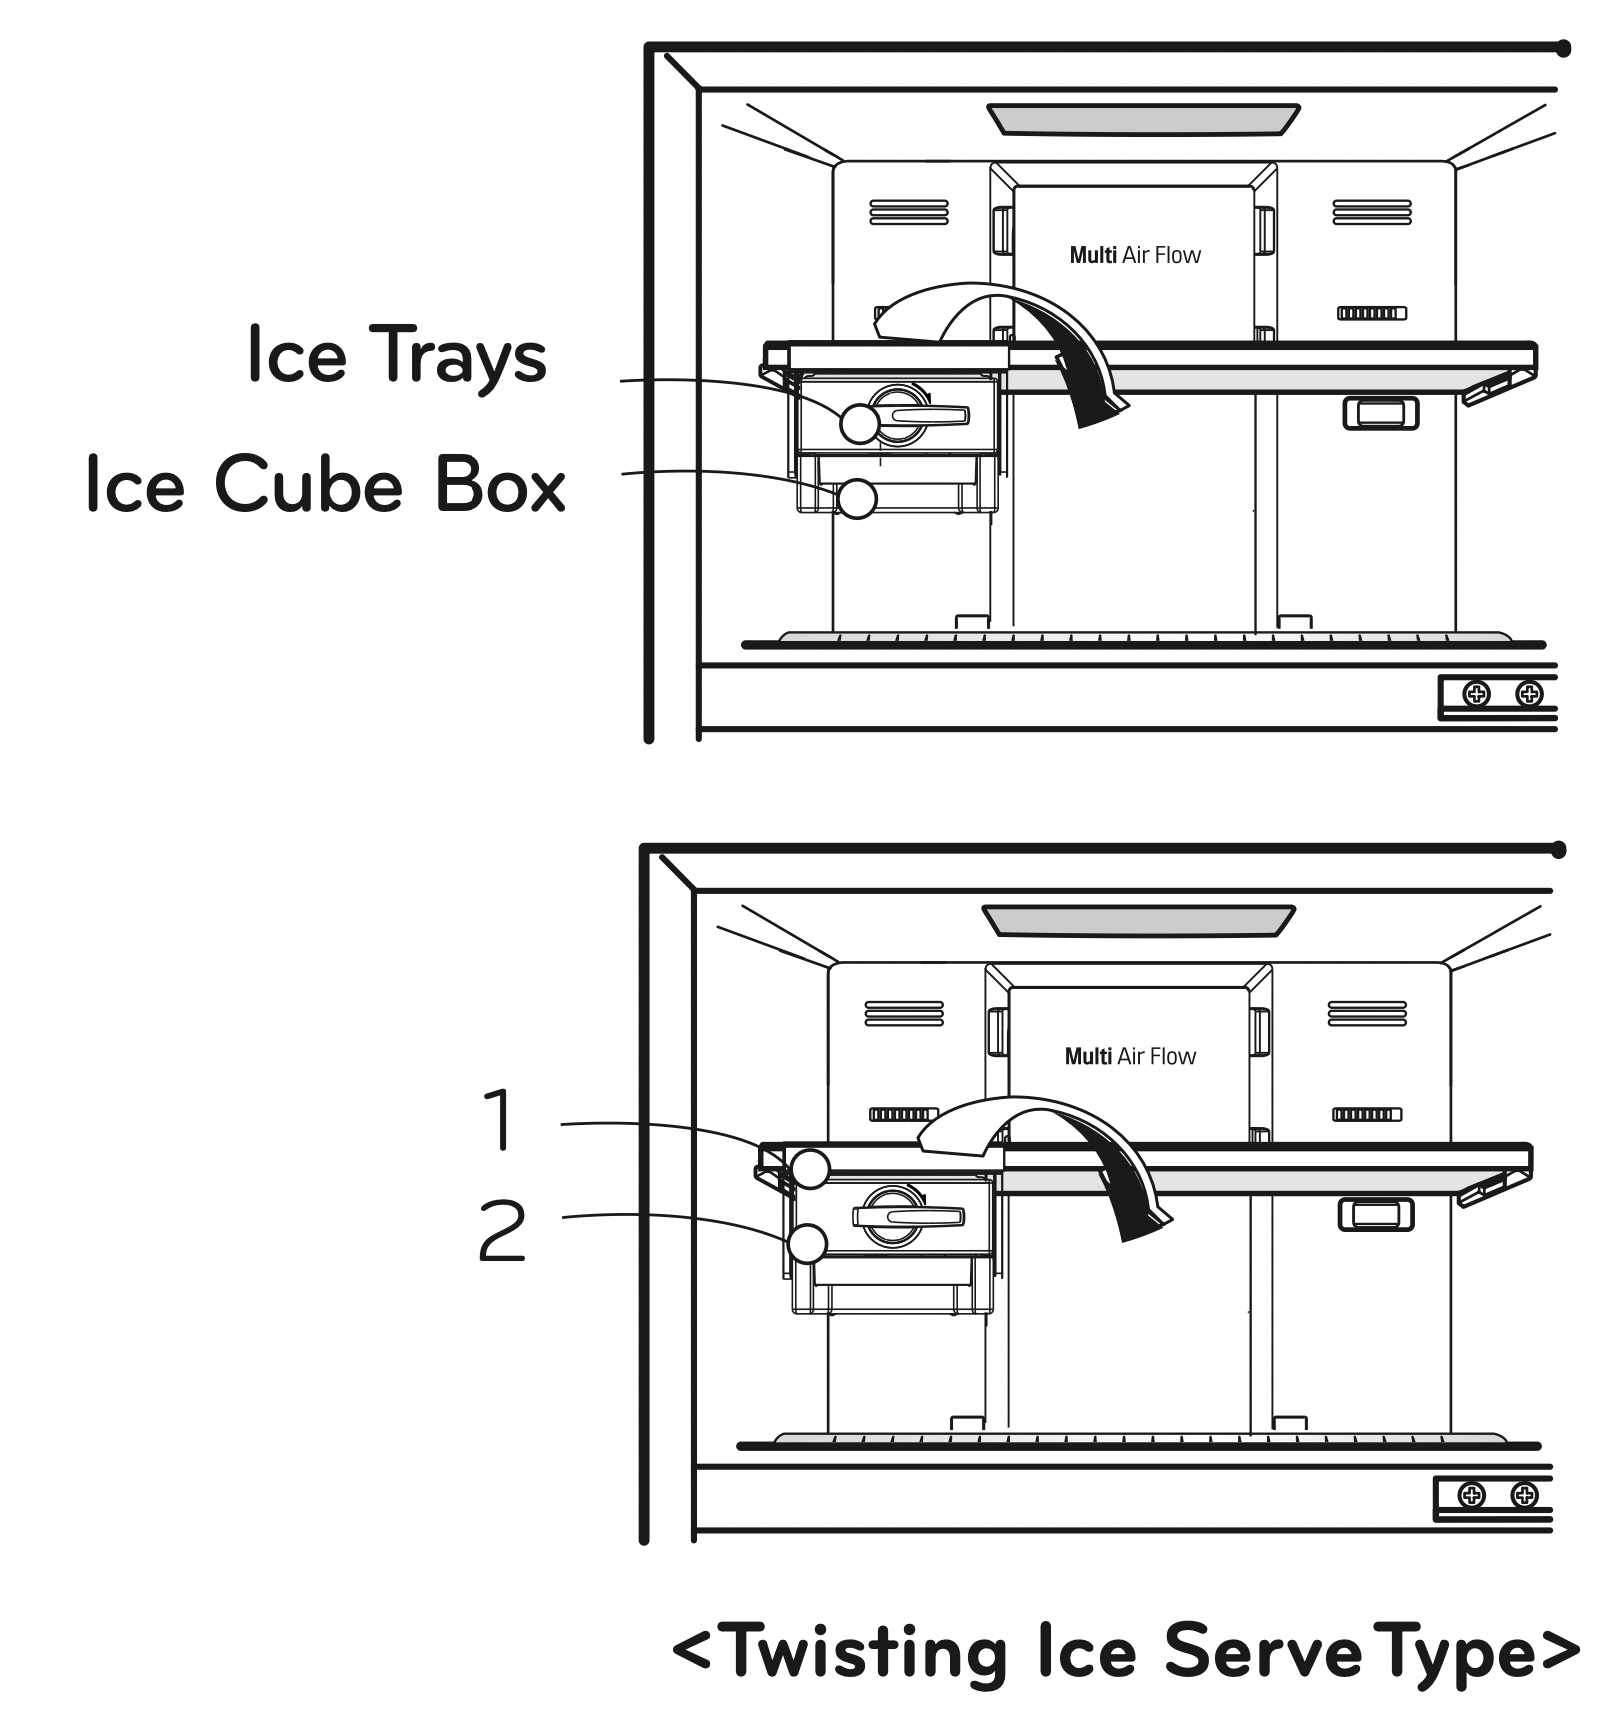
Twisting Ice Serve Type
To make ice cubes, fill the ice tray with water and insert in its position.
To remove ice cubes, hold the knob of the tray and turn it all the way clockwise until ice cubes drop in the ice cube bin. NOTE: You can remove the Ice Maker to secure additional space in the freezer.
Twisting Ice Serve Type: Remove 1 and 2
Ice Tray
Ice Cube Bin.
WARNING
Do not use anything other than water.
Fill with water up to the marked line.
DEFROSTING
Defrosting takes place automatically.
The defrosted water from the evaporator flows down to the evaporating tray which is located inthe lower back side of the refrigerator and is then evaporated by natural convection.
DEODORIZER (SOME MODELS)
Unpleasant odor of food in the fresh food compartment is deodorized .
Deodorizer Function
As the Deodorizer is a passive component, there is no need to move it around as it is located in the optimum place for the best result possible.
Do not hit or poke at the deodorizer with any object as it may damage it.
When storing food with a strong odor, wrap it or store it in a container with a lid as the odor may be passed on to other foods.
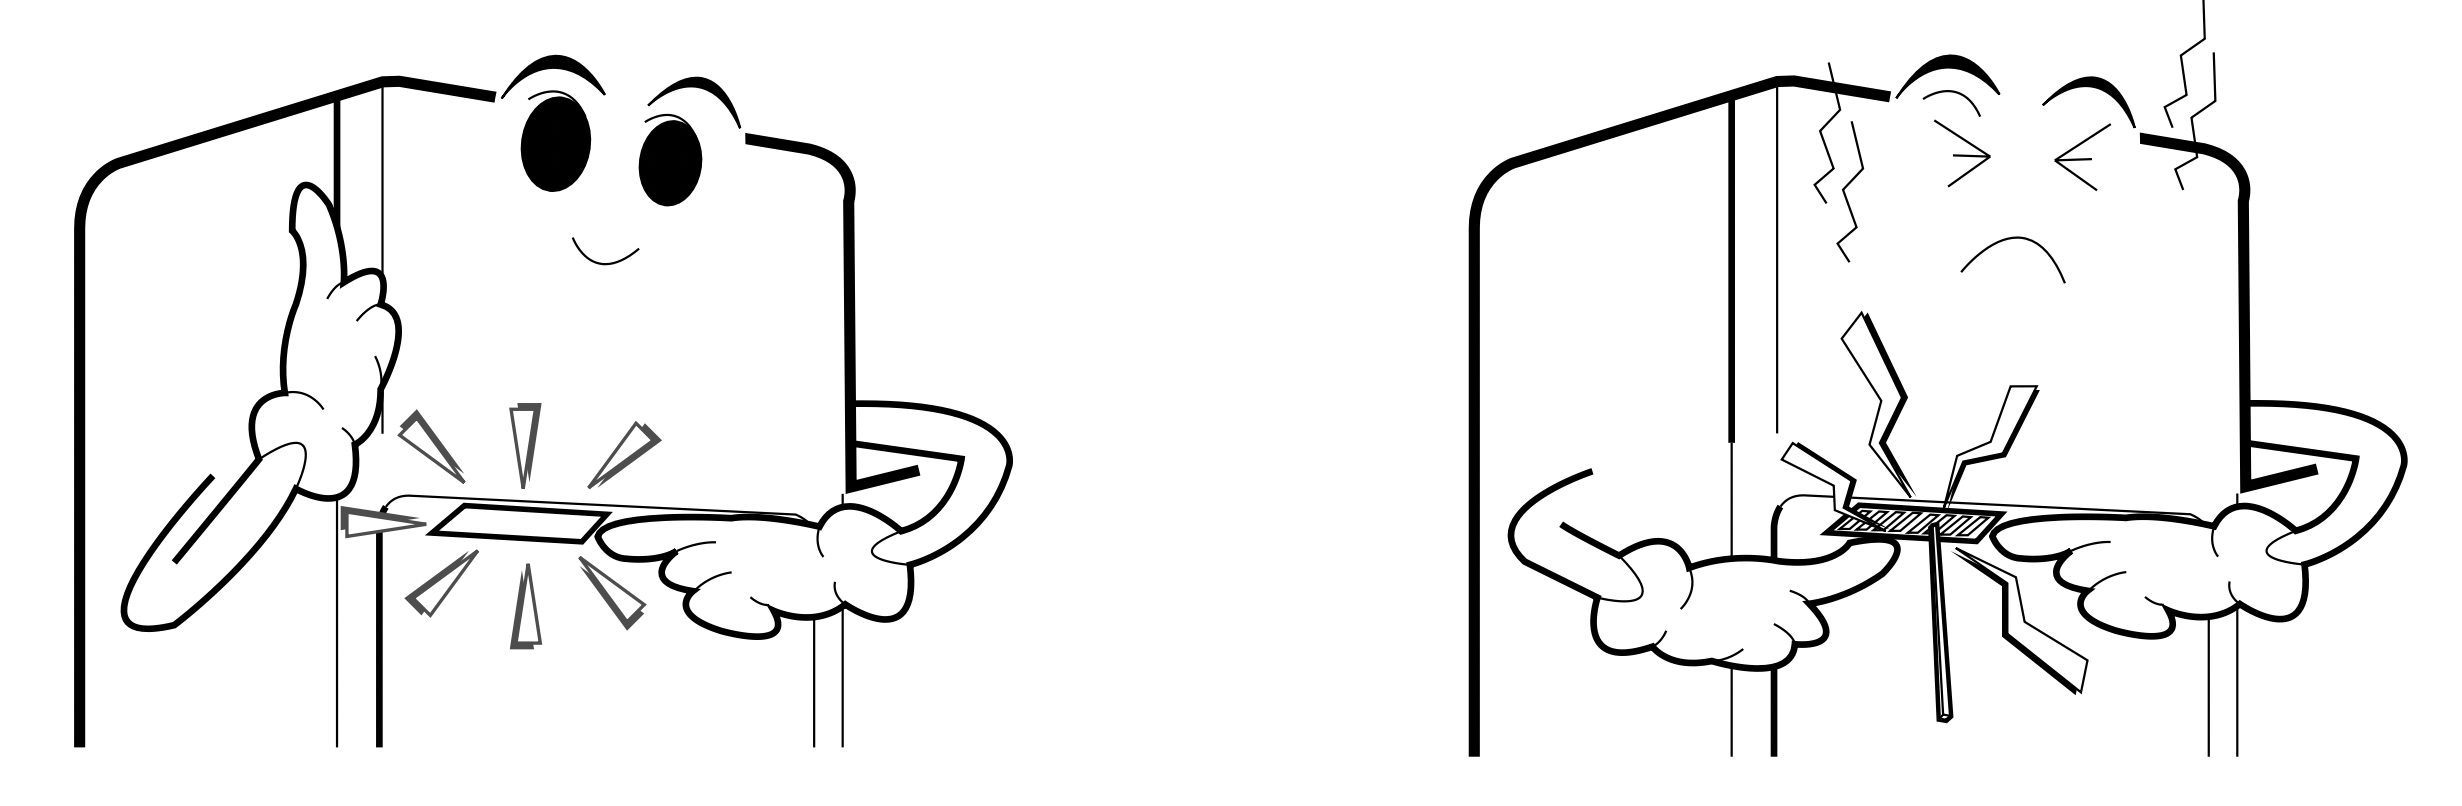
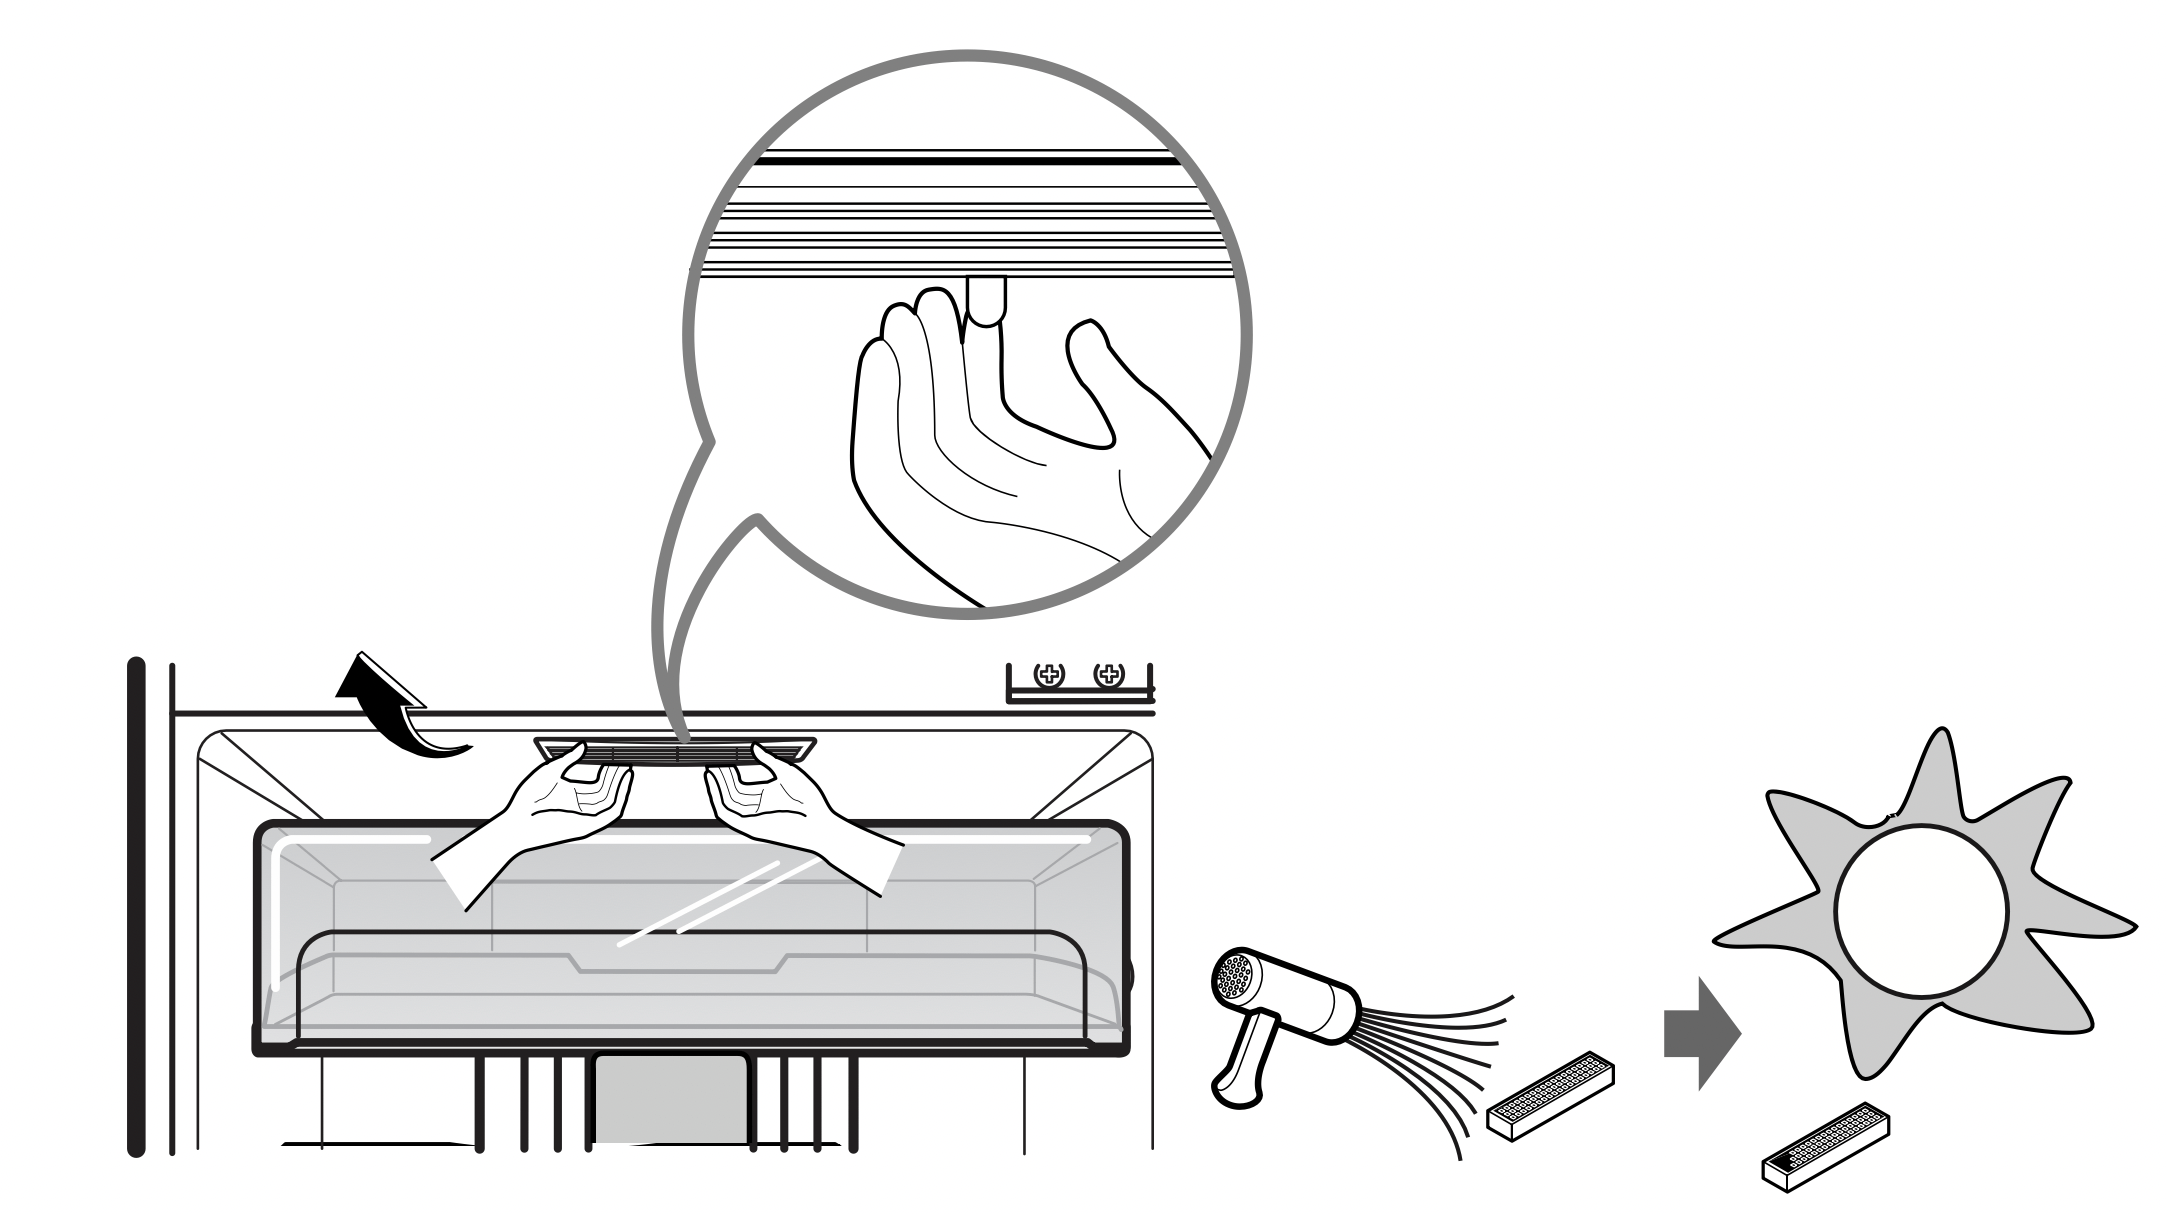
Re-Using of Deodorizer
The deodorizer should be cleaned periodically, especially if odors have been present in the refrigerator.
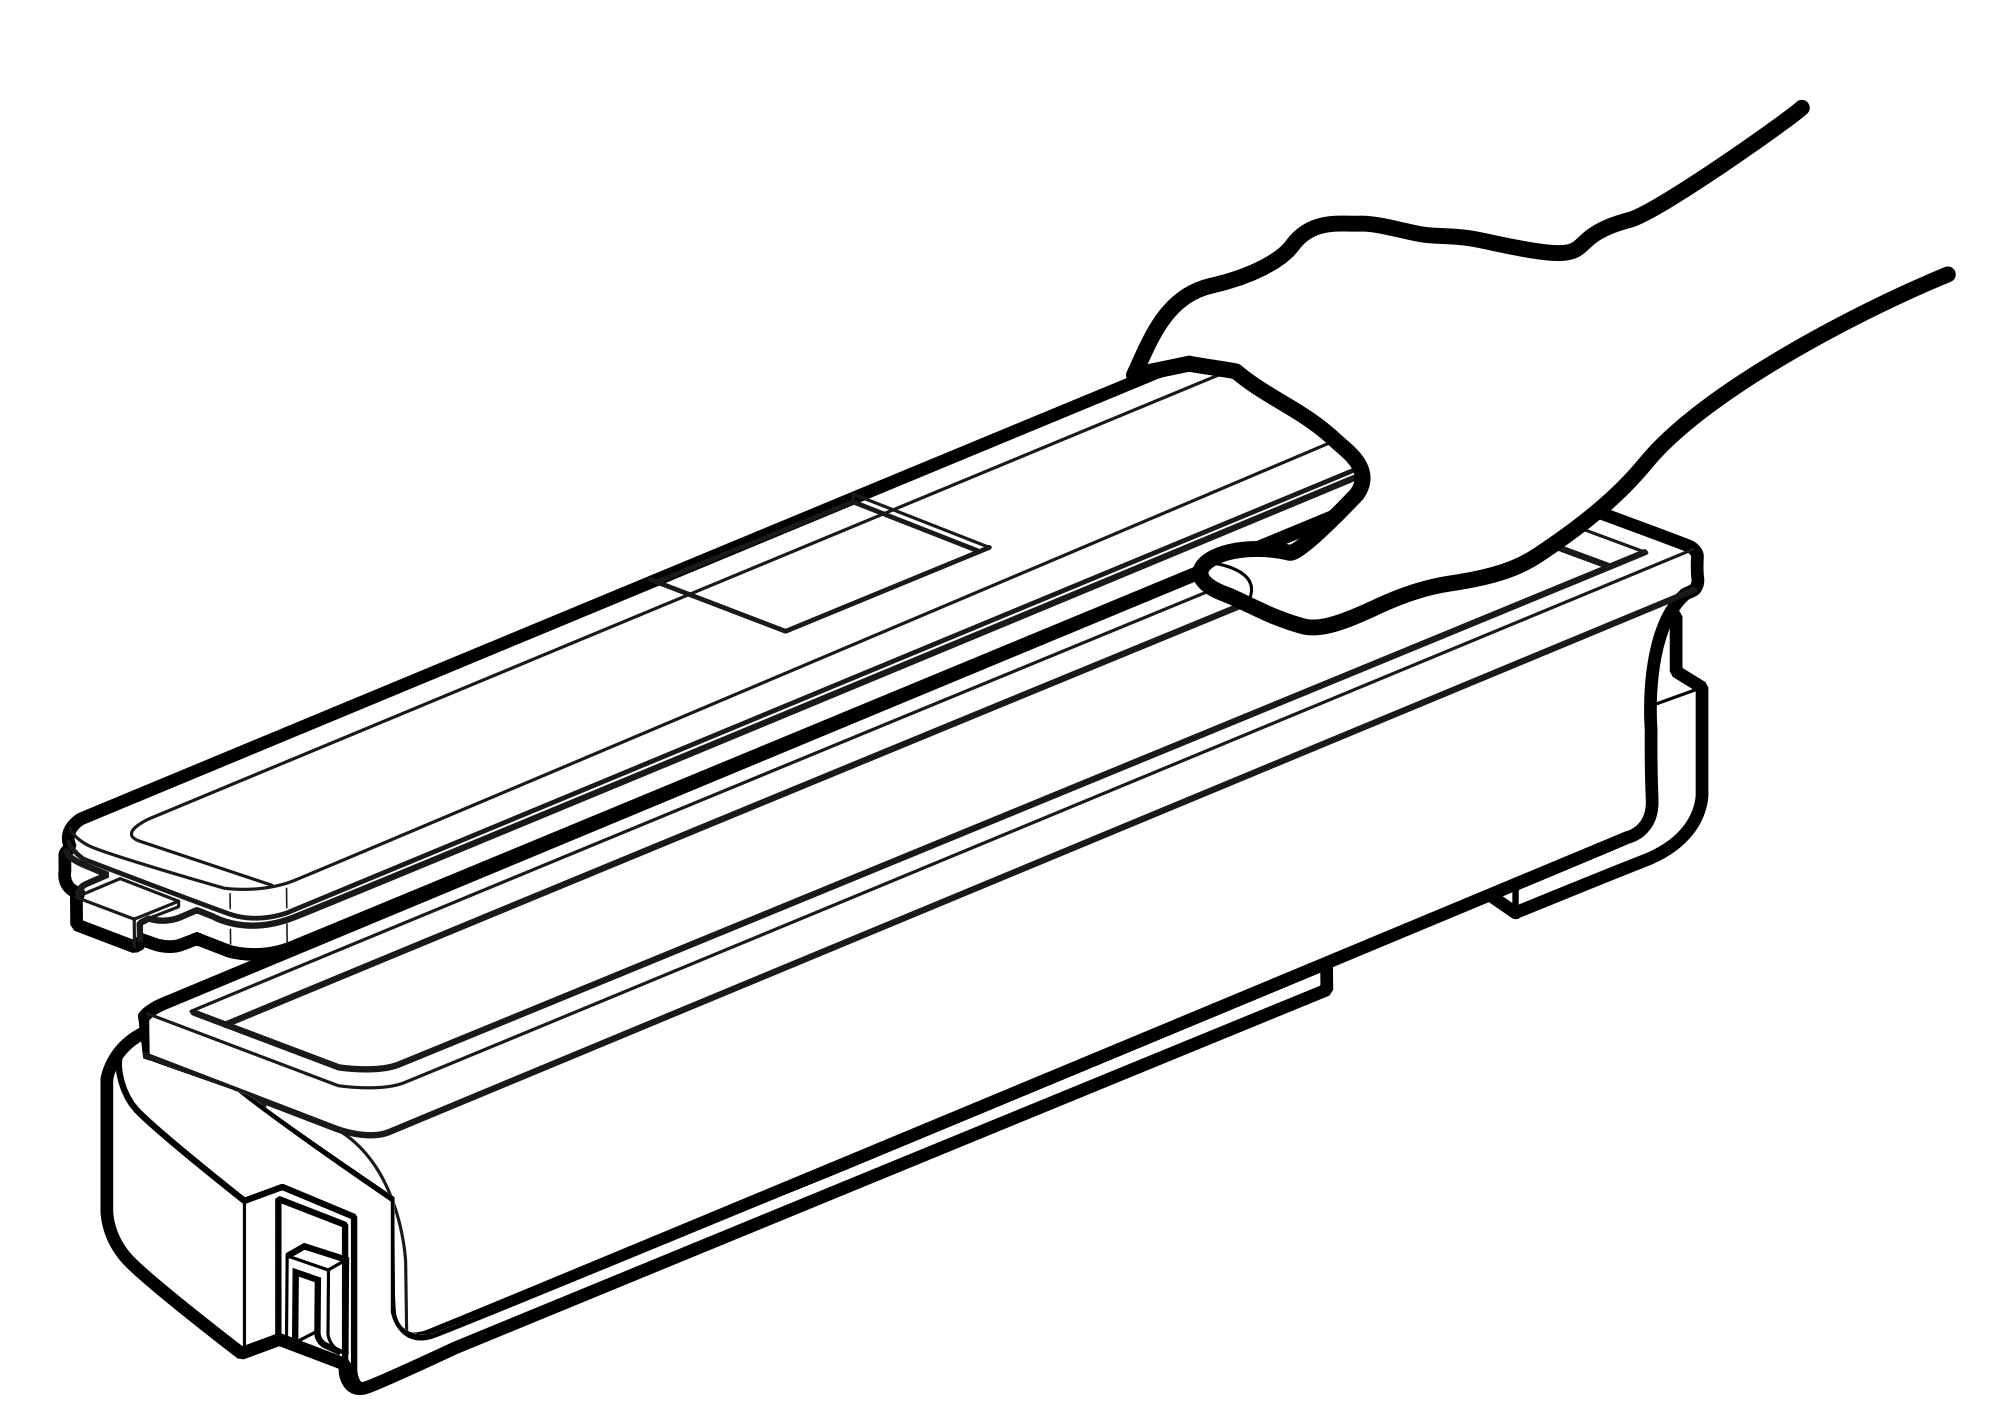
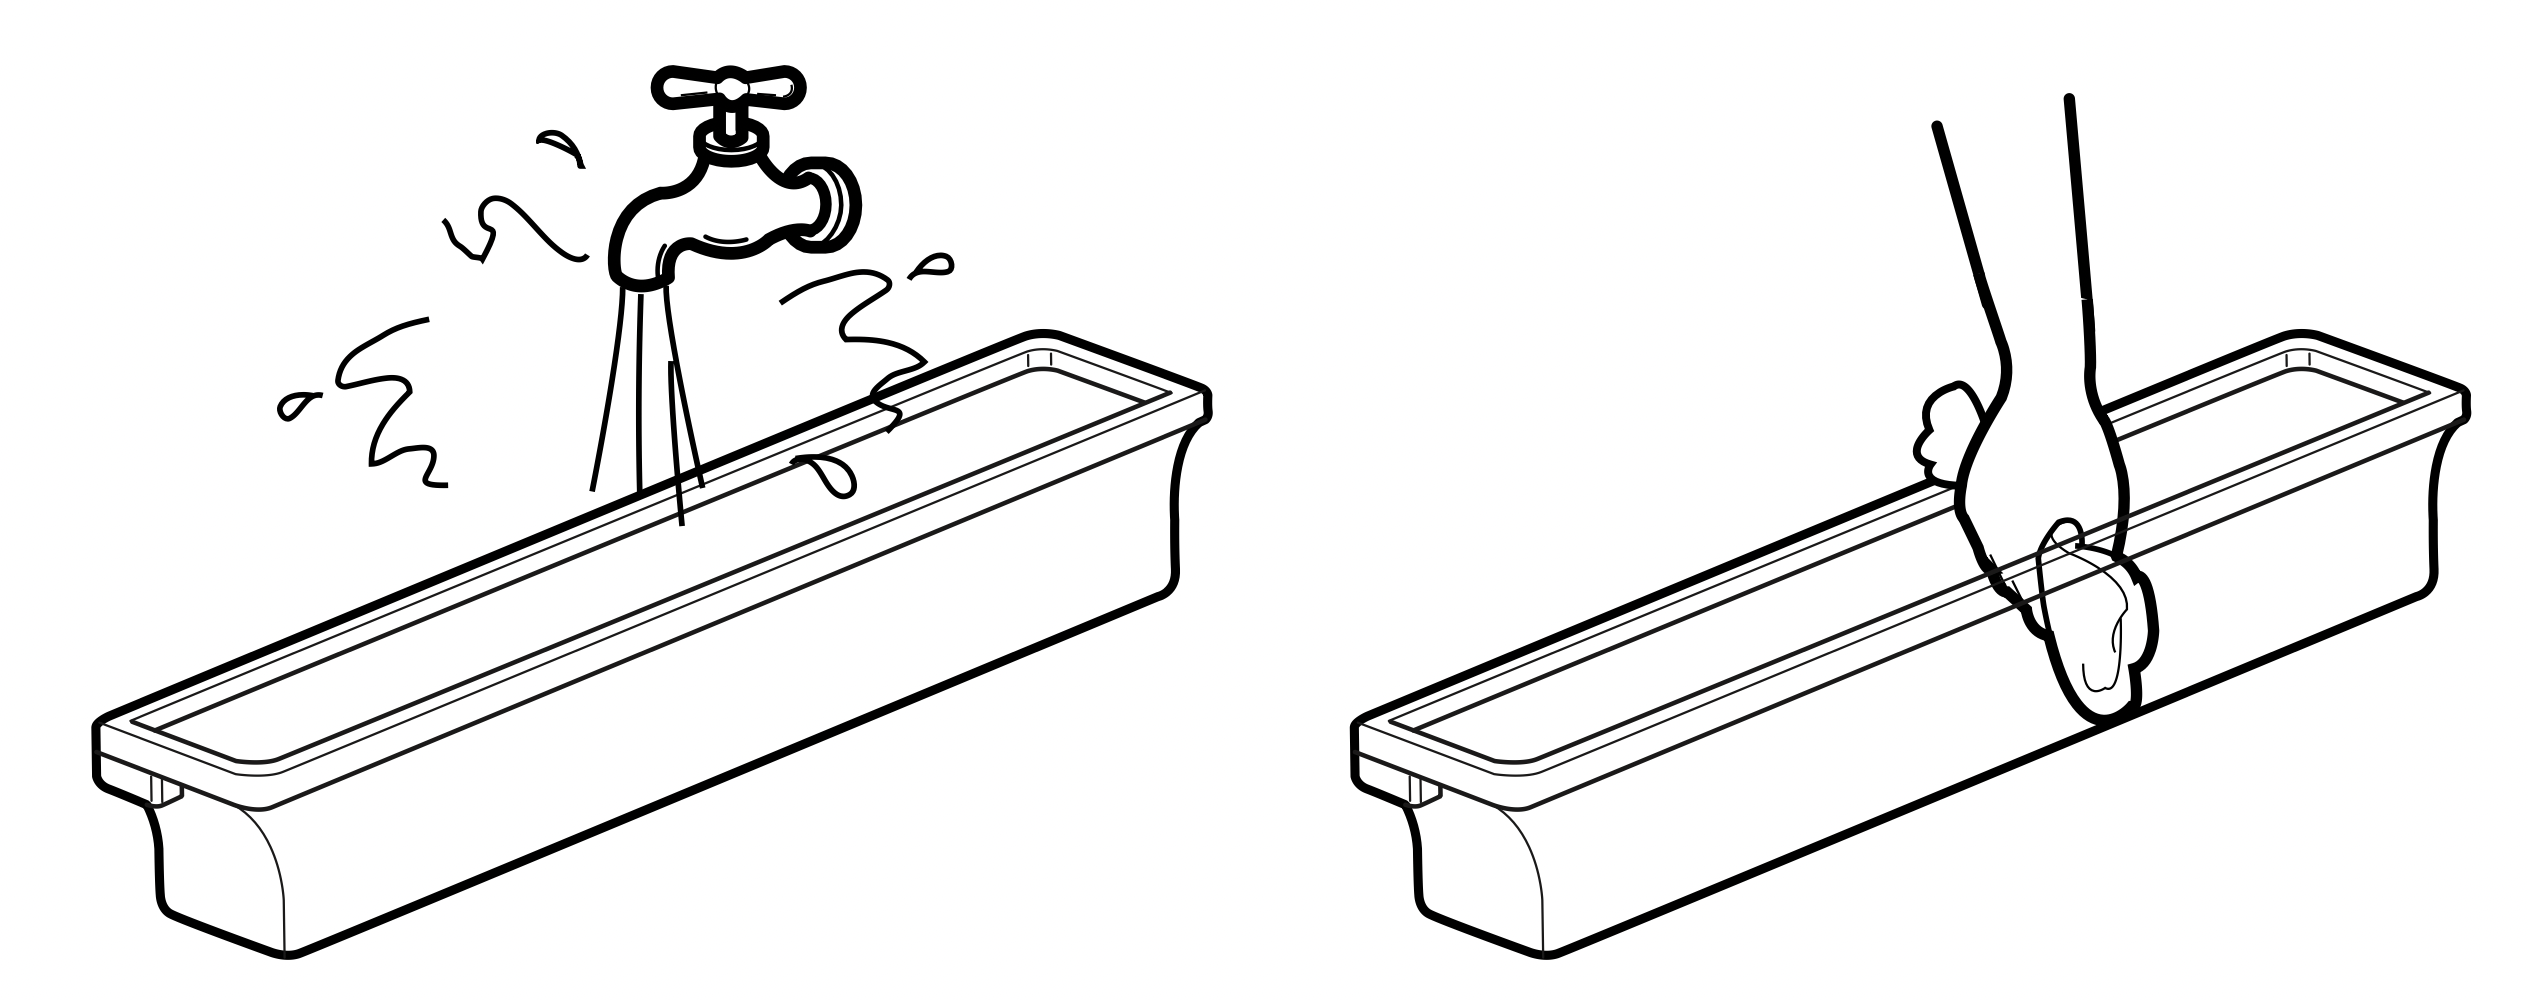
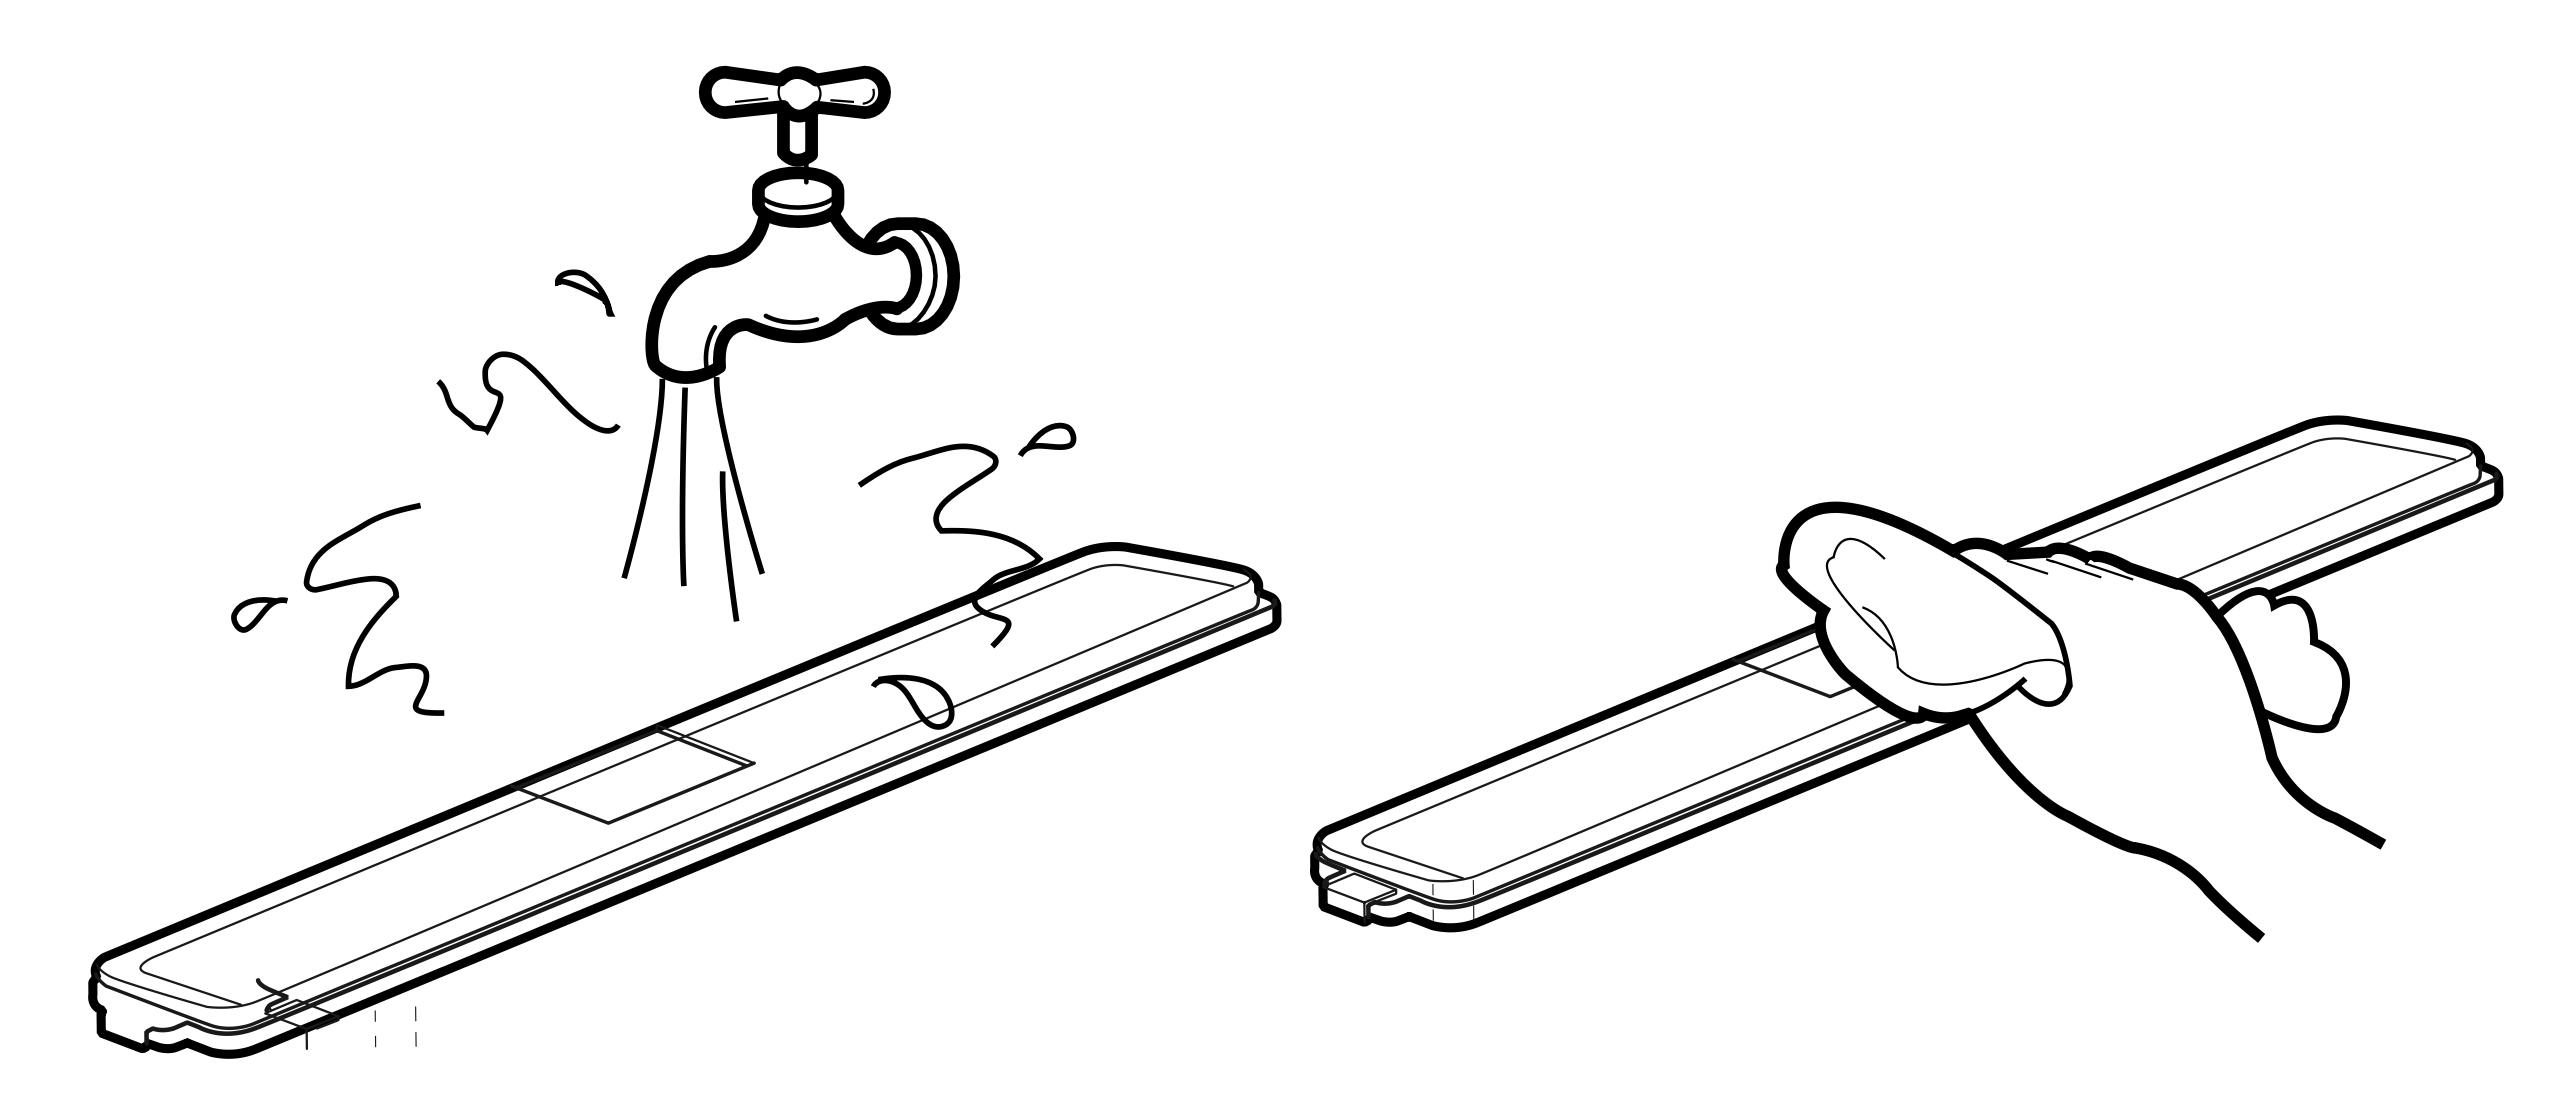
Remove the Deodorizer from the ceiling of the refrigerator compartment by gently pushing forward on the front clips and lowering the deodorizer body. Soak the deodorizer in warm phosphate based soapy water, then rinse off
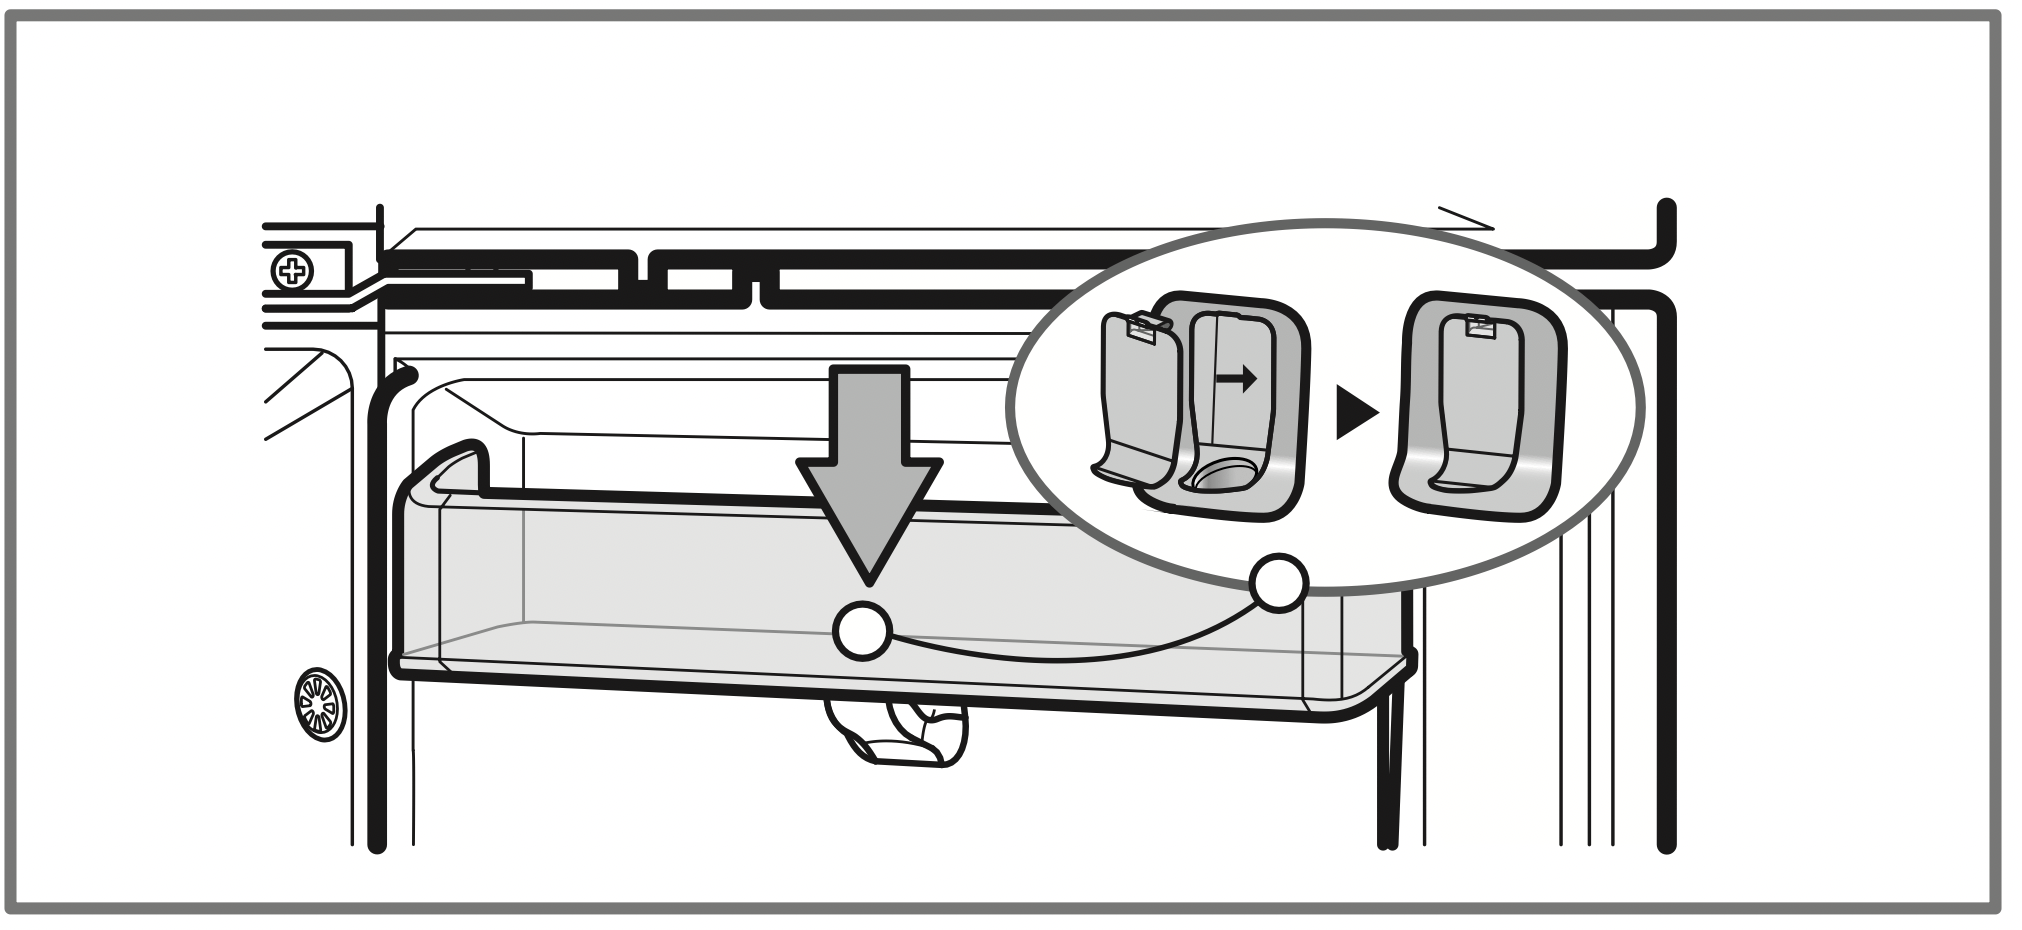
VEGETABLE DRAWER
How to use
Vegetable drawer humidity & temperature can be changed with the slider control.
Check the position of the sliding control prior to storing the food.
Do not set the slider to the middle point.
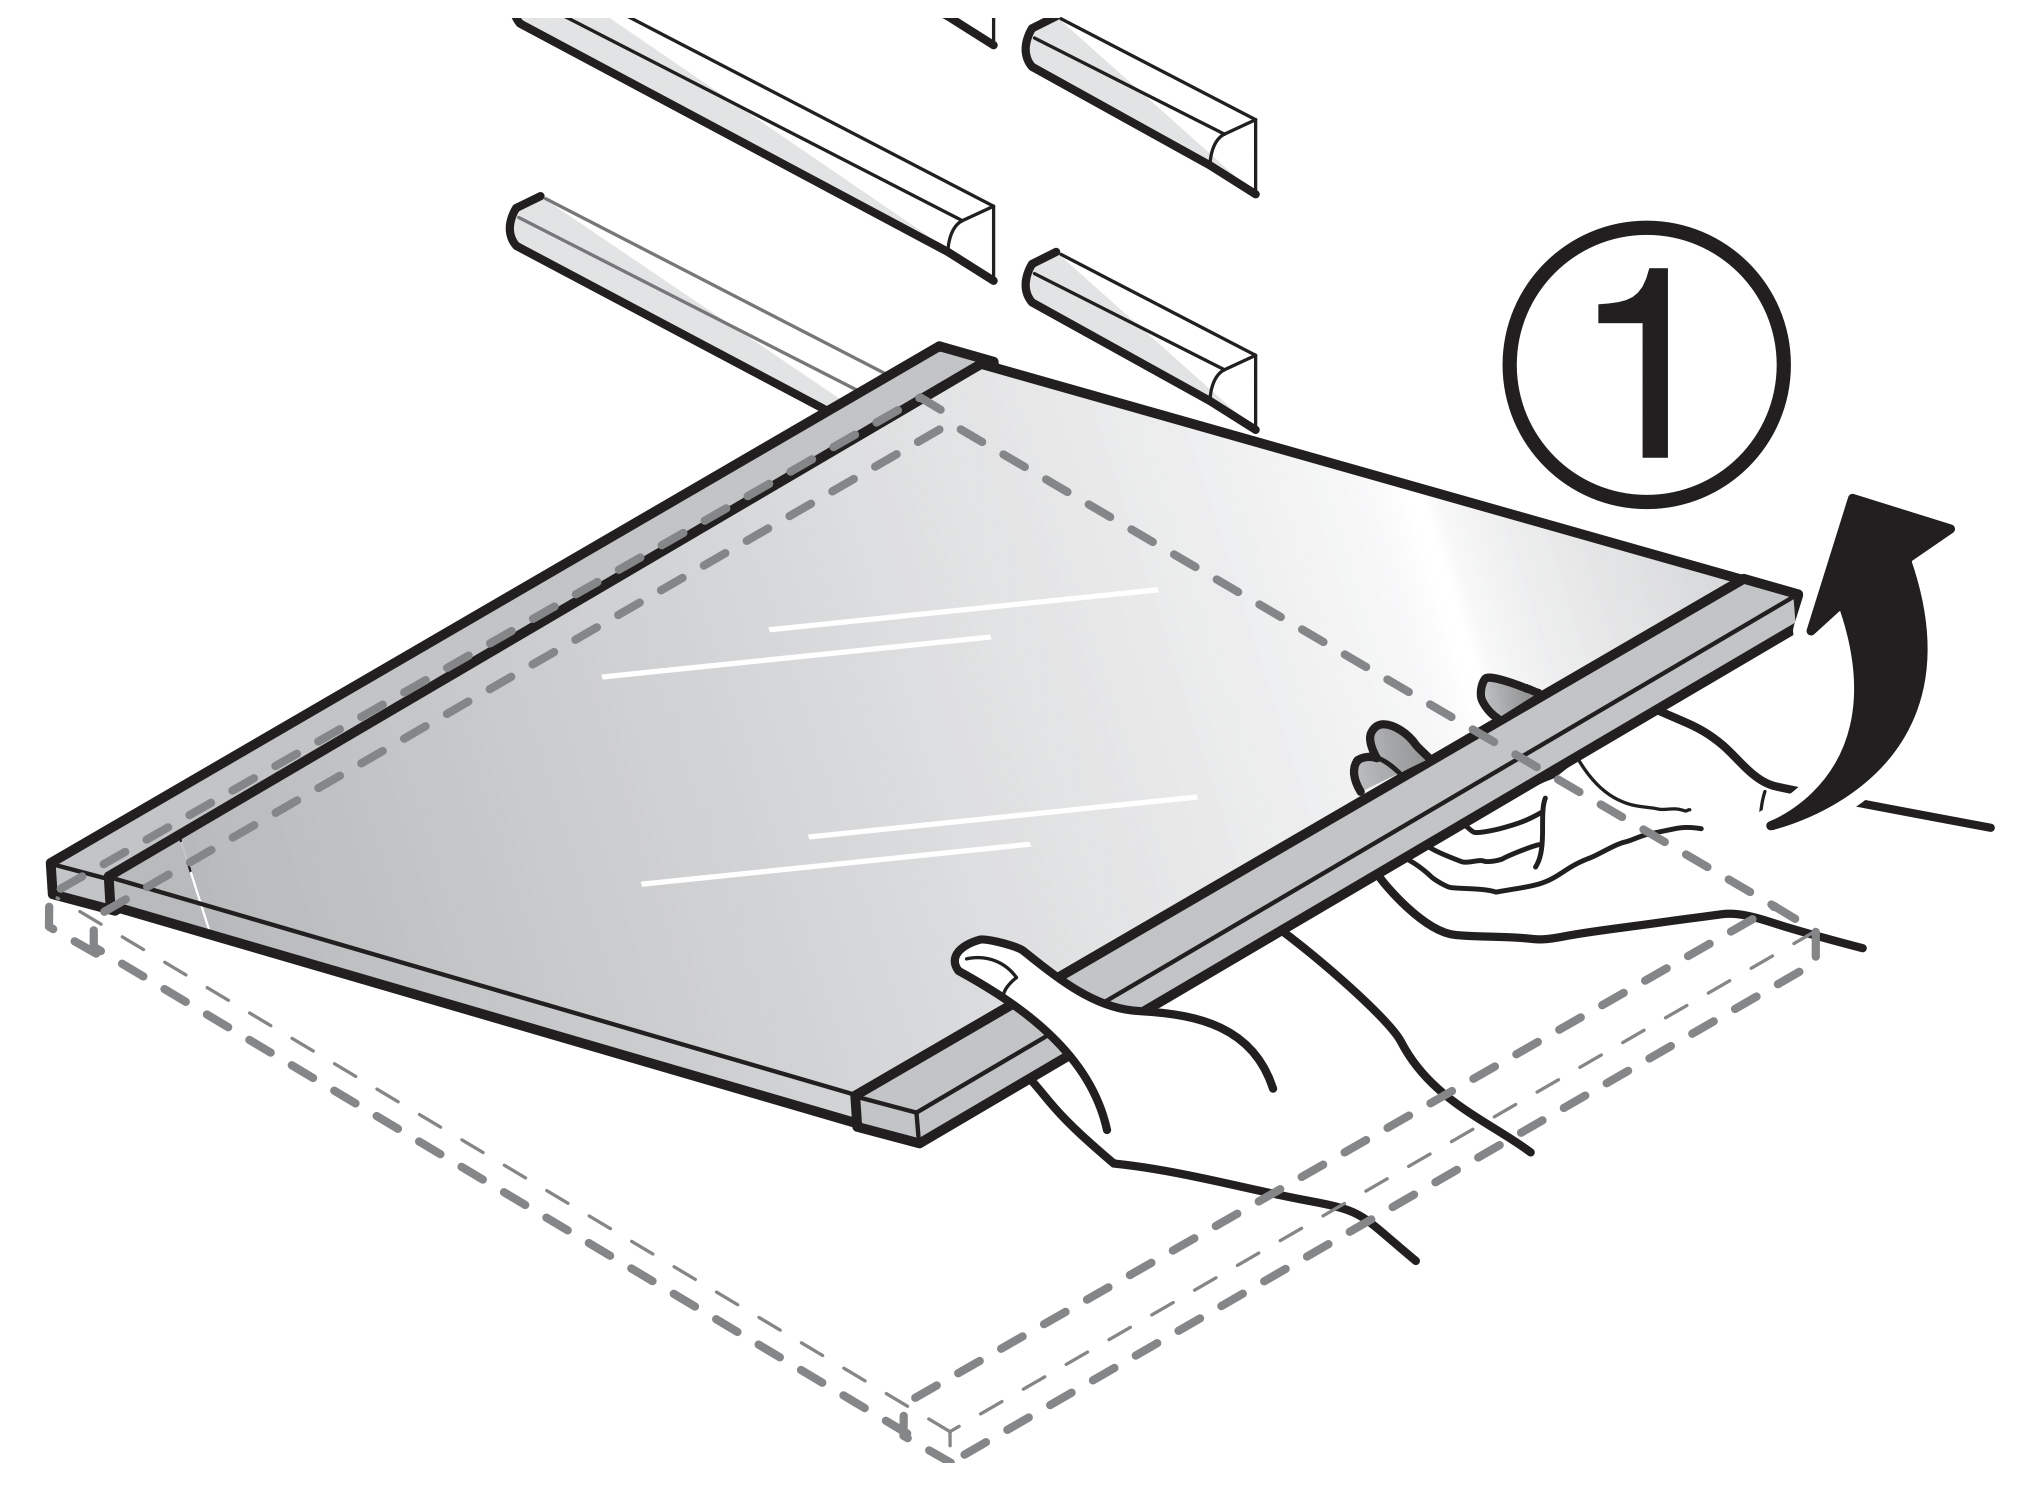
SHELVES
The shelves in your refrigerator is adjustable to meet your individual storage needs.
Adjusting the shelves to fit item of different heights will make finding the exact item you want easier. Doing so will also reduce the amount of time the refrigerator doors are open which will save energy.
IMPORTANT: Do not clean glass shelves with warm water while they are cold. Shelves may break if exposed to sudden temperature changes or impact
NOTE: Glass shelves are heavy. Use special care when removing them.
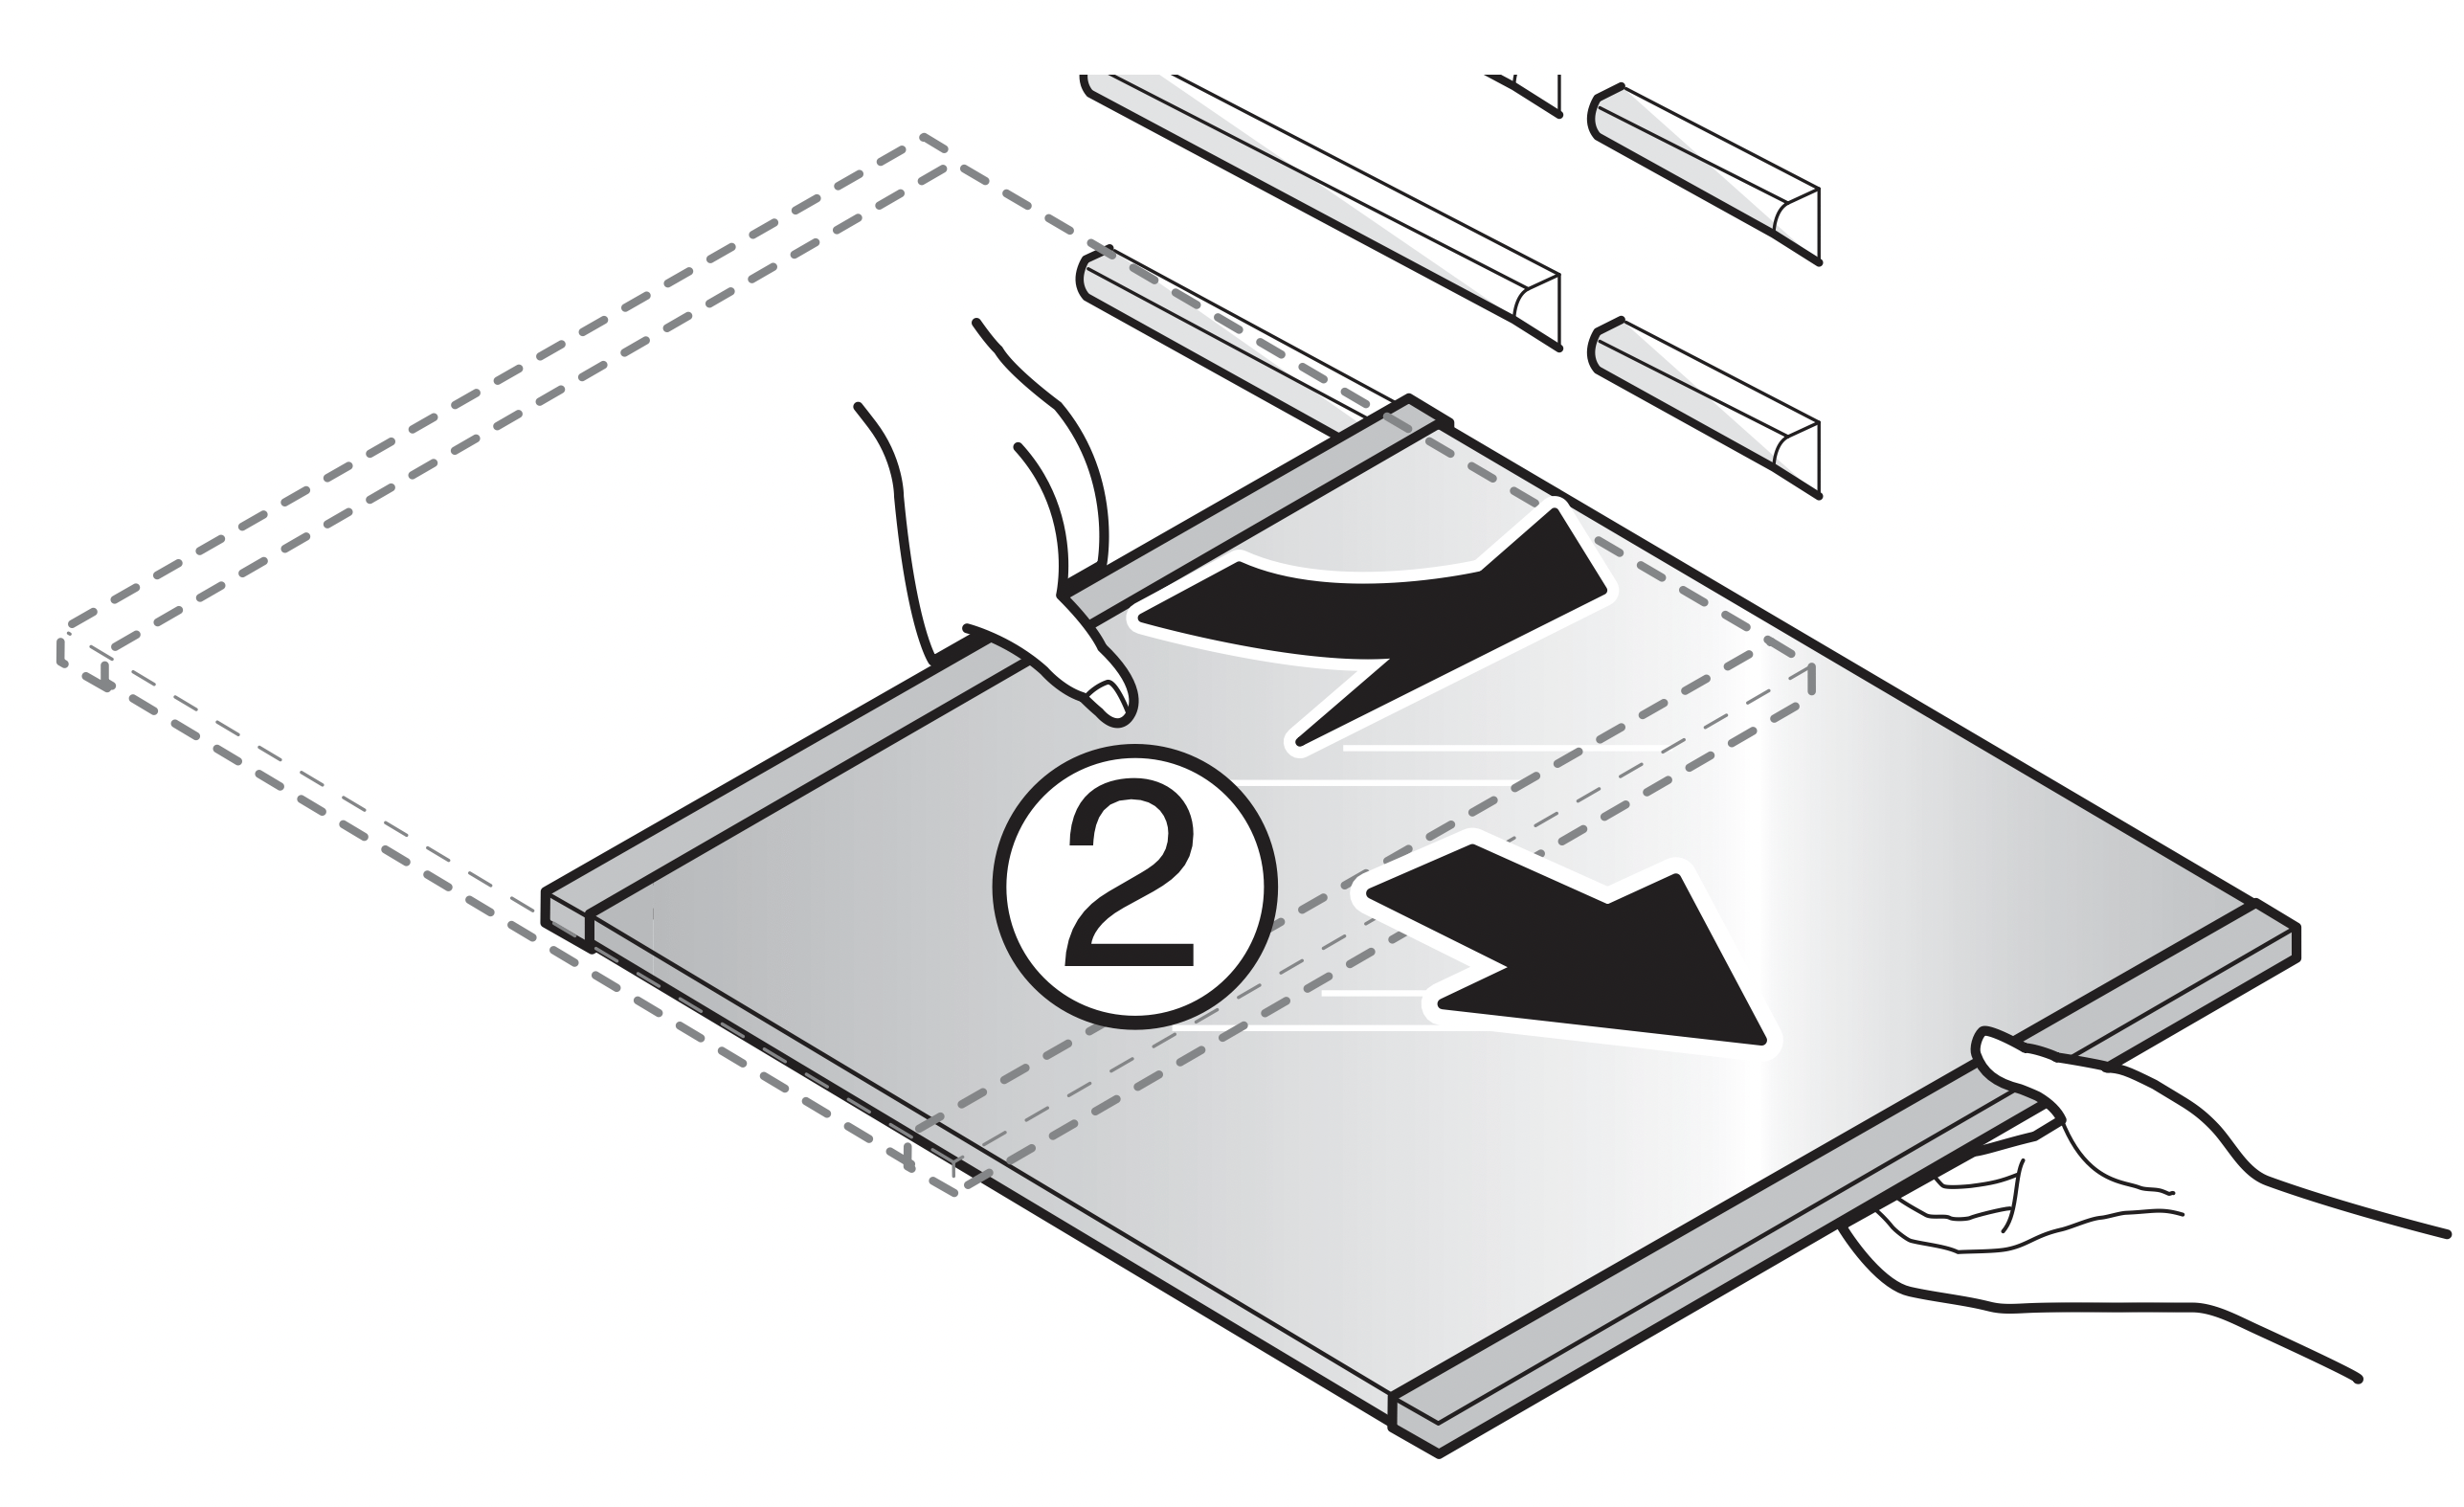
Detaching the shelf
Remove all items from the shelf. Lift the front of the shelf slightly to disengage the rail stops.
Pull the shelf forward about halfway, keeping the front of the shelf slightly lifted.
Holding the shelf with both hands, tilt the shelf and pull it out.
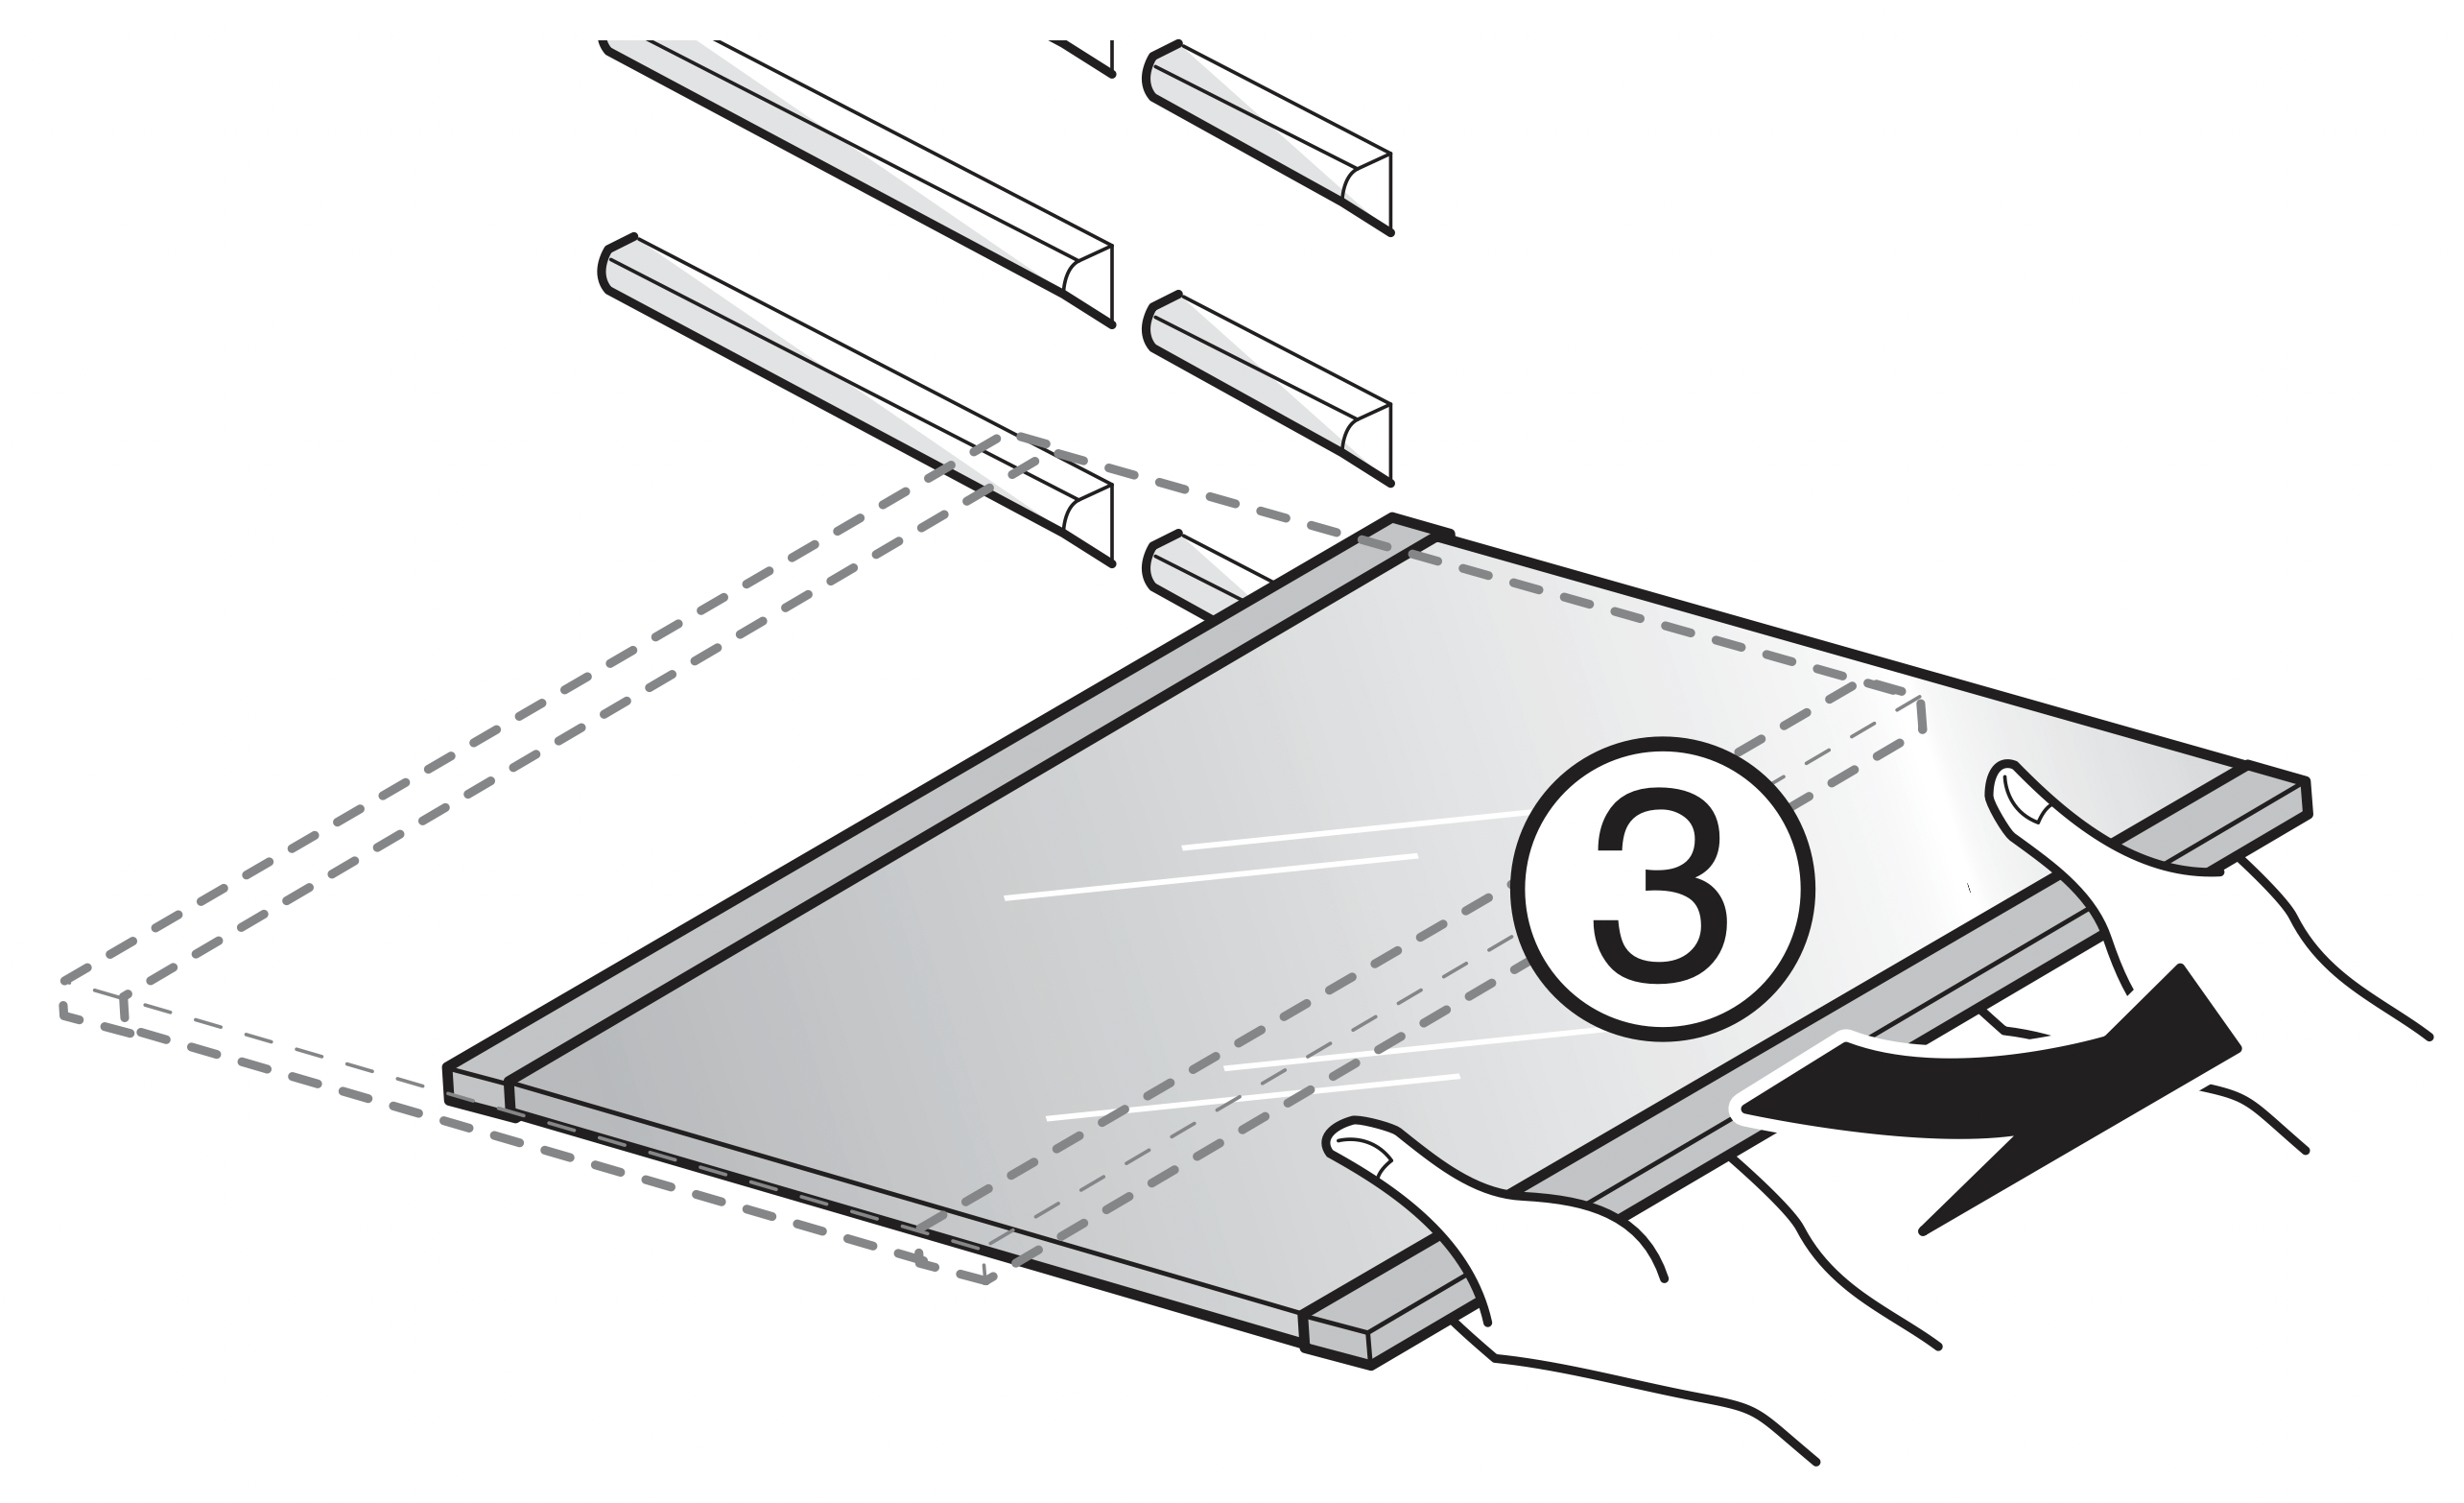
Assembling the shelf
Tilt the front of the shelf up and guide the shelf into the slots at a desired height. Slide the shelf in then lower the front of the shelf.
CAUTION: Make sure that shelves are level from one side to the other. Failure to do so may result in the shelf falling or spilling food.
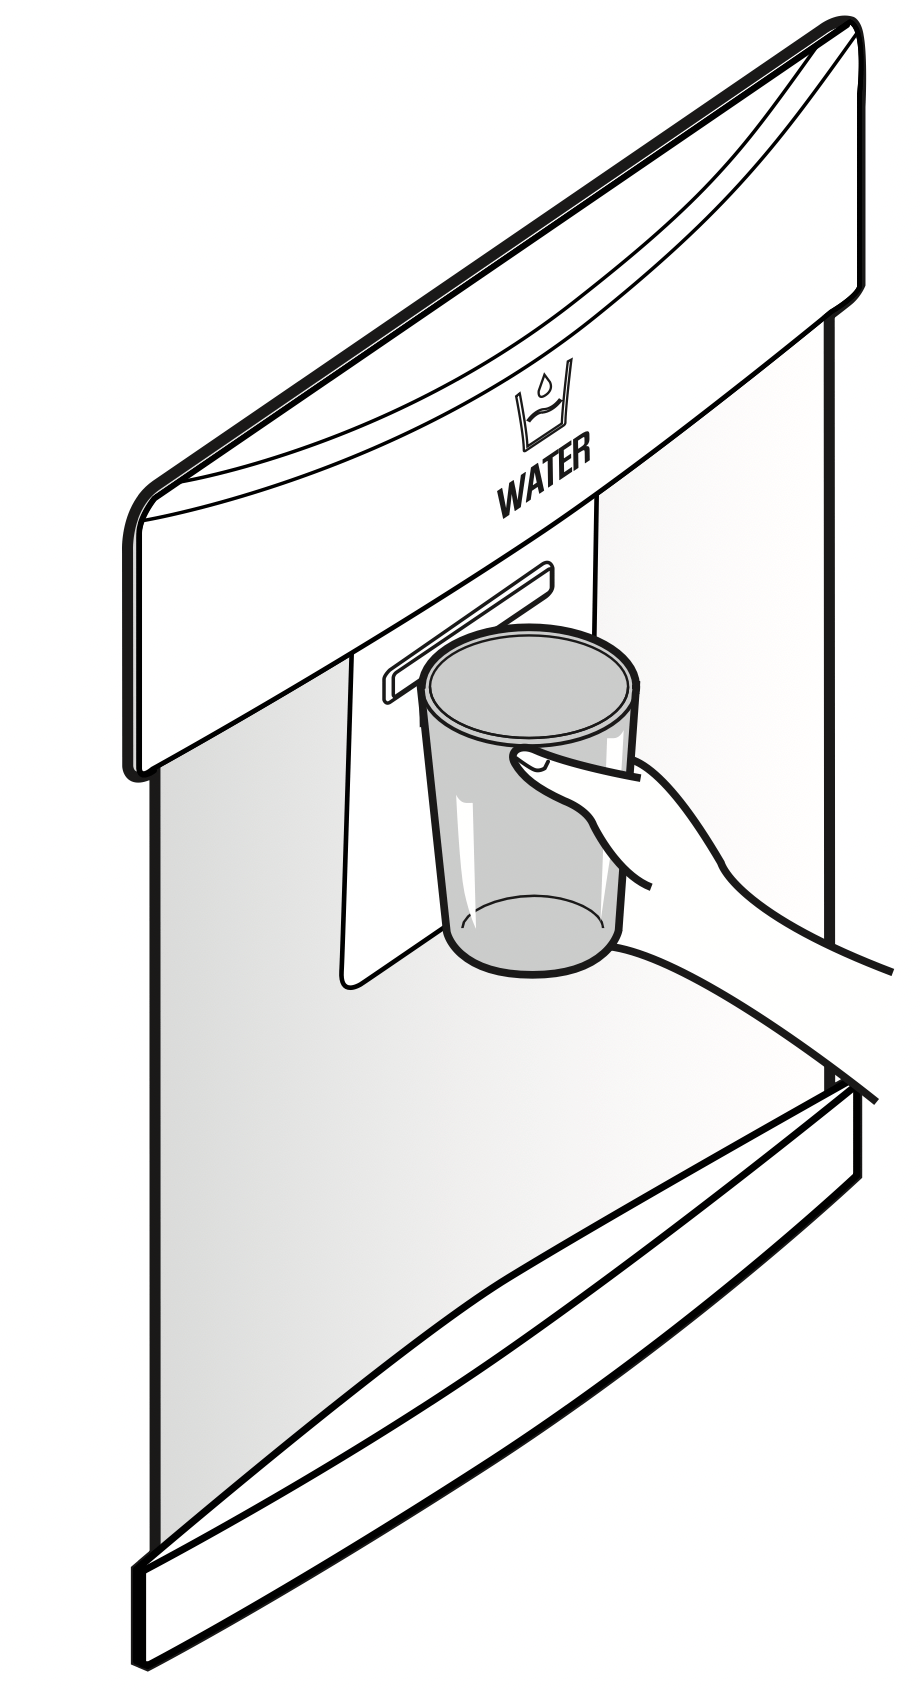
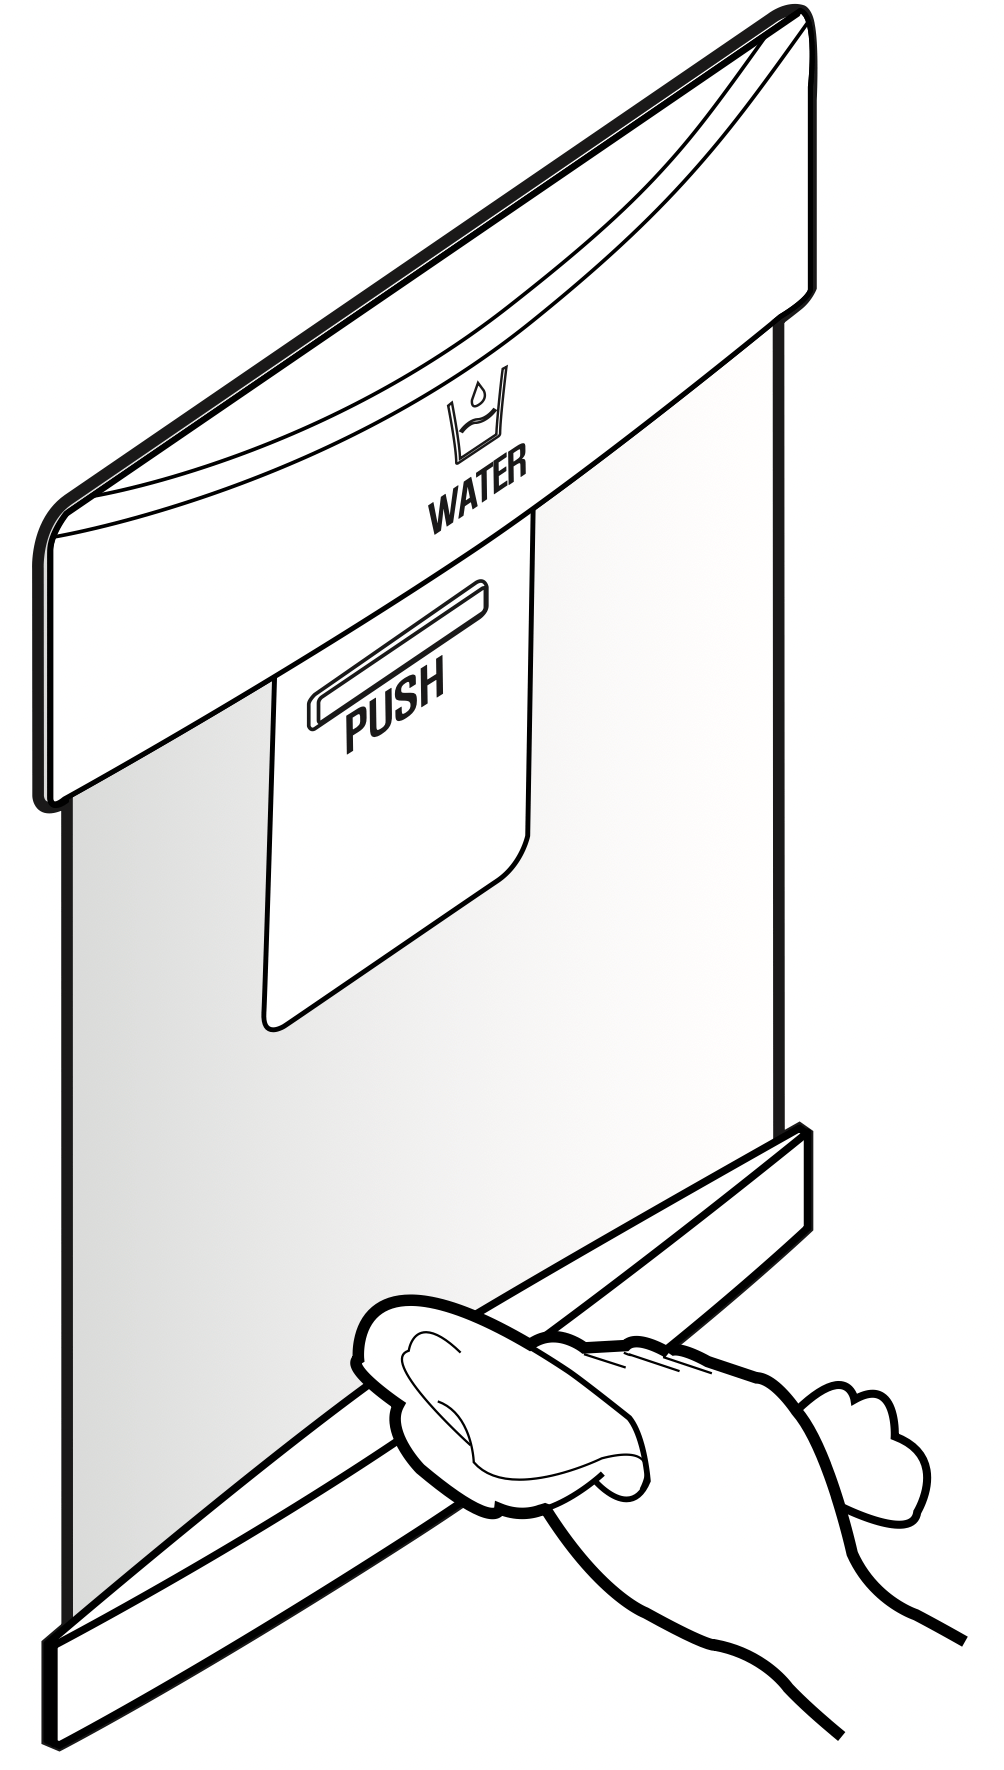
WATER DISPENSER (SOME MODELS)
NOTE:
Only fill the water tank after it has been rinsed and installed into position. It should always be removed for cleaning.
The water tank will will leak when it contains water if it's valve is pushed, even if if it is not fitted to the door basket.
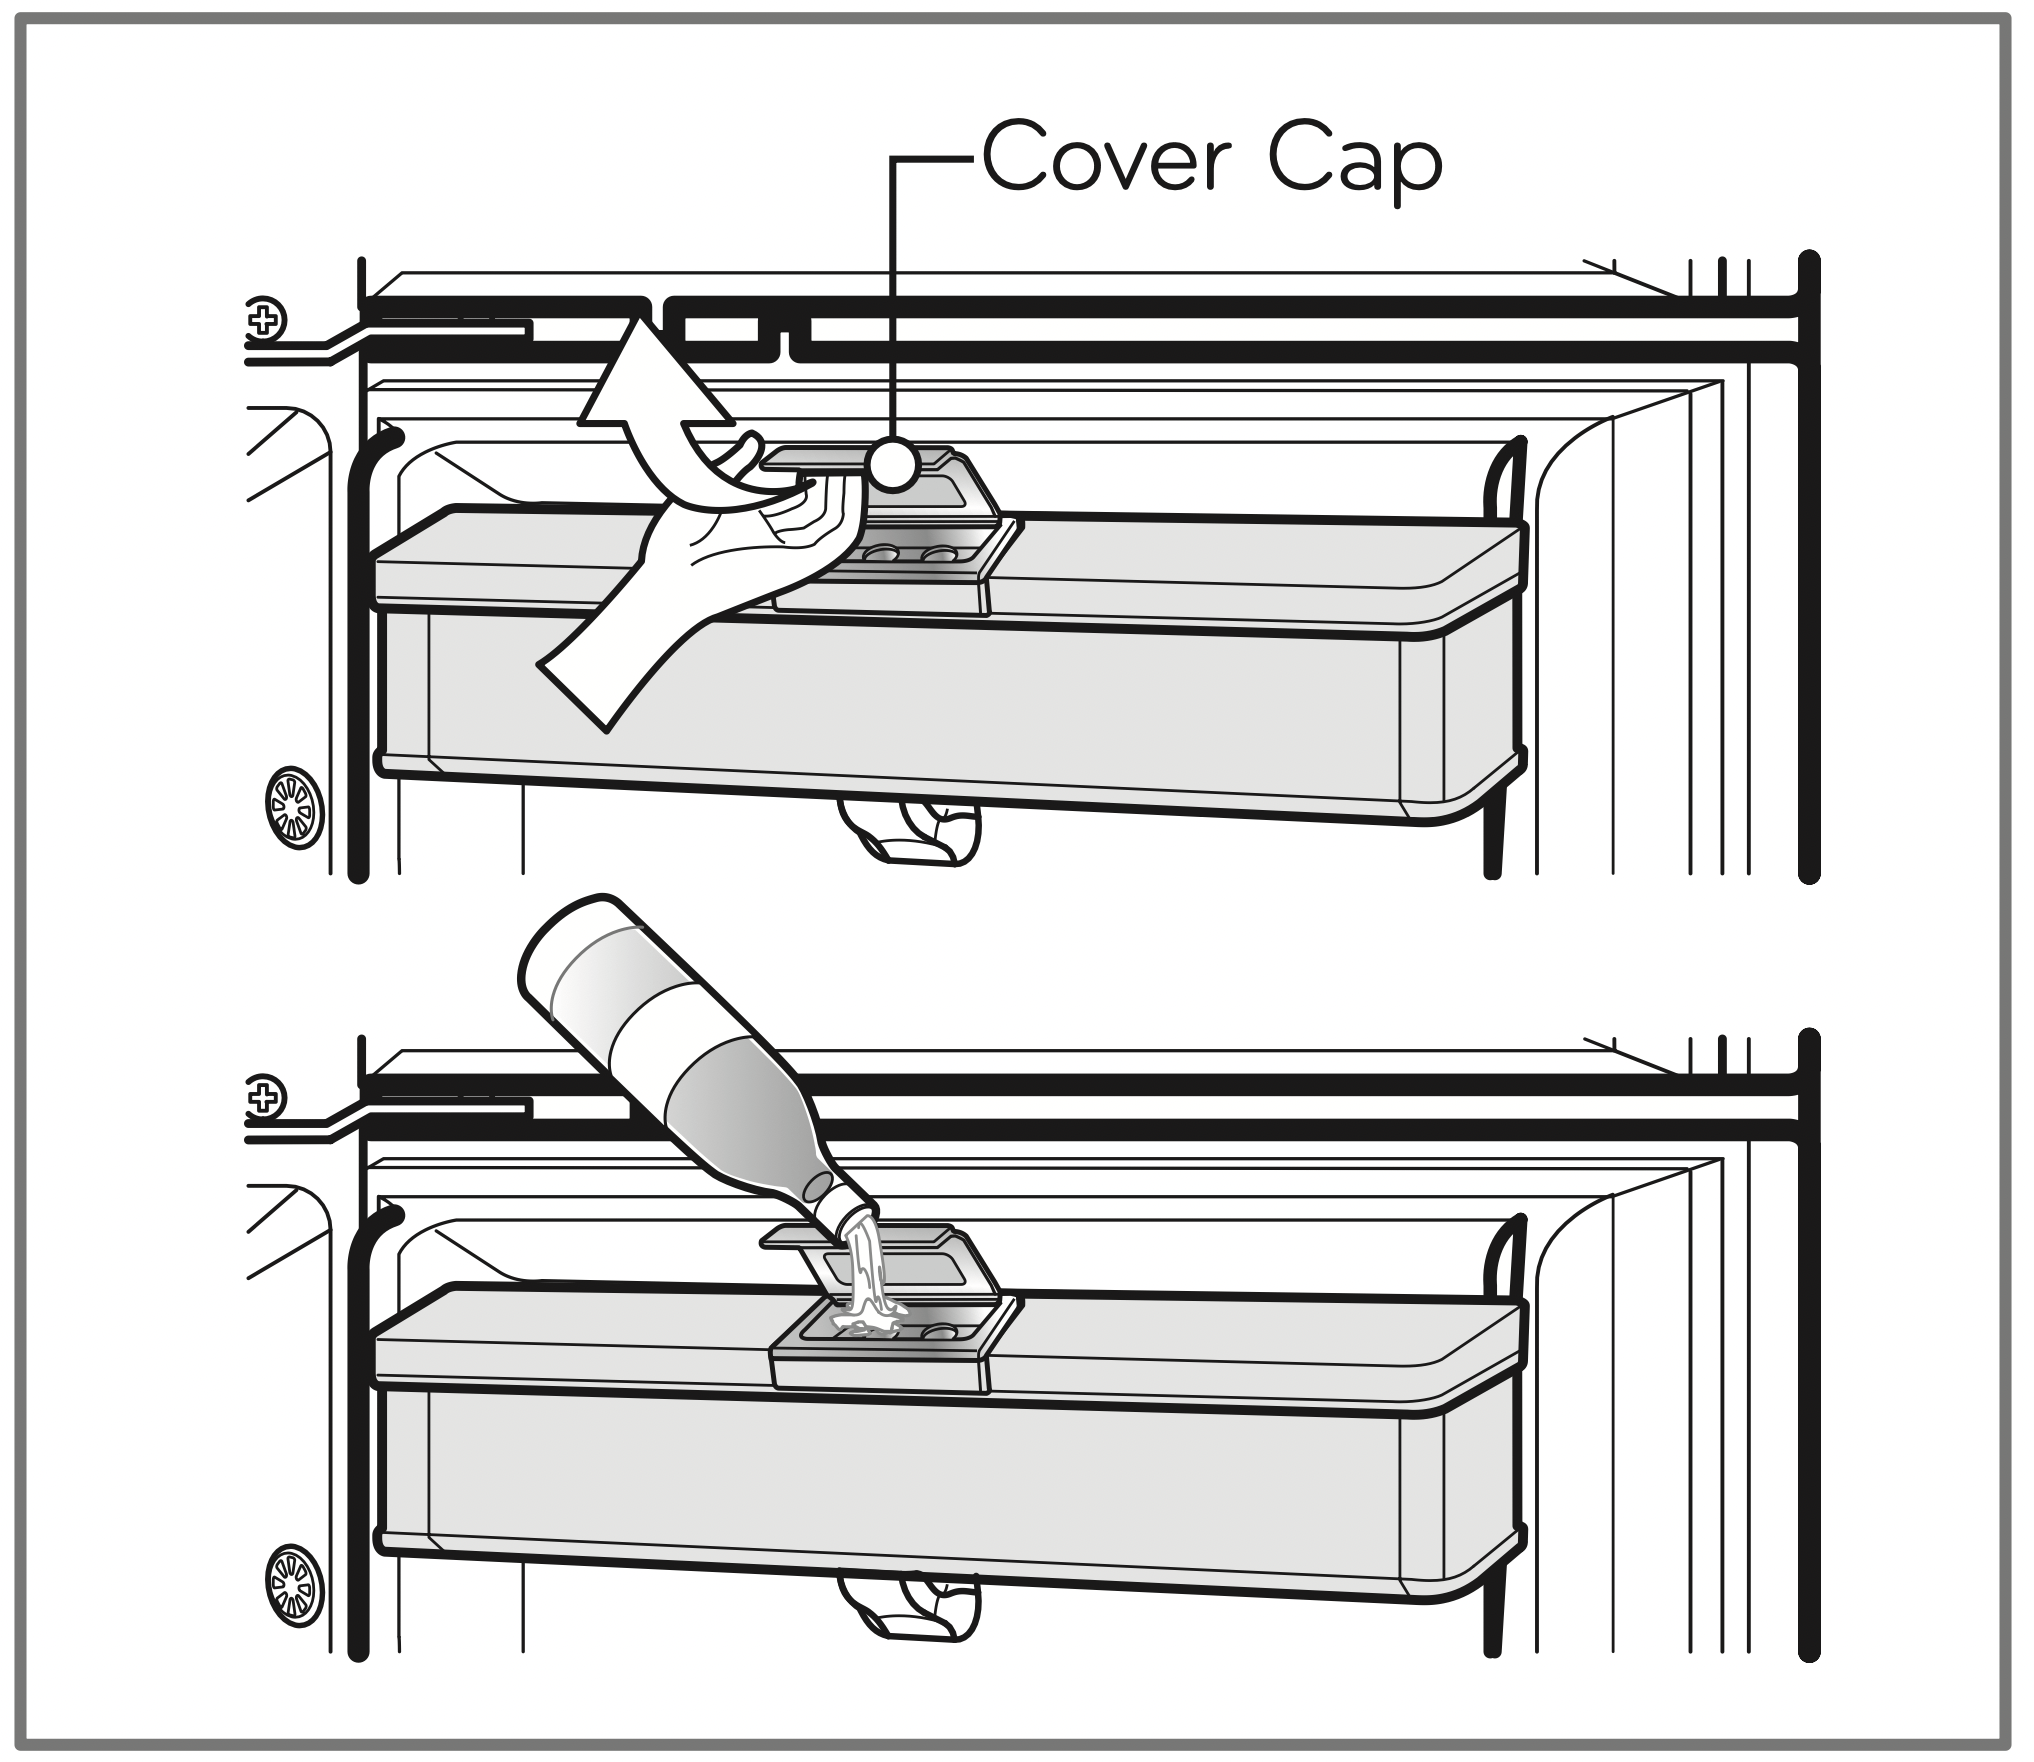
Putting water in the water tank
Open the cover cap and pour water into the water tank.
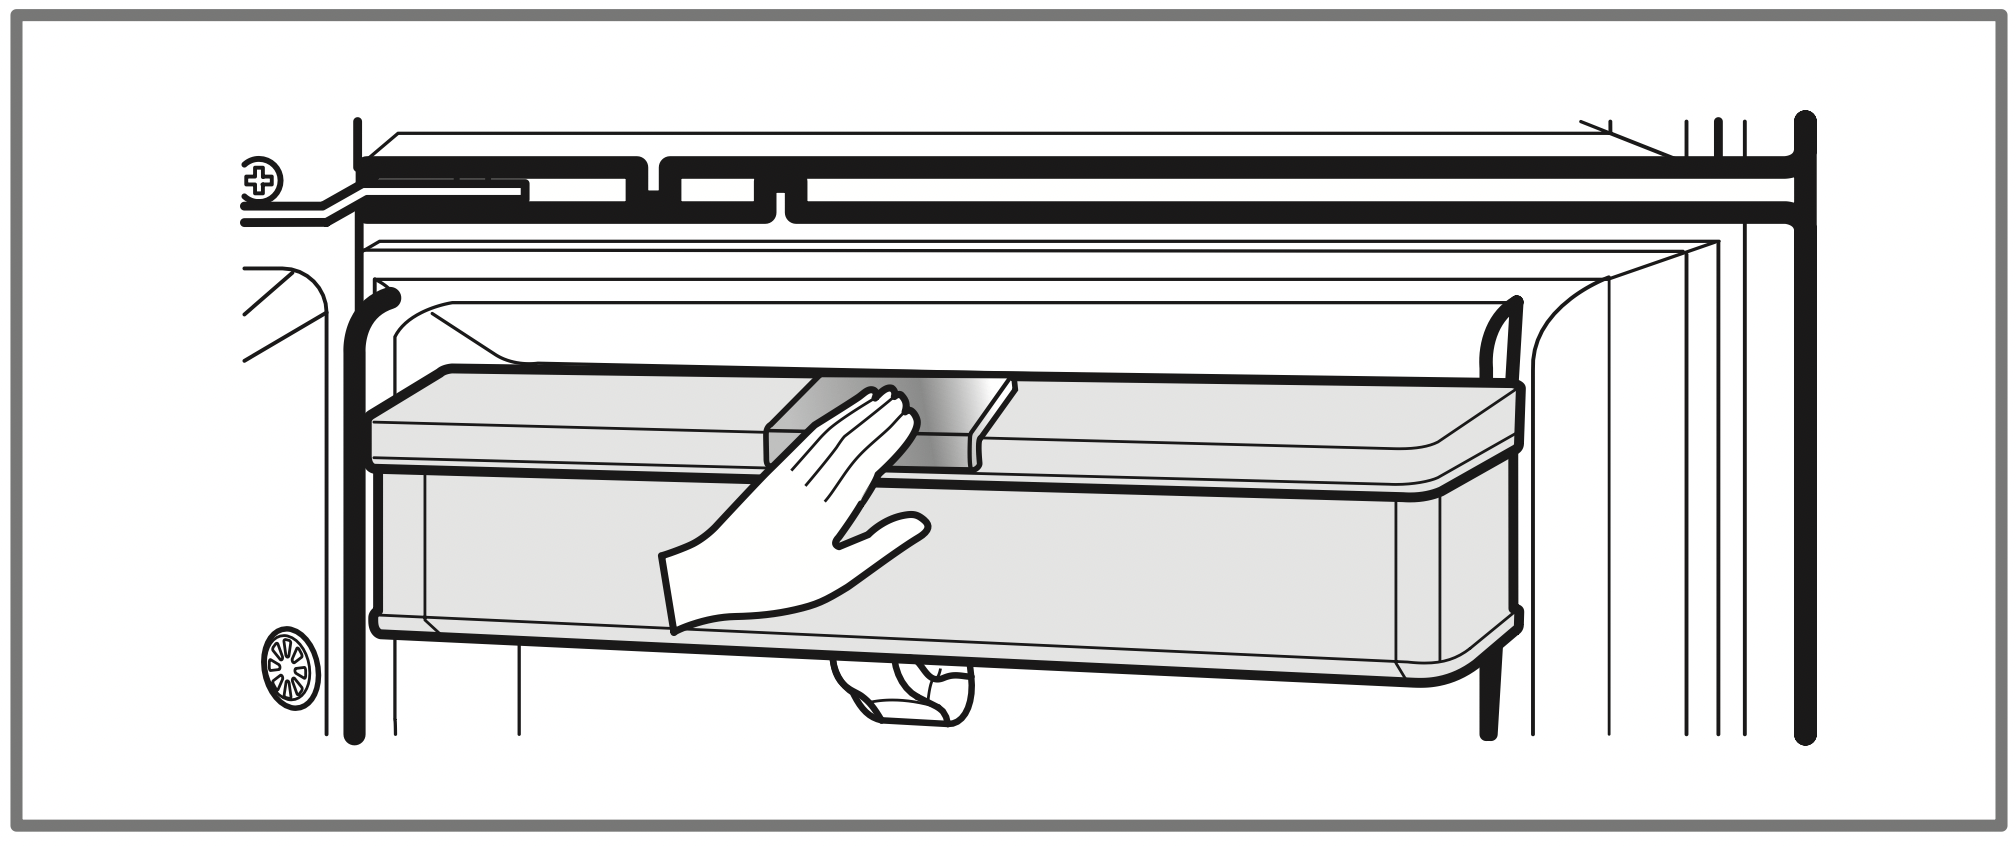
Close the cover cap.
The water tank is optional removable part which can be applied to enlarge the storage capacity. You can store food, drinks after removing the water tank cover.
Caution
Do not use anything other than water .
Hot water needs to be cooled before being put in the water tank.
Dispensing
Press the dispenser pad with a cup or glass.
The water is released when the dispenser pad is pressed. The pad returns to its original position when the cup or glass is removed and the water stops its flow.
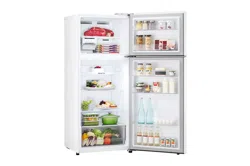
SUGGESTIONS ON FOOD STORAGE
STORING FOOD
Store fresh food in the refrigerator compartment. How food is frozen and thawed is an important factor in maintaining its freshness and flavor.
Do not store food which goes bad easily at low temperatures, such as bananas, pineapples, and melons.
Allow hot food to cool prior to storing. Placing hot food in the refrigerator could spoil other food, and lead to higher electricity bills!
When storing the food, cover it with vinyl wrap or store in a container with a lid. This prevents moisture from evaporating, and helps food to keep its taste and nutrients.
Do not block air vents with food. Smooth circulation of chilled air keeps refrigerator temperatures even.
Do not open the door frequently. Opening the door lets warm air enter the refrigerator, and causes temperatures to rise.
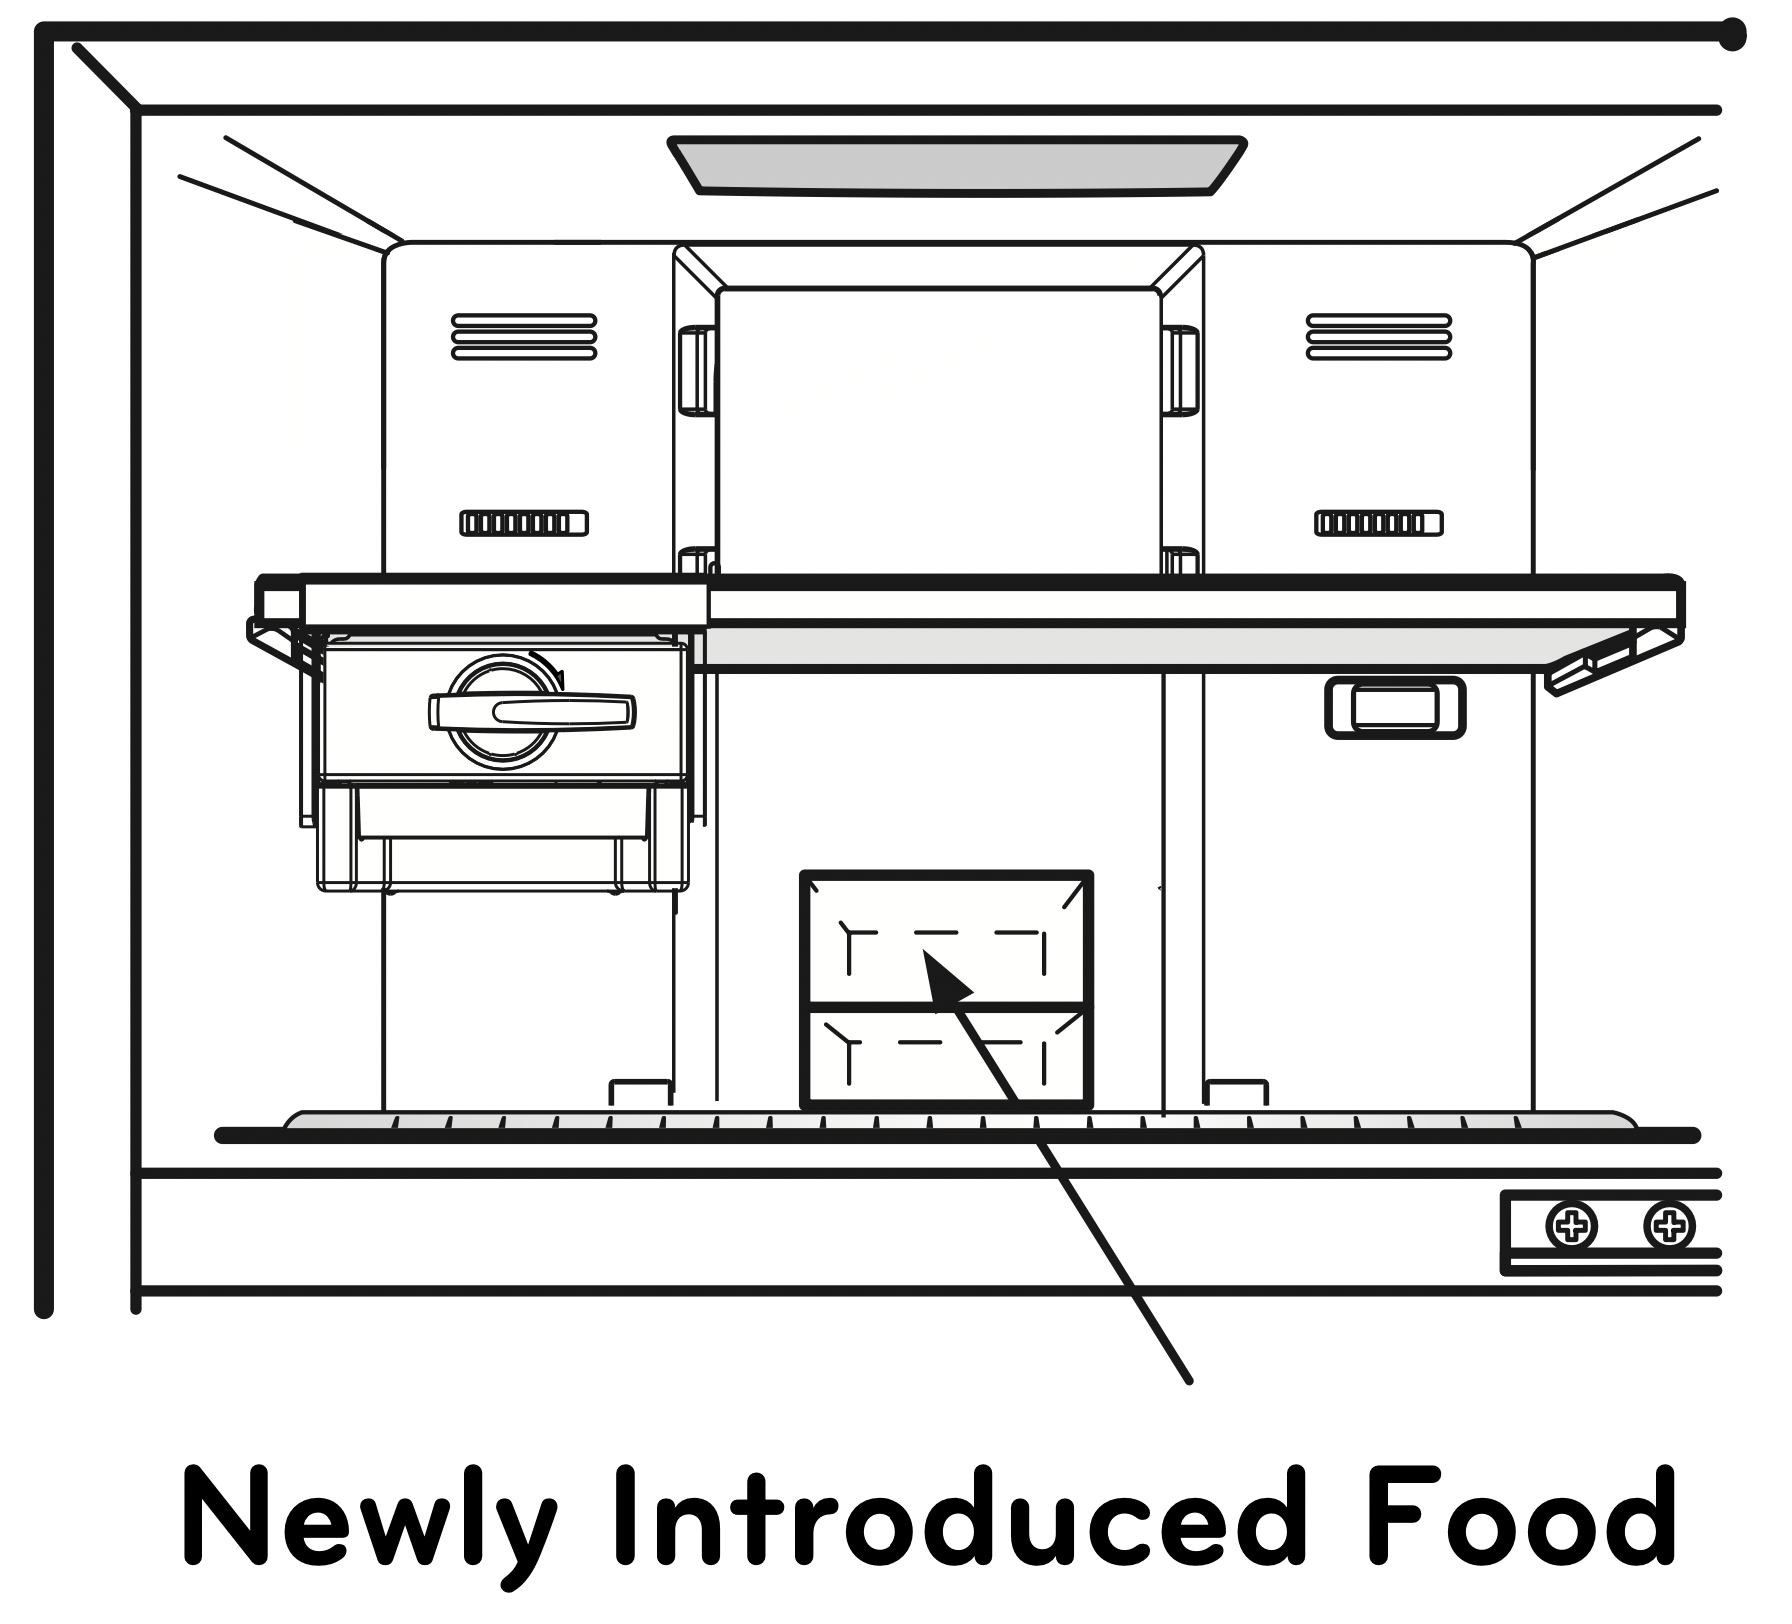
FREEZER COMPARTMENT
Do not store bottles in the freezer compartment - they may break or explode when frozen. Do not refreeze food that has been thawed. This causes loss of taste and nutrition.
When storing frozen food like ice cream for a long period, place it on the freezer shelf, not in the door basket.
Loading the Freezer - It is recommended to load newly introduced foods in the following freezer location for freezing:
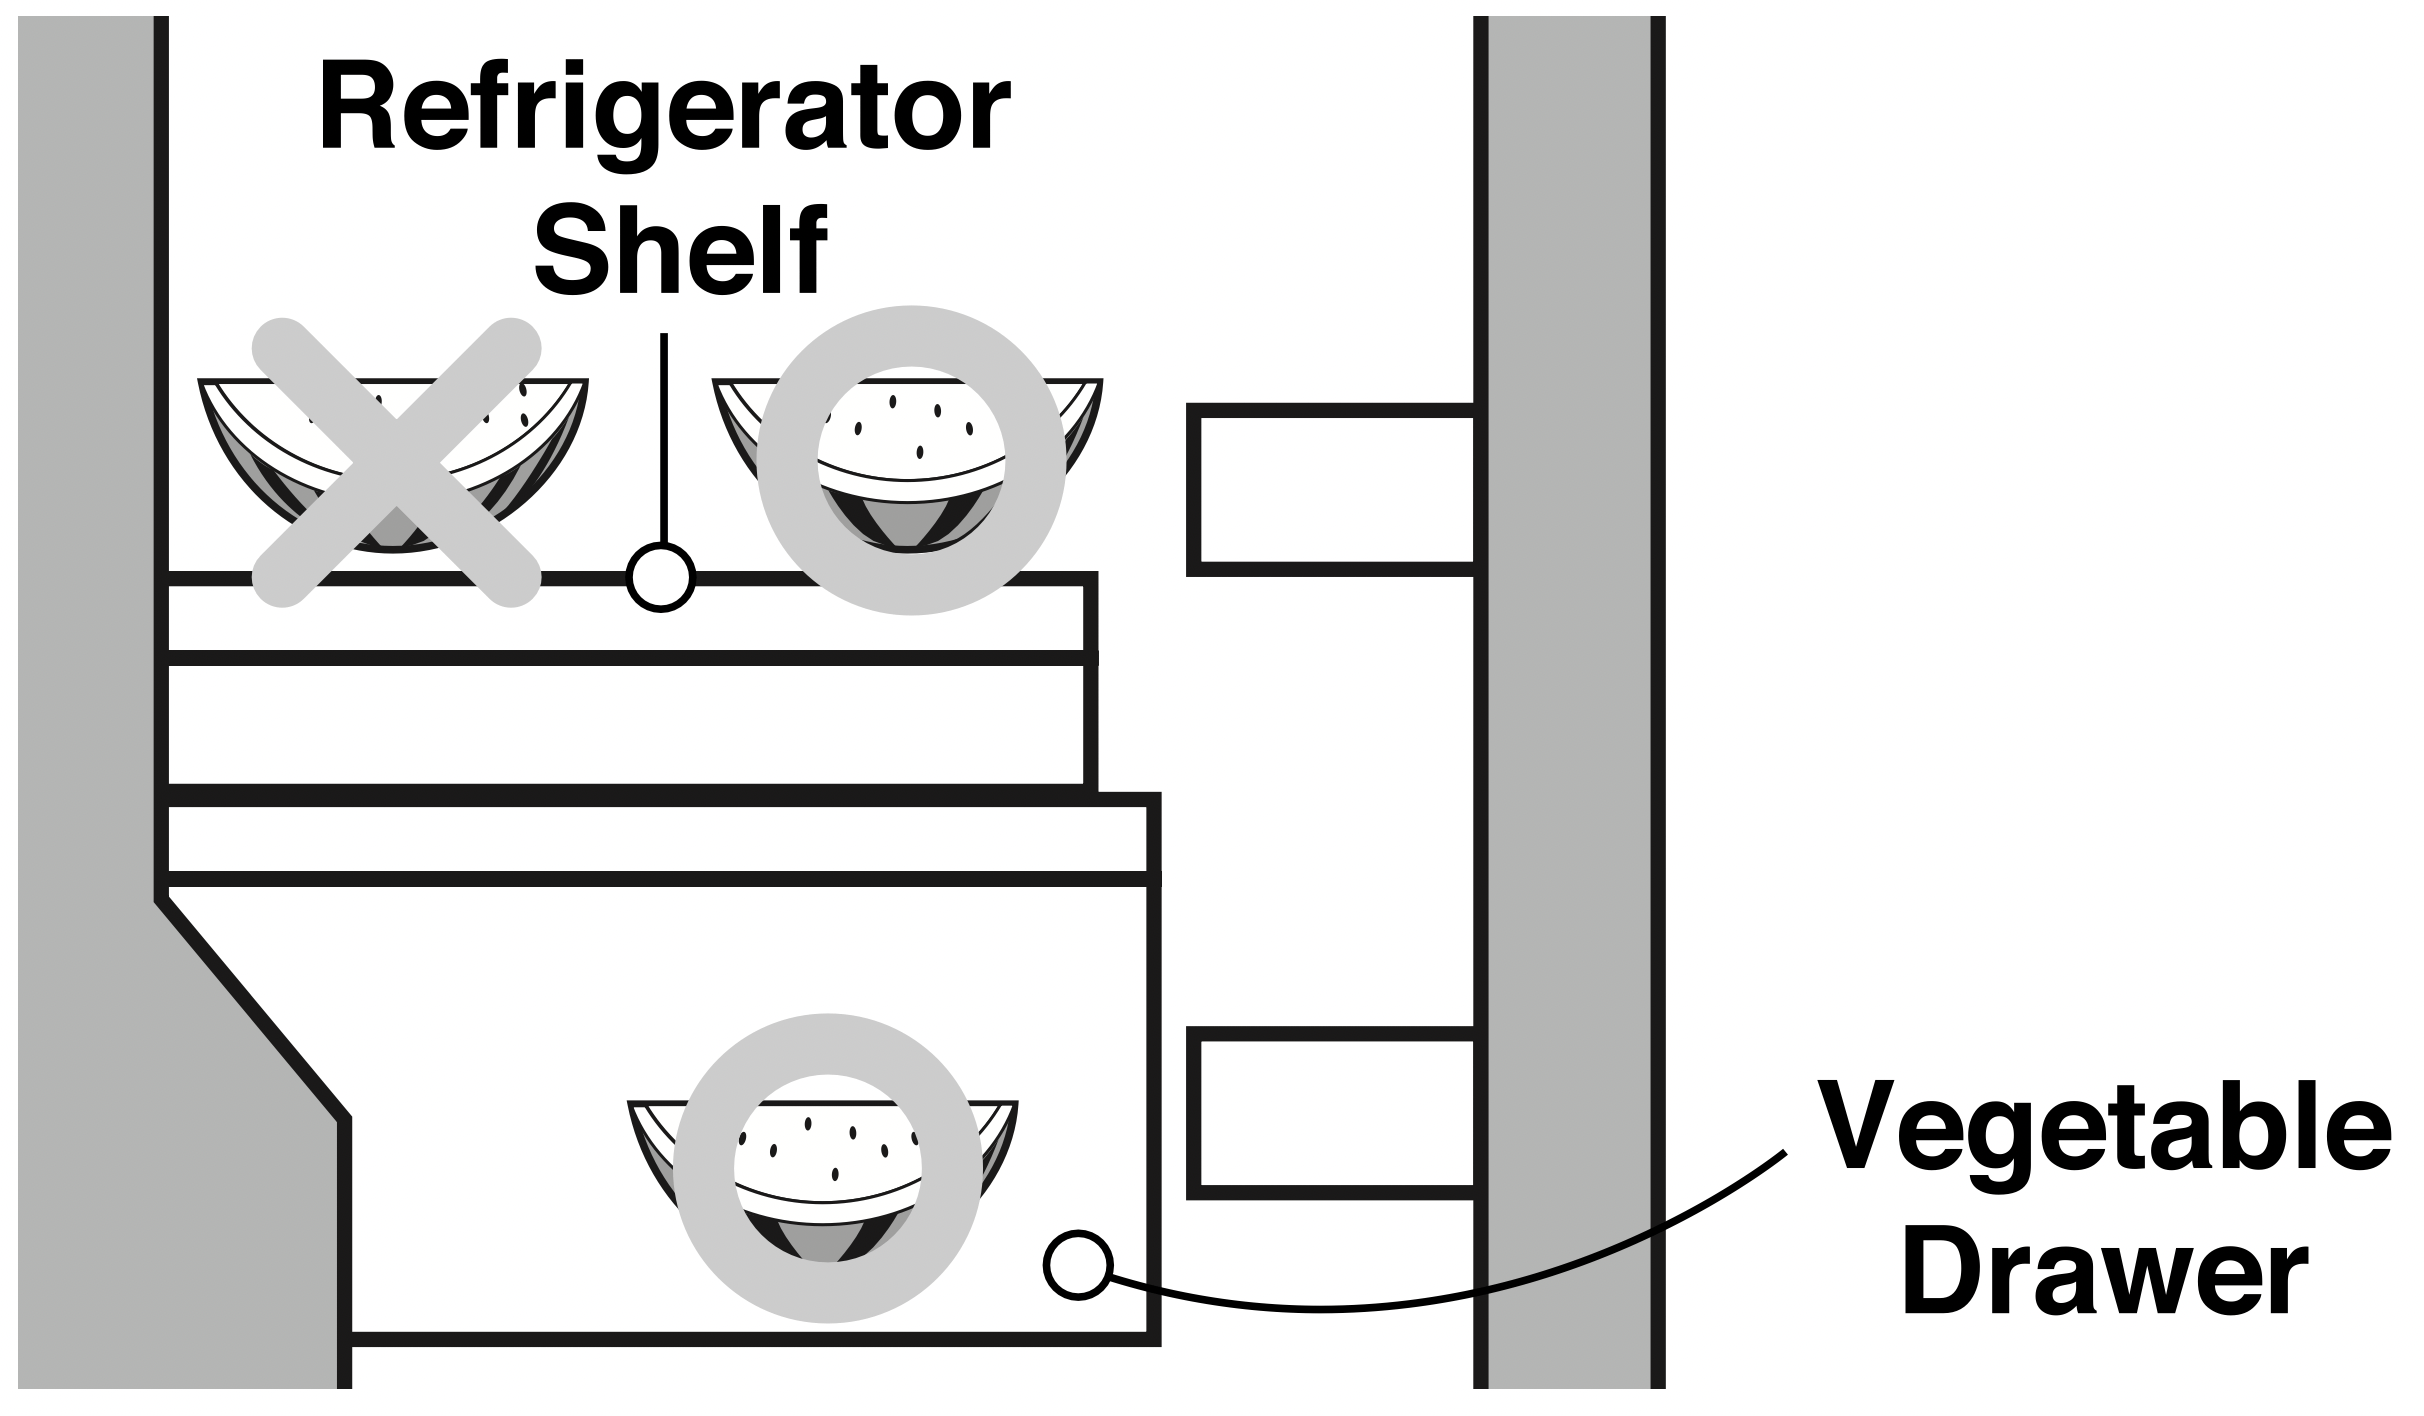
REFRIGERATOR COMPARTMENT
Avoid placing moist food deeply positioned on the refrigerator shelf, it could freeze upon direct contact with chilled air. To avoid this it is better to store food in a covered container.
It is desirable to store moist food (especially vegetable and fruit) in the vegetable storage compartment. If it is necessary to store on a shelf of the refrigerator, put it close to the door away from the back wall of the refrigerator to avoid being frozen by the cool circulating air in the refrigerator.
Always clean food prior to refrigeration. Vegetables and fruits should be washed and wiped, and packed food should be wiped clean, to prevent adjacent food from spoiling.
When storing eggs in their storage rack, ensure that they are fresh, and always store them in a up-right position, which keeps them fresh longer.
CLEANING
WARNING
Always remove power cord from the wall outlet prior to cleaning in the vicinity of electrical parts(lamps, switches, controls, etc.). Wipe up excess moisture with a sponge or cloth to prevent water or liquid from getting into any electrical part and causing electric shock. Do not use flammable or toxic cleaning liquids.
Do not use : Surface active agents, Car wax, Anticorrosive, or any kind of oil, Gasoline, Acids, Wax.
Only use dish washable solution, and soapy water when cleaning.
Using harsh cleaning chemicals will cause the external finishes to change colour.
It is important that your refrigerator be kept clean to prevent undesirable odors. Spilled food should be wipe up immediately, since it may acidify and stain plastic surfaces if allowed to settle.
Never use metallic scouring pads, brushes, coarse abrasive cleaners or strong alkaline solutions on any surface.
Before you clean, remember that damp objects will stick or adhere to extremely cold surfaces. Do not touch frozen surfaces with wet or damp hands.
EXTERIOR - Use a lukewarm solution of mild soap or dish washable solution to clean the durable finish of your refrigerator. Wipe with a clean, damp cloth and then dry.
INTERIOR - Regular cleaning of the interior and interior parts is recommended. Use a lukewarm solution of mild soap or dish washable solution to clean the inner lining of your refrigerator. Wipe with a clean, damp cloth and then dry.
INTERIOR PARTS - Wash compartment shelves, door racks, storage trays and magnetic door seals etc. Using a lukewarm solution of mild soap or dish washable solution to clean the inner lining of your refrigerator. Wipe with a clean damp cloth and then dry.
WATER DISPENSER
Grille - Wipe with a wet cloth, and dry with a dry cloth.
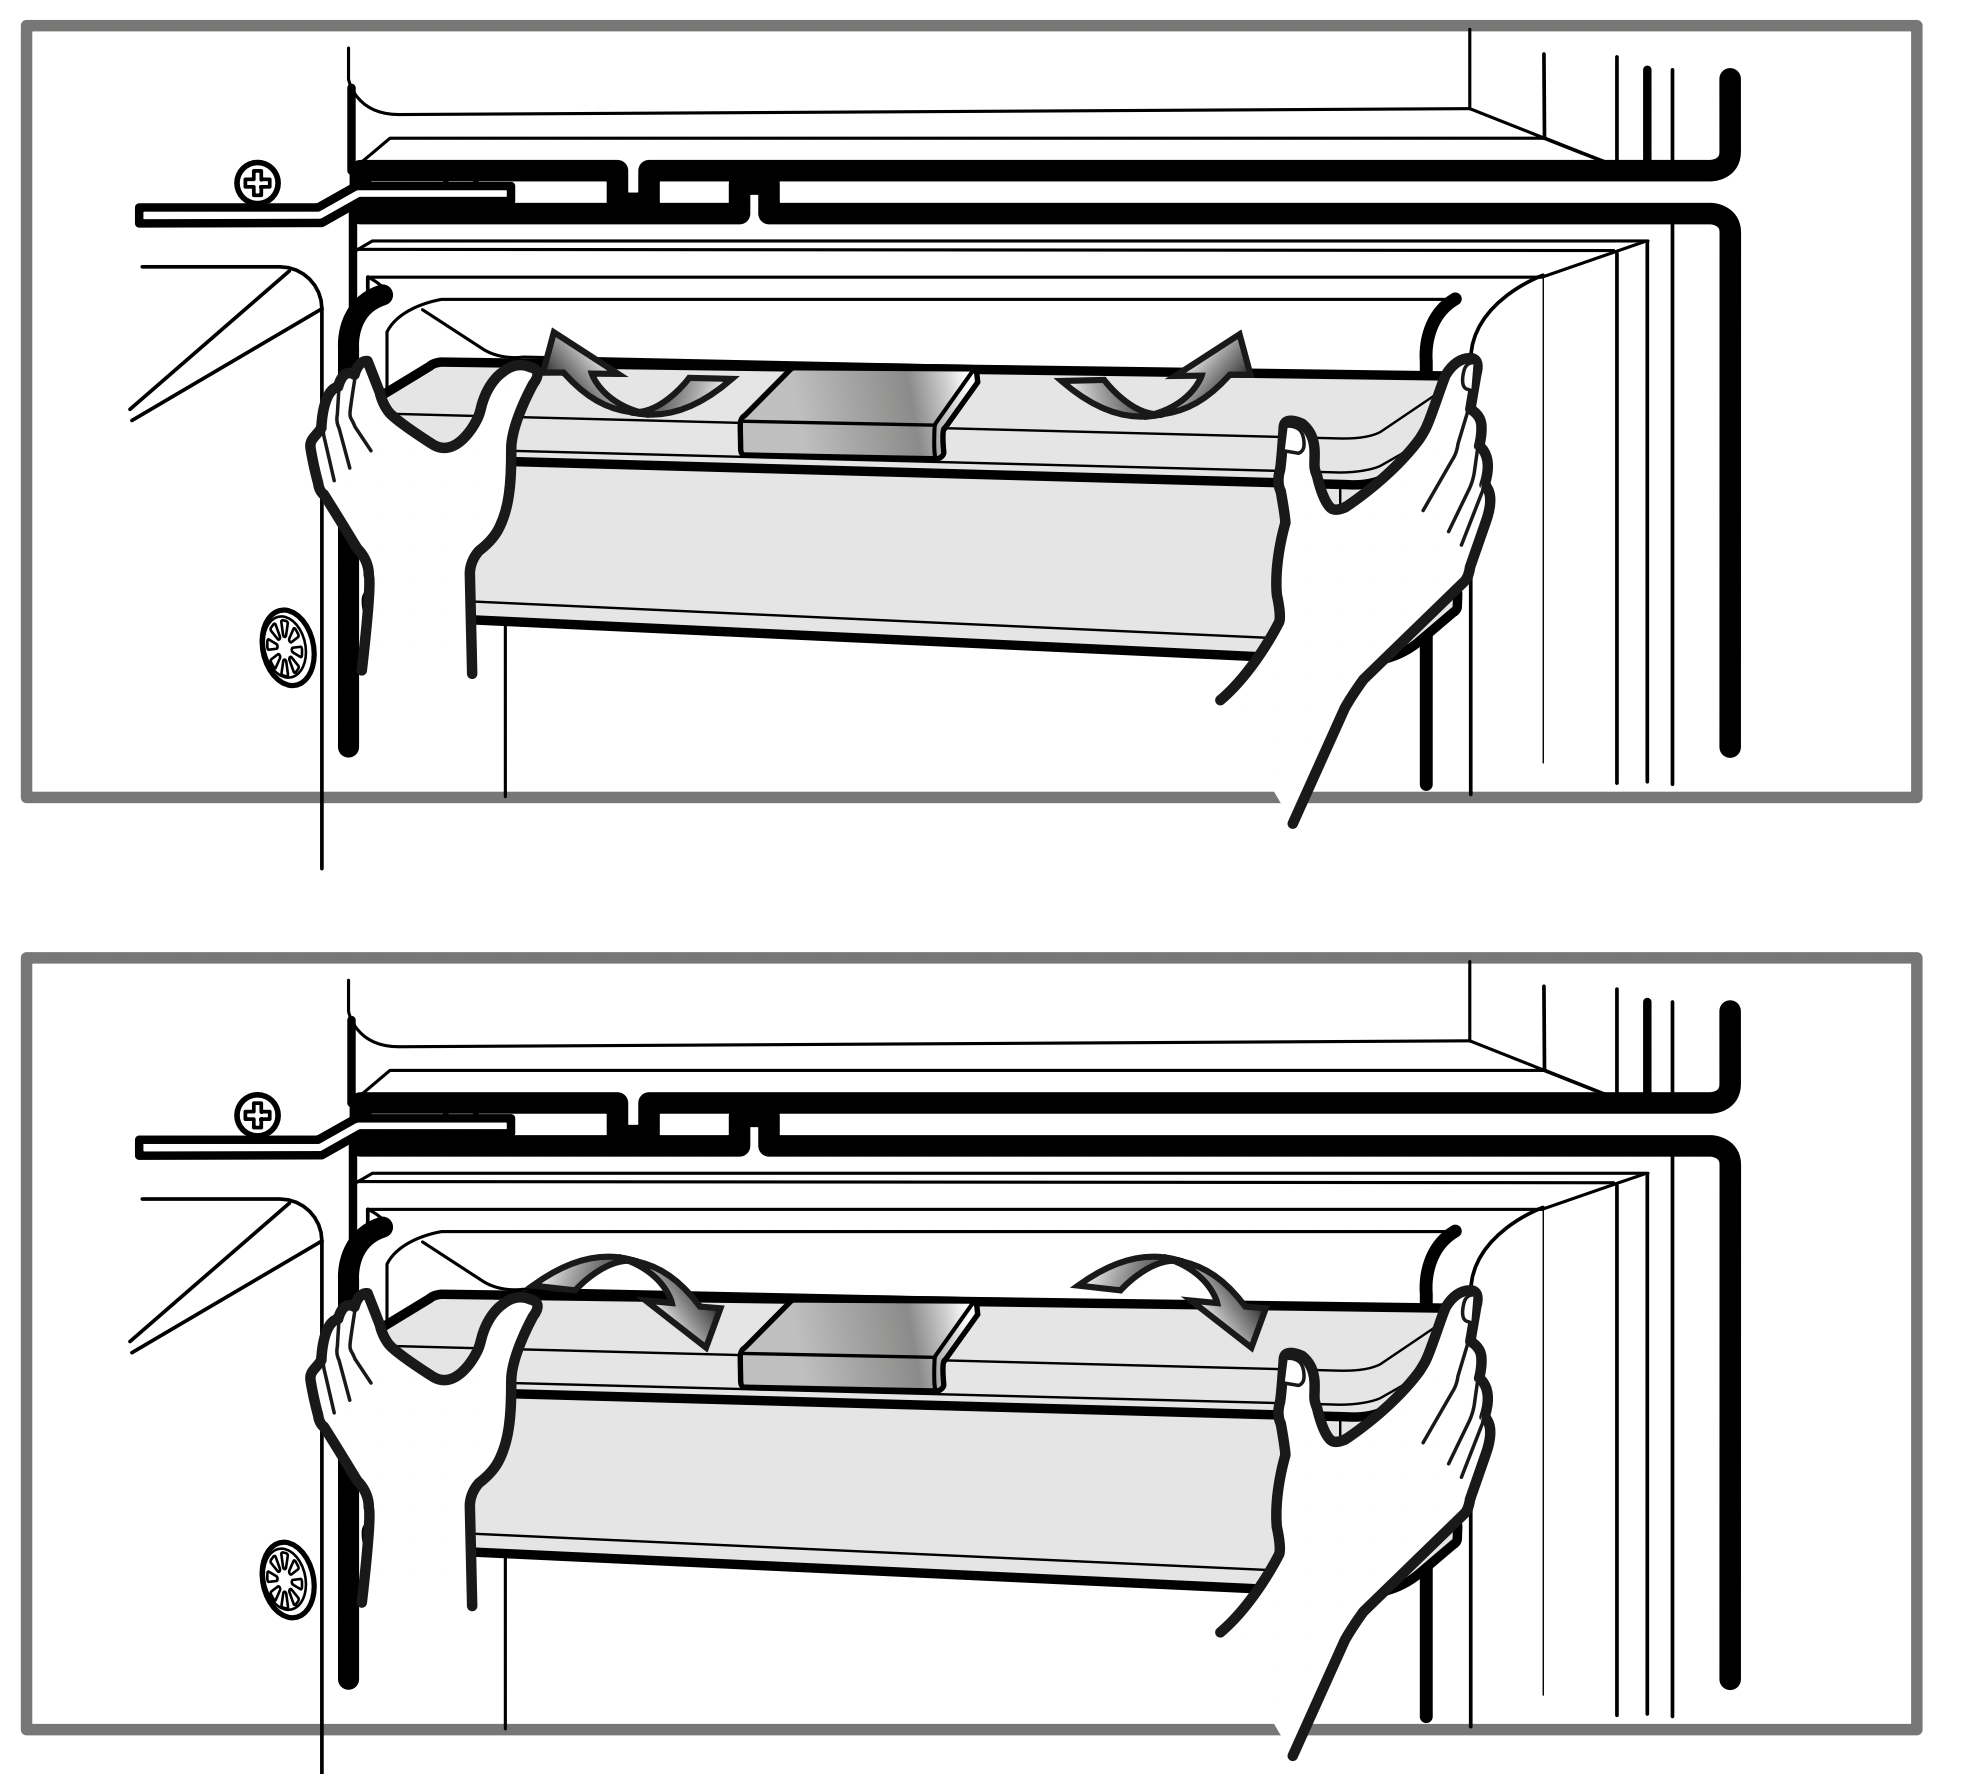
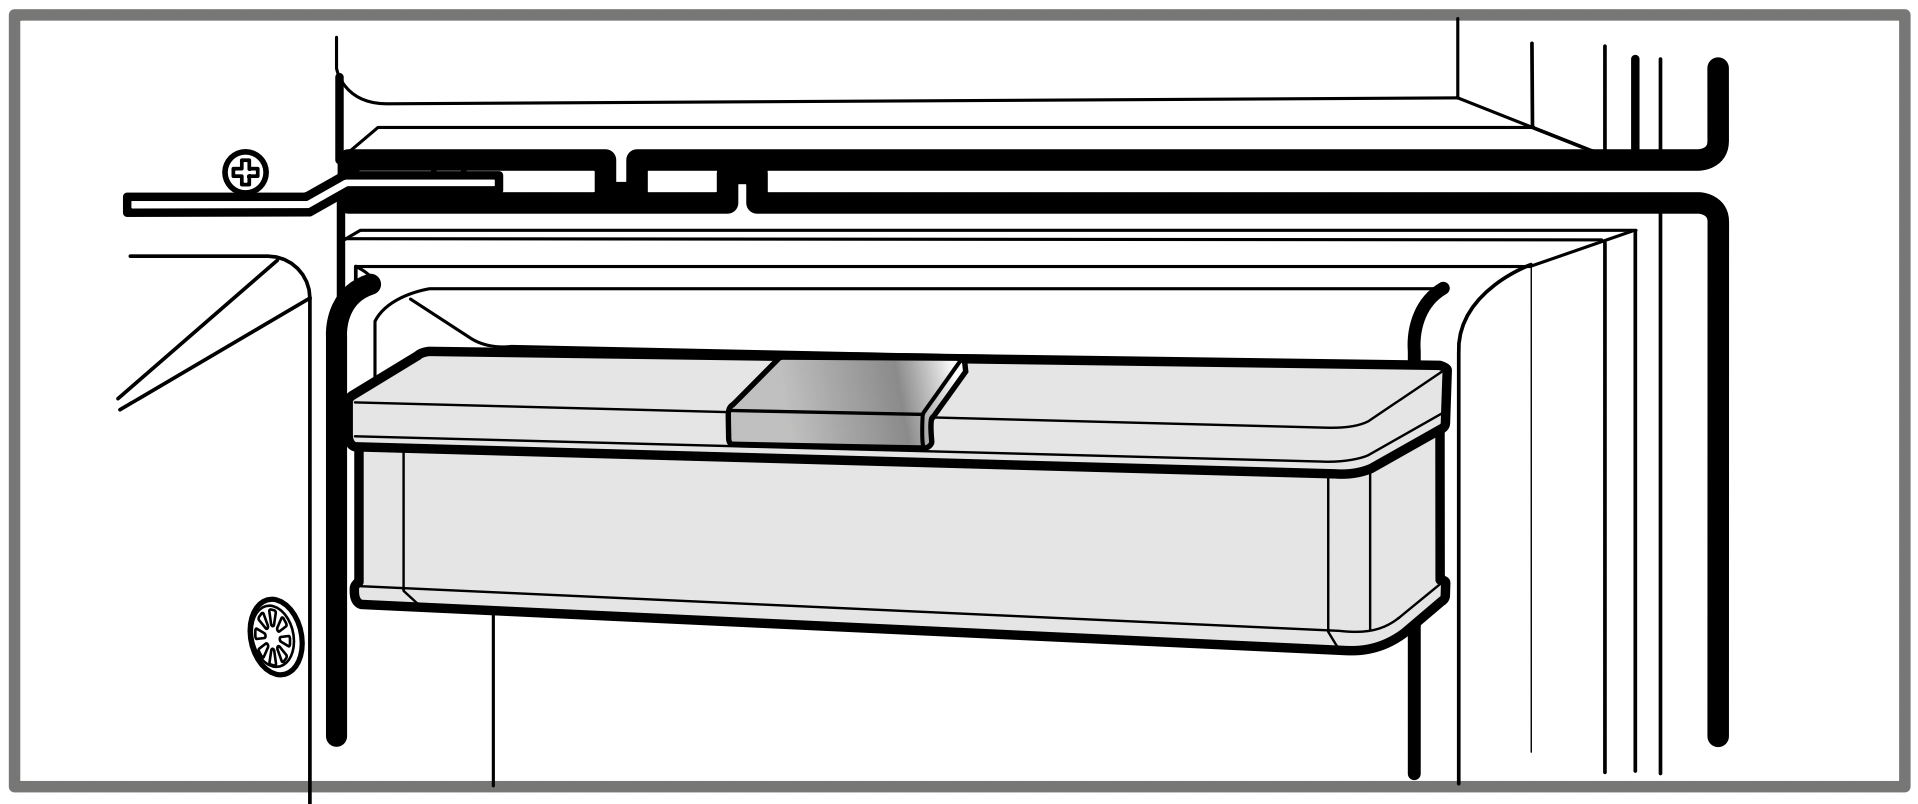
Water Tank
Putting the Water It is not necessary to remove the tank to fill it with water. (it could be filled like shows fig. 1 pulling the tank gate). NOTE: Before closing door, close the water cap to prevent water from spilling out. Do not use liquids containing sugar or carbonated drinks like soda
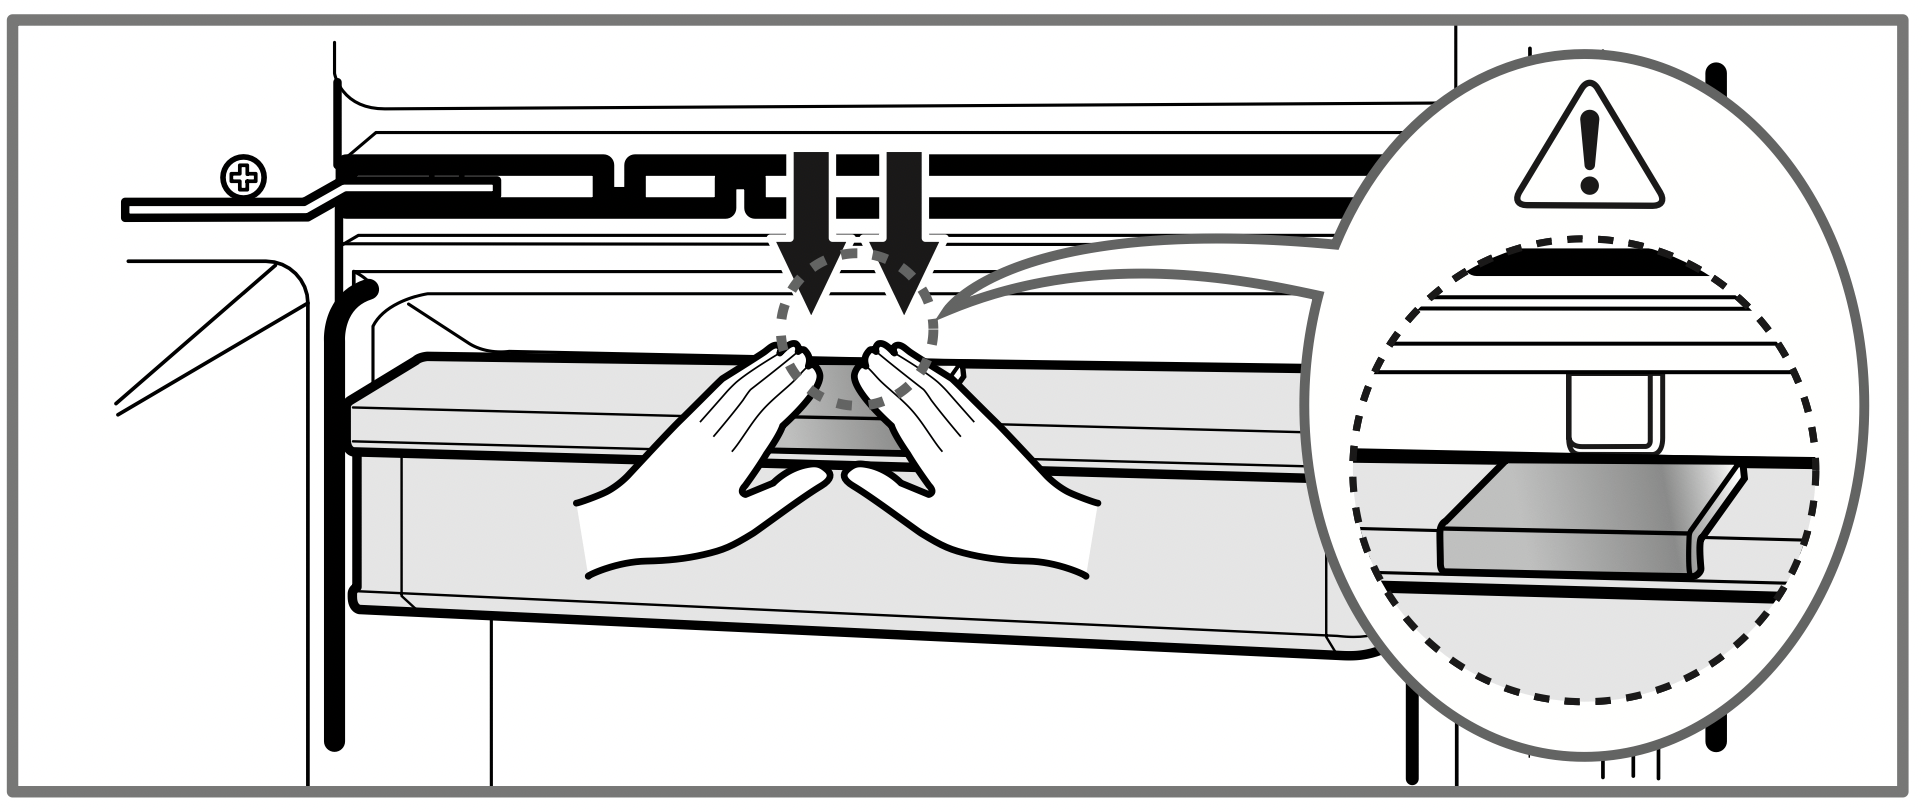
Disassembly Lift the water tank, gripping it from the sides then from the bottom of the tank. NOTE: When removing the Water Tank, dispense all the water from the dispenser first.
Assembly Refit the water tank by aligning it with the basket and slowly lowering it into the correct position, ensuring that the valve is pushed down snugly into the outlet hole of the door.
Cleaning the Water Tank
Remove the water tank as per the Disassembly instructions then remove the tank cover.
Clean the inside and outside of the water tank with diswashing detergent and rinse throughly under warm running water. Dry the water with a cloth.
Clean the inside and outside of the cap with diswashing detergent and rinse throughly under warm running water. Dry the water with a cloth.
Caution
Use lukewarm water when cleaning.
Do not use anything other than water.
TROUBLESHOOTING
SERVICE CALLS CAN OFTEN BE AVOIDED!
IF YOU FEEL YOUR REFRIGERATOR IS NOT OPERATING PROPERLY, CHECK THESE POSSIBLE CAUSES FIRST :
PROBLEM
POSSIBLE CAUSES
REFRIGERATOR DOES NOT OPERATE
Has a house fuse blown or circuit breaker tripped?
Has the power cord plug been removed or loosened from the electrical wall outlet?
REFRIGERATOR OR FREEZER COMPARTMENT TEMPERATURE TOO WARM
Temperature control not set on proper position.
Appliance is placed close to wall or heat source.
Warm weather-frequent door openings.
Door left open for a long time.
Large amount of foods are kept in the refrigerator.
ABNORMAL NOISE(S)
Refrigerator is installed in a weak or uneven place, or leveling the front feet may be necessary.
Unnecessary objects placed in or on the rear side of the refrigerator.
REFRIGERATOR HAS ODOR
Foods with strong odors should be tightly covered or wrapped.
Interior or deodorizer needs cleaning.
DEW FORMS ON THE CABINET OR INSIDE SURFACE
Not unusual during periods of high humidity.
Door may have been left ajar.
NO INTERIOR LIGHTING
This unit uses led lighting. It cannot be serviced or replaced by the owner. Call the manufacturer for service options.