Loading ...
Loading ...
Loading ...
70
30
40
50
60
80
90
100
110
20
10
120
EN 08
3. Use of the Oven
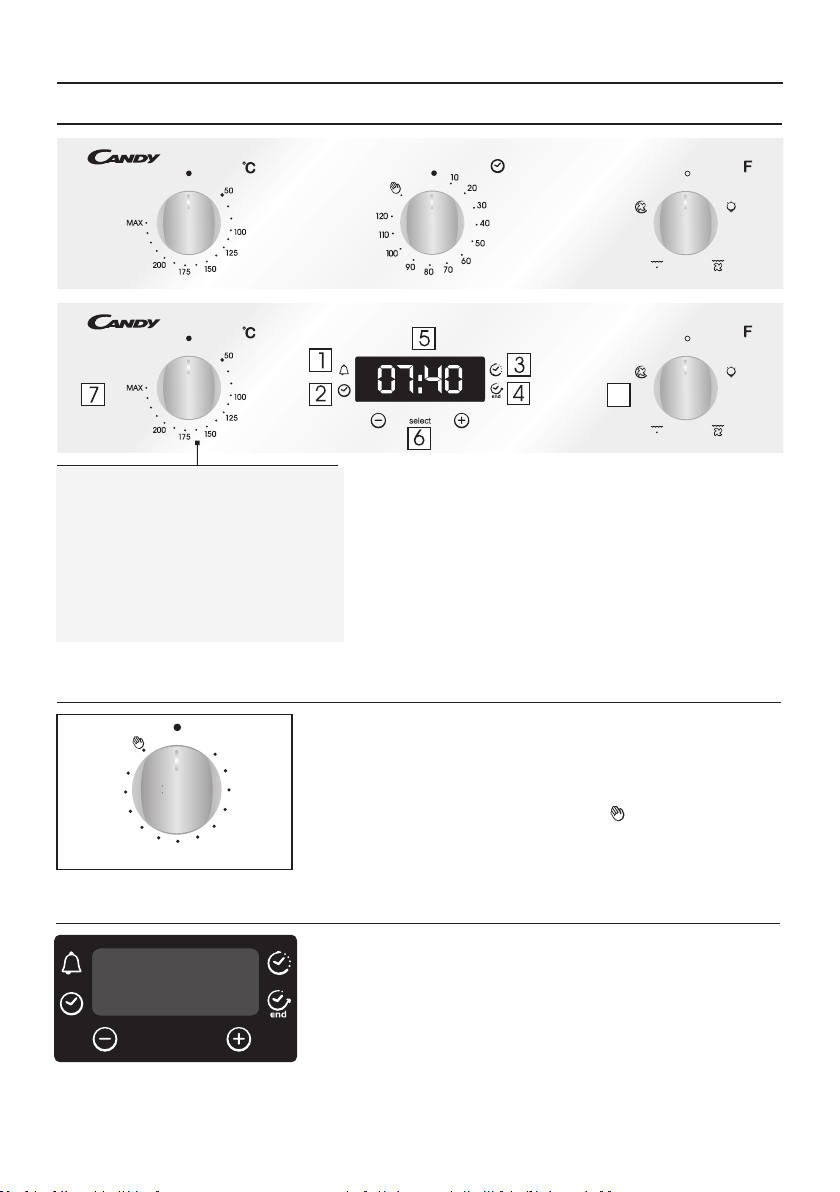
3.1 Display description
1. Minute minder
2. Clock setting
3. Cooking time
4. End of cooking
5. Temperature or clock display
6. LCD display adjustment controls
7. Thermostat selector knob
8. Function selector knob
8
WARNING!
The first operation to carry out after installation, or after a
power cut, is to set the time of day (a power cut has occured
if the display is flashing 12:00).
200°-> The temperature LED “°” flashes until the displayed
temperature is reached.
HOT -> When a programme finishes, if the oven is still hot,
the display shows "HOT", alternating with the time, even if
the knobs are positioned to OFF.
3.2 Using the end of cooking timer
This control enables to set the desired cooking time (max. 120 min.)
the oven will automatically switch off at the end of the set time.
The timer will count down from the set time return to the O position
and switch off automatically.
For normal use of oven set the timer to the position.
To set the oven ensure the timer is not on the O position.
WARNING: the first operation to carry out after the oven has been
installed or following the interruption of power supply (this is
recognizable the display pulsating and showing 12:00 ) is setting
the correct time. This is achieved as follows.
•Push the central button 4 times
•Set time with "-" "+" buttons.
•Release all buttons.
ATTENTION: The oven will only operate providing the clock is set.
00:00
select
3.3 Setting the correct time
Loading ...
Loading ...
Loading ...