Loading ...
J
x4
K
x4
L
x4
M
x4
M3
M4
M5
M6
If required
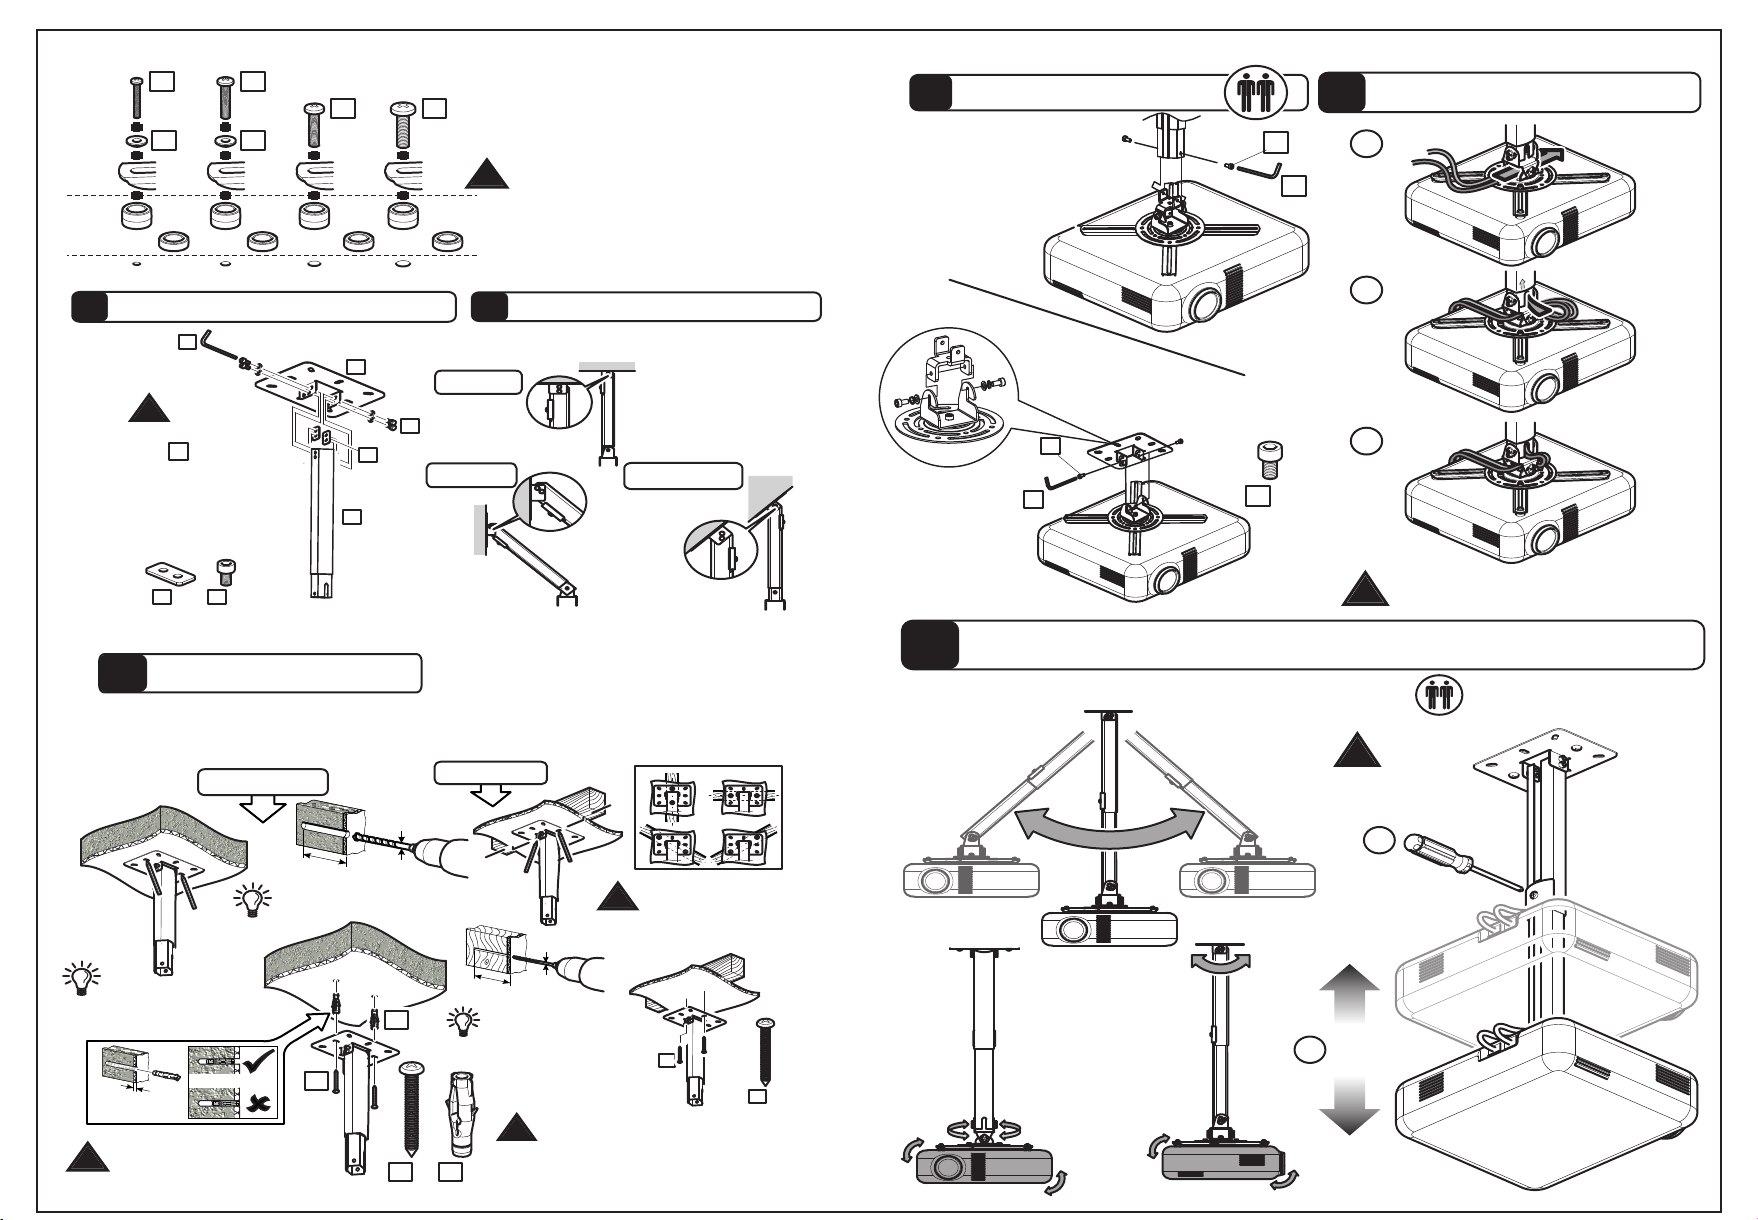
Attach the bracket to your Projector
using suitable screw reducer and
spacer combinations
I
x4
I
x4
and / or and / or and / or and / or
After completing step 3 you will
have fittings left over please keep
for future reference
!
4
Attach Ceiling Brack et to Extendable Post
D
x2
F
x4
B
1
F
C
A
1
D
If you have chosen not to use the
extendable post A
1
, please ignore
stages 4 and 5.
You will then fit the ceiling bracket as
per stage 6.
!
5
Different Locations
Please see below for examples of dif ferent
Projector mounting locations
Ceiling
Wall
Sloped Ceiling
70mm (
23/4
")
Ø10mm
(25/64")
B
A
Remove dust from hole
Solid Wall
Lubricate screw
thread with soap
Fitting the Ceiling Brack
DO NOT over tighten
screws. Tighten screws
by hand only
!
8mm (5/16")
MAX
6
Please note, the fitting process is exactly the same
if you fit to ceiling, wall or sloping ceiling.
A
x2
B
x2
!
Ø3mm
(1/8")
55mm
(2
1/8
")
A
Lubricate screw
thread with soap
DO NOT over tighten screws.
Tighten screws by hand only
!
Wood Stud
A
x2
Attach the Projector
7
With extendable post
F
C
8
Cable Management
Ensure cables don’t restrict movement
!
i
ii
iii
9
Optional
Tilt and turn
Height adjustable
i
ii
Before loosening, make sure
the projector is fully supported
!
F
x4
C
F
Ensure bracket is in the
centre of the wood stud