Loading ...
Loading ...
Loading ...
8
INSTALLATION AND OPERATING INSTRUCTIONS
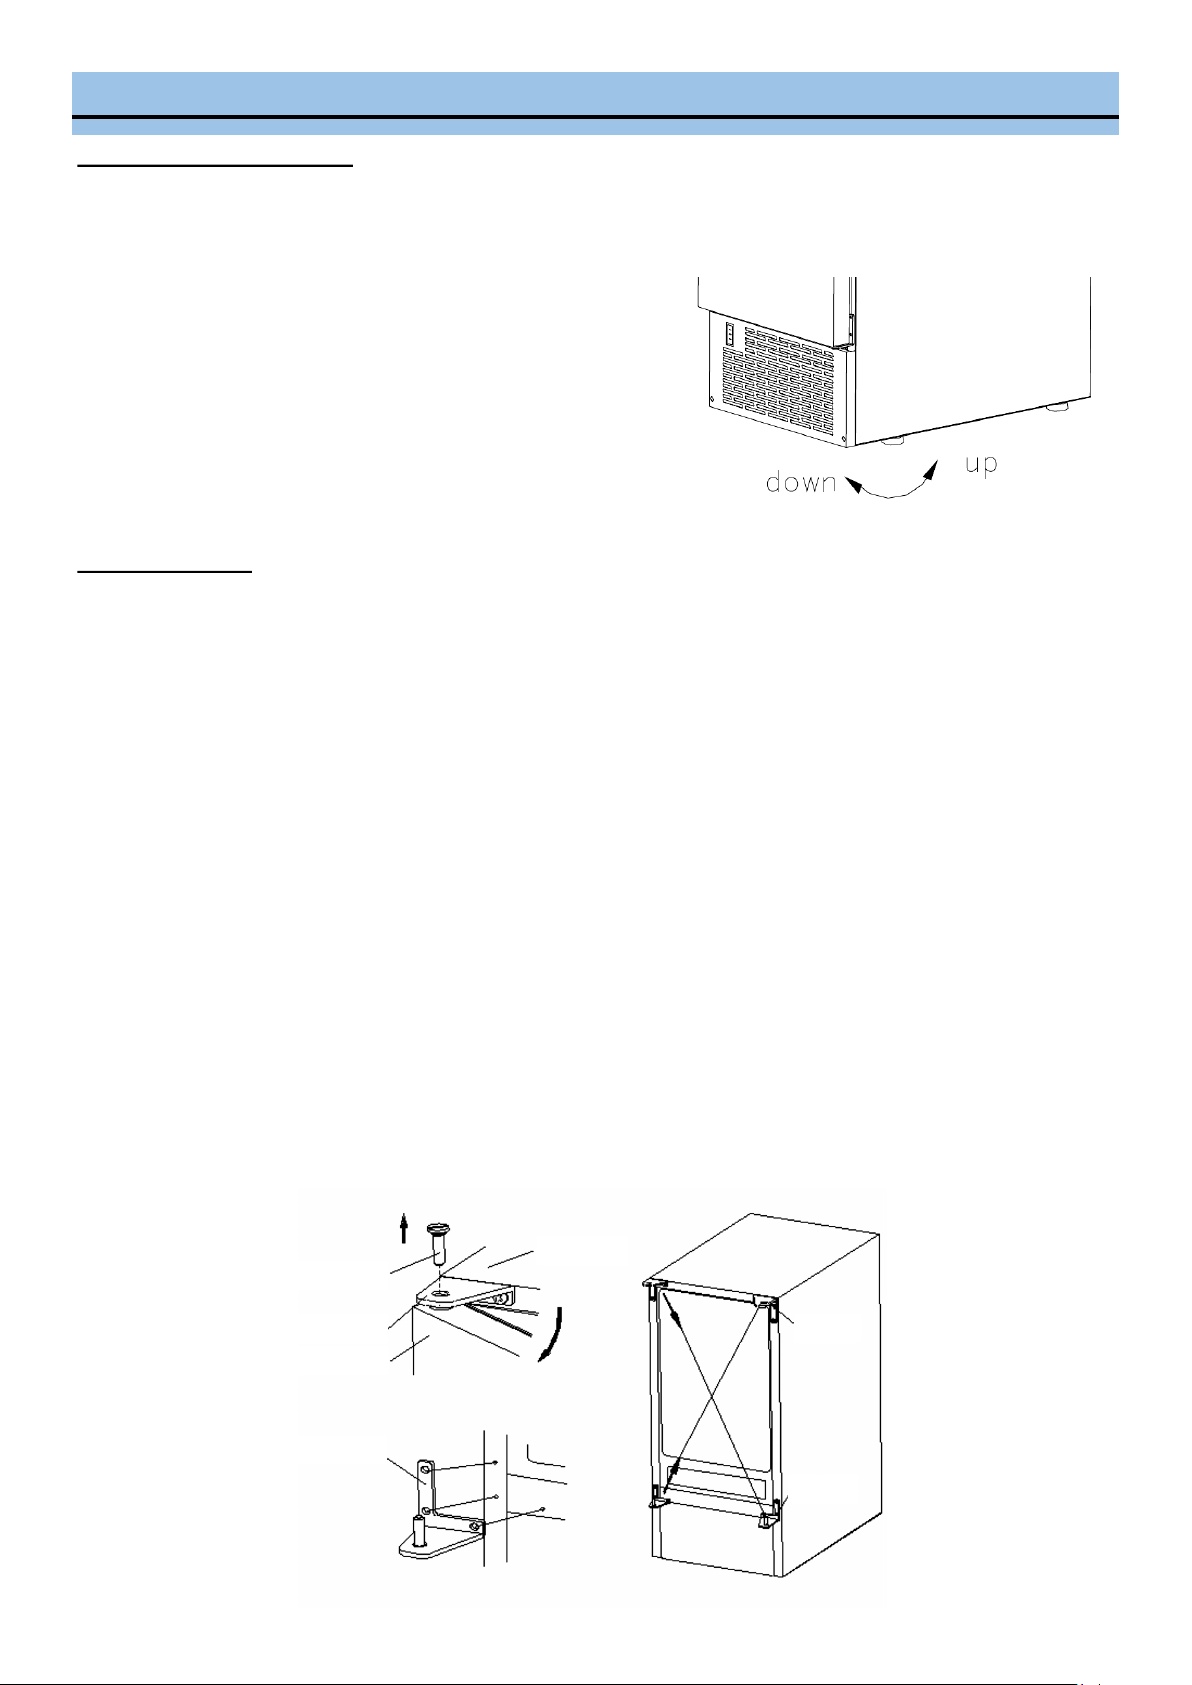
LEVELLING THE ICE MAKER
It is important for the ice maker to be leveled in order to work properly. It can be raised or lowered by turning the
four feet on the bottom of the machine. We recommend using a carpenter’s level to check the machine.
1. Place a carpenter’s level on top of the product to see if the ice
maker is level from front to back and side to side.
2. Adjust the height of the feet as follows:
• Turn the leveling feet to the right to lower that side of the ice
maker
• Turn the leveling feet to the left to raise that side of the ice
maker.
DOOR REVERSAL
This appliance has the capability of the door opening from either the left or right side. The appliance is delivered to
you with the door opening from the left side. Should you desire to reverse the opening direction, please follow the
following reversal instructions
Tools needed: Flathead screwdriver, Phillips screwdriver
IMPORTANT: Before you begin, unplug the ice maker or disconnect power
To remove door from hinges:
1. Using a flathead screwdriver, separate the hinge axis from hinge 1.
2. Open the door about 20°. Lift the door off the bottom hinge 2 and set the door aside.
To replace door on hinges:
1. Using a flathead screwdriver, remove the plug buttons from the screw holes opposite the door hinges, top and
bottom.
2. Replace the hinge axis on door hinge 1 and tighten it firmly. Remove door hinge 1 and place it on the opposite
bottom side.
3. Remove door hinge 2, place on the opposite top side. Separate the axis from hinge 2 and set it aside.
4. Align the door on the bottom hinge 1 and replace axis on the hinge 2. Tighten it firmly.
5. Push the plug buttons into the original screw holes.
Hinge Axis
Hinge 1
Door
Hinge 2
Cabinet
Hinge 2
Hinge 1
Loading ...
Loading ...
Loading ...