Loading ...
Loading ...
Loading ...
12
5
PREPARE THE WINDOW AND INSTALL
THE CASE (continues)
Cut the foam top window gasket to the window
width.
Stuff the foam
between the glass
and the window
to prevent air and
insects from getting
into the room.
NOTE: If the gasket supplied does not fit your
window, obtain appropriate material locally to
provide a proper installation seal.
H
CAUTION:
7RSUHYHQWEURNHQJODVV
or damage to windows,
RQYLQ\ORURWKHUVLPLODUO\
constructed windows,
attach the window
ORFNLQJEUDFNHWWRWKH
window side jamb.
Attach the window locking
bracket with one Type C
screw.
This unit contains two
window locking brackets.
I
J
Wood
Vinyl
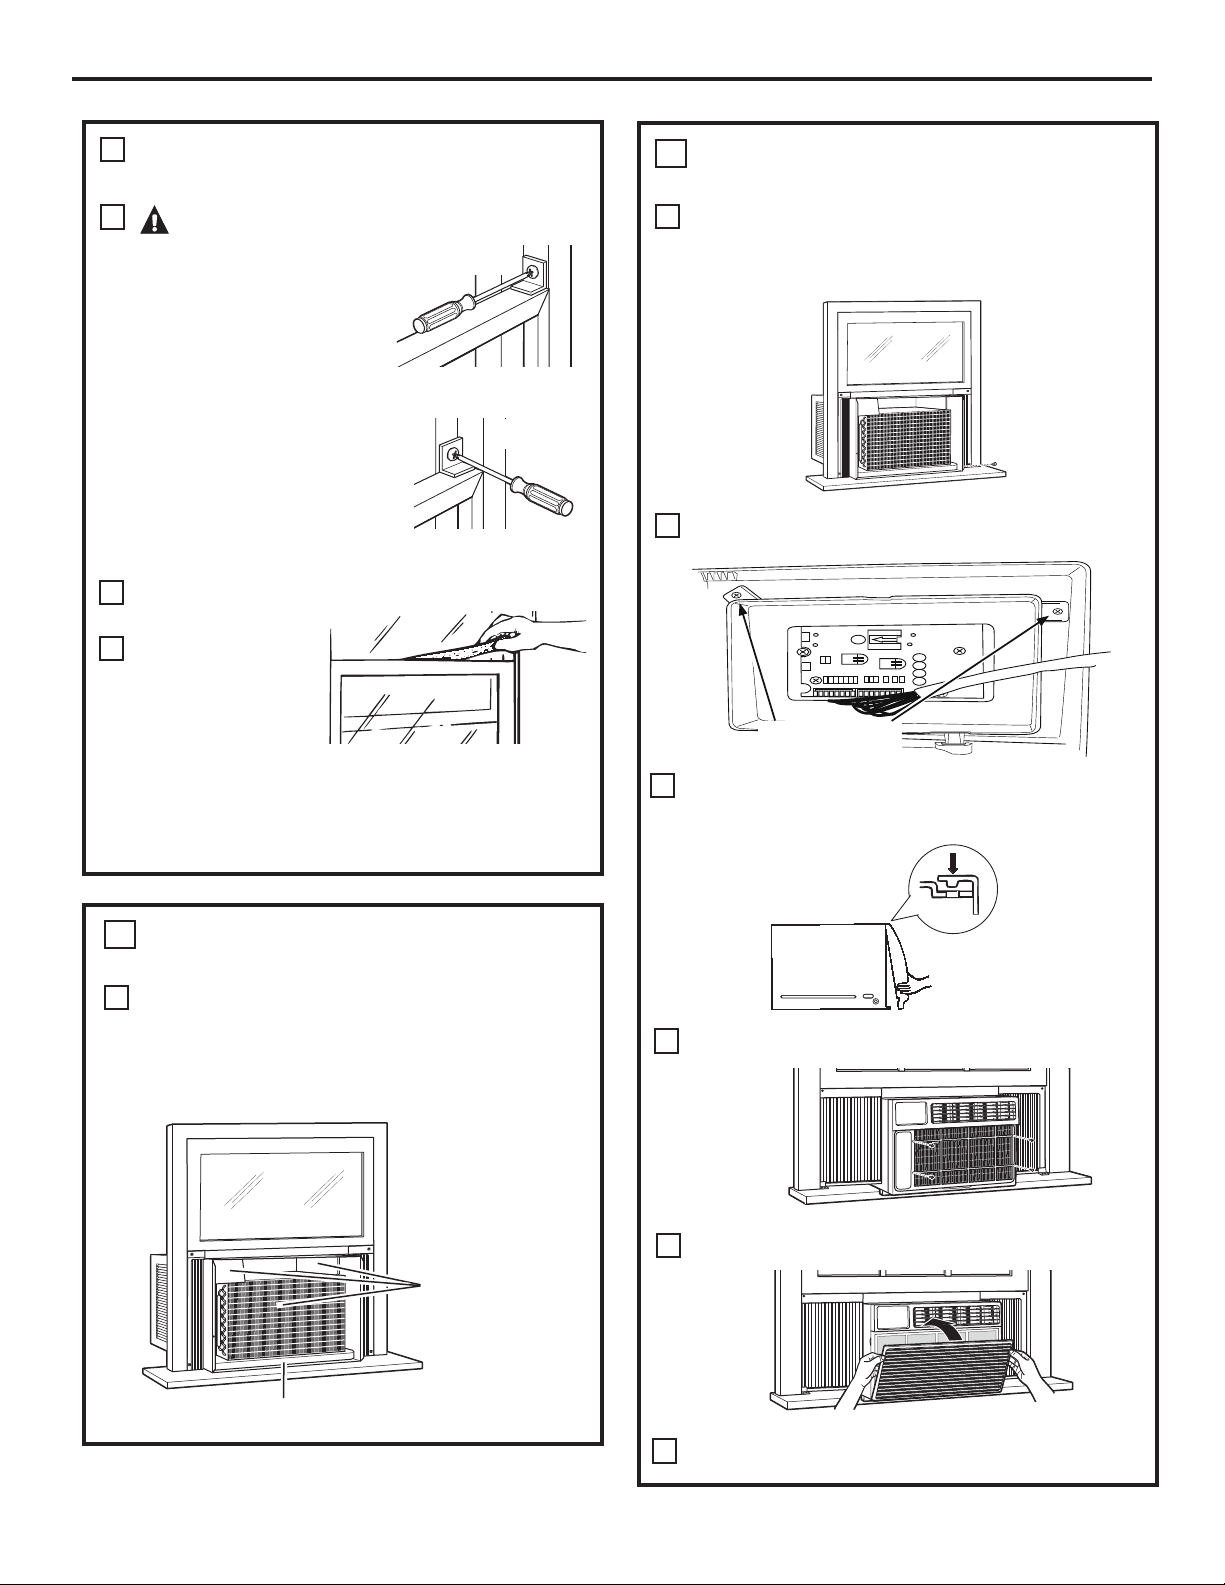
INSTALL THE AIR CONDITIONER
IN THE CASE (continues)
Replace the 1 screw removed earlier in the side of
the case.
IMPORTANT: THE GROUND SCREW MUST BE
REINSTALLED TO ENSURE PROPER GOUND.
Reinstall the control to the panel housing by
replacing the 2 screws you removed earlier.
Attach the front grille to the case by inserting the
tabs on the grille into the slots on the front top of
the case. Push the grille in.
Replace the screws.
Install the filter and the front grille.
Plug in the air conditioner.
6
B
C
INSTALL THE AIR CONDITIONER
IN THE CASE
Slide the air conditioner into the case by
the base pan. Do not push on the controls,
styrofoam air discharge housing or the finned
coils. Make sure the air conditioner is firmly
seated.
6
A
Do not press on
WKHVHDUHDV³
damage to the unit
may result
Base Pan
D
E
F
Installation Instructions
G
Remove Screws
Install Screws
Loading ...
Loading ...
Loading ...