Loading ...
Loading ...
3
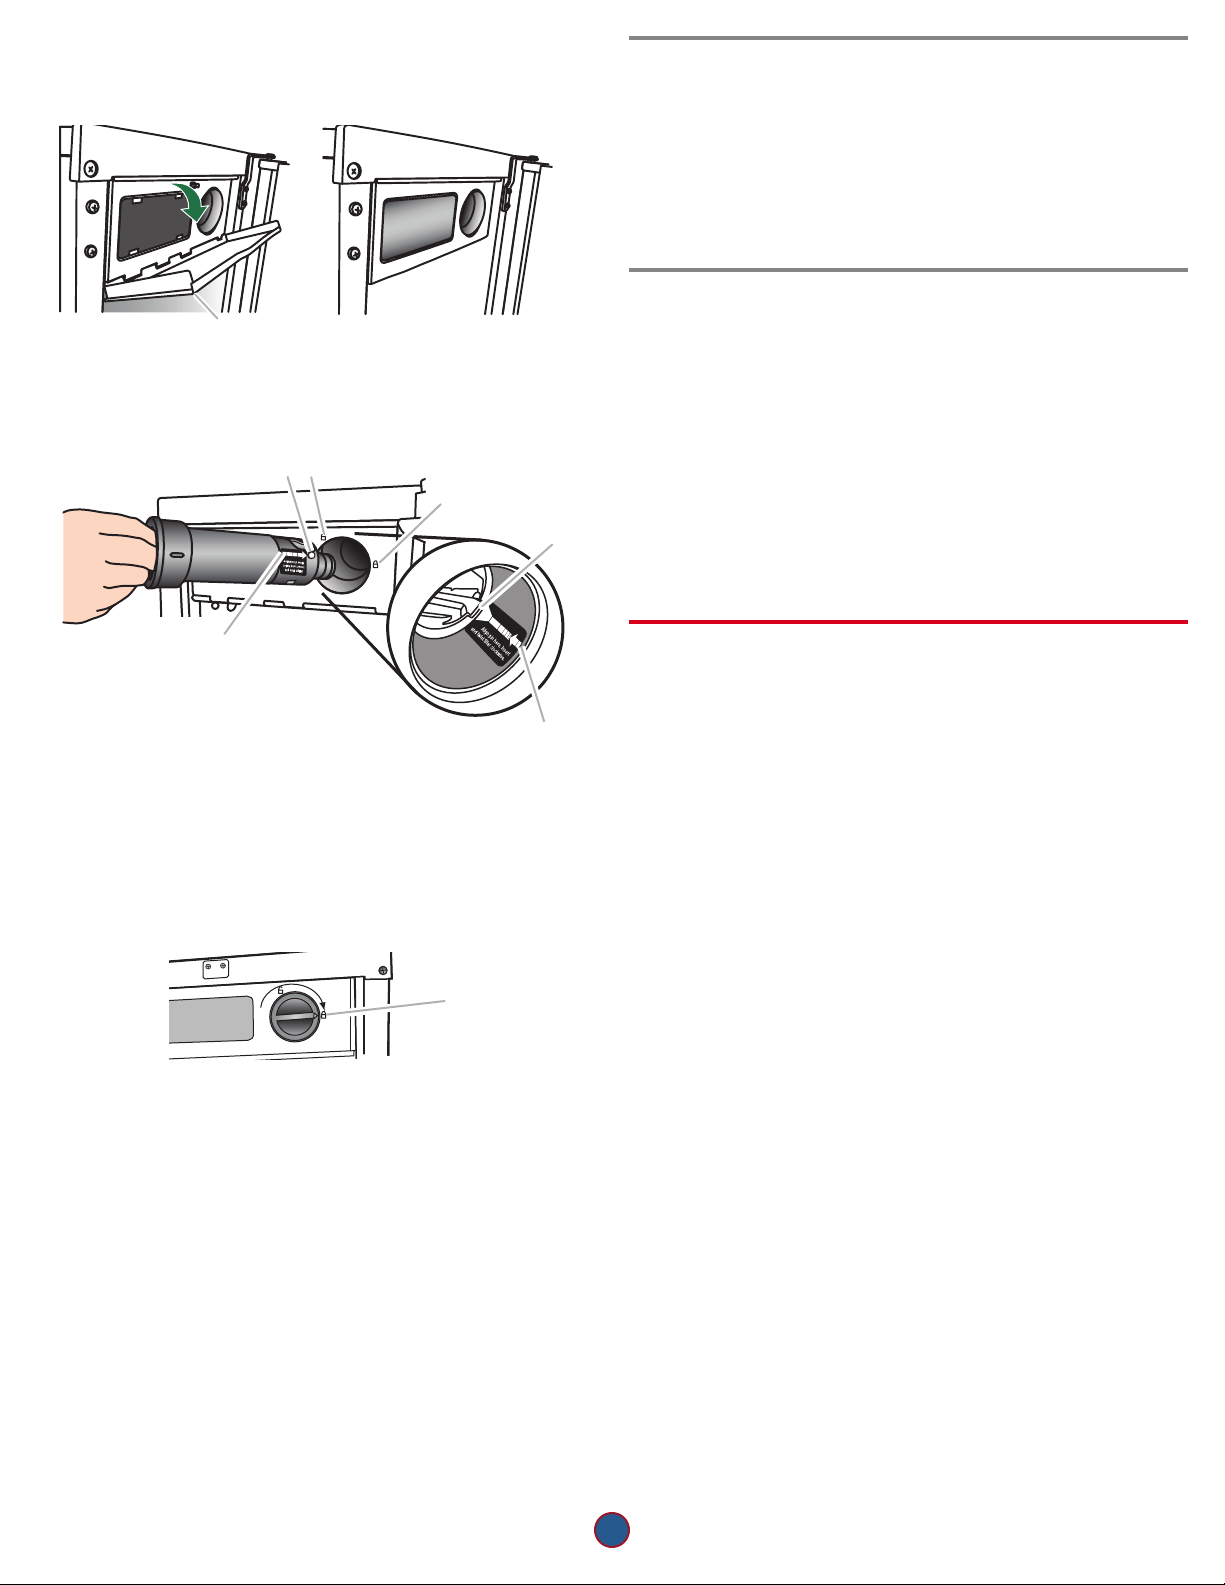
3. The water lter compartment is located in the right-hand side of
the ice maker controls. For 15" (38.1 cm) models, push in on the
door to release the latch, and then lower the door.
4. Using the arrow pointing to the alignment pin on the side of the
lter and the arrow inside the control housing, align the alignment
pin with the cutout notch and insert the lter into the housing.
5. Turn the lter clockwise until it locks into the housing. Ensure
that the alignment arrow on the lter head aligns with the locked
symbol on the control box housing.
NOTE: If the lter is not correctly locked into the housing, the ice
maker will not produce ice.
6. For 15" (38.1 cm) models, push the control box door closed until
the latch snaps closed.
The Water Filter Status Light
The water lter status lights will help you know when to change your
water lter.
■ The “Order Filter” status light will be illuminated when it is time to
order a replacement lter.
■ The “Replace Filter” status light will be illuminated when it is time
to replace the lter.
■ Replacing the disposable water lter with a new lter will
automatically reset the lter status tracking feature. See “Using
the Controls.”
Replace the Water Filter
To purchase a replacement water lter, see “Accessories.”
Replace the disposable water lter when indicated on the water
lter status display or at least every 9 months. If the ice making rate
decreases before the Replace Filter light illuminates, then replace the
lter.
1. Locate the water lter compartment in the right-hand side of the
control housing. See Step 3 in the “Install Water Filter” section.
2. Turn the water lter counterclockwise (to the left), and pull it
straight out of the compartment.
NOTE: There may be some water in the lter. Some spilling may
occur.
3. Install the replacement water lter by following steps 2 through 5
in the “Install the Water Filter” section.
Normal Sounds
Your new ice maker may make sounds that are not familiar to you.
Because the sounds are new to you, you might be concerned about
them. Most of the new sounds are normal. Hard surfaces such as
oors, walls and cabinets can make the sounds seem louder than
they actually are. The following describes the kinds of sounds that
might be new to you and what may be making them.
■ You will hear a buzzing sound when the water valve opens to ll
the water pan for each cycle.
■ Rattling noises may come from the ow of the refrigerant or the
water line. Items stored on top of the ice maker can also make
noises.
■ The high-efciency compressor may make a pulsating or high
pitched sound.
■ Water running over the evaporator plate may make a splashing
sound.
■ Water running from the evaporator plate to the water pan may
make a splashing sound.
■ As each cycle ends, you may hear a gurgling sound due to the
refrigerant owing in your ice maker.
■ You may hear air being forced over the condenser by the
condenser fan.
■ During the harvest cycle, you may hear a “thud” when the ice
sheet slides from the evaporator onto the cutter grid.
■ When you rst start the ice maker, you may hear water running
continuously. The ice maker is programmed to run a rinse cycle
before it begins to make ice.
■ If the ice maker is connected to a water supply pressure in
excess of 60 psi, you may hear a loud sound during water lling
associated with the ow of water through the inlet valve. Call
a licensed, qualied plumber to determine the best method to
reduce the supply water pressure (50 psi is recommended).
A
15" (38.1 cm) models
18" (45.7 cm) models
A. Door
A
C
B
D
E
F
A. Alignment pin
B. Unlocked symbol
C. Locked symbol
D. Cutout notch inside control housing
E. Arrow pointing to cutout notch
F. Arrow pointing to alignment pin
A
A. Alignment arrow aligned with locked symbol
Loading ...
Loading ...
Loading ...