
Write the model and serial
numbers here:
Model # _________________
Serial # _________________
You can find them on a label when
the door is open.
GE is a trademark of the General Electric Company. Manufactured under trademark license.
ESPAÑOL
Para consultar una version en
español de este manual de
instrucciones, visite nuestro sitio de
internet GEAppliances.com.
OWNER’S MANUAL
MICROWAVE OVEN
49-40723-2 12-16 GEA
CVM1750
SAFETY INFORMATION .........3
USING THE MICROWAVE
Features ..............................6
Controls ..............................7
Microwaving Features ..................8
Time and Auto Features ................9
Sensor Features ...................... 11
Other Features .......................14
CARE AND CLEANING
Oven ................................17
Exhaust Feature ..................... 20
TROUBLESHOOTING ............21
WARRANTY ..................... 26
ACCESSORIES ...................27
CONSUMER SUPPORT ..........28

2 49-40723-2
THANK YOU FOR MAKING GE APPLIANCES A PART OF YOUR HOME.
Whether you grew up with GE Appliances, or this is your first, we’re happy to have you in the family.
We take pride in the craftsmanship, innovation and design that goes into every GE Appliances
product, and we think you will too. Among other things, registration of your appliance ensures that we
can deliver important product information and warranty details when you need them.
Register your GE appliance now online. Helpful websites and phone numbers are available in the
Consumer Support section of this Owner’s Manual. You may also mail in the pre-printed registration
card included in the packing material.

49-40723-2 3
READ AND SAVE THESE INSTRUCTIONS
IMPORTANT SAFETY INFORMATION
READ ALL INSTRUCTIONS BEFORE USING THE APPLIANCE
SAFETY INFORMATION
WARNING
To reduce the risk of burns, electric shock, fire, injury to persons, or exposure to
excessive microwave energy:
When using electrical appliances, basic safety precautions should be followed, including the following:
Ŷ 5HDGDOOLQVWUXFWLRQVEHIRUHXVLQJWKLVDSSOLDQFH
Ŷ 5HDGDQGIROORZWKHVSHFLILFSUHFDXWLRQVLQWKH
PRECAUTIONS TO AVOID POSSIBLE EXPOSURE
TO EXCESSIVE MICROWAVE ENERGY section on
page 4.
Ŷ 8VHWKLVDSSOLDQFHRQO\IRULWVLQWHQGHGXVHDV
described in this manual. Do not use corrosive
chemicals or vapors in this appliance. This oven is
specifically designed to heat, dry or cook food, and is
not intended for laboratory or industrial use.
Ŷ 7KLVDSSOLDQFHPXVWRQO\EHVHUYLFHGE\TXDOLILHG
service personnel. Contact nearest authorized
service facility for examination, repair or adjustment.
INSTALLATION
Ŷ ,QVWDOORUORFDWHWKLVDSSOLDQFHRQO\LQDFFRUGDQFH
with the provided installation instructions.
Ŷ This appliance must be grounded. Connect only
to properly grounded outlet. See “GROUNDING
INSTRUCTIONS” found on page 5.
Ŷ 7KLVPLFURZDYHRYHQLV8/OLVWHGIRULQVWDOODWLRQRYHU
both gas (less than 60,000BTU) and electric ranges.
Ŷ 7KLVRYHUWKHUDQJHRYHQLVGHVLJQHGIRUXVHRYHU
UDQJHVQRZLGHUWKDQƎ,WPD\EHLQVWDOOHGRYHU
ERWKJDVDQGHOHFWULFFRRNLQJHTXLSPHQW
Ŷ Do not operate this appliance if it has a damaged
power cord or plug, if it is not working properly, or if it
has been damaged or dropped.
Ŷ .HHSFRUGDZD\IURPKHDWHGVXUIDFHV
Ŷ Do not let cord hang over the edge of the table or
counter
Ŷ 'RQRWLPPHUVHFRUGRUSOXJLQZDWHU
Ŷ 'RQRWFRYHURUEORFNDQ\RSHQLQJVRQWKH
appliance.
Ŷ 'RQRWVWRUHWKLVDSSOLDQFHRXWGRRUV'RQRWXVHWKLV
product near water—for example, in a wet basement,
near a swimming pool, near a sink or in similar
locations.
Ŷ 'RQRWPRXQWWKLVDSSOLDQFHRYHUDVLQN
TO REDUCE THE RISK OF FIRE IN THE CAVITY:
Ŷ Do not overcook food. Carefully attend appliance
when paper, plastic or other combustible materials
are placed inside the oven to facilitate cooking.
Ŷ 5HPRYHZLUHWZLVWWLHVDQGPHWDOKDQGOHVIURP
paper or plastic containers before placing them in
the oven.
Ŷ ,IPDWHULDOVLQVLGHWKHRYHQLJQLWHNHHSWKHRYHQ
door closed, turn the oven off and disconnect the
power cord or shut off power at the fuse or circuit
breaker panel.
Ŷ 'RQRWVWRUHDQ\PDWHULDOVLQWKLVRYHQZKHQQRWLQ
use. Do not leave paper products, cooking utensils
or food in the cavity when not in use. All racks
should be removed from oven when not in use.
Ŷ 'RQRWRSHUDWHWKHPLFURZDYHIHDWXUHZLWKRXWIRRGLQ
the oven.
Ŷ 'RQRWXVHWKH6HQVRU)HDWXUHVWZLFHLQVXFFHVVLRQ
on the same food portion. If food is undercooked
DIWHUWKHILUVWFRXQWGRZQXVH&22.%<7,0(IRU
additional cooking time.
TO REDUCE THE RISK OF BURNS:
Ŷ %HFDUHIXOZKHQRSHQLQJFRQWDLQHUVRIKRWIRRG8VH
pot holders and direct steam away from face and
hands.
Ŷ 9HQWSLHUFHRUVOLWFRQWDLQHUVSRXFKHVRUSODVWLF
bags to prevent build-up of pressure.
Ŷ %HFDUHIXOZKHQWRXFKLQJWKHWXUQWDEOHGRRUUDFNV
or walls of the oven which may become hot during
use.
Ŷ /LTXLGVDQGFHUWDLQIRRGVKHDWHGLQWKHPLFURZDYH
oven can present a risk of burn when removing
them from the microwave. The potential for a burn is
greater in young children, who should not be allowed
to remove hot items from the microwave.
4 49-40723-2
SAFETY INFORMATION
READ AND SAVE THESE INSTRUCTIONS
IMPORTANT SAFETY INFORMATION
READ ALL INSTRUCTIONS BEFORE USING THE APPLIANCE
WARNING
Continued
OPERATING
Ŷ $VZLWKDQ\DSSOLDQFHFORVHVXSHUYLVLRQLV
necessary when used by children.
Ŷ 'RQRWRSHUDWHWKHRYHQZLWKRXWWKHWXUQWDEOHLQ
place. The turntable must be unrestricted so it can
turn.
Ŷ 0DNHVXUHDOOFRRNZDUHXVHGLQ\RXUPLFURZDYH
oven is suitable for microwaving. Most glass
casseroles,cooking dishes, measuring cups, custard
cups, pottery or china dinnerware which does not
have metallic trim or glaze with a metallic sheen can
be used in compliance with cookware manufacturer’s
recommendations.
Ŷ 'RQRWVWRUHDQ\WKLQJGLUHFWO\RQWRSRIWKH
microwave oven surface when the microwave oven
is in operation.
Ŷ 6RPHSURGXFWVVXFKDVZKROHHJJVDQGVHDOHG
containers—for example, closed jars—are able to
explode and should not be heated in this oven.
Ŷ 'RQRWRYHUFRRNSRWDWRHV7KH\FRXOGGHK\GUDWHDQG
catch fire, causing damage to your oven.
Ŷ 'RQRWFRYHUDQ\SDUWRIWKHRYHQZLWKPHDOIRLO7KLV
will cause overheating of the oven.
Ŷ &RRNPHDWDQGSRXOWU\WKRURXJKO\²
PHDWWRDWOHDVWDQ,17(51$/WHPSHUDWXUHRI)
and poultry to at least an INTERNAL temperature
RI)&RRNLQJWRWKHVHWHPSHUDWXUHVXVXDOO\
protects against foodborne illness.
Ŷ 7KLVRYHQLVQRWDSSURYHGRUWHVWHGIRUPDULQHXVH
CLEANING
Ŷ .HHSWKHRYHQIUHHIURPJUHDVHEXLOGXS
Ŷ :KHQFOHDQLQJVXUIDFHVRIGRRUDQGRYHQWKDW
comes together on closing the door, use only mild,
nonabrasive soaps, or detergents applied with a
clean sponge or soft cloth. Rinse well.
SUPER HEATED WATER
Ŷ /LTXLGVVXFKDVZDWHUFRIIHHRUWHDDUHDEOHWR
be overheated beyond the boiling point without
appearing to be boiling. Visible bubbling or boiling
when the container is removed from the microwave
oven is not always present. THIS COULD RESULT
IN VERY HOT LIQUIDS SUDDENLY BOILING
OVER WHEN THE CONTAINER IS DISTURBED
OR A SPOON OR OTHER UTENSIL IS INSERTED
INTO THE LIQUID.
Ŷ 7RUHGXFHWKHULVNRILQMXU\WRSHUVRQV
'RQRWRYHUKHDWWKHOLTXLG
6WLUWKHOLTXLGERWKEHIRUHDQGKDOIZD\WKURXJK
heating it.
- Do not use straight-sided containers with narrow
necks.
- After heating, allow the container to stand in the
microwave oven for a short time before removing
the container.
- Use extreme care when inserting a spoon or other
utensil into the container.
NOTICE: PACEMAKERS
Most pacemakers are shielded from interference from electronic products, including microwaves. However,
patients with pacemakers may wish to consult their physicians if they have concerns.
STATE OF CALIFORNIA PROPOSITION 65 WARNINGS
WARNING
This product contains one or more chemicals known to the State of California to cause cancer,
and birth defects or other reproductive harm.
49-40723-2 5
READ AND SAVE THESE INSTRUCTIONS
SAFETY INFORMATION
IMPORTANT SAFETY INFORMATION
READ ALL INSTRUCTIONS BEFORE USING THE APPLIANCE
PRECAUTIONS TO AVOID POSSIBLE EXPOSURE
TO EXCESSIVE MICROWAVE ENERGY
(a) Do Not Attempt to operate this oven with the
door open since open-door operation can result
in harmful exposure to microwave energy. It is
important not to defeat or tamper with the safety
interlocks.
(b) Do Not Place any object between the oven front
face and the door or allow soil or cleaner residue to
accumulate on sealing surfaces.
(c) Do Not Operate the oven if it is damaged.
It is particularly important that the oven door close
properly and that there is no damage to the:
(1) door (bent),
(2) hinges and latches (broken or loosened),
(3) door seals and sealing surfaces.
(d) The Oven Should Not be adjusted or repaired by
DQ\RQHH[FHSWSURSHUO\TXDOLILHGVHUYLFHSHUVRQQHO
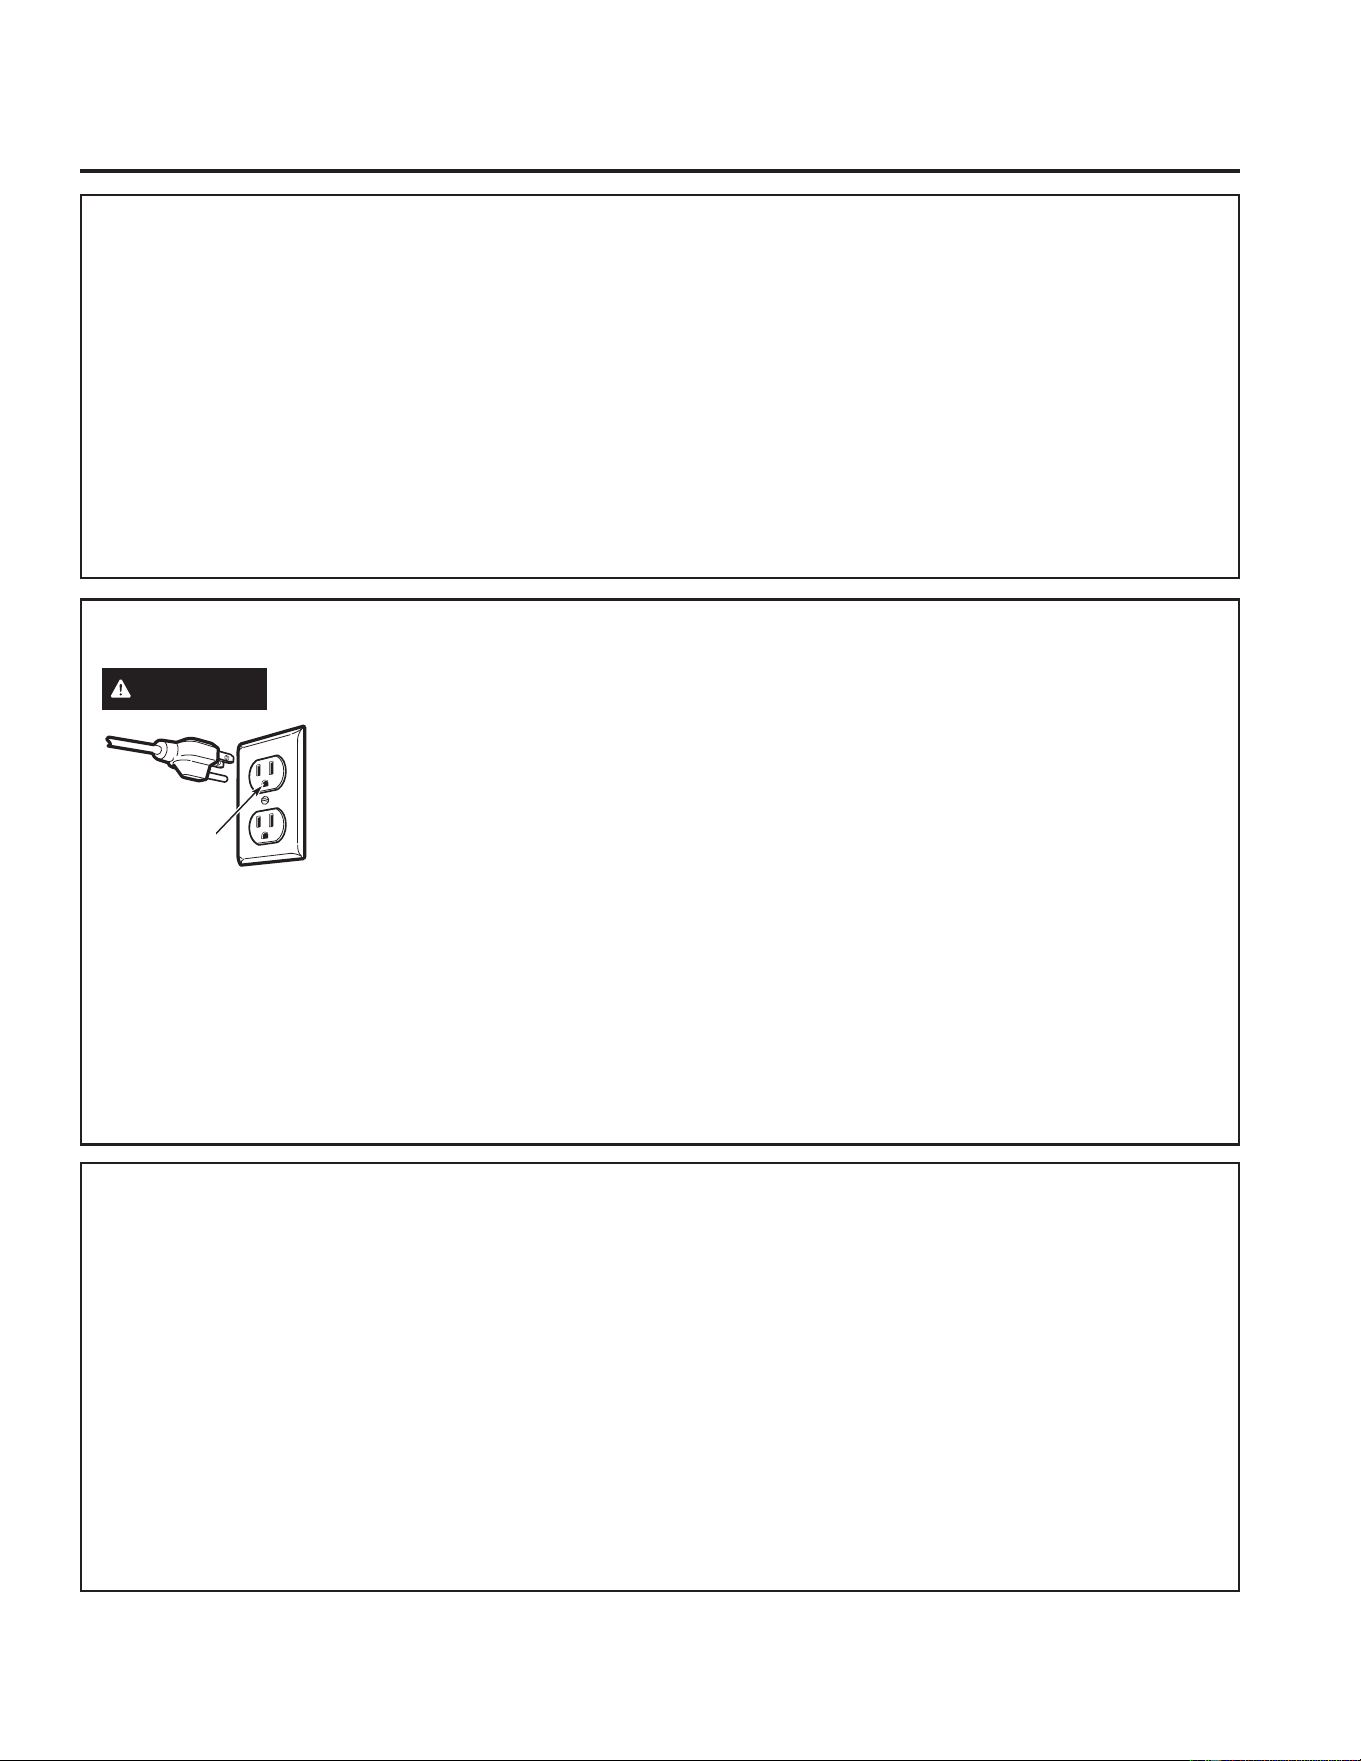
GROUNDING INSTRUCTIONS
WARNING
Improper use of the grounding plug can result in a risk of electric shock.
This appliance must be
grounded. In the event of
an electrical short circuit,
grounding reduces the risk of
electric shock by providing an
escape wire for the electric
current.
7KLVDSSOLDQFHLVHTXLSSHGZLWKDSRZHUFRUGKDYLQJD
grounding wire with a grounding plug. The plug must
be plugged into an outlet that is properly installed and
grounded.
&RQVXOWDTXDOLILHGHOHFWULFLDQRUVHUYLFHWHFKQLFLDQLI
the GROUNDING INSTRUCTIONS are not completely
understood, or if doubt exists as to whether the
appliance is properly grounded.
If the outlet is a standard 2-prong wall outlet, it is
your personal responsibility and obligation to have it
replaced with a properly grounded 3-prong wall outlet.
Do not under any circumstances cut or remove the
third (ground) prong from the power cord.
Do not use an extension cord. If the power cord is too
VKRUWKDYHDTXDOLILHGHOHFWULFLDQRUVHUYLFHWHFKQLFLDQ
install an outlet near the appliance.
)RUEHVWRSHUDWLRQSOXJWKLVDSSOLDQFHLQWRLWVRZQ
electrical outlet to prevent flickering of lights, blowing
of fuse or tripping of circuit breaker.
Ensure proper
ground exists
before use.
THE VENT FAN
The fan will operate automatically under certain
FRQGLWLRQVVHH9HQW)DQVHFWLRQ7DNHFDUHWR
prevent the starting and spreading of accidental
cooking fires while the vent fan is in use.
Ŷ Clean the underside of the Advantium often. Do not
allow grease to build up on the Advantium or the fan
filters.
Ŷ In the event of a grease fire on the surface units
below the Advantium, smother a flaming pan on the
surface unit by covering the pan completely with a
lid, a cookie sheet or a flat tray.
Ŷ Use care when cleaning the vent fan filters.
Corrosive cleaning agents, such as lye-based oven
cleaners, may damage the filters.
Ŷ When preparing flaming foods under the Advantium,
turn the fan on.
Ŷ Never leave surface units beneath your Advantium
unattended at high heat settings. Boilovers cause
smoking and greasy spillovers that may ignite and
spread if the Advantium vent fan is operating. To
PLQLPL]HDXWRPDWLFIDQRSHUDWLRQXVHDGHTXDWH
sized cookware and use high heat on surface units
only when necessary.
6 49-40723-2
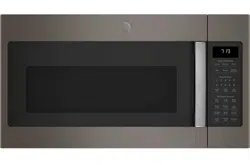
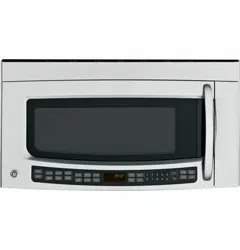
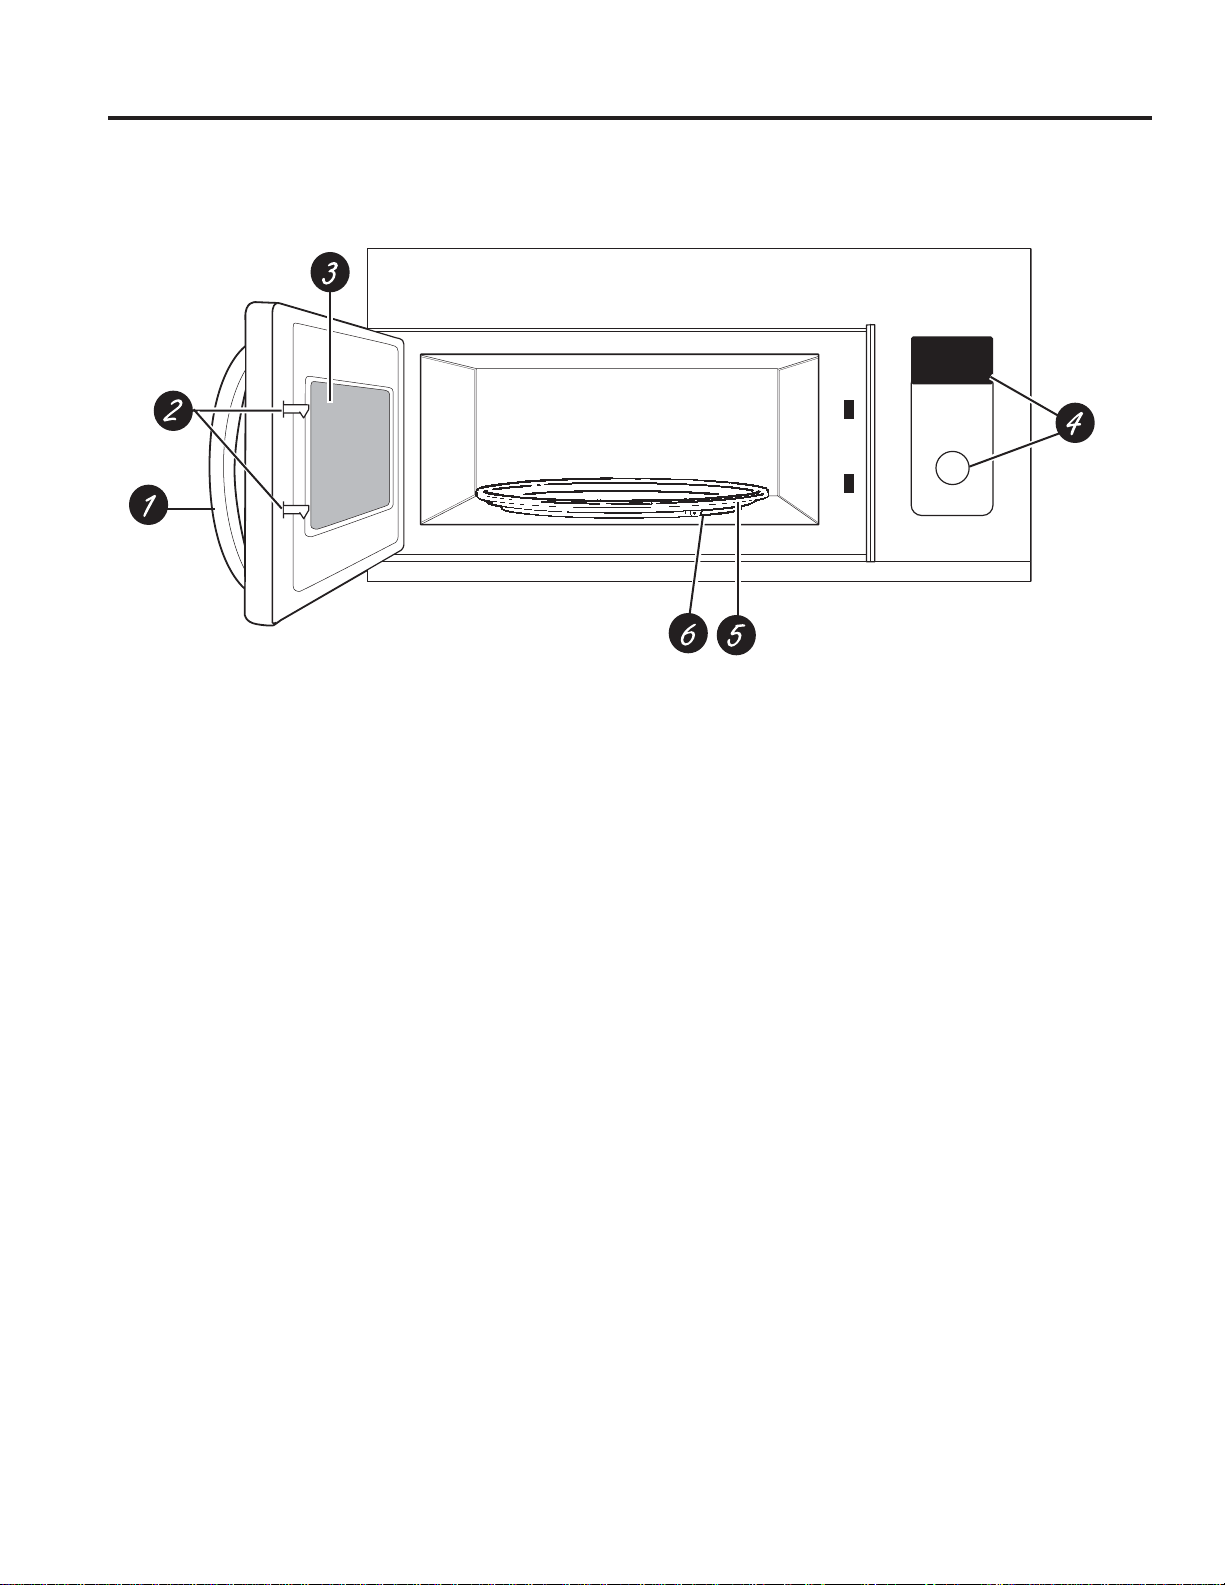
Features
1. Door Handle
2. Door Latch
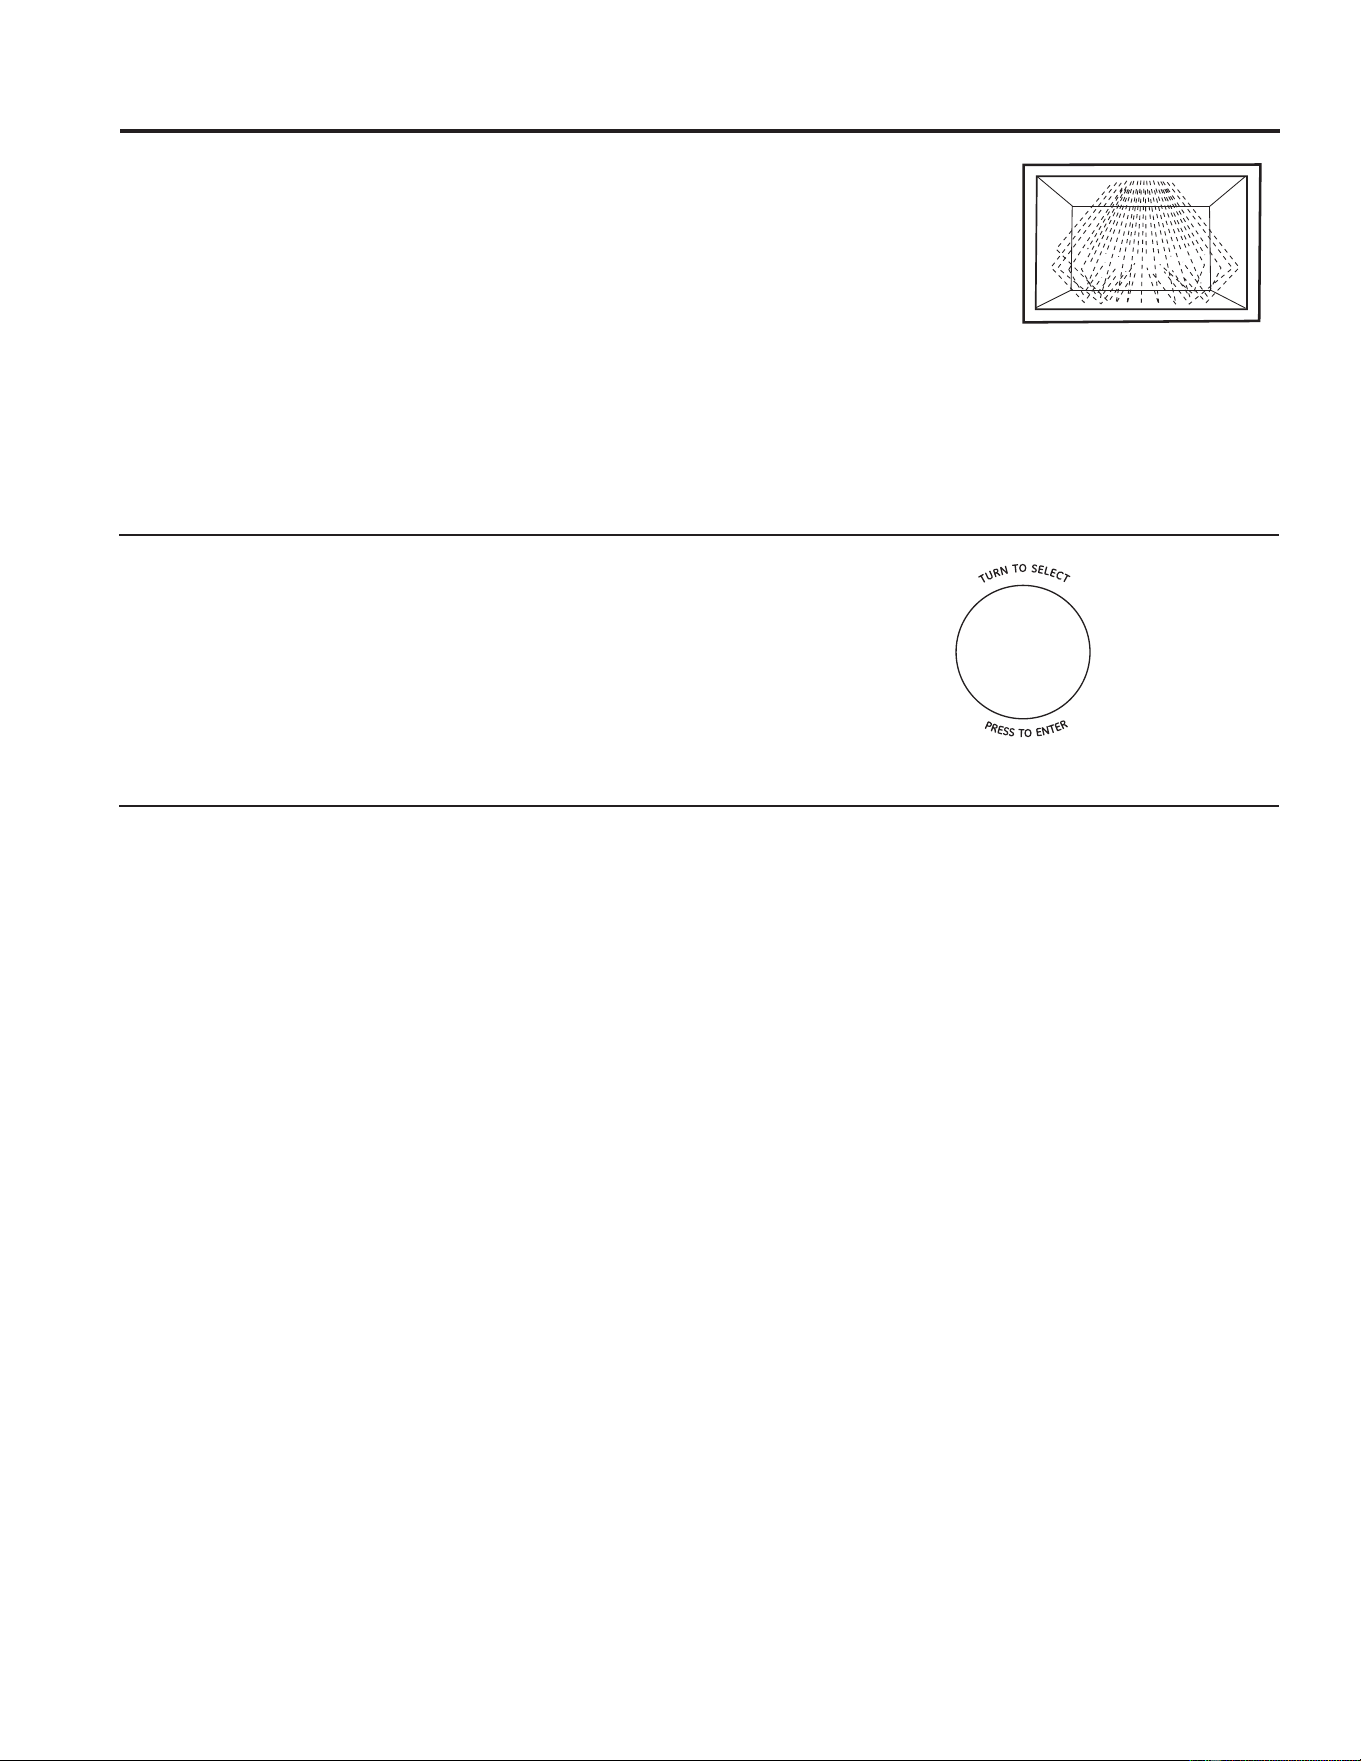
3. Window with Metal Sheild
Screen allows cooking to be viewed while keeping
microwaves confined in the oven.
4. Control Panel and Selector Dial
5. Removable Turntable
Do not operate the oven in the microwave mode
without the turntable and turntable support seated and
in place.
6. Removable Turntable Support
Do not operate the oven in the microwave mode
without the turntable and turntable support seated and
in place.
Throughout this manual, features and appearance may vary from your model.
USING THE MICROWAVE: )HDWXUHV
49-40723-2 7
USING THE MICROWAVE: Controls
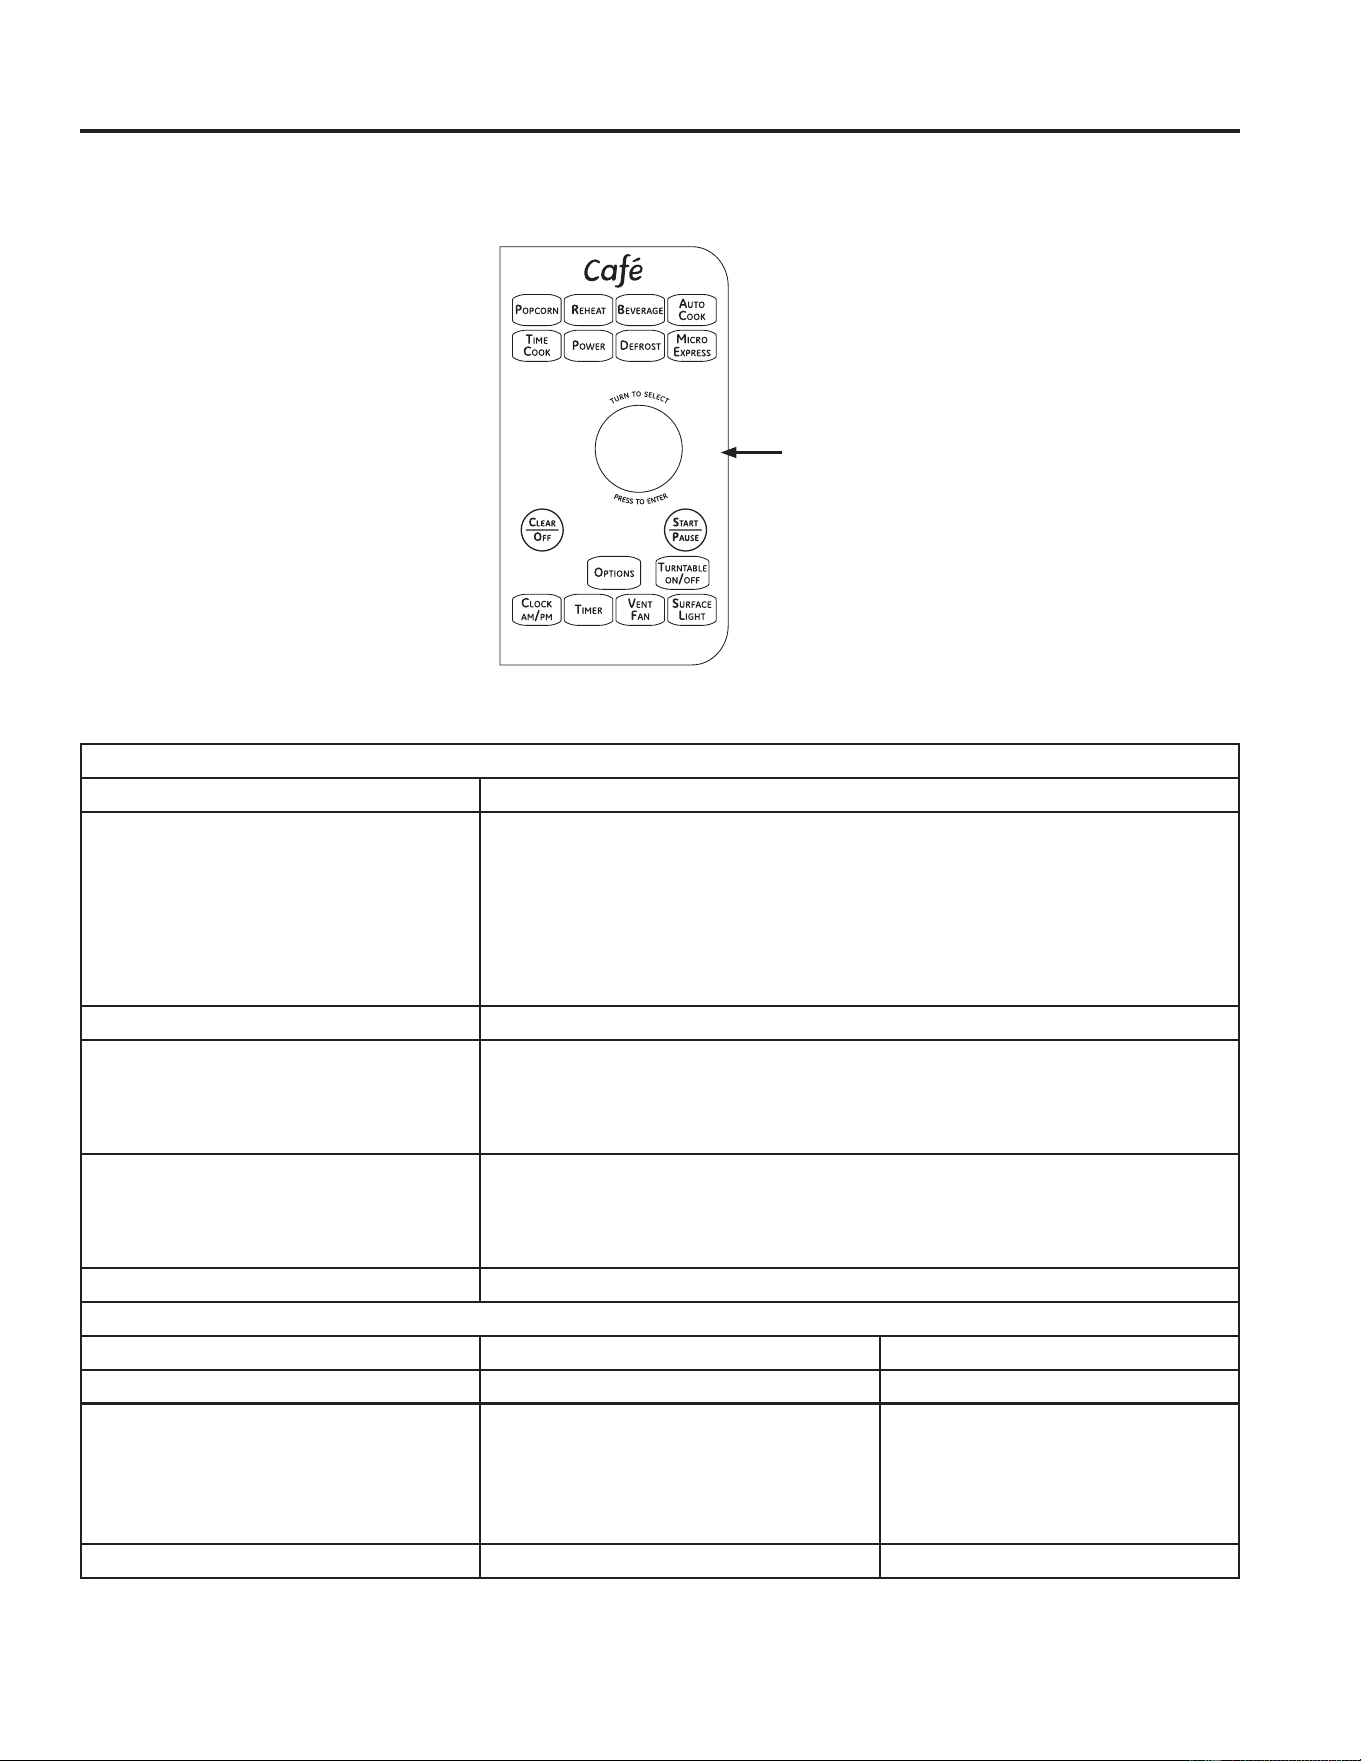
Controls
You can microwave by time or with the convenience features. Not all features on all models.
Dial Selector
Microwave Cooking Time and Auto Features
Press Turn and push dial to enter
TIME COOK
Press once (Time Cook I) to micro-
wave any time between 15 seconds
and 95 minutes.
Press twice (Time Cook II) to change
power levels automatically during
cooking.
Amount of cooking time
MICRO EXPRESS cook/Add 30 sec. Starts immediately!
DEFROST
3UHVVRQFH)DVW
Press twice (Auto)
Press three times (Time)
)RRGZHLJKWXSWRRQHSRXQG
)RRGZHLJKWXSWRVL[SRXQGV
Amount of defrosting time
BEVERAGE
Press once (6-7 oz.)
Press twice (8-9 oz.)
Press three times (10-12 oz.)
Starts immediately!
POWER Level Power level 1-10
Sensor Features
Press Turn and push dieal to enter Option
POPCORN Starts immediately! more/less time
REHEAT
Press once (plate)
Press twice (pasta)
Press three times (
1
/2 to 1 cup)
Press four times (1 to 2 cups)
Starts immediately! more/less time
AUTO COOK )RRG7\SH more/less time

8 49-40723-2
Microwaving Features
Cooking Method
Microwave energy
is distributed evenly
throughout the oven
for thorough, fast
cooking of food.
Heat Source
Microwave energy.
Heat Conduction
Heat produced
within food by
instant energy
penetration.
Benefits
)DVWKLJKHIILFLHQF\
cooking. Oven and
surroundings do
not get hot.
Easy clean-up.
Cooking Tips
Your oven uses microwave energy to cook by a set time or weight, or automatically by sensor.
Sensor microwave works by detecting the increasing humidity released during cooking.
The oven automatically adjusts the cooking time to various types and amounts of food.
Using the Dial
You can make selections on the oven by turning the dial
and pressing it to enter the selection.
Pressing the dial can also be used in place of the
START/PAUSE EXWWRQIRUTXLFNHUSURJUDPPLQJRIWKH
oven.
Power Level
The power level may be entered or changed immediately
after entering the time for Time Cook, Time Defrost or
Express Cook. The power level may also be changed
during time countdown.
1. )LUVWIROORZGLUHFWLRQVIRU Time Cook, Time Defrost
or Express Cook.
2. Press the POWER button.
3. Turn the dial clockwise to increase and
counterclockwise to decrease the power level. Press
the dial to enter.
4. Press the START/PAUSE button to start cooking.
Variable power levels add flexibility to microwave
cooking. The power levels on the microwave oven can
be compared to the surface units on a range. Each
power level gives you microwave energy a certain
percent of the time. Power level 7 is microwave energy
70% of the time. Power level 3 is energy 30% of the
time. Most cooking will be done on High (power level
10) which gives you 100% power. Power level 10 will
FRRNIDVWHUEXWIRRGPD\QHHGPRUHIUHTXHQWVWLUULQJ
rotating or turning over.
A lower setting will cook more evenly and need less
stirring or rotating of the food. Some foods may have
better flavor, texture or appearance if one of the lower
settings is used. Use a lower power level when cooking
foods that have a tendency to boil over, such as
scalloped potatoes.
Rest periods (when the microwave energy cycles off)
JLYHWLPHIRUWKHIRRGWR³HTXDOL]H´RUWUDQVIHUKHDWWR
the inside of the food. An example of this is shown with
power level 3—the defrost cycle. If microwave energy
did not cycle off, the outside of the food would cook
before the inside was defrosted.
Here are some examples of uses for various power
levels:
High 10:)LVKEDFRQYHJHWDEOHVKHDWLQJOLTXLGV
Med-High 7: Gentle cooking of meat and poultry;
baking casseroles and reheating.
Medium 5: Slow cooking and tenderizing for stews and
less tender cuts of meat.
Low 2 or 3: Defrosting; simmering; delicate sauces.
Warm 1:.HHSLQJIRRGZDUPVRIWHQLQJEXWWHU
USING THE MICROWAVE:0LFURZDYLQJ)HDWXUHV

49-40723-2 9
USING THE MICROWAVE: 7LPHDQG$XWR)HDWXUHV
Time and Auto Features
Micro Express Cook
7KLVLVDTXLFNZD\WRVHWDQGVWDUWFRRNLQJ
in 30 second blocks each time the MICRO EXPRESS
button is pressed. The cook timemay be changed by
turning the dial at any time during cooking.
The power level will automatically be set at 10 and the
oven will start immediately.
The power level can be changed as time is counting
down. Press the POWER button, turn the dial and press
to enter.
Time Defrost
Use Time Defrost to defrost for a selected length of
time.
1. Press the DEFROST button three times.
2. Turn the dial to select the time you want. Press the dial
to enter.
3. Press the START/PAUSE button to start defrosting.
4. Turn the food over if the oven signals TURN FOOD
OVER.
You may change the defrost time at any time during
defrosting by turning the dial.
Power level is automatically set at 3, but can be changed.
<RXFDQGHIURVWVPDOOLWHPVTXLFNO\E\UDLVLQJWKHSRZHU
level after entering the time. Power level 7 cuts the total
defrosting time in about half; power level 10 cuts the total
time to approximately 1/3. However, food will need more
IUHTXHQWDWWHQWLRQWKDQXVXDO
A dull thumping noise may be heard during defrosting. This
is normal when oven is not operating at High power.
Defrosting Tips
Ŷ )RRGVIUR]HQLQSDSHURUSODVWLFFDQEHGHIURVWHGLQ
the package. Closed packages should be slit, pierced
RUYHQWHG$)7(5IRRGKDVSDUWLDOO\GHIURVWHG3ODVWLF
storage containers should be partially uncovered.
Ŷ )DPLO\VL]HSUHSDFNDJHGIUR]HQGLQQHUVFDQEH
defrosted and microwaved. If the food is in a foil
container, transfer it to a microwave-safe dish.
Ŷ )RRGVWKDWVSRLOHDVLO\VKRXOGQRWEHDOORZHGWRVLW
out for more than one hour after defrosting. Room
temperature promotes the growth of harmful bacteria.
Ŷ )RUPRUHHYHQGHIURVWLQJRIODUJHUIRRGVVXFKDV
roasts, use Auto Defrost. Be sure large meats are
completely defrosted before cooking.
Ŷ :KHQGHIURVWHGIRRGVKRXOGEHFRROEXWVRIWHQHGLQ
all areas. If still slightly icy, return to the microwave
very briefly, or let it stand a few minutes.
Time Cook
Time Cook I
Allows you to microwave for any time between 15
seconds and 95 minutes.
Power level 10 (High) is automatically set, but you may
change it for more flexibility.
1. Press the TIME COOK button.
2. Turn the dial to set the cook time and press the dial
to enter.
3. Change power level if you don’t want full power.
(Press POWER. Turn the dial to select. Press the dial
to enter.)
4. Press the dial or the START/PAUSE button to start
cooking.
You may open the door during Time Cook to check
the food. Close the door and press the dial or START/
PAUSE to resume cooking.
NOTE: You may change the cook time at any time
during cooking by turning the dial. You may also change
the power level by pressing the POWER button.
Time Cook II
Lets you change power levels automatically during
cooking. Here’s how to do it:
1. Press the TIME COOK button.
2. Turn the dial to set the first cook time and press the
dial to enter.
3. Change the power level if you don’t want full power.
(Press POWER. Turn the dial to select. Press the dial
to enter.)
4. Press the TIME COOK button again.
5. Turn the dial to set the second cook time and press
the dial to enter.
6. Change the power level if you don’t want full power.
(Press POWER. Turn the dial to select. Press the dial
to enter.)
7. Press the dial or the START/PAUSE button to start
cooking.
At the end of Time Cook I, Time Cook II counts down.
NOTE: You may change the cook time at any time
during cooking by turning the dial. You may also change
the power level by pressing the POWER button.
10 49-40723-2
Time and Auto Features (Cont.)
Fast Defrost
Fast Defrost automatically sets the defrosting times and
power levels to give even defrosting results for meats,
poultry and fish weighing up to one pound.
Ŷ 5HPRYHPHDWIURPSDFNDJHDQGSODFHRQ
microwave-safe dish.
1. Press the DEFROST button once.
2. Turn the dial to the food weight, using the Conversion
*XLGHDWULJKW)RUH[DPSOHGLDOIRUSRXQGV
oz.) Press the dial to enter.
3. Press the START/PAUSE button to start defrosting.
4. Turn the food over if the oven signals TURN FOOD
OVER.
Ŷ 5HPRYHGHIURVWHGPHDWRUVKLHOGZDUPDUHDVZLWK
small pieces of foil.
Ŷ $IWHUGHIURVWLQJPRVWPHDWVQHHGWRVWDQGPLQXWHV
to complete defrosting.
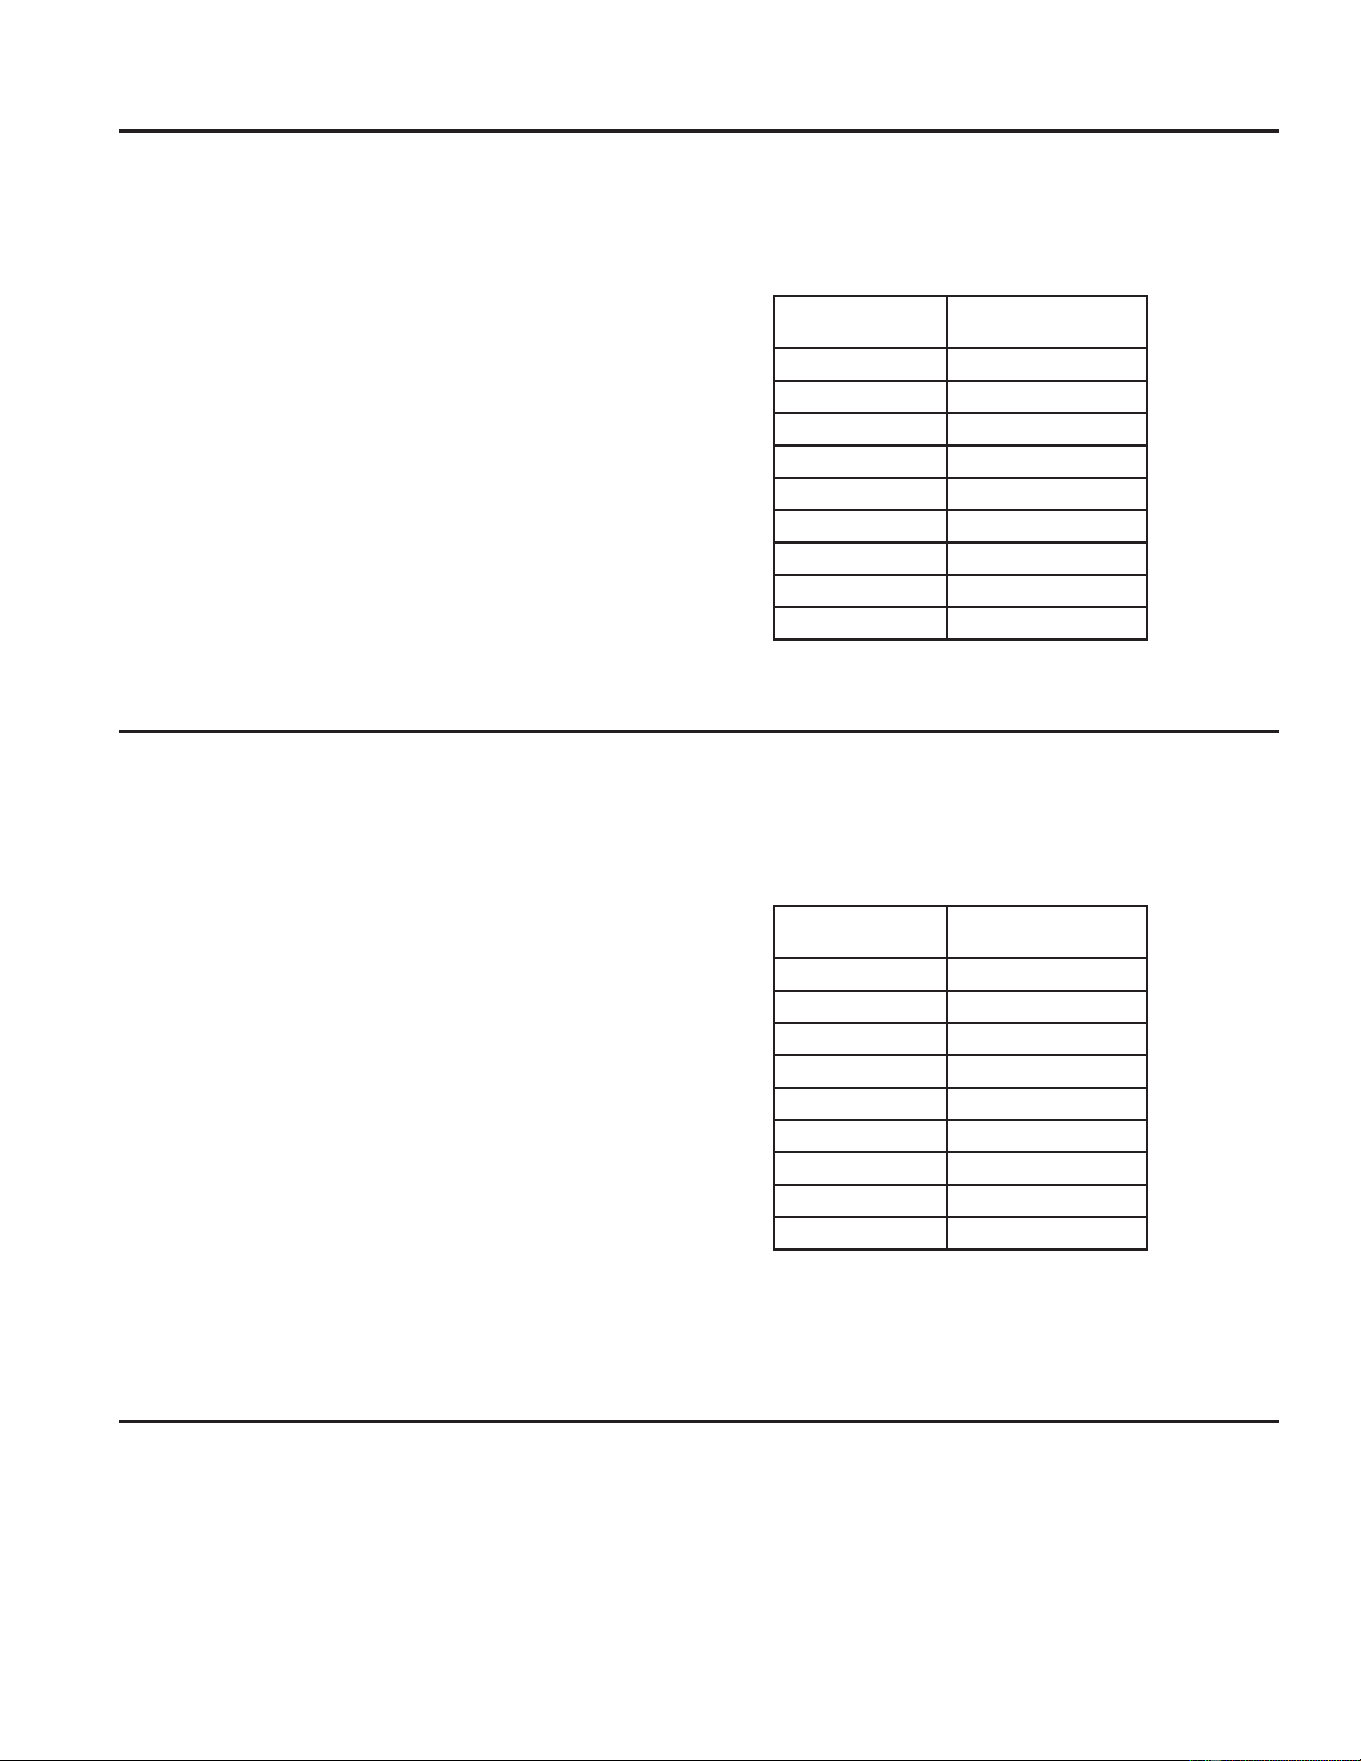
Conversion Guide
If the weight of food is stated in pounds and ounces, the
ounces must be converted to tenths (.1) of a pound.
Weight of Food
in Ounces
Enter Food Weight
(tenths of a pound)
1–2 .1
3.2
4–5 .3
6–7 .4
8.5
9–10 .6
11 .7
12–13 .8
14–15 .9
Beverage
The BEVERAGE feature heats beverages from 6 to 12
ounces.
Press once for 6–7 oz.
Press twice for 8–9 oz.
Press three times for 10–12 oz.
Drinks heated with the Beverage feature may be very
hot. Remove the container with care.
Auto Defrost
Use Auto Defrost for meat, poultry and fish weighing
up to six pounds. Use Time Defrost for most other
frozen foods.
Auto Defrost automatically sets the defrosting times
and power levels to give even defrosting results for
meats, poultry and fish.
Ŷ 5HPRYHPHDWIURPSDFNDJHDQGSODFHRQ
microwave-safe dish.
3UHVVWKH'()5267EXWWRQWZLFH
2. Turn the dial to the food weight, using the Conversion
*XLGHDWULJKW)RUH[DPSOHGLDOIRUSRXQGV
oz.) Press the dial to enter.
3. Press the START/PAUSE button to start defrosting.
4. Turn the food over if the oven signals TURN FOOD
OVER.
Ŷ 5HPRYHGHIURVWHGPHDWRUVKLHOGZDUPDUHDVZLWK
small pieces of foil.
Ŷ $IWHUGHIURVWLQJPRVWPHDWVQHHGWRVWDQGPLQXWHV
to complete defrosting. Large roasts should stand for
about 30 minutes.
Conversion Guide
If the weight of food is stated in pounds and ounces, the
ounces must be converted to tenths (.1) of a pound.
Weight of Food
in Ounces
Enter Food Weight
(tenths of a pound)
1–2 .1
3.2
4–5 .3
6–7 .4
8.5
9–10 .6
11 .7
12–13 .8
14–15 .9
USING THE MICROWAVE: 7LPHDQG$XWR)HDWXUHV
49-40723-2 11
USING THE MICROWAVE: 6HQVRU)HDWXUHV
Sensor Features
Humidity Sensor
:KDWKDSSHQVZKHQXVLQJWKH6HQVRU)HDWXUHV
7KH6HQVRU)HDWXUHVGHWHFWWKHLQFUHDVLQJKXPLGLW\
released during cooking. The oven automatically adjusts
the cooking time to various types and amounts of food.
'RQRWXVHWKH6HQVRU)HDWXUHVWZLFHLQVXFFHVVLRQ
on the same food portion—it may result in severely
overcooked or burnt food. If food is undercooked after
the countdown, use Time Cook for additional cooking
time.
NOTE: Sensor features will not operate when the oven
is hot. If one of the sensor cooking buttons is pressed
when the temperature inside the oven is greater than
)³29(1722+27)256(1625&22.,1*
USING ALTERNATE METHOD” will be displayed. The
oven will automatically change to cook by time (follow
the directions in the display) or once the oven is cool
enough, the sensor features will function normally.
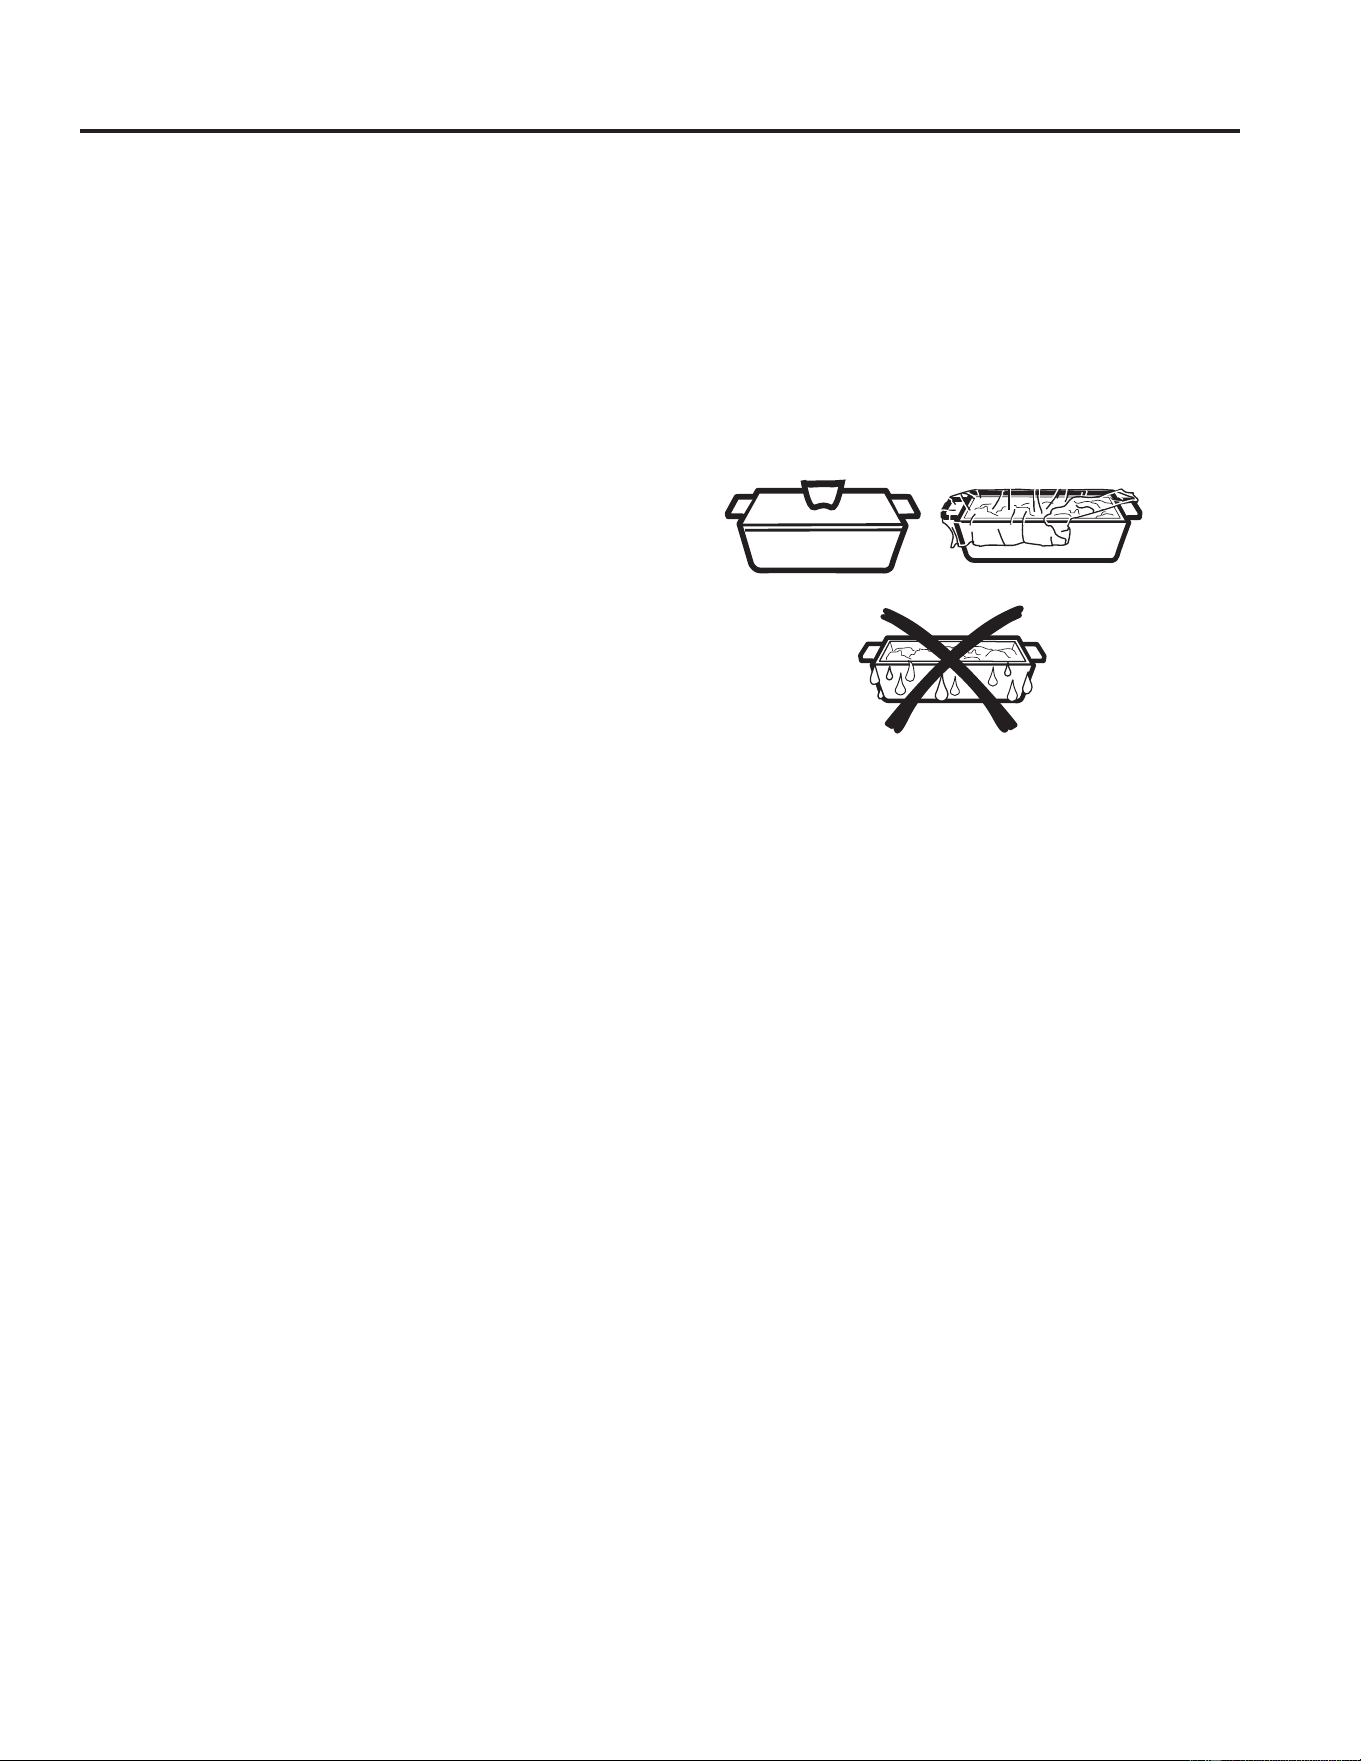
The proper containers and covers are essential for best
sensor cooking.
Ŷ$OZD\VXVHPLFURZDYHVDIHFRQWDLQHUVDQGFRYHUWKHP
with lids or vented plastic wrap. Never use tight sealing
plastic containers—they can prevent steam from
escaping and cause food to overcook.
Ŷ%HVXUHWKHRXWVLGHRIWKHFRRNLQJFRQWDLQHUVDQG
the inside of the oven are dry before placing food in
the oven. Beads of moisture turning into steam can
mislead the sensor.
Ŷ%HYHUDJHVDUHEHVWKHDWHGXQFRYHUHG
Covered
Vented
Dry off dishes so they
don’t mislead the sensor.
12 49-40723-2
Sensor Features (Cont.)
Auto Cook
(Do not use the shelves when microwave cooking.)
NOTE: Do not use this feature twice in succession
on the same food portion—it may result in severely
overcooked or burnt food.
Because most cooking containers must be covered
during Auto Cook, this feature is best with foods that
you want to steam or retain moisture.
NOTE: Use of the metal shelf with Auto Cook is not
recommended.
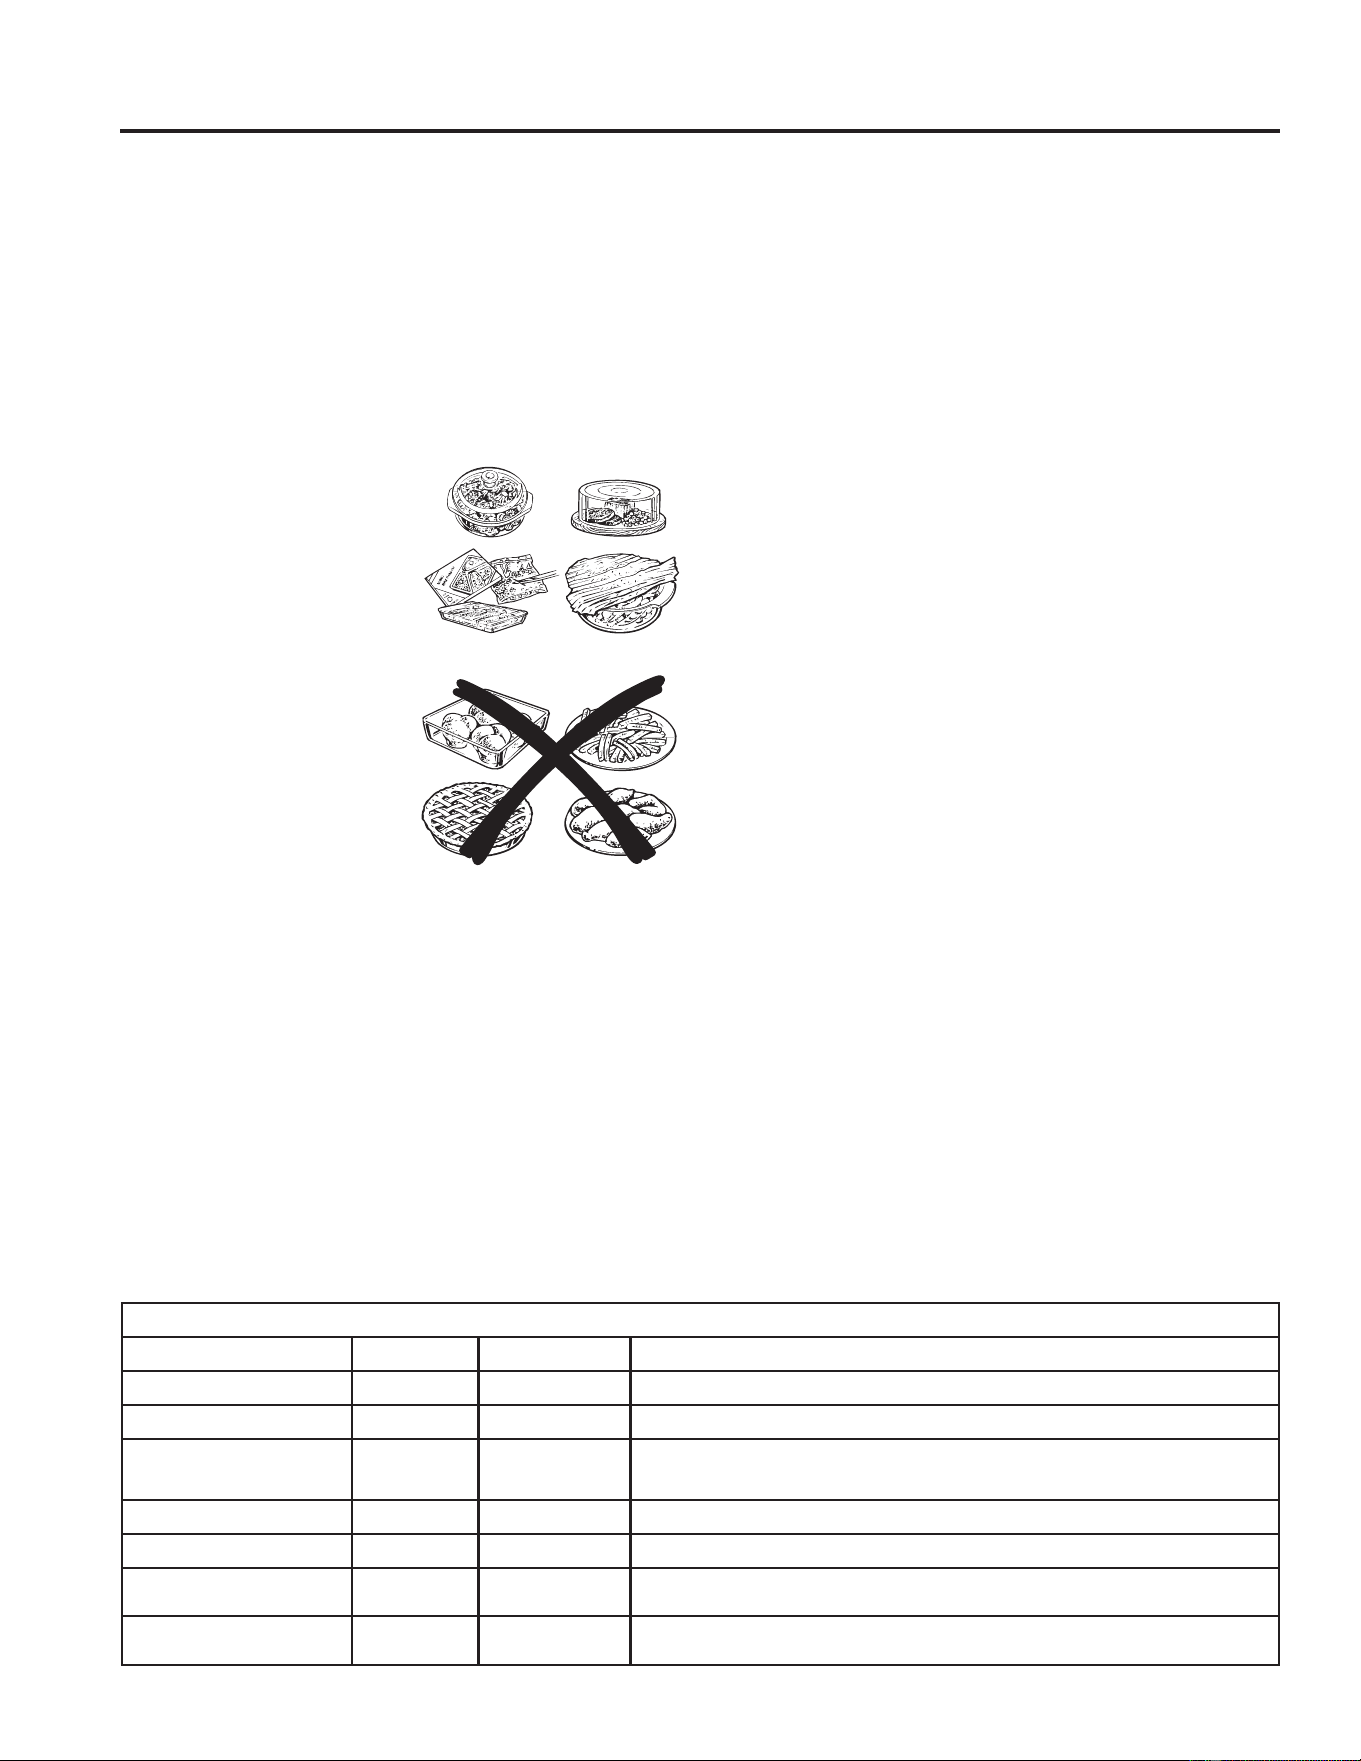
Recommended Foods
A wide variety of foods
including meats, fish and
vegetables can be cooked
using this feature.
Foods not recommended
)RRGVWKDWPXVWEHFRRNHG
XQFRYHUHGIRRGVWKDWUHTXLUH
constant attention, foods that
UHTXLUHDGGLWLRQRILQJUHGLHQWV
during cooking and foods
calling for a dry look or crisp
surface after cooking should
not be cooked using this
feature. It is best to Time
Cook them.
1. Place covered food in the oven and close the door.
Press the AUTO COOK button. ENTER FOOD TYPE
appears in the display.
2. Turn the dial to the desired food type. Press to enter.
6HHWKH6HQVRU)RRG7\SH*XLGHEHORZIRUVSHFLILF
foods and instructions.
The oven starts immediately.
NOTE: If the door was open while the control was being
set, close the door and press the START/PAUSE button
to begin cooking.
If food is undercooked after the countdown, use Time
Cook for additional cooking time.
Do not open the oven door before the countdown time
is displayed—steam escaping from the oven can affect
cooking performance. If the door is opened, close the
door and press START/PAUSE immediately.
If ground meat was selected, the oven may signal you to
drain and stir the meat. Open the door, drain the meat
and close the door. Press the START/PAUSE button if
necessary to resume cooking.
Cooking Tips
Ŷ :KHQRYHQVLJQDOVDQGFRXQWGRZQWLPHLVGLVSOD\HG
the door may be opened for stirring, turning or
rotating food. To resume cooking, close the door and
press START/PAUSE.
Ŷ 0DWFKWKHDPRXQWRIIRRGWRWKHVL]HRIFRQWDLQHU)LOO
containers at least 1/2 full.
Ŷ %HVXUHRXWVLGHRIFRQWDLQHUDQGLQVLGHRIRYHQDUH
dry.
Ŷ $IWHUFRPSOHWLRQRI&RRNF\FOHLIIRRGQHHGV
additional cooking, return food to oven and use Time
Cook to finish cooking.
How to Adjust the Oven’s Automatic Settings for a
Shorter or Longer Cook Time (Not available for all
food types)
To subtract 10% from the automatic cooking time:
Within the first 30 seconds after the oven starts, turn the
dial counterclockwise, until
a minus (“–”) sign appears, and press to enter.
To add 10% to the automatic cooking time:
Within the first 30 seconds after the oven starts, turn the
dial clockwise, until a plus (“+”) sign appears, and press
to enter.look or crisp surface after cooking should not be
cooked using this feature. It is best to Time Cook them.
Sensor Food Type Guide
Food Type Servings Serving Size Comments
Chicken Pieces
1 to 4 2 to 8 pieces 8VHREORQJVTXDUHRUURXQGGLVK&RYHUZLWKYHQWHGSODVWLFZUDS
Fish
1 to 4 4 to 16 oz. 8VHREORQJVTXDUHRUURXQGGLVK&RYHUZLWKYHQWHGSODVWLFZUDS
Ground Meat
(Beef, Pork, Turkey)
- 8 to 32 oz. Use round casserole dish. Crumble meat into dish. Cover with vented plastic
wrap.
Potatoes
1 to 4 8 to 32 oz. Piece skin wiht fork. Arrange in a star pattern in center of turntable.
Canned Vegetables
1 to 4 4 to 16 oz. Use microwave-safe casserole or bowl. Cover with a lid or vented plastic wrap.
Fresh Vegetables
1 to 4 4 to 16 oz. Use microwave-safe casserole or bowl. Add 2 tablespoons of water for each
serving. Cover with lid or vented plastic wrap.
Frozen Vegetables
1 to 4 4 to 16 oz. 8VHPLFURZDYHVDIHFDVVHUROHRUERZO)ROORZSDFNDJHLQVWUXFWLRQVIRUDGGLQJ
water. Cover with lid or vented plastic wrap.
USING THE MICROWAVE: 6HQVRU)HDWXUHV

49-40723-2 13
USING THE MICROWAVE: 6HQVRU)HDWXUHV
Sensor Features (Cont.)
Reheat
The Reheat feature reheats servings of previously
cooked foods or a plate of leftovers.
NOTE: Do not use this feature twice in succession
on the same food portion—it may result in severely
overcooked or burnt food.
3ODFHWKHFXSRIOLTXLGRUFRYHUHGIRRGLQWKHRYHQ
Press REHEAT once, twice, three times or four times.
The oven starts immediately.
Press once for a plate of leftovers.
Press twice for a pasta.
Press three times for 1/2 to 1 full cup.
Press four times for 1 to 2 full cups.
2. The oven signals when steam is sensed and the time
remaining begins counting down.
Do not open the oven door until time is counting down.
If the door is opened, close it and press START/PAUSE
immediately.
After removing food from the oven, stir, if possible, to
even out the temperature. Reheated foods may have
wide variations in temperature. Some areas of food may
be extremely hot.
If food is not hot enough after the countdown use Time
Cook for additional reheating time.
Some Foods Not Recommended for Use With Reheat
It is best to use Time Cook for these foods:
Ŷ %UHDGSURGXFWV
Ŷ )oods that must be reheated uncovered.
Ŷ )oods that need to be stirred or rotated.
Ŷ )oods calling for a dry look or crisp surface after
reheating.
How to Adjust the Oven’s Automatic Settings for a
Shorter or Longer Time
To subtract 10% from the automatic cooking time:
Within the first 30 seconds after the oven starts, turn the
dial counterclockwise, until a minus (“–”) sign appears,
and press to enter.
To add 10% to the automatic cooking time:
Within the first 30 seconds after the oven starts, turn the
dial clockwise, until a plus (“+”) sign appears, and press
to enter.
Popcorn
To use the Popcorn feature:
Use only with prepackaged microwave popcorn weighing
1.5 to 3.5 ounces.
NOTE: Do not use this feature twice in succession
on the same food portion—it may result in severely
overcooked or burnt food.
)ROORZSDFNDJHLQVWUXFWLRQVXVLQJ7LPH&RRNLIWKH
package is less than 1.5 ounces or larger than 3.5
ounces. Place the package of popcorn in the center
of the turntable.
2. Press the POPCORN button. The oven starts
immediately.
If you open the door while POPCORN SENSOR is
displayed, an error message will appear. Close the door,
press CLEAR/OFF and begin again.
If food is undercooked after the countdown, use Time
Cook for additional cooking time.
How to Adjust the Automatic Popcorn Setting to
Provide a Shorter or Longer Cook Time
If you find that the brand of popcorn you use underpops
or overpops consistently, you can add or subtract 20–30
seconds to the automatic popping time.
To subtract time:
Within the first 30 seconds after the oven starts, turn the
dial counterclockwise, until a minus (“–”) sign appears,
for 20 seconds less cooking time. Press to enter. Turn
again, until two minus (“– –”) signs appear, to reduce
cooking time another 10 seconds for a total of 30
seconds less time. Press to enter.
To add time:
Within the first 30 seconds after the oven starts, turn
the dial clockwise, until a plus (“+”) sign appears, for
an extra 20 seconds cooking time. Press to enter. Turn
again, until two plus (“++”) signs appear, to add another
10 seconds for a total of 30 seconds additional time.
Press to enter.

14 49-40723-2
Other Features
Cooking Complete Reminder
To remind you that you have food in the oven, the oven
ZLOOGLVSOD\<285)22',65($'<DQGEHHSRQFHD
minute until you either open the oven door or press the
&/($52))EXWWRQ
Resume
The cooking program just used stays in memory for 5
minutes. After that you will need to begin the program
again. To turn this option off, see the More Time
Message section.
1. If your food needs to cook a bit longer, you can
restart the oven by pressing the START/PAUSE
button or selector dial.
2. RESUME COOKING will be displayed and the oven
will restart immediately at 10% of the original time.
Clock
Press to enter the time of day or to check the time of day
while cooking.
1. Press the CLOCK button.
2. Turn the dial to set hours. Press the dial to enter.
3. Turn the dial to set minutes. Press the dial to enter.
4. Turn the dial to select AM or PM. Press the dial to
enter.
The clock is designed to turn off when unit is idle for
30 seconds to minimize the standby power usage. The
clock will turn on when unit is in use or door is opened.
There is not an override option available based on the
'2(HQHUJ\UHTXLUHPHQWV
Start/Pause
In addition to starting many functions, START/PAUSE
allows you to stop cooking without opening the door or
clearing the display.
Clear/Off
Press the CLEAR/OFF button to stop and cancel
cooking at any time.
Control Lock-Out
You may lock the control panel to prevent the oven from
being accidentally started during cleaning or being used
by children.
To lock or unlock the controls, press and hold the CLEAR/
OFF button for about three seconds. When the control panel
LVORFNHG&21752//2&.('ZLOOEHGLVSOD\HGEULHIO\
anytime a button or dial is pressed. (The control lock-out
GRHVQRWDSSO\WRWKH9(17)$1DQG685)$&(/,*+7
USING THE MICROWAVE: 2WKHU)HDWXUHV

49-40723-2 15
USING THE MICROWAVE: 2WKHU)HDWXUHV
Other Features (Cont.)
Auto Nite Light
The Auto Nite Light can be set to come on and go off at
desired times.
1. Press the OPTIONS button and turn the dial to select
AUTO NITE LIGHT. Press the dial to enter.
2. Turn the dial to select SET TIMES. Press the dial to
enter.
3. Enter the time of day for the light to come on by
turning the dial to select the hour, minutes and AM or
PM. Press the dial to enter after each selection.
4. Enter the time of day for the light to
go off by turning the dial to select the hour, minutes
and AM or PM. Press the dial to enter after each
selection.
NOTE: The NITE indicator will be lit whenever the nite
light is set to operate.
To review the nite light settings, turn the dial to select
REVIEW SETTINGS after selecting the Auto Nite Light
option. Press the dial to enter.
To clear the nite light settings, turn the dial to select
CLEAR SETTINGS after selecting the Auto Nite Light
option. Press the dial to enter.
Beeper Volume
The beeper sound level can be adjusted.
1. Press the OPTIONS button and turn the dial to select
BEEPER VOLUME. Press the dial to enter.
2. Turn the dial to select mute to loud. Press the dial to
enter.
NOTE: The MUTE indicator will be lit whenever the
beeper volume is set to mute.
Display Language
The language for the scrolling display can be set to
either English or Spanish.
1. Press the OPTIONS button and turn the dial to select
DISPLAY LANGUAGE. Press the dial to enter.
2. Turn the dial to select ENGLISH or SPANISH. Press
the dial to enter.
Display Speed
The scroll speed of the display can be changed.
1. Press the OPTIONS button and turn the dial to select
DISPLAY SPEED. Press the dial to enter.
2. Turn the dial to select slowest to fastest. Press the
dial to enter.
Surface Light
Press SURFACE LIGHT once for bright light, twice for
the night light or a third time to turn the light off.

16 49-40723-2
Other Features (Cont.)
Measures
Measurements can be set to display in Default (English)
or metric.
1. Press the OPTIONS button and turn the dial to select
MEASURES. Press the dial to enter.
2. Turn the dial to select DEFAULT or METRIC and
press to enter.
Timer
The Timer operates as a minute timer and can be used
at any time, even when the oven is operating.
1. Press the TIMER button.
2. Turn the dial to select the minutes. Press the dial to
enter.
3. Turn the dial to select the seconds. Press the dial to
enter
4. Press the dial or TIMER to start.
To cancel, press the TIMER button.
When time is up, the oven will signal.
To turn off the timer signal, press TIMER.
NOTE: The TIMER indicator will be lit while the timer is
operating.
Turntable On/Off
)RUEHVWFRRNLQJUHVXOWVOHDYHWKHWXUQWDEOHRQ,WFDQEH
turned off for large dishes.
1. Press the TURNTABLE ON/OFF button.
2. Purn the dial to select ON or OFF. Press the dial to
enter.
Sometimes the turntable can become too hot to touch.
Be careful touching the turntable during and after
cooking.
Vent Fan
The vent fan removes steam and other vapors from
surface cooking.
Press VENT FAN once for high fan speed,
twice for medium fan speed, three times for low fan
speed or a fourth time to turn the fan off.
NOTE: 7KH)$1LQGLFDWRUZLOOEHOLWZKLOH
the fan is operating.
Automatic Fan
An automatic fan feature protects the microwave from
too much heat rising from the cooktop below it. It
automatically turns on if it senses too much heat.
If you have turned the fan on you may find that you
cannot turn it off. The fan will automatically turn off when
the internal parts are cool. It may stay on for 30 minutes
or more after the cooktop and microwave controls are
turned off.
More Time Message
After cooking is complete, a message can be displayed
giving you the option to cook the food longer at the same
settings. See the Resume section.
1. Press the OPTIONS button and turn the dial to select
MORE TIME MESSAGE. Press the dial to enter.
2. Turn the dial to select MESSAGE ON or OFF and
press to enter.
USING THE MICROWAVE: Other Features

49-40723-2 17
CARE AND CLEANING: Oven
Oven
Helpful Hints
An occasional thorough wiping with a solution of baking
soda and water keeps the inside fresh.
Be certain the oven control is turned off before
cleaning any part of this oven.
How to clean the Inside
Walls, Floor, Inside Window, Metal and Plastic Parts
on the Door
Some spatters can be removed with a paper towel;
RWKHUVPD\UHTXLUHDGDPSFORWK5HPRYHJUHDV\
spatters with a sudsy cloth, then rinse with a damp cloth.
Do not use abrasive cleaners or sharp utensils on oven
walls.
Never use a commercial oven cleaner on any part of
your microwave.
Removable Turntable and Turntable Support
To prevent breakage, do not place the turntable into
water just after cooking. Wash it carefully in warm, sudsy
water or in the dishwasher. The turntable and support
can be broken if dropped. Remember, do not operate the
oven in the microwave mode without the turntable and
support seated and in place.
18 49-40723-2
Oven (Cont.)
How to clean the Outside
We recommend against using cleaners with ammonia
or alcohol, as they can damage the appearance of
the microwave oven. If you choose to use a common
household cleaner, first apply the cleaner directly to a
clean cloth, then wipe the soiled area.
Case
Clean the outside of the microwave with a sudsy cloth.
Rinse and then dry. Wipe the window clean with a damp
cloth.
Control Panel
Wipe with a damp cloth. Dry thoroughly. Do not use
cleaning sprays, large amounts of soap and water,
abrasives or sharp objects on the panel—they can
damage it. Some paper towels can also scratch the
control panel.
Door Panel
Before cleaning the front door panel, make sure you
know what type of panel you have. Refer to the eighth
digit of the model number. “S” is stainless steel, “L” is
CleanSteel and “B”, “W” or “C” are plastic colors.
Stainless Steel (on some models)
The stainless steel panel can be cleaned with Stainless
Steel Magic or a similar product using a clean, soft cloth.
Apply stainless cleaner carefully to avoid the surrounding
plastic parts. Do not use appliance wax, polish, bleach or
products containing chlorine on Stainless Steel finishes.
Plastic Color Panels
Use a clean, soft, lightly dampened cloth, then dry
thoroughly.
Door Seal
It’s important to keep the area clean where the door
seals against the microwave. Use only mild, non-
abrasive detergents applied with a clean sponge or soft
cloth. Rinse well.
Bottom
Clean off the grease and dust on the bottom often. Use a
solution of warm water and detergent.
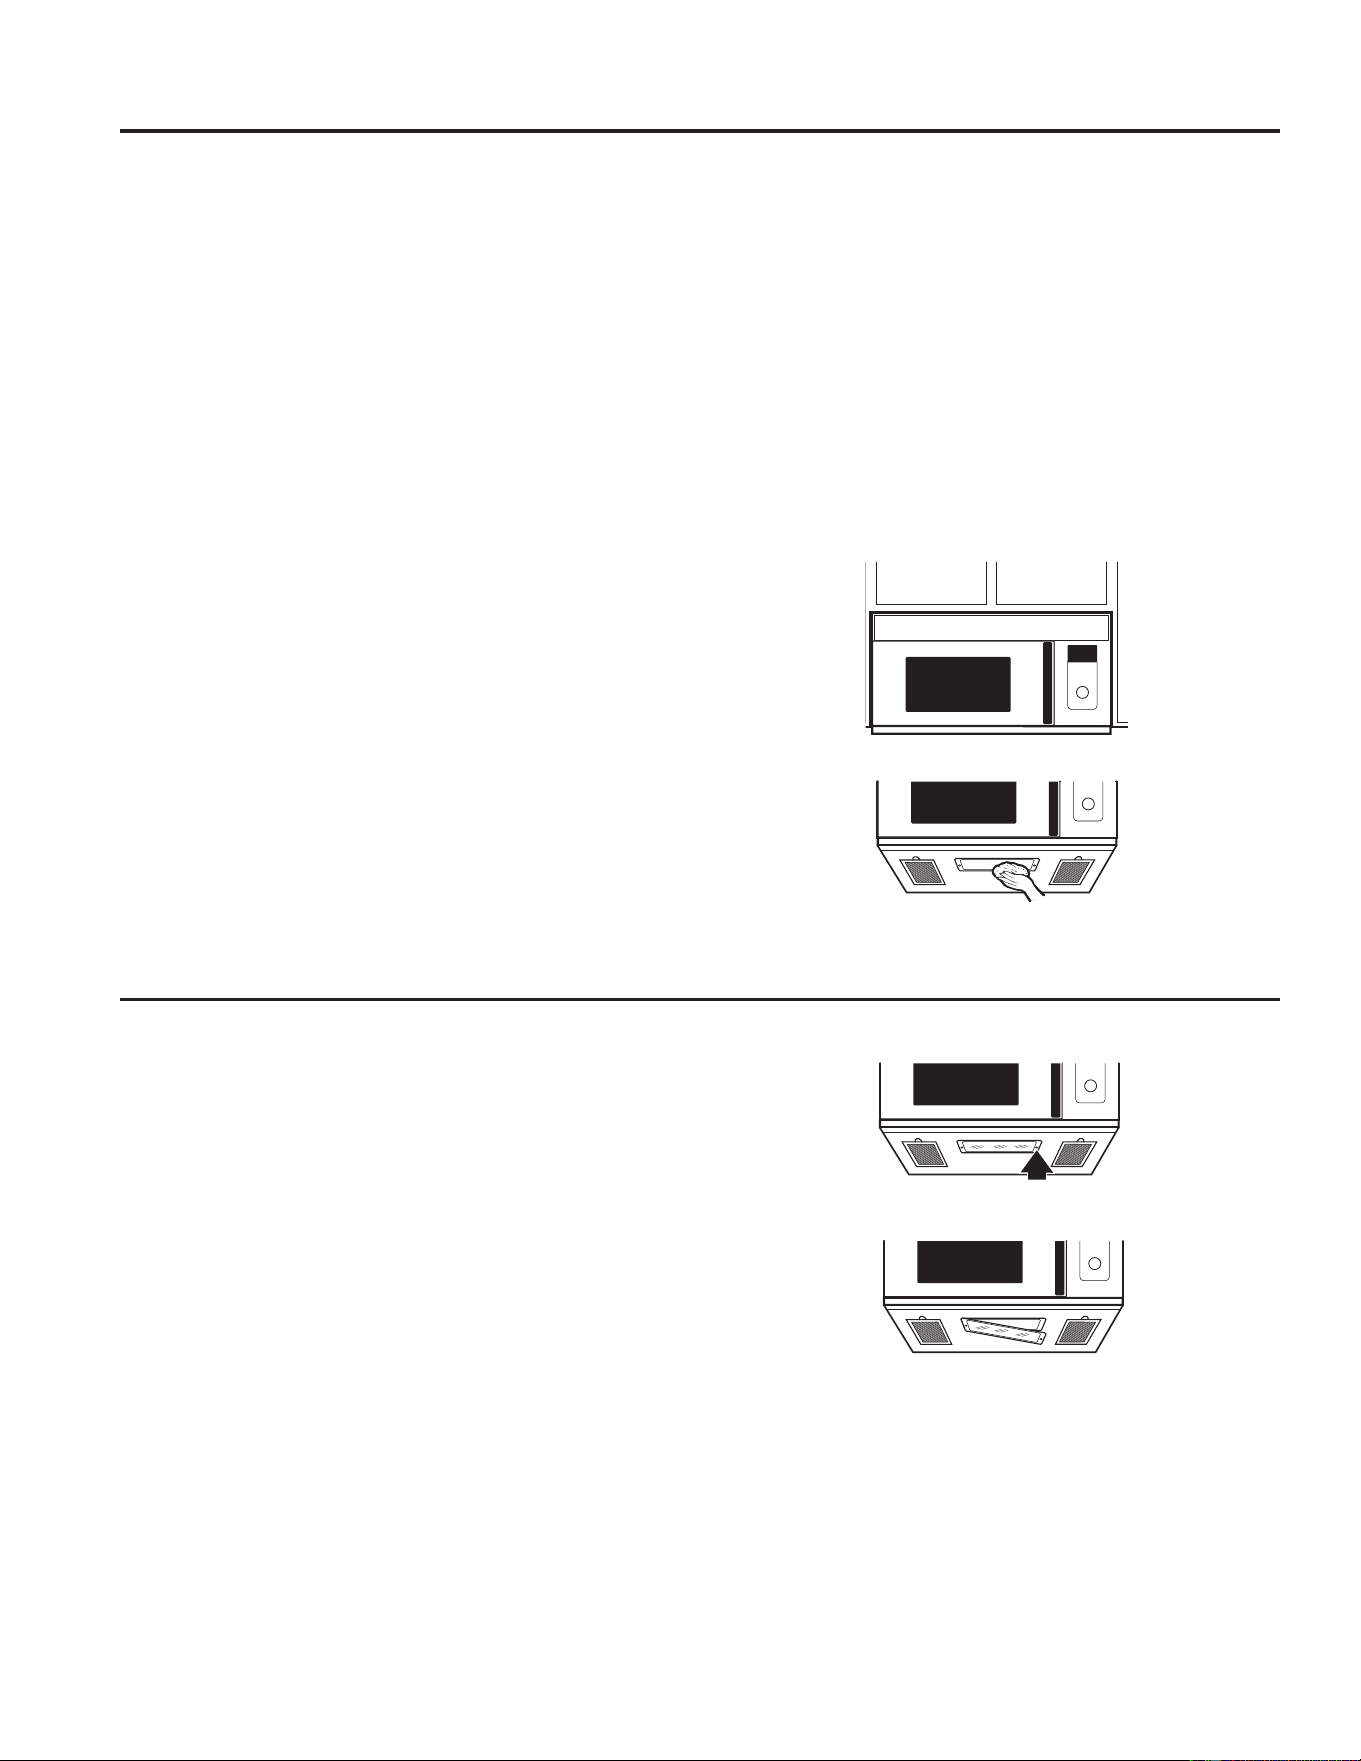
Replacing the Cooktop Light/Nite Light
Replace with a 120 volt, 40 watt (max.) halogen bulb.
Order WB08X10051 from your GE supplier.
1. To replace the cooktop light/nite light, first disconnect
the power at the main fuse or circuit breaker panel, or
pull the plug.
2. Remove the screw from the side of the light
compartment cover and lower the cover until it stops.
3. Be sure the bulb is cool before removing. Break the
adhesive seal by gently unscrewing the bulb.
4. Screw in the new bulb, then raise the light cover and
replace the screw. Connect electrical power to the
oven.
Remove screw.
CARE AND CLEANING: Oven
49-40723-2 19
CARE AND CLEANING: ([KDXVW)HDWXUH
Vent Fan
The vent fan has two metal reusable vent filters.
Models that recirculate air back into the room also use
a charcoal filter.
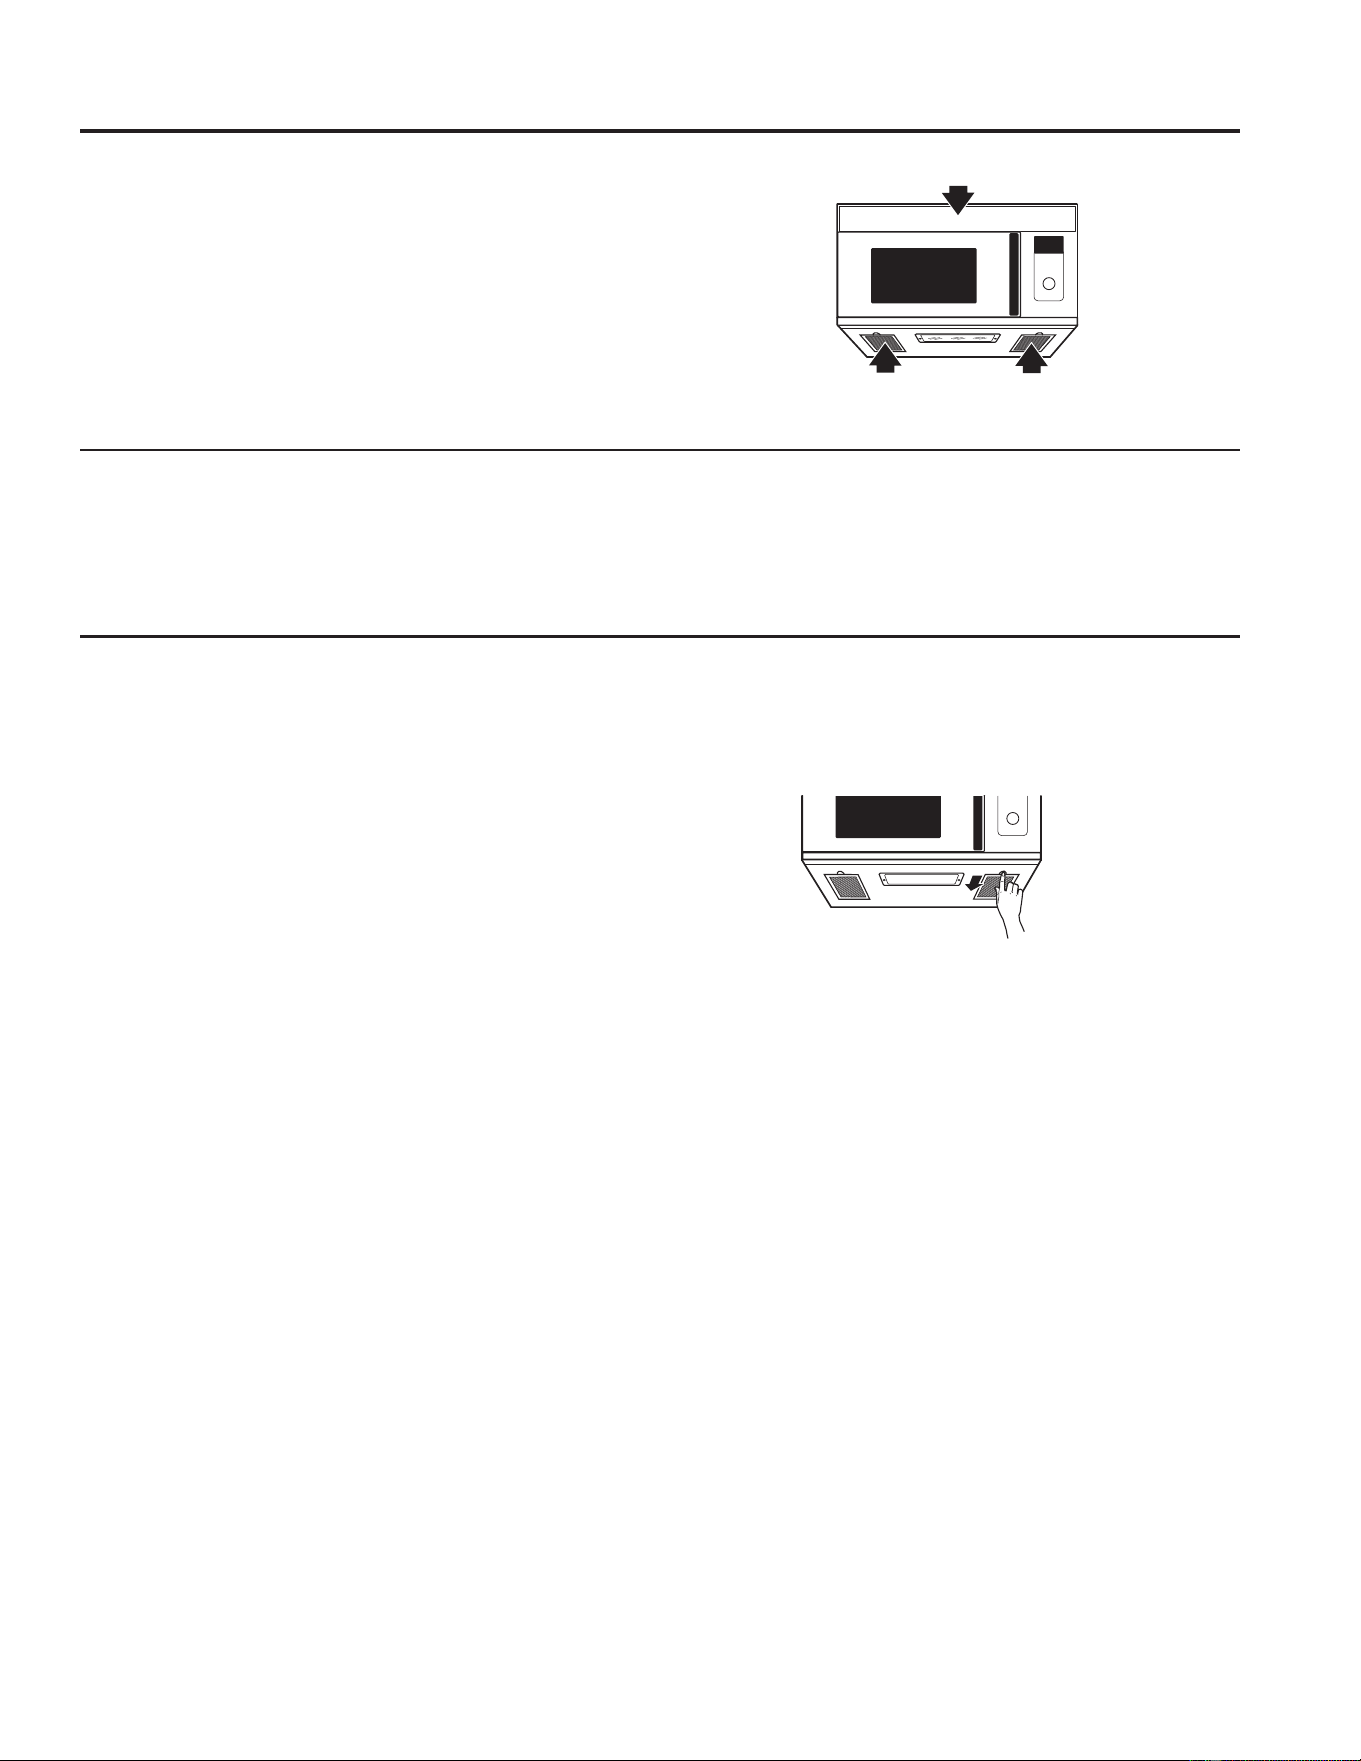
Removing and Cleaning the Filters
To remove, slide them to the rear using the tabs. Pull
down and out.
To clean the vent filters, soak them and then swish
around in hot water and detergent. Don’t use ammonia
or ammonia products because they will darken the metal.
Light brushing can be used to remove embedded dirt.
Rinse, shake and let dry before replacing.
To replace, slide the filters into the frame slots on the
back of each opening. Press up and to the front to lock
into place.
Reusable Vent Filter
The metal filters trap grease released by foods on the
cooktop. They also prevent flames from foods on the
cooktop from damaging the inside of the oven.
)RUWKLVUHDVRQWKHILOWHUVPXVWDOZD\VEHLQSODFHZKHQ
the hood is used. The vent filters should be cleaned
once a month, or as needed.
Exhaust Feature
Reusable vent filters
(on all models).
Charcoal filter (on some models).
20 49-40723-2
Charcoal Filter
The charcoal filter cannot be cleaned. It must be
replaced. Order Part No. WB02X10943 from your GE
supplier.
If the model is not vented to the outside, the air will be
recirculated through a disposable charcoal filter that
helps remove smoke and odors.
The charcoal filter should be replaced when it is
noticeably dirty or discolored (usually after 6 to 12
months, depending on usage). See “Accessories,” page
31, for more information.
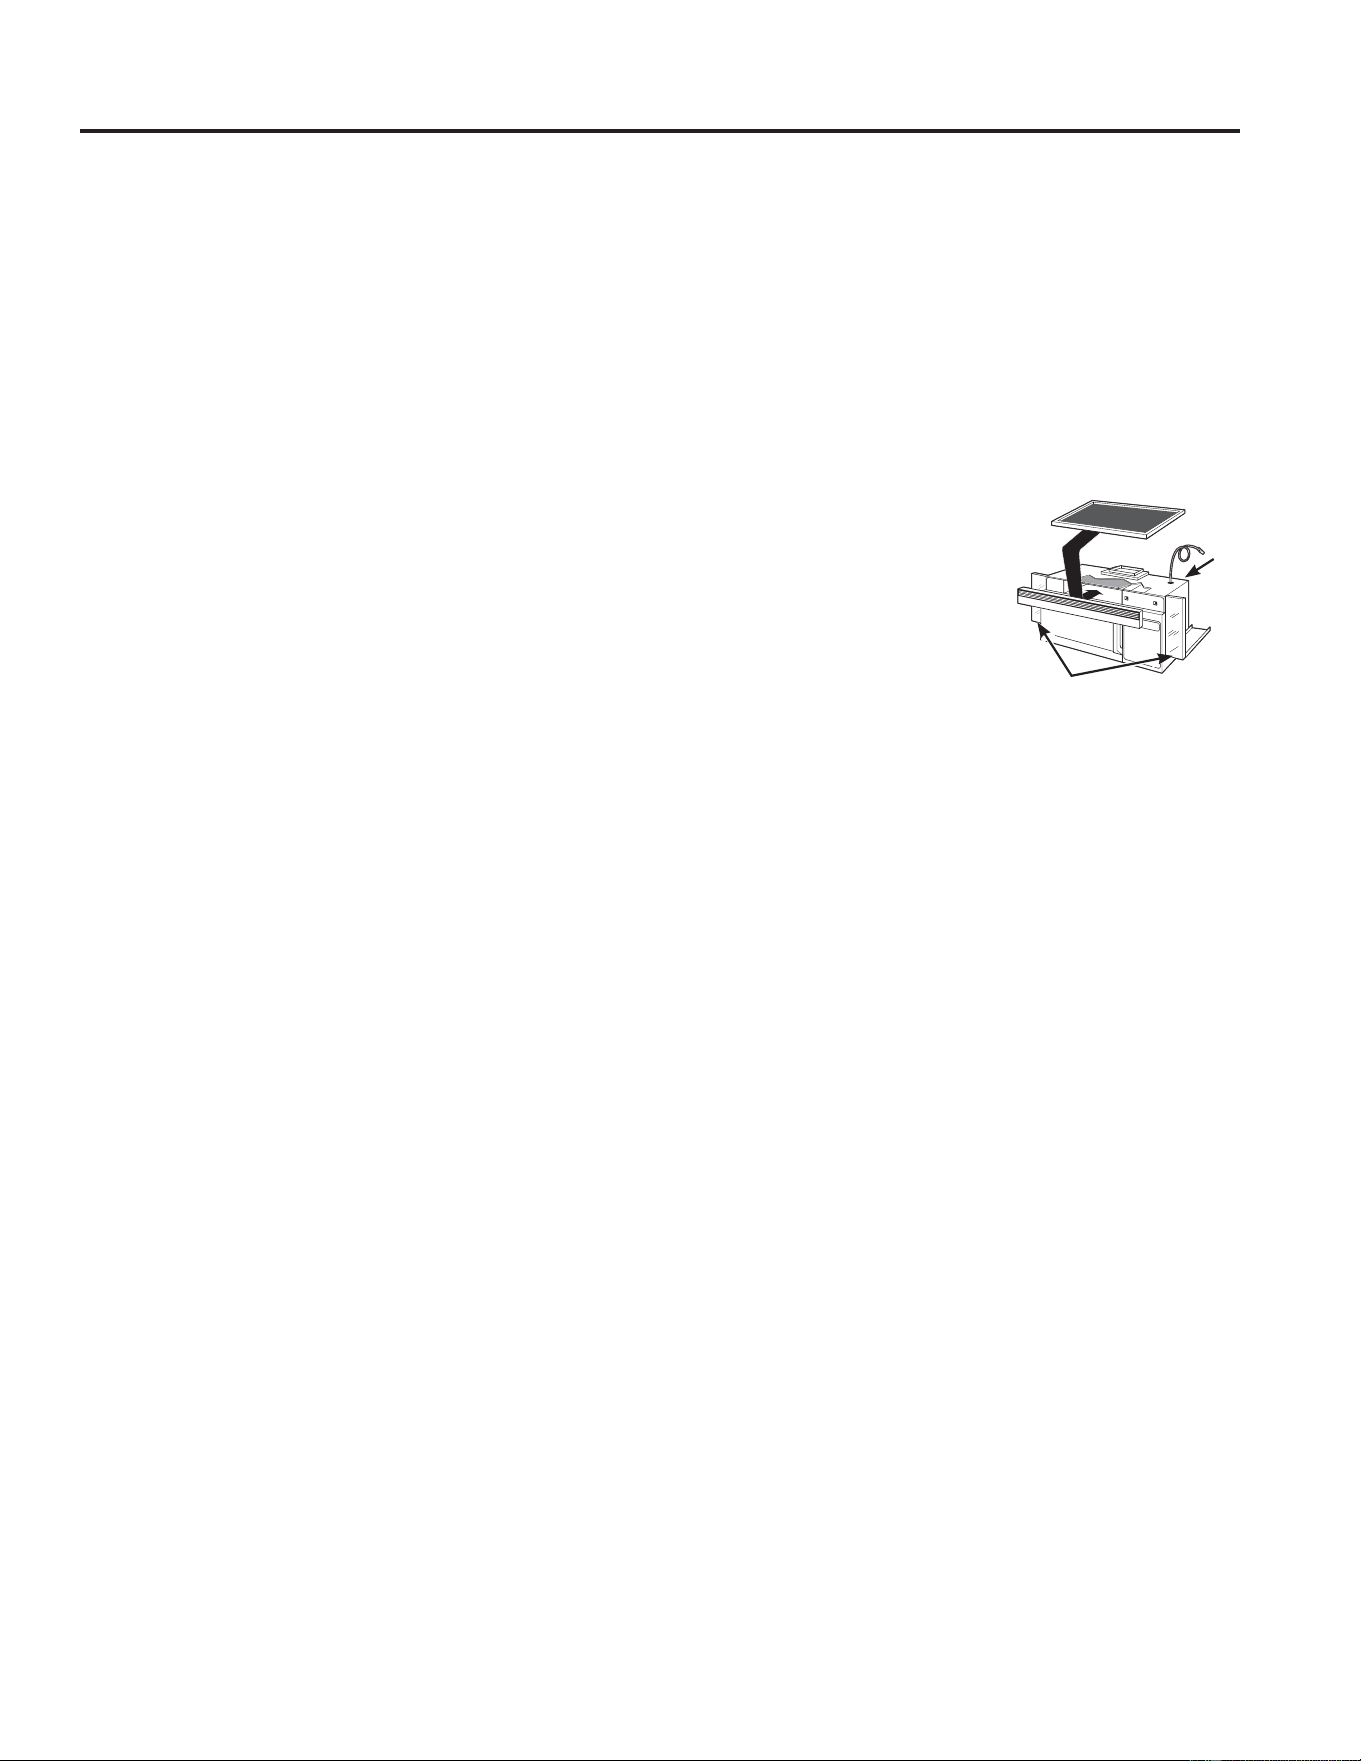
Exhaust Feature (Cont.)
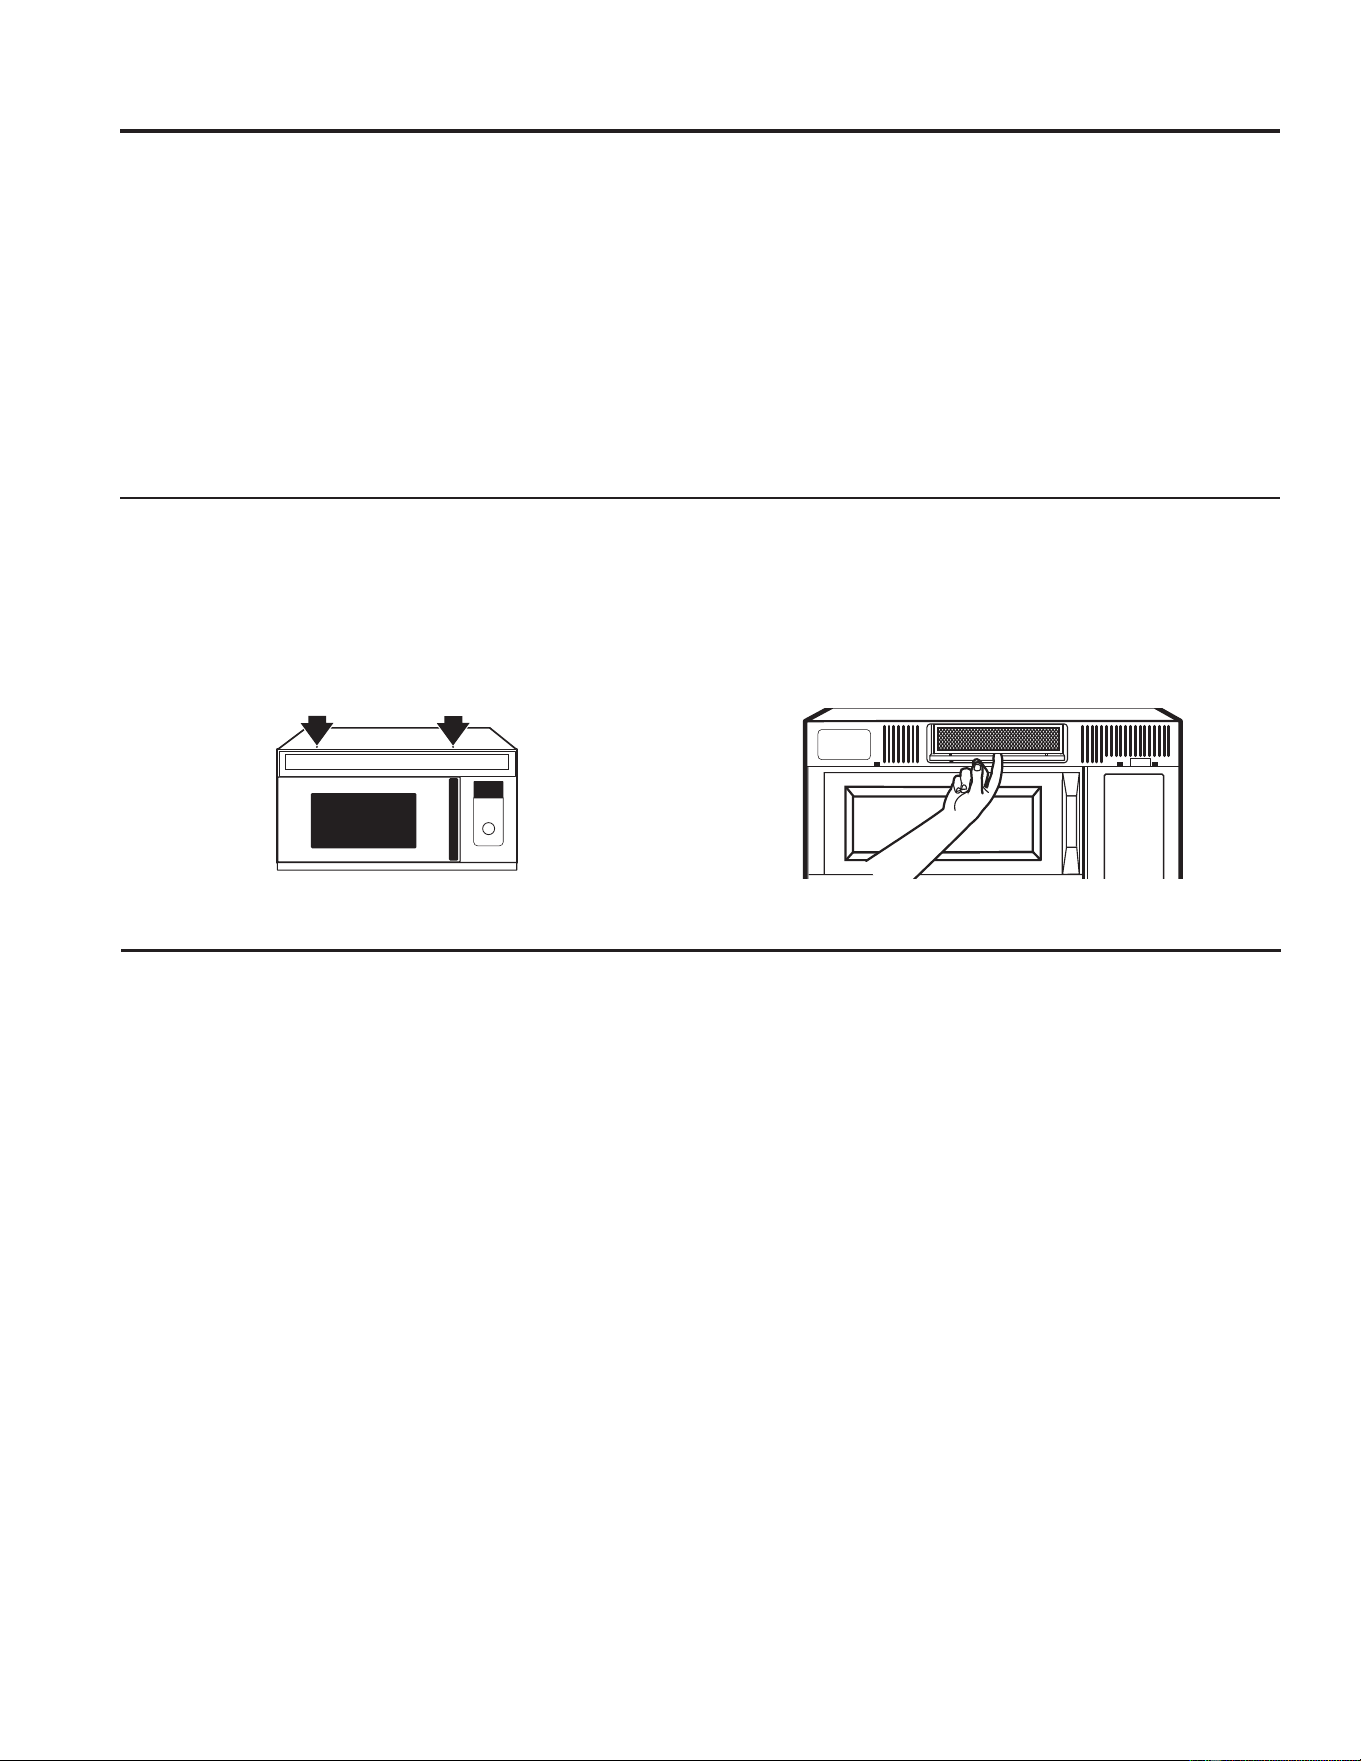
To Remove the Charcoal Filter
To remove the charcoal filter, first disconnect power at
the main fuse or circuit breaker, or pull the plug. Remove
the top grille by removing the two screws that hold it
in place.You may need to open the cabinet doors to
remove the screws.
Lift the filter at the bottom until it comes free of the tabs.
Slide the filter down and out.
Remove 2 grille screws to remove
the grille.
To Install the Charcoal Filter
To install a new charcoal filter, remove plastic and
other outer wrapping from the new filter.
Insert the top of the filter up and into the grooves on the
inside of the top opening. Push the bottom of the filter in
until it rests in place behind the tabs.
CARE AND CLEANING: Exhaust Feature
49-40723-2 21
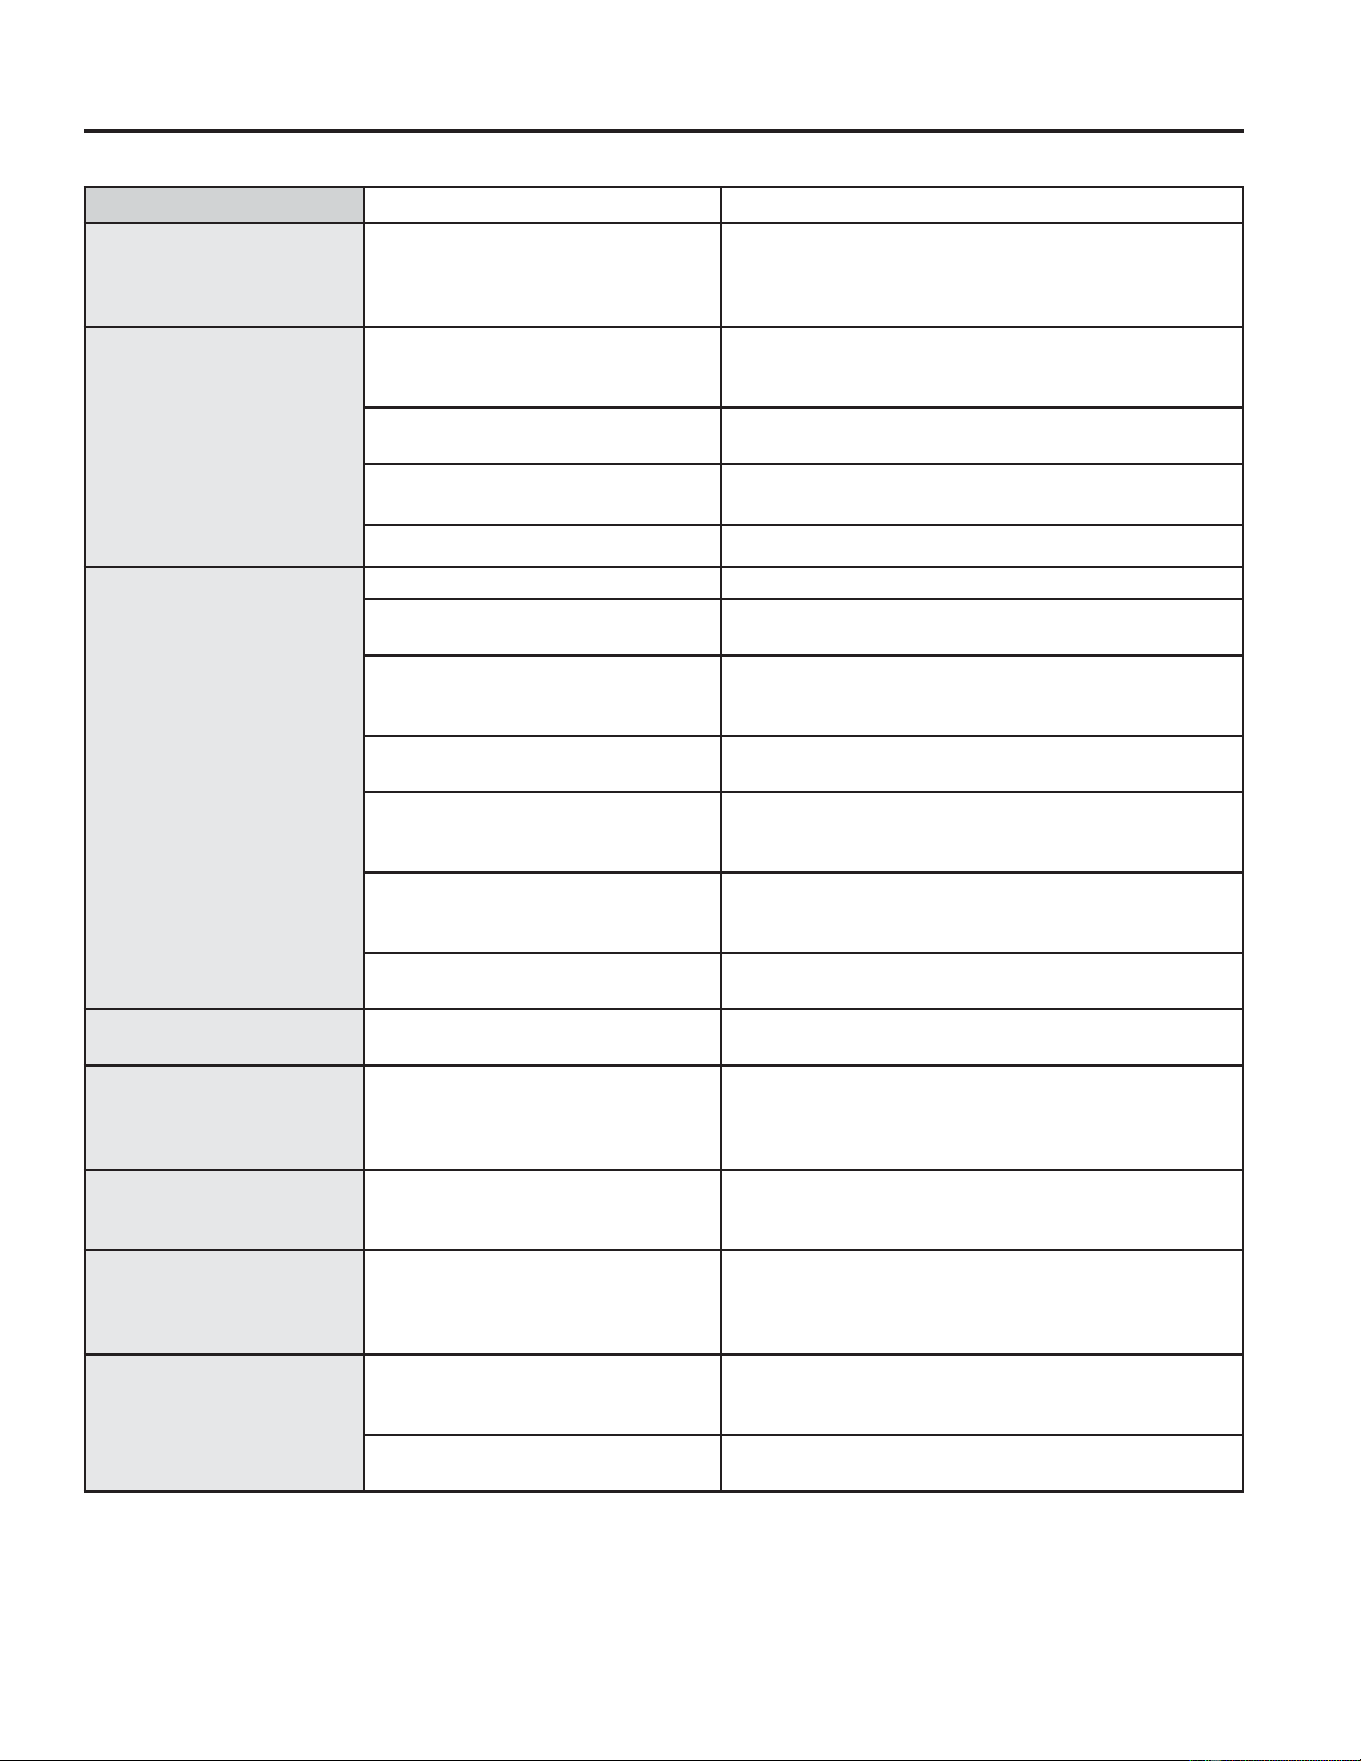
TROUBLESHOOTING TIPS
Save time and money! Review the charts on the following pages first and you may not need to call for service.
Problem Possible Cause What To Do
The display is blank The clock is designed to turn off
when unit is idle for 30 seconds
to minimize the standby power
usage.
The clock will turn on when unit is in use or door is
opened. There is not an override option available
EDVHGRQWKH'2(HQHUJ\UHTXLUHPHQWV
Oven will not start A fuse in your home may be
blown or the circuit breaker
tripped.
Replace fuse or reset circuit breaker.
Power surge. Unplug the microwave oven, then plug it back in.
Plug not fully inserted into wall
outlet.
Make sure the 3-prong plug on the oven is fully
inserted into wall outlet.
Door not securely closed. Open the door and close securely.
Control panel lighted, yet
oven will not start
Door not securely closed. Open the door and close securely.
START/PAUSE button not pressed
after entering cooking selection.
Press START/PAUSE.
Another selection entered already
in oven and CLEAR/OFF button
not pressed to cancel it.
Press
CLEAR/OFF.
Cooking time not entered after
pressing TIME COOK.
Make sure you have entered cooking time after
SUHVVLQJ7,0(&22.
CLEAR/OFF was pressed
accidentally.
Reset cooking program and press START/PAUSE.
Food weight not entered after
selecting AUTO DEFROST or
FAST DEFROST
Make sure you have entered food weight after selecting
AUTO DEFROST or FAST DEFROST.
Food type not entered after
pressing AUTO COOK.
Make sure you have entered food type.
CONTROL LOCKED
appears on display
The control has been locked Press and hold CLEAR/OFF for about 3 seconds to
unlock the control.
Floor of the oven is warm
even when the oven has
not been used.
The cooktop light is located below
the oven floor. When light is on,
the heat it produces may make the
oven floor get warm.
This is normal.
You hear an unusual
low-tone beep
You have tried to change the power
level when it is not allowed.
Many of the oven’s features are preset and cannot be
changed.
Vent fan comes on
automatically
The vent fan automatically turns
on to protect the microwave if it
senses too much heat rising from
the cooktop below.
This is normal.
SENSOR ERROR appears
on the display
When using a Sensor feature the
door was opened before steam
could be detected.
Do not open door until steam is seasoned and time is
shown counting down on the display.
Steam was not detected in a
maximum amount of time.
Use Time Cook to heat for more time.
Troubleshooting Tips... Before you call for service

22 49-40723-2
Troubleshooting Tips... Before you call for service
Things That Are Normal With Your Microwave Oven
Ŷ Moisture on the oven door and walls while cooking.
Wipe the moisture off with a paper towel or soft cloth.
Ŷ Moisture between the oven door panels when cooking
certain foods. Moisture should dissipate shortly after
cooking is finished.
Ŷ Steam or vapor escaping from around the door.
Ŷ Light reflection around door or outer case.
Ŷ Dimming oven light and change in the blower sound at
power levels other than high.
Ŷ Dull thumping sound while oven is operating.
Ŷ The vent fan operating while the microwave is
operating. The vent fan will not go off nor can it be
turned off until the microwave is off.
Ŷ TV-radio interference might be noticed while using the
microwave. Similar to the interference caused by other
small appliances, it does not indicate a problem with
the microwave. Plug the microwave into a different
electrical circuit, move the radio or TV as far away
from the microwave as possible or check the position
and signal of the TV/radio antenna.
Ŷ The clock is designed to turn off when unit is idle for
30 seconds to minimize the standby power usage. The
clock will turn on when unit is in use or door is opened.
There is not an override option available based on the
'2(HQHUJ\UHTXLUHPHQWV
TROUBLESHOOTING TIPS
FEDERAL COMMUNICATIONS COMMISSION RADIO FREQUENCY
INTERFERENCE STATEMENT (U.S.A. ONLY)
7KLVHTXLSPHQWJHQHUDWHVDQGXVHV,60IUHTXHQF\
energy and if not installed and used properly, that is in
strict accordance with the manufacturer’s instructions,
may cause interference to radio and television
reception. It has been type tested and found to comply
ZLWKOLPLWVIRU,60(TXLSPHQWSXUVXDQWWRSDUWRI
)&&5XOHVZKLFKDUHGHVLJQHGWRSDUWRI)&&
Rules, which are designed to provide residential
installation.
However, there is no guarantee that interference will not
RFFXULQDSDUWLFXODULQVWDOODWLRQ,IWKLVHTXLSPHQWGRHV
cause interference to radio or television reception, which
FDQEHGHWHUPLQHGE\WXUQLQJWKHHTXLSPHQWRIIDQGRQ
the user is encouraged to try to correct the interference
by one or more of the following:
Ŷ5HRULHQWWKHUHFHLYLQJDQWHQQDRIWKHUDGLRRU
television.
Ŷ5HORFDWHWKH0LFURZDYH2YHQZLWKUHVSHFWWRWKH
receiver.
Ŷ0RYHWKHPLFURZDYHRYHQDZD\IURPWKHUHFHLYHU
Ŷ3OXJWKHPLFURZDYHRYHQLQWRDGLIIHUHQWRXWOHWVRWKDW
the microwave oven and the receiver are on different
branch codes.
The manufacturer is not responsible for any radio of TV
interference caused by unauthorized modification to this
microwave oven. It is the responsibility of the user to
correct such interference.

49-40723-2 23
NOTES
Notes

24 49-40723-2
Notes
NOTES

49-40723-2 25
NOTES
Notes
26 49-40723-2
Staple your receipt here. Proof of the original purchase
date is needed to obtain service under the warranty.
GEAppliances.com
$OOZDUUDQW\VHUYLFHLVSURYLGHGE\RXU)DFWRU\6HUYLFH&HQWHUVRUDQDXWKRUL]HG&XVWRPHU&DUH
®
technician. To schedule
service online, visit us at www.geappliances.com/service_and_support/, or call GE Appliances at 800.GE.CARES
(800.432.2737). Please have your serial number and your model number available when calling for service.
6HUYLFLQJ\RXUDSSOLDQFHPD\UHTXLUHWKHXVHRIWKHRQERDUGGDWDSRUWIRUGLDJQRVWLFV7KLVJLYHVD*($SSOLDQFHVIDFWRU\
VHUYLFHWHFKQLFLDQWKHDELOLW\WRTXLFNO\GLDJQRVHDQ\LVVXHVZLWK\RXUDSSOLDQFHDQGKHOSV*($SSOLDQFHVLPSURYHLWV
products by providing GE Appliances with information on your appliance. If you do not want your appliance data to be
sent to GE Appliances, please advise your technician not to submit the data to GE Appliances at the time of service.
What GE Appliances will not cover:
Ŷ 6HUYLFHWULSVWR\RXUKRPHWRWHDFK\RXKRZWR
use the product.
Ŷ ,PSURSHULQVWDOODWLRQGHOLYHU\RUPDLQWHQDQFH
Ŷ 3URGXFWQRWDFFHVVLEOHWRSURYLGHUHTXLUHG
service.
Ŷ )DLOXUHRIWKHSURGXFWRUGDPDJHWRWKHSURGXFWLI
it is abused, misused (for example, cavity arcing
from wire rack or metal/foil), or used for other
than the intended purpose or used commercially.
Ŷ 5HSODFHPHQWRIWKHFRRNWRSOLJKWEXOEV
Ŷ 5HSODFHPHQWRIKRXVHIXVHVRUUHVHWWLQJRI
circuit breakers.
Ŷ 'DPDJHWRWKHSURGXFWFDXVHGE\DFFLGHQWILUH
floods or acts of God.
Ŷ ,QFLGHQWDORUFRQVHTXHQWLDOGDPDJHFDXVHGE\
possible defects with this appliance.
Ŷ 'DPDJHFDXVHGDIWHUGHOLYHU\
WARRANTY
GE Appliances Microwave Oven Warranty
EXCLUSION OF IMPLIED WARRANTIES
Your sole and exclusive remedy is product repair as provided in this Limited Warranty. Any implied warranties,
including the implied warranties of merchantability or fitness for a particular purpose, are limited to one year or
the shortest period allowed by law.
This warranty is extended to the original purchaser and any succeeding owner for products purchased for home use
within the USA. If the product is located in an area where service by a GE Appliances Authorized Servicer is not available,
\RXPD\EHUHVSRQVLEOHIRUDWULSFKDUJHRU\RXPD\EHUHTXLUHGWREULQJWKHSURGXFWWRDQ$XWKRUL]HG*($SSOLDQFHV
Service location for service. In Alaska, the warranty excludes the cost of shipping or service calls to your home.
6RPHVWDWHVGRQRWDOORZWKHH[FOXVLRQRUOLPLWDWLRQRILQFLGHQWDORUFRQVHTXHQWLDOGDPDJHV7KLVZDUUDQW\JLYHV\RX
specific legal rights, and you may also have other rights which vary from state to state. To know what your legal rights
are, consult your local or state consumer affairs office or your state’s Attorney General.
Warrantor: GE Appliances
Extended Warranties: Purchase a GE Appliances extended warranty and learn about special discounts that are
available while your warranty is still in effect. You can purchase it online anytime at
www.geappliances.com/service_and_support/shop-for-extended-service-plans.htm
or call 800.626.2224 during normal business hours. GE Appliances Service will still be there after your warranty expires.
For the period of GE Appliances will replace
One year
)URPWKHGDWH
of the original
purchase
Any part of the microwave oven which fails due to a defect in materials or workmanship.
During this limited one-year warranty, GE Appliances will provide, free of charge, all labor
and in-home service to replace the defective part.
Five years
)URPWKHGDWH
of the original
purchase
The magnetron tube, if the magnetron tube fails due to a defect in materials or
workmanship. During this five-year limited warranty, you will be responsible for any labor or
in-home service costs.
49-40723-2 27
ACCESSORIES
Looking For Something More?
GE Appliances offers a variety of accessories to improve your cooking and maintenance experiences!
Refer to the Consumer Support page for phone numbers and website information.
The following products and more are available at extra cost from your GE supplier:
Accessories
Filler Panel Kits
Ŷ JX40WH—White
Ŷ JX41—Black
When replacing a 36" range hood, filler panel kits fill in the
additional width to provide a custom built-in appearance.
)RULQVWDOODWLRQEHWZHHQFDELQHWVRQO\QRWIRUHQGRIFDELQHW
installation. Each kit contains two 3" wide filler panels.
Filter Kits
Ŷ JX81D—Recirculating Charcoal Filter Kit
)LOWHUNLWVDUHXVHGZKHQWKHRYHQFDQQRWEHYHQWHGWRWKH
outside.
Available at extra cost from your
GE supplier. See the back cover
for ordering by phone or
at GEAppliances.com.
JX81D
JX40, JX41

28 49-40723-2
Printed in the United States
Consumer Support
CONSUMER SUPPORT
GE Appliances Website
+DYHDTXHVWLRQRUQHHGDVVLVWDQFHZLWK\RXUDSSOLDQFH"7U\WKH*($SSOLDQFHV:HEVLWHKRXUVDGD\DQ\GD\
of the year! You can also shop for more great GE Appliances products and take advantage of all our on-line support
services designed for your convenience. In the US: GEAppliances.com
Register Your Appliance
Register your new appliance on-line at your convenience! Timely product registration will allow for enhanced
communication and prompt service under the terms of your warranty, should the need arise. You may also mail in
the pre-printed registration card included in the packing material. In the US: GEAppliances.com/register
Schedule Service
Expert GE Appliances repair service is only one step away from your door. Get on-line and schedule your service at
your convenience any day of the year. In the US: GEAppliances.com/ge/service-and-support/service.htm
or call 800.432.2737 during normal business hours.
Extended Warranties
Purchase a GE Appliances extended warranty and learn about special discounts that are available while your
warranty is still in effect. You can purchase it on-line anytime. GE Appliances Services will still be there after your
warranty expires. In the US: GEAppliances.com/ge/service-and-support/shop-for-extended-service-plans.htm
or call 800.626.2224 during normal business hours.
Remote Connectivity
)RUDVVLVWDQFHZLWKZLUHOHVVQHWZRUNFRQQHFWLYLW\IRUPRGHOVZLWKUHPRWHHQDEOH
visit our website at GEAppliances.com/ge/connected-appliances/ or call 800.220.6899 in the US.
Parts and Accessories
,QGLYLGXDOVTXDOLILHGWRVHUYLFHWKHLURZQDSSOLDQFHVFDQKDYHSDUWVRUDFFHVVRULHVVHQWGLUHFWO\WRWKHLUKRPHV
(VISA, MasterCard and Discover cards are accepted). Order on-line today 24 hours every day.
In the US: GEApplianceparts.com or by phone at 877.959.8688 during normal business hours.
Instructions contained in this manual cover procedures to be performed by any user. Other servicing
generally should be referred to qualified service personnel. Caution must be exercised, since improper
servicing may cause unsafe operation.
Contact Us
If you are not satisfied with the service you receive from GE Appliances, contact us on our Website with all the
details including your phone number, or write to:
,QWKH86*HQHUDO0DQDJHU&XVWRPHU5HODWLRQV_*($SSOLDQFHV$SSOLDQFH3DUN_/RXLVYLOOH.<
GEAppliances.com/ge/service-and-support/contact.htm

Anote aquí los números de modelo
y de serie:
Modelo número __________
Número de seri ___________
Los encontrará en una etiqueta al
abrir la puerta.
MANUAL DEL
PROPIETARIO
HORNO DE MICROONDAS
49-40723-2 12-16 GEA
CVM1750
INFORMACIÓN
DE SEGURIDAD .................3
USO DEL MICROONDAS
Funciones ............................9
Controles ............................10
Funciones de su microondas ........... 11
Funciones por tiempo y automático ....13
Functiones de Sensor .................14
Otras funciones .......................17
CUIDADO Y LIMPIEZA
Horno .............................. 20
Función de Escape ....................22
RESOLUCIÓN
DE PROBLEMAS ...............23
GARANTÍA ...................... 30
ACCESORIOS ....................31
AYUDA AL CLIENTE ............32
GE es una marca registrada de General Electric Company. Fabricado bajo licencia de marca.

2 49-40723-2
GRACIAS POR HACER QUE GE APPLIANCES SEA PARTE DE SU HOGAR.
Ya sea que haya crecido usando GE Appliances, o que ésta es su primera vez, nos complace
tenerlo en la familia.
Sentimos orgullo por el nivel de arte, innovación y diseño de cada uno de los electrodomésticos de
GE Appliances, y creemos que usted también. Entre otras cosas, el registro de su electrodoméstico
asegura que podamos entregarle información importante del producto y detalles de la garantía
cuando los necesite.
Registre su electrodoméstico GE ahora a través de Internet. Sitios Web y números telefónicos útiles
están disponibles en la sección de Soporte para el Consumidor de este Manual del Propietario.
También puede enviar una carta en la tarjeta de inscripción preimpresa que se incluye con
el material embalado.

49-40723-2 3
LEA Y GUARDE ESTAS INSTRUCCIONES
INFORMACIÓN IMPORTANTE DE SEGURIDAD
LEA TODAS LAS INSTRUCCIONES ANTES DE USAR
ADVERTENCIA
Para reducir el riesgo de quemaduras, descargas eléctricas, incendio, lesiones o exposición
a energía de microondas excesiva:
Cuando utilice aparatos eléctricos, se deben seguir las precauciones de seguridad básicas, entre las que se incluyen las
siguientes:
Ŷ /HDWRGDVODVLQVWUXFFLRQHVDQWHVGHXWLOL]DUHVWHDSDUDWR
Ŷ /HD\VLJDODVSUHFDXFLRQHVHVSHFtILFDVGHODVHFFLyQ
Precauciones para evitar una posible exposición a
excesiva energía de microondas la página 7
Ŷ 8WLOLFHHVWHDSDUDWRVyORSDUDORVILQHVGHVFULWRVHQHVWH
manual. No utilice químicos corrosivos o vapores en este
aparato.Este horno está específicamente diseñado para
calentar, deshidratar y cocinar alimentos, no se diseñó
para uso en laboratorios o para uso industrial.
Ŷ (VWHDSDUDWRVyORGHEHVHUUHSDUDGRSRUSHUVRQDOGH
servicio calificado. Contacte a la empresa de servicio
autorizada para la revisión, reparación o ajuste de este
aparato.
INSTALLATION
Ŷ ,QVWDOH\FRORTXHHVWHDSDUDWRGHDFXHUGRFRQODV
Instrucciones de Instalación suministradas.
Ŷ
Este aparato debe contar con una conexión a tierra.
Conecte sólo a un tomacorriente con adecuada conexión a
tierra. Ver la sección Instrucciones de conexión a tierra de
la página 7.
Ŷ (VWHKRUQRGHPLFURRQGDVVHHQFXHQWUDDSUREDGRSRU
8/SDUDODLQVWDODFLyQVREUHFRFLQDVDJDVPHQRVGH
%78\HOpFWULFDV
Ŷ (VWHKRUQRSDUDXVDUVREUHODHVWXIDHVWiGLVHxDGRSDUD
usarse sobre estufas de un ancho no superior a 36”.
Puede instalarse sobre equipamientos de cocción a gas y
eléctricos.
Ŷ No utilice este aparato si tiene el cable eléctrico o el
enchufe dañados, si no funciona bien o si ha sufrido una
avería o una caída.
Ŷ 0DQWHQJDHOFDEOHDOHMDGRGHVXSHUILFLHVFDOLHQWHV
Ŷ No permita que el cable eléctrico cuelgue sobre el borde
de la mesa o del mostrador de encimera.
Ŷ 1RVXPHUMDHOFDEOHHOpFWULFRRHOHQFKXIHHQDJXD
Ŷ 1RFXEUDQLEORTXHHQLQJXQDDEHUWXUDGHODSDUDWR
Ŷ 1RJXDUGHHVWHDSDUDWRHQHOH[WHULRU1RORXWLOLFHFHUFD
del agua – por ejemplo, en un sótano mojado, cerca de
una piscina, cerca de un grifo o en ubicaciones similares.
Ŷ 1RPRQWHHVWHDSDUDWRDUULEDGHOIUHJDGHUR
PARA REDUCIR EL RIESGO DE INCENDIO EN LA
CAVIDAD DEL HORNO:
Ŷ 1RFRFLQHGHPiVORVDOLPHQWRV3UHVWHDWHQFLyQDO
aparato cuando se coloquen papel, plástico u otros
materiales combustibles dentro del horno durante la
cocción.
Ŷ 4XLWHORVJDQFKLWRVGHDODPEUH\ODVPDQLMDVGHPHWDOGH
los recipientes de papel o de plástico antes de colocarlos
en el horno.
Ŷ 6LORVPDWHULDOHVXELFDGRVGHQWURGHOKRUQRVHSUHQGHQ
fuego, mantenga cerrada la puerta del horno, apáguelo y
desconecte el cable eléctrico, o corte la energía desde el
panel de fusibles o del interruptor de circuitos. Si se abre
la puerta, el fuego puede propagarse.
Ŷ 1RXWLOLFHHOKRUQRSDUDDOPDFHQDUHOHPHQWRV1RGHMH
productos de papel, utensilios de cocina o alimentos en
el horno cuando no lo esté usando. Todos los estantes
deberán ser retirados del horno cuando no se encuentren
en uso.
Ŷ 1RRSHUHHOKRUQRVLQDOLPHQWRVDGHQWUR
Ŷ 1RXWLOLFHODVIXQFLRQHVGHOVHQVRUGRVYHFHVVHJXLGDV
en la misma porción de comida. Si los alimentos no se
cocinaron después de la primera cuenta regresiva, utilice
&22.%<7,0(FRFLQDUSRUWLHPSRSDUDREWHQHUWLHPSR
de cocción adicional.
A FIN DE REDUCIR RIESGOS DE QUEMADURAS:
Ŷ7HQJDFXLGDGRDODEULUHQYDVHVFRQFRPLGDFDOLHQWH8VH
manijas y aleje el vapor del rostro y las manos.
Ŷ9HQWLOHSHUIRUHRFRUWHHQYDVHVEROVDVREROVDVSOiVWLFDV
para evitar la acumulación de presión.
Ŷ7HQJDFXLGDGRDOWRFDUHOSODWRJLUDWRULRODSXHUWDHVWDQWHV
o paredes del horno, los cuales se podrán calentar durante
el uso.
Ŷ/RVOtTXLGRV\FLHUWDVFRPLGDVFDOHQWDGDVHQHOKRUQRPLFUR-
ondas pueden presentar riesgos de quemaduras, al ser reti-
UDGRVGHOKRUQRPLFURRQGDV/DSRVLELOLGDGGHTXHPDGXUDV
es mayor en niños pequeños, a los cuales no se les deberá
permitir retirar ítems calientes del horno microondas.
INFORMACIÓN DE SEGURIDAD
4 49-40723-2
LEA Y GUARDE ESTAS INSTRUCCIONES
INFORMACIÓN IMPORTANTE DE SEGURIDAD
LEA TODAS LAS INSTRUCCIONES ANTES DE USAR
ADVERTENCIA
Continuado
USO
Ŷ (OXVRGHFXDOTXLHUHOHFWURGRPpVWLFRSRUSDUWHGHQLxRV
debería ser supervisado de cerca por un adulto.
Ŷ 1RKDJDIXQFLRQDUHOKRUQRVLQHOSODWRJLUDWRULRHQVX
lugar. El plato giratorio no debe tener ninguna clase de
bloqueo para que pueda girar.
Ŷ $VHJ~UHVHGHTXHWRGRVORVXWHQVLOLRVXVDGRVHQHOKRUQR
microondas sean para uso en el mismo. Podrán ser
usadas la mayoría de las cacerolas de vidrio, platos de
cocción, tazas graduadas, tazas para postre, vajillas de
cerámica o porcelana que no posean bordes metálicos o
vidriados con un brillo metálico, en cumplimiento con las
recomendaciones del fabricante de utensilios.
Ŷ 1RDOPDFHQHQLQJ~QHOHPHQWRGLUHFWDPHQWHVREUHOD
superficie del horno de microondas cuando éste se
encuentre en funcionamiento.
Ŷ $OJXQRVSURGXFWRVFRPRKXHYRVHQWHURV\UHFLSLHQWHV
sellados – por ejemplo, botes sellados – pueden explotar
y no deben calentarse en este horno. Si lo utiliza de esta
manera puede resultar en una lesión.
Ŷ 1RFRFLQHODVSDSDVH[FHVLYDPHQWH3XHGHQ
deshidratarse y provocar fuego, causando daños al horno.
Ŷ 1RFXEUDQLQLQJXQDSLH]DGHOKRUQRFRQOiPLQDGHPHWDO
Esto puede sobrecalentar el horno.
Ŷ &RFLQHODFDUQHGHUHVKDVWDDOFDQ]DUXQDWHPSHUDWXUD
INTERNA de por lo menos 160°F y las carnes de ave a
XQDWHPSHUDWXUD,17(51$GHSRUORPHQRV)/D
cocción a estas temperaturas generalmente protege de
enfermedades transmitidas por los alimentos.
Ŷ (VWHKRUQRQRHVWiDSUREDGRQLSUREDGRSDUDXVRPDULQR
LIMPIEZA
Ŷ 0DQWHQJDHOKRUQROLEUHGHDFXPXODFLRQHVGHJUDVD
Ŷ (VLPSRUWDQWHPDQWHQHUOLPSLDHOiUHDGRQGHODSXHUWDVH
sella contra el microondas. Sólo use detergentes suaves
no abrasivos aplicados con una esponja limpia o un paño
suave. Enjuague bien.
AGUA SOBRECALENTADA
Ŷ 2VOtTXLGRVFRPRHODJXDFDIpRWpSXHGHQFDOHQWDUVH
arriba del punto de hervor sin que aparenten que están
hirviendo. No siempre existen burbujas visibles o hervor
cuando retira el recipiente del horno microonda. ESTO
38('(5(68/7$5(1/Ë48,'2608<&$/,(17(6
48(+,(59(15(3(17,1$0(17(&8$1'26(
08(9((/5(&,3,(17(2,1752'8&(81$&8&+$5$
8275287(16,/,2(1(//Ë48,'2
Ŷ 3DUDUHGXFLUHOULHVJRGHXQDOHVLyQSHUVRQDO
- No sobrecaliente el líquido.
- Mueva el líquido antes y a la mitad del calentamiento.
- No utilice recipientes rectos con cuellos angostos.
'HVSXpVGHFDOHQWDUSHUPLWDTXHHOUHFLSLHQWHGHVFDQVH
en el horno microonda por un período corto de tiempo,
antes de retirar el recipiente.
- Tenga mucho cuidado cuando inserte una cuchara u otro
utensilio adentro del recipiente.
INFORMACIÓN DE SEGURIDAD
AVISO: MARCAPASOS
/DPD\RUtDGHORVPDUFDSDVRVVHHQFXHQWUDQSURWHJLGRVFRQWUDODLQWHUIHUHQFLDGHSURGXFWRVHOHFWUyQLFRVLQFOX\HQGRORV
microondas. Sin embargo, los pacientes que tengan marcapasos deberían consultar a sus médicos si tienen alguna duda.
ADVERTENCIAS DE LA PROPOSICIÓN 65 DEL ESTADO DE CALIFORNIA:
ADVERTENCIA
Este producto contiene uno o más químicos que el Estado de California entiende que producen
cáncer, y defectos en el nacimiento u otros daños reproductivos.

49-40723-2 5
INFORMACIÓN DE SEGURIDAD
PRECAUCIONES PARA EVITAR LA POSIBLE
EXPOSICIÓN A ENERGÍA DE MICROONDAS EXCESIVA
(a) No intente hacer funcionar el horno con
la compuerta abierta ya que ésto puede provocar
exposición peligrosa a la energía de microondas. Es
importante no forzar ni dañar los seguros.
(b) No coloque ningún objeto entre la parte frontal del horno
y la compuerta, ni permita que se acumulen residuos de
producto limpiador o detergente, suciedad o polvo en las
superficies de sellado.
(c) No haga funcionar el horno si se encuentra dañado. Es
particularmente importante cerrar bien la compuerta
ODFRPSXHUWDGREODGDRFXUYDGD
ODVELVDJUDV\SHVWLOORVURWRVRIORMRV
VHOORVGHODFRPSXHUWD\VXSHUILFLHVGHVHOODGR
(d) El horno no debe ser ajustado o reparado por ninguna
persona, excepto por personal de mantenimiento
calificado.
LEA Y GUARDE ESTAS INSTRUCCIONES
INFORMACIÓN IMPORTANTE DE SEGURIDAD
LEA TODAS LAS INSTRUCCIONES ANTES DE USAR
EL VENTILADOR EXTRACTOR
El ventilador se pondrá en funcionamiento de forma
DXWRPiWLFDEDMRFLHUWDVFLUFXQVWDQFLDVYHUIXQFLyQGH
9HQWLODGRU$XWRPiWLFR3UHYHQJDHOTXHHPSLHFHDOJ~Q
fuego al cocinar y que se extienda mientras el ventilador del
respiradero está en marcha.
Ŷ /LPSLHDPHQXGRODSDUWHLQIHULRUGHOPLFURRQGDV1R
permita que se acumule grasa en el microondas o en los
filtros del ventilador.
Ŷ 6LODJUDVDVHLQFHQGLDUDHQODVXQLGDGHVGHODFRFLQD
IRJRQHVEDMRHOKRUQRPLFURRQGDVVRIRTXHFXDOTXLHU
sartén en llamas de la unidad de cocina por completo con
una tapa, una bandeja de galletas o cualquier otra bandeja
plana.
Ŷ 7HQJDFXLGDGRDOOLPSLDUORVILOWURVGHOYHQWLODGRUH[WUDFWRU
/RVSURGXFWRVGHOLPSLH]DFRUURVLYRVFRPRORVOLPSLD
hornos a base de lejía, pueden dañar los filtros.
Ŷ 3RQJDHQPDUFKDHOH[WUDFWRUFXDQGRHVWpFRFLQDQGR
comidas con llama bajo el microondas.
Ŷ 1XQFDGHMHODVXQLGDGHVGHODFRFLQDIRJRQHVEDMRVX
microondas sin atención cuando se esté trabajando a
altas temperaturas. Cuando la comida entra en ebullición
se generan humos y se derraman grasas que pudieran
incendiarse y propagarse si el ventilador del microondas
está funcionando. Para minimizar el funcionamiento del
extractor automático, use utensilios de cocina de tamaño
adecuado y use el fuego rápido en las unidades de la
FRFLQDIRJRQHVVyORFXDQGRVHDQHFHVDULR
INSTRUCCIONES DE CONEXIÓN A TIERRA
ADVERTENCIA
El uso inadecuado del enchufe de conexión a tierra puede provocar un riesgo de
descarga eléctrica.
Tste aparato debe contar con una conexión a tierra. En caso
de un cortocircuito, la conexión
a tierra reduce el riesgo de una
descarga eléctrica al brindar un
cable de escape para la corriente
eléctrica.
Este aparato se encuentra
equipado con un cable eléctrico
que contiene un cable de
conexión a tierra con un
enchufe de conexión a tierra. El
enchufe debe conectarse en un tomacorriente con adecuada
instalación y conexión a tierra.
Consulte a un electricista o técnico calificado si no comprende
por completo las instrucciones de conexión a tierra, o si no
sabe si el aparato cuenta con una adecuada conexión a
tierra.
Para el uso de este aparato, es su responsabilidad y
obligación cambiar un tomacorriente de pared estándar de 2
clavijas por uno de 3 clavijas con adecuada conexión a tierra.
Bajo ninguna circunstancia corte o quite la clavija a tierra del
cable eléctrico.
No utilice un enchufe adaptador con este aparato.
No utilice un cable de extensión con este aparato. Si el
cable eléctrico es demasiado corto, solicite a un electricista o
técnico calificado la instalación de un tomacorriente cerca del
aparato.
Para un mejor funcionamiento, enchufe este aparato en su
propio circuito eléctrico para evitar que las luces parpadeen,
que el fusible se queme o que el interruptor de circuitos salte.
Asegúrese de
contar con una
conexión a
tierra adecuada
antes de usar.

6 49-40723-2
Funciones
1. Tirador
2. Enganches de puerta
3. Ventana con escudo metálico
/DYHQWDQDSHUPLWHYHUFRPRVHFRFLQDQORVDOLPHQWRV\
evita que salgan microondas del horno.
4. Panel de control y dial selector
5. Dispositivo giratorio extraíble
No ponga en marcha el horno en el modo microondas sin
que estén la base y el soporte de la base colocados en su
lugar.
6. Soporte del plato giratorio extraíble
El soporte del plato giratorio debe estar en su lugar cuando
se use el horno.
Su modelo puede tener otras características y apariencia que las ilustradas en este manual.
USO DEL MICROONDAS: Funciones

49-40723-2 7
USO DEL MICROONDAS: Controles
Controles
Es posible que las funciones y apariencias varíen con relación a su modelo a lo largo del manual.
6HOHFWRUGHO'LDO
Funciones de tiempo de cocción por microondas y automáticas
Presione Gire y apriete el dial para aceptar
TIME COOK (cocción por tiempo)
3XOVHXQDYH]7LPH&RRN,7LHPSRGH
FRFFLyQ,SDUDXWLOL]DUODIXQFLyQPLFURRQ-
das en un intervalo de tiempo de entre 15
segundos y 95 minutos.
3XOVHGRVYHFHV7LPH&RRN,,7LHPSR
GHFRFFLyQ,,SDUDFDPELDUORVQLYHOHVGH
potencia de forma automática durante la
cocción.
Cantidad de tiempo de cocción
MICRO EXPRESS cocinar/
Añadir 30 seg.
¡Empieza inmediatamente!
DEFROST (descongelar)
3XOVHXQDYH]5iSLGR
3XOVHGRVYHFHV$XWR
3XOVHWUHVYHFHV7LHPSR
Cantidad de tiempo de descongelación
Peso de alimentos hasta seis libras
Peso de alimentos hasta una libra
BEVERAGE (bebida)
3UHVLRQHXQDYH]R]
3UHVLRQHGRVYHFHVR]
3UHVLRQHWUHVYHFHVR]
¡Empieza inmediatamente!
POWER Level (Nivel de POTENCIA) Nivel de potencia 1–10
Funciones de sensor
Presione Gire y apriete el dial para aceptar Opción
POPCORN (rosetas o palomitas de
maíz)
¡Empieza inmediatamente! Más/menos tiempo
REHEAT
3UHVLRQHXQDYH]SODWR
3UHVLRQHGRVYHFHV
pasta
3UHVLRQHWUHVYHFHVDXQDWD]D
3UHVVIRXUWLPHVDWD]DV
¡Empieza inmediatamente! Más/menos tiempo
AUTO COOK (cocinar automáticamente)
Tipo de Comida Más/menos tiempo
8 49-40723-2
Funciones de microondas
Método de cocción
/DHQHUJtDPLFURRQGDVVH
distribuye de forma pareja
en todo el horno para que la
comida se cocine de forma
rápida y completa.
Fuente de calor
Energía microondas..
Conducción del calor
Calor producido dentro de
la comida por penetración
instantánea de energía.
Beneficios
Rápida, alta eficacia de
cocción. El horno y sus
alrededores no se calientan.
Fácil de limpiar.
Cocción por microondas
Su horno usa energía de microondas para cocinar según un período de tiempo predeterminado,
según el peso o de forma automática por medio de un sensor.
El microondas por sensor funciona detectando el incremento de humedad liberada durante la cocción.
El horno ajusta de forma automática el tiempo de cocción a varios tipos y cantidades de alimentos.
Cómo usar el dial
Podrá hacer selecciones en el horno girando el dial y
presionando para ingresar la selección.
8VWHGWDPELpQSXHGHSUHVLRQDUHOGLDOHQYH]GHERWyQ
START/PAUSE para una programación más rápida del horno.
Nivel de potencia
El nivel de potencia puede introducirse o cambiarse de forma
LQPHGLDWDWUDVLQWURGXFLUHOWLHPSRGHFRFFLyQTime CookHO
WLHPSRGHGHVFRQJHODFLyQTime DefrostRExpress Cook.
El nivel de potencia también puede cambiarse durante la
cuenta atrás.
1. Primero, siga las instrucciones para el tiempo de cocción
Time CookHOWLHPSRGHGHVFRQJHODFLyQTime Defrost
o Express Cook.
2. Presione el botón POWER.
3. Gire el dial, en el sentido de las agujas del reloj, para
aumentar y en el sentido contrario para disminuir la
potencia. Presione el dial para seleccionar.
4. Presione el botón START/PAUSE para empezar a cocinar.
/RVQLYHOHVGHSRWHQFLDYDULDEOHVDxDGHQIOH[LELOLGDGDOD
FRFLQDFRQPLFURRQGDV/RVQLYHOHVGHSRWHQFLDGHOKRUQR
microondas pueden compararse con las unidades de la
HQFLPHUDIRJRQHVHQXQDFRFLQD&DGDQLYHOGHSRWHQFLD
le proporciona energía microondas durante cierto porcentaje
del tiempo. Nivel de potencia 7 (power level 7) es energía
microondas al 70% del tiempo. Nivel de potencia 3 (power
level 3) es energía al 30% del tiempo. Normalmente se
cocinará en Alto (nivel de potencia 10) (High, power level
10) que proporciona una potencia del 100%. Power level 10
le permitirá cocinar más rápido, pero la comida, posiblemente,
necesitará que la agite, gire o dé la vuelta más a menudo.
8QQLYHOLQIHULRUFRFLQDUiODFRPLGDGHIRUPDPiVSDUHMD\
no necesitará que la agite, gire o dé la vuelta tanto. Algunas
comidas pueden tener mejor sabor, textura o aspecto si se usa
XQQLYHOLQIHULRU8VHXQQLYHOGHSRWHQFLDLQIHULRUFXDQGRHVWp
cocinando comidas que tengan tendencia a hervir, como las
papas gratinadas.
/RVSHUtRGRVGHGHVFDQVRFXDQGRVHDFDEDHOFLFORGHOD
HQHUJtDPLFURRQGDVOHGDQWLHPSRDODFRPLGDD³LJXDODUVH´R
transferir el calor a su interior. Se muestra un ejemplo de esto
con el ciclo de descongelación--power level 3 Si la energía
microondas no funcionara en ciclos, la parte externa de la
comida se cocinaría antes de que el interior se descongelara.
Estos son algunos ejemplos de aplicaciones para diferentes
niveles de potencia:
Alta 10: Pescado, bacon, verduras, calentar líquidos.
Media alta 7: Cocción suave de carne y aves, sirve para
cocinar guisos y para recalentar.
Media 5: Cocina lenta y tierna para estofados o guisos y para
partes menos tiernas de carne.
Baja 2 o 3: 3DUDGHVFRQJHODUFRFHUD³IXHJR´OHQWRSDUD
salsas delicadas.
Algo caliente 1: Mantener la comida caliente, ablandar la
mantequilla.
USO DEL MICROONDAS: Funciones de microondas

49-40723-2 9
USO DEL MICROONDAS: Funciones por tiempo y automático
Funciones por tiempo y automático
Micro Express Cook (cocción micro express)
Esta es la forma rápida de ajustar y empezar a cocinar en
bloques de 30 segundos cada vez que se aprieta el botón
MICRO EXPRESS. El tiempo de cocción puede cambiarse en
cualquier momento mientras se cocina girando el dial.
El nivel de potencia estará automáticamente seleccionado a 10
y el horno empezará inmediatamente.
El nivel de potencia puede cambiarse mientras el tiempo se va
agotando. Presione el botón POWER gire el dial y presiónelo
para seleccionar.
Time Defrost (Descongelación por tiempo)
8VHTime Defrost para descongelar por un período de tiempo
seleccionado.
1. Presione el botón DEFROSTGHVFRQJHODUXQDYH]
2. Gire el dial para seleccionar el tiempo que desee. Presione
el dial para seleccionar.
3. Presione el botón START/PAUSE para empezar a
descongelar.
'pODYXHOWDDODFRPLGDVLDSDUHFHHOPHQVDMHTURN FOOD
OVER.
Puede variar el tiempo de descongelación en cualquier
momento mientras se descongela girando el dial.
El nivel de potencia está preseleccionado a 3, pero puede
cambiarlo. Puede descongelar artículos pequeños rápidamente
elevando el nivel de potencia una vez introducido el tiempo.
El nivel de potencia 7 (power level 7) recorta el tiempo total
de descongelación a la mitad; el nivel de potencia 10 (power
level 10) recorta el tiempo total en, aproximadamente, una
tercera parte. Sin embargo, la comida necesitará más atención
de lo normal.
'XUDQWHODGHVFRQJHODFLyQSRGUtDRtUVHXQUXLGRGHJROSHV
sordo. Esto es normal cuando el horno no está funcionando en
la potencia High (Alta).
Consejos de descongelación
Ŷ/DFRPLGDFRQJHODGDHQSDSHORSOiVWLFRSXHGH
GHVFRQJHODUVHHQHOSDTXHWH/RVSDTXHWHVFHUUDGRV
deberían cortarse, pincharse o debería proveerse cualquier
WLSRGHYHQWLODFLyQ'(638e6GHKDEHUGHVFRQJHODGROD
FRPLGDSDUFLDOPHQWH/RVUHFLSLHQWHVGHSOiVWLFRGHEHUtDQ
dejarse parcialmente destapados.
Ŷ/DVFRPLGDVSUHHPSDTXHWDGDVFRQJHODGDVGHWDPDxR
familiar pueden descongelarse y hacerse en el microondas.
Si la comida está en un contenedor de aluminio, pásela a un
plato seguro para su uso en microondas.
Ŷ/DVFRPLGDVTXHVHHFKDQDSHUGHUUiSLGDPHQWHQR
deberían dejarse fuera por un período de más de una hora
WUDVVXGHVFRQJHODFLyQ/DWHPSHUDWXUDDPELHQWHSURPXHYH
el crecimiento de bacterias dañinas.
Ŷ3DUDODGHVFRQJHODFLyQPiVLJXDODGDGHDOLPHQWRVPD\RUHV
FRPRDVDGRVXVH$XWR'HIURVW$VHJ~UHVHGHTXHODV
carnes grandes estén completamente descongeladas antes
de cocinarlas.
Ŷ&XDQGRHVWpGHVFRQJHODGDODFRPLGDGHEHUtDHVWDUIUtDSHUR
blanda en todas sus áreas. Si aún está ligeramente helada,
devuélvala al microondas por muy poco tiempo, o déjela
fuera unos minutos.
Time Cook (cocción por tiempo)
Time Cook I (cocción por tiempo I)
/HSHUPLWHXVDUHOPLFURRQGDVSRUXQSHUtRGRGHHQWUH
segundos y 95 minutos.
El Nivel de potencia 10 (alto) (power level 10 [High]) se
selecciona de forma automática pero puede cambiarlo para
mayor flexibilidad.
3UHVLRQHHOERWyQ7,0(&22.FRFFLyQSRUWLHPSR
2. Gire el dial para ajustar el tiempo de cocción y presione el
dial para seleccionar
3. Cambie el nivel de potencia si no quiere que cocine a toda
SRWHQFLD3UHVLRQHPOWER. Gire el dial para buscar.
3UHVLRQHHOGLDOSDUDVHOHFFLRQDU
3UHVLRQHHOGLDORHOERWyQ67$573$86(SDUDHPSH]DUD
cocinar.
Cuando use Time Cook puede abrir la puerta para revisar la
comida. Cierre la puerta y presione el dial o START/PAUSE
para seguir cocinando.
NOTA: El tiempo de cocción puede cambiarse en cualquier
PRPHQWRPLHQWUDVVHFRFLQDJLUDQGRHOGLDO8VWHGSXHGH
también cambiar el nivel de energía presionando el botón de
energía POWER.
Time Cook II (cocción por tiempo II)
/HSHUPLWHFDPELDUORVQLYHOHVGHSRWHQFLDGHIRUPD
automática mientras cocina. Se hace de la siguiente forma:
3UHVLRQHHOERWyQ7,0(&22.FRFFLyQSRUWLHPSR
2. Gire el dial para ajustar el primer tiempo de cocción y
presione el dial para seleccionar.
3. Cambie el nivel de potencia si no quiere que cocine a toda
SRWHQFLD3UHVLRQH32:(5*LUHHOGLDOSDUDVHOHFFLRQDU
3UHVLRQHHOGLDOSDUDVHOHFFLRQDU
3UHVLRQHHOERWyQ7,0(&22.FRFFLyQSRUWLHPSRGH
nuevo.
5. Gire el dial para ajustar el segundo tiempo de cocción y
presione el dial para seleccionar.
6. Cambie el nivel de potencia si no quiere que cocine a toda
SRWHQFLD3UHVLRQH32:(5*LUHHOGLDOSDUDVHOHFFLRQDU
3UHVLRQHHOGLDOSDUDVHOHFFLRQDU
3UHVLRQHHOHOGLDORHOERWyQ67$573$86(SDUDHPSH]DU
a cocinar.
Cuando acaba Time Cook I, Time Cook II empieza a
funcionar.
NOTA: El tiempo de cocción puede cambiarse en cualquier
PRPHQWRPLHQWUDVVHFRFLQDJLUDQGRHOGLDO8VWHGSXHGH
también cambiar el nivel de energía presionando el botón de
energía POWER.
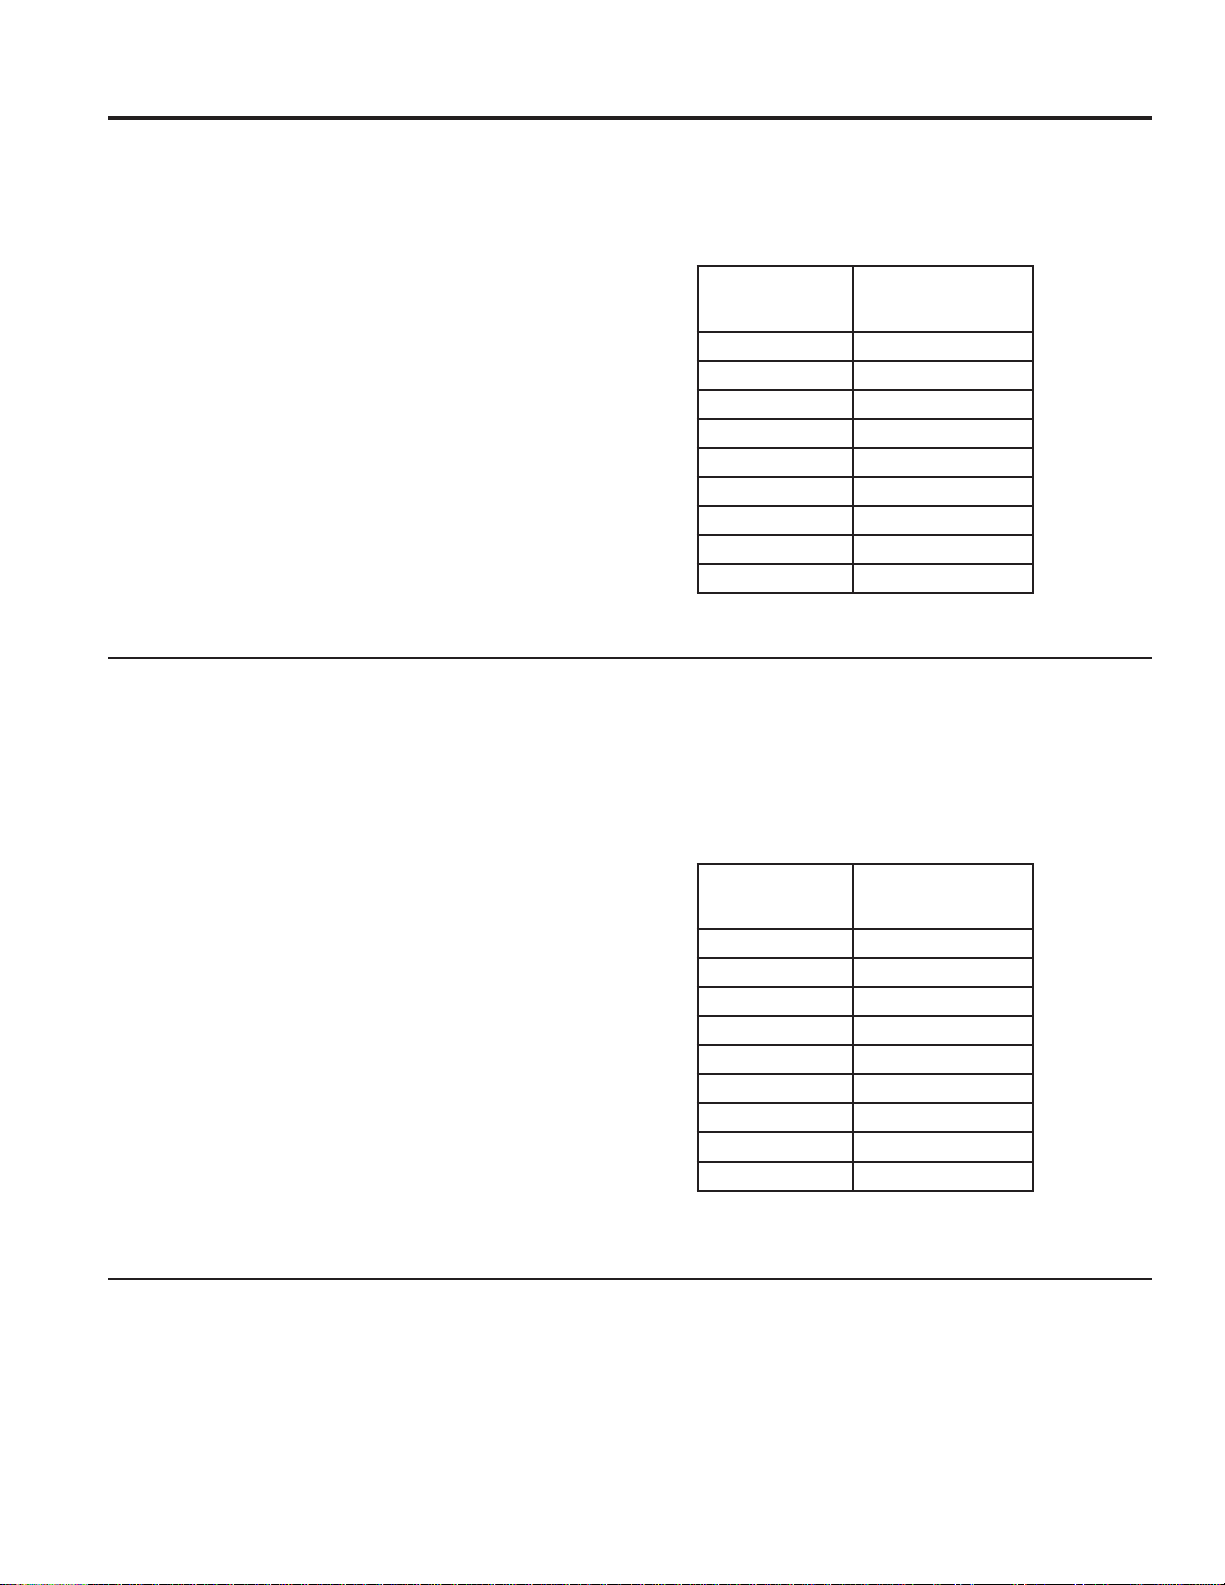
10 49-40723-2
Funciones por tiempo y automático (Cont.)
Descongelación rápida
)DVW'HIURVWDMXVWDGHIRUPDDXWRPiWLFD
los tiempos de descongelación y los niveles de potencia para
producir resultados de descongelación parejos para carnes,
aves y pescado que pesen hasta una libra.
Ŷ6DTXHODFDUQHGHOSDTXHWH\FROyTXHODHQXQSODWRDSWR
para microondas.
1. Presione el botón DEFROST (descongelar) tres veces.
2. Gire el dial hasta alcanzar el peso de la comida usando
la Tabla de Conversión a la derecha. Por ejemplo, ponga
HOGLDODSDUDOLEUDVRQ]DV3UHVLRQHHOGLDOSDUD
seleccionar.
3. Presione el botón START/PAUSE para empezar a
descongelar.
'HODYXHOWDDODFRPLGDVLDSDUHFHHOPHQVDMHTURN FOOD
OVER.
Ŷ5HWLUHODFDUGHGHVFRQJHODGDRFXEUDODViUHDVFDOLHQWHV
con pequeños recortes de papel de aluminio.
Ŷ8QDYH]GHVFRQJHODGDVODPD\RUtDGHFDUQHVQHFHVLWDQ
minutos en reposo para que acaben de descongelarse.
Tabla de conversión
Si el peso de la comida se calcula en libras y onzas, las onzas
GHEHUiQFRQYHUWLUVHDGpFLPDVGHOLEUD
Peso de la
comida en
onzas
Introduzca el
peso de la comida
(décimas de libra)
1–2 .1
3.2
4–5 .3
6–7 .4
8.5
9–10 .6
11 .7
12–13 .8
14–15 .9
Beverage (bebida)
/DIXQFLyQBEVERAGE (Bebida) calienta bebidas de entre 6 y
12 onzas.
Pulse una vez para 6-7 oz.
Pulse dos veces para 8-9 oz.
Pulse tres veces para 10-12 oz.
/DVEHELGDVFDOHQWDGDVFRQODIXQFLyQBeverage pueden estar
muy calientes. Saque el recipiente con cuidado.
Auto Defrost (descongelación automática)
8VH Auto Defrost para carne, aves y pescados que pesen
KDVWDVHLVOLEUDV8VHTime Defrost para la mayoría del resto
de comidas congeladas.
$XWR'HIURVWDMXVWDGHIRUPDDXWRPiWLFDORVWLHPSRVGH
descongelación y los niveles de potencia para producir
resultados de descongelación parejos para carnes, aves
y pescado.
Ŷ6DTXHODFDUQHGHOSDTXHWH\FROyTXHODHQXQSODWRDSWR
para microondas.
3UHVLRQHHOERWyQ'()5267GHVFRQJHODUGRVYHFHV
2. Gire el dial hasta alcanzar el peso de la comida usando la
Tabla de Conversión a la derecha. Por ejemplo, ponga el
GLDODSDUDOLEUDVOLEUDRQ]DV3UHVLRQHHOGLDO
para seleccionar.
3. Presione el botón START/PAUSE para empezar a
descongelar.
'HODYXHOWDDODFRPLGDVLDSDUHFHHOPHQVDMHTURN FOOD
OVER.
n Retire la carne descongelada o cubra las áreas calientes
con pequeños recortes de papel de aluminio.
Q 8QDYH]GHVFRQJHODGDVODPD\RUtDGHODVFDUQHV
necesitan 5 minutos en reposo para que acaben de
GHVFRQJHODUVH/RVDVDGRVJUDQGHVGHEHUtDQGHMDUVHUHSRVDU
por unos 30 minutos.
Tabla de conversión
Si el peso de la comida se calcula en libras y onzas, las
RQ]DVGHEHUiQFRQYHUWLUVHDGpFLPDVGHOLEUD
Peso de la
comida en
onzas
Introduzca el
peso de la comida
(décimas de libra)
1–2 .1
3.2
4–5 .3
6–7 .4
8.5
9–10 .6
11 .7
12–13 .8
14–15 .9
USO DEL MICROONDAS: Funciones por tiempo y automático
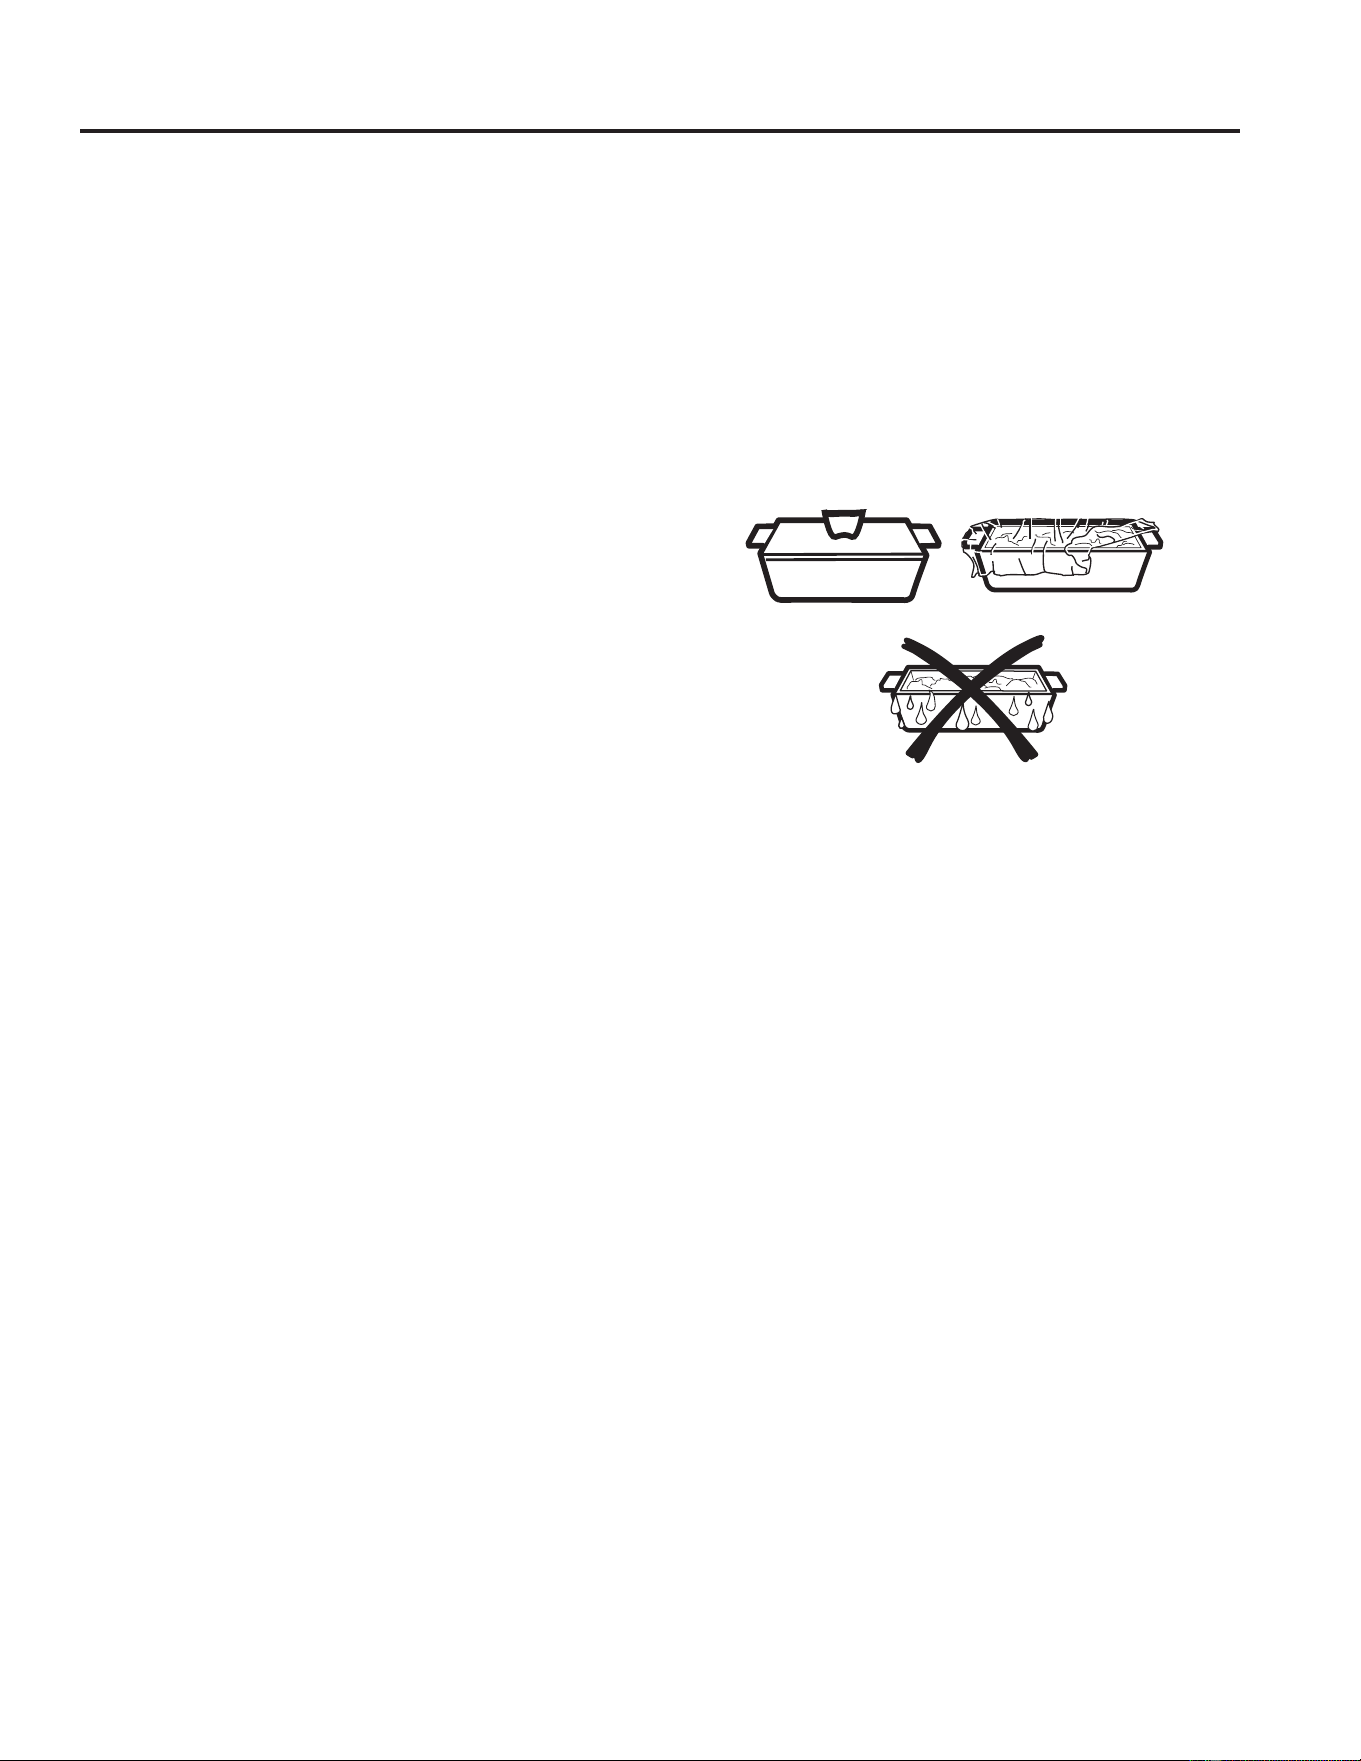
49-40723-2 11
USO DEL MICROONDAS: Funciones del sensor
Funciones del sensor
Sensor de humedad
4XpVXFHGHFXDQGRXVDODVIXQFLRQHVGHVHQVRUHV
/DVIXQFLRQHVGH6HQVRUGHWHFWDQODPD\RUKXPHGDGOLEHUDGD
durante la cocción. El horno ajusta automáticamente el tiempo
de cocción a los diferentes tipos y cantidades de comida.
No utilice las funciones de Sensor dos veces consecutivas
en la misma porción de comida. Puede resultar en que los
alimentos se cocinen en exceso o se quemen. Si la comida no
se ha cocinado por completo después de la cuenta regresiva,
use la función Time Cook para tiempo de cocción adicional.
NOTA: Las funciones de sensor no estarán disponibles
cuando el horno está caliente. Si se pulsa uno de los botones
de cocinar por sensor cuando la temperatura dentro del
KRUQRHVVXSHULRUDORV)DSDUHFHUiHOPHQVDMH³29(1
722+27)256(1625&22.,1*86,1*$/7(51$7(
0(7+2'´+RUQRGHPDVLDGRFDOLHQWHSDUDFRFLQDUSRU
VHQVRU6HHVWiXWLOL]DQGRRWURPpWRGR(OKRUQRFDPELDUi
DXWRPiWLFDPHQWHDODIXQFLyQ³FRRNE\WLPH´FRFLQDUSRU
WLHPSRVLJDODVLQGLFDFLRQHVGHODSDQWDOODRXQDYH]TXHHO
horno esté lo suficientemente frío, las funciones del sensor se
ejecutarán de forma normal.
/RVUHFLSLHQWHV\WDSDVRFXELHUWDVDSURSLDGDVVRQHVHQFLDOHV
para obtener los mejores resultados con la cocción por sensor.
Ŷ(VHVHQFLDOXVDUORVUHFLSLHQWHV\ODVWDSDVDSURSLDGRVSDUD
cocinar por sensor de forma óptima.
Ŷ8VHVLHPSUHUHFLSLHQWHVDSWRVSDUDPLFURRQGDV\F~EUDORV
con tapas o film de plástico agujereado. No use nunca
recipientes cerrados por completo—pueden hacer que
el vapor no salga y causar que la comida se cocine
demasiado.
Ŷ$VHJ~UHVHTXHWDQWRHOH[WHULRUGHORVUHFLSLHQWHVFRPRHO
interior del horno microondas estén secos antes de poner la
FRPLGDHQHOKRUQR/DVDFXPXODFLRQHVGHKXPHGDGTXHVH
convierten en vapor pueden engañar al sensor.
Agujereado
Cubierto
Seque los platos para que
no engañen al sensor.
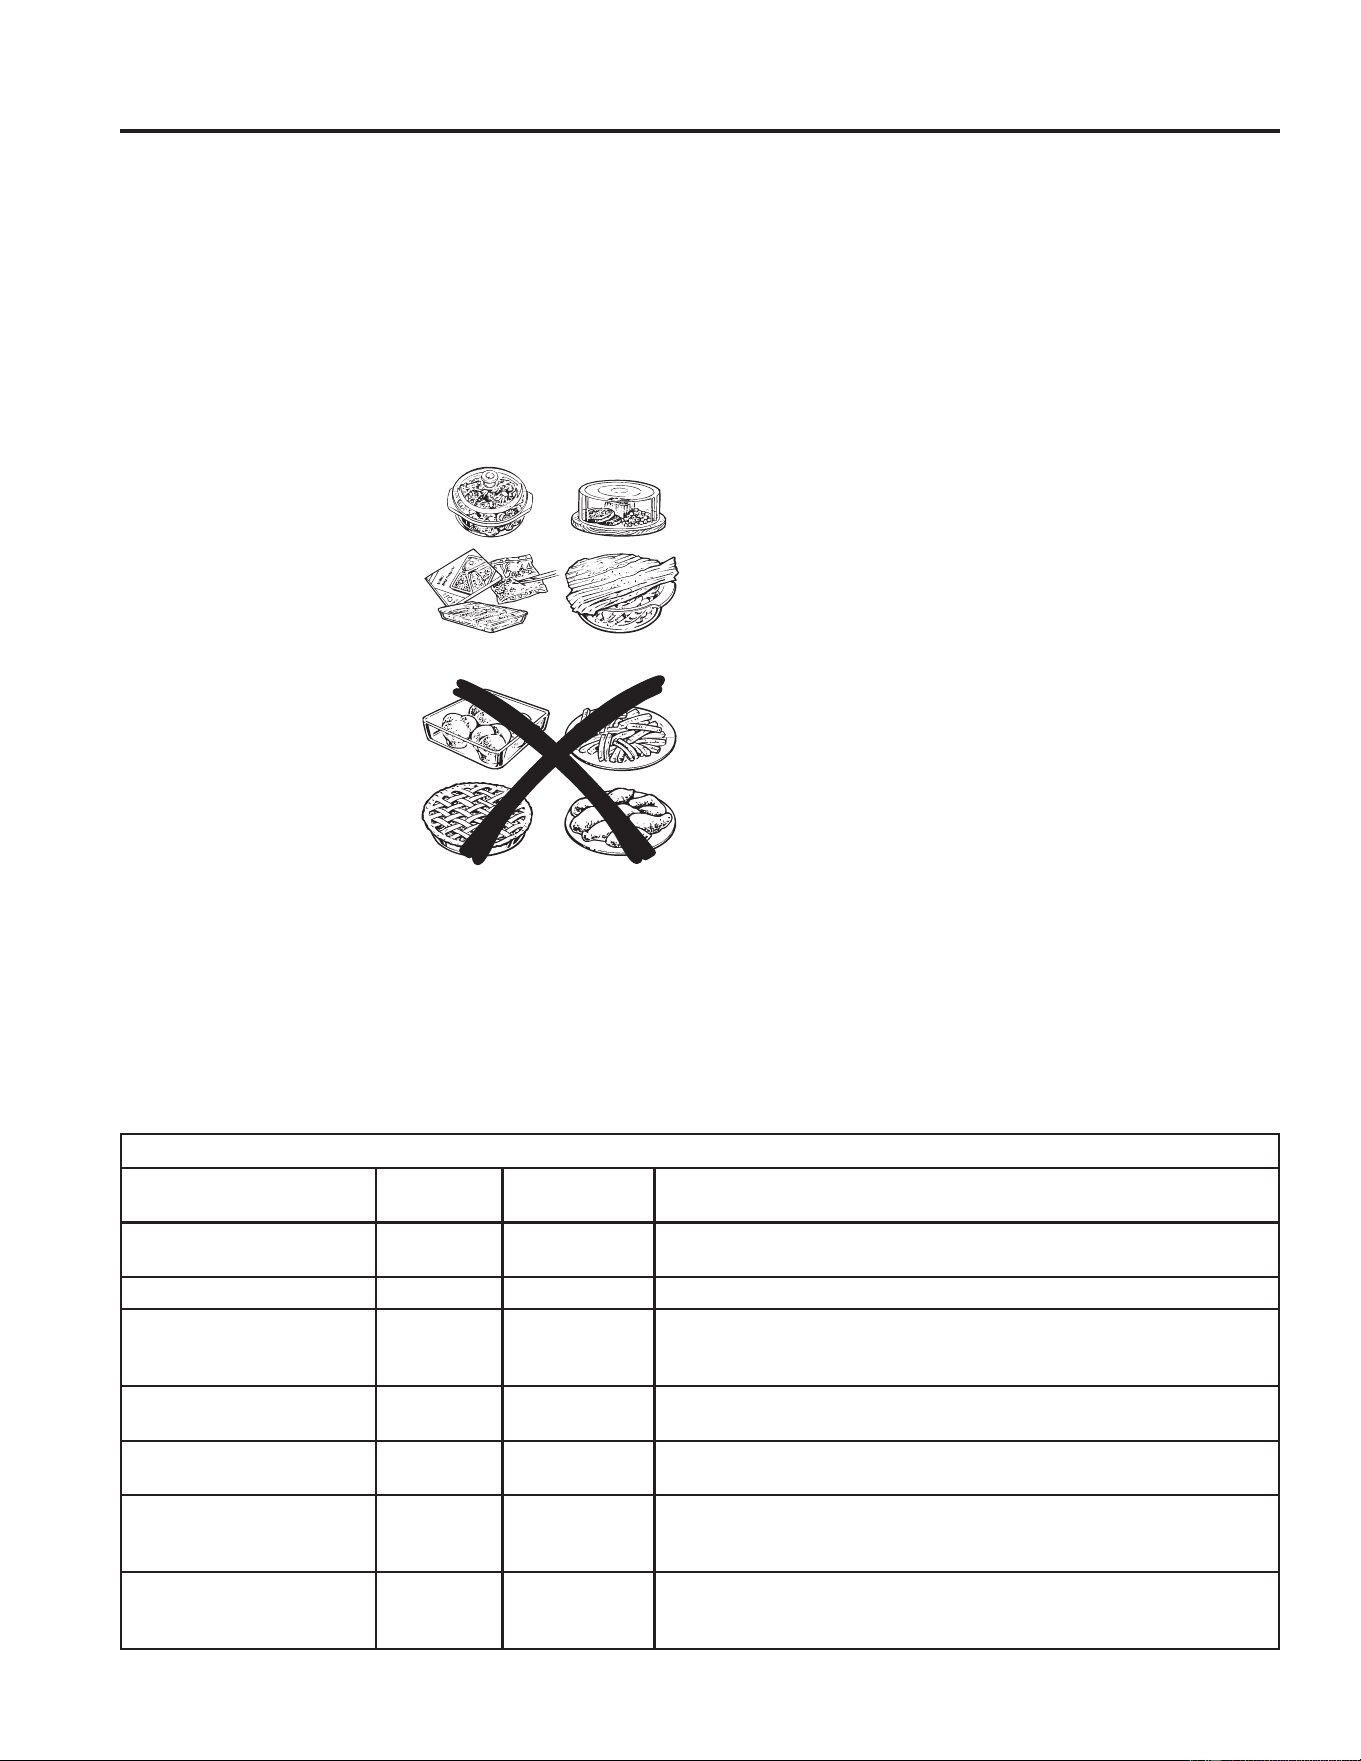
12 49-40723-2
Funciones del sensor (Cont.)
Auto Cook (cocinar automáticamente)
QRXWLOL]DUORVHVWDQWHVFXDQGRFRFLQDSRUPLFURRQGDV
NOTA: No utilice las function dos veces en sucesión
en la misma porción de comida ya que puede dar como
resultado comida severamente sobrecocinada o quemada.
'DGRTXHODPD\RUtDGHORVUHFLSLHQWHVGHEHQHVWDUFXELHUWRV
durante Auto Cook, esta función trabaja mejor con comidas
que quiera hacer al vapor o en las que quiera mantener la
humedad.
NOTA: No se recomienda el uso del estante de metal con Auto
Cook.
Comidas recomendadas
Con esta función se pueden cocinar una gran variedad de
comidas incluyendo carnes,
pescado y vegetales.
Comidas no recomendadas
No deberían cocinarse
usando esta función aquellas
comidas que deban cocinarse
descubiertas, aquellas que
requieran atención constante,
aquellas que requieran añadir
ingredientes durante su cocción
y comidas que deban tener
apariencia seca o con una
superficie crujiente. Es mejor
cocinar todas estas usando Time
Cook.
1. Ponga la comida cubierta en
el horno y cierre la puerta.
3XOVHHOERWyQ$872&22.
FRFFLyQDXWRPiWLFD$SDUHFHHQSDQWDOOD(17(5)22'
7<3(LQWURGX]FDHOWLSRGHFRPLGD
2. Gire el dial al tipo de comida deseado. Presione para
seleccionar
Ver la Tabla de Tipos de Comidas con Sensor de más abajo
para tipos específicos de comidas e instrucciones.
El horno empieza a funcionar inmediatamente.
NOTA: Si la puerta se abre mientras se está seleccionando
el control, ciérrela y presione el botón START/PAUSE para
empezar a cocinar.
Si la comida no se ha cocinado por completo después de la
cuenta regresiva, use la función Time Cook para tiempo de
cocción adicional.
No abra la puerta del horno antes de que el tiempo de cuenta
atrás aparezca en la pantalla—el vapor que se escapa del
horno puede afectar la cocción. Si se abre la puerta, ciérrela y
SUHVLRQH67$573$86(LQPHGLDWDPHQWH
6LVHOHFFLRQDFDUQHSLFDGDJURXQGPHDWHOKRUQRSXHGH
que le indique que le extraiga el líquido y la remueva. Abra
la puerta, seque la carne y cierre la puerta. Presione el botón
67$573$86(VLIXHUDQHFHVDULRSDUDVHJXLUFRQODFRFFLyQ
Consejos de cocción
nCuando el horno hace una señal y aparece el tiempo hacia
atrás, la puerta puede abrirse para remover, girar o dar la
vuelta a la comida. Cierre la puerta y presione START/PAUSE
para seguir cocinando.
Ŷ$MXVWHODFDQWLGDGGHFRPLGDDOWDPDxRGHOUHFLSLHQWH/OHQH
los recipientes por lo menos hasta la mitad.
Ŷ$VHJ~UHVHGHTXHODSDUWHH[WHULRUGHOUHFLSLHQWH\HOLQWHULRU
del horno estén secos.
Ŷ8QDYH]FRPSOHWDGRHOFLFORGH&RFFLyQVLODFRPLGD
necesita cocerse más, vuélvala a poner en el horno y use
Time Cook para acabar de cocinarla.
Cómo ajustar la configuración automática del horno
para un tiempo de cocción más corto o más largo (no
disponible para todos los tipos de alimentos)
Para restar el 10% del tiempo de cocción automático: En
los primeros 30 segundos tras el horno comienza a funcionar,
gire el dial en el sentido contrario de las agujas del reloj hasta
TXHDSDUH]FDXQVLJQRPHQRV³±´\SXOVHSDUDLQWURGXFLUOD
selección.
Para agregar el 10% al tiempo de cocción automático:
'HQWURGHORVSULPHURVVHJXQGRVWUDVHOKRUQRFRPLHQ]D
a funcionar, gire el dial en el sentido de las agujas del reloj
KDVWDTXHDSDUH]FDXQVLJQRPiV³´\SXOVHSDUDLQWURGXFLU
la selección.
Tabla de tipos de comidas con sensor
Tipo de comida Raciones Tamaños de
las raciones
Comentarios
Piezas de pollo 1 a 4 2 a 8 pieces 8VHXQSODWRRYDODGRFXDGUDGRRUHGRQGR&XEUDFRQHQYROWXUD
plástica ventilada.
Pescado 1 a 4 4 a 16 oz. 8VHXQSODWRRYDODGRFXDGUDGRRUHGRQGR
Carne picada
7HUQHUD3XHUFR3DYR
- 8 a 32 oz. 8VHSODWRGHJXLVRVUHGRQGR5HSDUWDODFDUQHHQHOSODWR&~EUDOR
con un papel de cera o un en el plato. Cúbralo con un papel de cera
o un film plástico agujereado.
Papas 1 a 4 8 a 32 oz. Rompa la piel con un tenedor. Arréglelas en un patrón en forma de
estrella al centro del plato giratorio.
Vegetales enlatados 1 a 4 4 a 16 oz. 8VHFD]XHODGHJXLVRVSDUDPLFURRQGDVWD]yQRERO&~EUDORFRQ
una tapa o un film plástico agujereado.
Vegetales frescos 1 a 4 4 a 16 oz. 8VHFD]XHODGHJXLVRVSDUDPLFURRQGDVWD]yQRERO$xDGDGRV
cucharadas de agua por cada ración. Cúbralo con una tapa o un
film plástico agujereado.
Vegetales congelados 1 a 4 4 a 16 oz. 8VHFD]XHODGHJXLVRVSDUDPLFURRQGDVWD]yQRERO6LJDODV
instrucciones del paquete en cuanto al agua a añadir. Cúbralo con
una tapa o un film plástico agujereado.
USO DEL MICROONDAS: Funciones del sensor

49-40723-2 13
USO DEL MICROONDAS: Funciones del sensor
Funciones del sensor (Cont.)
Reheat (recalentar)
/DIXQFLyQGHUHFDOHQWDU5HKHDWYXHOYHDFDOHQWDU
raciones de comidas previamente cocinadas o un plato de
sobras.
NOTA: No utilice esta función dos veces consecutivas en la
misma porción de comida. Puede resultar en que los alimentos
se cocinen en exceso o se quemen.
1. Coloque la taza de líquido o comida cubierta en el horno.
3XOVH5(+($7UHFDOHQWDUXQDGRVWUHVRFXDWURYHFHV
El horno empieza a funcionar automáticamente.
Presione una vez para un plato de sobras.
Pulse dos veces para pasta.
Presione tres veces para cantidades de 1/2 a 1 taza llena.
Pulse cuatro veces para entre 1 y 2 tazas llenas.
2. El horno da una señal cuando advierte que hay vapor y
empieza a mostrarse hacia atrás el tiempo que queda.
No abra la puerta del horno hasta que el tiempo en el horno
aparezca en cuenta atrás. Si se abre la puerta, ciérrela y
SUHVLRQH67$573$86(LQPHGLDWDPHQWH
8QDYH]TXHKD\DUHWLUDGRODFRPLGDGHOKRUQRUHPXpYDOD
VLHVSRVLEOHSDUDLJXDODUODWHPSHUDWXUD/DVFRPLGDV
recalentadas pueden tener grandes diferencias de
temperatura. Algunas áreas pueden estar extremadamente
calientes.
Si la comida no está suficientemente caliente después de
la cuenta regresiva, use Time Cook tiempo adicional para
recalentar.
No está recomendado el uso de reheat para algunas comidas
Es mejor usar Time Cook en estos casos:
Ŷ 3URGXFWRVGHSDQ
Ŷ &RPLGDVTXHGHEHQUHFDOHQWDUVHVLQFXEULU
Ŷ $OLPHQWRVTXHQHFHVLWHQUHPRYHUVHRURWDUVH
Ŷ &RPLGDVTXHQHFHVLWHQWHQHUXQDVSHFWRVHFRRXQD
superficie crujiente tras ser recalentados.
Cómo ajustar la configuración automática del horno para
un mayor o menor tiempo de cocción
Para sustraer un 10% del tiempo de cocción automático:
Antes de que acaben los primeros 30 segundos desde que
el horno se pone en funcionamiento, gire el dial en el sentido
contrario a las agujas del reloj y presiónelo para seleccionar
Para añadir un 10% del tiempo de cocción automático:
Antes de que acaben los primeros 30 segundos desde que el
horno se pone en funcionamiento, gire el dial en el sentido de
las agujas del reloj y presiónelo para seleccionar.
Popcorn (rosetas o palomitas de maíz)
Para usar la función Popcorn:
8VHVyORFRQSDORPLWDVRURVHWDVSUHHPSDTXHWDGDVSDUD
microondas que pesen de 1,5 a 3,5 onzas.
NOTA: No utilice esta función dos veces consecutivas en la
misma porción de comida. Puede resultar en que los alimentos
se cocinen en exceso o se quemen.
1. Siga las indicaciones del paquete, use Time Cook si el
paquete pesa menos de 1,5 onzas o es mayor de 3,5 onzas.
Sitúe el paquete de rosetas en el centro del plato giratorio.
2. Presione el botón POPCORN una o dos veces. El horno
empieza a funcionar inmediatamente.
Si abre la puerta mientras aparece en pantalla POPCORN
SENSOR (sensor de palomitas), aparecerá un mensaje de
error. Cierre la puerta, pulse CLEAR/OFFERUUDUGHVDFWLYDU\
comience de nuevo.
Si la comida no se ha cocinado por completo después de la
cuenta regresiva, use la función Time Cook para tiempo de
cocción adicional.
Cómo ajustar la configuración automática para palomitas
de maíz para un mayor o menor tiempo de cocción
Si se da cuenta de que en la bolsa de la marca de palomitas
que usa queda mucho maíz sin reventar o lo cuece
demasiado, puede añadir o substraer 20–30 segundos al
tiempo automático de cocción.
Para sustraer tiempo:
Antes de que acaben los primeros 30 segundos desde que
el horno se pone en funcionamiento, gire el dial en el sentido
FRQWUDULRDODVDJXMDVGHOUHORMSDUDVHJXQGRV±PHQRV
de tiempo de cocción. Pulse para introducir la selección. Gire
GHQXHYRKDVWDTXHDSDUH]FDQGRVVLJQRVPHQRV³´SDUD
reducir el tiempo de cocción en otros 10 segundos hasta una
cantidad de reducción de tiempo de 30 segundos. Pulse para
introducir la selección.
Para añadir tiempo:
Antes de que acaben los primeros 30 segundos desde que el
horno se pone en funcionamiento, gire el dial en el sentido de
ODVDJXMDVGHOUHORMVHJXQGRVPiVDOWLHPSRGHFRFFLyQ
Pulse para introducir la selección. Gire de nuevo, hasta
TXHDSDUH]FDQGRVVLJQRVPiV³´SDUDDxDGLURWURV
segundos, hasta un total de 30 segundos de tiempo adicional.
Pulse para introducir la selección.

14 49-40723-2
Otras funciones
Señal de final de cocción
Para recordarle que tiene comida en el horno, aparecerá el
mensaje YOUR FOOD IS READY (Su comida está lista)
y sonará un pitido cada minuto hasta que abra la puerta del
horno o presione el botón CLEAR/OFF.
Resume (Continuar)
El programa de cocción que acaba de utilizar permanece en
memoria durante 5 minutos. Tras esto, es necesario que inicie
el programa de nuevo. Para desactivar esta función, consulte
ODVHFFLyQ0HQVDMH³0iVWLHPSR´
1. Si necesita cocinar los alimentos un poco más, puede
UHLQLFLDUHOKRUQRSXOVDQGRHOERWyQ67$573$86(,QLFLR
3DXVDRHOGLDOVHOHFWRU
5(680(&22.,1*&RQWLQXDUFRFFLyQDSDUHFHUiHQ
pantalla y el horno se reiniciará inmediatamente al 10 del
tiempo original.
Reloj
Presione para introducir la hora del día o para revisar la hora
de día mientras cocina.
1. Presione el botón CLOCK (reloj).
2. Gire el dial para configurar las horas. Presione el dial para
seleccionar.
3. Gire el dial para configurar los minutos. Presione el dial para
seleccionar.
4. Gire el dial para seleccionar AM o PM. Presione el dial para
seleccionar.
El reloj fue diseñado para apagar la unidad cuando quede
inactiva durante 30 segundos, a fin de minimizar el uso de
la energía en suspensión. El reloj se encenderá cuando la
unidad se encuentre en uso, la puerta sea abierta, la tecla
&$1&(/2))&DQFHODU$SDJDUVHDSUHVLRQDGDRHOGLDOVHD
presionado. No hay una opción de anulación disponible basada
HQORVUHTXLVLWRVGHHQHUJtD'2(
Start/Pause (inicio / pausa)
Además de poner en marcha muchas funciones, START/
PAUSE le permite parar la cocción sin tener que abrir la puerta
o borrar lo que haya en pantalla.
Clear/Off (borrar/apagado)
Presione el botón CLEAR/OFF para parar y cancelar la
cocción en cualquier momento.
Bloqueo del control
Puede bloquear el panel de control para evitar que enciendan
el horno accidentalmente durante la limpieza o paraque no lo
utilicen los niños.
Para bloquear y desbloquear los controles, apriete y mantenga
el botón CLEAR/OFF durante un período de tres segundos.
Con el panel de control bloqueado aparecerá brevemente el
mensaje CONTROL LOCKED cada vez que se apriete un
botón o el dial.
USO DEL MICROONDAS: Otras funciones

49-40723-2 15
USO DEL MICROONDAS: Otras funciones
Otras funciones (Cont.)
Luz nocturna automática
La luz nocturna automática puede configurarse para que se
encienda y se apague a horas determinadas.
1. Presione el botón OPTIONS y gire el dial para seleccionar
AUTO NITE LIGHT. Presione el dial para seleccionar.
2. Gire el dial para seleccionar SET TIMES. Presione el dial
para seleccionar.
3. Introduzca la hora del día para que la luz se encienda
girando el dial para seleccionar la hora, minutos y AM o PM.
Presione el dial para seleccionar cada cambio que quiera
realizar.
4. Introduzca la hora del día para que la luz se apague girando
el dial para seleccionar la hora, minutos y AM o PM.
Presione el dial para seleccionar cada cambio que quiera
realizar.
NOTA: El indicador NITE (noche) se encenderá cuando la luz
de noche se haya fijado para operar.
Para revisar la configuración de la luz nocturna, gire el dial
para seleccionar REVIEW SETTINGS después de seleccionar
la opción Auto Nite Light. Presione el dial para seleccionar.
Para borrar la configuración de la luz nocturna, gire el dial para
seleccionar CLEAR SETTINGS después de seleccionar la
opción Auto Nite Light. Presione el dial para seleccionar.
Volumen de señal de aviso
El volumen de la señal de aviso puede ajustarse.
1. Presione el botón OPTIONS y gire el dial para seleccionar
BEEPER VOLUME. Presione el dial para seleccionar.
2. Gire el dial para seleccionar desde mudo a alto. Presione el
dial para seleccionar.
NOTA: (OLQGLFDGRU087(VLOHQFLRVRVHHQFHQGHUiFXDQGRHO
volumen se haya fijado en silencioso.
Idioma de pantalla
The language for the scrolling display can be set to
either English or Spanish.
1. Press the OPTIONS button and turn the dial to select
DISPLAY LANGUAGE. Press the dial to enter.
2. Turn the dial to select ENGLISH or SPANISH. Press
the dial to enter.
Velocidad de pantalla
/DYHORFLGDGGHOPHQ~GHSDQWDOODSXHGHFDPELDUVH
1. Presione el botón OPTIONS y gire el dial para seleccionar
DISPLAY SPEED. Presione el dial para seleccionar.
2. Gire el dial para seleccionar desde el más lento al más
rápido. Presione el dial para seleccionar
Luz de superficie
Presione SURFACE LIGHT una vez para una iluminación
fuerte, dos veces para la luz nocturna o una tercera vez para
apagarla

16 49-40723-2
Otras funciones (Cont.)
USO DEL MICROONDAS: Otras funciones
Medidas
Pueden configurarse las medidas para que aparezcan de la
IRUPDSRUGHIHFWRLQJOHVDRPpWULFD
1. Pulse el botón OPTIONS (Opciones) y gire el dial para
seleccionar MEASURES (Medidas). Pulse el dial para
introducir la selección.
2. Gire el dial para seleccionar DEFAULT (Preestablecido) o
METRIC (Métrico) y pulse para introducir la selección.
Temporizador
El Timer (temporizador) funciona como temporizador de
minutos y se puede usar en cualquier momento, incluso
cuando el horno está en marcha.
1. Presione el botón TIMER.
2. Gire el dial para configurar los minutos. Presione el dial para
seleccionar.
3. Gire el dial para configurar los segundos. Presione el dial
para seleccionar.
4. Presione el dial o TIMER para empezar.
Para cancelar, presione el botón TIMER.
Cuando se acabe el tiempo, el horno dará una señal. Para
apagar la señal del temporizador, presione TIMER.
NOTA: El indicador del temporizador se encenderá mientras el
temporizador esté en marcha.
Dispositivo giratorio activado/desactivado
Para obtener mejores resultados de cocción, deje el dispositivo
giratorio activado. Puede desactivarse si va a cocinar platos
grandes.
1. Pulse el botón TURNTABLE ON/OFF (Dispositivo
giratorio activado/ desactivado).
2. Gire el dial para seleccionar ON (Activado) u OFF
(Desactivado). Pulse el dial para introducir la selección.
En determinadas ocasiones el dispositivo giratorio puede
calentarse demasiado como para tocarlo.
Tenga cuidado al tocarlo durante la cocción o posteriormente
a ella.
Ventilador extractor
El extractor aspira el vapor de agua y otros vapores de la
encimera de la cocina.
Pulse VENT FAN (Ventilador extractor) una vez para alta
velocidad de ventilación, dos veces para velocidad media, tres
veces para velocidad baja y una cuarta vez para desactivar el
ventilador.
NOTA: El indicador del extractor estará prendido mientras el
extractor esté operando.
Extractor automático
An automatic fan feature protects the microwave from too
much heat rising from the cooktop below it. It automatically
turns on if it senses too much heat.
If you have turned the fan on you may find that you cannot
turn it off. The fan will automatically turn off when the internal
parts are cool. It may stay on for 30 minutes or more after the
cooktop and microwave controls are turned off.
Mensaje “Más tiempo”
8QDYH]TXHVHFRPSOHWHODFRFFLyQSXHGHPRVWUDUVHXQ
mensaje que le ofrezca la opción de cocinar la comida durante
más tiempo utilizando la misma configuración. Consulte la
sección Continuar.
1. Pulse el botón OPTIONS (Opciones) y gire el dial para
seleccionar MORE TIME MESSAGE (Mensaje “Más
tiempo”). Pulse el dial para introducir la selección.
2. Gire el dial para seleccionar MESSAGE ON (Mensaje
activado) o MESSAGE OFF (Mensaje desactivado) y
pulse para introducir la selección.
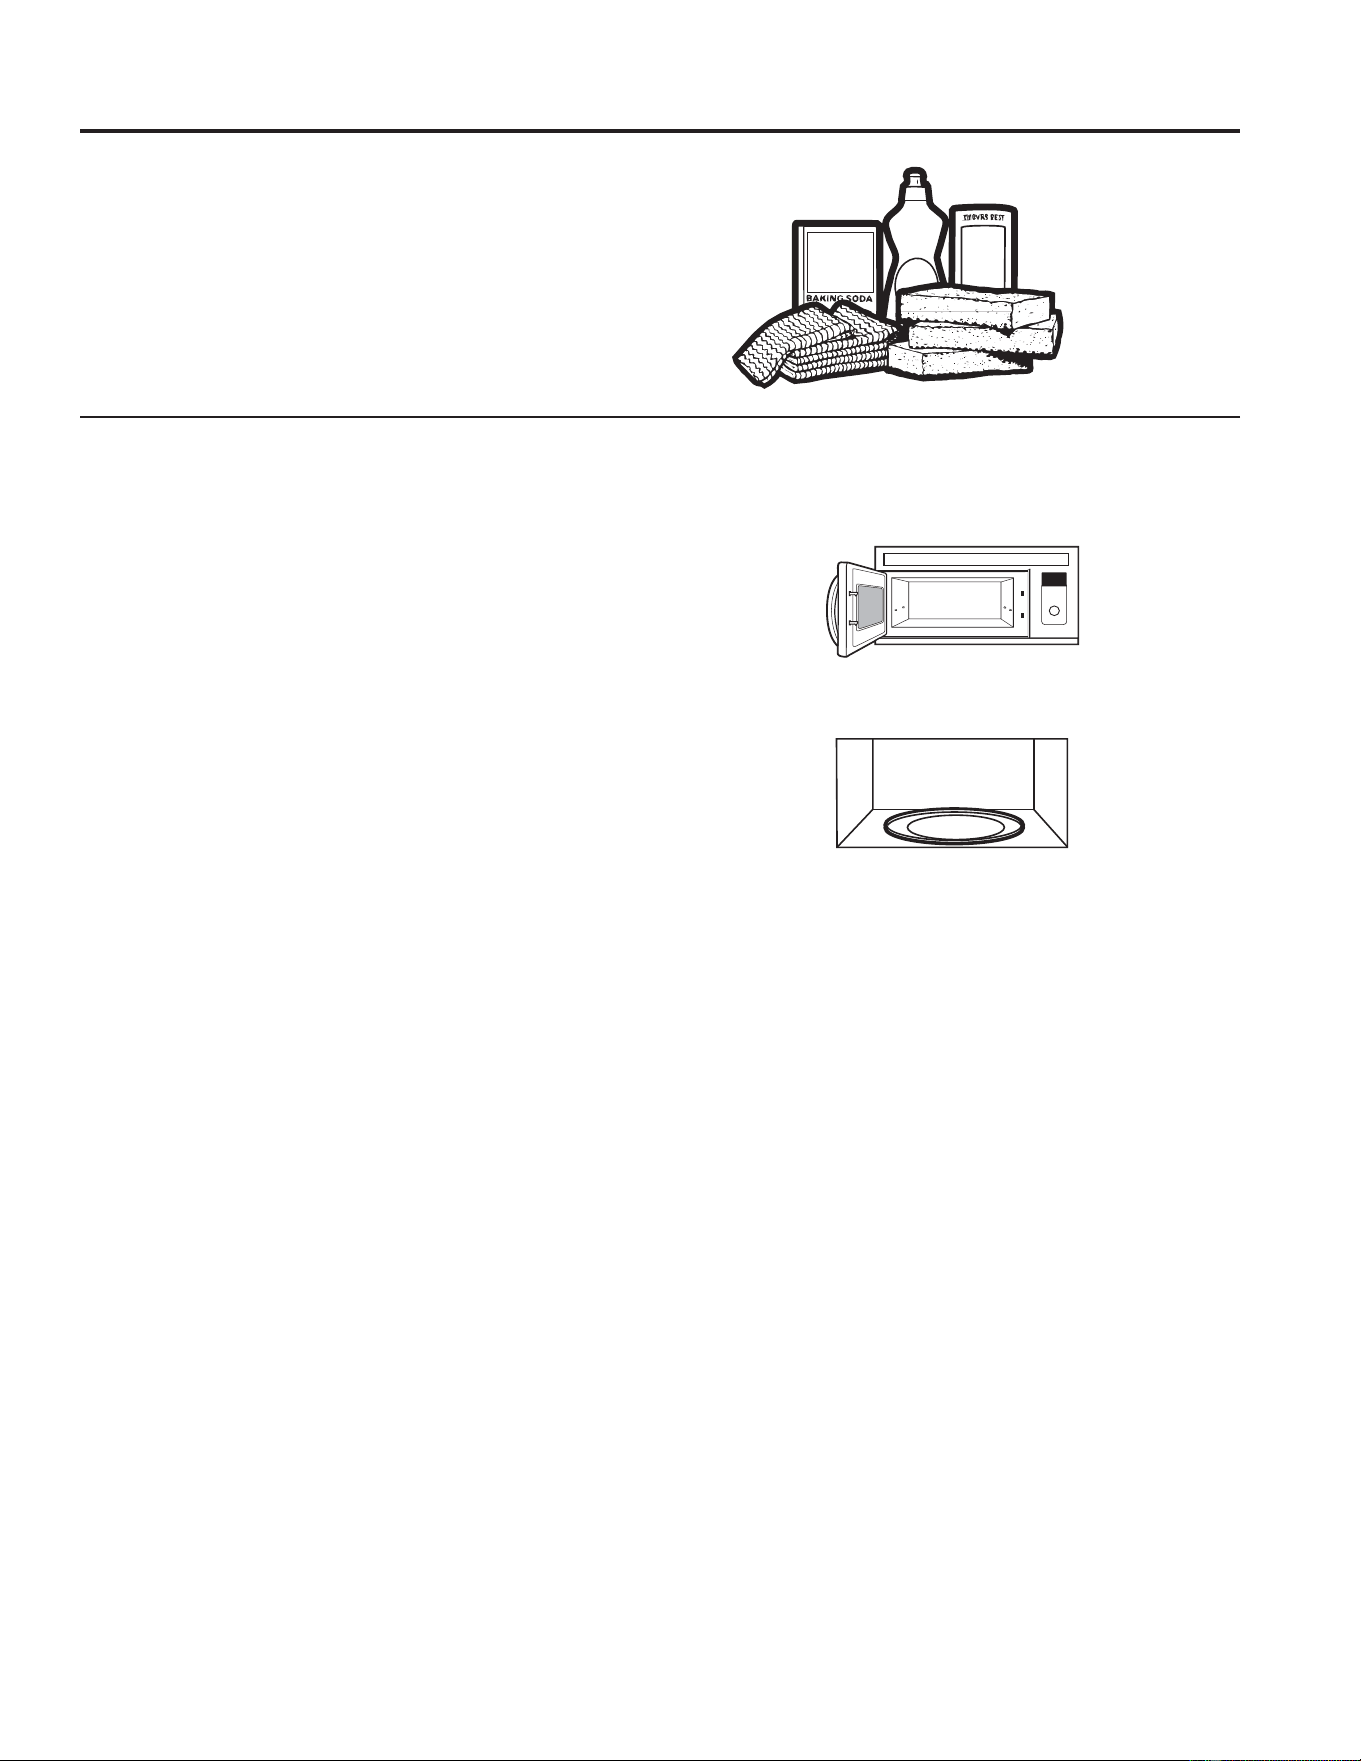
49-40723-2 17
Horno
Consejos prácticos
Para mantener el interior fresco pásele un paño
con una solución de agua y bicarbonato sódico de
cuando en cuando.
Asegúrese de que esté apagado (en off) antes de
limpiar cualquier parte de este horno.
Cómo limpiar el interior
Paredes, suelo, ventana interior y piezas de plástico
de la puerta
Algunas salpicaduras pueden limpiarse con un papel
WRDOODRWUDVSXHGHQQHFHVLWDUXQSDxRK~PHGR4XLWH
las salpicaduras con un paño enjabonado y aclare
con un paño húmedo. No use limpiadores abrasivos ni
utensilios afilados en las paredes del horno.
Nunca use un limpiador comercial de horno en ninguna
parte del microondas.
Base giratoria extraíble y soporte de base giratoria
Para que no se rompa, no ponga el plato giratorio en
DJXDMXVWRGHVSXpVGHFRFLQDU/tPSLHORFRQFXLGDGRHQ
agua tibia con jabón o en el lavavajillas. El plato giratorio
y el soporte pueden romperse si se caen. Recuerde no
hacer funcionar el horno en el modo microondas sin el
dispositivo giratorio y el soporte colocados en su lugar.
CUIDADO Y LIMPIEZA: Oven
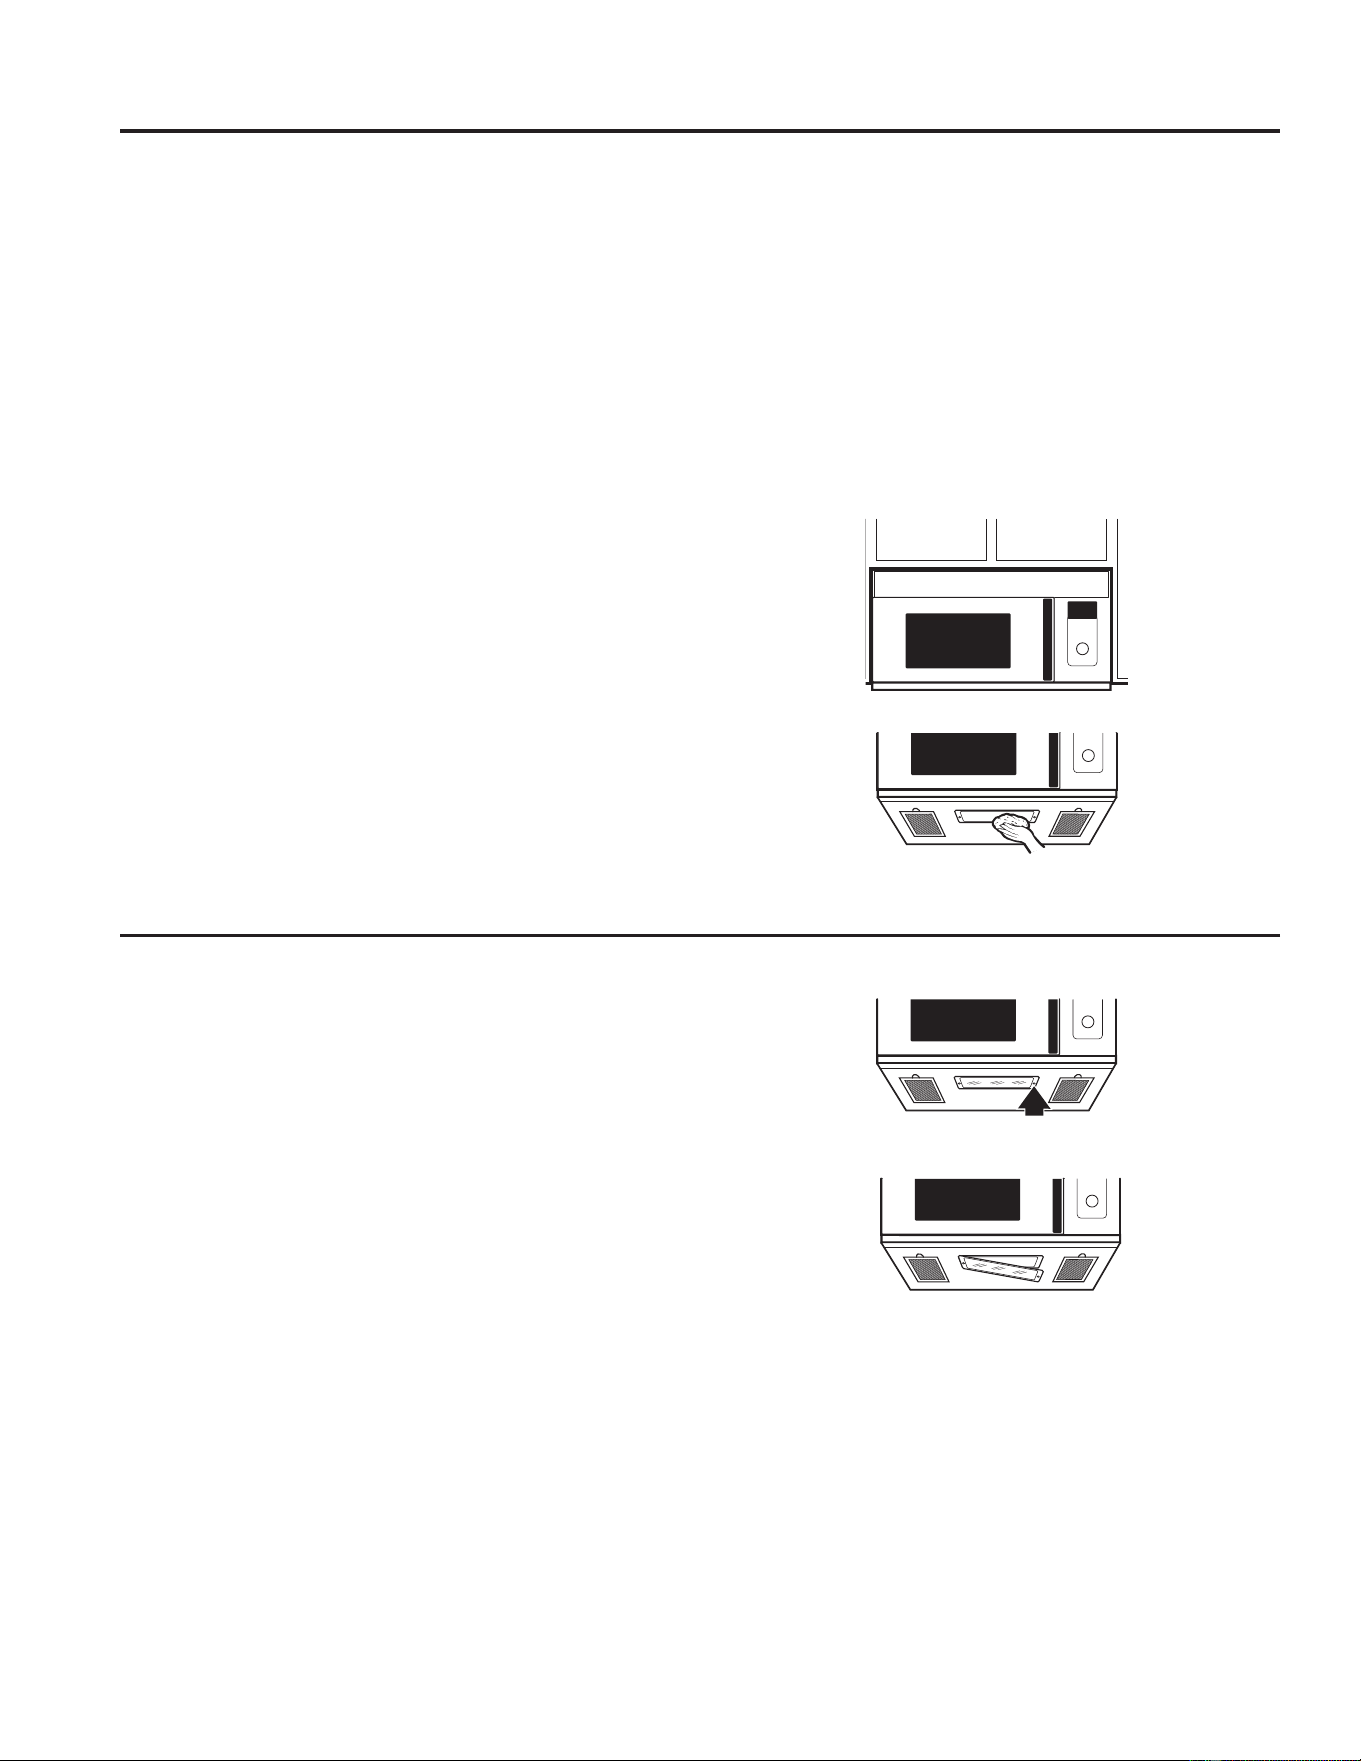
18 49-40723-2
Oven (Cont.)
Cómo limpiar el exterior
No recomendamos el uso de limpiadores con amoniaco
o alcohol, ya que pueden dañar el aspecto del horno
microondas. Si opta por usar un limpiador casero, primero
aplique el limpiador directamente en un paño limpio, luego
limpie el área sucia.
/DFDMD
/LPSLHODSDUWHH[WHUQDGHOKRUQRGHPLFURRQGDVFRQXQSDxR
humedecido con agua jabonosa. Enjuáguela y luego séquela.
Pásele un paño humedecido limpio a la ventana para limpiarla.
El panel de control
Pásele un paño humedecido para limpiar. Seque
completamente. No use esprays limpiadores, grandes
cantidades de detergente y agua, abrasivos u objetos filosos
sobre el panel, ya que lo podría dañar. Algunas toallas de
papel podrían también dañar el panel de control.
Panel de puerta
Antes de limpiar el panel de puerta frontal, asegúrese de que
sabe qué tipo de panel tiene. Consulte el octavo dígito del
Q~PHURGHPRGHOR³6´HVDFHURLQR[LGDEOH³/´HV&OHDQ6WHHO\
³%´³:´R³&´VRQFRORUHVSOiVWLFRV
Acero inoxidable (en algunos modelos)
El panel de acero inoxidable puede limpiarse con Stainless
Steel Magic o un producto similar, utilizando un paño suave y
limpio. Aplique el limpiador de superficies de acero inoxidable
cuidadosamente para evitar tocar las piezas de plástico que
rodean al acero. No utilice cera, pulimento, lejía ni productos
que contengan clorina en acabados en acero inoxidable.
Paneles plásticos de color
8WLOLFHXQSDxRVXDYHOLPSLR\OLJHUDPHQWHKXPHGHFLGR\D
continuación, seque bien toda la zona.
Los sellos de la puerta
Es importante mantener el área donde la puerta se sella con
el horno de microondas limpia. Solamente use detergentes no
abrasivos suaves aplicados con una esponja limpia o con un
paño suave. Enjuague bien.
El fondo
/LPSLHODJUDVD\HOLPLQHHOSROYRGHOIRQGRDPHQXGR8VH
una solución de agua cálida y detergente.
Luz de encimera/luz nocturna
Cámbiela por una bombilla halógena de 120 voltios,
20 watt (max). Pida WB36X10213 de su suministrador
GE Appliances.
1. Para cambiar la luz de encimera/luz nocturna, primero
desconecte la corriente del fusible principal o del
panel de diferencial o estire del enchufe.
4XLWHHOWRUQLOORGHOODWHUDOGHODFXELHUWDGHO
compartimiento de la bombilla y baje la cubierta hasta
que pare.
3. Asegúrese que la bombilla está fría antes de retirarla.
Rompa el sello adhesivo desenroscando con cuidado
la bombilla.
4. Enrosque la nueva bombilla, luego levante la cubierta
y vuelva a poner el tornillo. Conecte el horno a la
corriente eléctrica.oven.
CUIDADO Y LIMPIEZA: Oven
4XLWHHOWRUQLOOR

49-40723-2 19
CUIDADO Y LIMPIEZA: Función de Escape
Ventilador extractor
El ventilador extractor tiene dos filtros de metal reutilizables.
/RVPRGHORVTXHKDFHQUHFLUFXODUHODLUHGHQXHYRDOD
habitación usan un filtro de carbón vegetal
Cómo quitar y limpiar los filtros
Para quitarlos, usando las lengüetas, deslícelos hacia atrás.
Estire hacia abajo y afuera.
Para limpiar los filtros del extractor, empápelos y páselos de
un lado a otro en agua con detergente. No use amoniaco ni
productos que lo contengan ya que oscurecerían el metal.
Se pueden cepillar ligeramente para quitar suciedad pegada.
Aclárelos, sacúdalos y déjelos secar antes de volverlos a
poner.
Para volver a colocarlos, deslice los filtros en los marcos por
la parte trasera de cada apertura. Presione hacia arriba y hacia
la parte frontal para ajustarlos en su lugar.
Filtros de extractor reutilizables
/RVILOWURVPHWiOLFRVDWUDSDQODJUDVDOLEHUDGDSRUODFRPLGDHQ
la cocina encimera. También evitan que las llamas de la cocina
encimera puedan dañar en interior del horno.
Por esta razón, los filtros deben estar siempre en su lugar
FXDQGRVHHVWpXVDQGRODFDPSDQD/RVILOWURVGHOH[WUDFWRU
deben limpiarse una vez al mes o según sea necesario.
Función de Escape
Filtros de extractor reutilizables
HQWRGRVORVPRGHORV
)LOWURGHFDUEyQYHJHWDOHQDOJXQRVPRGHORV

20 49-40723-2
Función de Escape (Cont.)
CUIDADO Y LIMPIEZA: Función de Escape
Filtros de carbón vegetal
El filtro de carbón vegetal no puede limpiarse. Debe
cambiarse por otro. Pida el recambio No. WB02X10943 de
su suministrador GE Appliances.
Si el modelo no realiza la extracción al exterior, el aire
recirculará a través de un filtro de carbón vegetal no
reutilizable que ayuda a quitar olores y humos.
El filtro de carbón vegetal debería cambiarse cuando está
YLVLEOHPHQWHVXFLRRGHVFRORULGRQRUPDOPHQWHWUiVR
PHVHVVHJ~QHOXVR&RQVXOWH³$&&(625,26´HQOD página
27 para obtener más información.
Cómo quitar el filtro de carbón vegetal
Para quitar el filtro de carbón vegetal, primero desconecte la
corriente del fusible principal o del panel de diferencial o estire
del enchufe. Retire la parrilla superior quitando los dos tornillos
que lo sujetan.Puede ser que necesite abrir las puertas del
armario para quitar los tornillos.
/HYDQWHHOILOWURGHODSDUWHLQIHULRUKDVWDTXHVHOLEHUHGHODV
SHVWDxDV'HVOLFHHOILOWURKDFLDDEDMR\KDFLDIXHUD
Retire la parrilla superior quitando
los dos tornillos que lo sujetan.
Cómo instalar el filtro de carbón vegetal
Para instalar un nuevo filtro de carbón vegetal, retire el
plástico y cualquier otro envoltorio del nuevo filtro.
Introduzca la parte superior del filtro hacia arriba y dentro de
los huecos en la parte interior de la apertura superior. Apriete
la parte inferior del filtro hacia dentro hasta que se coloque tras
las pestañas.
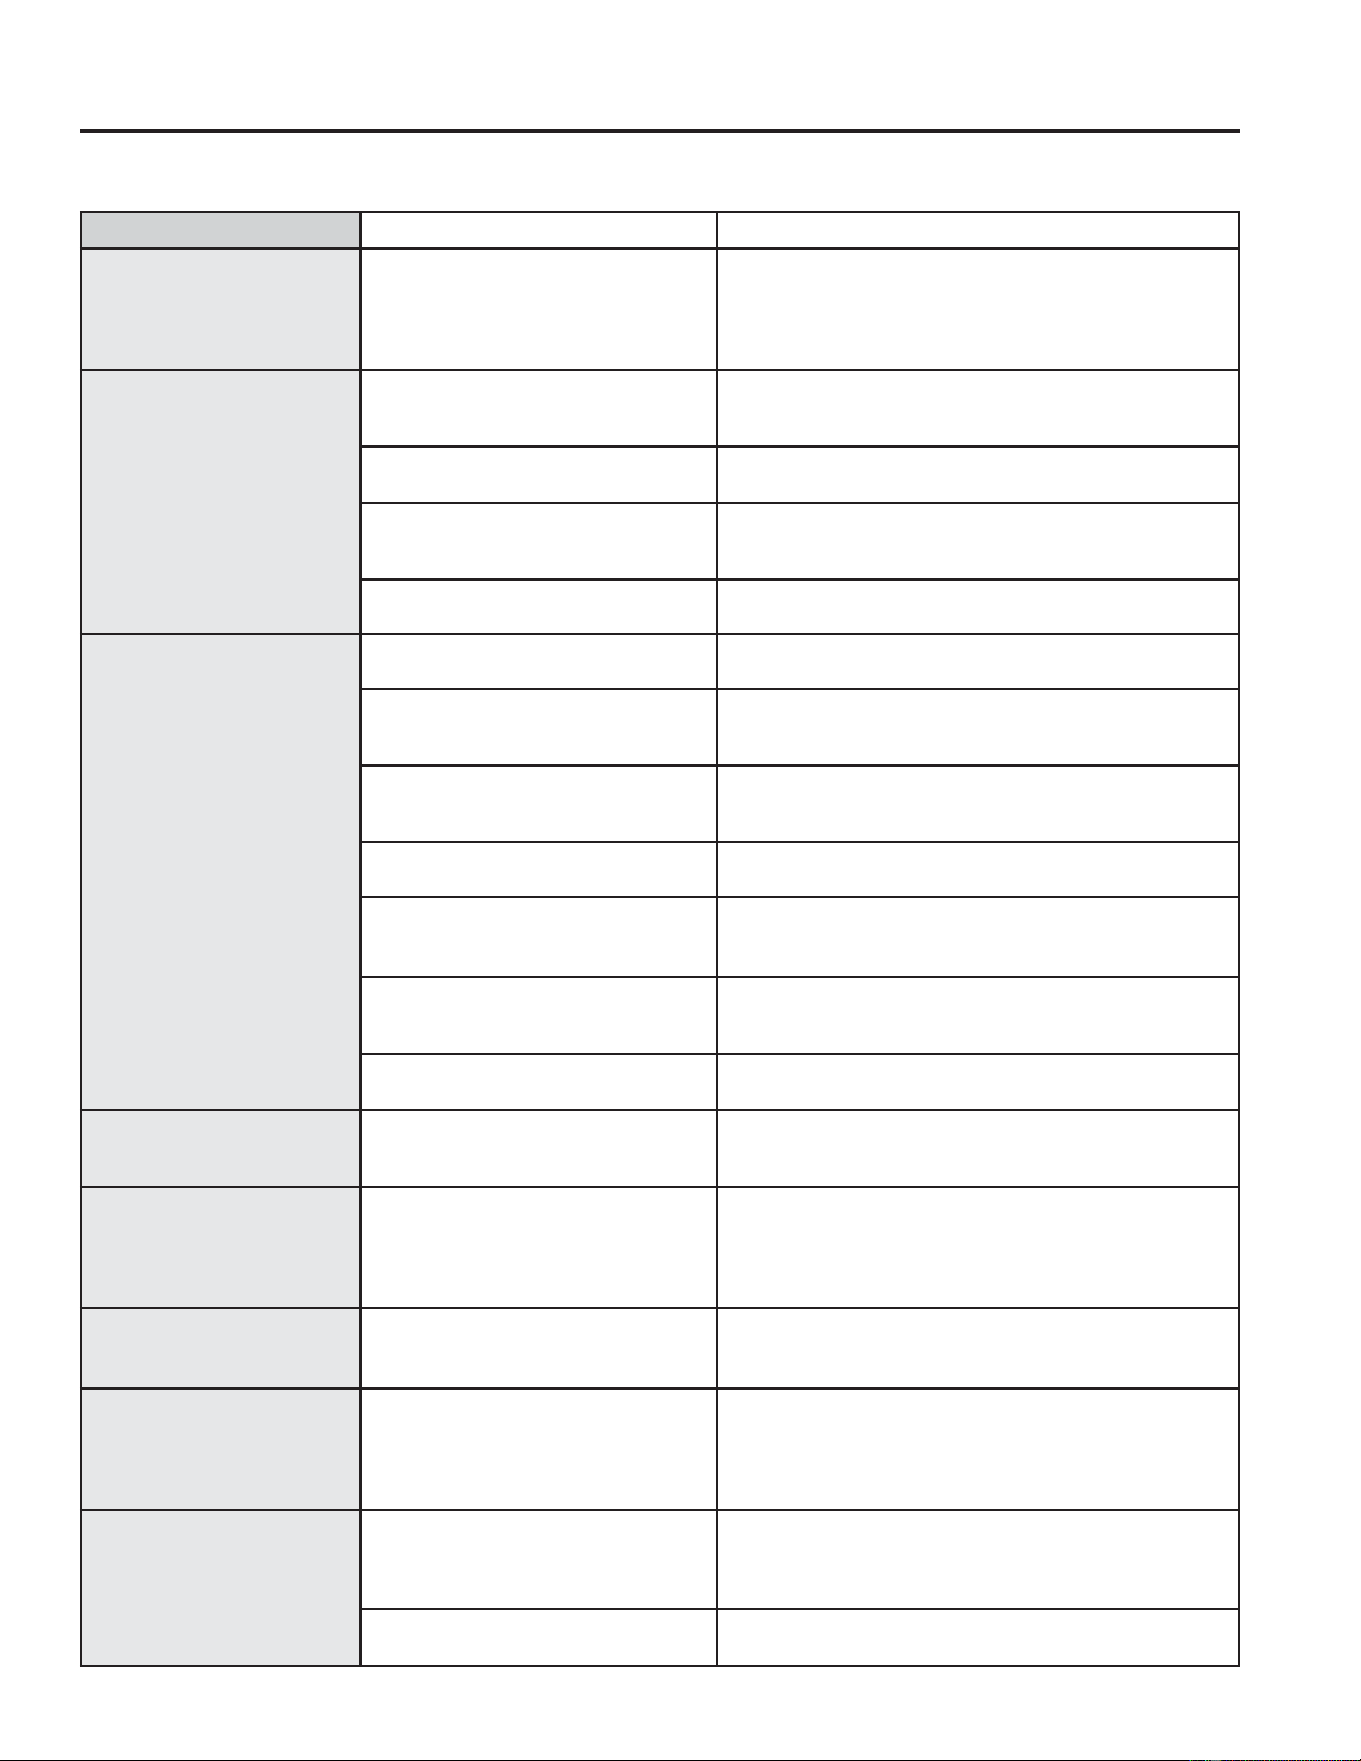
49-40723-2 21
¡Ahorre tiempo y dinero! Primero revise los cuadros que aparecen en las siguientes páginas y es posible que no necesite solicitar
reparaciones.
Problema Posibles causas Qué Hacer
La pantalla está en blanco.
El reloj fue diseñado para apagar
la unidad cuando quede inactiva
durante 30 segundos, a fin de
minimizar el uso de la energía en
suspensión.
El reloj se encenderá cuando la unidad se encuentre
en uso, la puerta sea abierta. No hay una opción
de anulación disponible basada en los requisitos de
HQHUJtD'2(
El horno no se pone en
marcha
Puede que se haya fundido un
fusible de su casa o que haya
saltado el diferencial.
Cambie el fusible o reconecte el diferencial.
Apagón de corriente. 'HVHQFKXIHHOKRUQRPLFURRQGDVGHODFRUULHQWH\
vuélvalo a enchufar.
El enchufe no está completamente
insertado en la toma de corriente
de la pared.
Asegúrese de que el enchufe de 3 clavijas del horno
esté completamente insertado en la toma de corriente
de la pared.
La puerta no está cerrada del
todo.
Abra la puerta y ciérrela por completo.
El panel de control está
encendido pero el horno
no se pone en marcha
La puerta no está cerrada del
todo.
Abra la puerta y ciérrela por completo.
No se presionó el botón START/
PAUSE tras seleccionar el modo
de cocción.
Presione START/PAUSE.
Ya se ha realizado otra selección
en el horno y no se presionó
CLEAR/OFF para cancelarla.
Presione CLEAR/OFF.
No se introdujo un tiempo de
cocción tras apretar TIME COOK.
Asegúrese de introducir un tiempo de cocción tras
presionar TIME COOK.
Se presionó CLEAR/OFF sin
querer.
Vuelva a programar la cocción y presione START/
PAUSE.
No se introdujo el peso tras
seleccionar AUTO DEFROST o
FAST DEFROST.
Asegúrese de introducir el peso de la comida tras
seleccionar AUTO DEFROST o FAST DEFROST.
No se introdujo el tipo de comida
tras apretar AUTO COOK.
Asegúrese de entrar un tipo de comida.
CONTROL BLOQUEADO
para (CONTROL LOCKED)
aparece en la pantalla
El control ha sido bloqueado. Presione y mantenga CLEAR/OFF durante 3 segundos
desbloquear el control.
El suelo del horno está
templado incluso cuando
el horno no se ha usado
La luz de la encimera está situada
bajo el suelo del horno. Cuando
la luz está puesta, el calor que
produce puede calentar el suelo
del horno.
Esto es normal.
Se escucha un pitido con
un tono inusualmente
bajo
Ha intentado cambiar el nivel nivel
de potencia cuando no estaba
permitido.
Muchas de las funciones del horno están
preseleccionadas y no pueden cambiarse.
El extractor del
horno se enciende
automáticamente
El extractor se enciende
automáticamente para proteger
el microondas si percibe que
hay
demasiado calor en la estufa
debajo de éste.
Esto es normal.
Aparece en la pantalla
SENSOR ERROR (Error de
sensor)
Se abrió la puerta mientras se
utilizaba la función de sensor
antes antes de que pudiera
detectarse el vapor.
No abra la puerta hasta que se perciba el vapor y
aparezca en pantalla la cuenta de tiempo regresiva.
El vapor no se detectó en la
cantidad de tiempo máxima.
8WLOLFH7LPH&RRN7LHPSRGHFRFFLyQSDUDFDOHQWDU
durante más tiempo.
Consejos para la Solución de Problemas... Antes de solicitar el servicio técnico
CONSEJOS PARA LA SOLUCIÓN DE PROBLEMAS

22 49-40723-2
Cosas normales de su horno microondas
Ŷ+XPHGDGHQODSXHUWD\SDUHGHVGHOKRUQRDOFRFLQDU)URWH
la humedad con una toallita de papel o un paño suave.
Ŷ+XPHGDGHQWUHORVSDQHOHVGHODVSXHUWDVGHOKRUQRDO
FRFLQDUGHWHUPLQDGRVDOLPHQWRV/DKXPHGDGVHGLVLSDUi
poco después de terminar de cocinar.
Ŷ(OYDSRUVHHVFDSDSRUODSXHUWD
Ŷ8QDOX]GHUHIOH[LyQDOUHGHGRUGHODSXHUWDRHQODSHULIHULD
de la caja del horno.
Ŷ/DOX]GHOKRUQRVHGHELOLWD\HOVRQLGRGHOVRSODGRUFDPELD
cuando se usan niveles de potencia diferentes al alto.
Ŷ8QVRQLGRVRUGRGHJROSHFXDQGRHOKRUQRGHPLFURRQGDV
está en operación.
Ŷ(OYHQWLODGRURSHUDPLHQWUDVHOKRUQRGHPLFURRQGDVHVWi
operando. El ventilador no se apagará ni se puede apagar
hasta que el horno de microondas se apague.
Ŷ6HSXHGHQRWDUXQDLQWHUIHUHQFLDGHWHOHYLVLyQ\UDGLR
mientras se usa el horno de microondas. Similar a la
interferencia casada por otros electrodomésticos, lo cual no
indica un problema. Conecte el horno de microondas en un
tomacorriente de un circuito diferente, mueva la televisión o
el radio tan lejos del horno de microondas como sea posible
o inspeccione la posición de la antena de la televisión o el
radio.
Ŷ/DSDQWDOODIXHGLVHxDGDSDUDDSDJDUVHFXDQGRODXQLGDG
quede inactiva durante 30 segundos, a fin de minimizar
HOXVRGHHQHUJtDHQPRGRGHVXVSHQVLyQ/DSDQWDOODVH
encenderá cuando el control esté en uso o cuando se abra
la puerta.
CONSEJOS PARA LA SOLUCIÓN DE PROBLEMAS
Consejos para la Solución de Problemas... Antes de solicitar el servicio técnico
DECLARACIÓN DE INTERFERENCIA POR RADIOFRECUENCIA DE LA
FEDERAL COMMUNICATIONS COMMISSION (COMISIÓON FEDERAL DE
COMUNICACIONES) (EE.UU. ÚNICAMENTE)
Este equipamiento genera y utiliza energía de
frecuencia ISM y si no es instalado y usado de forma
adecuada, estando en estricto cumplimiento con las
instrucciones del fabricante, podrá generar interferencia
en la recepción de radio y televisión. Fue evaluado de
forma específica y se comprobó que cumple con los
límites de Equipamientos ISM, de acuerdo con la parte
18 de las Reglas de la FCC, que fueron diseñadas para
brindar una instalación residencial.
Sin embargo, no se garantiza que no se presenten
interferencias en una instalación en particular. Si este
equipamiento genera interferencias en la recepción
de radio o televisión, lo que se puede comprobar
encendiendo y apagando el equipo, se aconseja al
usuario que intente corregir la interferencia a través de
una de las siguientes medidas:
Ŷ5HRULHQWHODDQWHQDUHFHSWRUDGHODUDGLRRHO
televisor.
Ŷ5HXELTXHHO+RUQR0LFURRQGDVHQUHODFLyQDO
receptor.
Ŷ$OHMHHOKRUQRPLFURRQGDVGHODSRVLFLyQGHOUHFHSWRU
Ŷ(QFKXIHHOKRUQRPLFURRQGDVHQXQWRPDFRUULHQWH
diferente, de modo que el horno microondas y el
receptor estén en diferentes recepciones de códigos.
El fabricante no es responsable por ninguna
interferencia de radio o TV generada por modificaciones
no autorizadas sobre este horno microondas. Es
responsabilidad del usuario corregir tales interferencias.

49-40723-2 23
NOTAS
Notas

24 49-40723-2
Notas
NOTAS

49-40723-2 25
NOTAS
Notas
26 49-40723-2
Abroche su recibo aquí. Para acceder al servicio técnico de acuerdo con
la garantía deberá contar con la prueba de la fecha original de compra.
GEAppliances.com
Todos los servicios de garantía los proporcionan nuestros Centros de Reparación de Fábrica o nuestros técnicos
Customer Care® autorizados. Pare concertar una cita de reparación, en línea, 24 horas al día, visite GEAppliances.com,
ROODPHDO*(&$5(6&XDQGROODPHSDUDVROLFLWDUVHUYLFLRSRUIDYRUWHQJDDPDQRHOQ~PHURGH
serie y el número de modelo.
Para realizar el servicio técnico de su electrodoméstico, se podrá requerir el uso de datos del puerto de abordaje para su diagnóstico.
Esto da al técnico del servicio de fábrica de GE Appliances la habilidad de diagnosticar de forma rápida cualquier problema con
su electrodoméstico, y de ayudar a GE Appliances a mejorar sus productos al brindarle a GE Appliances la información sobre su
electrodoméstico. Si no desea que los datos de su electrodoméstico sean enviados a GE Appliances, solicitamos que le indique a su
técnico no entregar los datos a GE Appliances en el momento del servicio.
Lo que GE Appliances no cubrirá:
Ŷ 9LDMHVGHUHSDUDFLyQDVXKRJDUSDUDHQVHxDUOHFyPR
usar el producto.
Ŷ ,QVWDODFLyQRHQWUHJDLQDSURSLDGDRPDQWHQLPLHQWR
impropio.
Ŷ 3URGXFWRQRDFFHVLEOHSDUDIDFLOLWDUHOVHUYLFLRUHTXHULGR
Ŷ )DOORVGHOSURGXFWRVLKD\DEXVRPDOXVRSRUHMHPSOR
chispas dentro de horno microondas del estante metálico/
SDSHOGHDOXPLQLRRXVRSDUDRWURVSURSyVLWRVTXHORV
propuestos, o si se usa con fines comerciales.
Ŷ 5HHPSOD]RGHERPELOODVGHODOX]GHODHVWXID
Ŷ 5HHPSOD]RGHIXVLEOHVGHVXKRJDURUHDMXVWHGHORV
diferenciales.
Ŷ 'DxRDOSURGXFWRFDXVDGRSRUDFFLGHQWHIXHJR
LQXQGDFLRQHVRDFWRVGH'LRV
Ŷ 'DxRLQFLGHQWDORFRQVHFXHQFLDODVXSURSLHGDGFDXVDGR
por posibles defectos con el aparato.
Ŷ &DXVDUGDxRVGHVSXpVGHODHQWUHJD
Ŷ &DXVDUGDxRVGHVSXpVGHODHQWUHJD
GARANTÍA
Garantía de Horno Microondas GE Appliances
EXCLUSIÓN DE GARANTÍAS IMPLÍCITAS
Su único y exclusivo derecho es la reparación del producto, tal y como se indica en esta Garantía limitada.
Cualquier garantía implícita, incluyendo las garantías implícitas de comerciabilidad o adecuación para un fin
determinado, están limitadas a un año o el período de tiempo más breve permitido por la ley.
Esta garantía se extiende al comprador original y cualquier comprador posterior de productos comprados para uso
UHVLGHQFLDOGHQWURGH(VWDGRV8QLGRV6LHOSURGXFWRHVWiVLWXDGRHQXQiUHDTXHQRGLVSRQHGHVHUYLFLRSRUSDUWH
de un proveedor de servicio autorizado de GE, podría tener que hacerse cargo de los costes de envío o bien podría
solicitársele que lleve el producto a una centro de servicio de GE autorizado para realizar la reparación. En Alaska, la
garantía excluye el costo de envío o las visitas de servicio a su casa.
Algunos estados no permiten la exclusión o limitación de daños incidentales o consecuenciales. Esta garantía le
proporciona derechos legales específicos, y puede tener otros derechos que pueden variar de un estado a otro. Para
conocer los derechos legales de su estado, consulte con su oficina local de asuntos del consumidor o al procurador
general de su estado.
Garantizador: GE Appliances
Garantías Extendidas: Adquiera una garantía extendida de GE Appliances y conozca los descuentos especiales
que están disponibles mientras su garantía aún está vigente. Puede acceder a la misma a través de Internet en
cualquier momento en
www.geappliances.com/service_and_support/shop-for-extended-service-plans.htm
ROODPDQGRDOGXUDQWHHOKRUDULRFRPHUFLDO/RV6HUYLFLRVSDUDORV*($SSOLDQFHVD~QHVWDUiQ
disponibles cuando su garantía caduque.
Durante el
período de
GE Appliances reemplazará
Un año
'HVGHODIHFKDGH
compra original
Cualquier recambio del horno microondas que falle debido a un defecto en sus materiales
RHQVXIDEULFDFLyQ'XUDQWHHVWDgarantía limitada de un año, GE proporcionará, sin costo
adicional, mano de obra y servicio relacionado para reemplazar las partes defectuosas.
Cinco años
'HVGHODIHFKDGH
compra original
El magnetrón, el tubo magnetrón fallase debido a un defecto en sus materiales o en
VXIDEULFDFLyQ'XUDQWHHVWRVcinco años adicionales de garantía limitada, usted será
responsable de cualquier costo de mano de obra o servicio a domicilio.
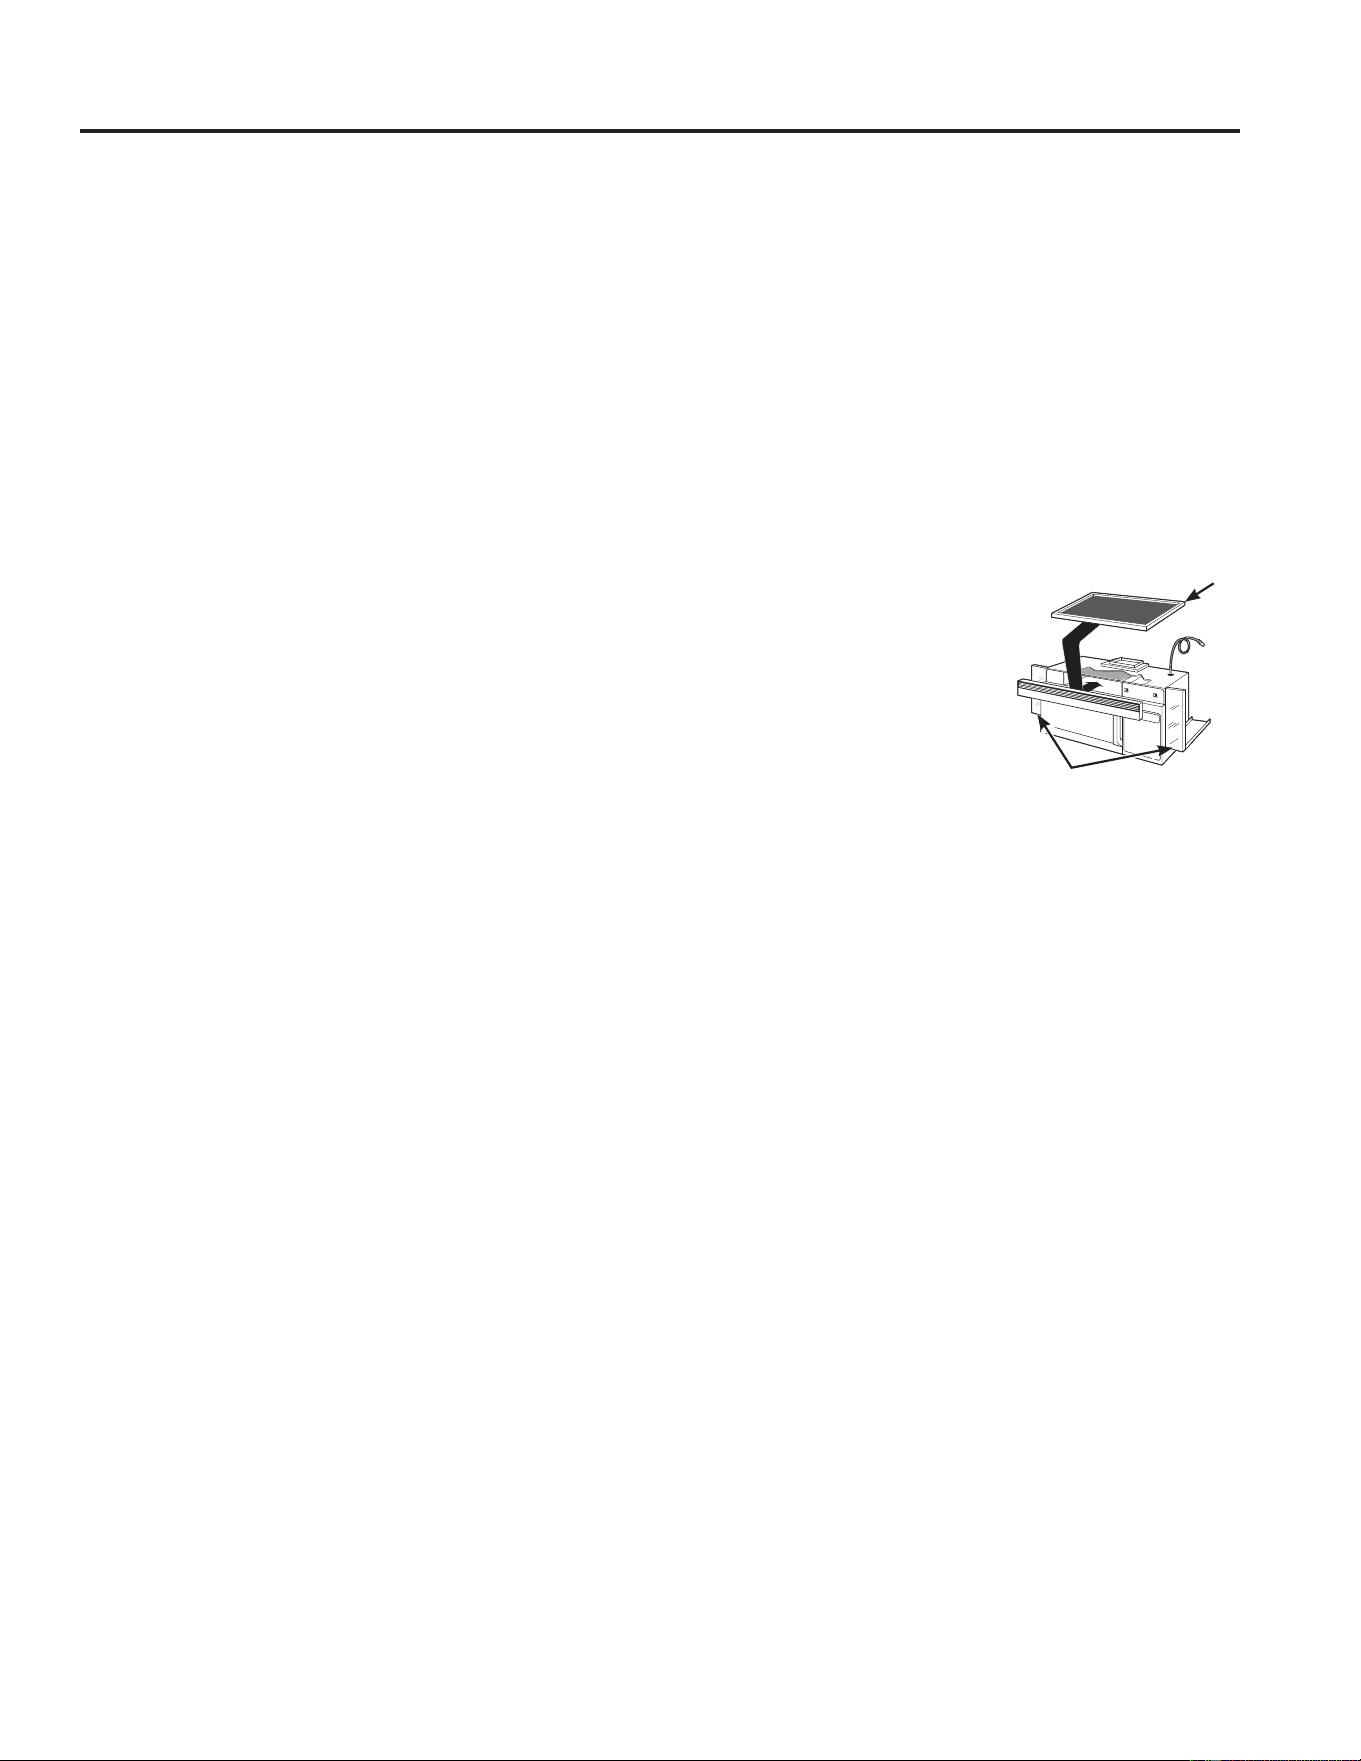
49-40723-2 27
ACCESORIOS
¿Busca Algo Más?
¡GE Appliances ofrece una variedad de accesorios
para mejorar sus experiencias de cocción y
mantenimiento!
Para acceder a números telefónicos e información
de sitios Web, consulte la página de Soporte para el
Consumidor.
Estos y otros productos están disponibles:
Estos y otros productos están disponibles en su
distribuidor GE Appliances por un costo adicional:
Accesorios
Kits de panel de relleno
Ŷ JX40WH—Blanco
Ŷ
JX41—Negro
Al cambiar la tapa de una cocina encimera de 36” los kits de
paneles de relleno ocupan el espacio adicional proveyendo un
aspecto de montaje a medida.
Sólo para instalarse entre armarios, no pueden instalarse al
final de los armarios. Cada kit contiene dos paneles de relleno
de 3”.
Kits de filtros
Ŷ JX81D—Kit de filtro de carbón vegetal de
recirculación
/RVNLWVGHILOWURVVHXVDQFXDQGRHO
horno no puede tener una salida al
exterior.
/RVNLWVGHILOWURVHVWiQGLVSRQLEOHV
a un costo adicional en su
abastecedor GE. Para pedir,
llame a GE Appliances o visite
nuestro sitio Web, GEAppliances.com
FRQVXOWHODSiJLQDWUDVHUD
JX81D
JX40, JX41

28 49-40723-2
Soporte para el Consumidor
SOPORTE PARA EL CONSUMIDOR
Sitio Web de GE Appliances
¢'HVHDUHDOL]DUXQDFRQVXOWDRQHFHVLWDD\XGDFRQVXHOHFWURGRPpVWLFR"£,QWHQWHDWUDYpVGHO6LWLR:HEGH*($SSOLDQFHVODV
KRUDVGHOGtDFXDOTXLHUGtDGHODxR8VWHGWDPELpQSXHGHFRPSUDUPiVHOHFWURGRPpVWLFRVPDUDYLOORVRVGH*($SSOLDQFHV\
aprovechar todos nuestros servicios de soporte a través de Internet, diseñados para su conveniencia.
(Q((88GEAppliances.com
Registre su Electrodoméstico
£5HJLVWUHVXHOHFWURGRPpVWLFRQXHYRDWUDYpVGH,QWHUQHWVHJ~QVXFRQYHQLHQFLD8QUHJLVWURSXQWXDOGHVXSURGXFWRSHUPLWLUi
una mejor comunicación y un servicio más puntual de acuerdo con los términos de su garantía, en caso de surgir la necesidad.
También puede enviar una carta en la tarjeta de inscripción preimpresa que se incluye con el material embalado.
(Q((88GEAppliances.com/register
Servicio Programado
El servicio de reparación de expertos de GE Appliances está a sólo un paso de su puerta. Conéctese a través de Internet y programe
VXVHUYLFLRDVXFRQYHQLHQFLDFXDOTXLHUGtDGHODxR(Q((88GEAppliances.com/ge/service-and-support/service.htm
o comuníquese al 800.432.2737 durante el horario de atención comercial.
Garantías Extendidas
Adquiera una garantía extendida de GE Appliances y conozca los descuentos especiales que están disponibles mientras su
JDUDQWtDD~QHVWiYLJHQWH/DSXHGHDGTXLULUHQFXDOTXLHUPRPHQWRDWUDYpVGH,QWHUQHW/RVVHUYLFLRVGH*($SSOLDQFHVD~Q
estarán allí cuando su garantía caduque.
(Q((88GEAppliances.com/ge/service-and-support/shop-for-extended-service-plans.htm
o comuníquese al 800.626.2224 durante el horario de atención comercial.
Conectividad Remota
3DUDVROLFLWDUDVLVWHQFLDSDUDODFRQHFWLYLGDGGHUHGLQDOiPEULFDSDUDPRGHORVFRQDFFHVRUHPRWR
visite nuestro sitio web en GEAppliances.com/ge/connected-appliances/RFRPXQtTXHVHDOHQ((88
Piezas y Accesorios
Aquellos individuos calificados para realizar el servicio técnico de sus propios electrodomésticos podrán solicitar el envío de
SLH]DVRDFFHVRULRVGLUHFWDPHQWHDVXVKRJDUHVVHDFHSWDQODVWDUMHWDV9,6$0DVWHU&DUG\'LVFRYHU2UGHQHKR\DWUDYpVGH
,QWHUQHWGXUDQWHODVKRUDVWRGRVORVGtDV(Q((88GEApplianceparts.com o de forma telefónica al 877.959.8688 durante
el horario de atención comercial.
Las instrucciones que figuran en este manual cubren los procedimientos que serán realizados por cualquier usuario.
Otros servicios técnicos generalmente deben ser derivados a personal calificado del servicio. Se deberá tener cuidado,
ya que una reparación indebida podrá hacer que el funcionamiento no sea seguro.
Contáctenos
Si no se encuentra satisfecho con el servicio que recibió de GE Appliances, comuníquese con nosotros a través de nuestro sitio
Web con todos los detalles, incluyendo su número telefónico, o escriba a:
(Q((88*HQHUDO0DQDJHU&XVWRPHU5HODWLRQV_*($SSOLDQFHV$SSOLDQFH3DUN_/RXLVYLOOH.<
GEAppliances.com/ge/service-and-support/contact.htm