Loading ...
Loading ...
Loading ...
9
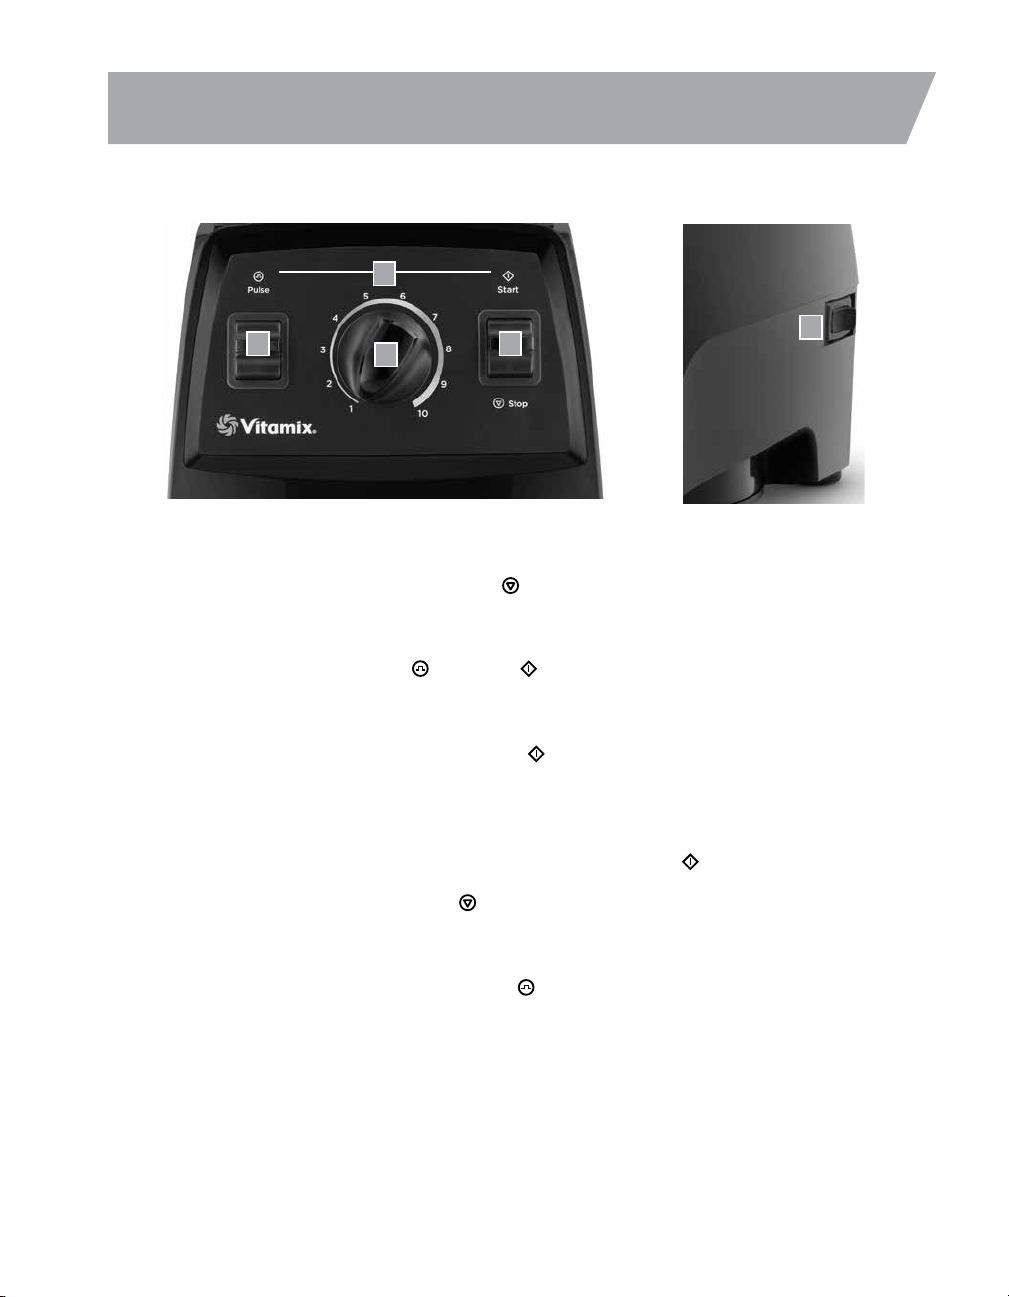
1. On/O Switch: The On/O (or Power) Switch is on the right-hand side of the machine base. The On/O
Switch controls the power to the machine. BEFORE moving the On/O Switch to the On
(I)
position,
make sure the Start/Stop Switch is in the Stop ( ) position and the Variable Speed Dial is to the far
left, pointed at number 1. Move the On/O Switch to the O position whenever the machine will be left
unattended.
2. On/O Indication: When the Pulse ( ) and Start ( ) symbols are lit, they indicate that the machine is
plugged in, the On/O Switch is powered On, and power is flowing.
3. Start/Stop Switch
:
Before starting, always make sure that the Variable Speed Dial is to the far left, pointed
at number 1. Lifting the Start/Stop Switch to the Start ( ) position will start the machine and initiate the
blending process.
4. Variable Speed Dial:
The Variable Speed Dial selects blade rotation speeds from 1 to 10 (low to high).
Always begin the blending process with the Variable Speed Dial set to 1. Make sure that the On/O
Switch is in the On (I) position. Move the Start/Stop Switch to the Start ( ) position. Rotate the Variable
Speed Dial to the desired speed setting. To stop the machine, rotate the Variable Speed Dial back to 1 and
move the Start/Stop Switch back to Stop (
) position. If the Variable Speed function is not working
and the blades only rotate at the lowest speed (Variable Speed 1) the blender must be reset. Refer to
Troubleshooting on Page 17.
5. Pulse Switch: Pressing down on the Pulse Switch
(
)will cause the machine to blend at the speed
setting shown on Variable Speed Dial for as long as the Pulse Switch is held down.
1
5
4
3
2
CONTROL PANEL
Loading ...
Loading ...
Loading ...