Loading ...
Loading ...
Loading ...
44
Other Shooting Modes
P Mode
Tv, Av, M, and C Mode
Playback Mode
Wireless Features
Setting Menu
Accessories
Appendix
Before Use
Index
Basic Guide
Advanced Guide
Camera Basics
Auto Mode /
Hybrid Auto Mode
Shooting
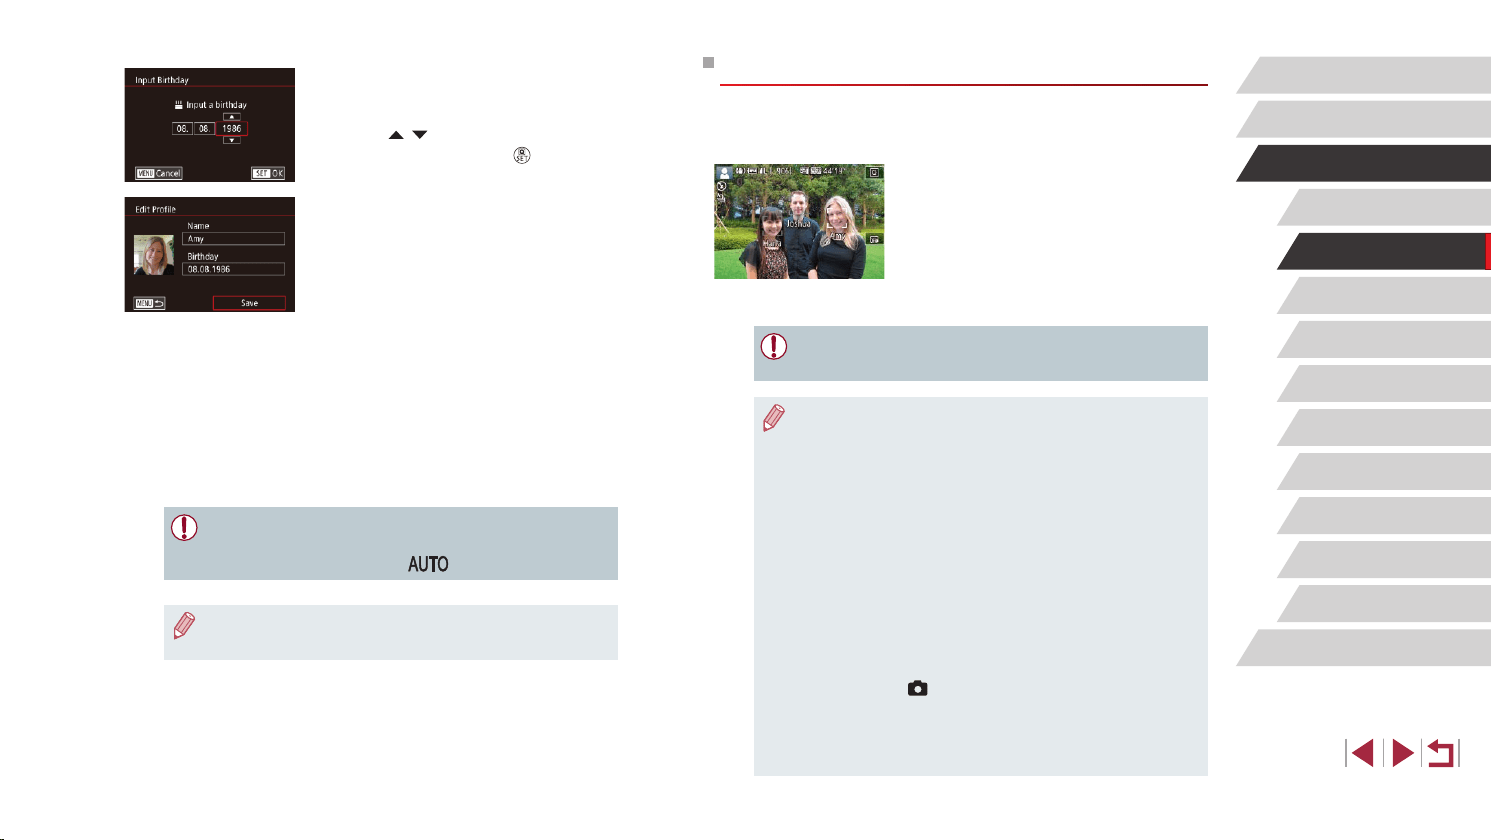
If you register a person ahead of time, the camera will prioritize that
person as the main subject, and optimize focus, brightness, and color for
that person when shooting.
z When you point the camera toward people,
the names of up to 3 registered people will
be displayed when they are detected.
z Shoot.
z Displayed names will be recorded in still
images. The names of detected people
(maximum total of 5) will be recorded,
even if the names are not displayed.
● People other than those registered may be mistakenly detected
as the registered person if they share similar facial features.
● Registered people may not be correctly detected if the captured
image or scene differs drastically from the registered face information.
● If a registered face is not detected, or not easily detected,
overwrite registered information with new face info. Registering
face info right before shooting will allow for easier detection of
registered faces.
● If a person is mistakenly detected as another person and you
continue shooting, you can edit or erase the name recorded in the
image during playback (
=
110).
● Because faces of babies and children change quickly as they
grow, you should update their face info regularly (
=
43).
● Names will still be recorded in images even if you clear the [Shooting
Info] check box in “Customizing the Information Displayed” (
=
98)
so that the names are not displayed.
● If you don’t want names to be recorded in images, choose [Face ID
Settings] on the [
2] tab, choose [Face ID], and then choose [Off].
● You can check names recorded in images in the playback screen
(simple information display) (
=
105).
● Names recorded in continuous shooting (
=
42) continue to be
recorded in the same position as the rst shot, even if subjects move.
z To register a birthday, on the [Edit Prole]
screen, touch the birthday text box.
z Touch an option to choose it.
z Touch [
][ ] to specify the date.
z When nished, press the [
] button.
4
Save the settings.
z Touch [Save].
z After a message is displayed, touch [Yes].
5
Continue registering face
information.
z To register up to 4 more points of face
information (expressions or angles),
repeat step 2.
z Registered faces are more easily
recognized if you add a variety of face
information. In addition to a head-on
angle, add a slight side angle, a shot
when smiling, and shots inside and
outside.
● The ash will not re when following step 2.
● If you do not register a birthday in step 3, Babies or Children icons
(
=
37) will not be displayed in [ ] mode.
● You can overwrite registered face info, and add face info later if
you have not lled all 5 face info slots (
=
43).
Loading ...
Loading ...
Loading ...