Loading ...
Loading ...
Loading ...
CAUTION: While it is possible for one person to
assemble this grill, obtain assistance from another
person when handling some of the larger, heavier pieces
1. Open lid of shipping carton and remove top
sheet of cardboard. Lay cardboard sheet on floor and use
as a work surface to protect floor and grill parts from
scratches.
2. Remove packing materials from shipping carton.
3. You may slice the carton front corners with a utility knife
to lay open the carton front panel. This will allow you to
raise the grill head lid and remove the components packed
inside the head.
4. Use the parts list to check that all parts have been
included.
5. Inspect the grill for damage as you assemble it. Do not
assemble or operate the grill if it appears damaged. If there
are damaged or missing parts when you unpack the
shipping box, or you have questions during the assembly
process, call:
Caution: Before moving onto side shelf assembly, remove
main grease tray and cup from back of grill, and remove
and discard any ties or packing material. Then reinsert
tray/cup assembly back into grill as below picture shown.
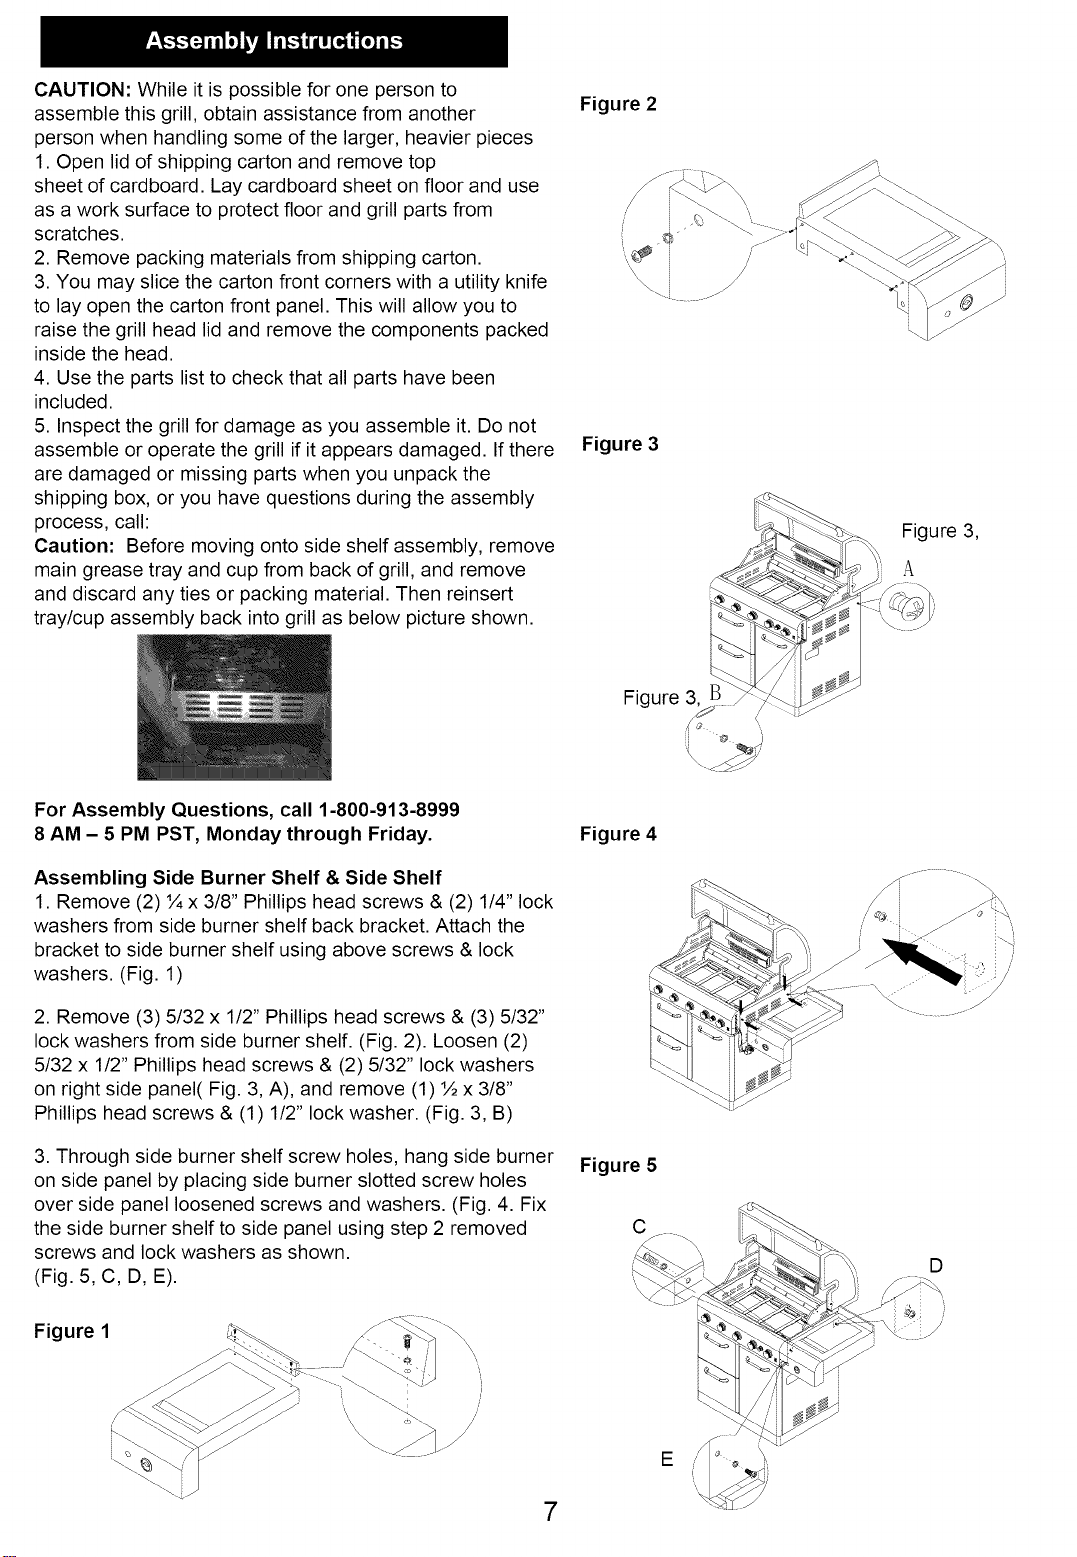
Figure 2
Figure 3
Figure 3,
A
Figure 3,
For Assembly Questions, call 1-800-913-8999
8 AM - 5 PM PST, Monday through Friday.
Assembling Side Burner Shelf & Side Shelf
1. Remove (2) ¼ x 3/8" Phillips head screws & (2) 1/4" lock
washers from side burner shelf back bracket. Attach the
bracket to side burner shelf using above screws & lock
washers. (Fig. 1)
2. Remove (3) 5/32 x 1/2" Phillips head screws & (3) 5/32"
lock washers from side burner shelf. (Fig. 2). Loosen (2)
5/32 x 1/2" Phillips head screws & (2) 5/32" lock washers
on right side panel( Fig. 3, A), and remove (1) ½ x 3/8"
Phillips head screws & (1) 1/2" lock washer. (Fig. 3, B)
3. Through side burner shelf screw holes, hang side burner
on side panel by placing side burner slotted screw holes
over side panel loosened screws and washers. (Fig. 4. Fix
the side burner shelf to side panel using step 2 removed
screws and lock washers as shown.
(Fig. 5, C, D, E).
Figure 1
\\\
/'
/
s
7
Figure 4
Figure 5
C
j ......... -. -_\\
f
D
Loading ...
Loading ...
Loading ...