Loading ...
Loading ...
Loading ...
Picture
Before you begin:
You must set Home in Location. L p. 31
Otherwise, personalized Picture and Sound settings will not be
memorized after the Unit goes into Standby Mode.
1
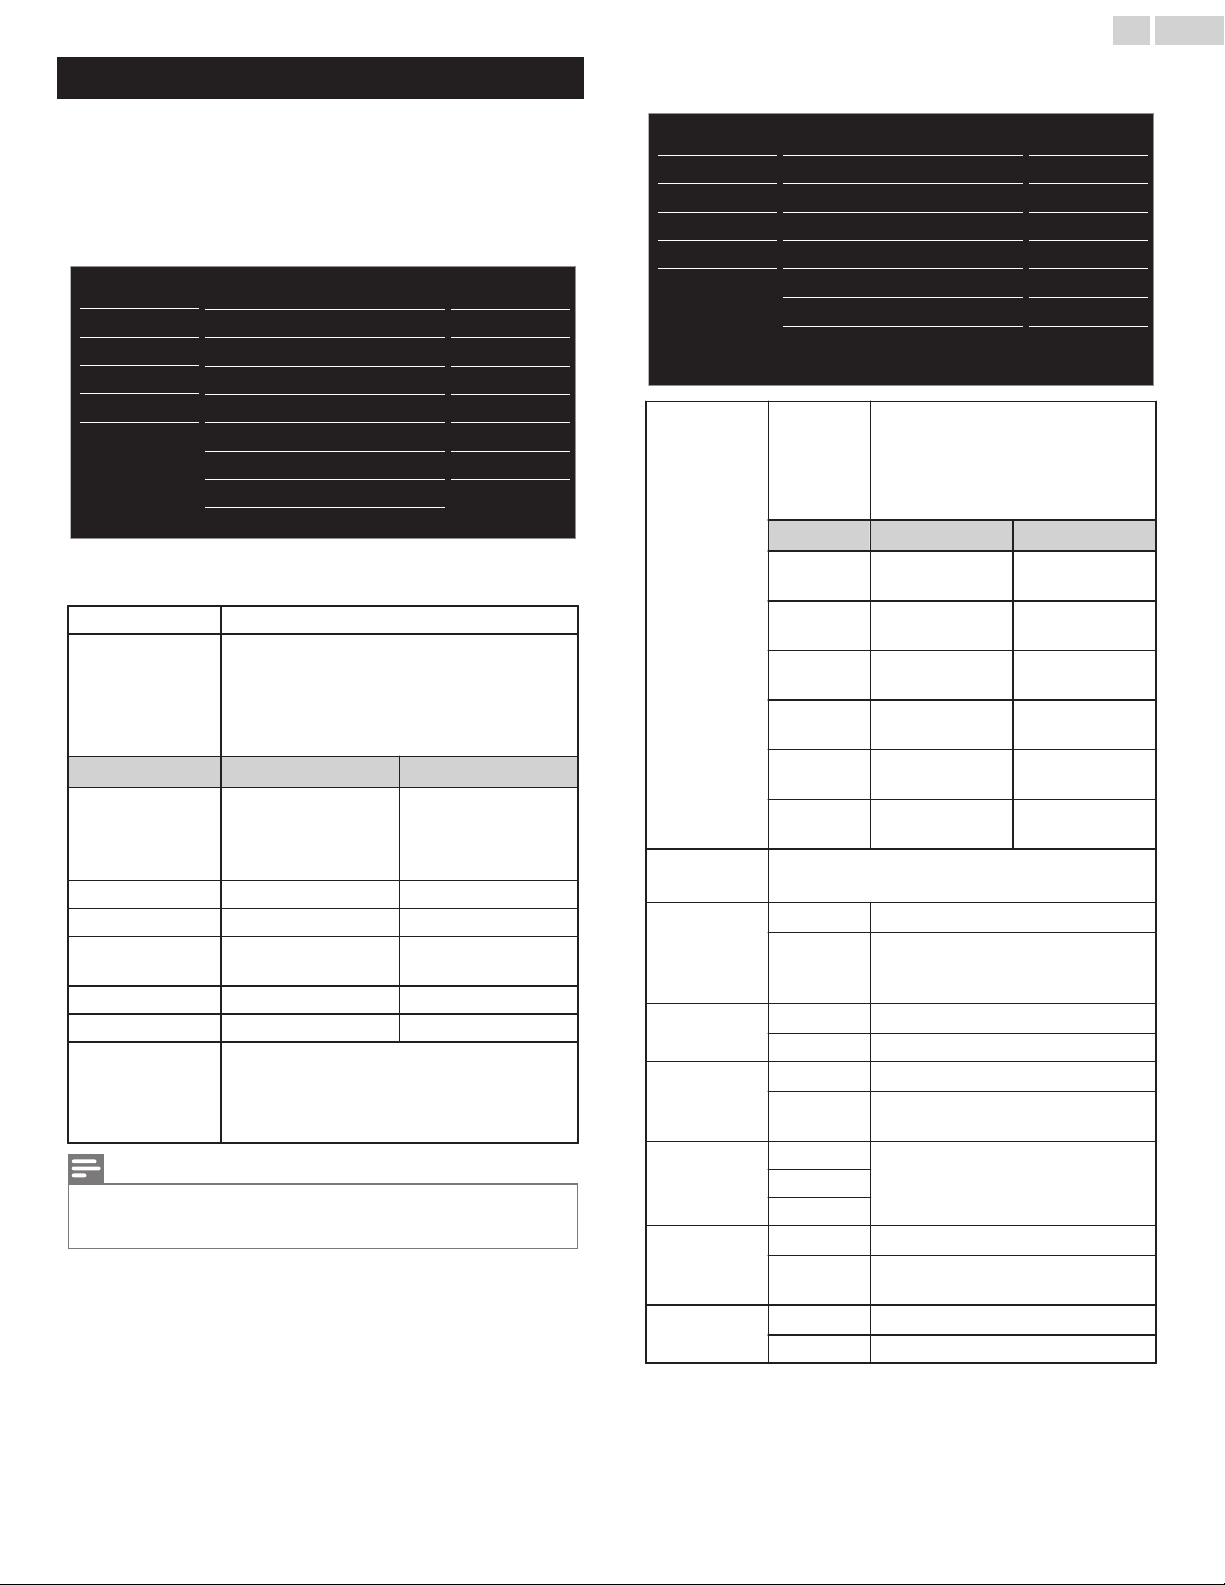
Press Q and use H I to select Picture, then press OK.
18
50
30
30
0
2
USB
Language
Features
Setup
Sound
Picture
Personal
Advanced settings
Sharpness
Tint
Color
Brightness
Contrast
Backlight
Auto picture
Settings assistant
2
Use H I J K to select the item you want to adjust, then press
OK.
Settings assistant
to guide you through the best picture setting
Auto picture
to select the desired setting, then press OK.
(Personal, Standard, Vivid, Sports, Movie, Game
and Eco)
When you adjust the following settings, Personal
picture will be set Automatically.
J Cursor Cursor K
Backlight
to Reduce Power
Consumption and
Reduce Backlight
Brightness
to Increase Power
Consumption and
Brightness
Contrast
to Decrease Contrast to Increase Contrast
Brightness
to Decrease Brightness to Increase Brightness
Color
to Decrease Color
Intensity
to Increase Color
Intensity
Tint
to Add Red to Add Green
Sharpness
to Soften to Sharpen
Advanced settings
to Select the desired Setting, then press OK
(Color alignment, Noise reduction, Ambient light
sensor, Black stretch, Dynamic contrast, Gamma,
Film mode and 120 PMR)
Note(s)
●
Adjusts Backlight for the Best Picture Quality by Dynamically Adjusting the Backlight
Intensity in accordance with the Room Lighting Condition when Ambient light sensor is
Set to On. Please ensure the Room Lighting is Stable and the Light Sensor is Not Blocked.
●
You can set a Particular Picture Quality using Advanced
settings.
Normal
Gamma
Dynamic contrast
Black stretch
Noise reduction
Color alignment
USB
Language
Features
Setup
Sound
Picture
Medium
On
Gamma2
On
On
On
120 PMR
Ambient light sensor
Auto
Film mode
Color
alignment
Color
temperature
mode
to set the picture color temperature to
Personal (Cool, Normal or Warm)
When you adjust the following
settings, Personal picture will be set
Automatically.
J Cursor Cursor K
Red gain
to Decrease Red
Contrast
to Increase Red
Contrast
Green gain
to Decrease
Green Contrast
to Increase Green
Contrast
Blue gain
to Decrease Blue
Contrast
to Increase Blue
Contrast
Red offset
to Decrease Red
Brightness
to Increase Red
Brightness
Green
offset
to Decrease
Green Brightness
to Increase Green
Brightness
Blue offset
to Decrease Blue
Brightness
to Increase Blue
Brightness
Noise
reduction
to select the desired setting, then press OK
(Off, Minimum, Medium and Maximum)
Ambient light
sensor
Off
to Set Ambient light sensor to Off
On
to Adjust Backlight for Best Picture
quality based on the incoming Video
Signal
Black stretch
Off
to Set Black stretch to Off
On
to Enhance Black Color
Dynamic
contrast
Off
to Set Dynamic contrast to Off
On
to Enhance Contrast in an Image
Automatically
Gamma
Gamma1
to Change the Gamma setting
(changes the Brightness and Contrast
in the picture)
Gamma2
Gamma3
Film mode
Off
to Set Film mode to Off
Auto
to Optimize the Picture recorded by
the Original film
120 PMR
Off
to Set 120 PMR to Off
On
to Make the Video appear smooth
22 .English
Loading ...
Loading ...
Loading ...