Loading ...
Loading ...
Loading ...
11
1
MENU
INPUT
OK
BACK
INFO
VOL CH
PIC
1
2
3
4
5 6
7
8
9
0
CC
EXIT
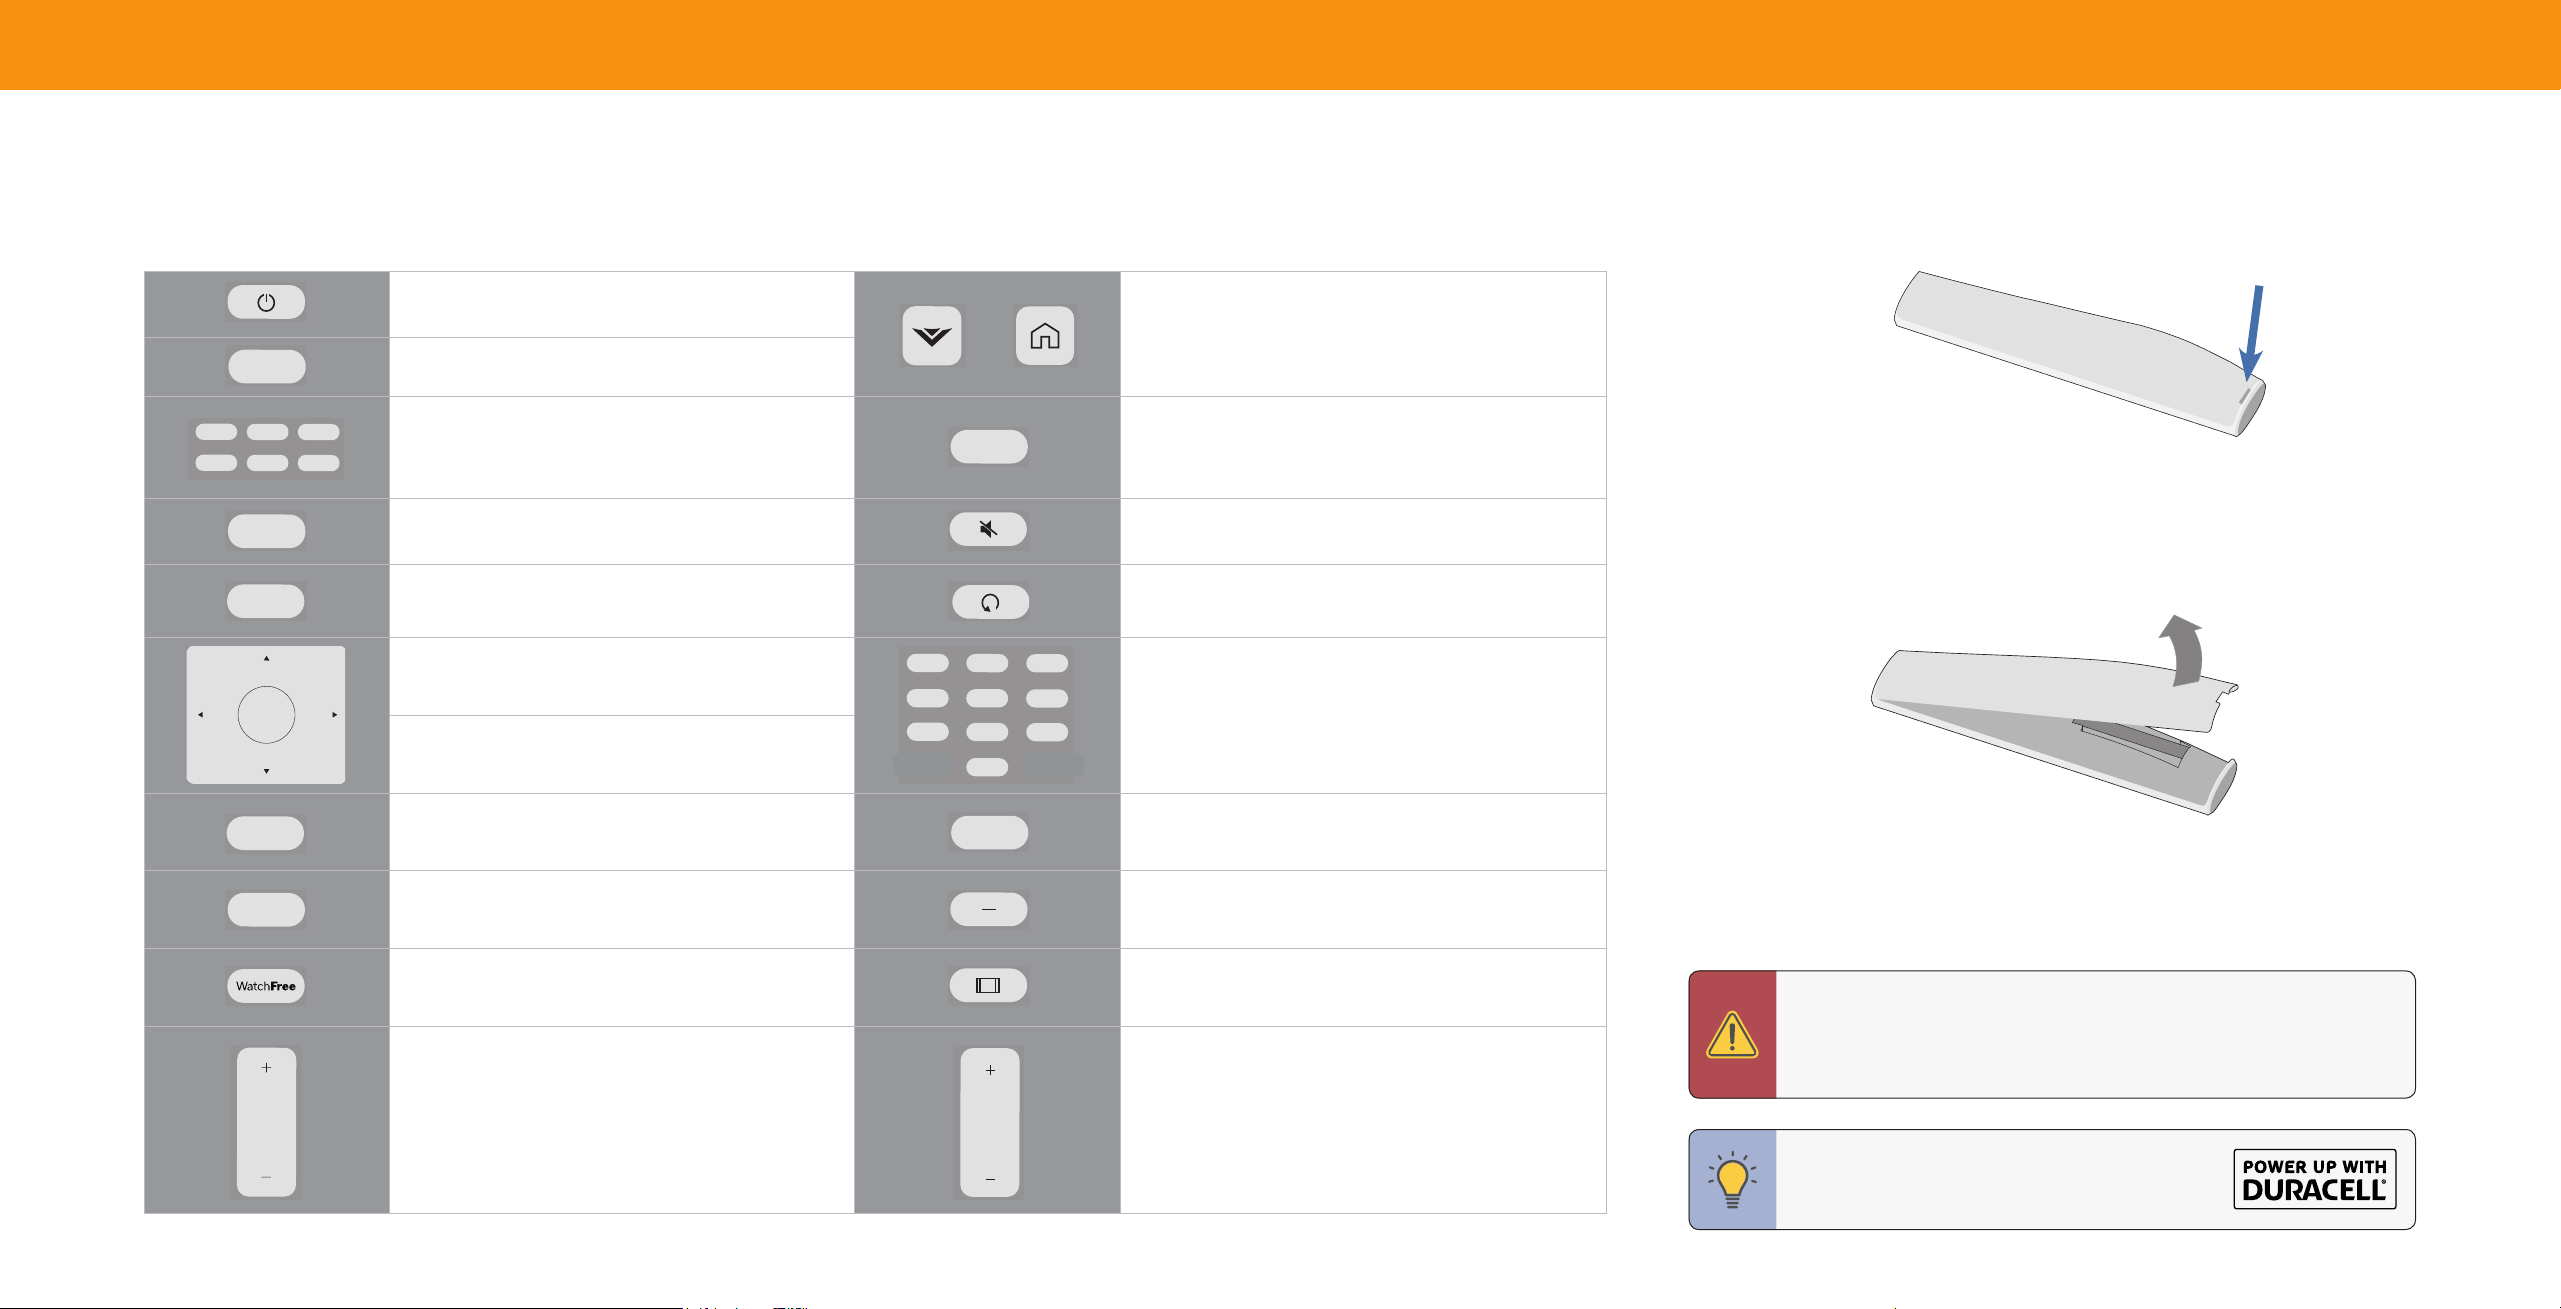
Replacing the Batteries
1. Find the notch on the back of the remote. Insert a coin and pry open the
back cover.
MENU
INPUT
OK
BACK
INFO
VOL CH
PIC
1
2
3
4
5 6
7
8
9
0
CC
EXIT
2. Insert two batteries into the remote control. Make sure that the (+) and (-) symbols
on the batteries match the (+) and (-) symbols inside the battery compartment.
3. Replace the battery cover.
In many places batteries cannot be thrown away or discarded with household waste. Please ensure you properly
dispose of your batteries consistent with the laws and/or regulations where you live. For more information please
visit: www.vizio.com/environment
WARNING: Keep the remote control batteries away from children.
It may cause choking and/or lead to a re or chemical burn if
mishandled. Do not dispose of batteries in re. Replace only with
batteries of the correct type.
TIP: When needed, VIZIO recommends replacing
the batteries that came with this remote with
two, new Duracell ‘AAA’ alkaline batteries.
USING THE REMOTE
Power
Turn television on or o
SmartCast Home
SM
Button
Launch SmartCast Home/Return to SmartCast Home
Screen
Input
Change the currently displayed input
App Launcher
Quickly launch the pictured app
Closed Caption
Open the closed caption menu
Open Accessibility menu by holding down this button for 5
seconds.
Menu
Display the settings menu
Mute
Turn the audio on or o
Exit
Close the on-screen menu
Last
Return to the channel last viewed
Arrow Buttons
Navigate the on-screen menus
Number Pad
Manually enter a channel
OK/Play/Pause
Select the highlighted menu option and play or
pause content
Back
Go to the previous on-screen menu
Pic
Cycle through the dierent picture setting modes
Enabled/disable talk back feature*
Info
Display the info window
Dash
Use with number pad to manually enter a digital
sub-channel (for example, 18-4 or 18-5)
WatchFree™
Access WatchFree channels
(not available in Canada)
Wide
Change the picture display size/aspect ratio
Enable/disable zoom mode*
Volume Up/Down
Increase or decrease the loudness of the audio
Channel Up/Down
Change the channel
MENU
INPUT
OK
BACK
INFO
VOL CH
PIC
1
2
3
4
5 6
7
8
9
0
CC
EXIT
MENU
INPUT
OK
BACK
INFO
VOL CH
PIC
1
2
3
4
5 6
7
8
9
0
CC
EXIT
MENU
INPUT
OK
BACK
INFO
VOL CH
PIC
1
2
3
4
5 6
7
8
9
0
CC
EXIT
MENU
INPUT
OK
BACK
INFO
VOL CH
PIC
1
2
3
4
5 6
7
8
9
0
CC
EXIT
MENU
INPUT
OK
BACK
INFO
VOL CH
PIC
1
2
3
4
5 6
7
8
9
0
CC
EXIT
MENU
INPUT
OK
BACK
INFO
VOL CH
PIC
1
2
3
4
5 6
7
8
9
0
CC
EXIT
MENU
INPUT
OK
BACK
INFO
VOL CH
PIC
1
2
3
4
5 6
7
8
9
0
CC
EXIT
MENU
INPUT
OK
BACK
INFO
VOL CH
PIC
1
2
3
4
5 6
7
8
9
0
CC
EXIT
MENU
INPUT
OK
BACK
INFO
VOL CH
PIC
1
2
3
4
5 6
7
8
9
0
CC
EXIT
MENU
INPUT
OK
BACK
INFO
VOL CH
PIC
1
2
3
4
5 6
7
8
9
0
CC
EXIT
MENU
INPUT
OK
BACK
INFO
VOL CH
PIC
1
2
3
4
5 6
7
8
9
0
CC
EXIT
MENU
INPUT
OK
BACK
INFO
VOL CH
PIC
1
2
3
4
5 6
7
8
9
0
CC
EXIT
MENU
INPUT
OK
BACK
INFO
VOL
CH
PIC
1
2
3
4
5 6
7
8
9
0
CC
EXIT
MENU
INPUT
OK
BACK
INFO
VOL
CH
PIC
1
2
3
4
5 6
7
8
9
0
CC
EXIT
MENU
INPUT
OK
BACK
INFO
VOL CH
PIC
1
2
3
4
5 6
7
8
9
0
CC
EXIT
MENU
INPUT
OK
BACK
INFO
VOL CH
PIC
1
2
3
4
5 6
7
8
9
0
CC
EXIT
MENU
INPUT
OK
BACK
INFO
VOL CH
PIC
1
2
3
4
5 6
7
8
9
0
CC
EXIT
MENU
INPUT
OK
BACK
INFO
VOL CH
PIC
1
2
3
4
5 6
7
8
9
0
CC
EXIT
*Enabled/disabled dierent accessibility features by holding down each of these buttons for 5 seconds.
Note that specic buttons may vary depending on your model.
MENU
INPUT
OK
BACK
INFO
VOL CH
PIC
1
2
3
4
5 6
7
8
9
0
CC
EXIT
MENU
INPUT
OK
BACK
INFO
VOL CH
PIC
1
2
3
4
5 6
7
8
9
0
CC
EXIT
or
Loading ...
Loading ...
Loading ...