Loading ...
Loading ...
Loading ...
LOCATION
• Two people should be used when moving the
appliance.
• Place the appliance on a fl oor that is strong
enough to support it when it is fully loaded.
• Do not place the appliance in direct sunlight or
near sources of heat, such as a stove or heater,
as this can increase electrical consumption.
Extreme cold ambient temperatures may also
cause the appliance to perform improperly.
• Do not use the appliance near water, for
example in a wet basement or near a sink.
• Before connecting the appliance to a power
source, let it stand upright for approximately 6
hours to avoid damage to internal components.
• This appliance is 52.7 cm (20.8 inches) wide
by 84 cm (33.1 inches) high by 54.1 cm (21.3
inches) deep.
• Allow 12.7 cm (5 inches) of space between the
back of the appliance and the walls. Allow 5 cm
(2 inches) of space between the sides and top of
the appliance and all adjacent walls.
• This appliance is intended for free-standing
installation only and is not intended to be
built into a cabinet or counter. Building in this
appliance can cause it to malfunction.
• This appliance is not designed for outside
installation, including anywhere that is not
temperature controlled (garages, porches,
vehicles, etc.).
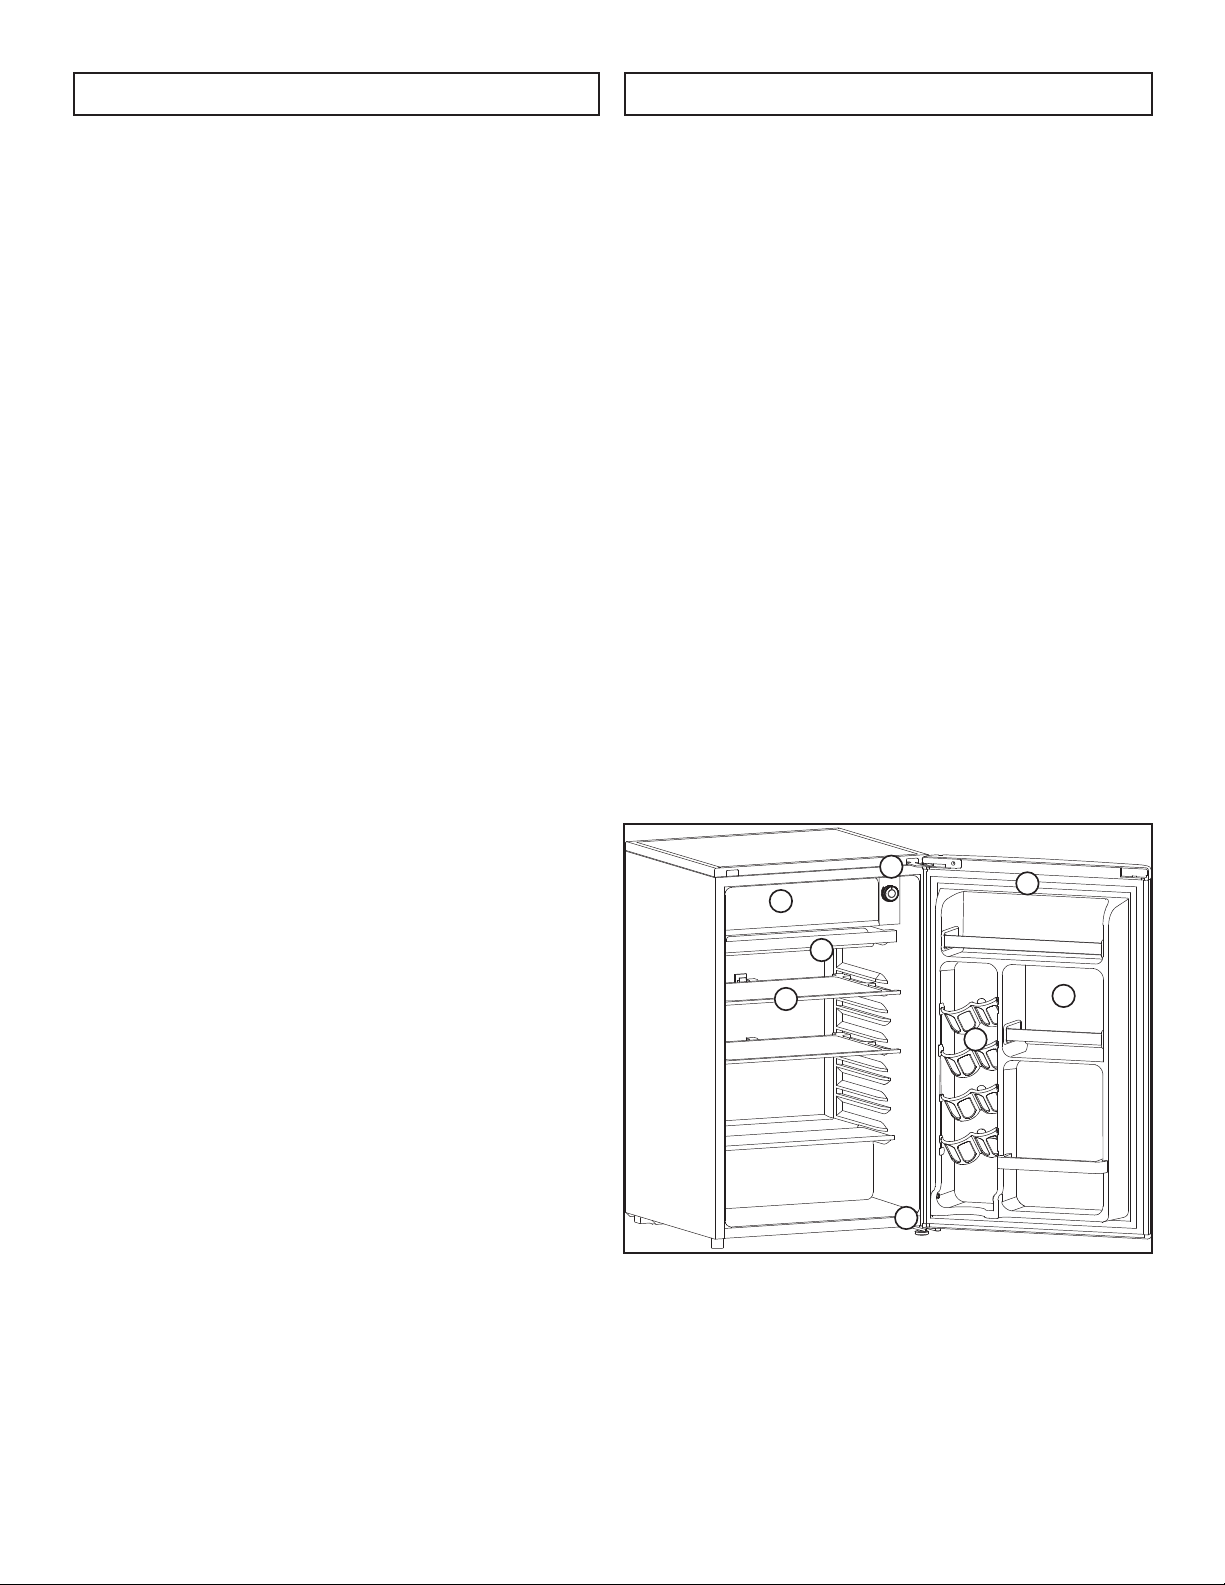
FEATURES
1. Thermostat Dial and Push Button Defrost:
For controlling the temperature inside the
refrigerator; the compressor activates as soon as
the temperature rises above the desired level.
2. Freezer Compartment with Freezer Door:
Separate freezer section can hold small items.
3. Drip Tray: Catches the water that drips off the
evaporator when defrosting.
4. Glass Shelves
5. Magnetic Gasket: Tight fi tting door seal keeps
all the cooling power locked inside. No hooks or
latches.
6. Bottle Racks: For tall, small and medium cans or
jars.
7. CANSTOR™ Door Liner: Holds 355ml cans of
pop, juice, or beer.
8. Leveling Legs: Adjust so the unit is level.
0
1
2
3
4
5
6
7
8
3
INSTALLATION INSTRUCTIONS OPERATING INSTRUCTIONS
Loading ...
Loading ...
Loading ...