Health & Safety, Use & Care and Installation guide
www.whirlpool.eu/register

2
ENGLISH .......................................3
3
EN
ENGLISH
HEALTH & SAFETY, USE & CARE
and INSTALLATION GUIDES
Use and Care guide
Index
Health and Safety guide
SAFETY INSTRUCTIONS ..............................................................................5
SAFEGUARDING THE ENVIRONMENT ................................................................8
DECLARATION OF CONFORMITY .....................................................................9
PRODUCT DESCRIPTION ............................................................................10
APPLIANCE ..........................................................................................10
CONTROL PANEL .....................................................................................10
DOOR ...............................................................................................11
DRUM LIGHT (if available) ............................................................................11
AVAILABLE ACCESSORIES ............................................................................11
HOW TO USE THE APPLIANCE .......................................................................12
FIRST TIME USE ......................................................................................12
DAILY USE ...........................................................................................13
PROGRAMMES .......................................................................................15
OPTIONS ............................................................................................18
FUNCTIONS ..........................................................................................19
INDICATORS .........................................................................................21
ENERGY SAVING .....................................................................................22
THANK YOU FOR BUYING A WHIRLPOOL PRODUCT.
In order to receive a more complete assistance,
please register your appliance on www.whirlpool.eu/register

4
CLEANING & MAINTENANCE ........................................................................23
EMPTYING THE WATER TANK ..........................................................................23
CLEANING THE DOOR FILTER .........................................................................24
CLEANING THE BOTTOM FILTER .......................................................................25
CLEANING THE OUTSIDE OF THE DRYER ...............................................................27
REVERSING THE DOOR STOP ..........................................................................28
TROUBLESHOOTING GUIDE & AFTER-SALES SERVICE ..............................................33
FAILURE INDICATOR AND MESSAGES ..................................................................35
TRANSPORT AND HANDLING .........................................................................37
AFTER-SALES SERVICE ................................................................................38
Installation guide ...................................................................................39
5
EN
SAFETY
INSTRUCTIONS
IMPORTANT TO BE READ AND OBSERVED
Before using the dryer carefully
read, Health and Safety and
Use and Care guides.
Keep these instructions close
at hand for future reference.
YOUR SAFETY AND SAFETY
OF OTHERS IS VERY
IMPORTANT.
This manual and the dryer
itself provide important safety
warnings, to be read and
observed at all times.
This is the safety alert symbol.
This symbol alerts you to
potential hazards that can kill
or hurt you and others.
All safety messages will follow
the safety alert symbol or the
word DANGER or WARNING.
These words mean:
DANGER
Indicates a hazardous situation
which, if not avoided, will
cause serious injury.
WARNING
Indicates a hazardous situation
which, if not avoided, could
cause serious injury.
All safety warnings give
specic details of the potential
risk presented and indicate
how to reduce risk of injury,
damage and electric shock
resulting from improper use of
the dryer. Carefully observe the
following instructions.
Failure to observe these
instructions may lead to risks.
The Manufacturer declines any
liability for injury to persons or
animals or damage to property
if these advices and
precautions are not respected.
Very young (0-3 years) and
young children (3-8 years)
shall be kept away unless
continuously supervised.
Children from 8 years old
and above and persons with
reduced physical, sensory or
mental capabilities or lack of
experience and knowledge
can use this dryer only if
they are supervised or have
been given instructions on
safe appliance use and if
they understand the hazards
involved. Children shall not
play with the dryer. Cleaning
and user maintenance shall not
be made by children without
supervision.
Items that have been soiled
with substances such as
cooking oil, acetone, alcohol,
petrol, kerosene, spot
removers, turpentine, waxes
and wax removers should be
washed in hot water with an
extra amount of detergent
before being dried in the
tumble dryer.
Items such as foam rubber
(latex foam), shower caps,
waterproof textiles, rubber
backed articles and clothes or
pillows tted with foam rubber
pads should not be dried in the
tumble dryer.
Remove all objects from
pockets such as lighters and
matches.
Do not use the tumble dryer if
chemicals have been used for
cleaning.
Oil-soaked items ignite
spontaneously, especially when
exposed to heat sources such
as in a tumble dryer. The items
become warm, causing an
oxidation reaction in the oil.
Oxidation creates heat. If the
heat cannot escape, the item
can become hot enough to
catch re. Piling, stacking or
storing oil-soaked items can
prevent heat from escaping and
so create a re hazard.
WARNING
Never stop a tumble dryer
before the end of the drying
cycle unless all items are quickly
removed and spread out so
that the heat is
dissipated.
Health and Safety guide
6
The last phase of the drying
cycle is done without heat
(cool down phase), to assure
that the laundry stays at a
temperature level which is not
leading to a damaging of the
laundry.
If you want to stack the dryer
on a washing machine, rst
contact our After-Sales Service
to verify if this is possible.
Stacking of a dryer is only
admitted if the dryer is safely
xed on the washing machine
by using an appropriate
stacking kit.
INTENDED USE
OF THE PRODUCT
This dryer is designed solely
for domestic usage. To aim
the dryer as professional use is
forbidden. The manufacturer
declines all responsibility for
inappropriate use or incorrect
setting of the controls.
CAUTION: The dryer is not
intended to be operated by
means of an external timer
or separate remote control
system.
Do not use the dryer outdoors.
Do not store explosive or
ammable substances such
as aerosol cans and do not
place or use gasoline or other
ammable materials in or near
the dryer: a re may break out
if the dryer is inadvertently
switched on.
INSTALLATION
Installation and repairs must
be carried out by a qualied
technician, in compliance with
the manufacturer’s instructions
and local safety regulations. Do
not repair or replace any part
of the dryer unless specically
stated in the user manual.
Children should not perform
installation operations.
Keep children away during
installation of the dryer. Keep
the packaging materials
(plastic bags, polystyrene
parts, etc.) out of reach of
children, during and after the
installation of the dryer.
Use protective gloves to
perform all unpacking and
installation operations.
After unpacking the dryer,
make sure that it has not been
damaged during transport. In
the event of problems, contact
the dealer or your nearest
After-sales Service.
The dryer must be handled
and installed by two or more
persons.
Keep children away during
installation of the dryer.
The dryer must be
disconnected from the power
supply before carrying out any
installation operation.
During installation, make sure
the dryer does not damage the
power cable.
Only activate the dryer when
the installation procedure has
been completed.
After installation of the device
to wait a few hours before
starting it, to acclimatize to the
environmental conditions of
the room.
Do not install your dryer where
it may be exposed to extreme
conditions, such as: poor
ventilation, high temperature
or below 5°C or above 35°C.
The dryer must not be installed
behind a lockable door, a
sliding door or a door with a
hinge on the opposite side to
that of the tumble dryer, in
such a way that a full opening
of the tumble dryer door is
restricted.
The dryer must be placed with
the back towards a wall, to
avoid injuries by touching the
rear panel, which can become
hot during the drying process.
Do not install the dryer in
rooms with poor ventilation.
If you want to install it in a
small storage room, toilet,
bathroom or similar, assure a
good ventilation (open door,
ventilation grid or slot larger
than 500 cm²).
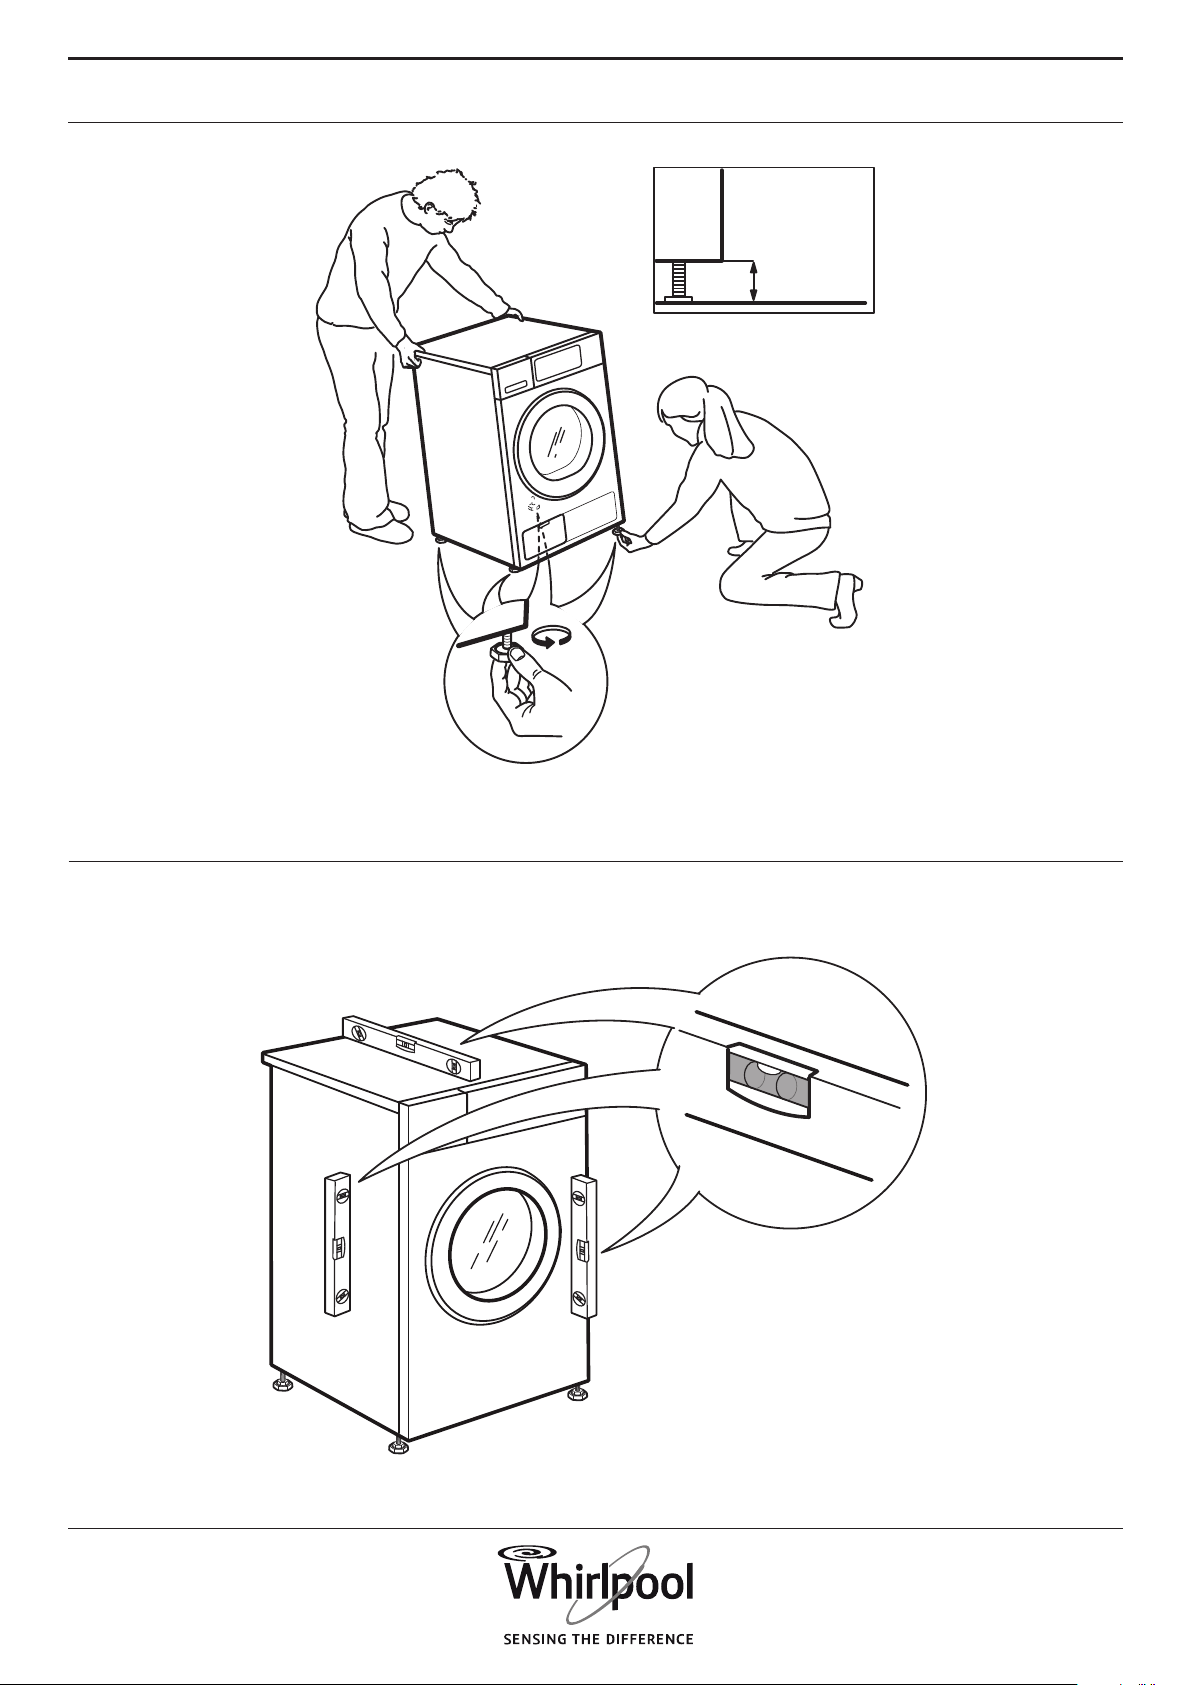
When installing the dryer make
sure that the four feet are
stable and resting on the oor,
adjusting them as required,
and check that the dryer is
perfectly level using a spirit
level.
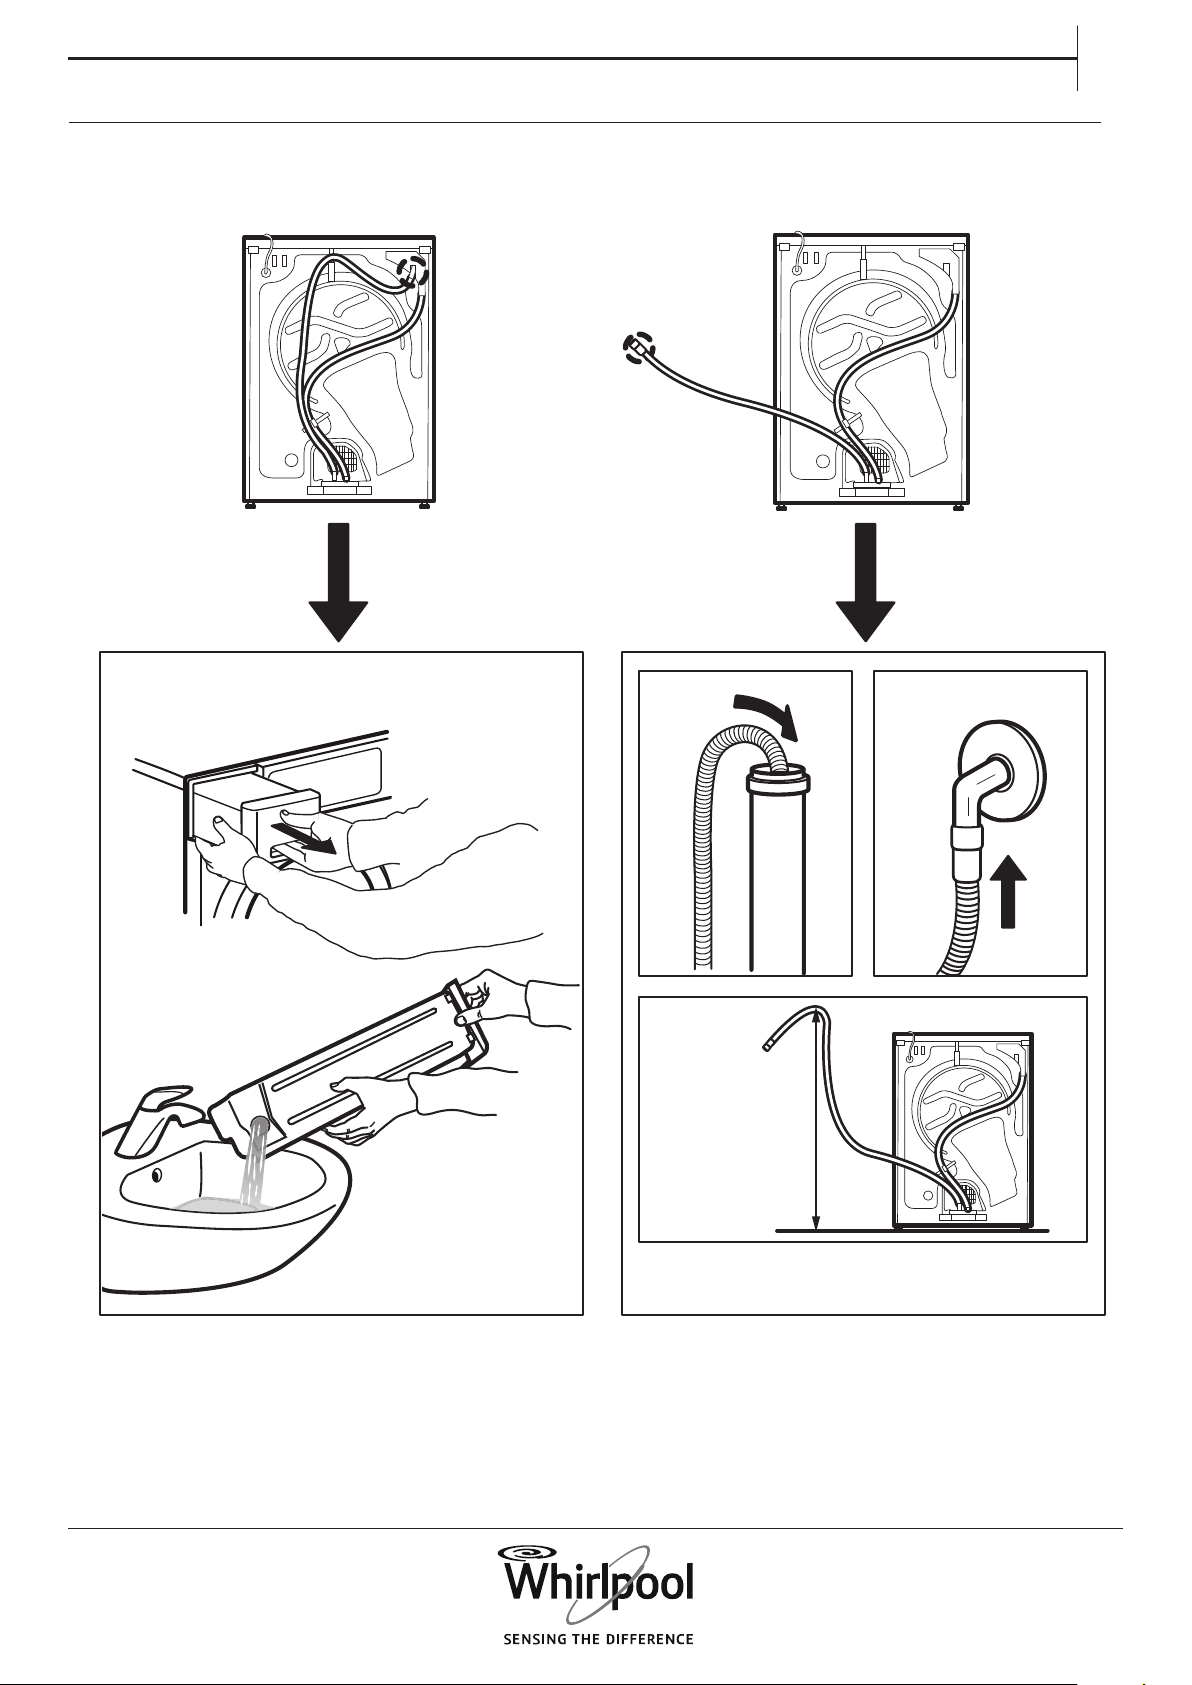
If possible use a hose to drain
the water directly into the
domestic plumbing system.
This will avoid having to empty
the water container at the end
of each drying cycle, since the
condensation water can be
directly drained away.
Take care not to install the
dryer on a deep-pile carpet.
If, due to lack of space, the
dryer must be installed directly
next to a gas or coal stove, a
heat insulating plate (85 x 57 cm)
7
EN
Important:
The fuse cover must be retted
when changing a fuse and
if the fuse cover is lost the
plug must not be used until a
correct replacement is tted.
Correct replacement are
identied by the colour insert
or the colour embossed in
words on the base of the plug.
Replacement fuse covers
are available from your local
electrical store.
For the Republic of Ireland
only
The information given in
respect of Great Britain will
frequently apply, but a third
type of plug and socket is also
used, the 2-pin, side earth
type.
Socket outlet / plug (valid for
both countries)
If the tted plug is not suitable
for your socket outlet, please
contact After-sales Service for
further instruction. Please do
not attempt to change plug
yourself. This procedure needs
to be carried out by a qualied
technician in compliance with
the manufactures instructions
and current standard safety
regulations.
CORRECT USE
Do not exceed the maximum
load allowed. Check the
maximum load allowed in the
programme chart.
Do not dry unwashed items in
the tumble dryer.
Do not overdry the laundry.
cable must only be replaced
by a qualied technician
in compliance with the
manufacturer instruction and
current safety regulations.
Contact an authorized service
centre.
Do not operate this dryer if
it has a damaged mains cord
or plug, if it is not working
properly, or if it has been
damaged or dropped. Do not
immerse the mains cord or
plug in water. Keep the cord
away from hot surfaces
The electrical components
must not be accessible to the
user after installation.
Do not touch the dryer with
any wet part of the body
and do not operate it when
barefoot.
ELECTRICAL CONNECTION
FOR GREAT BRITAIN AND
IRELAND ONLY
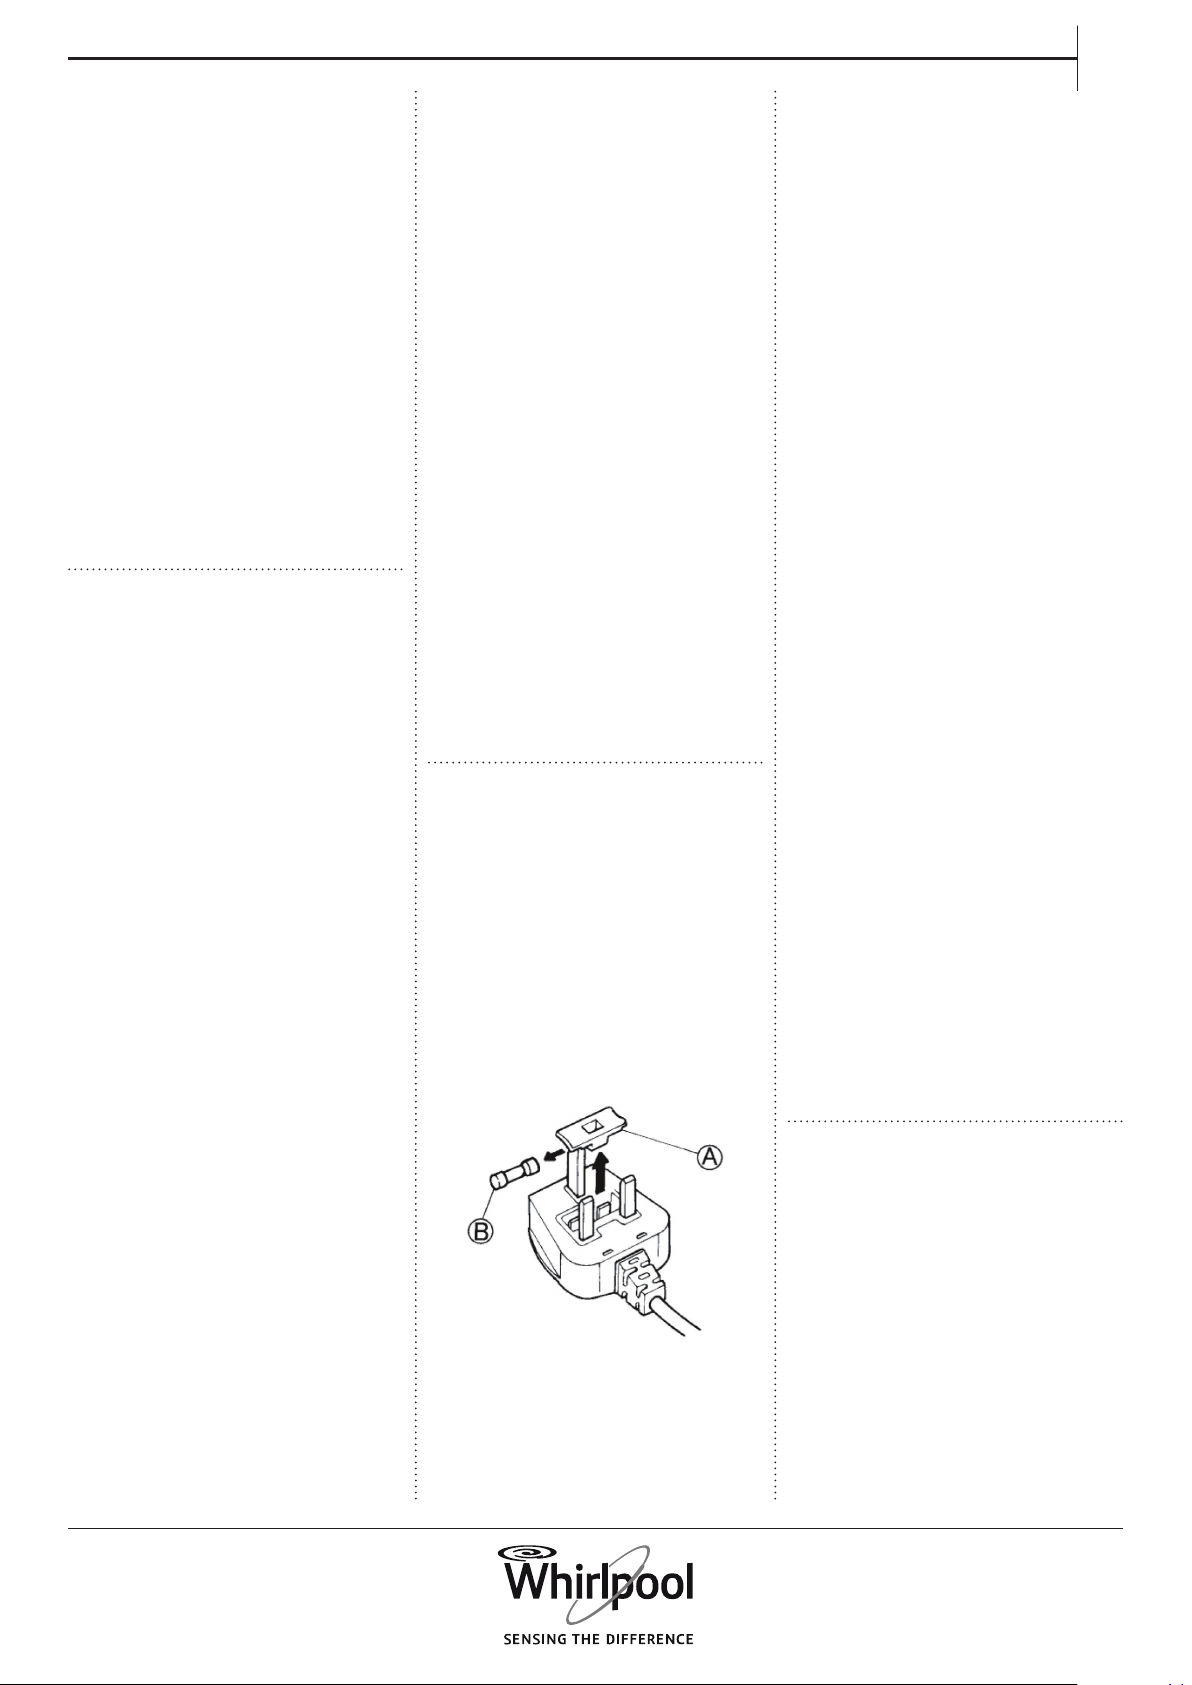
Fuse replacement.
If the mains lead of this dryer is
tted with a BS 1363A 13amp
fused plug, to change a fuse in
this type of plug use an A.S.T.A.
approved fuse to BS 1362 type
and proceed as follows:
1. Remove the fuse cover (A)
and fuse(B).
2. Fit replacement 13A fuse into
fuse cover.
3. Ret both into plug.
must be installed in between
and the side of the plate facing
the stove must be covered
with aluminium foil.
The dryer is not designed for
built-in installation.
The dryer can be installed
under a worktop, provided
that adequate ventilation of
the dryer is assured. Install a
ventilation grid (minimum 45
cm x 8 cm), in the rear part of
the worktop under which the
dryer is installed.
ELECTRICAL WARNINGS
Make sure the voltage
specied on the rating plate
corresponds to that of your
home.
For installation to comply with
current safety regulations,
an omnipolar switch with
minimum contact gap of 3mm
is required.
Regulation require that the
dryer is earthed.
For dryers with tted plug,
if the plug is not suitable for
you socket outlet, contact a
qualied technician.
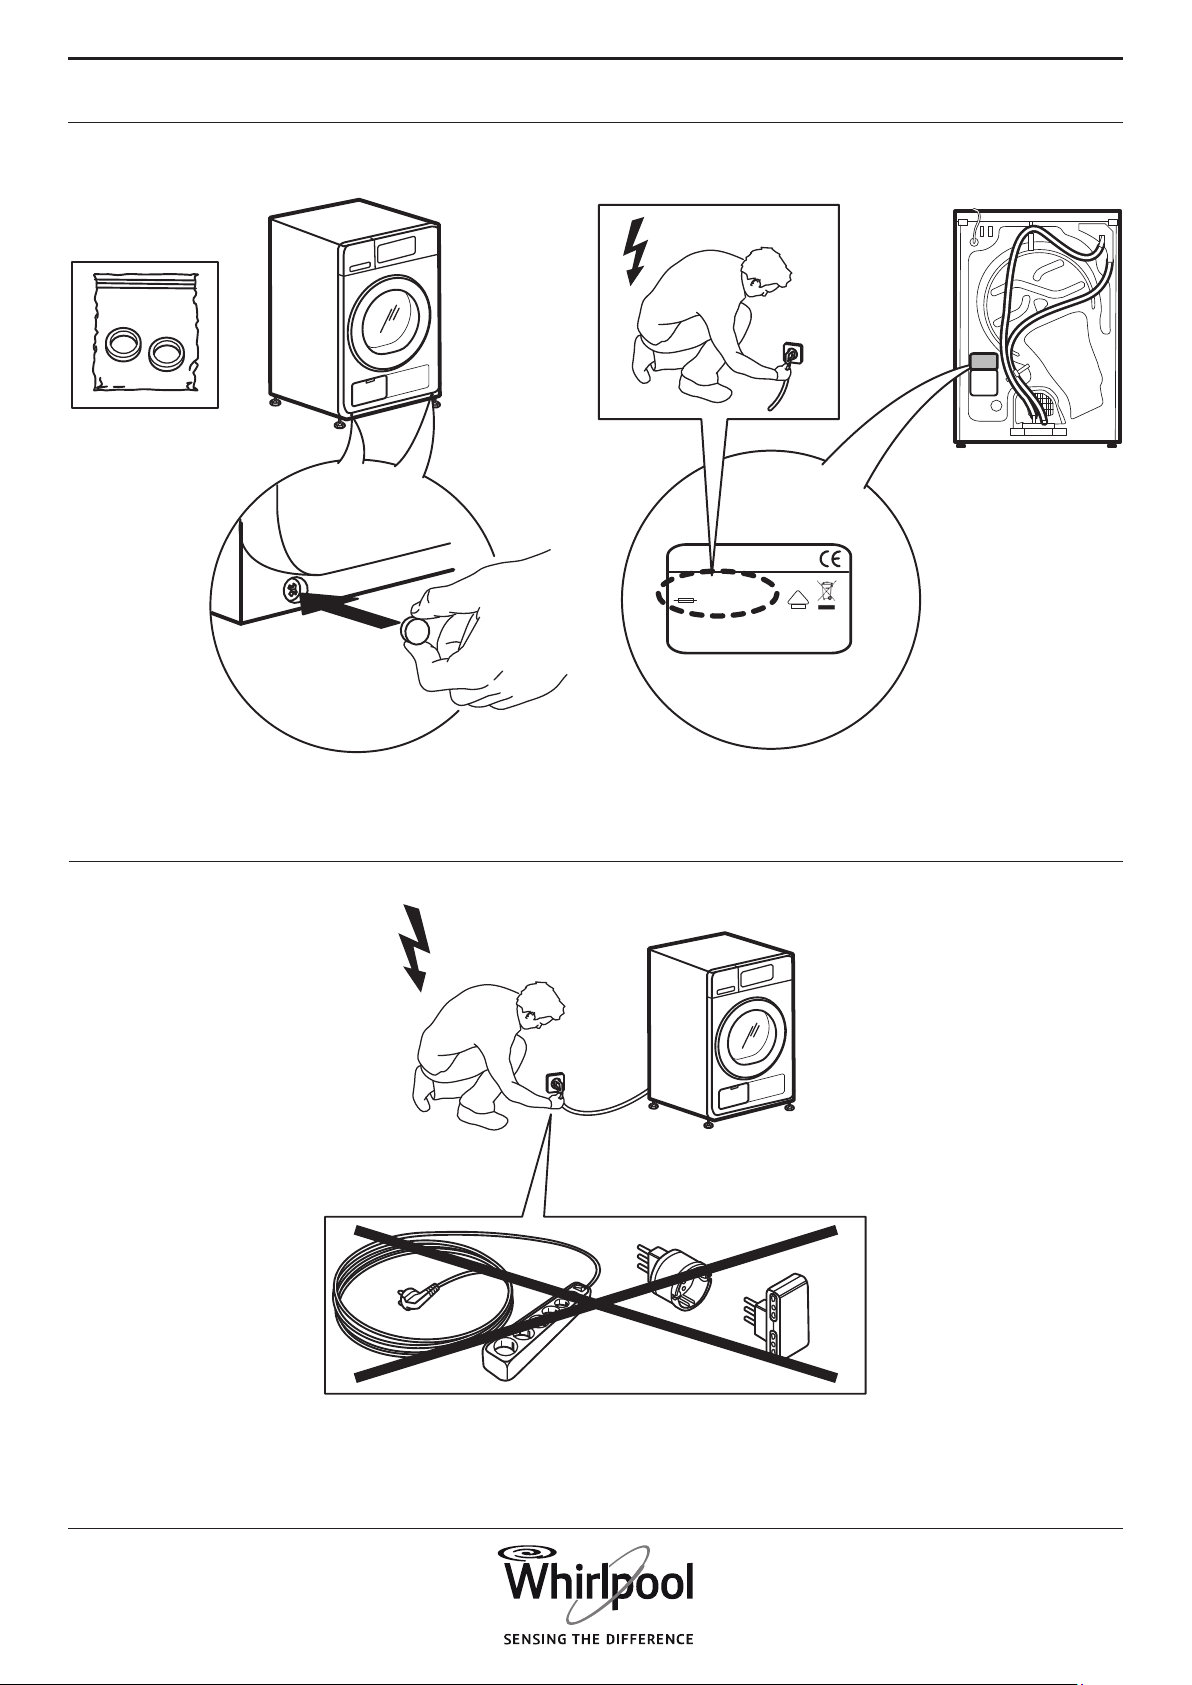
Do not use extension leads,
multiple sockets or adapters.
Do not connect the dryer to a
socket which can be operated
by remote control.
The power cable must be
long enough for connecting
the dryer, once tted in its
housing, to the main power
supply.
Do not pull the power supply
cable.
If the power cable is damaged
it must be replaced with an
identical one. The power
8
SCRAPPING OF
HOUSEHOLD APPLIANCES
When scrapping the dryer,
make it unusable by cutting o
the power cable and removing
the doors and shelves (if
present) so that children
cannot easily climb inside and
become trapped.
This dryer is manufactured
with recyclable
or reusable materials. Dispose
of it in accordance with local
waste disposal regulations.
For further information on
the treatment, recovery
and recycling of household
electrical appliances, contact
your competent local
authority, the collection service
for household waste or the
store where you purchase the
dryer.
SAFEGUARDING
THE ENVIRONMENT
For dryer models with heat-
pump technology:
This dryer contains uorinated
greenhouse gas (R134a). The
circuit containing this gas
is hermetically sealed. The
electrical switchgear has a
tested leakage rate of less than
0,1% per year.
DISPOSAL OF PACKAGING
MATERIALS
The packaging material is
100% recyclable and is marked
with the recycle symbol:
The various parts of the
packaging must therefore be
disposed of responsibly and in
full compliance with local
authority regulations
governing waste disposal.
This dryer is marked in
compliance with European
Directive 2012/19/EU, Waste
Electrical and Electronic
Equipment (WEEE).
By ensuring this product is
disposed of correctly, you
will help prevent potential
negative consequences for
the environment and human
health, which could otherwise
be caused by inappropriate
waste handling of this product.
This symbol
on the product or on the
accompanying documentation
indicates that it should not be
treated as domestic waste but
must be taken to an
appropriate collection centre
for the recycling of electrical
and electronic equipment.
Take care that no lint or dust is
accumulated around the dryer.
Fabric softeners, or similar
products, should be used as
specied by the fabric softener
instructions.
CLEANING AND
MAINTENANCE
The dryer must be
disconnected from the power
supply before carrying out
any cleaning or maintenance
operation.
Never use steam cleaning
equipment.
9
EN
DECLARATION
OF CONFORMITY
This appliance has been
designed, constructed and
distributed in compliance with
the requirements of European
Directives:
LVD 2014/35/EU
EMC 2014/30/EU and RoHS
2011/65/EU.
ENERGY SAVING TIPS
Always dry a full load,
depending on the type of
laundry and the programme/
drying time. For more
detailed information, see the
programme chart.
By preference use the
maximum spin speed allowed
by your washing machine, since
draining the water mechanically
requires less energy. You will
save time and energy when
running your drying cycle.
Always select the correct
programme/drying time for
the load in order to obtain the
desired drying results.
Select the ‘Gentle’ option only
in case of drying small loads.
When drying cotton, for
example, dry Iron Dry and
Cupboard Dry loads together.
Start with the Iron Dry
programme/drying time
setting, remove the laundry
to be ironed at the end of that
cycle and dry the remainder of
the load on the Cupboard Dry
setting.
10
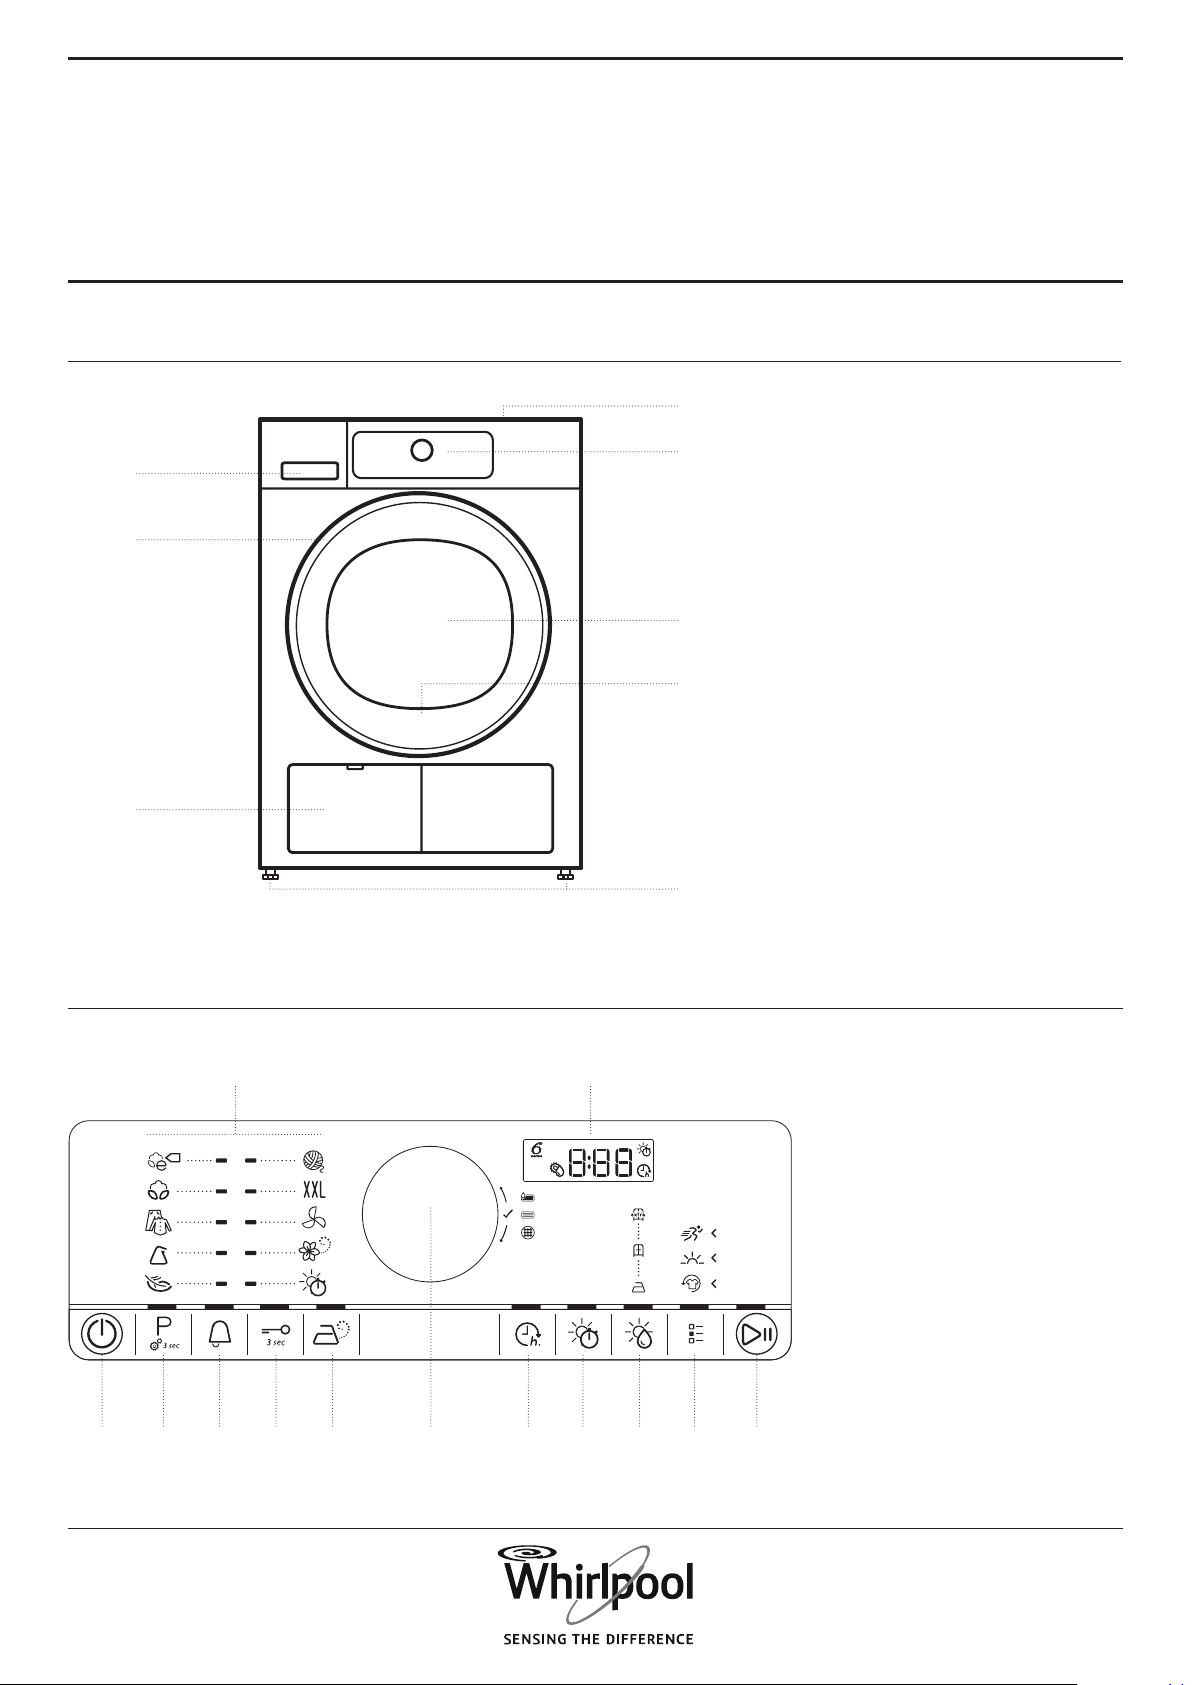
PRODUCT
DESCRIPTION
APPLIANCE
CONTROL PANEL
1. Worktop
2. Control panel
3. Water tank
4. Door
5. Door handle
6. Door lter (behind door)
7. Bottom lter (behind ap)
8. Adjustable feet (4)
Use and Care guide
1. On/O button (Reset if
long pressed)
2. Programme button
(Settings button if long
pressed)
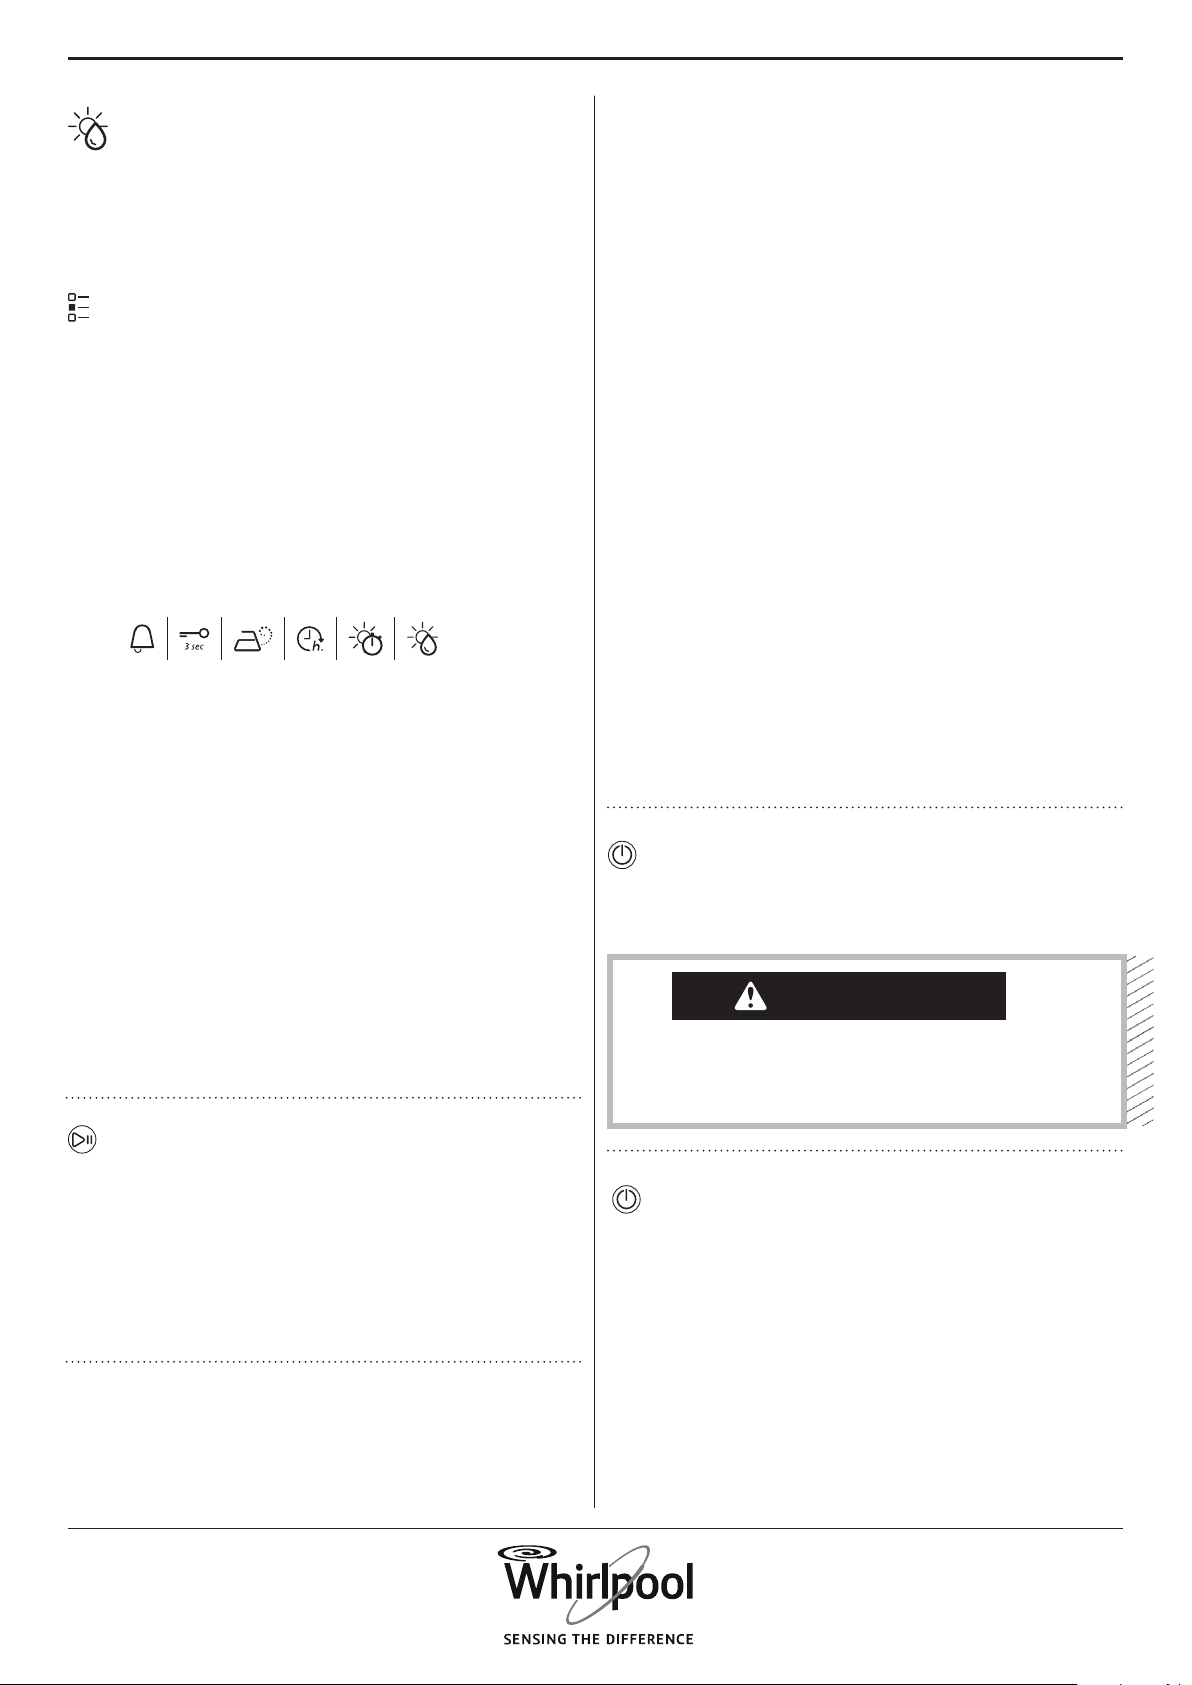
3. Cycle end alert
4. Key lock button
5. Steam refresh button
6. Knob (Turn to select /
Press to conrm)
7. Start delay button
8. Drying / Airing time
button
9. Drying level button
10. Options button
11. Start/Pause button
12. Display
13. Programmes area
1.
2.
4.
6.
8.
7.
5.
3.
1. 2. 7.3. 8.4. 9.5. 10.
12.13.
11.6.
11
EN
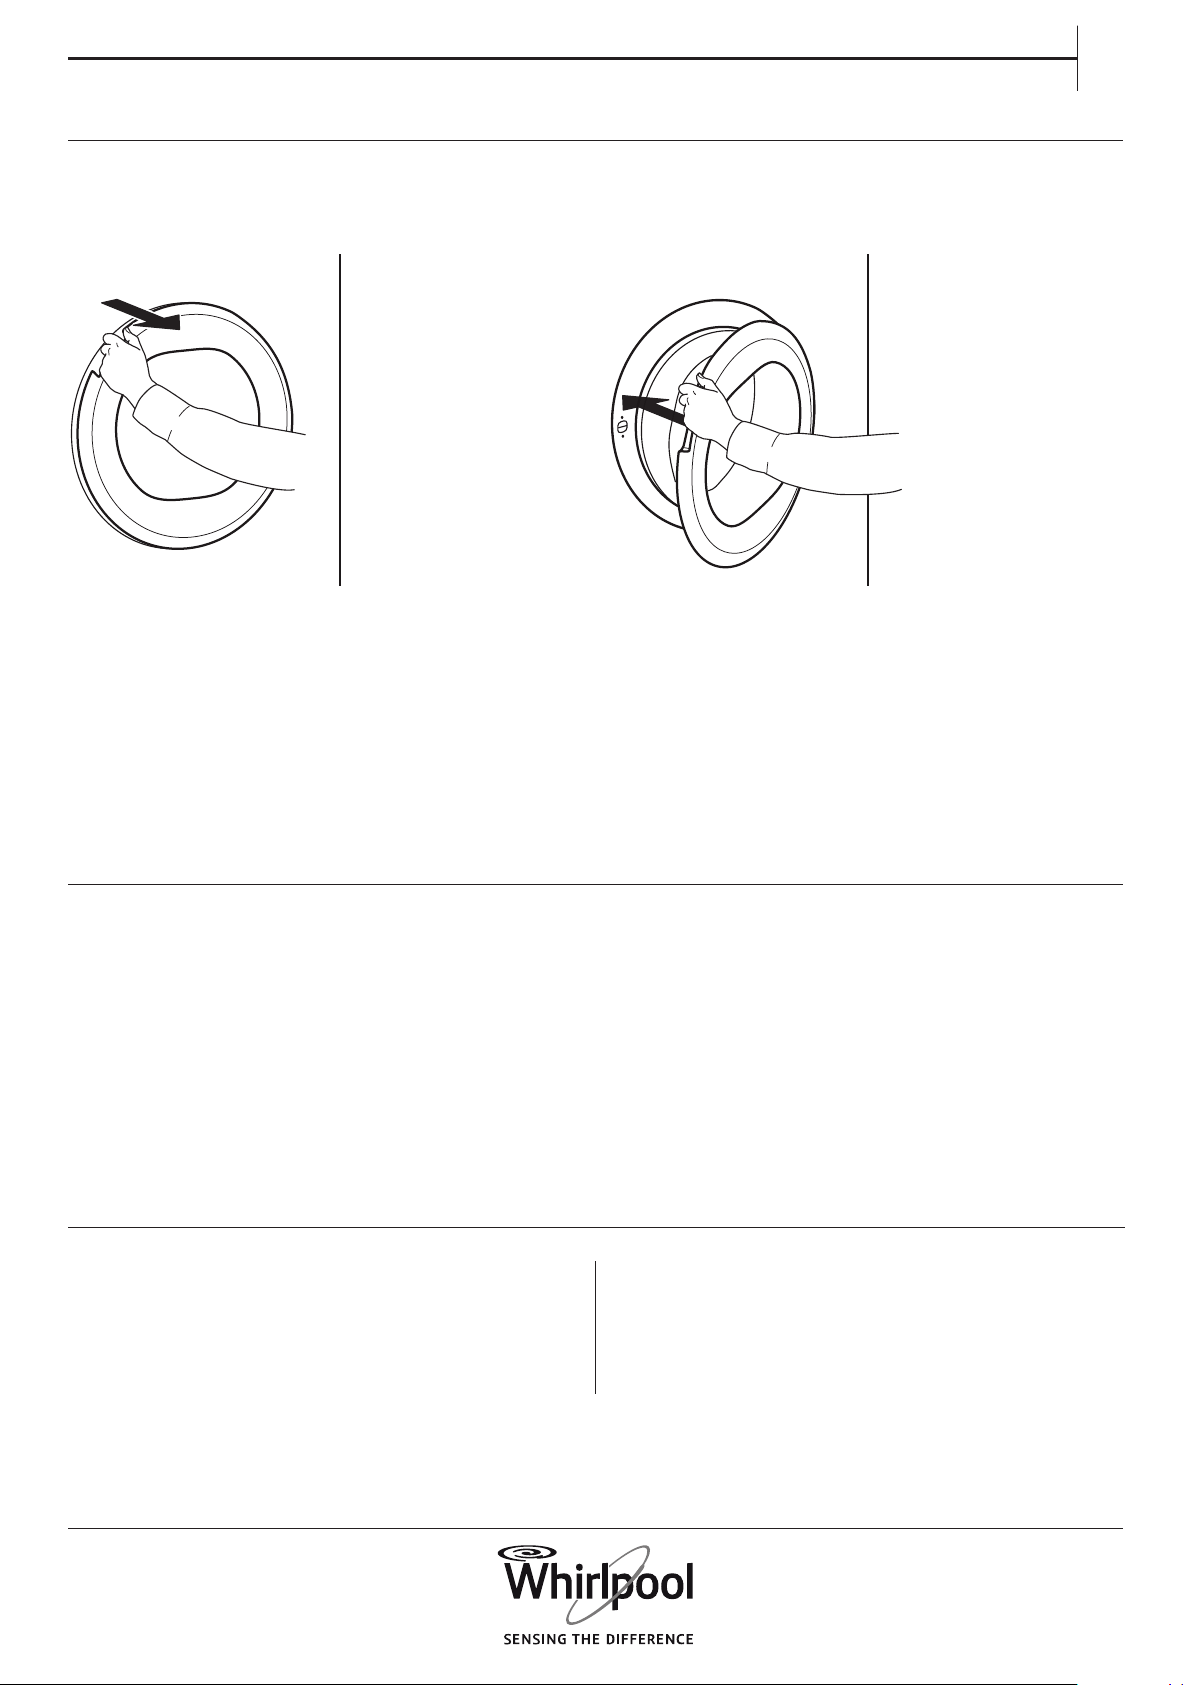
DOOR
DRUM LIGHT (if available)
AVAILABLE
ACCESSORIES
To open the door, pull the handle.
If you interrupt a running programme by opening
the door, the programme will be reset if the dryer
door is not closed again within one minute.
• During programme selection: the light goes on for
laundry loading
• After programme start: the light fades on and o
while the laundry load is detected.
• After programme end, when you open the door,
the light goes on for a while for unloading the
laundry. Then it goes o to save energy; touch any
button to switch it on again.
Contact our After-Sales Service to check if the following
accessory is available for your washing machine and
dryer combination.
STACKING KIT SHELF
by which your dryer can be xed on top of your
washing machine to save space and to facilitate
loading and unloading your dryer in the higher
position.
To close the door, hold the handle and push so that
you can hear it click shut.
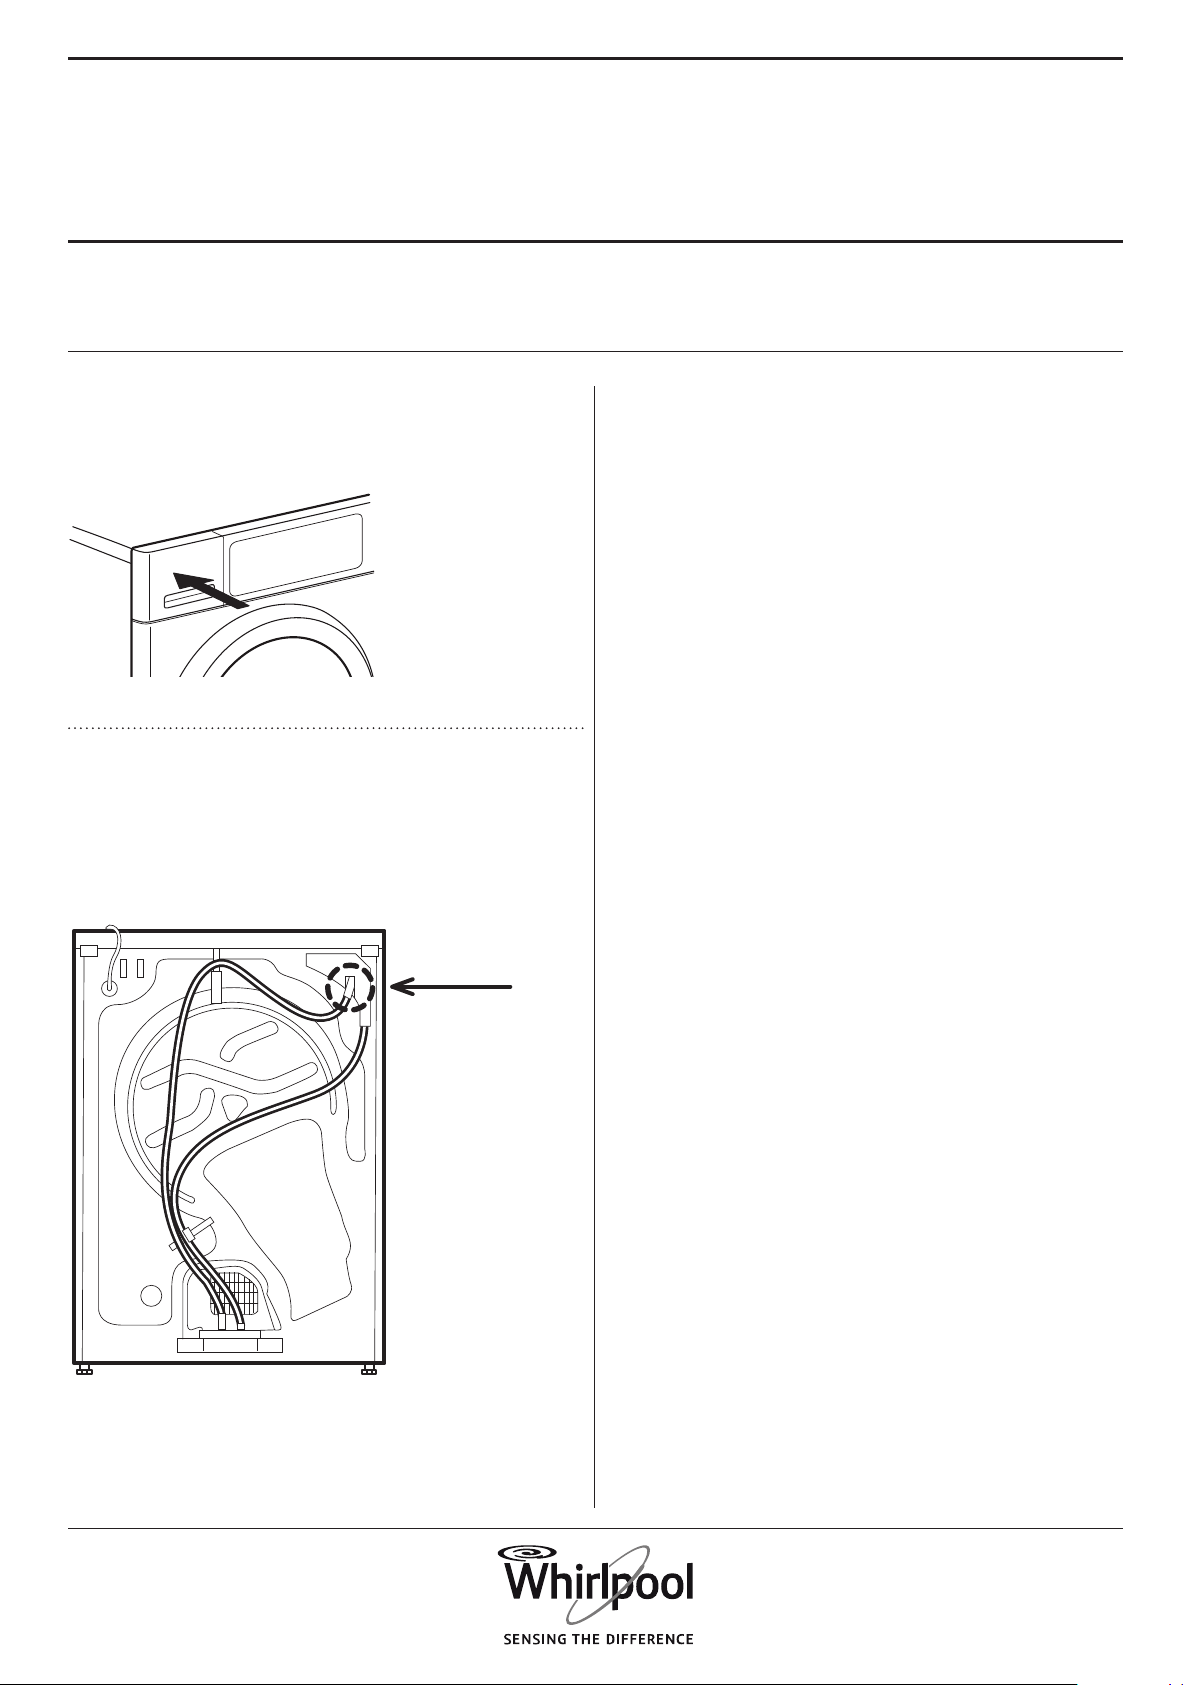
12
FIRST TIME USE
HOW TO USE
THE APPLIANCE
1. CHECK WATER TANK
Make sure that the water tank is correctly inserted
2 . CHECK DRAIN HOSE
Make sure that the drain hose on the back of the
dryer is xed, either to the dryer’s water tank or to
your domestic sewage system (see INSTALLATION
GUIDE).
13
EN
DAILY USE
WARNING
Make sure that no lighters
or matches are left in
clothing.
Make sure that the
laundry is not soaked with
ammable liquids.
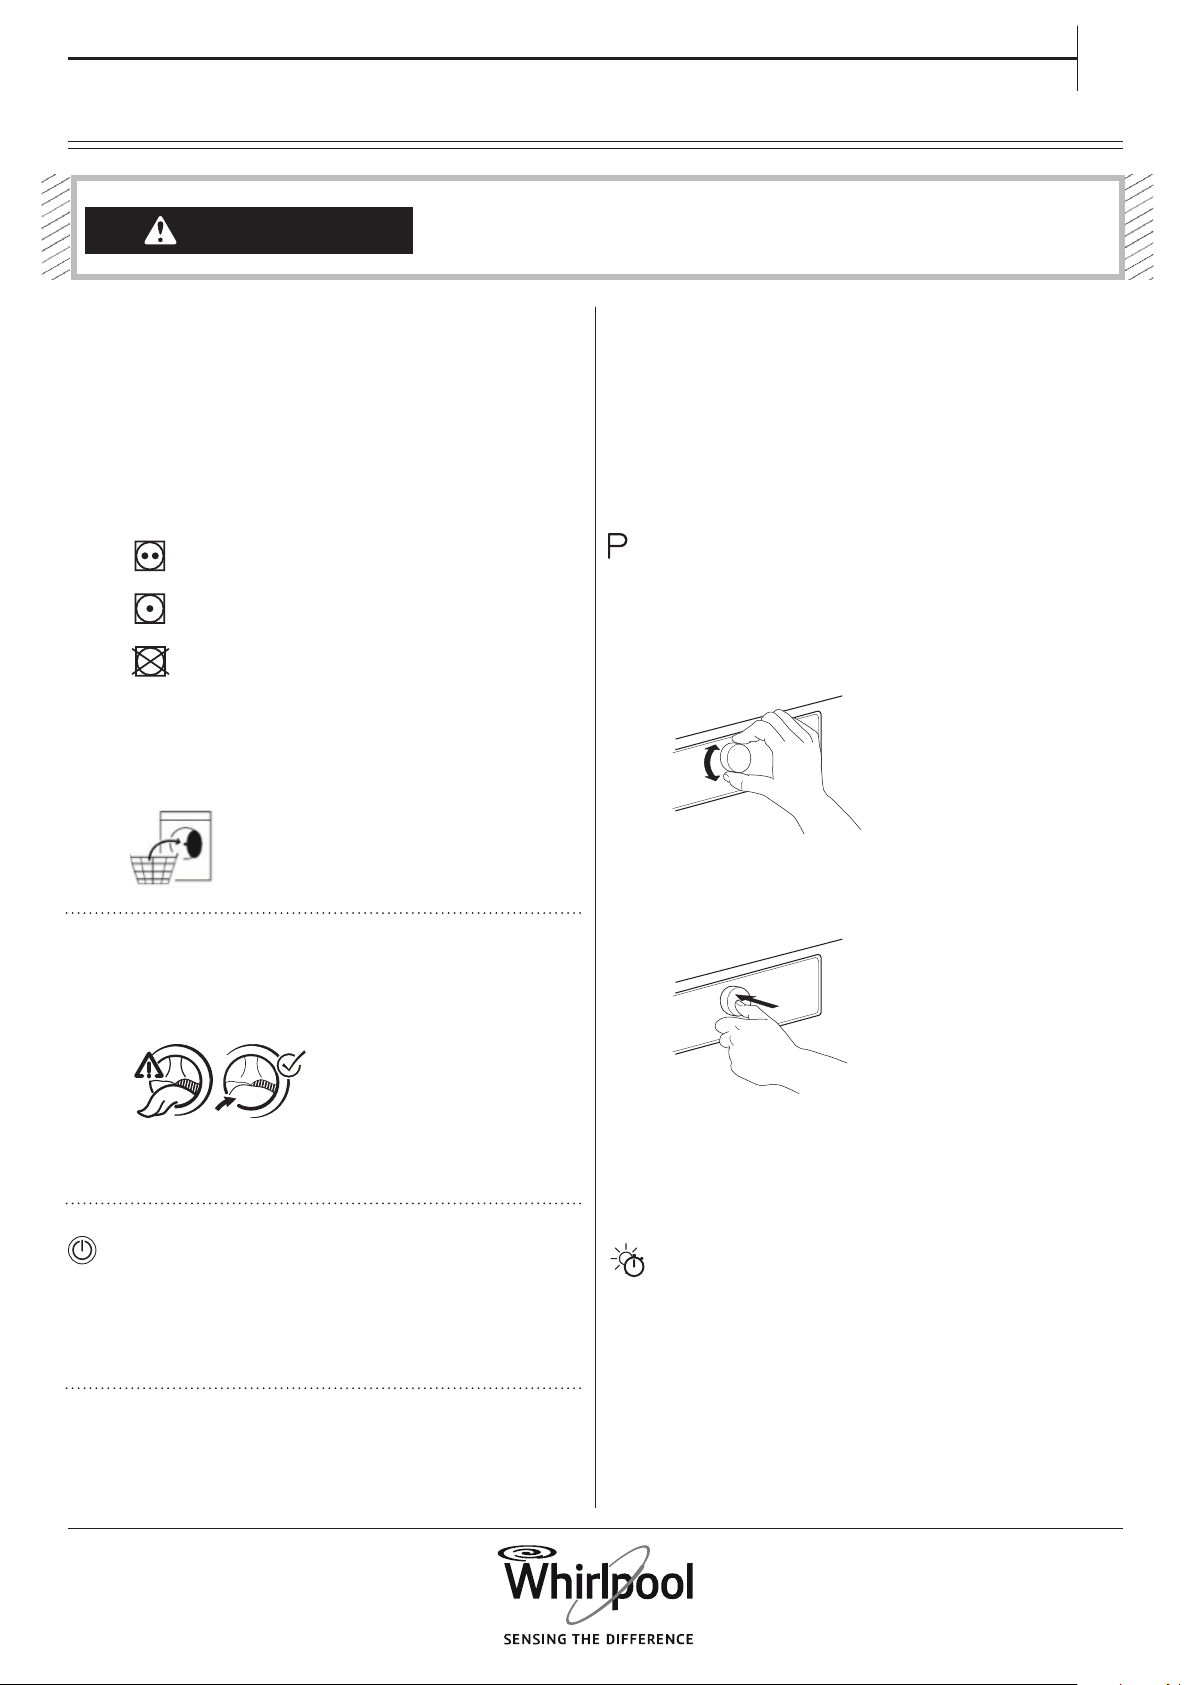
1. LOAD THE LAUNDRY
Respect your items’ care labels; make sure
that the items to be dried are suitable for
tumble drying.
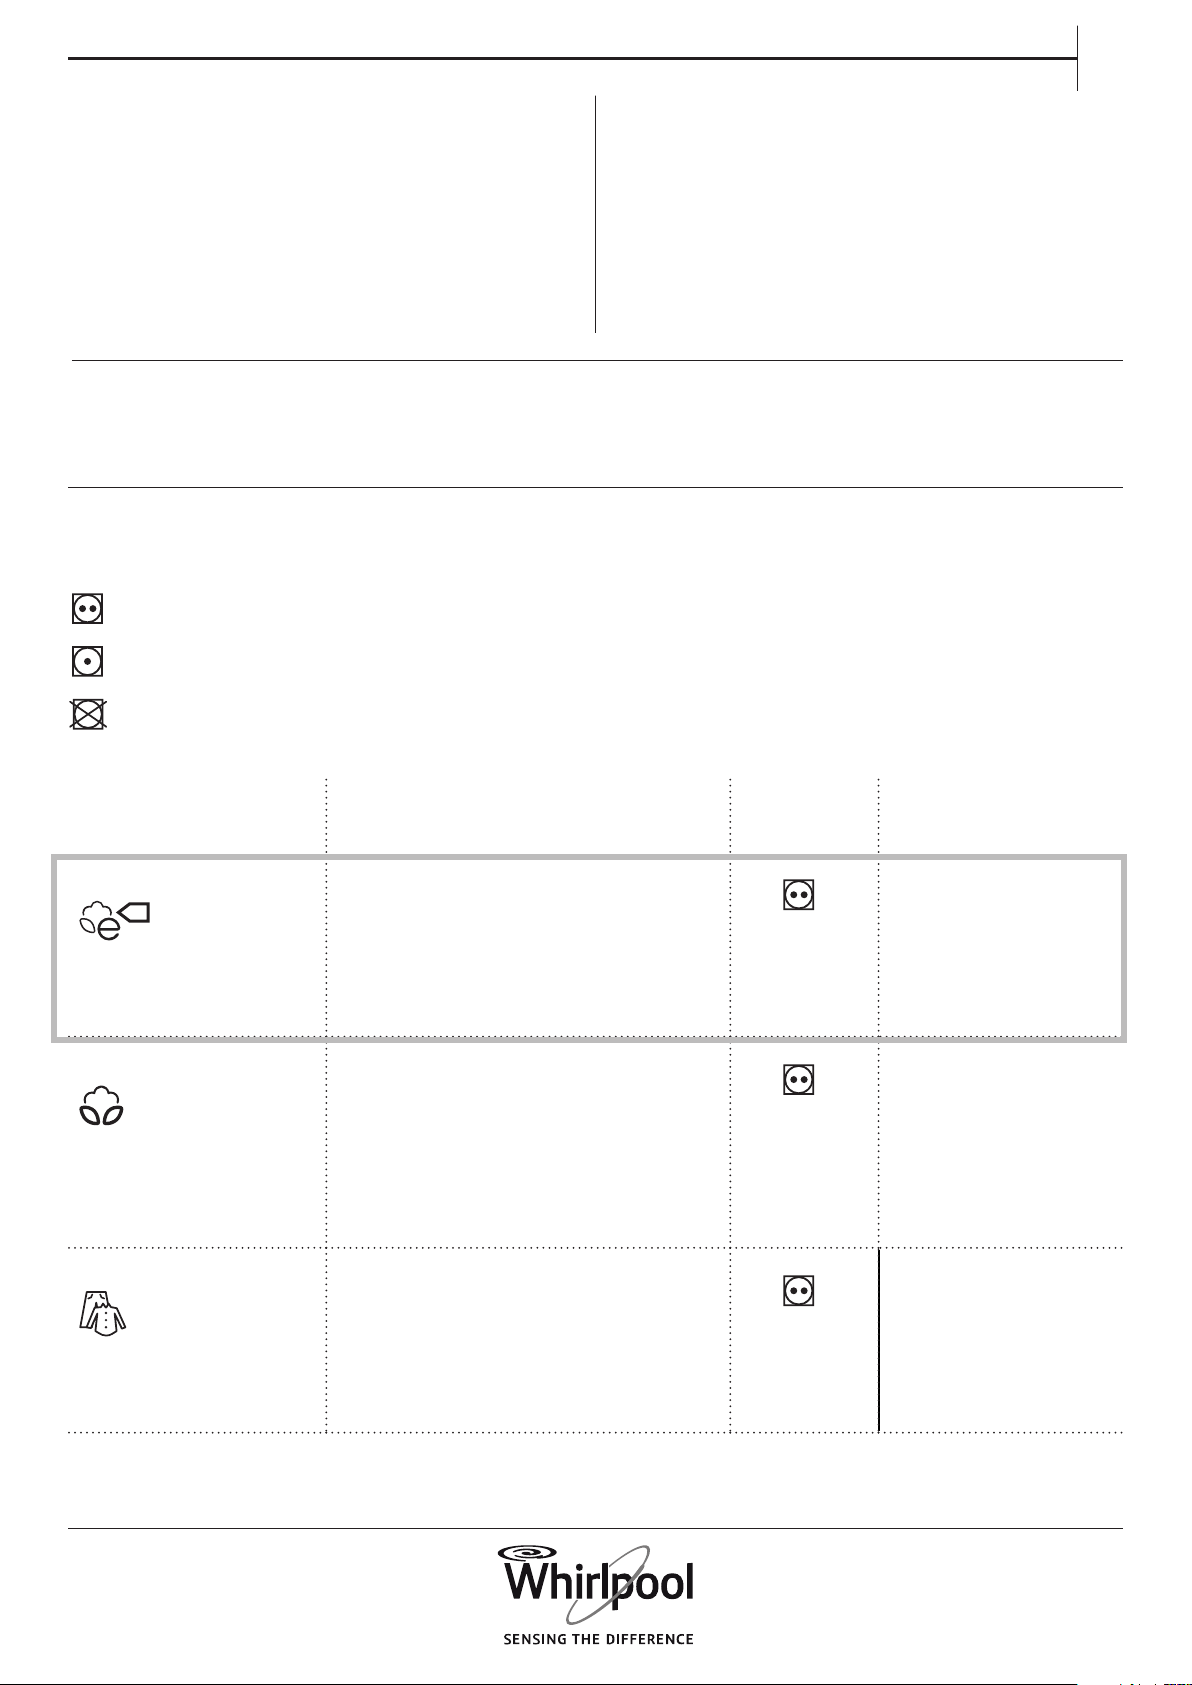
Drying Care Labels
The dots indicate the temperature degree for
drying the laundry.
Normal temperature
Reduced temperature
Do not tumble dry
Open the door and load the laundry. Observe
the maximum load sizes given in the section
Programmes.
2. CLOSE THE DOOR
Make sure that no items get stuck between
the door glass and door lter.
Close the door so that you can hear it click
shut.
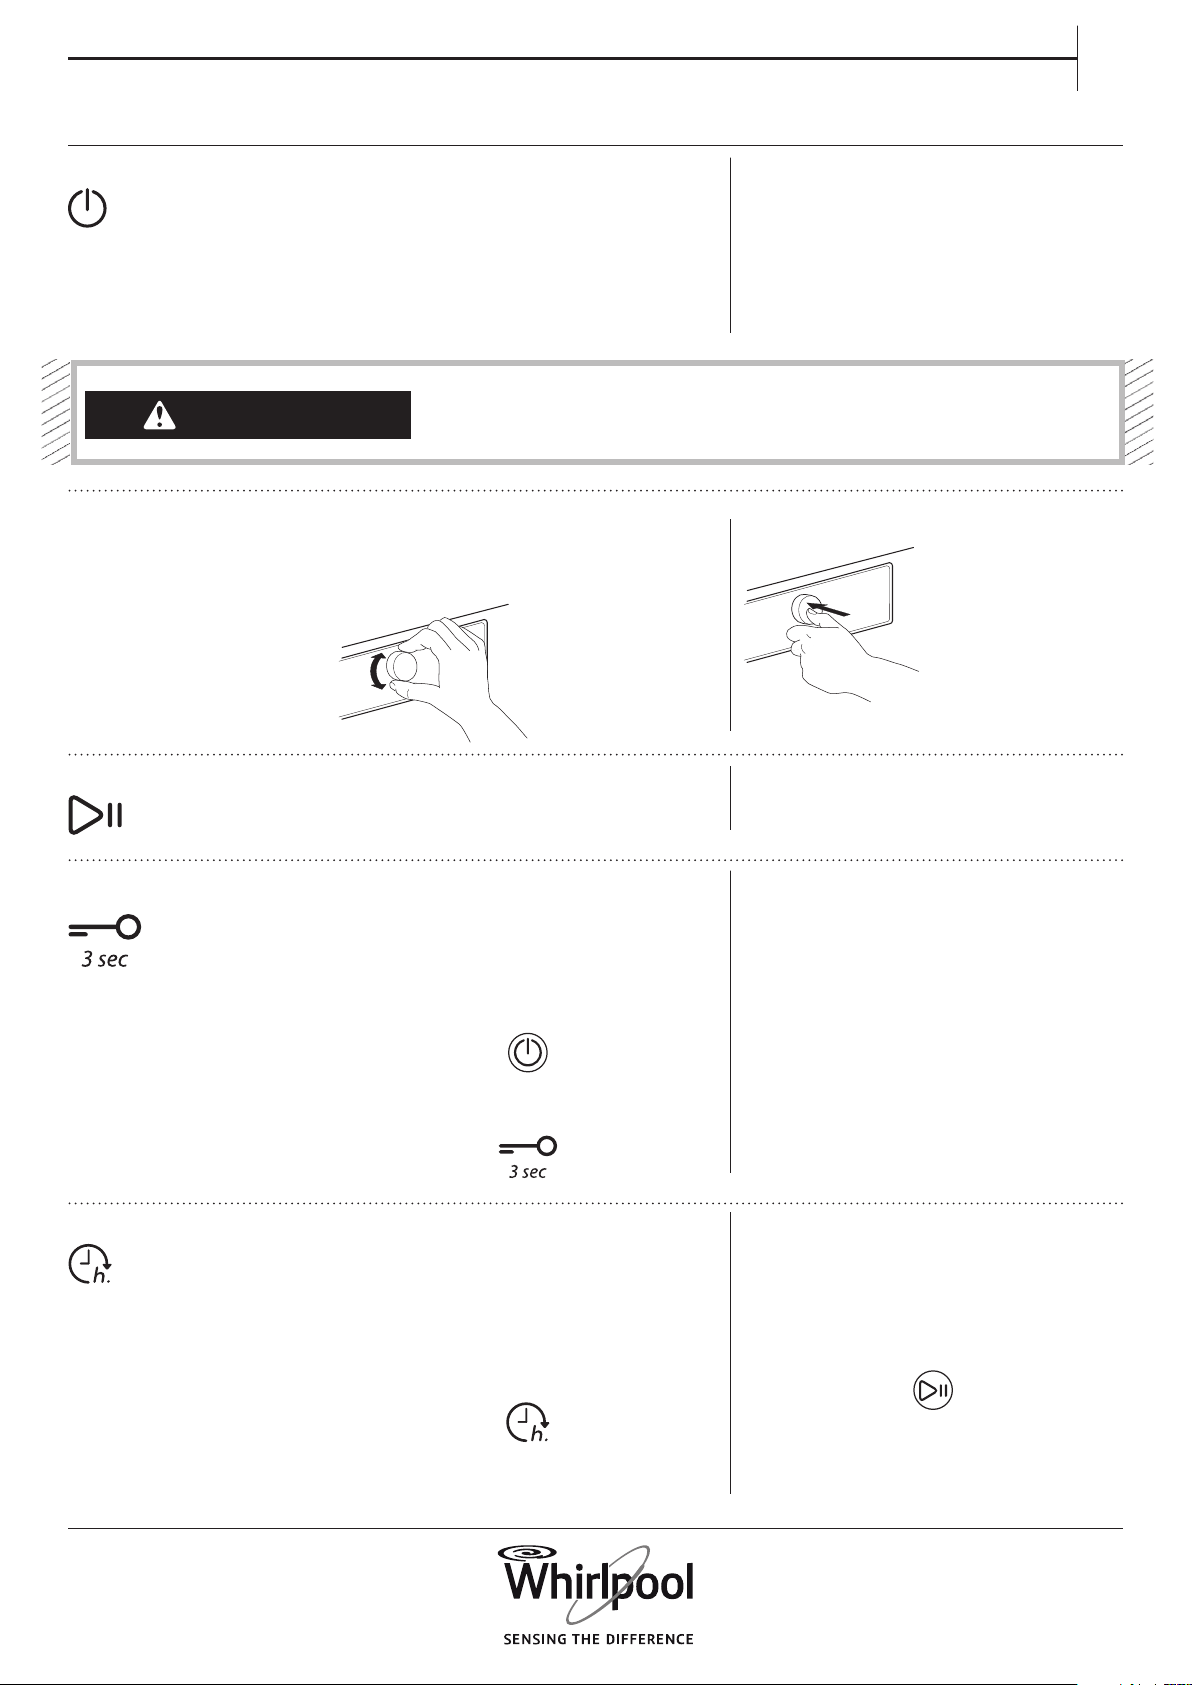
3. SWITCH ON DRYER
Press the On/O button « until the pro-
gramme button lights up. An animation
appears on the display, followed by a beep.
Afterwards the dryer is ready to be operated.
4. SET THE DESIRED PROGRAMME
GUIDED MODE the button light will guide
you through setting your programme in the
following order: selection of programme /
drying time (ONLY if Drying time or Airing
programme is selected) / dryness level (only if
selectable / adjustable) / options. As soon as
you conrm a selection by pressing the knob,
the button light will jump to the next step.
Select programme:
Make sure that the Programme button « lights
up.
Turn the knob to select the desired pro-
gramme. The indicator next to the selected
programme lights up.
Conrm the desired programme by pressing
the knob.
Find more information regarding pro-
grammes in section PROGRAMMES, OP-
TIONS AND INDICATORS.
Select Drying time, if needed
Only if you have selected programme Drying
time or Airing «, you can set the desired drying
time from a minimum of 10 minutes to maxi-
mum 180 minutes (three hours).
Make sure that the Drying time button lights
up.
Turn the knob to select the desired drying /
airing time. Conrm it by pressing the knob.
14
Set dryness level, if needed
If you want to change the dryness level, make
sure that the Dryness level button « lights up.
Turn the knob to select the desired dryness
level, afterwards press the knob to conrm.
Select options, if needed
If you want to select additional options,
make sure that the Options button « lights
up. The options which are selectable for your
programme are indicated by a lighting arrow.
Turn the knob to select the desired options.
The symbol of the selected option blinks. To
conrm it, press the knob.
Some options / functions can be selected by
directly pressing the button.
Refer to section OPTIONS, FUNCTIONS
AND INDICATORS for more information.
CUSTOM MODE
After you have switched on the dryer, you are
not forced to follow the GUIDED MODE.
It is up to you which order you choose to
set your programme. To choose a setting,
rst press the relevant button, then turn the
knob to select, and nally press the knob to
conrm.
The variety of options and dryness levels
depends on the programme selected.
Therefore it is recommended to start set-up
by programme selection.
5. START PROGRAMME
Press and hold Start/Pause « until the button
lights up solidly; the programme starts.
The duration can be recalculated and
adapted in the course of the programme.
During such phases, an animation appears on
the display.
6. CHANGE THE SETTINGS OF A
RUNNING PROGRAMME, IF NEEDED
You can still change some settings after a
programme has started:
• Adjust drying time (only if programme
Drying time or Airing is selected)
• Adjust or cancel Start delay, if a delay option
is already in progress.
• Add or cancel an option, provided the
progress of the programme still allows it.
Press the relevant button. The selected
setting blinks for a few seconds.
While blinking, you can adjust the setting
by turning the knob. If the value or setting
stopped blinking, press the button again.
Press the knob to conrm the modication.
If you do not conrm, the modication is
conrmed automatically — the modied
setting stops blinking.
The programme continues automatically.
To change the settings of a running
programme or delay, you can also:
• press Start/Pause to put the running
programme on hold
• change your settings
• press Start/Pause again to continue the
programme.
7. CANCEL A RUNNING PROGRAMME, IF
NEEDED
Press and hold the On/O button « until “rES”
appears on the display.
WARNING
After cancelling a running programme,
quickly remove all items and spread
them out so that the heat is dissipated.
8. SWITCH OFF THE DRYER AFTER
PROGRAMME END
At the end of the programme, “End” appears
on the display. Press On/O button « to switch
o the dryer. Open the door and take out
your laundry.
The dryer switches o automatically in about
a quarter of an hour after programme end, to
save energy.
15
EN
If not switched o right after programme
end, the dryer will tumble the laundry for
about 10 minutes, to prevent creasing. The
display shows an animation.
9. EMPTY WATER TANK / CLEAN DOOR
FILTER / CLEAN BOTTOM FILTER
Empty
• the water tank after each programme
• the door lter after each programme
• the bottom lter after every fth
programme.
Refer to section CARE AND MAINTENANCE
PROGRAMMES
The dots indicate the temperature degree for dry-
ing the laundry.
Normal temperature
Reduced temperature
Do not tumble dry
PROGRAMME Type of Wash
and Recommendations
Care
Labels
Regulations
ECO COTTON
Standard cotton programme, suitable
to dry normally wet cotton laundry.
Most ecient programme in terms of
energy consumption for drying cotton
laundry. The values on the Energy
Label are based on this programme.
max. load (kg): max
default programme
duration (h): 1:40
selectable options:
Fresh care
COTTON For drying cotton laundry. max. load (kg): max
default programme
duration (h): 1:50
selectable options:
Steam option,
Dryness level, Fresh
care, Gentle, Rapid
MIXED For drying mixed laundry made of
cotton, linen, articial bres and their
blends.
max. load (kg): 3.0
default programme
duration (h): 1:20
selectable options:
Steam option, Fresh
Care, Gentle

16
PROGRAMME Type of Wash
and Recommendations
Care
Labels
Regulations
SYNTHETICS
For drying laundry made of synthetic
bres.
max. load (kg): 3.5
default programme
duration (h): 0:55
selectable options:
Steam option,
Dryness level, Fresh
care, Gentle
DELICATES For drying delicate laundry which
needs gentle treatment.
max. load (kg): 2.5
default programme
duration (h): 0:50
selectable options:
Fresh care
WOOL FINISH
For nishing the air-drying process of
woollen textiles.
Woollens get uy and smooth.
max. load (kg): 1.0
default programme
duration (h): 0:05
selectable options: ---
BIG ITEMS
For drying big laundry items, such as
bathmats, blankets etc.
max. load (kg): 3.0
default programme
duration (h): 1:20
selectable options:
Fresh care
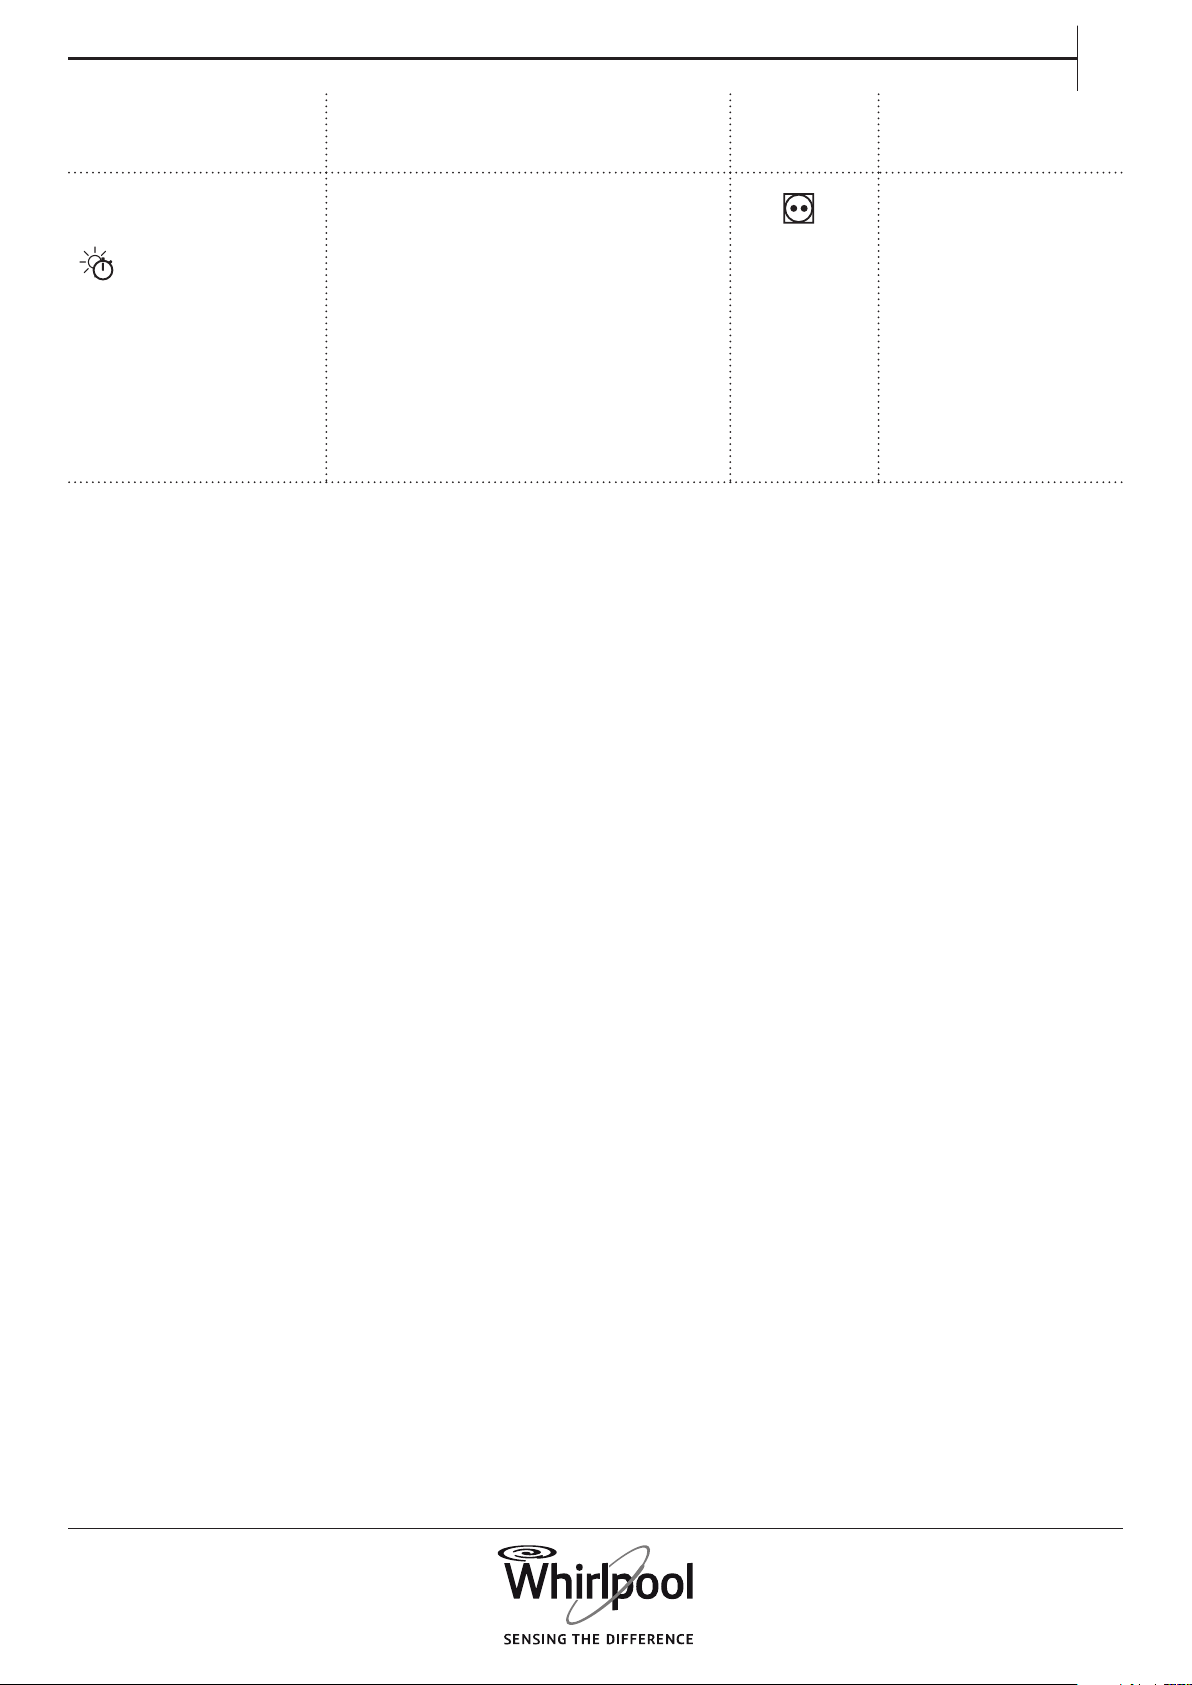
AIRING For airing, refreshing and loosening
up laundry for 30 minutes, without
heating.
max. load (kg): max
default programme
duration (h): 0:15
selectable options:
Drying time, Fresh
care
STEAM REFRESH For refreshing laundry with steam.
Specically designed to refresh
and remove odours from dry and
clean casual garments like shirts,
blouses, trousers made out of cotton,
synthetics and their blends.
Before loading the laundry into the
drum, slightly humidify it by spraying
it with water (maximum 200 ml; use a
water spray bottle). Load the slightly
humidied laundry into the drum and
start the programme.
After programme end, the garments
shall be removed immediately and
put on clothes hangers to minimise
wrinkling.
max. load (kg): 1.5
default programme
duration (h): 0:30
selectable options:
---
17
EN
PROGRAMME Type of Wash
and Recommendations
Care
Labels
Regulations
DRYING TIME
Time-restricted drying programme.
Select programme duration by option
Drying time.
For all fabrics appropriate for tumble
drying. Suitable to add an additional
short drying phase after programme
end.
Refer to OPTIONS, FUNCTIONS AND
INDICATORS / option Drying time for
more information.
max. load (kg): max
default programme
duration (h): 0:10
selectable options:
Drying time, Fresh
care
max = maximum capacity of the dryer
Programme durations indicated in the table are
default values. The programme duration mainly
depends on the humidity level of the laundry and
the volume of the laundry load. For that reason,
the real programme duration can deviate from the
indicated values.
18
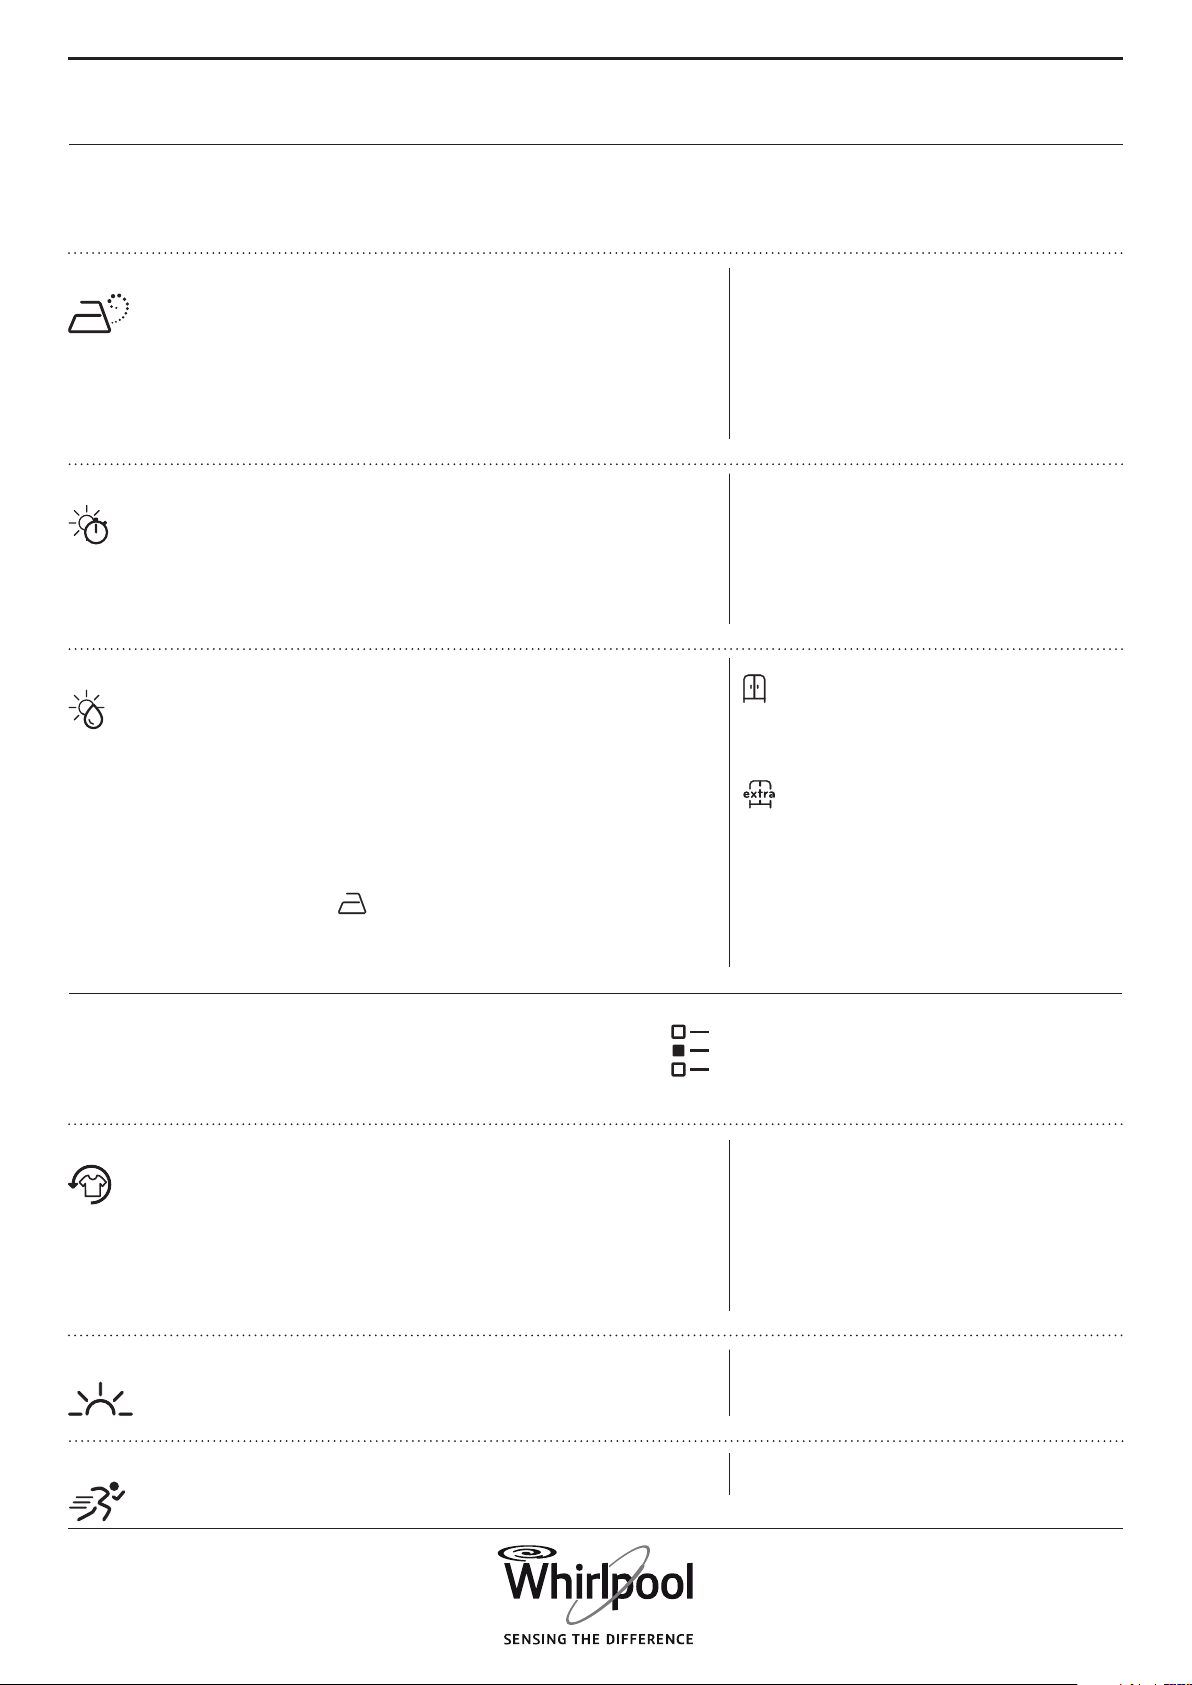
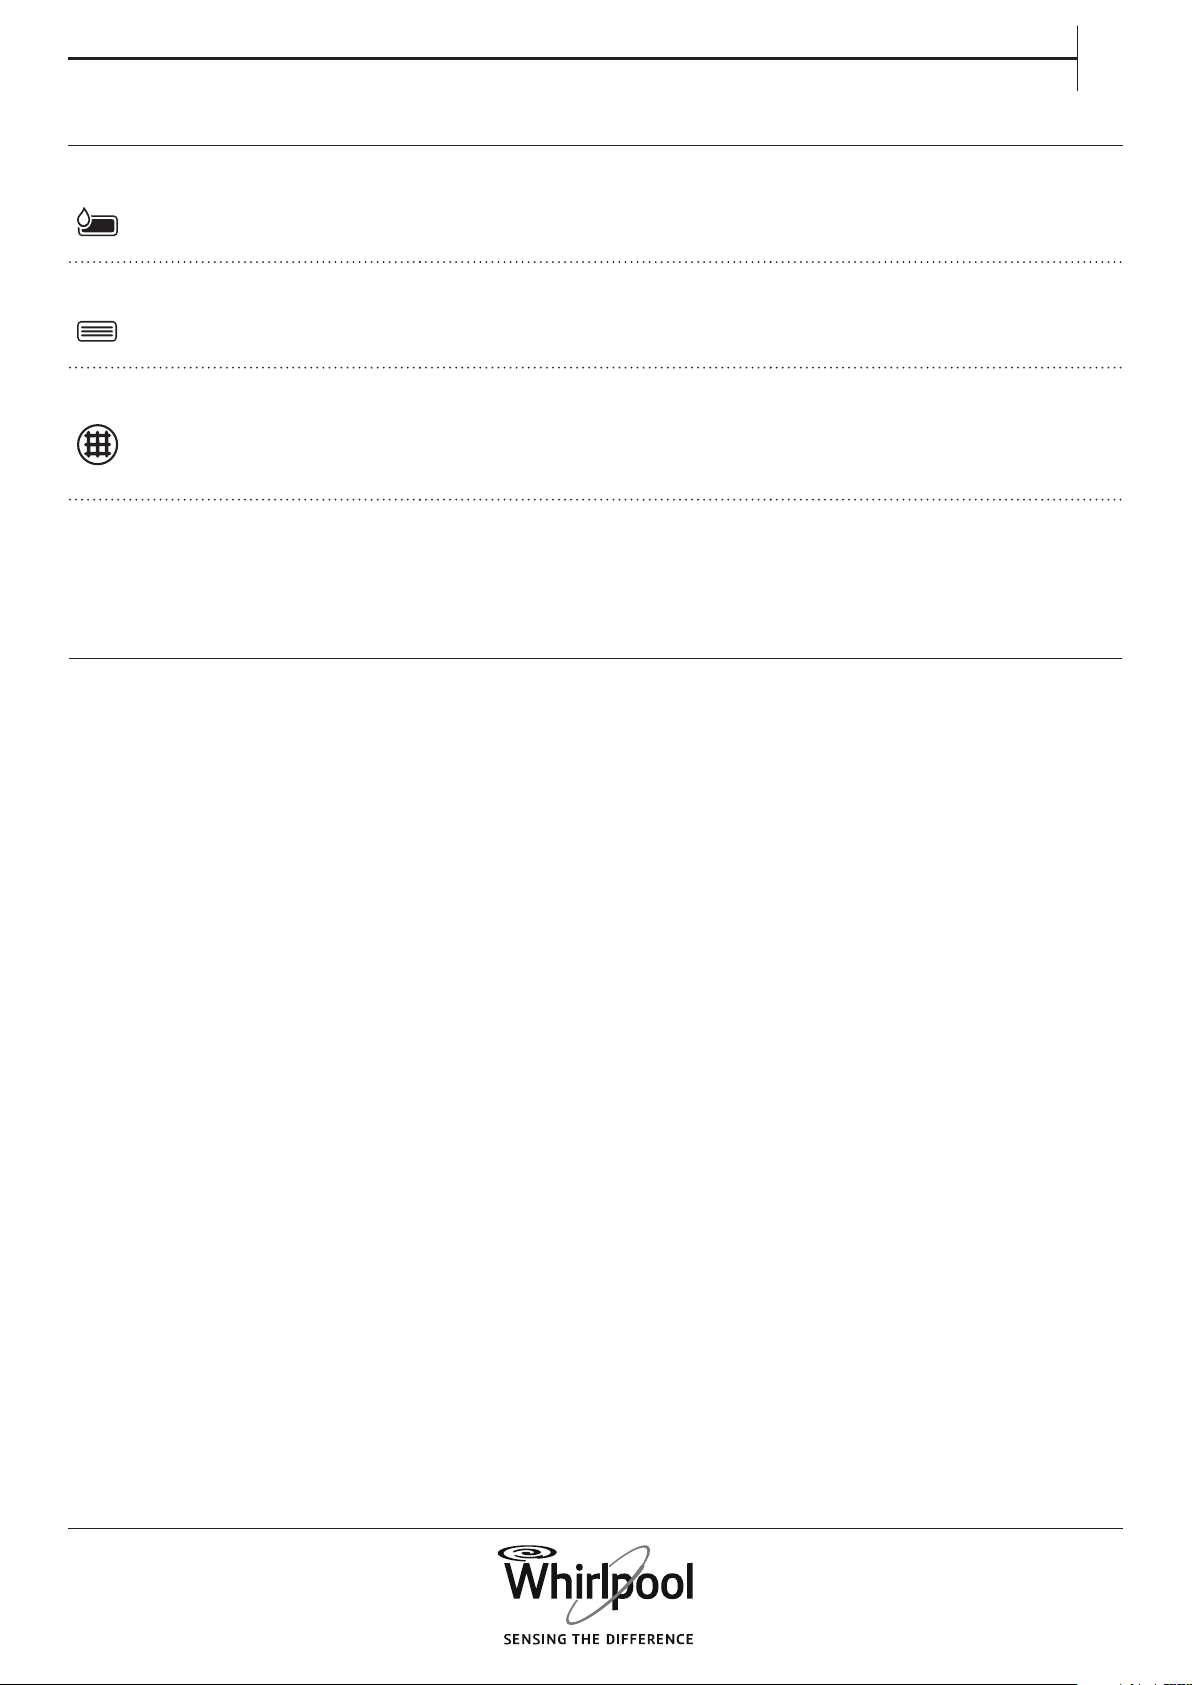
STEAM OPTION
FRESH CARE
GENTLE
DRYING TIME OPTION
DRYNESS LEVEL
Minimises creasing of garments made
of cotton, synthetics and their blends
by adding a humidifying phase at the
end of the drying cycle.
Use the option with small loads only,
unload the garments from the dryer
immediately after programme end
and put them on clothes hangers.
The humidity level automatically
adjusts to “cupboard dry” and cannot
be changed with this option.
Helps to prevent creasing if you
cannot unload the laundry soon after
programme end.
The dryer starts to tumble the laundry
periodically a few minutes after
programme end. This tumbling will
last up to approximately 12 hours after
end of the programme.
You can stop it at any time by
switching o the dryer with the On/
O button.
Enables a more gentle treatment of
the laundry by reducing the drying
temperature.
To adjust the desired drying time if
Drying time or Airing programme has
been selected.
Press the button; the light goes on,
and the drying time which was used
last appears on the display.
Turn the knob to select the desired
drying time from a minimum of 10
minutes up to maximum 180 minutes,
afterwards press the knob to conrm.
To select the desired dryness level for
the laundry load.
Press the button; the light goes on.
Turn the knob to select the desired
dryness level.
Choose between:
Iron Dry (suitable to be ironed
after the drying cycle, therefore still
slightly humid)
Cupboard Dry (dry enough to be
put in a cupboard at the end of the
drying cycle)
Extra Dry (maximum dryness
level) and conrm by pressing the
knob.
The dryness level is adjustable in
programmes Cotton and Synthetics.
OPTIONS WHICH ARE DIRECTLY SELECTABLE
BY PRESSING THE RESPECTIVE BUTTON
OPTIONS SELECTABLE WITH THE OPTIONS
BUTTON
RAPID Enables quicker drying by shortening
the programme duration.
OPTIONS
19
EN
FUNCTIONS
ON/OFF
KNOB
START/PAUSE
KEY LOCK
START DELAY
To switch the dryer on: press the
button until the Start/Pause button
lights up.
To switch the dryer o after
programme end: press the button
until the lights go o.
To cancel a running programme:
press and hold the button until “rES”
appears on the display.
To select and conrm programmes,
options and settings.
Turn to select
Push to conrm
To start the programme, after you
have nished your settings
To pause a running programme
To continue a paused programme
This function allows you to lock the
buttons and the knob of the control
panel against unwanted operation, for
example by small children.
The dryer must be switched on.
Press and hold the Key lock button
until button lights up.
Knob and buttons are locked now.
The only working function is On/O to
switch the dryer o.
The key lock remains active also if you
switch o and on again the dryer.
To unlock the buttons/knob, press and
hold the option button again until the
button light goes o.
Enables to have the laundry ready at a
particular time by moving the start of
the programme to a later time.
Select programme and options.
Press the Start delay button – the
button lights up.
Turn the knob to select a delay up to
23 hours. and conrm by pressing the
knob.
Press Start / Pause - the display shows
the countdown of the delay until
start of the programme. The Start /
Pausebutton lights up. A sound by
activation of the pump may
occur.
The colon on the display between
hours and minutes blinks.
WARNING
After cancelling a running
programme, quickly remove
all items and spread them
out so that the heat is
dissipated.
20
The programme starts automatically
at the end of the delay period. On
programme start, the delay on the
display is replaced by the remaining
programme duration.
When selecting a delay, the original
programme duration appears again
after the maximum possible delay of
23 hours. To exit the settings mode
again without setting a delay, select
the default programme duration.
To cancel a delay which has already
been started:
Either press Start/Pause to cancel
the delay. To start the selected
programme immediately, press Start/
Pause again.
Or press and hold On/O to cancel the
complete programme setting.
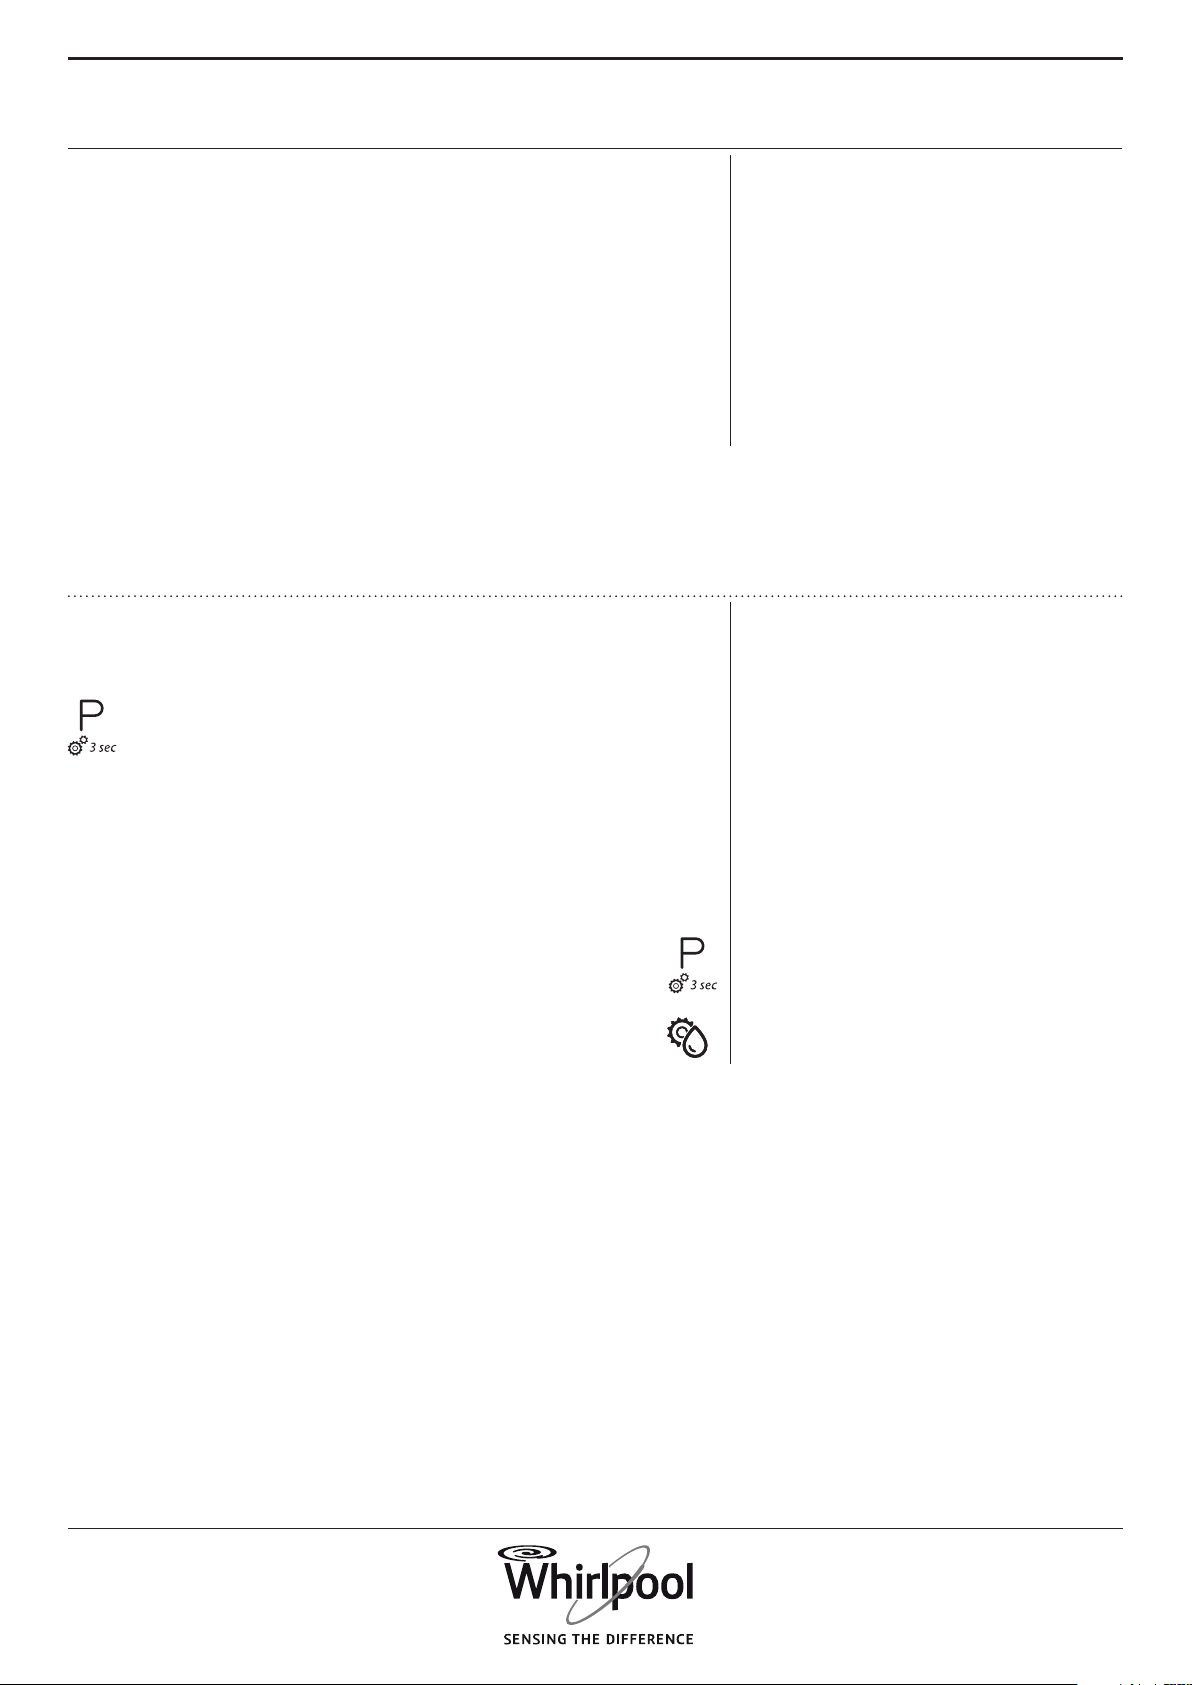
WATER
CONDUCTIVITY
SETTING
The drying results are aected by the
conductivity of the water used during
washing. If, by modifying the available
dryness levels (iron dry; cupboard dry;
extra dry), you are not satised with
the nal drying results, you can adapt
the water conductivity level.
The dryer comes with preset level 2.
Choose between
level 1 (most damp results)
and level 5 (most dry results).
Press and hold the Programme
button until the Conductivity
Adjustment symbol on the
display blinks.
Turn the knob to adjust the level (1 –2
– 3 – 4 - 5). Press the knob to conrm
the selected level.
This operation is not needed for every
drying cycle. Once the most
satisfying water conductivity level has
been identied, you no longer need
to modify it.
21
EN
INDICATORS
WATER TANK FULL => empty water tank
BOTTOM FILTER CLOGGED
=> clean bottom lter
DOOR FILTER CLOGGED
=> clean door lter
FAILURE
F..
For any failure indication on
the display, refer to section
TROUBLESHOOTING for more
information.
Find more information in section CARE AND
MAINTENANCE, and TROUBLESHOOTING GUIDE.
22
ENERGY SAVING TIPS
• To reduce the drying time, make sure that the
laundry is spun with the maximum possible spin
speed of the wash programme. This reduces the
moisture content in the laundry.
• Preferably dry a full load, as indicated in the
Programmes table. This optimises the relative
energy consumption.
• Do not over dry the laundry.
• Clean the door lter after every drying cycle.
• Clean the bottom lter after every fth drying
cycle.
• The optimum ambience temperature for the
dryer is between 15 and 20 °C. In case of a higher
temperature, air the room.
• Use Gentle option only with small loads.
• When drying cotton or synthetics laundry, run
Iron dry and Cupboard dry loads together. Start
the programme with dryness level Iron dry. At the
end of the programme, remove the laundry to be
ironed. Finish the drying process for the remaining
load with dryness level Cupboard dry.
ENERGY SAVING
AUTOMATIC SWITCHOFF FUNCTION The dryer is designed to save energy. After the
programme has nished, it therefore switches o
automatically after about a quarter of an hour.
23
EN
CLEANING &
MAINTENANCE
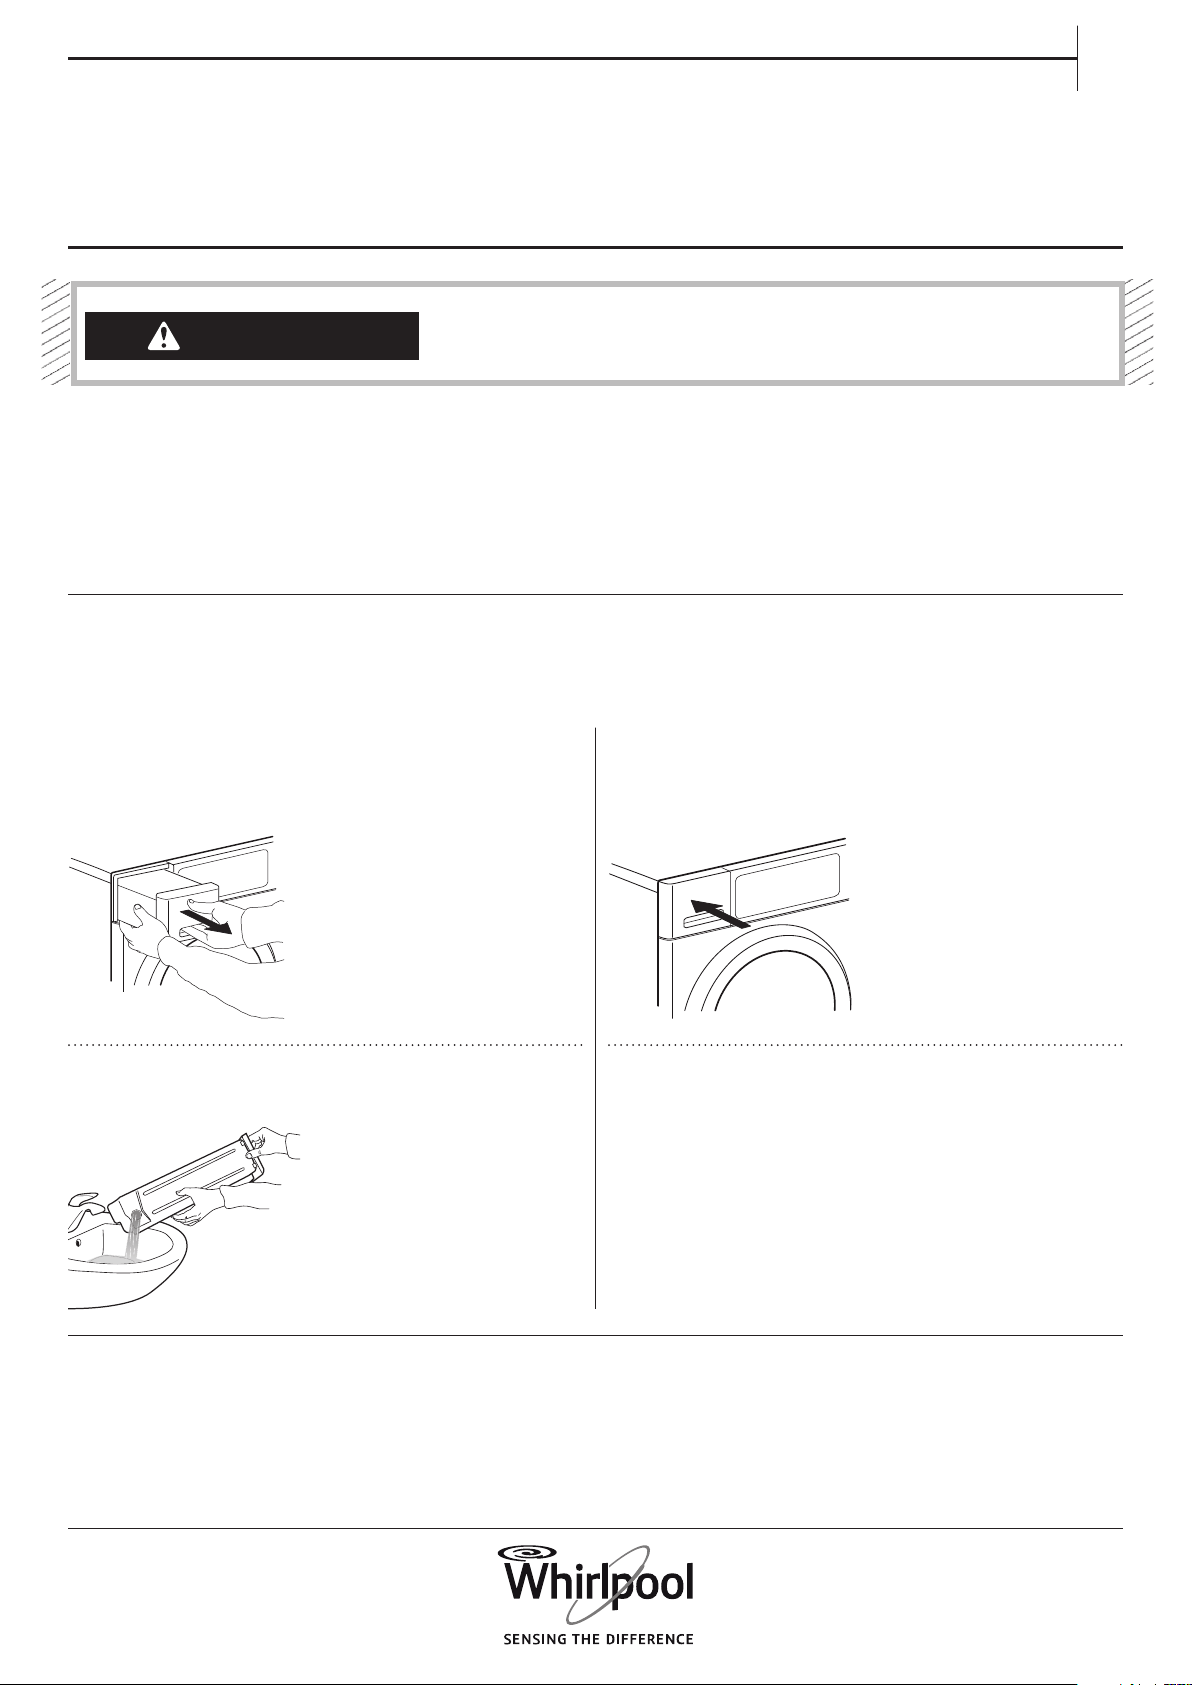
EMPTYING THE WATER TANK
Empty the water tank after each programme,
provided the drain hose is not connected to your
sewage system (refer to INSTALLATION GUIDE).
WARNING
Do not use ammable uids
to clean the dryer.
1. Hold the handle and carefully pull out the
water tank. Hold the full water tank with both
hands.
2. Empty the water.
3. Insert the water tank by pushing it back into
place. Make sure that it is completely inserted in the
compartment.
For any cleaning and maintenance, switch o the
dryer.
24
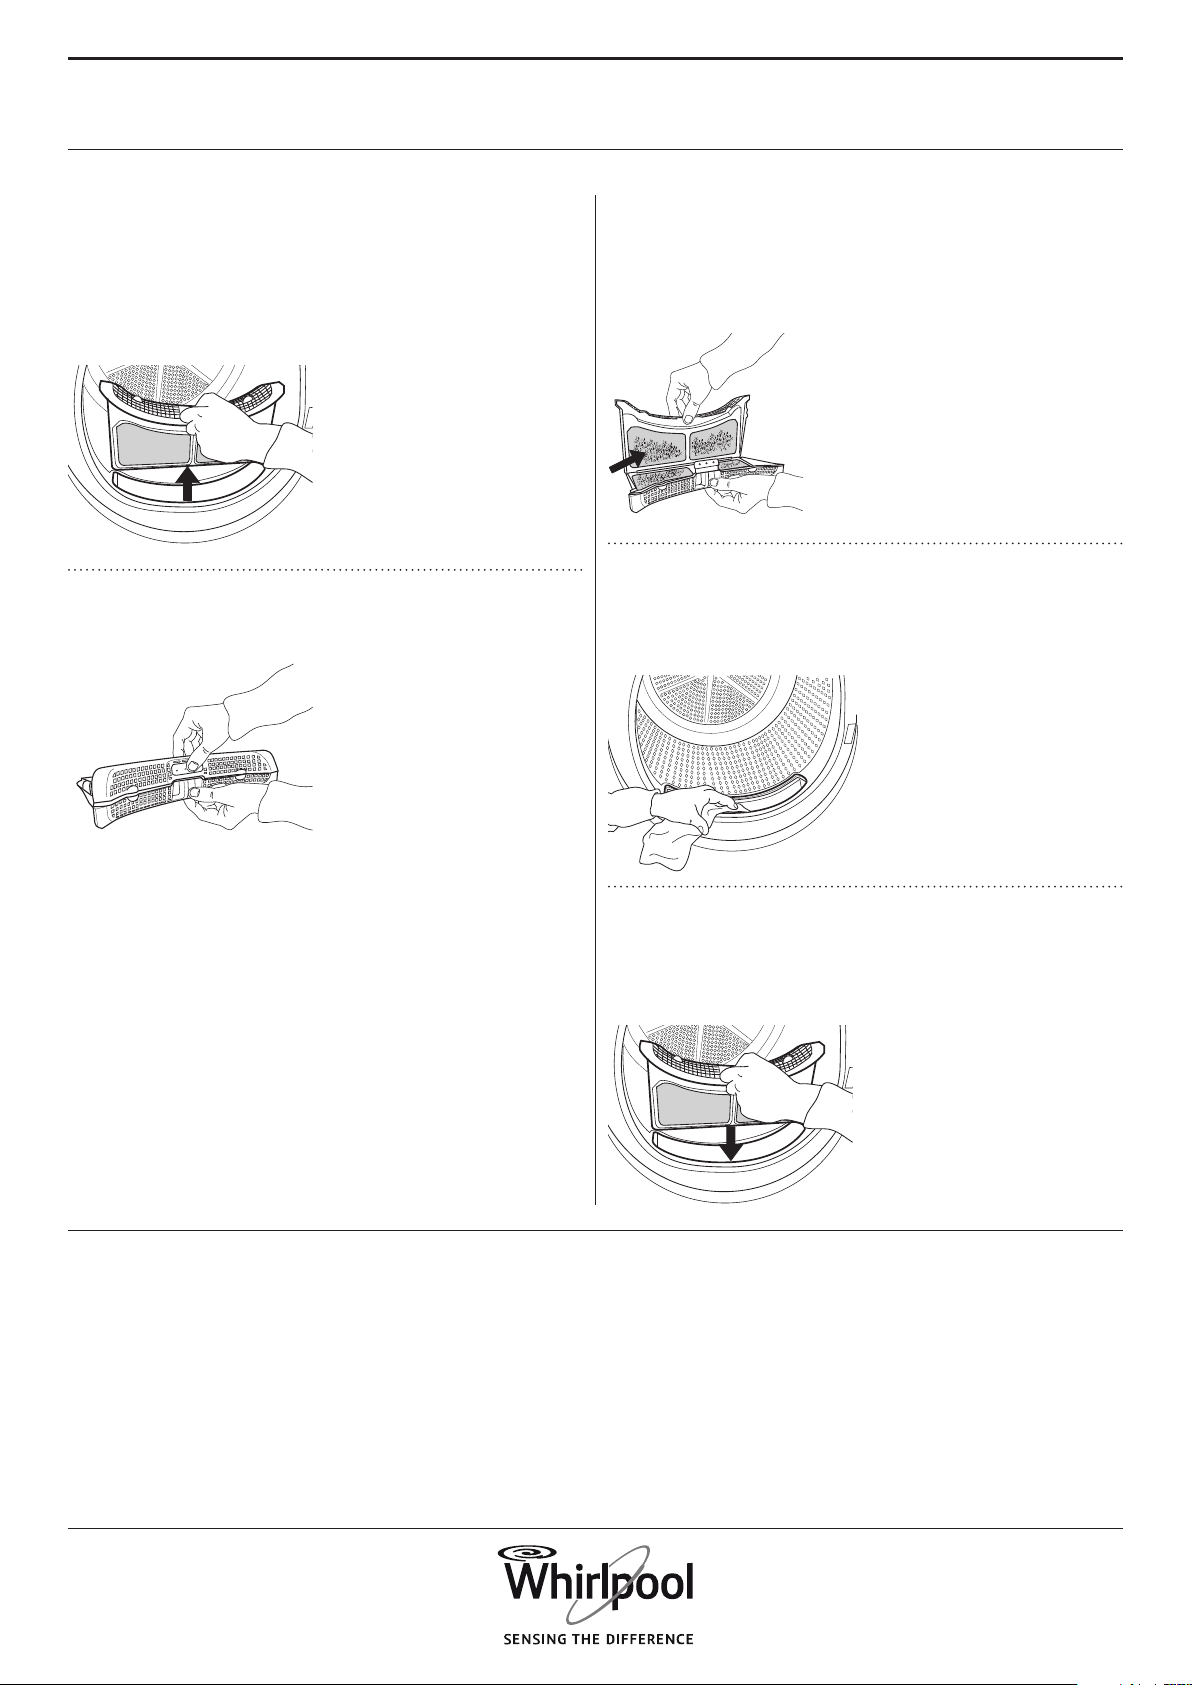
Clean the door lter after each programme.
Make sure that the laundry is unloaded. Open the
door.
1. Remove the door lter by pulling it upwards.
2. Press the button to open the door lter.
3. Carefully remove the complete lint from the
screen by hand.
If needed, the screen can be cleaned also under
running water, using a soft brush.
4. Clean the lter compartment with a soft cloth,
or carefully with a vacuum cleaner.
5. Close the lter and reinsert it in the right
direction, so that it completely integrates in the
lter compartment.
CLEANING THE DOOR FILTER
25
EN
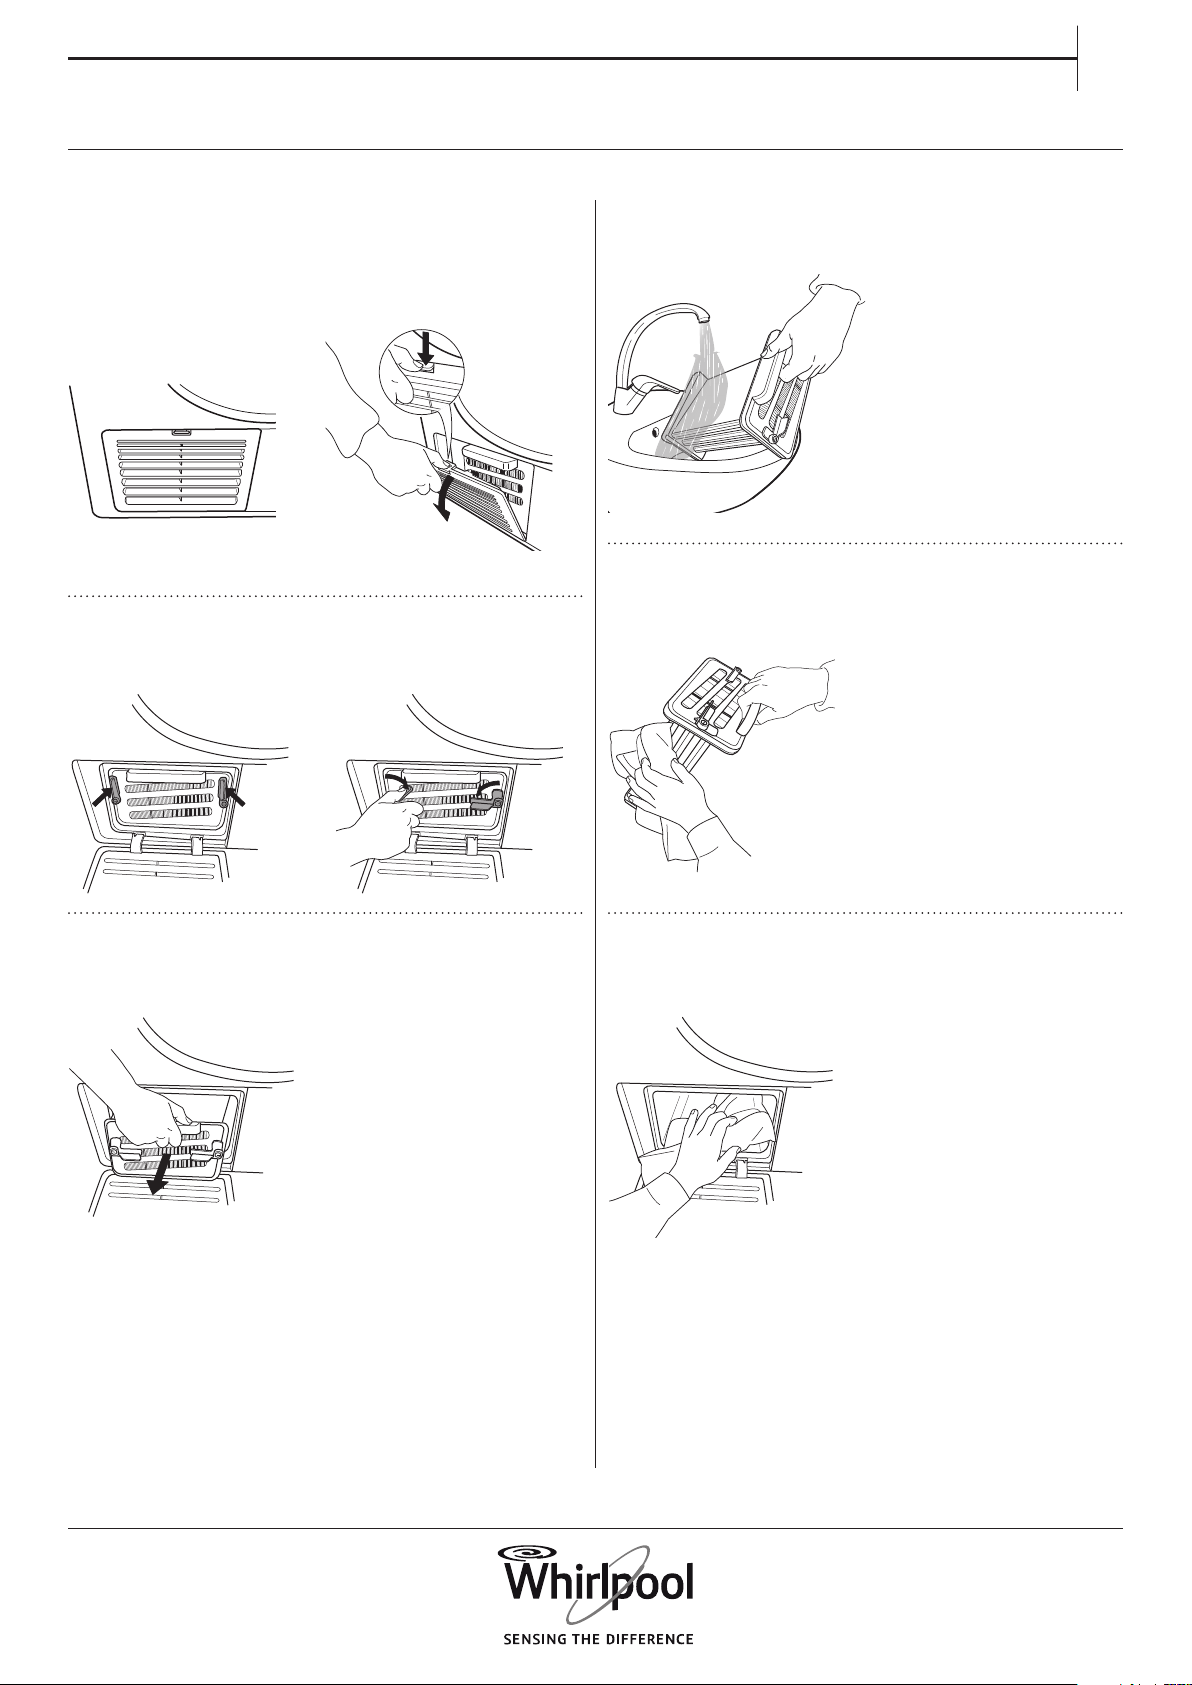
4. Clean the bottom lter under running water;
wipe away dust and lint.
5. Wipe the bottom lter dry, so that it is not
dripping wet anymore.
6. Clean the lter compartment with a soft cloth
or carefully with a vacuum cleaner.
Clean the bottom lter about every two months.
1. Carefully press down the strap to open the
bottom ap.
2. Turn the locking bars right and left on the
bottom lter downwards in horizontal position.
3. Hold the bottom lter on the handle and pull
it out.
CLEANING THE BOTTOM FILTER
26
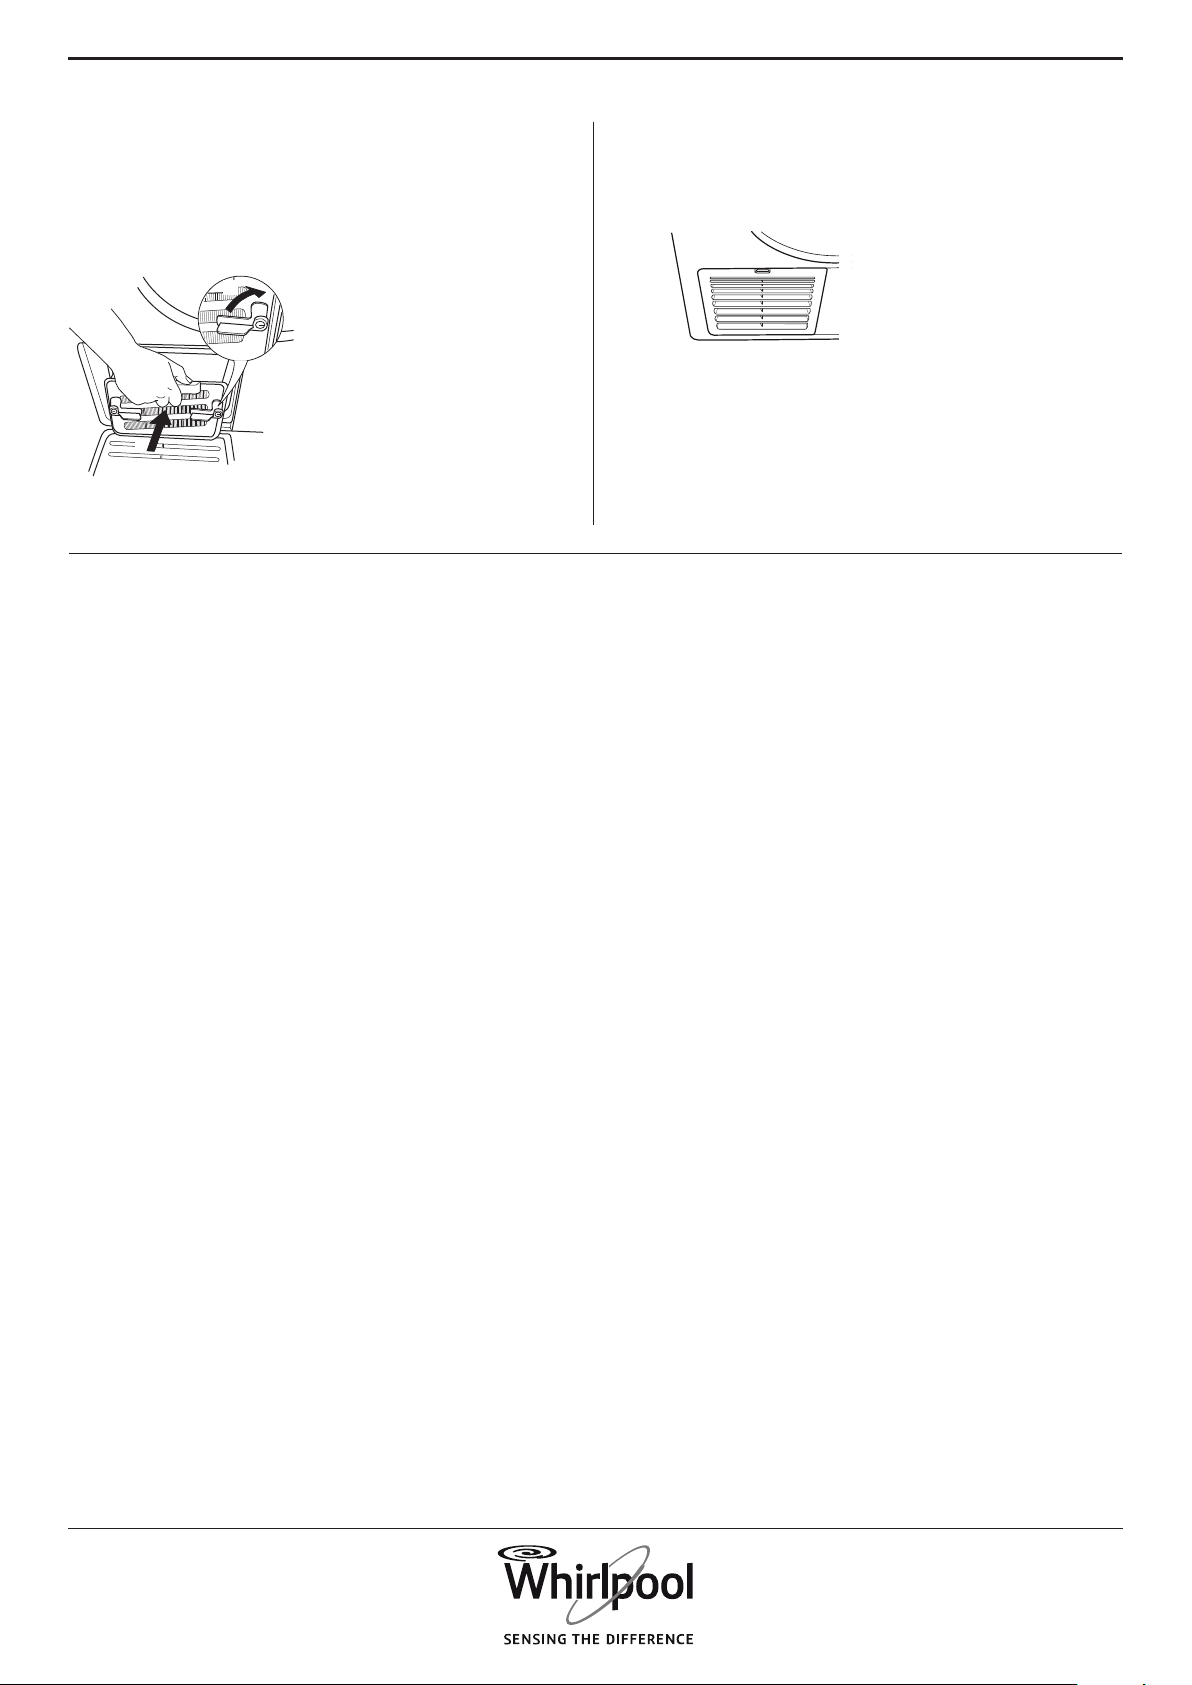
7. Push the bottom lter back into the lter
compartment; make sure that it is completely
integrated. Turn both locking bars (right and left)
back into vertical position, to lock the bottom lter.
1°
2°
8. Finally close the bottom ap again.
27
EN
CLEANING THE OUTSIDE
OF THE DRYER
Use a soft damp cloth to clean the outer parts of the
dryer.
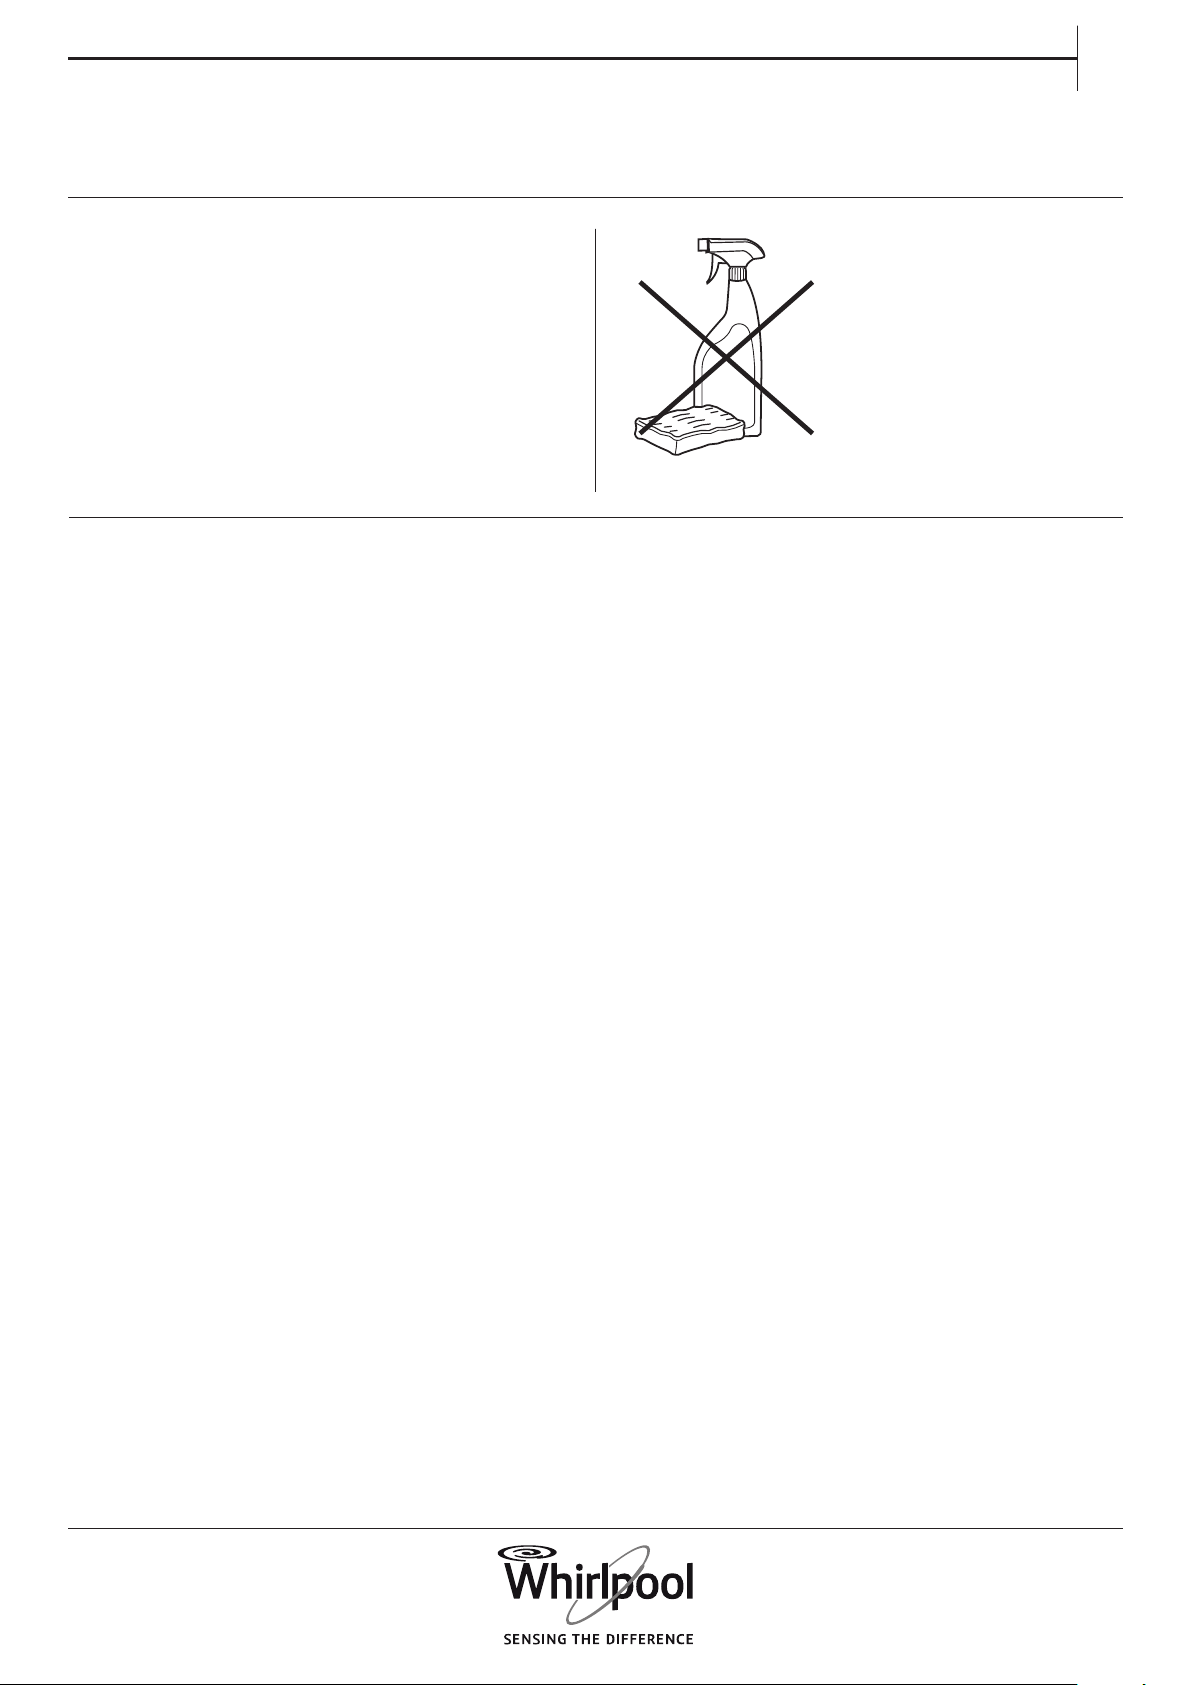
Do not use glass or general purpose cleaners,
scouring powder or similar to clean the control
panel – these substances might damage the
surfaces.
28
REVERSING THE DOOR STOP
If needed, the door stop of the dryer door can be
reversed. Use pliers and a cross-head screwdriver for
the procedure.
For removing and xing the door, the help of a
second person is recommended. Make sure that the
dryer is unplugged. Open the dryer door.
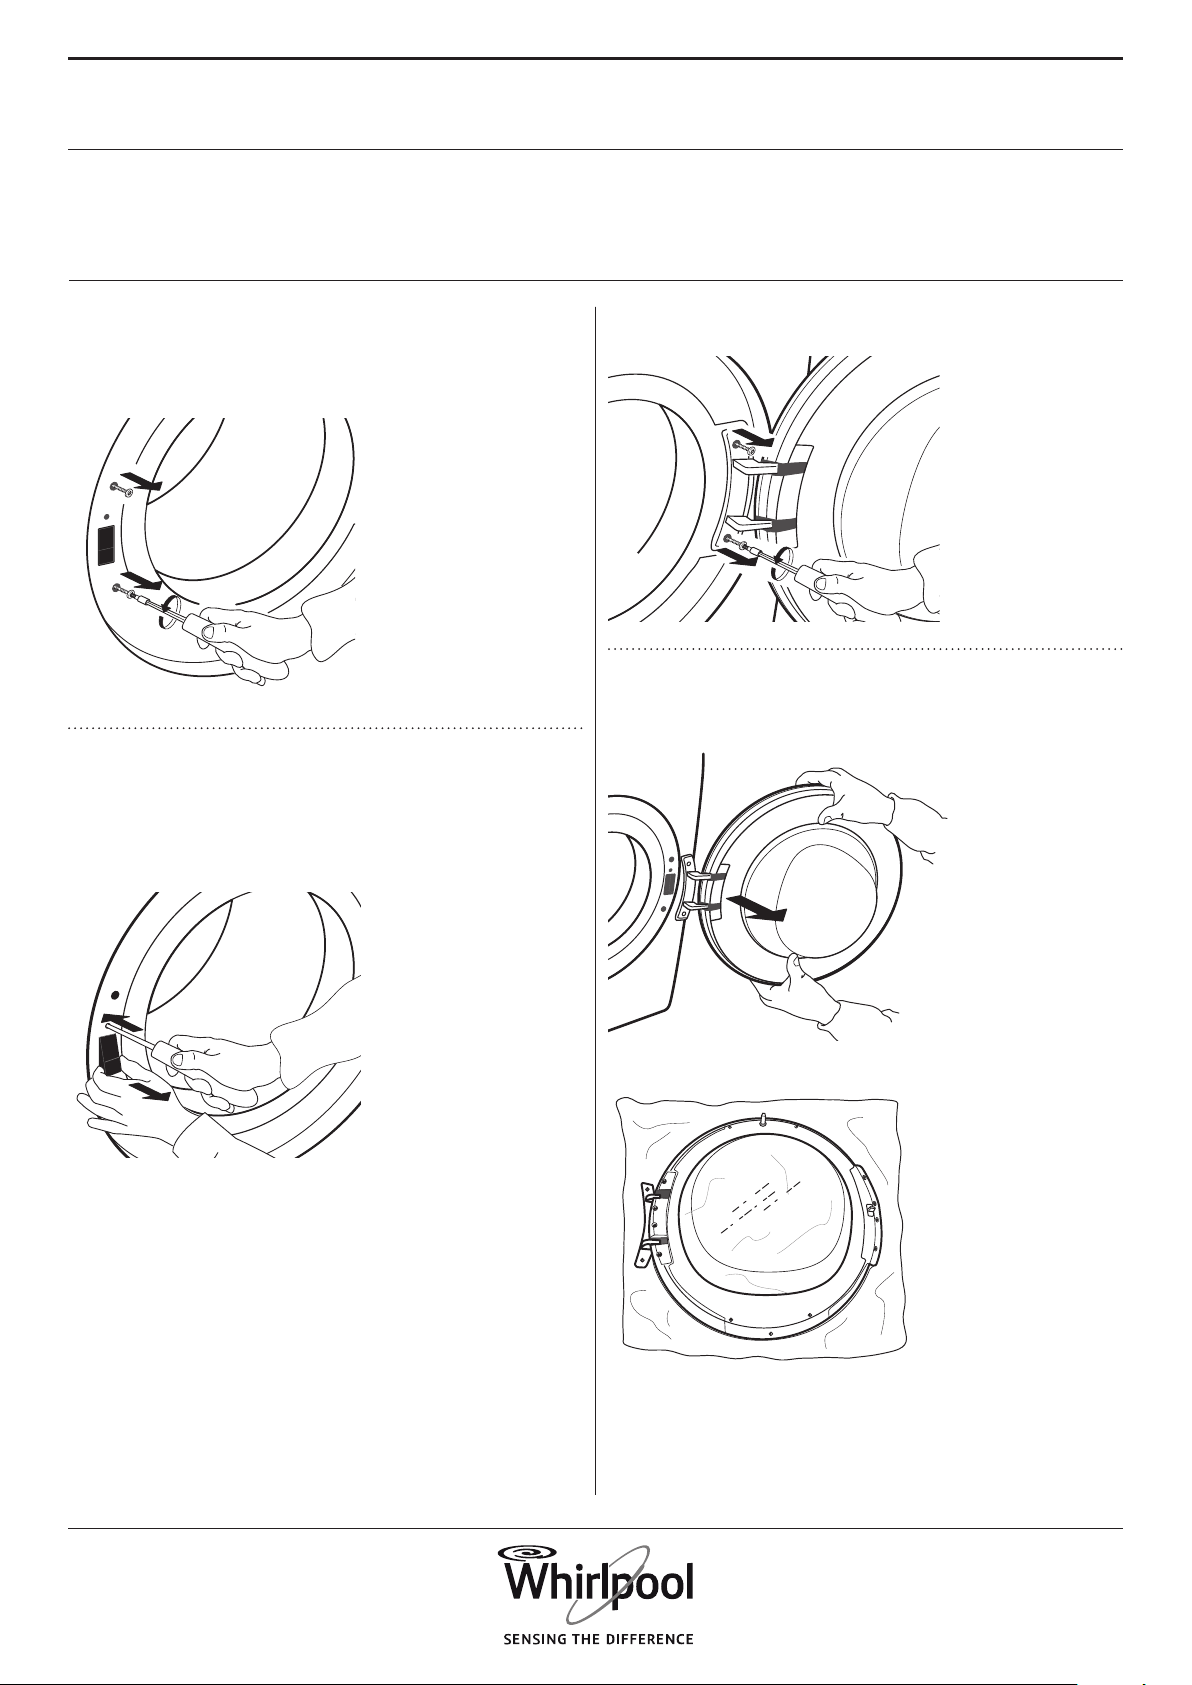
3. Remove the two screws on the door hinge.
4. Remove the door and carefully lay it upside
down on a blanket or similar.
1. Remove the two screws which are situated
over and under the door lock, left from the door
opening.
2. Press the small knob above the door lock
with a small screwdriver. At the same time move
upwards the door lock and pull it towards you with
your nger.
29
EN
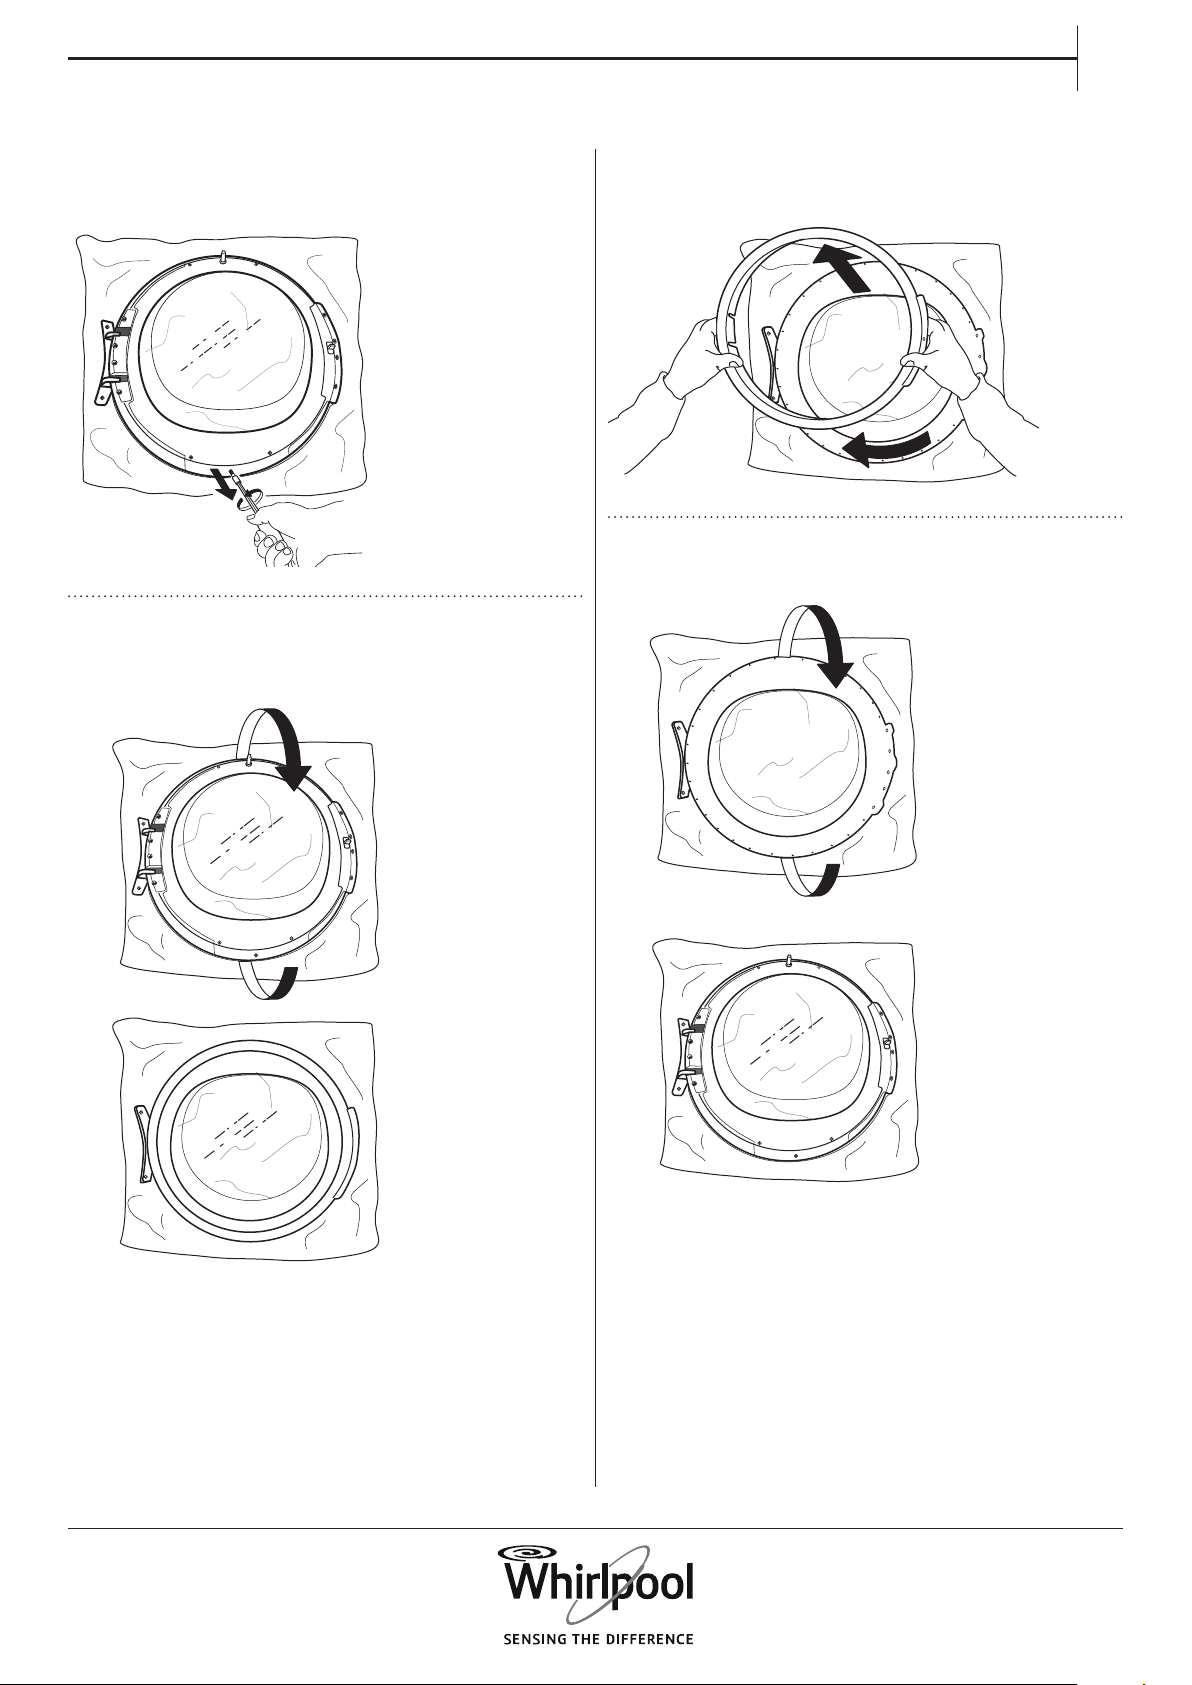
5. Unscrew the bottom screw, to release the
cover frame on the front of the door.
6. Turn the door and lay it down on the door
glass.
1
2
7. Carefully turn the door frame in clockwise
direction, and remove it.
1
2
8. Turn the door again and lay it upside down.
1
2

30
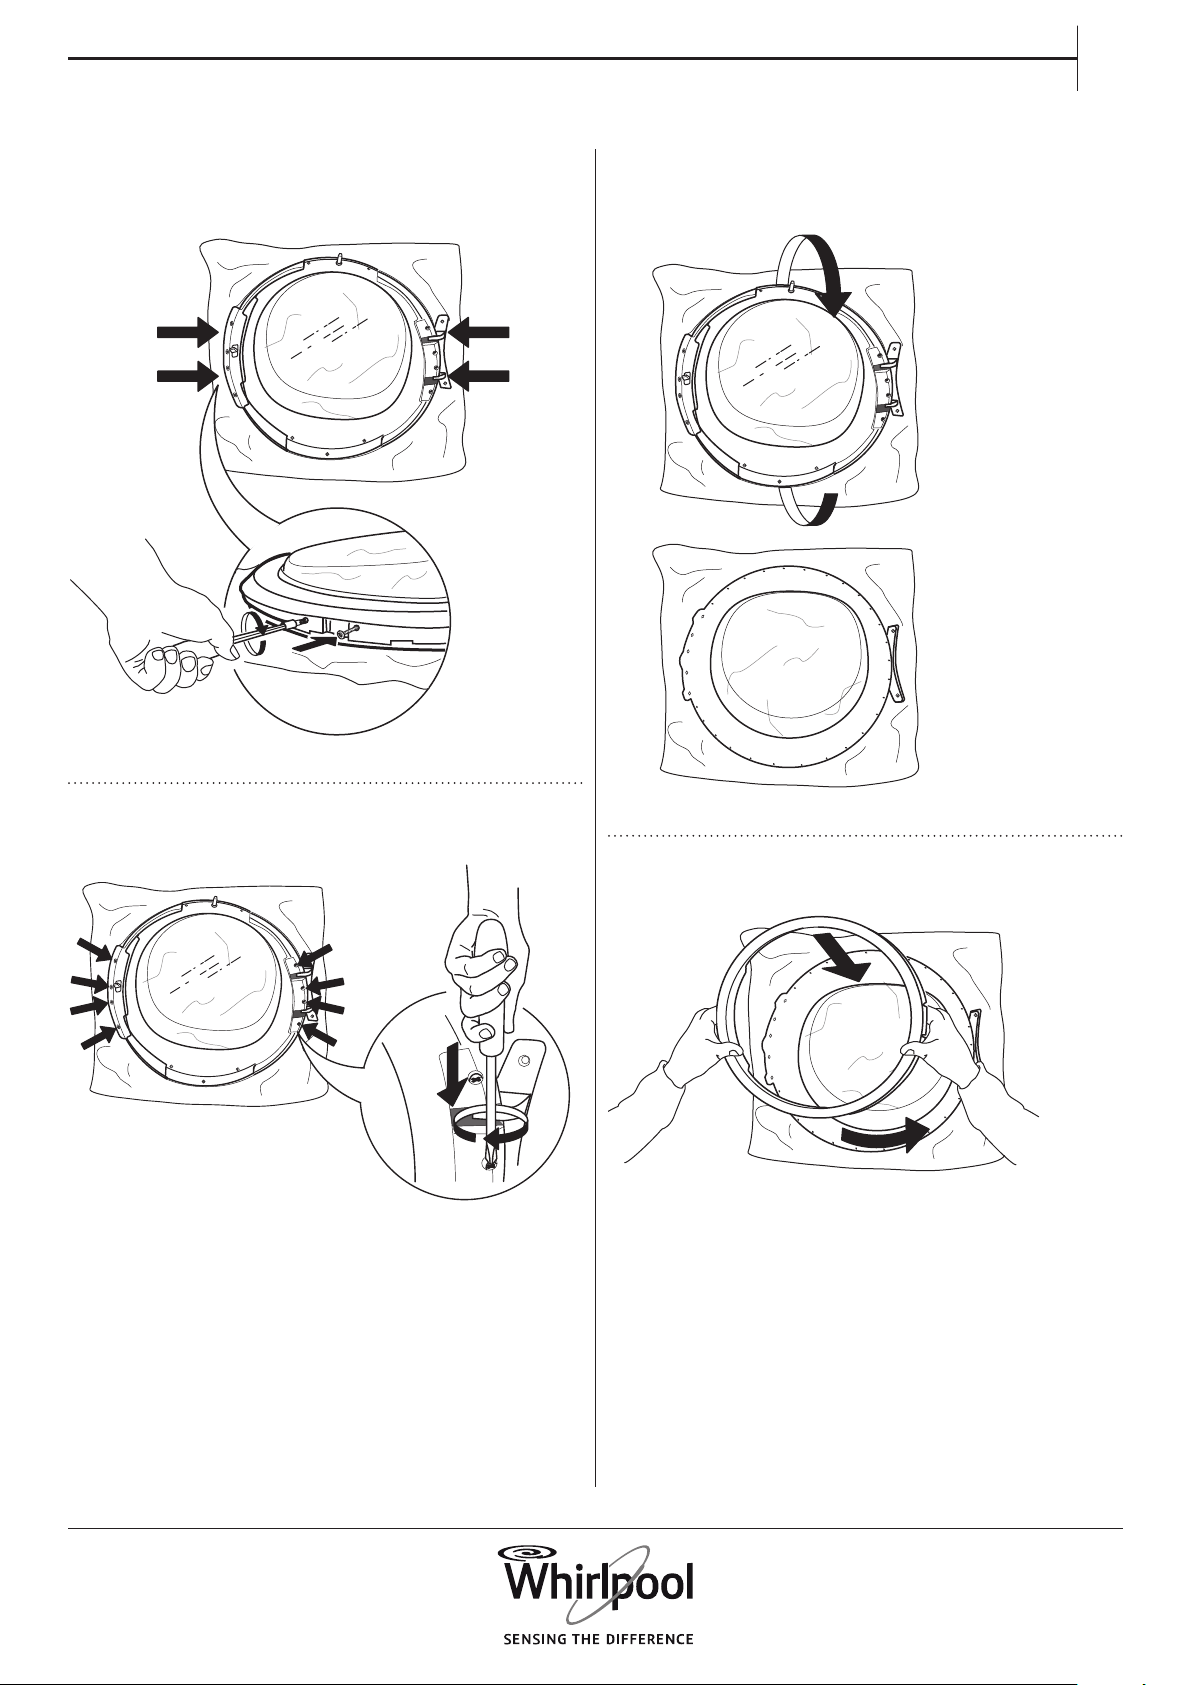
9. Remove the two side screws. Do this on both
sides of the door.
10. Remove the 4 inner screws on each side of
the door.
11. Remove the side parts on each side of the
door.
1
2
12. Reverse the side parts and insert them
again.
31
EN
13. Fix the 2 side screws on both sides of the
door again.
14. Fix the 4 inner screws on each side again.
15. Turn the door and lay it down on the door
glass.
1
2
16. Ret the door frame.
1
2

32
17. Turn the door again and lay it upside down.
Fix the bottom screw again.
18. Insert the door lock on the right side of the
door opening. Press it completely inside the hole
and move it a bit downwards, until the small knob
of the door lock latches.
19. Fix the two screws over and under the door
lock, on the right side of the door opening.
20. Fix the door on the left side of the door
opening by turning in the two screws.
33
EN
Your dryer is equipped with various automatic safety
functions. These enable failures to be detected in good
time and the safety system can react appropriately.
These failures are frequently so minor that they can be
removed within a few minutes.
TROUBLESHOOTING
GUIDE & AFTER-SALES
SERVICE
Problem Possible Cause Solution
DRYING TAKES TOO LONG
LAUNDRY IS NOT DRY
ENOUGH
Selected programme not
optimum for type of laundry
• Select the programme
matching best the type of
laundry; refer to section
PROGRAMMES
Door lter or bottom lter
clogged
• Clean the lters according to
the instructions in section CARE
AND MAINTENANCE
Laundry too wet • Make sure that laundry is spun
with the maximum spin speed
before drying. If laundry was
spun with spin speed below 800
rpm, the water tank may get full
during the drying programme.
The ambient temperature is too
high
• The ambient temperature
is ideal between 15 and 20°C.
If the ambient temperature is
higher, air the room.
DRYER DOES NOT START,
ALTHOUGH START/PAUSE HAS
BEEN PRESSED
Door not properly closed • Push door to close it until it
clicks shut
Key lock is activated • Press and hold the button
with the key symbol until the
display indicates that the keys
are unlocked.

34
WATER DROPLETS ARE
BENEATH THE DRYER
Bottom lter not inserted
correctly
• Check position of the bottom
lter and make sure it is
completely integrated in the
lter compartment.
Lint remaining on bottom lter or
door seal
• Remove lint residues on the
rubber seals of bottom lter and
door seal.
Water tank not inserted correctly • Push in the water tank and
make sure that it is completely
integrated in the tank
compartment.
Direct drain connection not
working properly
• Check drain connection and
make sure that the water can
drain.
Dryer not standing level • Check level position of dryer
on the tabletop with a water
level; if needed adjust the dryer
feet.
(refer to INSTALLATION GUIDE).
35
EN
FAILURE INDICATOR AND MESSAGES
Make sure to
• Empty the water tank after each programme
• Clean the door lter after each programme
• Clean the bottom lter after every fth programme
Refer to section CARE AND MAINTENANCE for
emptying water tank or cleaning lters.
Failure Indicator Possible Cause Solution
Water tank may be
• lled with water • Empty water tank; make sure to insert it properly
afterwards.
• not correctly positioned • Push in the water tank to make sure that it is
correctly inserted in the tank compartment.
Bottom lter may be
• blocked by lint • Clean the bottom lter; make sure to insert it
properly afterwards
• not correctly positioned • Push in the bottom lter and move the release
levers into vertical position, to make sure that the
lter is correctly inserted in the lter compartment.
Close the ap.
Door lter may be
• blocked by lint • Remove and clean the door lter; make sure to
insert it properly afterwards so that it completely
integrates in the lter compartment.
• not correctly positioned • Check position of the door lter; make sure that it
is properly inserted in the lter compartment.
36
Below is a summary of possible failure causes and
solutions.
If the problem persists after having followed the
instructions as indicated below, press and hold On/
O for at least three seconds. If afterwards the failure
indication still appears, switch o and unplug the dryer
and contact our After-Sales Service.
Display message Possible Cause Solution
F01 to F04 Failure of a component Press and hold On/O for at least 3 seconds.
F05 to F09 Failure of a component Switch off and unplug the dryer. Immediately
open the door and take out the laundry, so that
the heat can dissipate.
Make sure that the ambient temperature ranges
between 5°C and 35°C. Wait for about an hour.
Plug in the dryer, load the laundry and start the
programme again.
If the failure persists, call the After-Sales Service.
F10 to F24 Failure of a component Switch off and unplug the dryer. Wait for about half
an hour. Plug in the dryer and start the programme
again.
If the failure persists, call the After-Sales Service.
37
EN
TRANSPORT AND HANDLING
1.
Unplug the dryer.
2. Make sure that door and water tank are
properly closed.
3. If the drain hose is connected to your sewage
system, x the drain hose on the rear of the dryer
again (see Installation Guide).
WARNING
Never lift the dryer by
holding it at the worktop.
38
AFTER-SALES
SERVICE
BEFORE CALLING
THE AFTER-SALES SERVICE
IF AFTER THE ABOVE CHECKS THE FAILURE STILL
OCCURS, GET IN TOUCH WITH THE NEAREST
AFTER-SALES SERVICE
1. See if you can solve the problem by yourself
with the help of the suggestions given in the
TROUBLESHOOTING GUIDE.
To receive assistance, call the number shown on the
warranty booklet or follow the instructions on the
website www.whirlpool.eu
Always specify:
• a brief description of the failure;
• the type and exact model of the appliance;
• the service number (number after the word Service
on the rating plate on the back of the dryer).
The service number is also indicated on the
guarantee booklet;
• your full address;
• your telephone number.
For any repairs, use our authorized After-Sales
Service, to ensure proper repairing and use of
original spare parts.
2. Switch the appliance o and on again to see if
the failure persists.
Manufacturer:
Whirlpool Europe s.r.l. Socio Unico
Viale Guido Borghi 27
21025 Comerio (VA)
Italy

39
EN
2a. 2b.
1.
40
3a.
3b.
max 2 cm
max 0.79 inch
41
EN
4.
max 100 cm
39 inch
1
2
42
5.
6a.
6b.
..............
xxx V ~ xx Hz
xx A
IPX4
E
V
D
xxxx xxxx xxxx

43
EN

400011023011
Printed in Italy