Loading ...
Loading ...
Loading ...
• Donotuseanexhausthoodwithamagneticlatch.
improper venting can cause moisture and lint to collect
indoors, which may result in:
Ill Moisture damage to woodwork, furniture, paint, wallpaper,
carpets, etc.
Ill Housecleaning problems and health problems.
Excessive Weight Hazard
Use two or more people to move and install
washer/dryer.
Failure to do so can result in back or other injury.
To avoid damaging floor, use a large flat piece of cardboard from
shipping carton. Gently place Laundry Center on its side, on the
cardboard.
Install rear leveling legs
1. Push legs into holes in rear corners until they snap into place.
2. Check adjustability of rear legs by pushing in one leg. The
other leg should come out. Check both legs. If they do not
move freely, repeat Step 1.
Install front leveling legs
1. Examine front leveling legs, find diamond marking.
2. Screw front legs by hand, into holes in triangular braces in
front corners. Use wrench to finish turning the legs until
diamond marking is no longer visible.
3. Gently stand Laundry Center upright.
@VOd@ _;; "'
earn Psck g
1. Open the washer lid. The latch under the dryer will keep the
lid open.
2. Pull the foam packing ring out of the washer.
NOTE: Keep the foam ring and use it when transporting your
Laundry Center. This packing material is used to keep the washer
tub stable during transport.
Oonn Hose
Proper connection of the drain hose avoids damage to your
floors due to water leakage. To keep the drain hose from coming
off or leaking, it must be installed according to the following
instructions:
IMPORTANT: To ensure proper installation, this procedure must
be followed exactly.
1. Check drain hose to see whether it is the proper length.
2. Wet inside of the straight end of the drain hose with tap water.
IMPORTANT: Do not use any lubricant other than water.
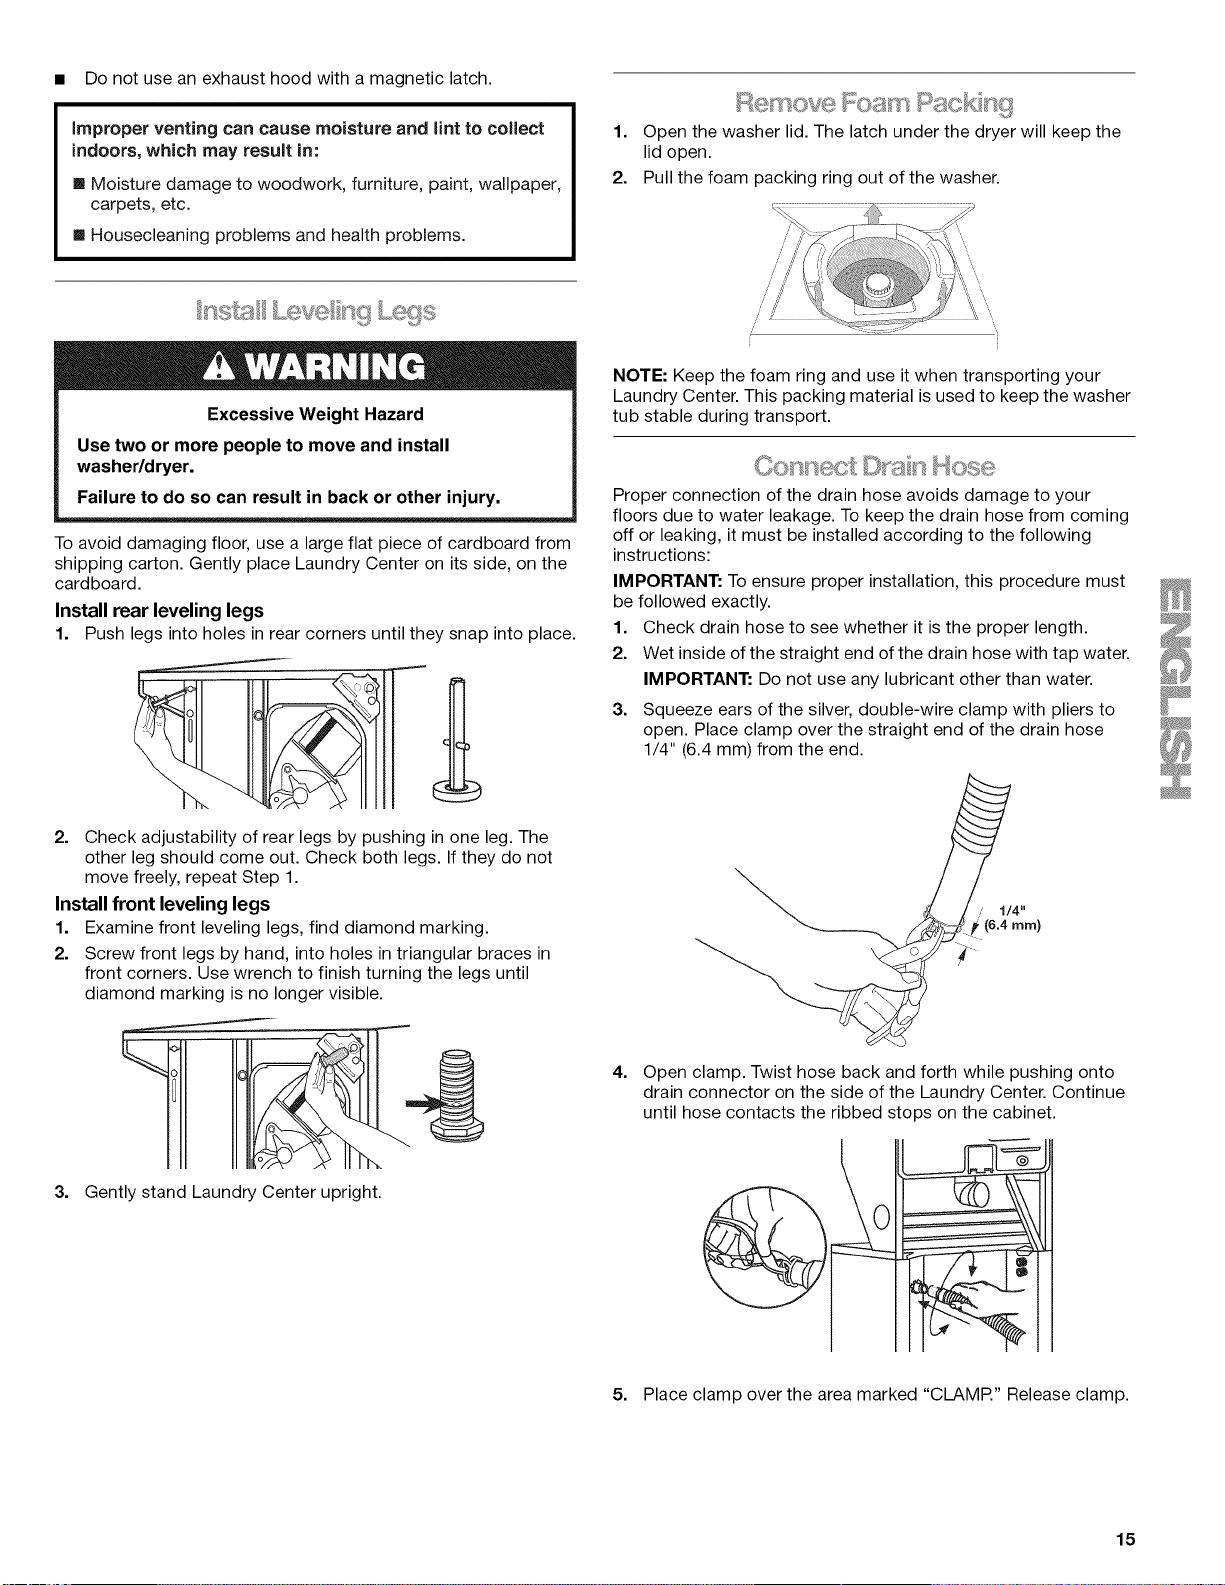
3. Squeeze ears of the silver, double-wire clamp with pliers to
open. Place clamp over the straight end of the drain hose
1/4" (6.4 mm) from the end.
4. Open clamp. Twist hose back and forth while pushing onto
drain connector on the side of the Laundry Center. Continue
until hose contacts the ribbed stops on the cabinet.
@
5. Place clamp over the area marked "CLAMR" Release clamp.
15
Loading ...
Loading ...
Loading ...