Loading ...
Loading ...
Loading ...
Using Your Cooktop
Halogen/Radiant Cooktop
10
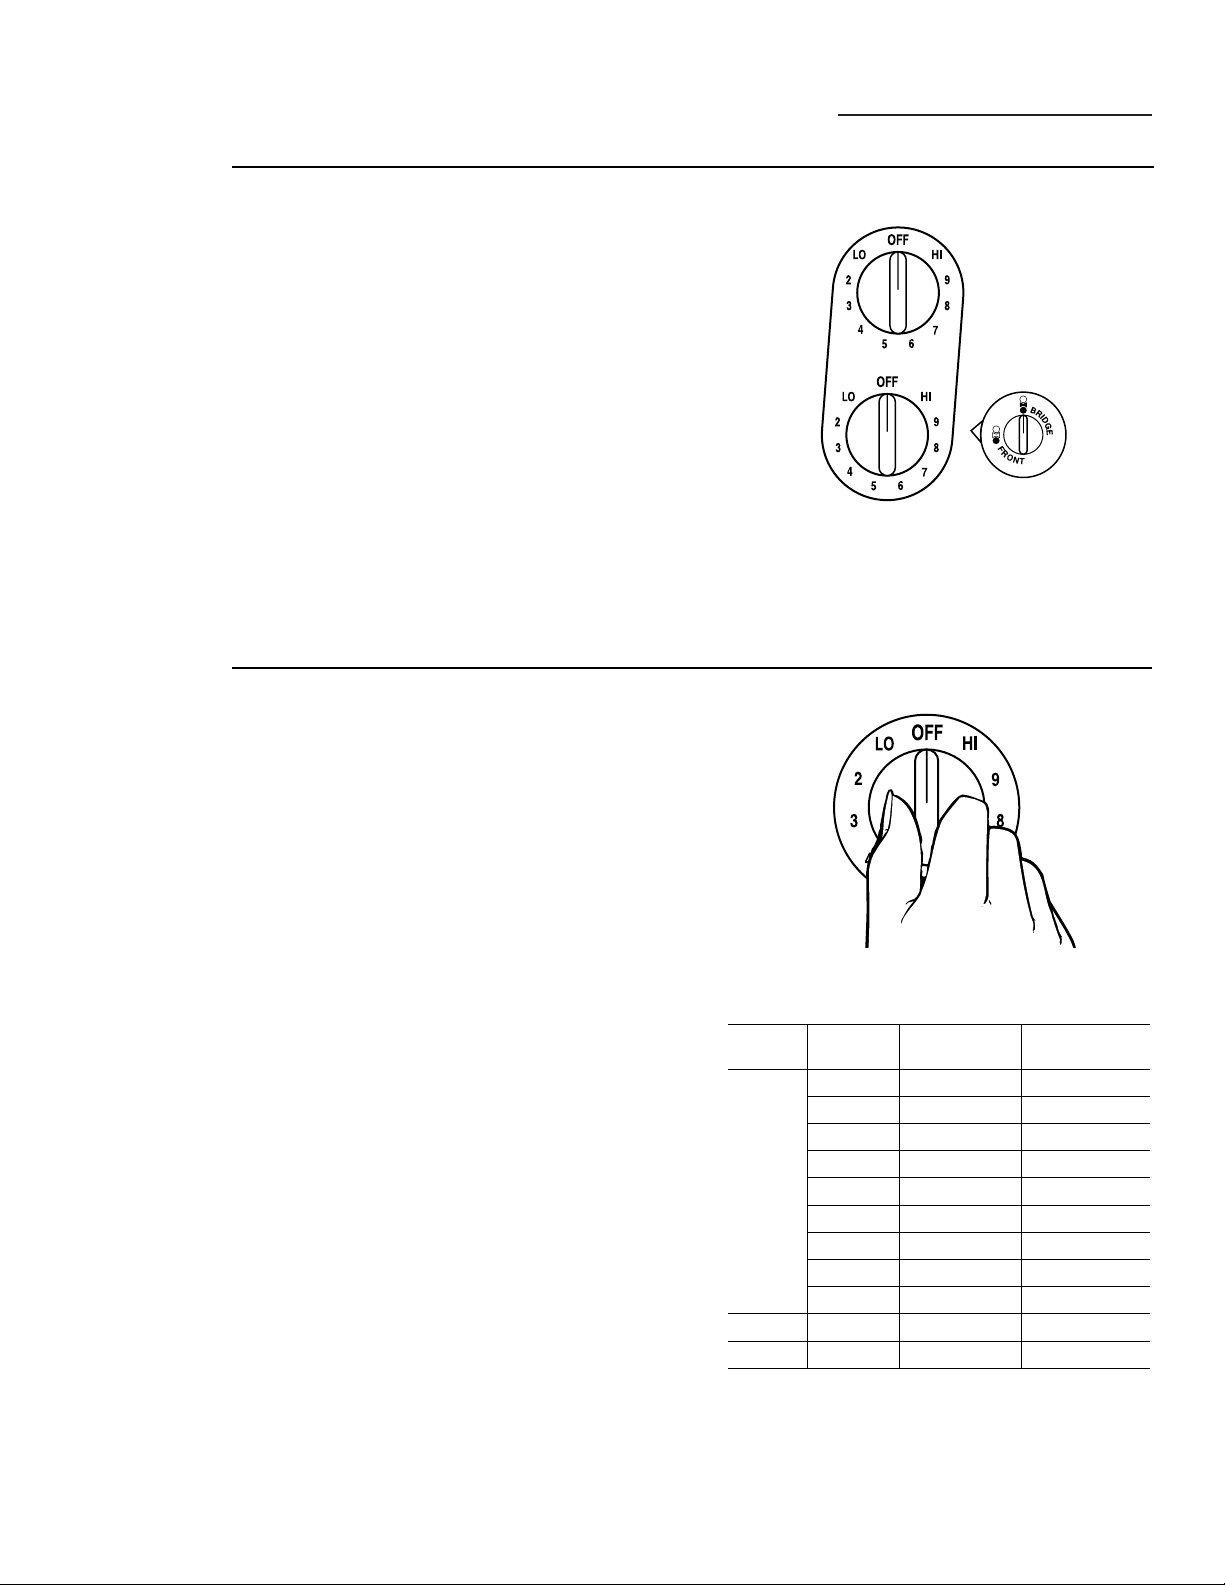
Using the
bridge
burner
Make sure the pan rests flat on the glass
cooktop and it is not resting on the trim. If you
notice poor cooking performance, move the
pan to make sure it is flat on the cooktop.
When the burner select knob points to
BRIDGE, the LEFT knob controls both the left
front surface unit and the bridge area.
Choose pans that match the circle/bridge area
as closely as possible.
When the burner select knob points to FRONT,
the LEFT knob controls the left front surface
unit only.
NOTE: You can create an oblong heated area by
using the left rear unit in addition to the front unit
bridge combination.
Halogen
surface
units
You may notice that the knobs that operate the
halogen surface units are slightly harder to turn
than the knobs for the radiant surface units.
This is due to the difference in design between
the two controls.
• The lowest three settings will produce no
visible evidence of the surface unit being on
although up to 11% of the total wattage is
being generated. On the lowest settings, the
percentage of power may not cause the HOT
SURFACE lights to glow. The UNIT ON
indicator light will glow when either surface
unit is on.
• The surface UNIT ON light will glow for all
positions except the OFF position.
• If the halogen/radiant cooktop is connected to
208 volts, you will notice some increase in
cooking times.
The ten-position halogen control produces the following
variation in cooking power.
Switch Brightness Typical Heater
Settings Position of Lamp Power %
HI 10 Full 100
9 High 76
8 High 56
7 Medium 41
6 Medium 30
5 Low 23
4 Low 16
3 Invisible 11
2 Invisible 8
LO 1 Invisible 5
OFF OFF Invisible 0
Loading ...
Loading ...
Loading ...