COHTENT$
SAFETY
TO START THINGS COOKIHG
Removal of Packaging Tape .....................................................4
Features of Your Oven ................................................................5
Oven Controls ..............................................................................5-73
Clock .....................................................................................................7
Timer ..................................................................................................7
Oven Cooking Tips ................................................................8, 9
To Bake .......................................................................................9, 10
Broiling ..........................................................................................11
CLEANING TIPS
Self-Clean Cycle ............................................... .................... I2-13
Cleaning Tips .......................................................................................14
REMOVABLE PARTS
SERVllCE
Before Calling for Service .................................................... __
Thermostat Adjustments ........................................... t"7
WARRANTY
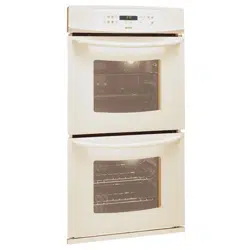
MODELS 40429
40425
K nrTIOrQ
R_cyc_ Papo_
O
TY
229C4020P016=2 SR10250
SAVE THESE INSTRUCTIONS
Read alp instructions be[owe using this ,applance. When using electrical
applances, basic sa[ety precautions should be [olowed, including _he [oilowing:
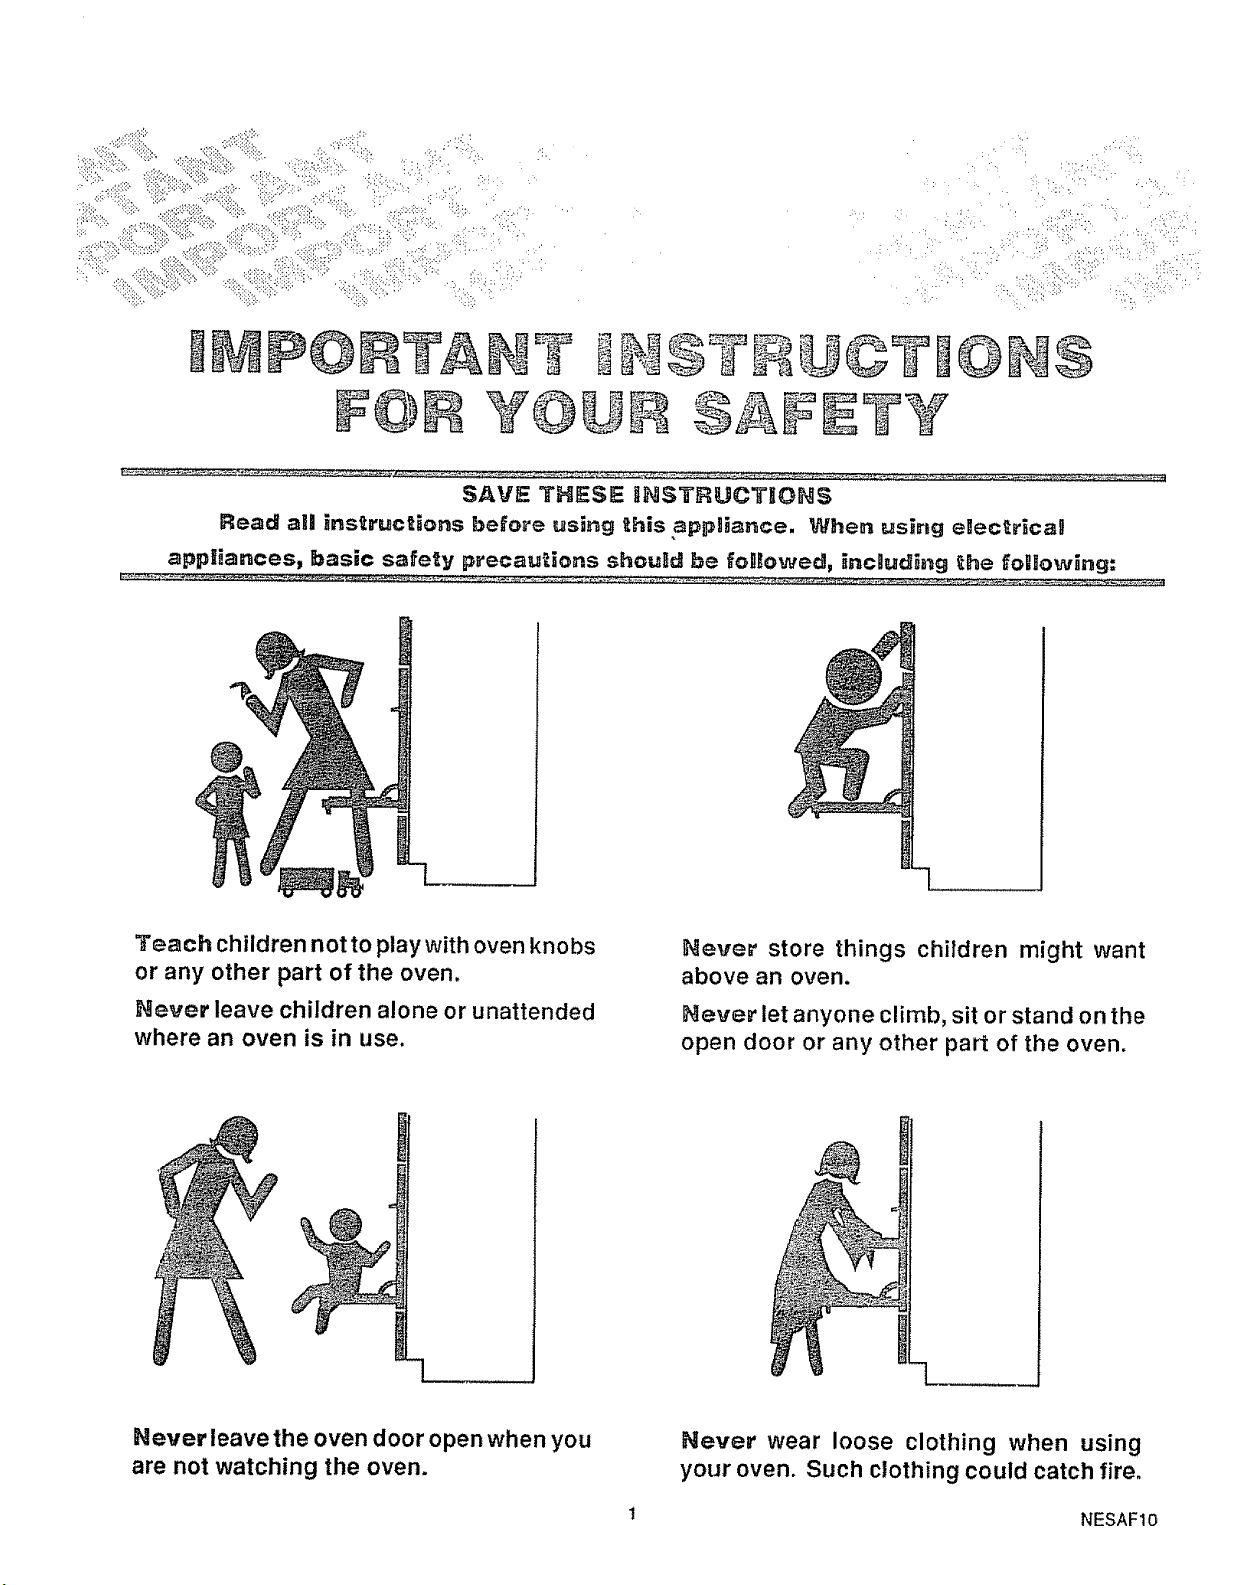
Teach children not to play with oven knobs
or any other part of the oven.
Never leave children alone or unattended
where an oven is in use.
Never store things children might want
above an oven.
Never let anyone climb, sit or stand on the
open door or any other part of the oven.
Never ieavethe oven door open when you
are not watching the oven.
Never wear loose clothing when using
your oven. Such clothing could catch fire.
t NESAFIO
To insure safety for yourself and your home, please read your Owner's Manual
carefully. Keep it handy for quick easy reference. Pay close attention to the
_]our
safety sections of manual. You can recognize the safety sections by
looking for the symbol or the word "Safety".
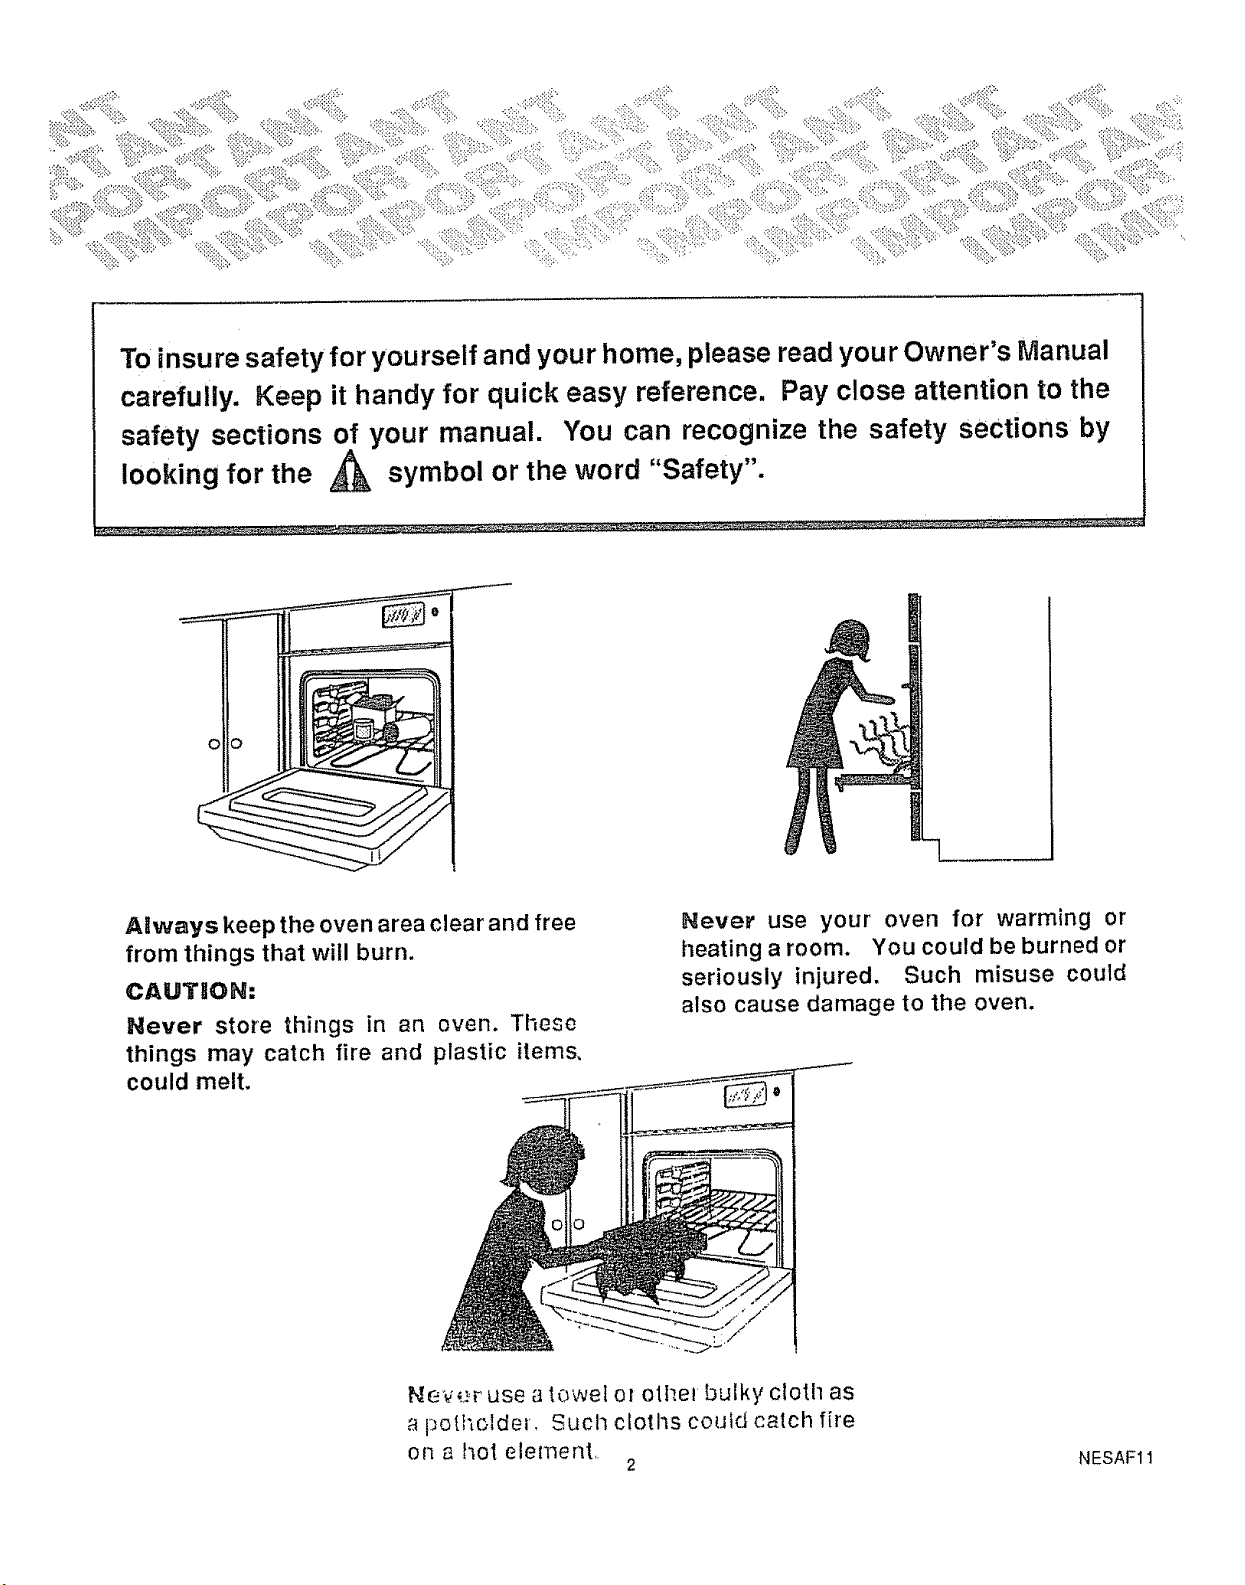
Always keep the oven area clear and free
from things that will burn.
CAUTION:
Never store things in an oven. These
things may catch fire and plastic items,
could melt.
Never use your oven for warming or
heating a room, You could be burned or
seriously injured, Such misuse could
also cause damage to the oven.
Nev:.,,F use a lowel ot otllel bulky clolll as
a poihoider. Sucl_ cloths could catch fire
on a hot element
2
NESAF11

BASUC SAFETY PRECAUTIONS
Keep this book for later use.
Be sure your oven Is tnstatled and grounded properly
by a qualified technician.
Always use dry potholders when removing pans from,
the oven. Moist or damp potholders can cause steam
burns_
Always follow cleaning instructions in thts book
Always keep the oven clean. Food and grease are easy
to Ignite. Clean the oven and vents regularly.
Clean Only Parts Listed in Manual.
CAUTION: Do not store items of interest to
chiBdren in c_binets above the even Children
climbing ;o reach iiterns couJd be seriously in-
jured.
,_Jwavs keep combustible wall coverings, curtains, or
drapes a safe distance away from your oven.
_dlways keep dish towels, dish cloths, potholders and
other linens a safe distance away from your oven. Never
store such Items in your oven.
Always keep the appliance area clear and free from
things that will burn (gasoline and other flammable
vapors and liquids),
Never try to repair or replace any part of the oven
unless Instructions are gtven tn thls book, All other
work should be done by a skilled technician.
Never heat unopened food contalnerso Pressure
buildup may make container burst and cause Injury.
Never leave jars or cans of fat ordripptngs in or near the
oven, Never let grease build up tn your oven. You can
keep grease fires from starting If you clean up grease
and spills after each oven use.
Never try to move a pan of hot fat, especially adeep fat
fryer. Wait until the fat has cooled.
Never touch the heating elements or interior surfaces
of the oven. They may be hot even though they appear
dark in color,
Always keep wooden utensils, plastic utensils or canned
food a safe distance away from your oven.,
Some cleaners produce nox-
ious fumes and wet cloths or
sponges could cause steam
burns If used on a hot surface_
NOTE:
Be sure the oven is securely insta|led in a cabi.
net that is firmly attached to the house struc.
ture, Weight on _he overt door could potentially
cause _he oven _o tip and result in injury, Never
_iJow anyone to ci_mb, si_, stand or hang on the
oven door.
OVEN S ,F TY
Place oven racks tn desired position while oven Iscool.
If rack must be moved while oven Is hot, do not let
potholder contact hot heating element in oven,
Af[er broiling, always take the broiler pan out of the
oven and clean It. Leftover grease In the broiler pan can
catch on fire the next time you use the pan.
Always use care when opening oven door. Let hot air
and steam escape before moving food.
Neveruse aluminum loll to line oven bottoms, Improper
use of foil could start a fire.
$I LF=CL AI SAFETY
If _he self-cleaning mode malfunctions, turn off
and disconnect the power supply. Have serviced by a
qualified technician.
Always remove broiler pan and other utenslls from the
oven before a self-clean cycle.
Never rub, move, or damage the door gasket on self-
cleaning ranges_ The gasket is essential for a good seat.
Never try to clean utensils, cookware or removable
parts of your oven during a self-clean cycle.
Do Not Use Oven Cleaners _ No commercial oven
cleaner or oven liner protective coating of any kind
should be used in or around any part of the oven.
3 NESAF84
READ AND UNDERSTAND
THIS tNFORMATBON NOW.w
Should you ever need it, you wilU
not have t_e for reading,
Be sure everyone in your home
knows what to do in case of fire.
Never use water on a grease fire -
it wiU_ onlly spread the flameso
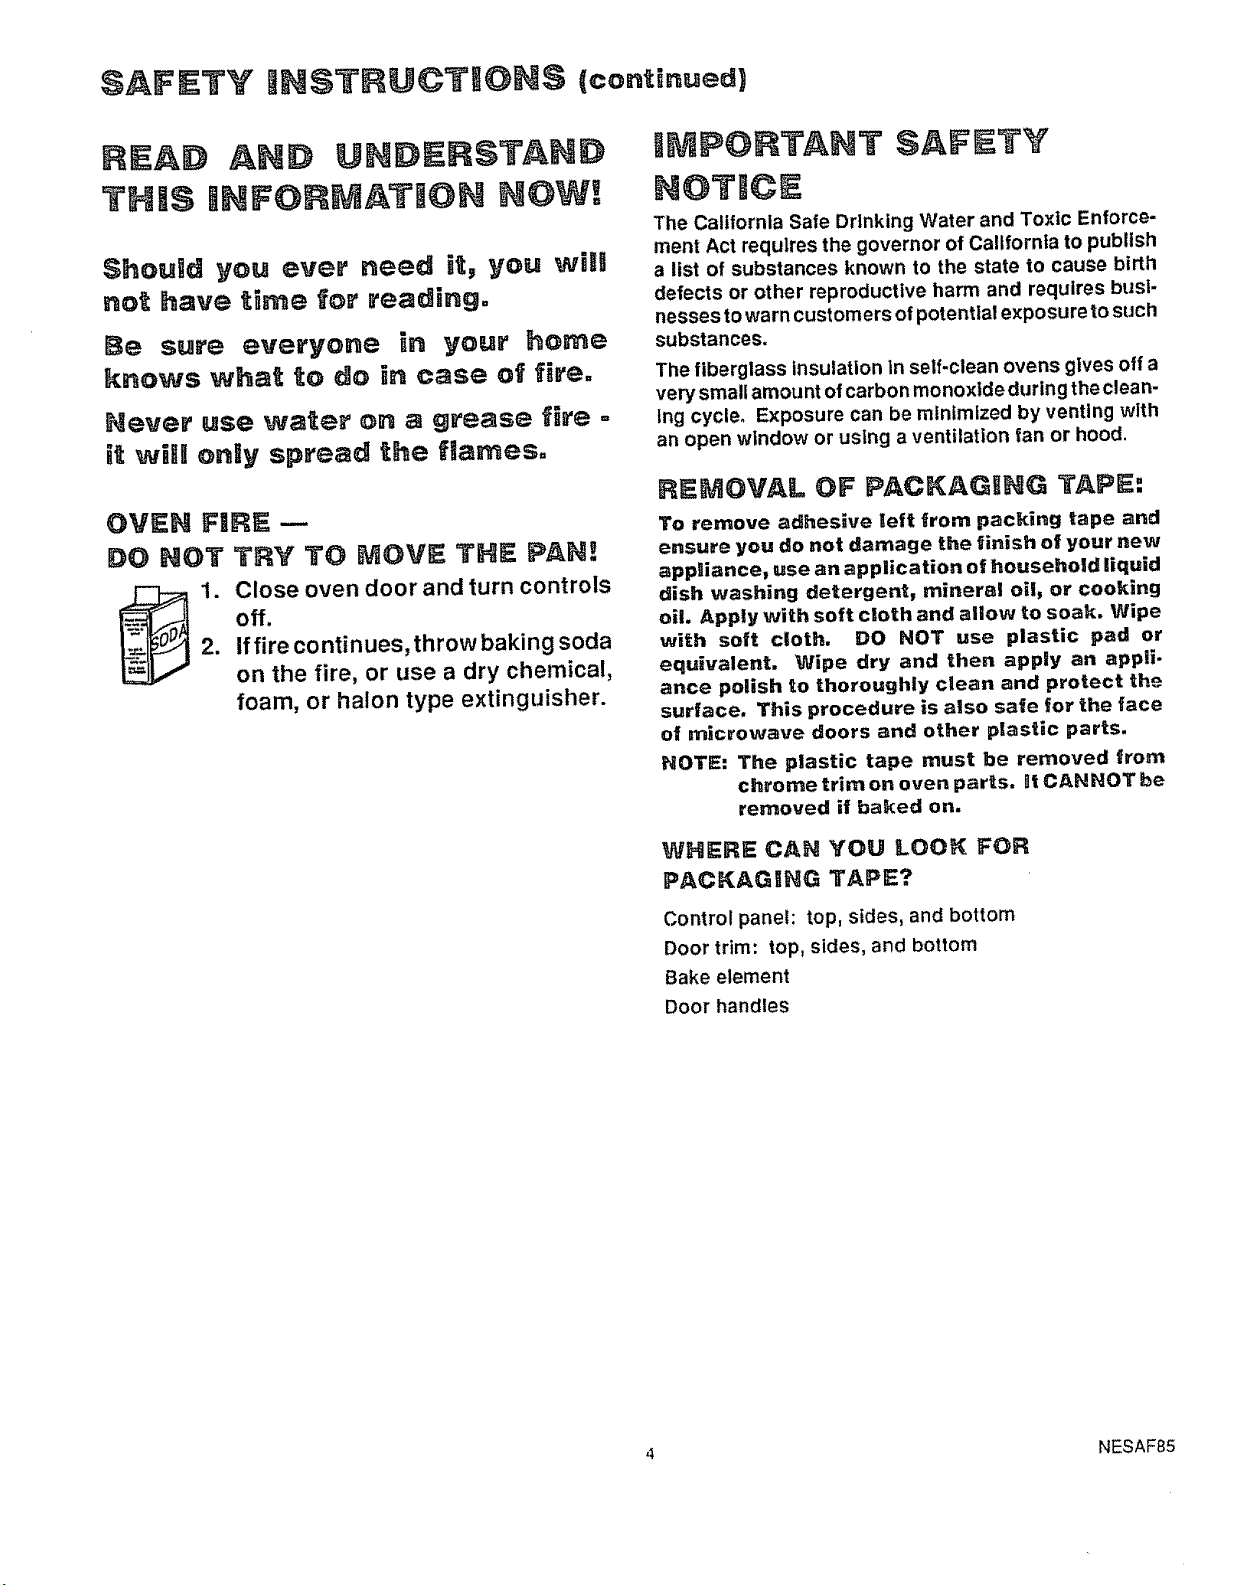
OVEN FRRE --
DO NOT TAY TO MOVE THE PAN. !
Close oven door and turn controls
off.
If fire continues, throw baking soda
on the fire, or use a dry chemical,
foam, or halon type extinguisher.
iMPORTANT SAFETY
NOTBCE
The California Safe Drinking Water and Toxic Enforce-
ment Act requires the governor of Callforn|a to publlsh
a list of substances known to the state to cause birth
defects or other reproductive harm and requires busi-
nesses to warn customers of potential exposure to such
substances.
The fiberglass Insulation in self-clean ovens gives off a
very small amount of carbon monoxide durtng the clean-
lng cycle. Exposure can be rnlnfmized by venting with
an open window or using a ventilation fan or hood,
AEMOVAL OF PACKAGING TAPE:
To remove adhesive left from packing tape and
ensure you do not damage the _iinish of your new
appliance, use an application of household liquid
dish washing detergent, mineral oil, or cooking
oil. Apply with soft cloth and allow to soak. Wipe
with soft cloth. DO NOT use plastic pad or
equivalent. Wipe dry and then apply an appli.
ance polish to thoroughly clean and protect the
surface, This procedure is also safe for the face
of microwave doors and other plastic parts.
NOTE: The plastic tape must be removed from
chrome trim on oven parts. _tCANNOT be
removed if baked on.
WHERE CAH YOU LOOK FOR
PACKAGIHG TAPE?
Control panel: top, sides, and bottom
Door trim: top, sides, and bottom
Bake element
Door handles
4 NESAF85
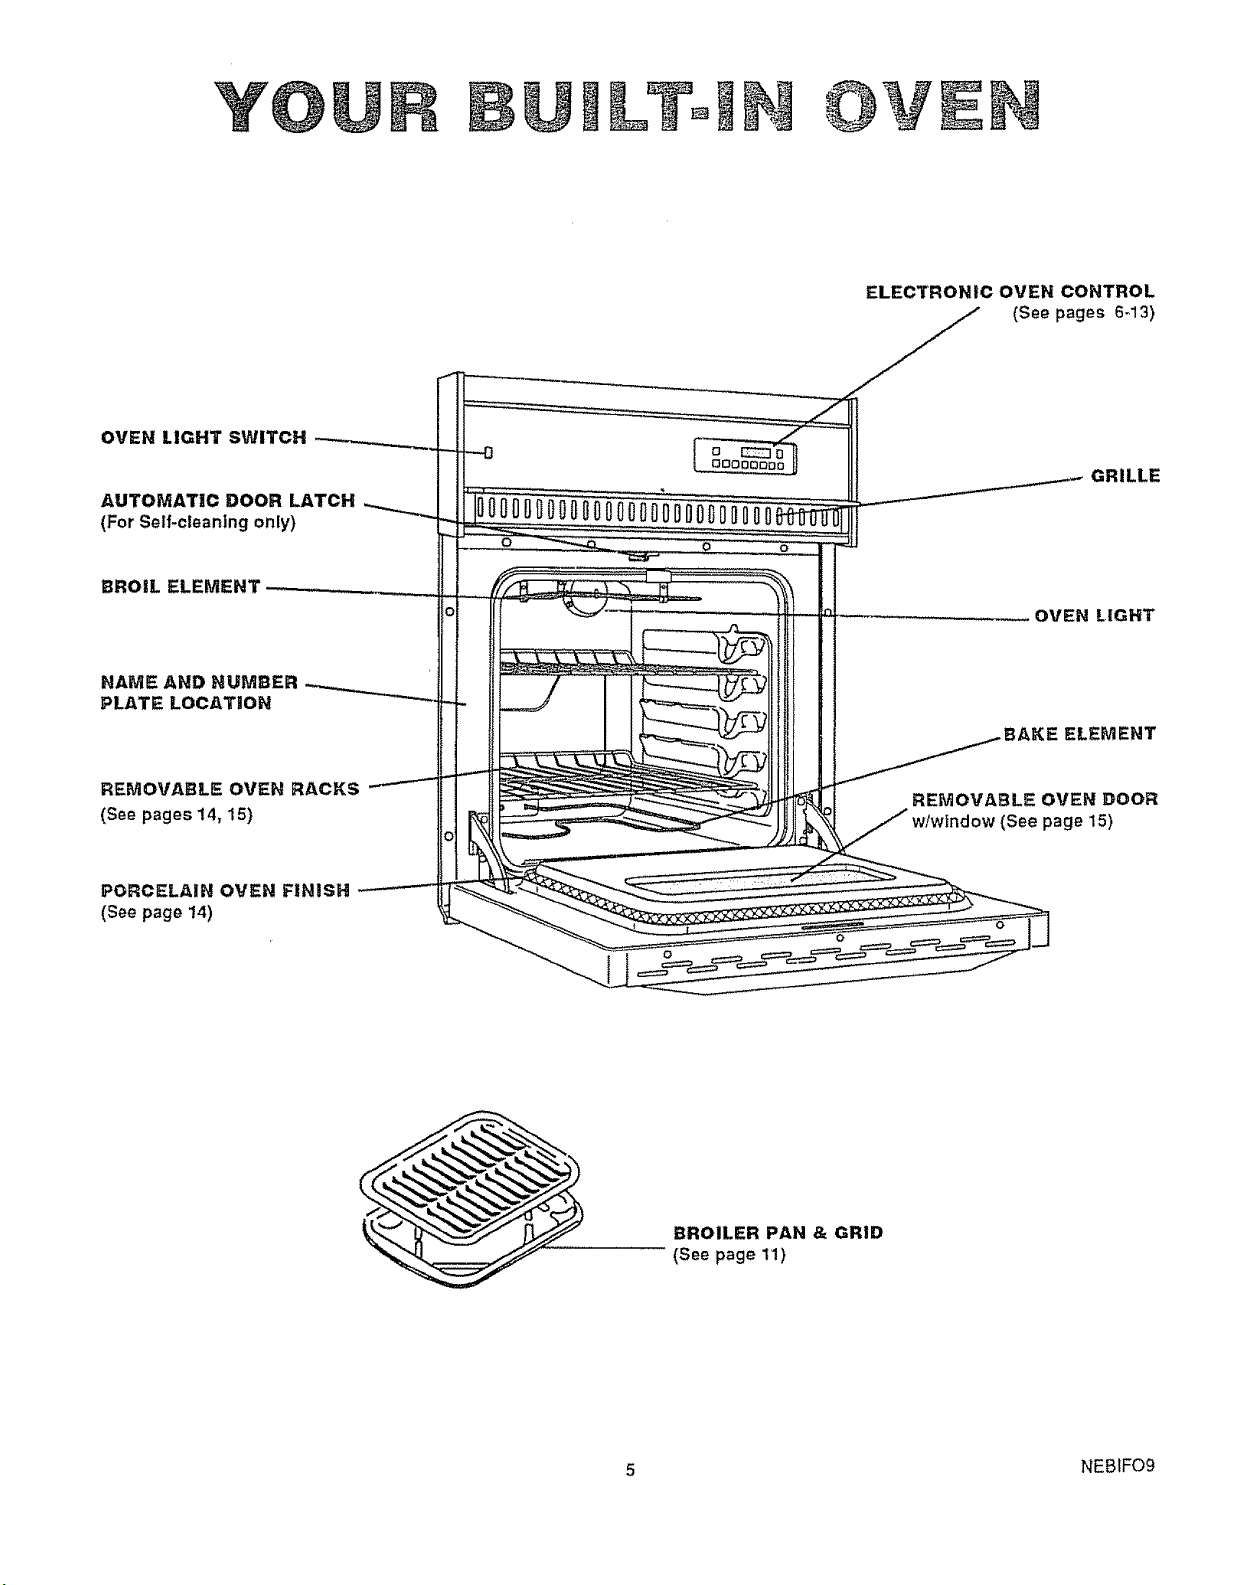
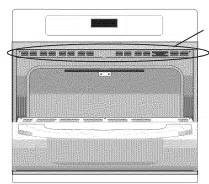
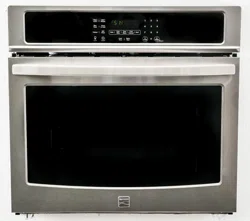
Y@U LTo
H
OVEN LIGHT SWITCH _------"H
II
AUTOMATIC DOOR LATCH _ I I
(For Self-cleaning only) -""'_ _
111
BROIL ELEMENT-
]If
NA.EANDNU._ER--._ _11I
PLATELOCATION __
REMOVABLEOVENRACKS----- Ill
PORCELAIN OVEN FINISH ------'-_H _
(See page 14)
ELECTRONIC OVEN CONTROL
(See pages 6_13)
GRILLE
OVEN LIGHT
ELEMENT
REMOVABLE OVEN DOOR
(See page 15)
BROILER PAN & GRID
(See page 11)
5 NEBIFO9
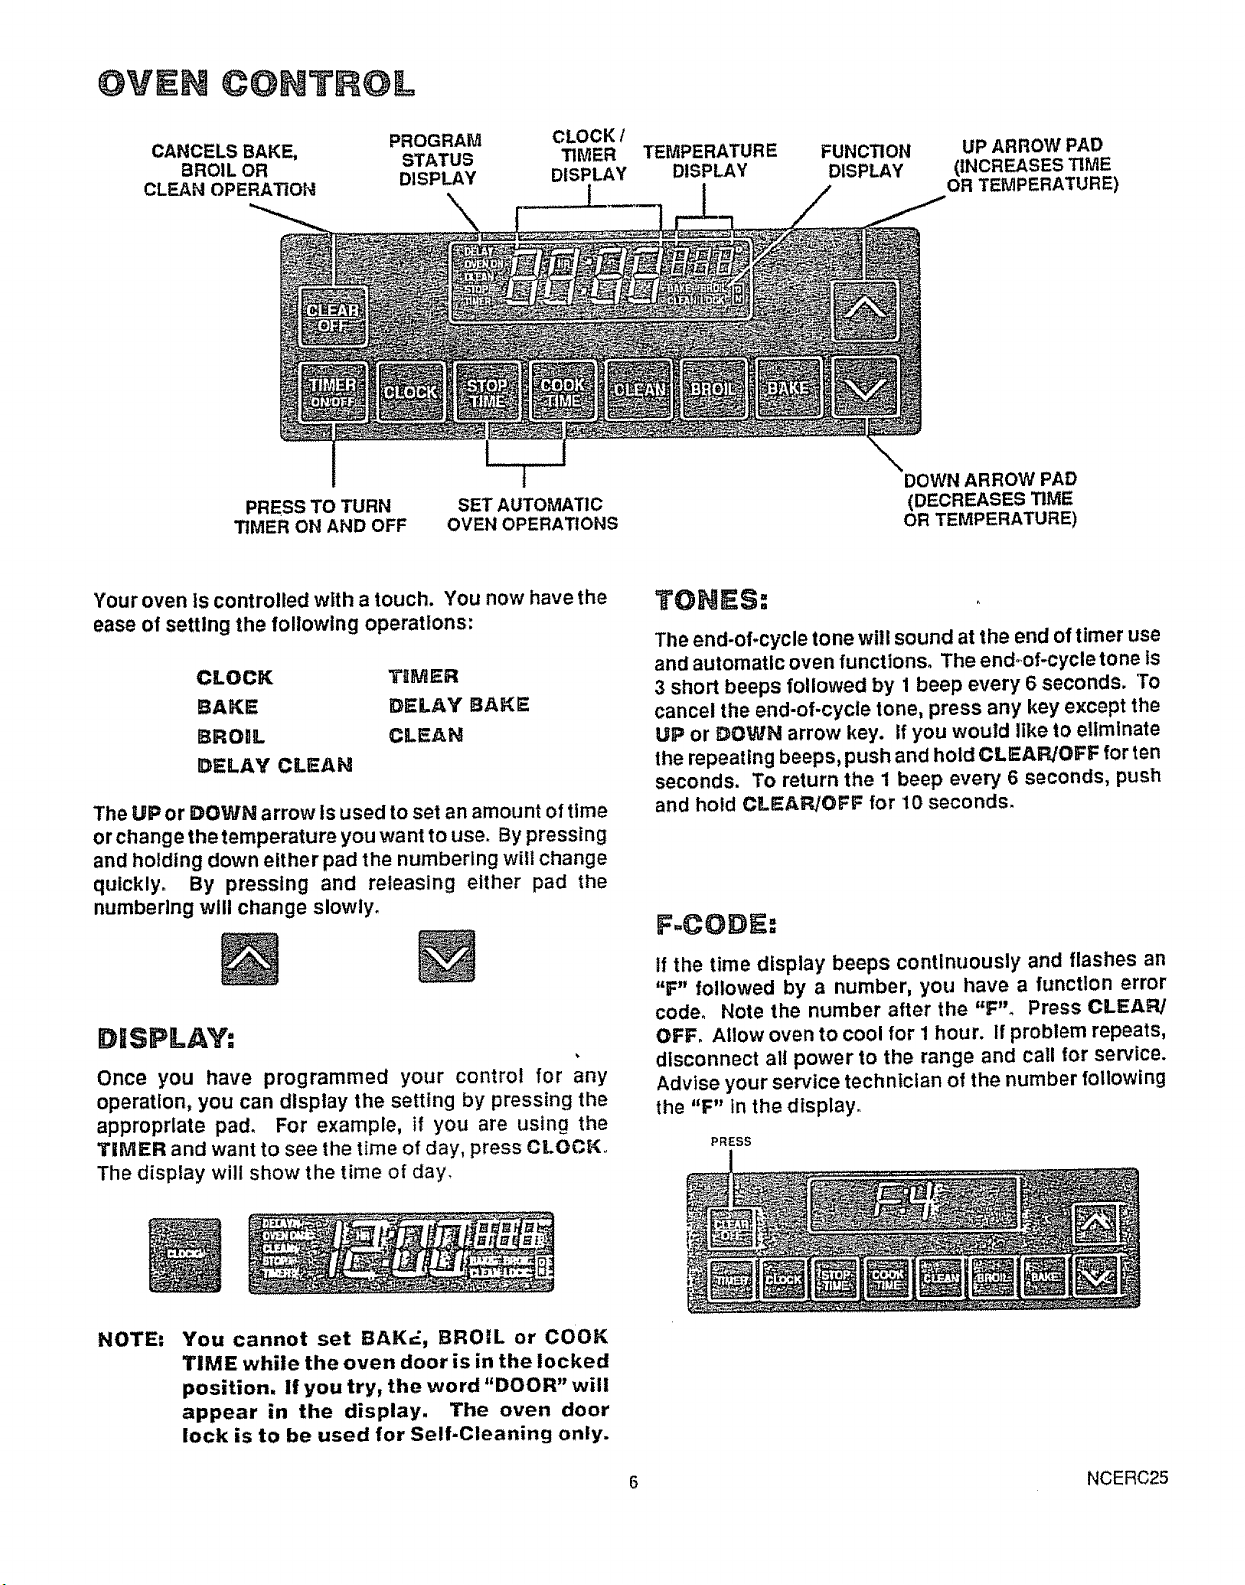
OVEN COHTROL
CANCELSBAKE, PROGRAM CLOCK/
STATUS _MER
BROIL OR DISPLAY DISPLAY
CLEAN OPERATION \ L
TEMPERATURE
DISPLAY
FUNC_ON
DISPLAY
UP ARROW PAD
(INCREASES TIME
OR TEMPERATURE)
PRESS TO TURN
_MER ON AND OFF
SET AUTOMATIC
OVEN OPERATIONS
DOWN ARROW PAD
(DECREASES TIME
OR TEMPERATURE)
Your oven is controlled wtth a touch. You now have the
ease of setUng the following operatlons:
CLOCK TIMER
BAKE DELAY BAKE
BROIL CLEAN
DELAY CLEAN
The UP or DOWN arrow Is used to set an amount of time
or chang e the temperature you want to use. By pressing
and holding down either pad the numbering will change
quickly. By pressing and releasing either pad the
numbering will change slowly.
DUSPLAY:
Once you have programmed your control for any
operatlon, you can dlsplay the settlng by pressing the
appropriate pad. For example, if you are using the
TIMER and want to see the time of day, press CLOCK
The display will show the time of day.
TONES:
The end-of-cycle tone will sound at the end of timer use
and automatic oven functions. The endoof-cycle tone is
3 short beeps followed by 1 beep every 6 seconds. To
cancel the end-of-cycle tone, press any key except the
UP or DOWN arrow key. If you would like to eliminate
the repeating beeps, push and hold CLEAR/OFF for ten
seconds. To return the I beep every 6 seconds, push
and hold CLEAR/OFF for 10 seconds.
F.CODE:
if the time display beeps continuously and flashes an
"F" followed by a number, you have a function error
code° Note the number after the "F". Press CLEAR/
OFF. Allow oven to cool for 1 hour. If problem repeats,
disconnect all power to the range and call for service.
Advise your service technician of the number following
the "F" in the dtsptay.
PRESS
NOTE:
YOU cannot set BAK=:, BROIL or COOK
TIME while the oven door is in the locked
position, if you try, the word "DOOR" will
appear in the display. The oven door
lock is to be used for Self-Cleaning only.
6 NCERC25
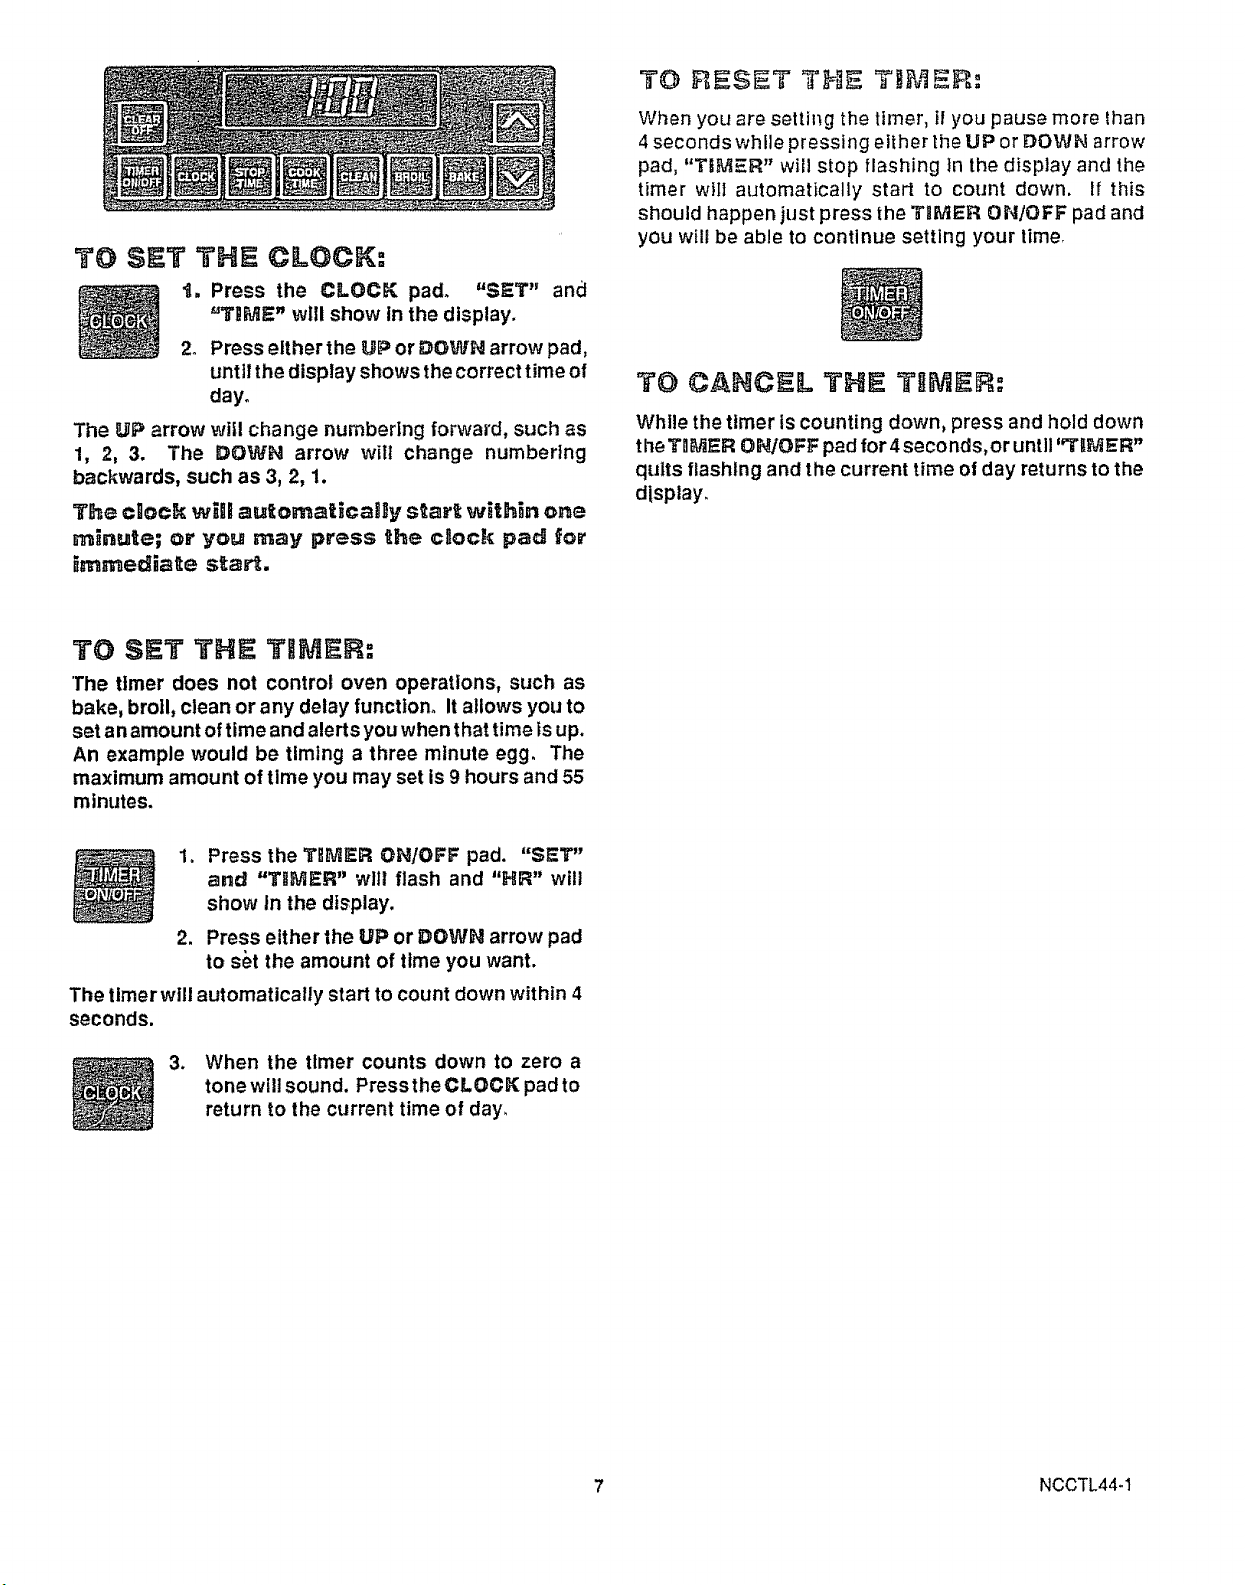
TO SET THE CLOCK:
% Press the CLOCK pad_ "SET" and
=TIIME" will show in the display.
2o Press eltherthe UP or DOWN arrow pad,
until the display shows the correct time of
day°
The UP arrow wifl change numbering forward, such as
1, 2, 3. The DOWN arrow will change numbering
backwards, such as 3, 2, 1.
The clock will automatically start within one
minute; o_ you may press the clock pad for
immediate sta_.
TO RESET THE TBMER:
When you are setting the timer, tl you pause more than
4 seconds while pressing either the UP or DOWN arrow
pad, "TIMER" will stop flashing In the display and the
timer will automatically start to count down. If this
should happen just press the THVtER ON]OFF pad and
you wilt be able to continue setting your time.
TO CANCEL THE TIME :
While the timer Is counting down, press and hold down
the TnMER ON/OFF pad for 4 seconds, or until '"Tltt'_ER"
quits flashlng and the current time of day returns to the
display.
TO SET THE TIMER:
1"he timer does not control oven operations, such as
bake, broil, clean or any delay function. It allows you to
set an amount oftime and alerts you when that time isup.
An example would be timing a three minute egg. The
maximum amount of time you may set is 9 hours and 55
minutes.
1. Press the TliMER ON/OFF pad. "SET"
and "TIMER" wit1 flash arid "HR" will
show In the display.
2. Press elther the UP or DOWN arrow pad
to s_t the amount of time you want.
The timer will automatically start to count down within 4
seconds.
3. When the timer counts down to zero a
tonewlll sound. PresstheCLOCK pad to
return to the current time of day.
7 NCCTL44-1
OVEN COOK|NG
GENERAL RULES
, When cooking a food for the first time in your new
oven, use time given on recipes as a guide.
Your new oven has been set correctly at the factory
and Is apt to be more accurate than the oven it
replaced.
After you have used your oven for awhile, If you feel
your oven should be hotter orcooler, you can adjust
ityourself. See TEMPERATURE ADJUSTMENTS
in this manual.
• NO PEEKING.-- Opening the door too often to check
food during baking will allow heat loss and may
cause poor baking results,
• Theremaybesomeodorwhentheovenisflrstused.
This Is caused by the heating of new parts and
Insulation.
• Do not cover an entire oven rack with foil The foil
can block normal heat flow and cause poor baking
results° Do not place any foil directly above the bake
element. Foil used on the oven bottom under the
element may damage the oven surface, therefore, it
should not be used_
PREHEATING
When recipes require preheating, have food nearby
before you open the oven door, if the oven door is
allowed to remain open for more than a brief time,
the preheat temperature will be lost.
Let the oven preheat thoroughly before cooking
baked products. Watch forthe Preheat indicator
Light to come on or listen for a notification tone. If
your oven is not equipped with either of these,
preheat for 10 minutes and put the food In the oven.
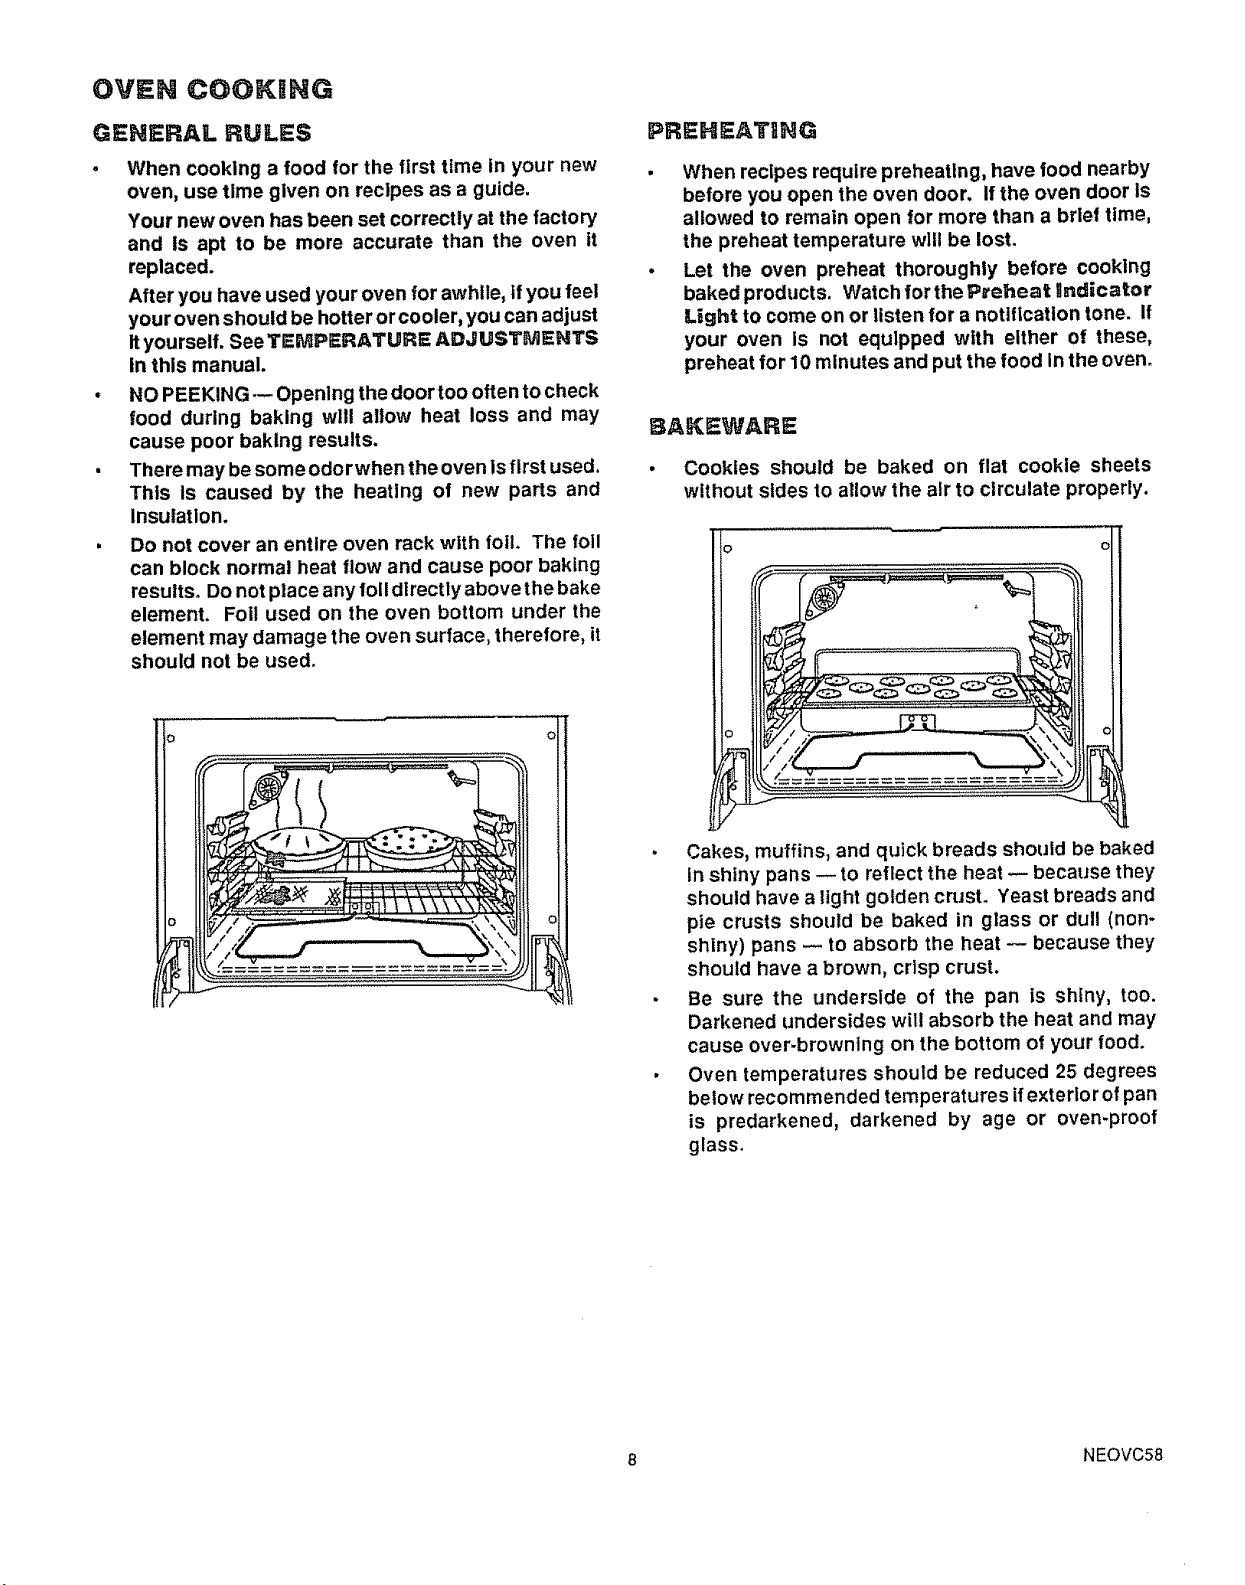
BAKEWARE
• Cookies should be baked on flat cookle sheets
without sides to allow the air to circulate properly.
• Cakes, muffins, and quick breads should be baked
in shiny pans -- to reflect the heat -- because they
should have a light golden crust. Yeast breads and
pie crusts should be baked in glass or dull (non-
shiny) pans -- to absorb the heat -- because they
should have a brown, crisp crust.
• Be sure the underside of the pan is shiny, too.
Darkened undersides will absorb the heat and may
cause over-browning on the bottom of your food.
, Oven temperatures should be reduced 25 degrees
below recommended temperatures ifexterior of pan
is predarkened, darkened by age or oven-proof
glass.
8 NEOVC58
BAKING:
, Always follow recipe carefully.
• Measure Ingredients properly°
, Use proper pan and rack placement to obtain the
best cooking results.
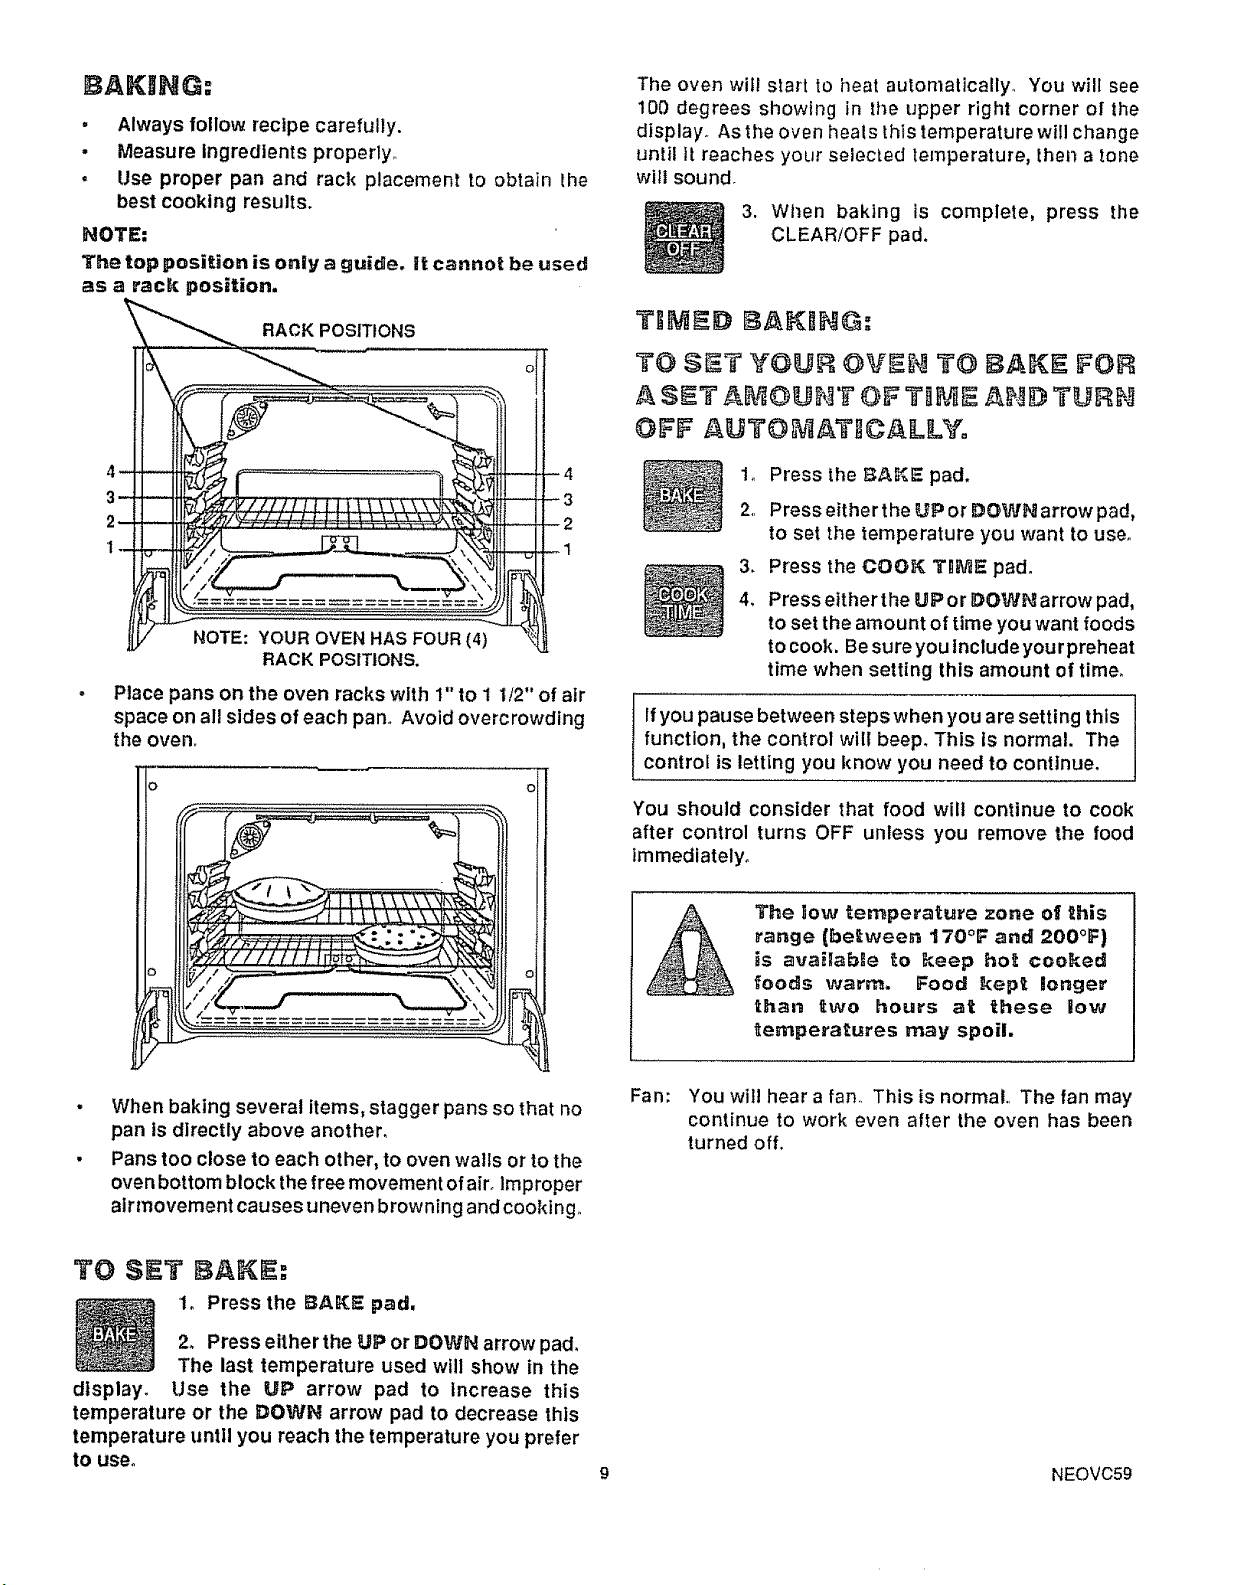
NOTE:
The top position is only a guide, it cannol_ be used
as a rack position.
RACK POSITIONS
NOTE: YOUR OVEN HAS FOUR (4)
RACK POSITIONS,
-4
--3
2
--1
Place pans on the oven racks with 1" to 1 1/2" of air
space on all sides of each pan. Avoid overcrowding
the oven.
The oven will start to heat automatically_ You will see
100 degrees showing in tl_e upper right corner of the
display. As the oven heals this temperature will change
until it reaches your selected temperature, ther_ a tone
will sound,
3. When baking is complete, press the
CLEAR/OFF pad.
TIMED BAKING:
TO SAT YOUA OVAN TO BAKA FOR
A SET OF TI E AN# TURN
OFF AUTO ATI]CALLYo
3_
4,
Press the BAKE pad,
Press either the UP or DOWN arrow pad,
to set the temperature you want to use°
Press the COOK TiME pad.
Press either the UPor DOWN arrow pad,
to set the amount of time you want foods
to cook, Be sure you Include your preheat
time when setting this amount of time,
If you pause between steps when you are setting thls
function, the control will beep. This ts normal. The
control is letting you know you need to continue.
You should consider that food will continue to cook
after control turns OFF unless you remove the food
immediately°
The low temperature zone ot 1this
range (between 170°F and 200°F}
is available _o P_eep ho_ cooked
_oods warm. Food kept longer
than two hours at _hese low
temperatures may spoil,
When baking several items, stagger pans so that no
pan is directly above another,
Pans too close to each other, to oven walls or to the
oven bottom block the free movement of air. Improper
alr movement causes uneven browning and cooking,.
Fan:
You will hear a fan. This is normal.. The fan may
continue to work even after the oven has been
turned off.
2, Press either the UP or DOWN arrow pad,
The last temperature used will show in the
Use the UP arrow pad to Increase this
temperature or the DOWN arrow pad to decrease this
temperature until you reach the temperature you prefer
tO use.
display.
NEOVC59
TO SET YOUR OV[EIR FOR A DSLAYI_D
START A_D AUTOMAT!;C STOP
While setting this operation you will not need to
calculate when the oven will turn on; the control will
do this for you, You will need to set the following:
1, Temperature 2_Cooking Time 3. Stop Time
2,
3_
4o
5_
6.
72
Press the BAKE pad,
Press the UP or DOWN arrow pad to
select the temperature you want.
Press the COOK TiME pad°
Press the UP arrow to select how tong
you want food to cook, Be sure to
include your preheat time.
Press the STOP TiME pad_
Press the UP arrow pad to enter the time
of day you want the oven to turn off, The
oven will shut off automatically when the
preset STOP TIME is reached°
Press the CLOCK pad to return the dis-
play to the current time of day°
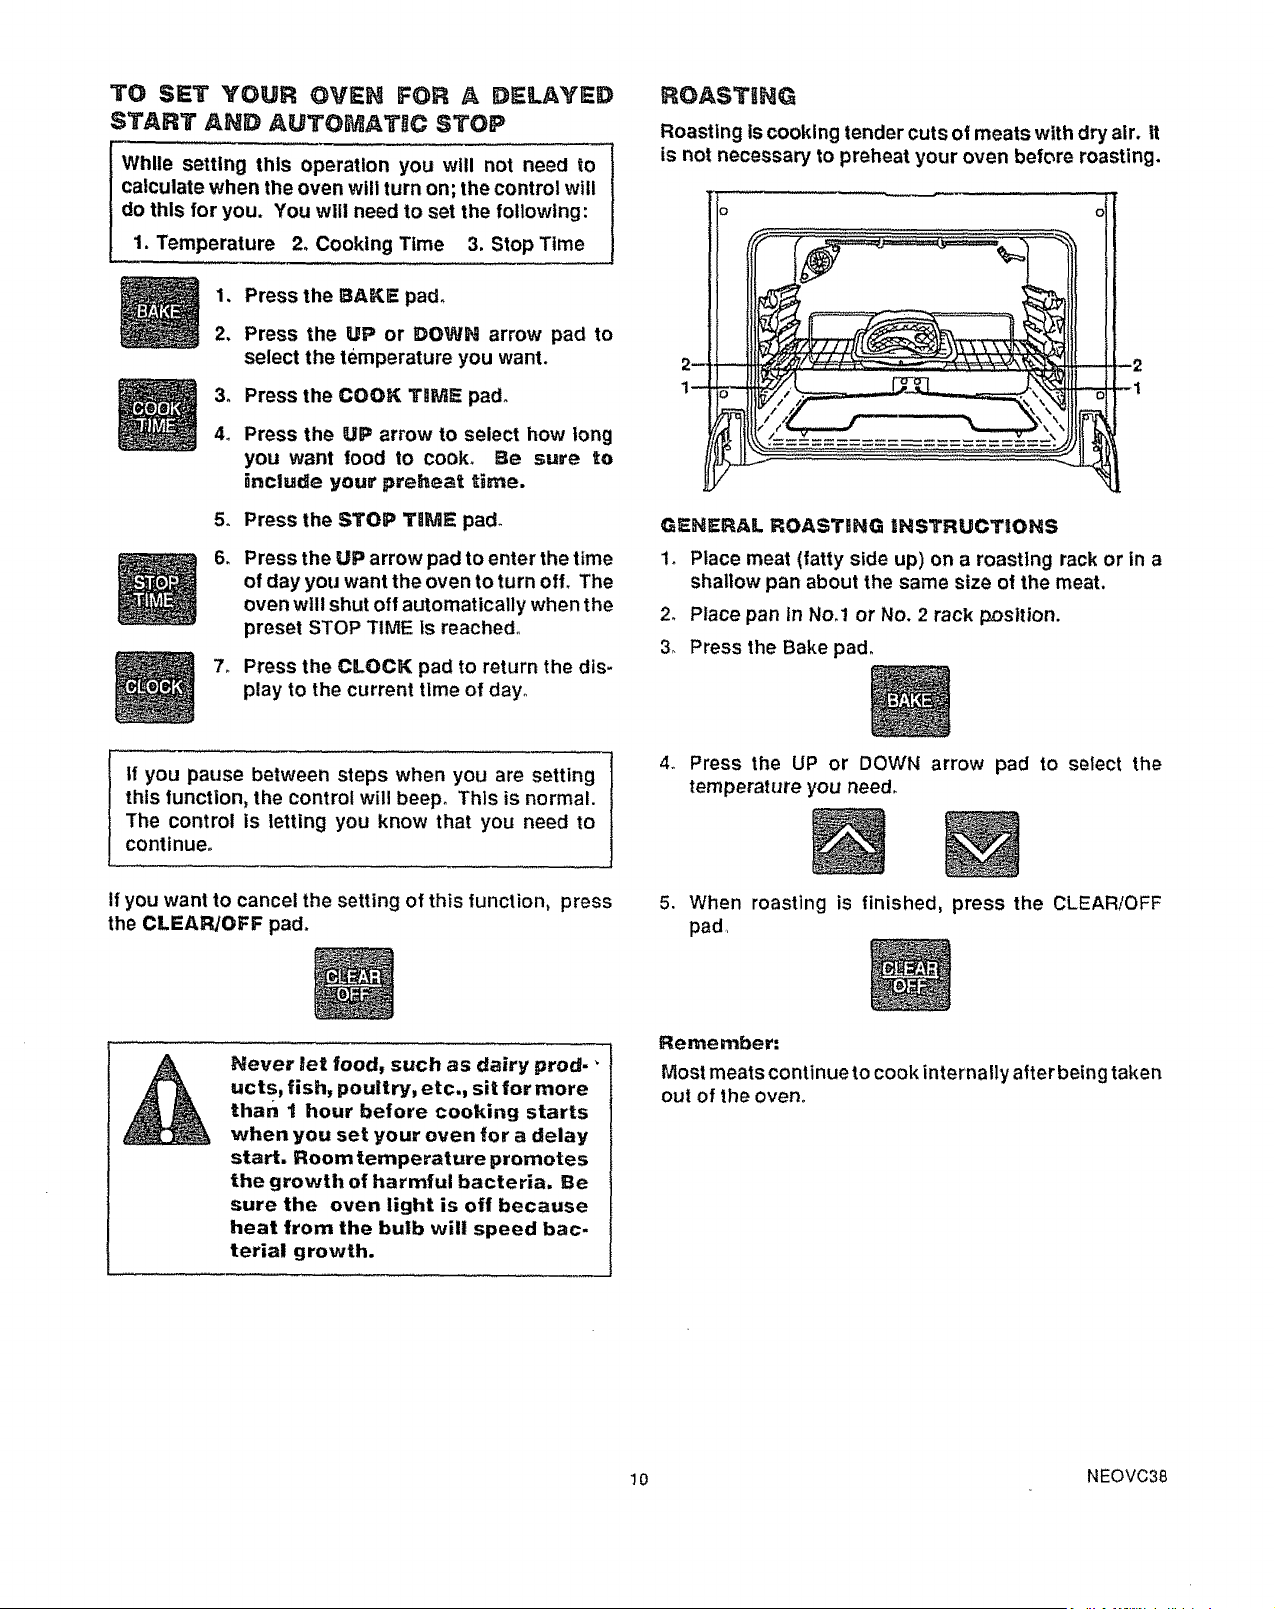
ROASTING
Roasting Is cooking tender cuts of meats with dry air, it
is not necessary to preheat your oven before roasting,
GENERAL ROASTING iNSTRUCTitOHS
1o Place meat (fatty side up) on a roasting rack or in a
shallow pan about the same size of the meat,
2, Place pan in No,1 or No, 2 rack position.
3_ Press the Bake pad_
tf you pause between steps when you are setting
this function, the control will beep. This is normal.
The control is letting you know that you need to
continue.
4_
Press the UP or DOWN arrow pad to select the
temperature you need.
if you want to cancel the setting of this function, press
the CLEARJOFF pad,
5. When roasting is finished, press the CLEAR/OFF
pad,
A
Never met food, such as dairy prod-"
ucts, fish, poultry, etc., sit for more
than I hour before cooking starts
when you set your oven for a delay
start. Roomtemperature promotes
the growth of harmful bacteria. Be
sure the oven light is off because
heat from the bulb will speed bac-
terial growth.
Remember:
Most meats continueto cook internally after being taken
out of the oven°
10 NEOVC38
BROBL NG
BROILING TIPS:
I
Please note: _I _ _
Your oven door shouid t .<
be open to the broil stop _S __
position while broiling, \-_/
<f._/
• Use only the brolier pan and grid that came with your
range for broiling. They are designed for proper
drainage of fat and liquids and help prevent spatter.
smoke or fire.
• Do _o_ p_'eheat when broiling, For even broiling
on both sides, start tl_e food on a cold pan.
. Trim the outer layer of fat from steaks and chop& Slit
the fatty edges to keep the meat from curling°
• For maximum juiciness, salt the first side just before
turning the meat. Salt the second side just before
serving.
, Brush chicken and fish with butter several times as
riley broil. When broiling fish, grease the grid to
prevent sticking. It ts not necessary to turn fish,
Broil chicken skin side down.
, Never leave a soiled broiler pan in the oven.
Grease in the pan may smoke or burn the next time
the oven Is used.
• Be sure you know the correct procedure for putting
out a grease fire. See _he section on safety,
PO$ ITtOH NG BROILER PAt;
Broiling Is cooking by direct heat from the broil element.
Tender cuts of meat or marinated meat should be se-
lected for broiling, For best results, steaks and chops
should be at least 3/4" thick.
After placing food on the broiler pan and grid, put the
pan on an oven rack in the proper position. The recom-
mended rack posltton and cooking time can be found in
the following chart.
11
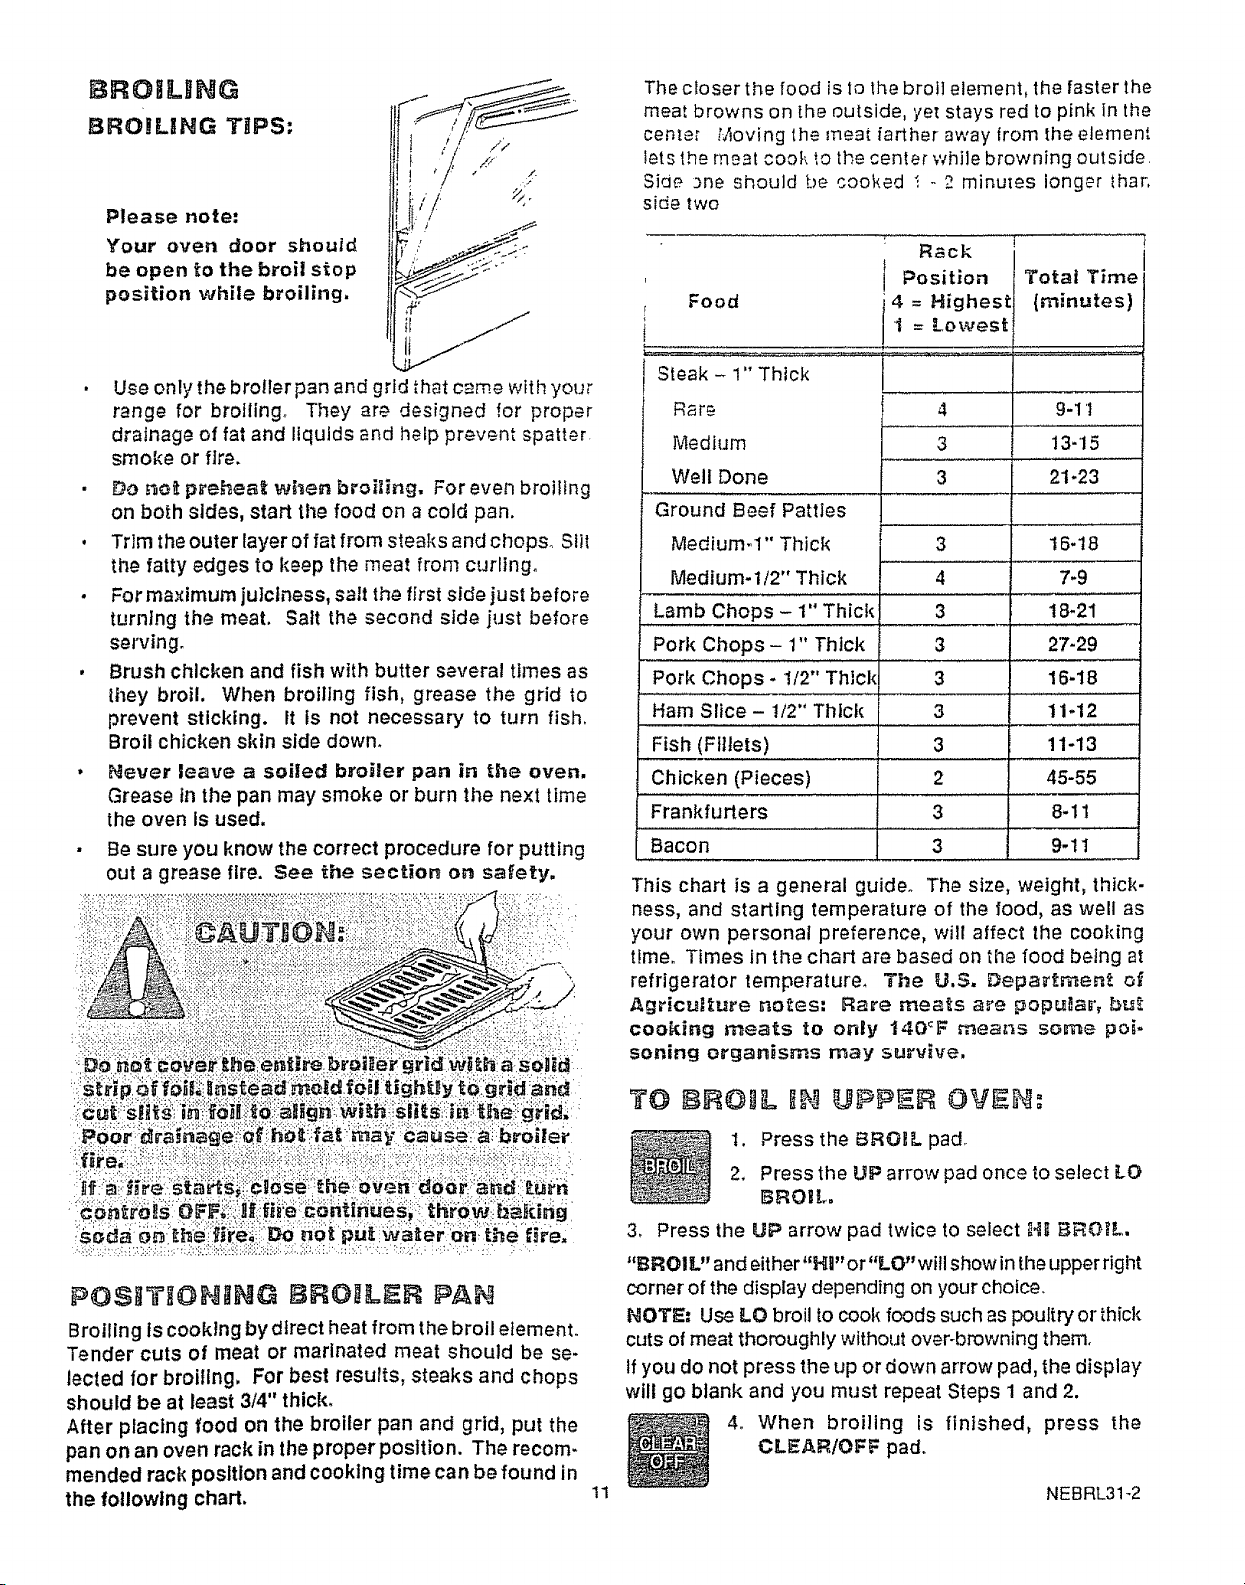
The closer the food is to the broi] element, the faster the
meat browns on the outside, yet stays red to pink In the
cenze; .t_ioving the meat farther away from the element
iets the meat cook _o the center while browning outside.
Side _ne should be cooked ! ° 2 minu_es longer _har,
side two
Food
Steak - 1" Thick
Rare
Medium
Well Done
Ground Beef Patties
Medium-l" Thick
Medium-l!2" Thick
.Lamb Chops - 1" Thick
Pork Chops- 1" Thick
Pork Chops - 1/2" Thick
,, , ,,,, , _,
Ham Slice - !/2" Thick
Rack
Position Totat Time
4 = Highest {minutes}
1 = Lowest
4
3
3
3
4
3
3
3
3
9-11
13-15
21-23
16-t8
7-9
18-21
27-29
16-18
11-12
Fish (Fillets) 3 11-13
Chicken (Pieces)
Frankfurters
Bacon
2 45-55
3 8-11
3 9-11
This chart is a general guide. The size, weight, thick-
ness, and starting temperature of the food, as well as
your own personal preference, will affect the cooking
time. Times in the chart are based on the food being at
refrigerator temperature. The U.S, Departmer_t o_
AgricuH:ure notes: Rare mea_s a_e popular_ buf:
cooking meats to only 140_F _ear_s some poi-
soning organisms may survive.
TO IIROIL Iii I,.tPPIIR OVIN:
1. Press the BROIL pad,
2, Press the UF arrow pad once to select LO
BROIL,
3, Press the UP arrow pad twice to select _'t_BROIL.
"BRO! L" and either "Hi" or "LO_'witl show in the upper right
corner of the display depending on your choice.
NOTE: Use LO broil to cook foods such as poultry or thick
cuts of meat thoroughly without over-browning them,
If you do not press the up or down arrow pad, the display
wtll go blank and you must repeat Steps 1 and 2.
4. When broiling is finished, press the
CLEAR!OFF pad,
NEBRL31-2
BEFORE A CLEAN CYCLE
1. Remove the broiler pan and grid, oven racks, all
utensils and any fell that may be in the oven. Do not
try to clean utensils or any other objects In the oven
during a self-clean cycle. If oven racks are left in
the range during a clean cycRe, they will darken,
lose their luster and become hard to slide, nf
you choose to leave the racks in _he oven, you
can ponish the edges o'_the racks with steel
wool and apply a small amount of vegetable oil
to the rack edges after the self.clean cycle.
This will make the racks easier to slide.
2oSoil on the oven front frame, under the front edge of
the cooktop, the door liner outside the door gasket
and the front edge of the oven cavity (about 1" into the
oven) will not be cleaned during a clean cycle (see
illustration below). Clean these areas by hand before
starting a clean cycle.
Use hot water with a soap-filled steel wool pad.. We
recommend a cleanser such as 'Soft Scrubby' brand
or a similar cleaning product to keep white surfaces
looking clean and new° After cleaning, rinse well to
help prevent a brown residue from forming when the
oven is heated° Buff these areas dry with a dry clothe
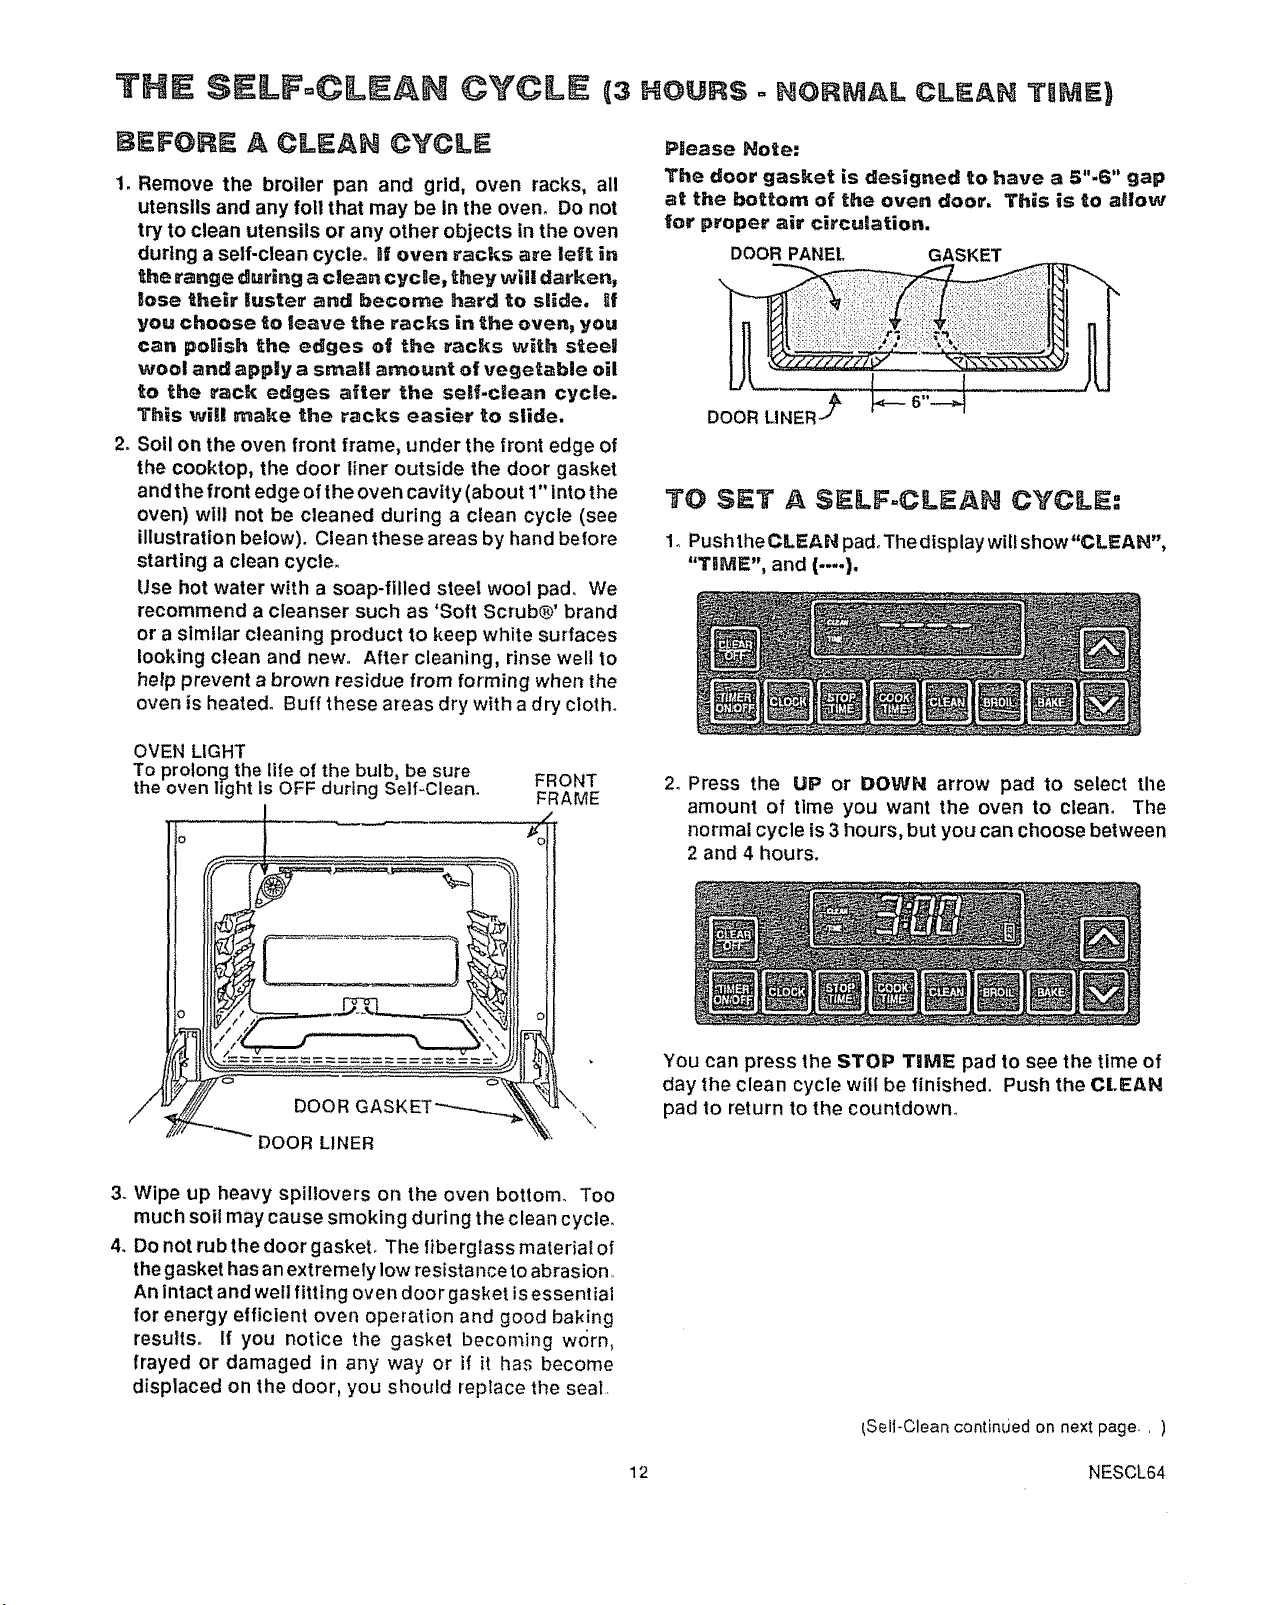
Please Note:
The door gasket is designed to have a 5"-6" gap
at the bottom of the eve. door, This is to allow
_or proper air circulation,
DOORPANEL GASKET
DOOR LINER _
TO SET A S =LF.CLEAN CYCLE:
1oPush theCLEAN pad. The display will show"CLEAN",
"TilViE", and (.... ).
OVEN LIGHT
To prolong the life of the bulb, be sure
the oven hght is OFF during Self-Clean.
FRONT
FRAME
2. Press the UP or DOWN arrow pad to select tile
amount of tlme you want the oven to clean. The
normal cycle is 3 hours, but you can choose between
2 and 4 hours.
DOOR GAS
DOOR LINER
You can press the STOP TIME pad to see the time of
day the clean cycle will be finished. Push the CLEAN
pad to return to the countdown°
3. Wipe up heavy spillovers on the oven bottom. Too
much soil may cause smoking during the clean cycle.
4. Do not rub the door gasket. Tl_efiberglass material of
the gasket has an extremely low resista nceto abrasion,.
An intact andwell fitting oven door gasket is essential
for energy efficient oven operation and good baking
results° If you notice the gasket becoming worn,
frayed or damaged in any way or if it has become
displaced on the door, you should replace the seal.
12
IS_lJ-Clean continued on next page , )
NESCL64
(Self-Cleancontinued )
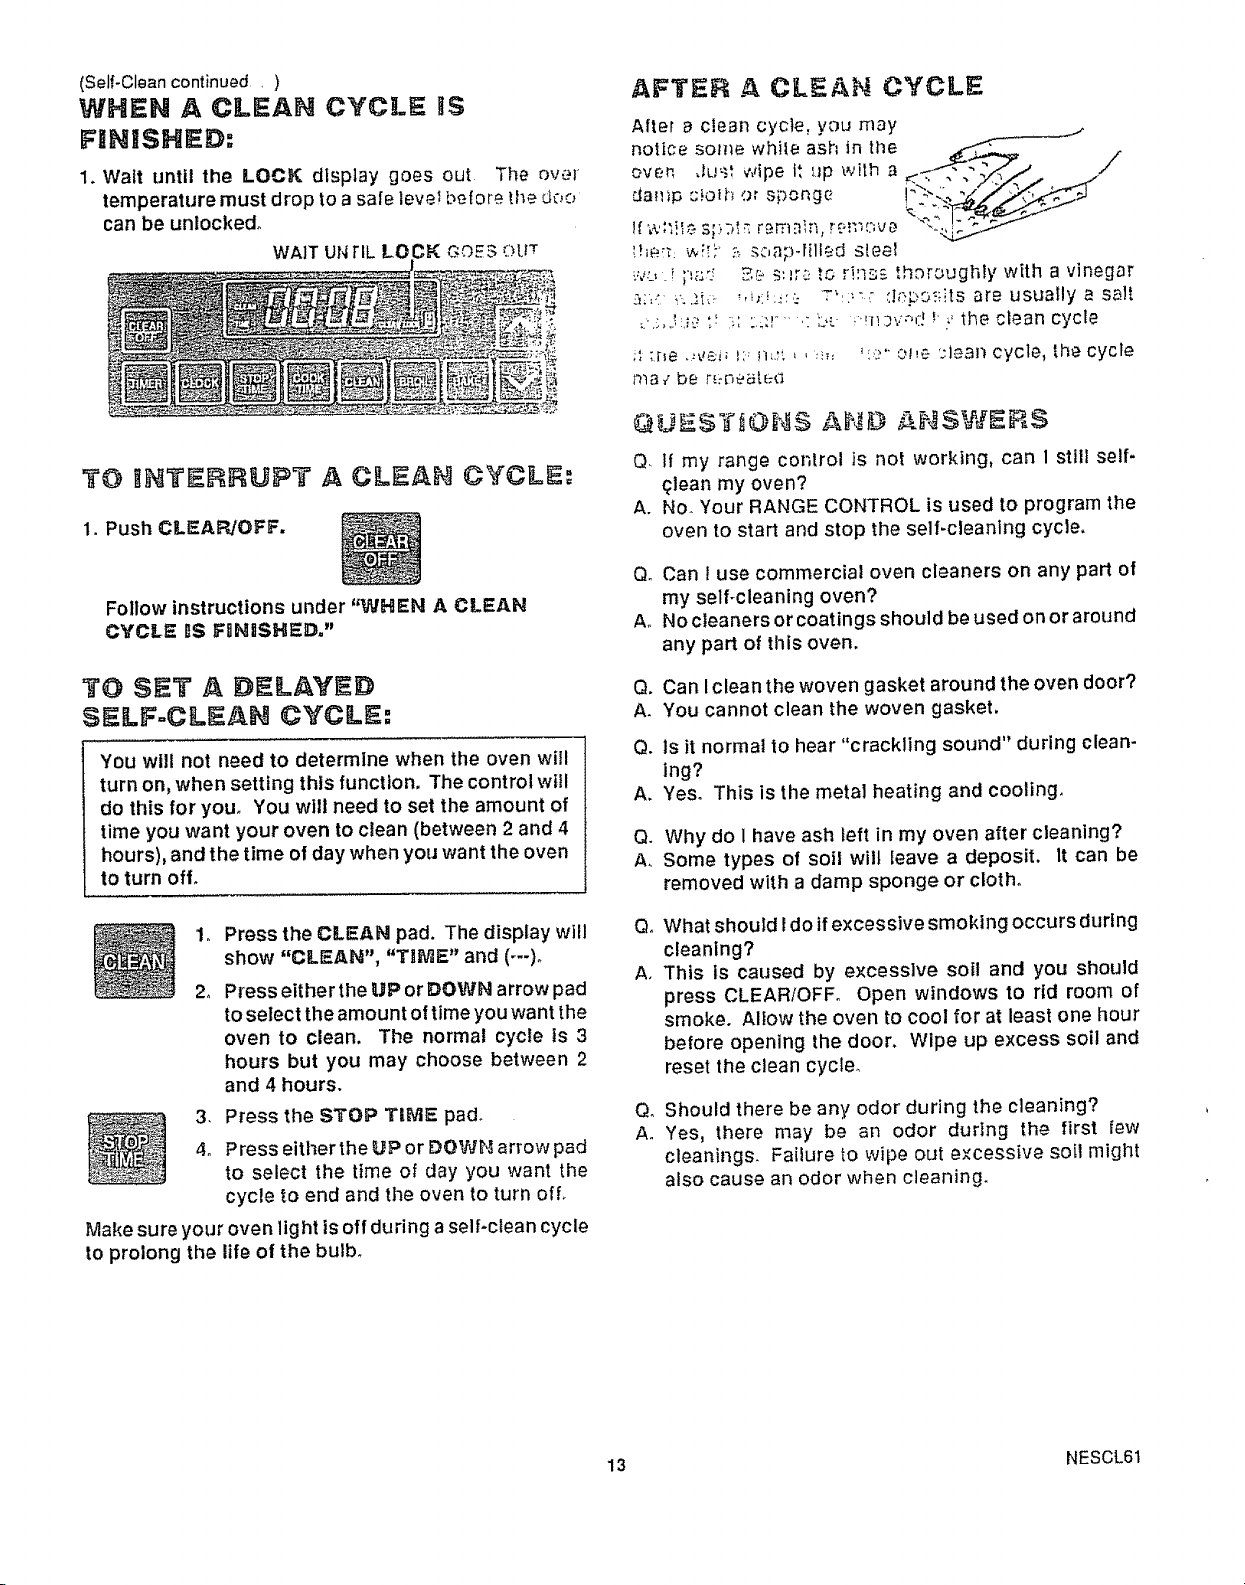
WHEN A CLEAN CYCLE
FINISHED:
1. Wait until the LOCK dlsptay goes out The over
temperature must drop to a sale leve! be[ore the dc_o
can be unlocked°
WAlT UNTIL LOCK GOES C)UT
TO iNTERRUPT A CLEAN CYCLE:
1. Push CLEAR/OFF.
Follow instructions under 'qNHEN A CLEAN
CYCLE i$ FONISHED,"
TO SET A DELAYED
SELF-CLEAN CYCLE:
You wll not need to determine when the oven will
turn on, when setting this function. The control will
do this for you. You wlll need to set the amount of
time you want your oven to clean (between 2 and 4
hours), and the time of day when you want the oven
to turn off.
2_
Press the CLEAN pad. The display will
show "CLEAN", "TIME" and (o--)o
Press either the UP or DOWN arrow pad
to select the amount of time you want the
oven to clean. The normal cycle is 3
hours but you may choose between 2
and 4 hours.
3, Press the STOP TIME pad°
4o Press eitherthe UP or DOWb_arrow pad
to select the time of day you want the
cycle to end and the oven to turn of L
Make sure your oven light is off during a self-clean cycle
to prolong the life of the bulb_
AFTER A CLEAN CYCLE
After a clean cycle, you may _._
oven JLb'.-.,wipe it _Jpwith _ < /
_,;,-: _':._i_. ,,_:_:_.:._ T'.:._ d_:.bo_:itsare usually a salt
,...;,J.=._.?1: }t ,._:t......: b-: _'r_:2v-_,::__ ,' the ctean cycle
;_:r_e .:_el; _:,i]_:", ,,_,, ",e" o!_e _:leal'_cycle, the cycle
t_]a_'be r:_.nea[ed
QIJISTiONI9 AHSWI 9
Q. tf my range conlrol is no! working, can 1still self-
,.lean my oven?
A. No_ Your RANGE CONTROL is used to program the
oven to start and stop the sell-cleaning cycle.
Qo Can I use commercial oven cleaners on any part of
my self-cleaning oven?
A. No cleaners or coatings should be used on or around
any part of this oven.
Q. Can Iclean the woven gasket around the oven door?
A. You cannot clean the woven gasket.
Q. Is it normal to hear "crackling sound" during clean-
ing?
A. Yes. This is the metal heating and cooling.
Q. Why do I have ash left in my oven after cleaning?
A. Some types of soil will leave a deposit. It can be
removed with a damp sponge or cloth.
Q_
A.
What should Ido if excessive smoking occurs during
cleaning?
This is caused by excessive sol and you should
press CLEAR/OFF. Open windows to rid room of
smoke. Allow the oven to cool for at least one hour
before opening the door. Wipe up excess soil and
reset the clean cycle°
Q_
A.
Should there be any odor during the cleaning?
Yes, there may be an odor during the first few
cleanings. Failure to wipe out excessive soil might
also cause an odor when cleaning.
13 NESCL61
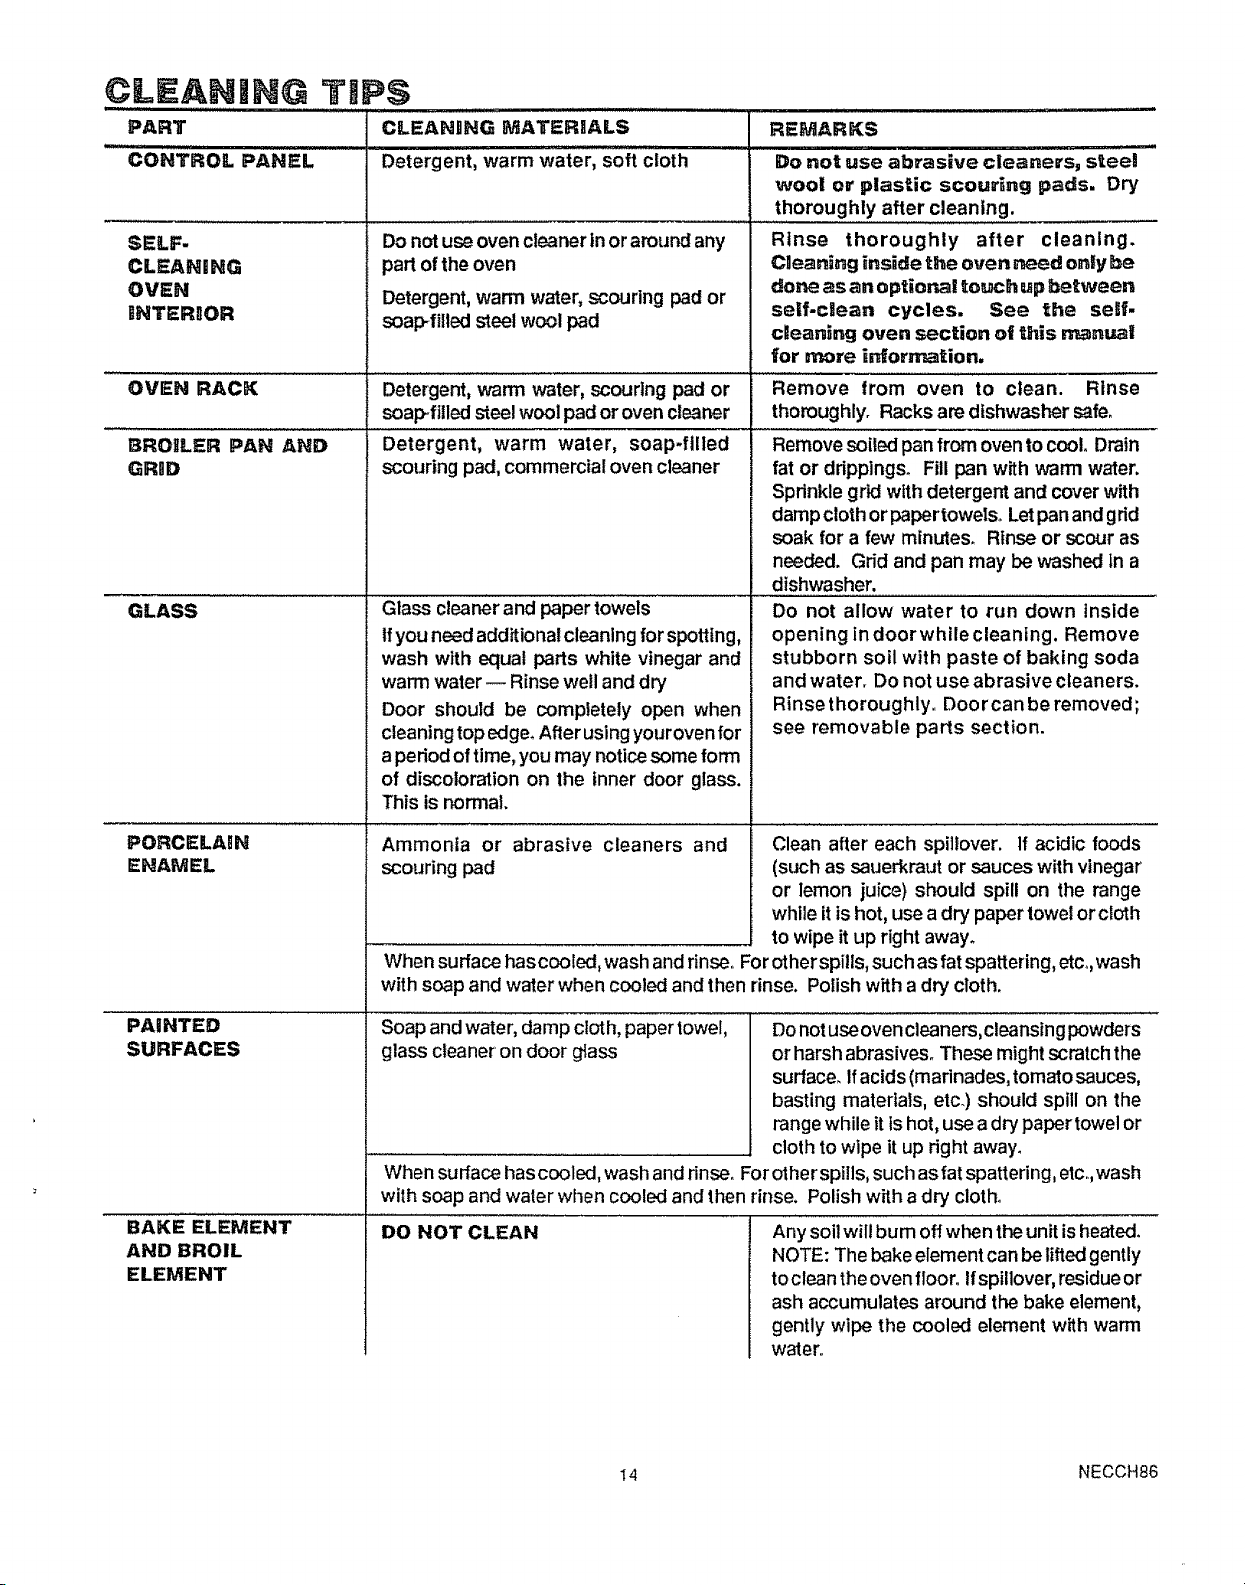
CLEANING TIPS
PART CLEANING MATERIALS
CONTROL PANEL
SELF-
CLEANING
OVEN
UNTERROR
OVEN RACK
BROILER PAN AND
GRnD
GLASS
PORCELAmN
ENAMEL
PAINTED
SURFACES
Detergent, warm water, soft cloth
BAKE ELEMENT
AND BROIL
ELEMENT
Do not useoven cleanerin oraround any
part ofthe oven
Detergent,warm water, scouring pad or
soap"filled steel wool pad
Detergent, warm water, scouring pad or
soap-filledsteel woolpad or oven cleaner
Detergent, warm water, soap-filled
scouring pad, commercial oven cleaner
Glass cleaner and paper towels
Ifyou need additional cleaning for spotting,
wash with equal parts white vinegar and
warm water-- Rinse well and dry
Door should be completely open when
cleaning top edge. After using your oven for
a period of time, you may notice some form
of discoloration on the inner door glass.
This is normal.
Ammonia or abrasive cleaners and
scouring pad
REMARKS
Do not use abrasive cleaners, steel
wool or plastic scouring pads. Dry
thoroughly after cleaning.
Rinse thoroughly after cleaning.
Cleaning inside the oven need only be
done as an optional touch up between
self-clean cycles. See the seer-
cleaning oven section oI Uds manual
for more intormaUon.
Remove from oven to clean. Rinse
thoroughly. Racks are dishwasher safe.
Remove soiled pan from oven to cool. Drain
fat or drippings. Fill pan with warm water.
Sprinkle grid with detergent and cover with
damp cloth or paper towetso Letpan and grid
soak for a few minutes. Rinse or scour as
needed. Grid and pan may be washed In a
dishwasher.
Do not allow water to run down inside
opening in door while cleaning. Remove
stubborn soil with paste of baking soda
and water. Do not use abrasive cleaners.
Rinse thoroughly,, Doorcan be removed;
see removable parts section.
Clean after each spiitover. If acidic foods
(such as sauerkraut or sauces with vinegar
or lemon juice) should spill on the range
while it is hot, use a dry paper towel or cloth
to wipe it up right away°
When surface hascooled, wash andrinse° For_herspills, such asfat spattering, etc. wash
with soap and water when cooled and then rinse. Polish with a dry"cloth.
Soap and water, damp cloth, paper towel, Donotuseoven cleaners,cleansingpowders
glass cleaner on door glass or harsh abrasives. These might scratch the
surface. Ifacids (marinades, tomato sauces,
basting materials, etc.) should spill on the
range while it ishot, use a dry paper towel or
cloth to wipe itup right away_
When surface hascooled, wash and rinse. Forother spills, such as fatspattering, etco,wash
with soap and water when cooled and then rinse. Polish with a dry cloth°
DO NOT CLEAN
Any soil will bum ofl when theunitisheated.
NOTE: The bake element can be lifted gently
to clean the oven floor. Ifspillover, residue or
ash accumulates around the bake element,
gently wipe the cooled element with warm
water°
I4 NECCH86

/
Fig. ?B
H_NGE
STOP POSITION
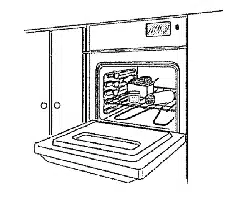
3"O remove:
1. Open the door to the stop position (see fl}ustlation).
2_ Grasp the door at each side and lift up and off the
hinges. DO NOT lift door by the handle; door glass
breakage or damage to the door could resuIL
NOTE: When the door is removed and hinge arms are at
stop position, do not bump or try to move the hinge
arms. The hinges could snap back causing an injury to
the hands or damage to the porcelain on the front of the
range. Cover the hinges with toweling or empty towel
roils while working tn the oven area°
To reptace:
1_ Hold the door over the hinges with the slots at the
bottom edge of the door lined up with the hinges.
The hinge arms must still be tn the stop position.
2. Slide the door down onto the hinges as far as it will
go and close the door.
2 Push the rack inun!ilyou reach the bump in the rack
guide, then Itlt the lront of _he rack a bit and push lt_a
rack all the way in
To remove:
Pull the oven rack out, the_ up, in one motion, See
the cleaning chart,
NOTE:
(A) The racks are designed with stop locks,
When placed correctly on the rack support and
extended from the oven, the stop lock prevents
lhe racks from tilting when you are removing
food from the racks or placing food on them,
(B) For best performance, remove oven racks
during selFclean cycle_ If oven racks are _eftin
the range during aclean cycle, they will darken,
lose theil luster and become hard to slide. Ii
you choose to leave the racks in the oven, you
can polish the edges of the racks with steel
wool and apply a small amount of vegetable oil
to the rack edges after the self-clean cycle.
This will make the racks easier to slide.
R PLACING L GHT
BULB
NOTE: Do not allow water to run down inside the door,
Open door completely whencleaning thetop edge.
RE ' OVABILA OVAN IRACi $
BULB COVER BAIL WIRE
Do not touch hot oven bulb, Do not
touch buJb w_h wet hands, Never
wipe oven light area wi_h wet cloth.
Never touch _he electrically live metal
coRlar on _he buib when replacing,
BUMP
IN RACK
GUIDE
Be careful not to scratch the oven finish when installing
or removing oven racks.
To instail:
1. Set the raised back edge ofthe rack on a pair of rack
guide&
15
To remove:
1_ Disconnect electric power to the oven at the main
fuse or circuit breaker°
2o Hold your hand under cover and firmly push back the
bait wire until it clears the cover. The cover will fall
into your hand. DO NOT REMOVE ANY SCREWS
TO RE_v_OVE THE COVER.
3, Replace bulb with 40-watt home appliance bulb,
To replace covert
!o Place cover into groove of tamp receptacle, Pullwire
bail forward until it snaps into place. Be certain wire
bail is in center of cover, Wire will hold cover firmly
when in correct position.
2, Connect power to oven,
NEMNT127
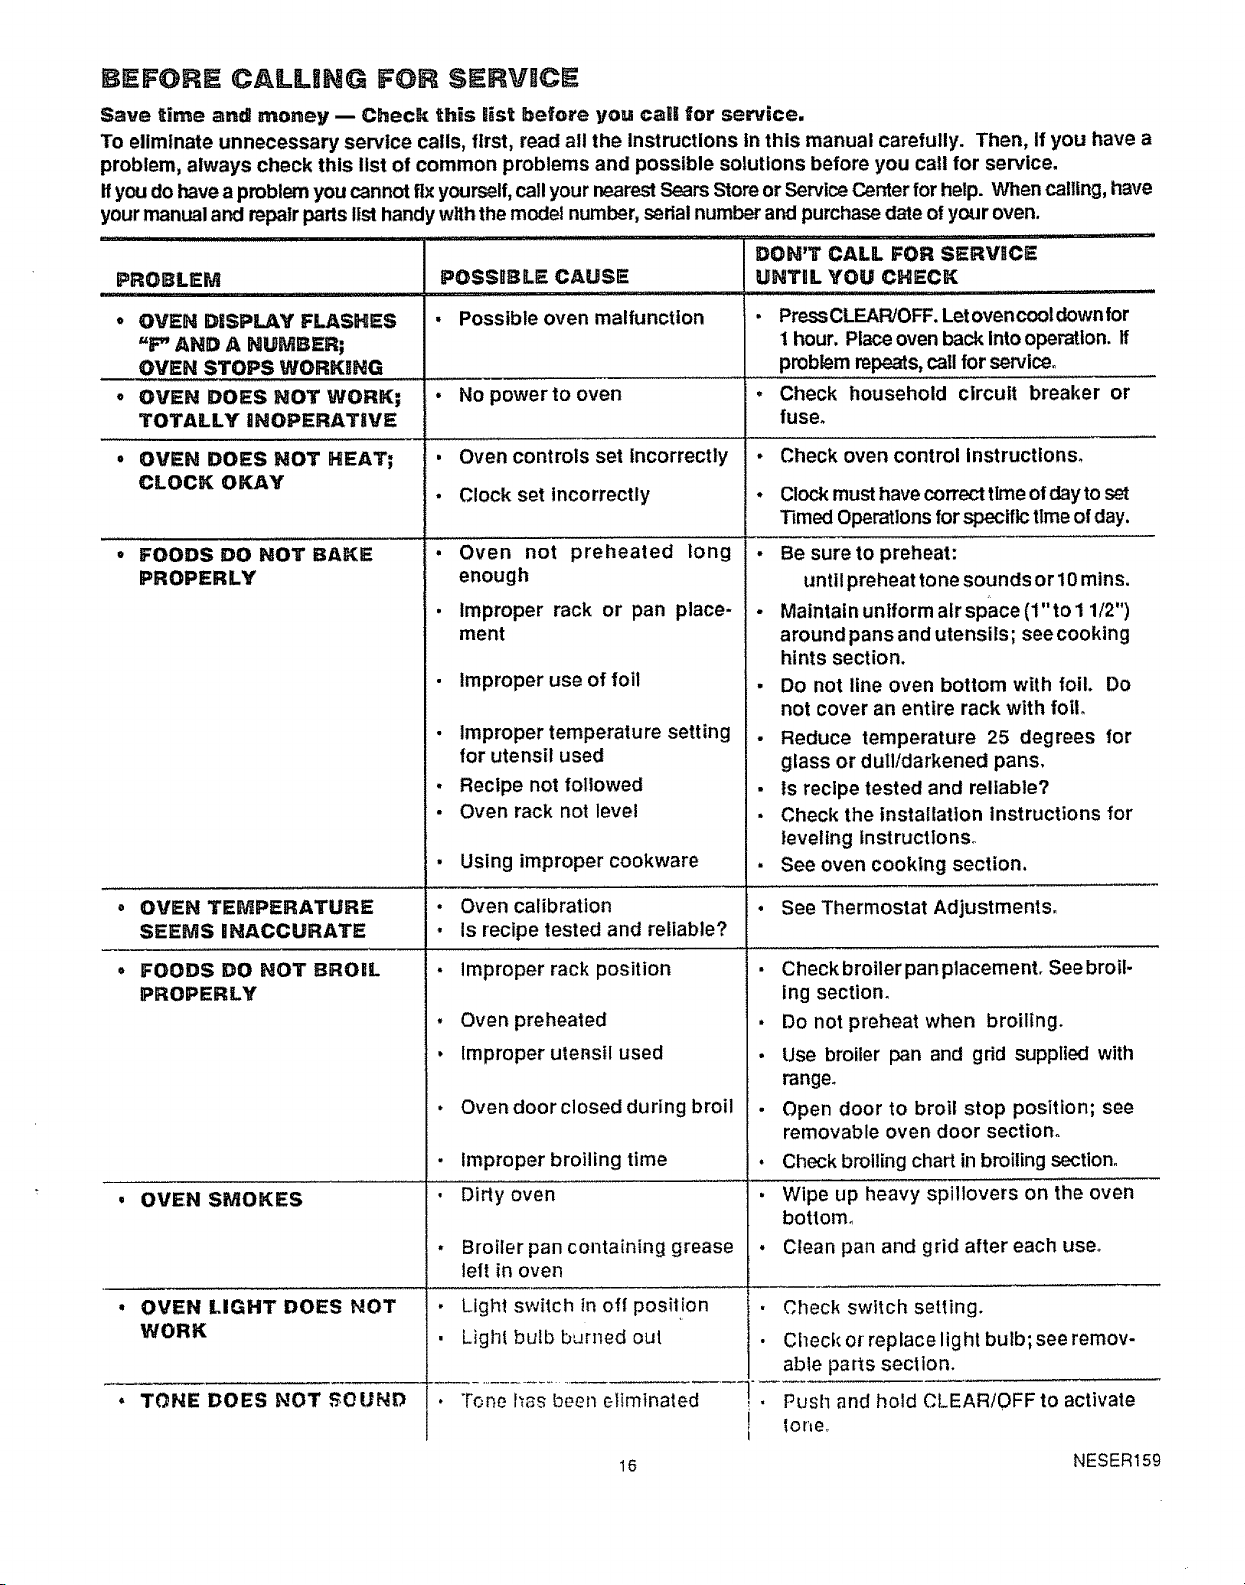
BEFORE CALLING FOR SERVICE
Save time and{ money -- Check this list before you call for service.
To eliminate unnecessary service calls, first, read all the Instructions in this manual carefully. Then, if you have a
problem, always check this list of common problems and possible solutions before you call for service.
If you do have a problem you cannot fixyourself,carlyour nearest SearsStore or ServiceCenter for help. When calling, have
yourmanual and repatrparts list handy with the model number,serial number and purchase date ofyour oven.
PROBLEM
o OVEN DISPLAY FLASHES
"F" AND A NUMBER;
OVEN STOPS WORKHNG
o OVEN DOES NOT WORK;
TOTALLY iNOPERATiVE
OVEN DOES NOT HEAT;
CLOCK OKAY
FOODS DO NOT BAKE
PROPERLY
POSSBBLE CAUSE
, Possible oven malfunction
• No power to oven
• Oven controls set incorrectly
- Clock set incorrectly
Oven not preheated long
enough
improper rack or pan place-
ment
• improper use of foil
• improper temperature setting
for utensil used
• Recipe not followed
• Oven rack not level
DON'T CALL FOR SERVIlCE
UNTI]L YOU CHECK
Press CLEAR/OFF. Letovencooldown for
I hour, Placeoven backinto operation. If
problem repeats,call for service_
Check household circuit breaker or
fuse°
- Check oven control Instructions°
Clock musthavecorrecttLmeofdayto set
Timed Operationsfor specifictimeofday.
• Using improper cookware
• OVEN TEMPERATURE • Oven calibration • See Thermostat Adjustments.
SEEMS iNACCURATE • Is recipe tested and reliable?
• - Improper rack position •
. Oven preheated
• improper uter_stl used
• Oven door closed during broil
• Improper broiling time
• Dirty oven
. Broiler pan containing grease
left in oven
• Light switch in off position
• Light bulbburned out
• Tone h_,s been elimtnaled
16
FOODS DO NOT BROIL
PROPERLY
OVEN SMOKES
OVEN LIGHT DOES NOT
WORK
TONE DOES NOT SOUND
• Be sureto preheat:
until preheat tone sounds or 10 mtns.
• Maintain uniform air space (1"to 1 1/2")
around pans and utensils; see cooking
hints section.
. Do not line oven bottom with foil. Do
not cover an entire rack with foil.
• Reduce temperature 25 degrees for
glass or dull/darkened pans,
• Is recipe tested and reliable?
• Check the installation instructions for
leveling Instructions°
See oven cooking section.
Check broiler pan placement. See broil-
ing sectiom
• Do not preheat when broiling.
• Use broiler pan and grid supplied with
range_
• Open door to broil stop position; see
removable oven door section.
• Check broiling chart in broiling section.
• Wipe up heavy spillovers on the oven
bottom°
. Clean pan and grid after each use°
. Check switch setting.
• Check or replace light bulb; see remov-
able parts section.
, . Pusl_ and hold CLEAR/OFF to activate
, _orte,
NESER159
DO=iT-YOURSELF OVEN TEMPERATURE ADJUSTM ....
You may feel that your new oven cooks differently thar_
the oven it replaced_ We recommend that you use your
new oven a few weeks to become more familiar with it:
following the times given in your recipes as a guide
Your oven has been preset to maximize cooking
efficiency. If you think your new oven Is too I_ot
(burning foods), or not hot enough (foods are under-
cooked) you can adjust the temperature yourself The
appearance and texture of foods is a better Indicator of
oven accuracy than an Inexpensive oven thermometer.
We do not recommend the use of _nexpensive
_hermorneters, such as those found in the grocery
store, to readjust the temperature se_ng of your
new oven. These thermometers can vary by 20°-40°F..
Also, you must open the oven door to read the
thermometer and thls changes the temperature of the
oven.
To decide how much to change the temperature, set the
oven temperature 25°F higher (if foods are under-
cooked) or 25°F lower (if foods are burning) than the
temperature in your recipe, then bake, The results of
this "test" should give you an idea of how much the
temperature should be changed.
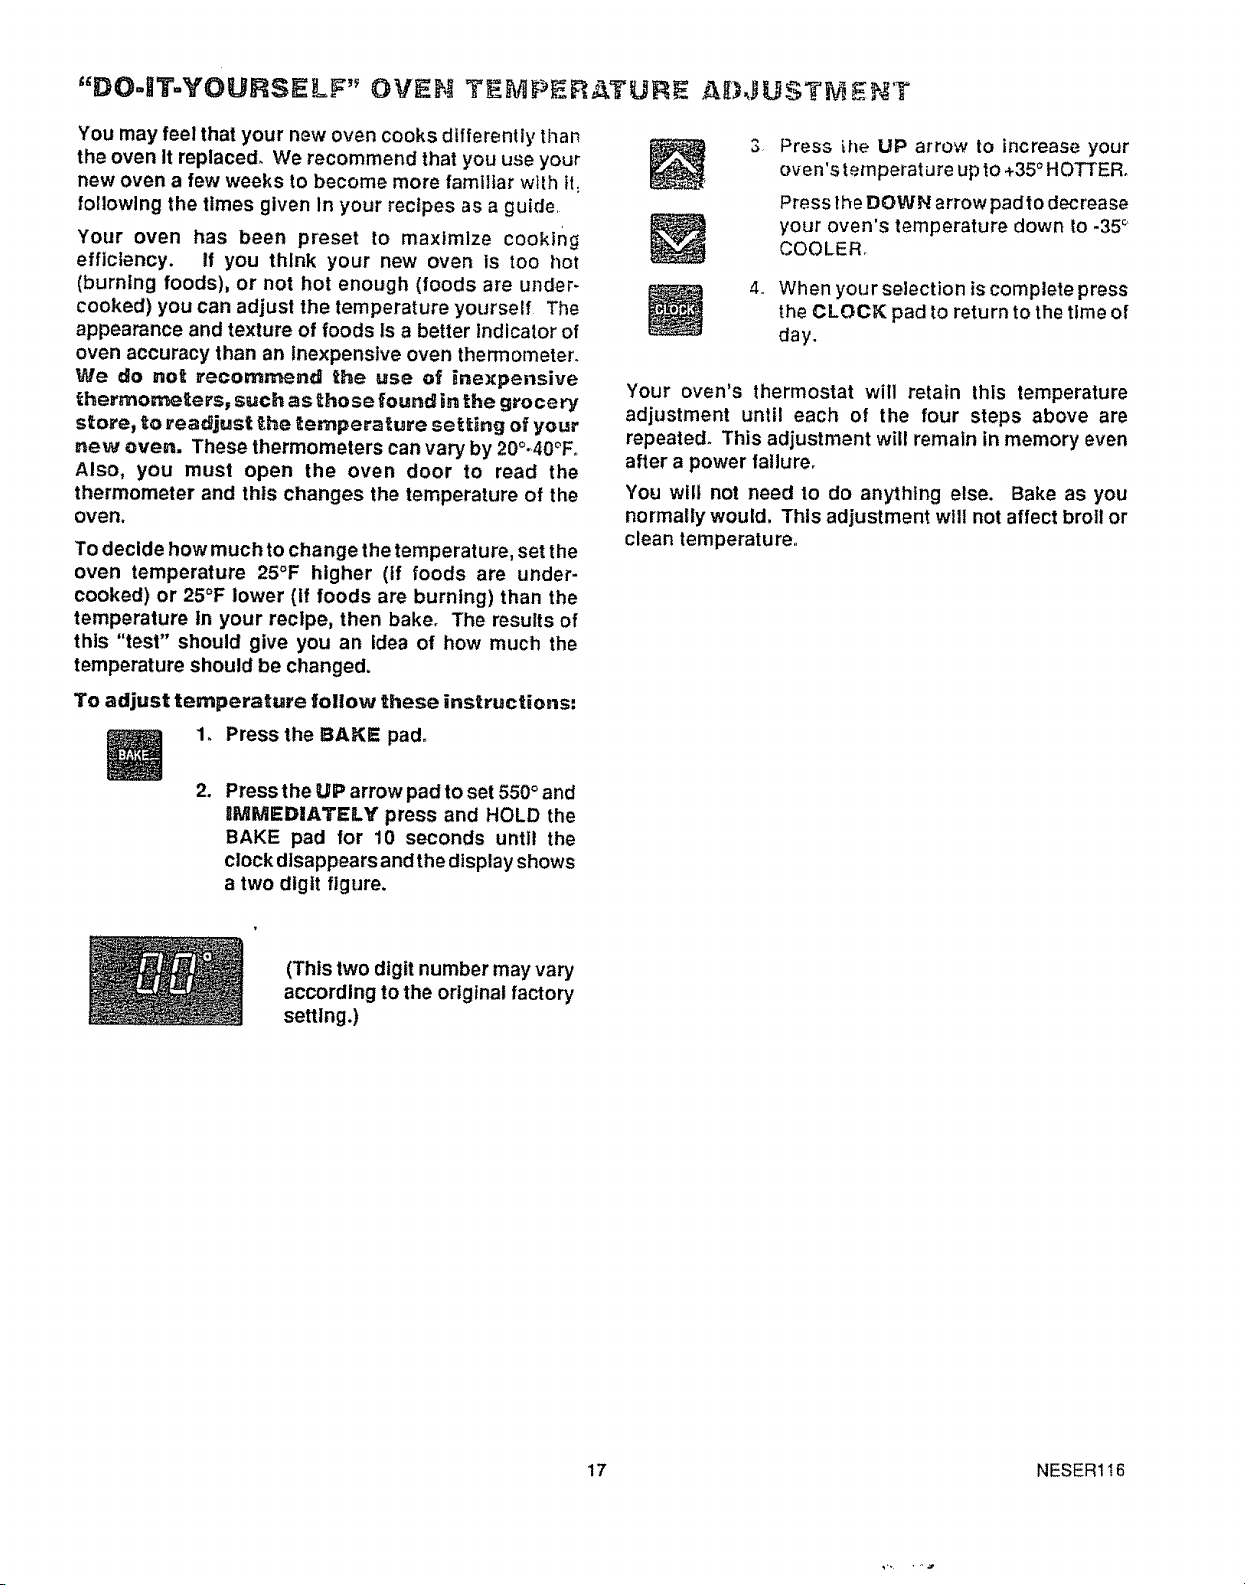
To adjust temperature follow these instructions:
4.
Press _he UP arrow to increase your
oven's temperature up to +35°HOTTER,
Press lhe DOWN arrow padre decrease
your oven's temperature down to -35'_
COOLER
When your selection iscomplete press
the CLOCK pad to return to the time of
day.
Your oven's thermostat will retain this temperature
adjustment until each of the four steps above are
repeated, This adjustment will remain in memory even
after a power failure,
You will not need to do anything else. Bake as you
normally would. This adjustment will not affect broil or
clean temperature
1. Press the BAKE pad°
,
Press the UP arrow pad to set 550°and
BF,_M_=DIATELY press and HOLD the
BAKE pad for 10 seconds until the
clock disappears and the display shows
a two digit figure.
(This two digit number may vary
according to the original factory
setting.)
17 NESERt t6

NOTES
illll ,Jl,_ .... ill ii_ll_l I',
18
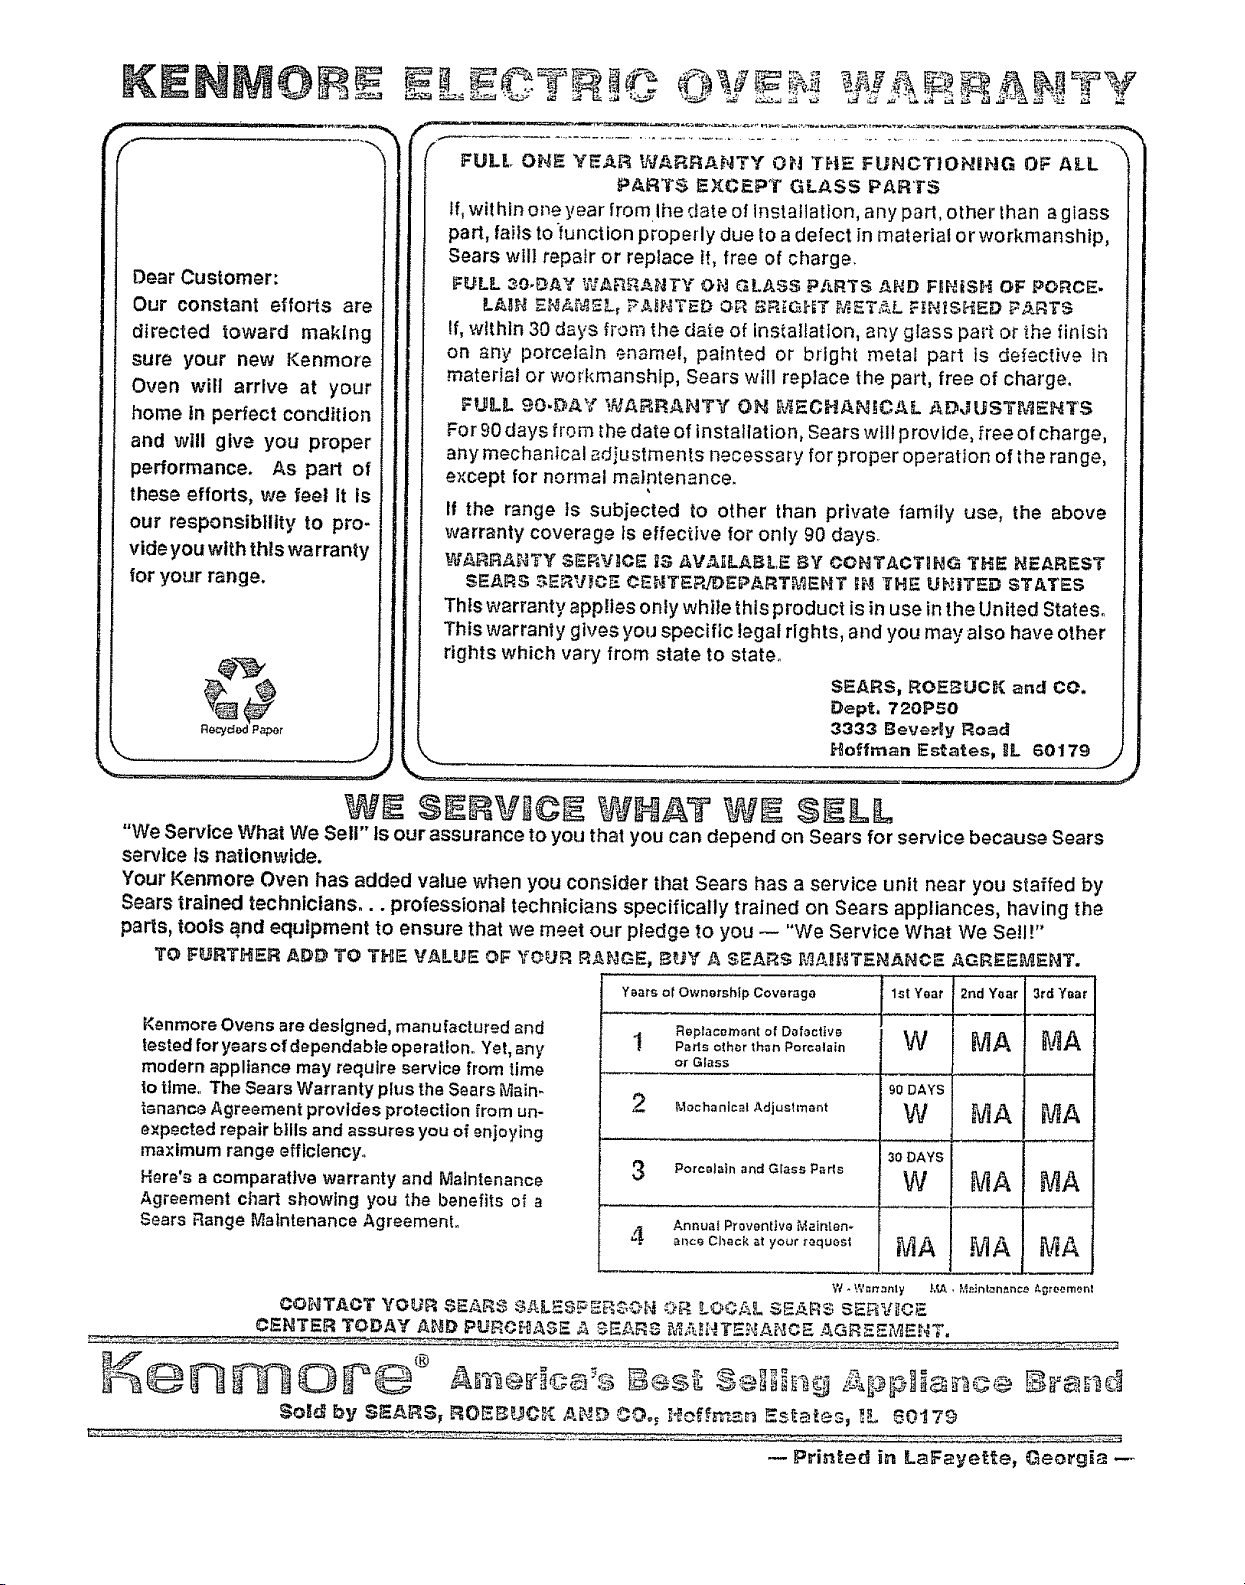
Dear Customer:
Our constant efforts are
directed toward making
sure your new Kenmore
Oven will arrive at your
home In perfect condition
and will give you proper
performance. As part of
these efforts, we feet It is
our responsibility to pro-
vide you wtth this warranty
for your range.
Re_ci_d Papor
tf _.
FULL ONE YF._R WARRANTY OH THE: FUNCTIONIHG OF ALL
PARTS EXCEPT GLASS PARTS
If, within one year frorn Ihe ;late of installation, any part, other than a @ass
part, fails to function properly due to a defect in material or workmanship,
Sears will repair or replace it, free of charge.
FULL 30.DAY WARRAHTY ON GLASS P/_RTS AND FINISH OF PONCE.
_N_._._ P'AI_'_T_DOV¢_RiGHT MET,_L F_N_SHED _ARTS
If, within 30 c_ys from the date of lns_alat[on, any glass par_ or the finlsi_
on _ny porcelain _n-3rnel, painted or bright metal part }s defective in
material or workmanship, Sears will replace the part, free of charge.
FULL 90,DAY WAF_R_HTY ON M_CHAN!C_L ADJUST_'_NTS
For 90 days from th_ date of installation, Sears will provide, _reeof charge,
any mechanical adjustments necessary for proper operation of the range,
e},'cept for normal maintenance.
If the range is subjected to other than private family use, the above
warranty coverage is effective for only 90 days,
WArRaNTY S_RV]C_ _9 _,V_ILA_LE BY CONTACTING THE NEAREST
SEARS _ERV_C_- O_NTEPJDEPART_,_ENT _H _'H_ UHiTED STATES
This warranty applies only while this product is in use in the United States°
This warranty gives you specific legal rights, and you may also have other
rights which vary from state to state°
SEARS, ROE_UCH _nd CO.
Dept, 720P50
3333 Beve_'llyRoad
Hoffrn_n Estates, IL 60179
,,..., _'
9gNVtON NAT $gLL
"We Service What We Sell" Is our assurance to you that you can depend on Sears for service because Sears
service Is nationwide.
Your Kenmore Oven has added value when you consider that Sears has a service unit near you staffed by
Sears trained technicians.., professional technicians specifically trained on Sears appliances, having the
parts, tools and equipment to ensure that we meet our pledge to you _ "We Service What We SelF'
TO F_RTH_R _DD TO THE V_LUE OF YOUR R_GE, _UY A SE_R9 _']'_II_TENJ_NC_ ,,_GREE_ENT.
Kenmore Ovens are designed, manu lectured and
tested for years of dependable operation. Yet, any
modern appliance may require service from time
to time.. The Sears Warranty plus the Sears Main-
tenance Agreement provides protection from un-
expected repair bills and assures you of enjoying
ma×imum range efflclency.
Here's a comparative warranty and Maintenance
Agreement chart showing you the benefits of a
Sears Range Maintenance Agreement.
Yeats of Ownorsh|p Covmraga
Roptacom_nt of Dofacttva
! Parts other th_n Porcelain
o_ Glass
2 Mechanical Adjustment
I ...........! ....
W
90 DAYS
W
3 Porcelain and Glass Parts
AnnuaI Pr_ventva Maintan-
4 ._nce Check _t your _aquest
30 DAYS
W
W • W_rr_nly
i #tA
MA
MA
MA MA
INDtCE
SEGURIDAD
CGMO EMPEZAR A COCgNAR
C6mo sacar la cinta de empaque ......................................4
Caracteristicas de su homo ........................................ 5
Conlroles de! homo .....................................................6-13
Reloj .........................................................................................7
Cronbmetro ..............................................................................7
Consejos para cocinar en el homo ,o.,.................... 8, 9
Como hornear .................................................................9.10
Como asar .....................................................................................11
LIMP_EZA
Ciclo de autolimpieza ....................................................12, 13
Consejos de limpieza ........................................................14
Partes removibles ...................................................................15
SERVIIC_O
Antes de Ilamar para un servtclo ...................,......................16
Ajusles de temperatura ................................................. 17
GARANTIA
tVIODELOS 40429
40425
0
®
229C4020P016-2 SR10250
PAllIA
.......:,._i_zili!*
GUARDF. ESTAS nHSTRUCCIONES
Lea _odas las ins_cc_ones antes _e usar el apa_'a_oelectrodorndst_co. Cuande u_ilice un apara_e
ell_c_rico, deben _ornarse precauciones _,_sicas de segur_dad, que inclwen |as s=gu_en_es."" "
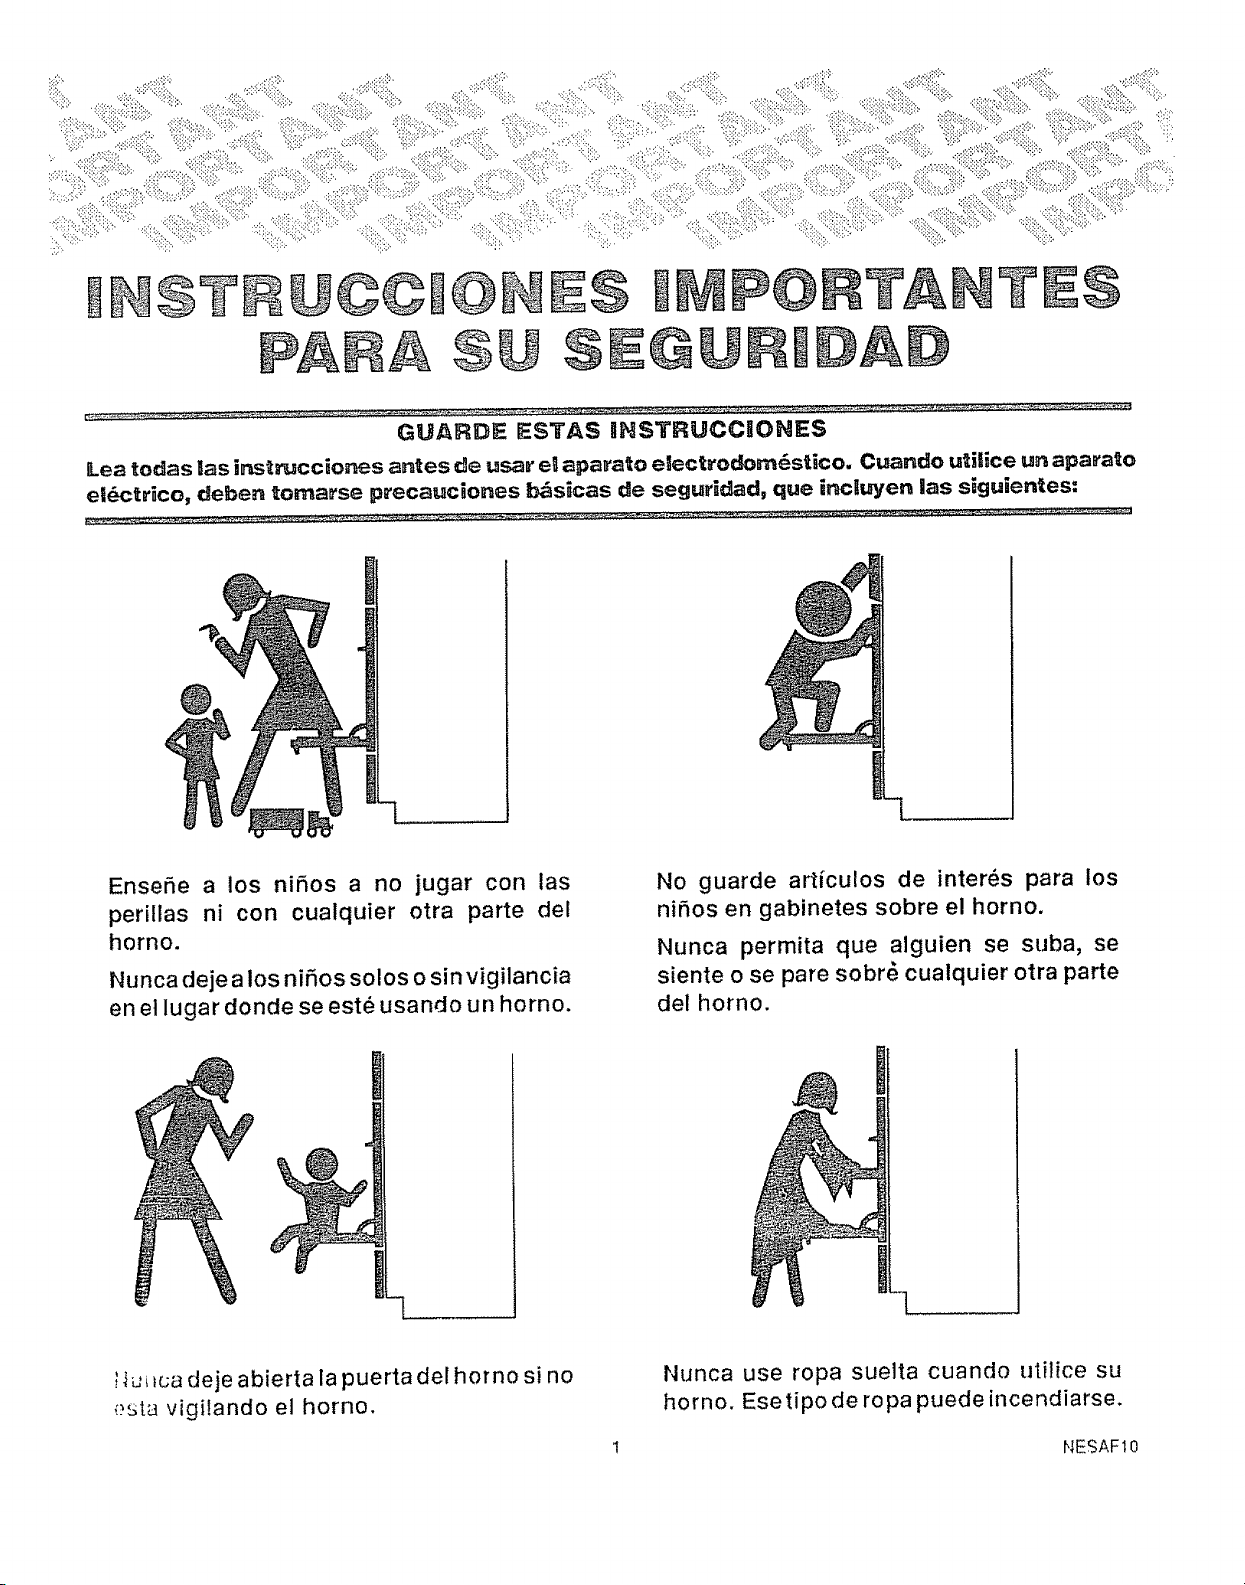
EnseSe a los nihos a no jugar con las
perillas ni con cualquier otra parte del
homo.
Nunca deje a los ni5os solos o sin vigilancia
en el lugar donde se este usando un horno.
No guarde articulos de interes para los
niSos en gabinetes sobre el horno.
Nunca permita que alguien se suba, se
siente o se pare sobr_ cualquier otra parte
del horno.
,,_._ca deje abierta la puerta del horno si no
,:?5tavigi!ando el horno.
Nunca use ropa suelta cuando utilice su
horno. Ese tipo de ro pa puede incendiarse.
1 NESAFtO
z
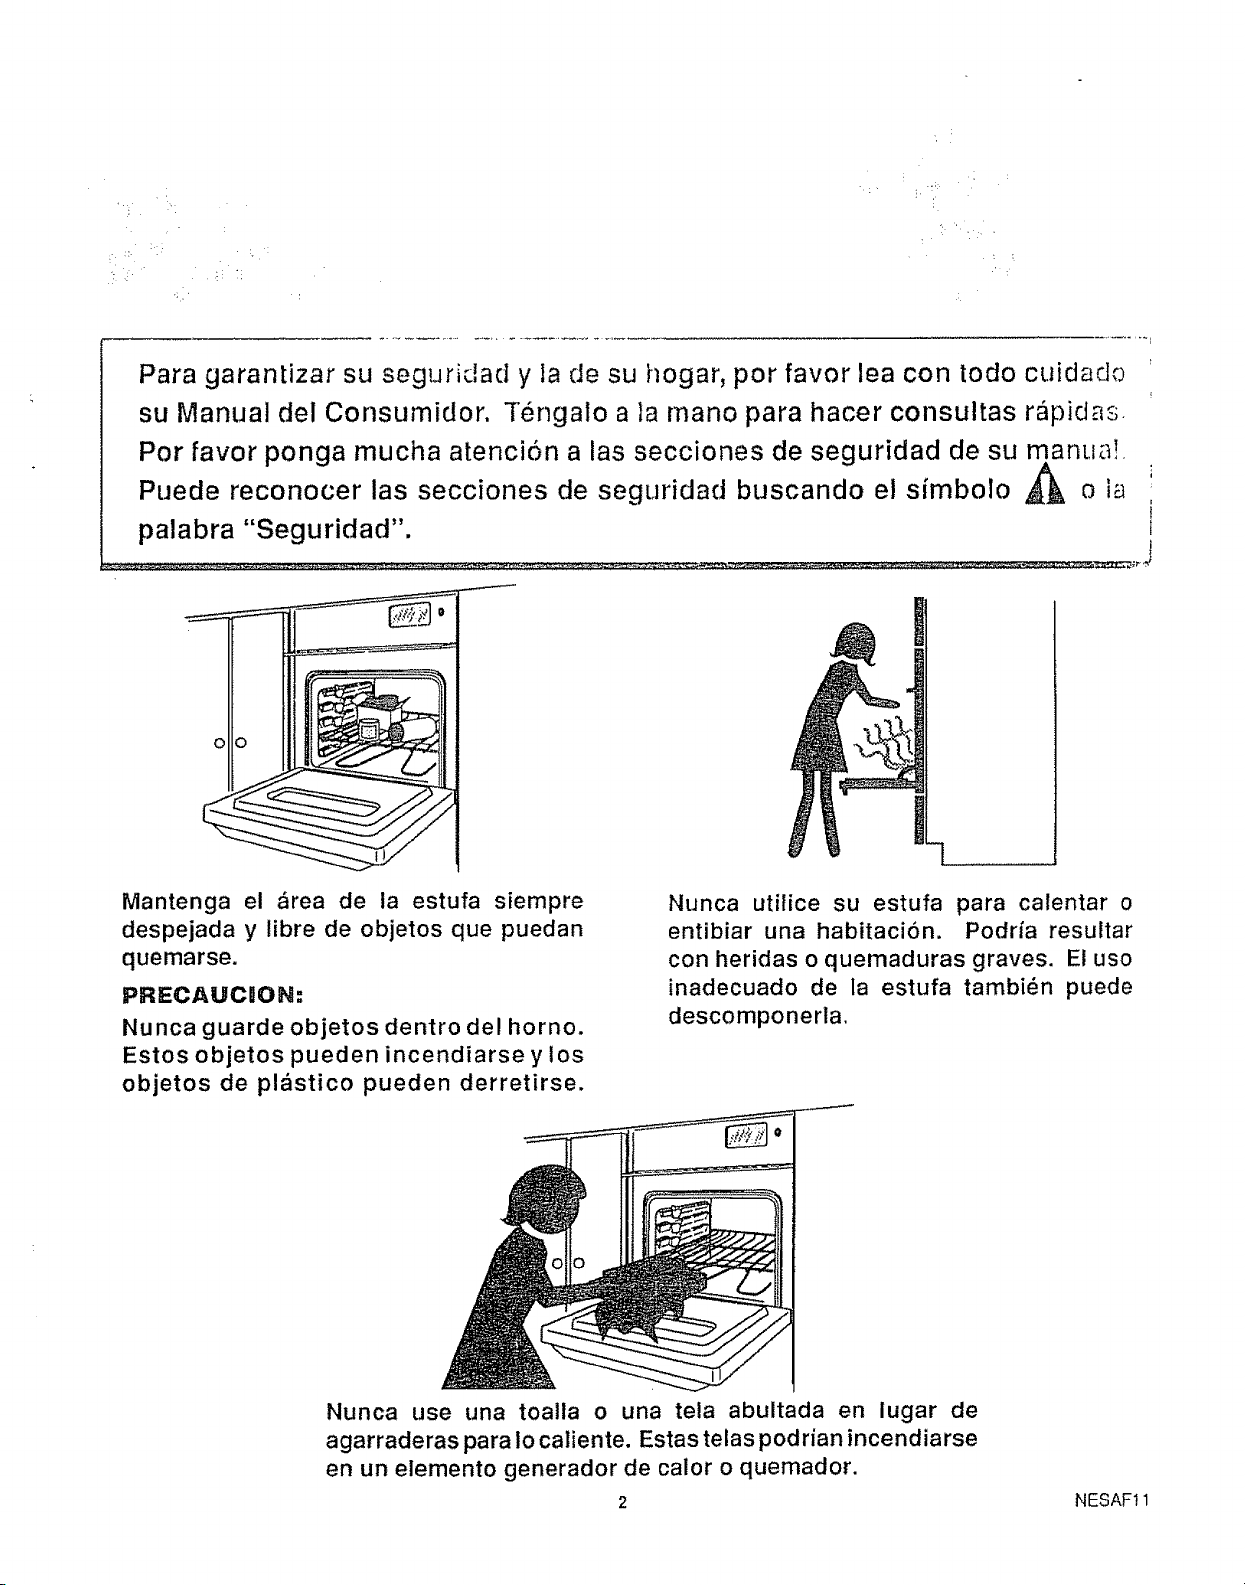
Para garantizar su seguridad y la de su hogar, por favor lea con todo cuidado
su Manual del Consumidor. Tengalo a la mano para hacer consultas rapidas.
Por favor ponga mucha atencion alas secciones de seguridad de su manua!
A
Puede reconocer las secciones de seguridad buscando el simboto o ia
palabra "Seguridad". i
o
Mantenga el ,_rea de ia estufa siempre
despejada y libre de objetos que puedan
quemarse.
PRECAUCIION-"
Nunca guarde objetos dentro del horno.
Estos objetos pueden incendiarse y los
objetos de plastico pueden derretirse.
Nunca utitice su estufa para calentar o
entibiar una habitacion. Podria resultar
con heridas o quemaduras graves. El uso
inadecuado de ta estufa tambi_n puede
descomponerla,
Nunca use una toalla o una tela abultada en lugar de
agarraderas para !o caliente. Estas telas podrian incendiarse
en un elemento generador de calor o quemador.
2
NESAF11
PRECAUCIONES BA$1CAS DE;
SEGURNDAD
Guarde este libro para un uso futuro.
Cerctbrese de que su horno haya sido lnstalado y que
haga tierra correctarnente pot un t_cnlco calificado.
Siempre use agarraderas secas cuando quite ollas del
homo, Las agarraderas hurnedas o mojadas pueden
causar quemaduras pot vapor.
Siernpre siga las instrucciones de 5irnpieza que vienen
en este libro.
Siernpre mantenga lirnpio el homo. La cornida y lagrasa
se incendian con lacilidad. Lirnpie el homo y tas rejitlas
de ventilacl6n de rnanera regular_
Limpie s61o las partes que se enurneran en este Manual.
PRECAUCBOH" No guarde articulos de interns para los
niSos en gabinetes sobre la estufa o en el homo. Los
nfSos que se suban a ta homo para alcanzar dichos
articulos podrian resultar heridos de gravedad.
Siernpre mantenga a una distancia segura del horno el
papel tapiz de las paredes, las cortinas o colgaduras
que sean combustibles, Nunca guarde dichos articutos
en su homo.
Conserve siempre el area que rodea el horno libre de
cosas que puedan quernarse (gasoltna y otros liqufdos
y gases inflamables).
Nunca tntente reparar o reernplazar cualquier parte del
homo a menos que se den instrucciones al respecto en
este libroo Todos los demos trabajos deben set realizados
por un t_cnico capacitado.
Nunca caliente recipientes con cornida que est_n
tapados. El aumento de la presi6n interna puede
ocasionar que el recipiente estalle y cause lesioneso
Nunca deje frascos o latas de grasa o goteaduras sobre
o cerca de! horno. Nunca permita que la grasa se
acumu]e en su horno. Puede evitar incendios pot grasa
si lirnpia ta grasa y cualquier derrarne cada vez que
termine de usar el homo°
Nunca trate de mover una olla con grasa caliente, en
especial si es una freldora. Espere a que la grasa se
haya enfriado,
:Junca toque los elernentos generadores de calor o las
superficies interiores del homo. Pueden estar calientes
_unque su color sea oscuroo
_antenga siempre los utensilios de madera, los
._.ensilios de pl_stico o aiirnentos enlatados a una
_slar}cia segura de su homo.
Algunos productos limpiadores
producen vapores perjudiciales
y las telas o esponjas mojadas
podrian causar quemaduras pot
vapor si se utilizan sobre una
superficie caiiente,
NOTA."
Cercidrese que el aparato estd instalado
firmernente en un gabinete que est_ fuertemente
pegado a la estructura de la casa, Peso sobre la
puerta de! homo podria causar potenciaimente
que en homo se vuelque y resuitar en heridas,
Hunca permita que alguien se suba, se siente o
se pare en !a puerta abierta de! homo,
SEGURBDAD EN EL USO DEL HORNO
Coloque la parrilla del horno en ia posicl6n deseada
rnientras _ste se encuentre fdo. S[ tiene que mover la
parrilla cuando el horno est,. callente, no permita que la
agarradera o guante entre en contacto con el elernento
generador de calor del hornoo
Despu_s de asar, siempre saque del horno la fuente
para asar y I_velao Las sobras de grasa en la fuente para
asar pueden incendiarse la pr6×ima vez que utilice la
fuenteo
Slempre tenga cuidado cuando abra la puerta del homo.
Permita que el aire callente y el vapor salgan antes de
mover los alimentos_
Nunca use papel de alurninio para forrar las fuentes de
escurrirniento o el rondo del horno. El uso tncorrecto
del papel de alurninio podria causar un incendto.
$EGUR DAD IEH LA AUTOLI] P;;
Si no funciona blen el modo de autolirnpieza, ap_guelo
y desconecte el suministro de energia el_ctrica. Sollclte
que un t_cnico calificado revise y le d_ servicio a su
estufa_
Siernpre retire la fuente para asar y otros utensHios de!
horno antes de un ciclo de autoiimpiezao
Hunca friegue, rnueva o daSe el seilo de lapuerla en las
estutas que tlenen rnodo de autotirnpiezao El sello es
esencial para un buen cierre,
Nunca trate de limpiar utensilios, trastes o partes
removibies de su estufa durante un ciclo de auto-
lirnpieza.
No utilice limpiadores para homo - no deberi_ utilizar
ningun limpiador comercial para homo o revestimiento
protector de ningun tipo en el homo o alrededor de
cuatquiere de sus partes,
3 HES/FS:
|NSTRUCCIONES DE SEGURitDAD (continuaci6n}
xLEA Y COMPRENDA ESTA
INFORMACION AHOi A
Si aiguna vez la necesita, no tendr&
tiempo para leerla.
Cerci6rese de que todos en su
hogar sepan qud hacer en caso de
_ncendio.
Nunca utilice agua en un incend_o
causado pot grasa ya que esto s61o
ayudar_ a extender ias Harnas.
FUF=GO SN EL HORHO-
;HO IHTEHTIE MOVI_R LA FUEHTE_
1. Cierrelapuertadel hornoyapague
los controles.
2. Si el fuego continlJa, use una
espuma quimica seca o un
extingutdor de tipo hal6n.
NOTtFICAC|OH DE
SEGURIE)AD |MPORTANT;
El Acta de Aplicaci6n de Agua Potable y TDxicos d_!
Estado de California requiere que el gobernado, d_,
California publique una lista de sustancias conocida3
por el estado que causen defectos de nacimienfo _]
otros dafios reproductivos y requiere que se adviert_ _.
los clientes de la exposiciSn potenctal a dichas
sustanclas.
El aislamiento de libra de vidrio de los hornos de auto-
Ilmpieza produce una pequef_a cantidad de mono×ido
de carbono durante el clclo de limpiezao La exposicion
puede mlnlmizarse abrtendo una ventana o utiiizando
un ventilador o una campana extractora.
COIVIO SE QUITA LA CIHTA
ADHES_VA DE EMPAQUIE
Para quitar el adhesivo que qued6 como residuode
la cinta de empaque y asegurarse de no da_ar el
acabado de su nuevo aparato, utilice una
aplicaci6n de detergente liquido domdstico para
ropa, aceite mineral, oaceite de cocina. Aplfquelo
con una tela suave y permita que empape el
adhesivo. Limpie con una tela suave. NO USE
fibras de pldstico ni productos similares. Frote
hasta secar y luego aplique una capa de pulidor
para lirnpiar perfectamente y proteger la
superficie, Este procedimiento tarnbi_n es seguro
para ia parte delantera de los hornos de
microondas y otras partes pl&sticas,
HOTA: La cin_a pl&stica debe sacarse de las
molduras cromadas de las partes de la
estufa.
NO PODRA quitarse si se hornea.
&DONDE DEBE BUSCAR CIHTA
ADHES_VA DE EMPAQUE?
Panel de control: parte superior, costados y parte
inferior
Marco de la puerta: parte superior, costados y parle
inferior
Elemento generador de calor del horno
Manijas de la puerta
4 NESAF85
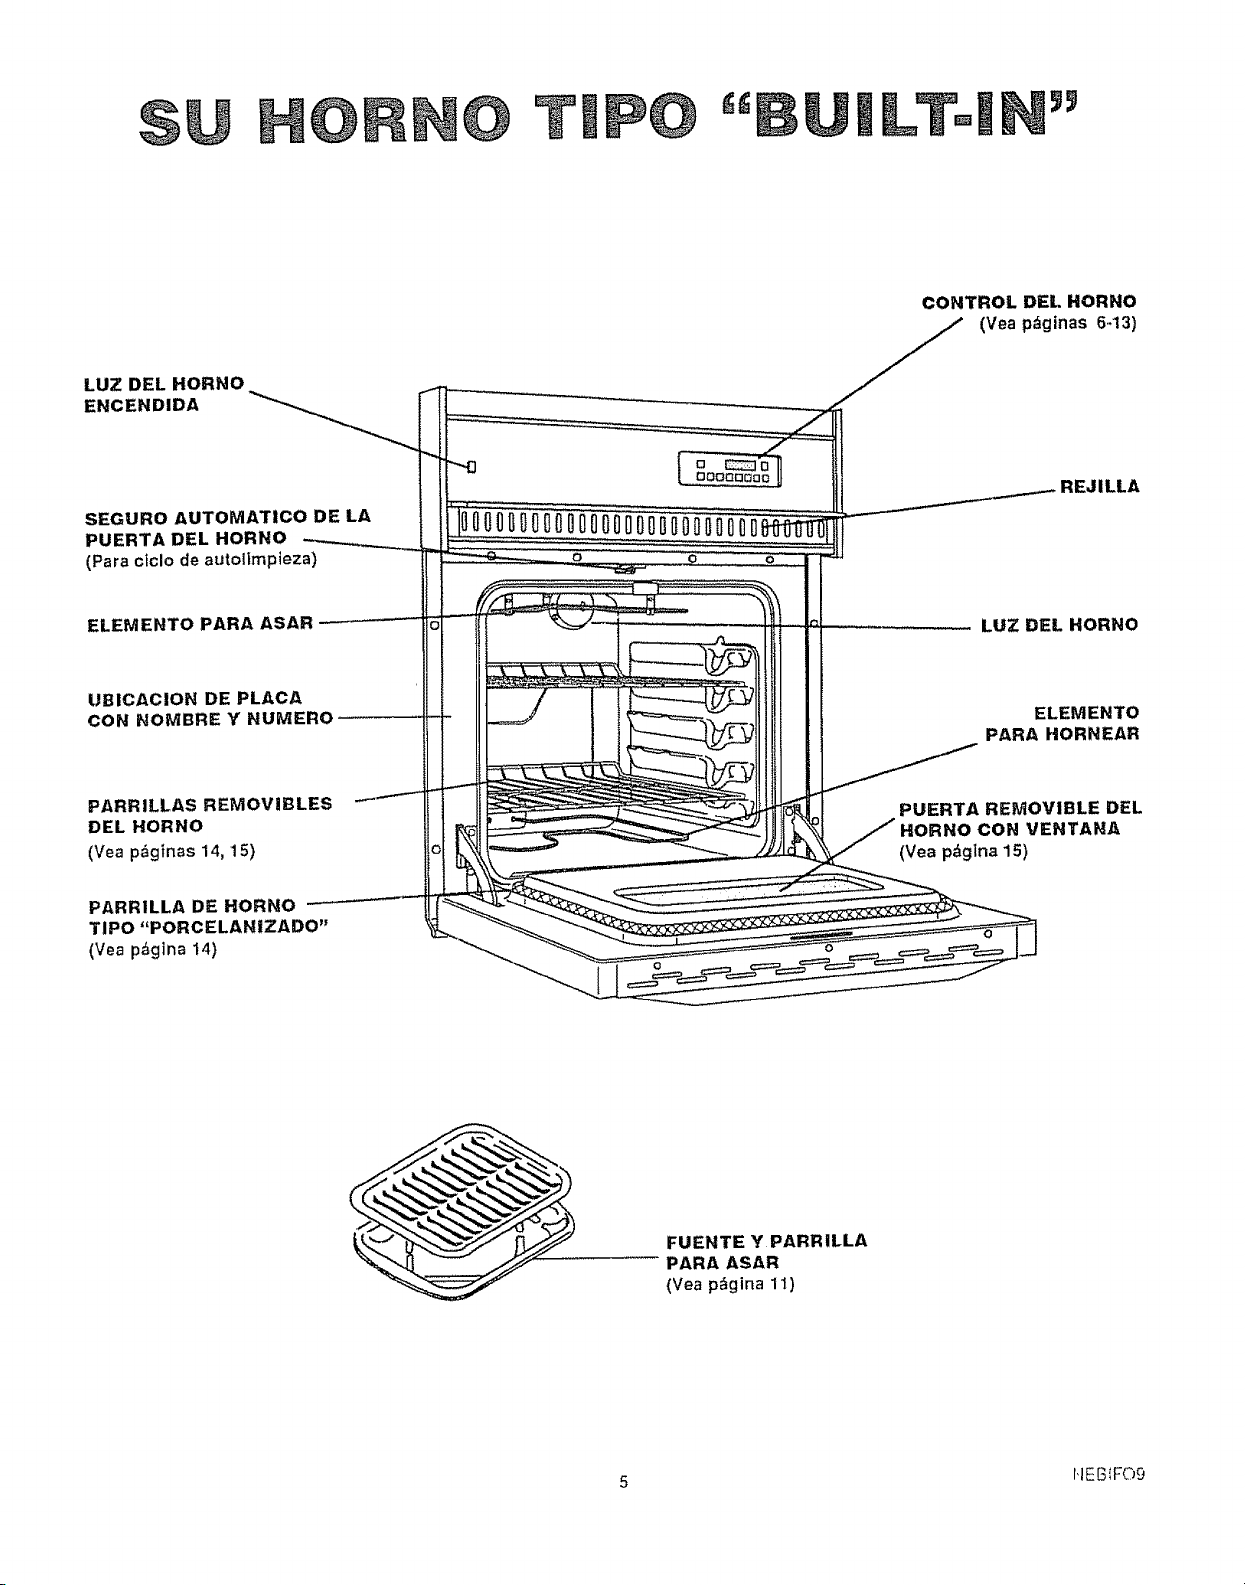
LUZ DEL HORNO
ENCENDIDA
SEGURO AUTOMATICO DE LA
PUERTA DEL HORNO
(Para ciclo de autolimpieza)
ELEMENTO PARA ASAR
UBICACION DE PLACA
CON NOMBRE Y"NUMERO
PARRILLAS REMOVIBLES
DEL HORNO
(Vea pdginas 14, 15)
PARRILLA DE HORNO
TIPO "PORCELANIZADO"
(Yea pdgina 14)
O
CONTROL DEL HORNO
(Vea pdgtnas 6.13)
LUZ DEL HORNO
ELEMENTO
PARA HORNEAR
PUERTA REMOVIBLE DEL
HORNO CON VENTANA
(Vea p_glna 15)
FUENTE Y PARRiLLA
PARA ASAR
(Vea p_gina 11)
5 I,IEB_F09
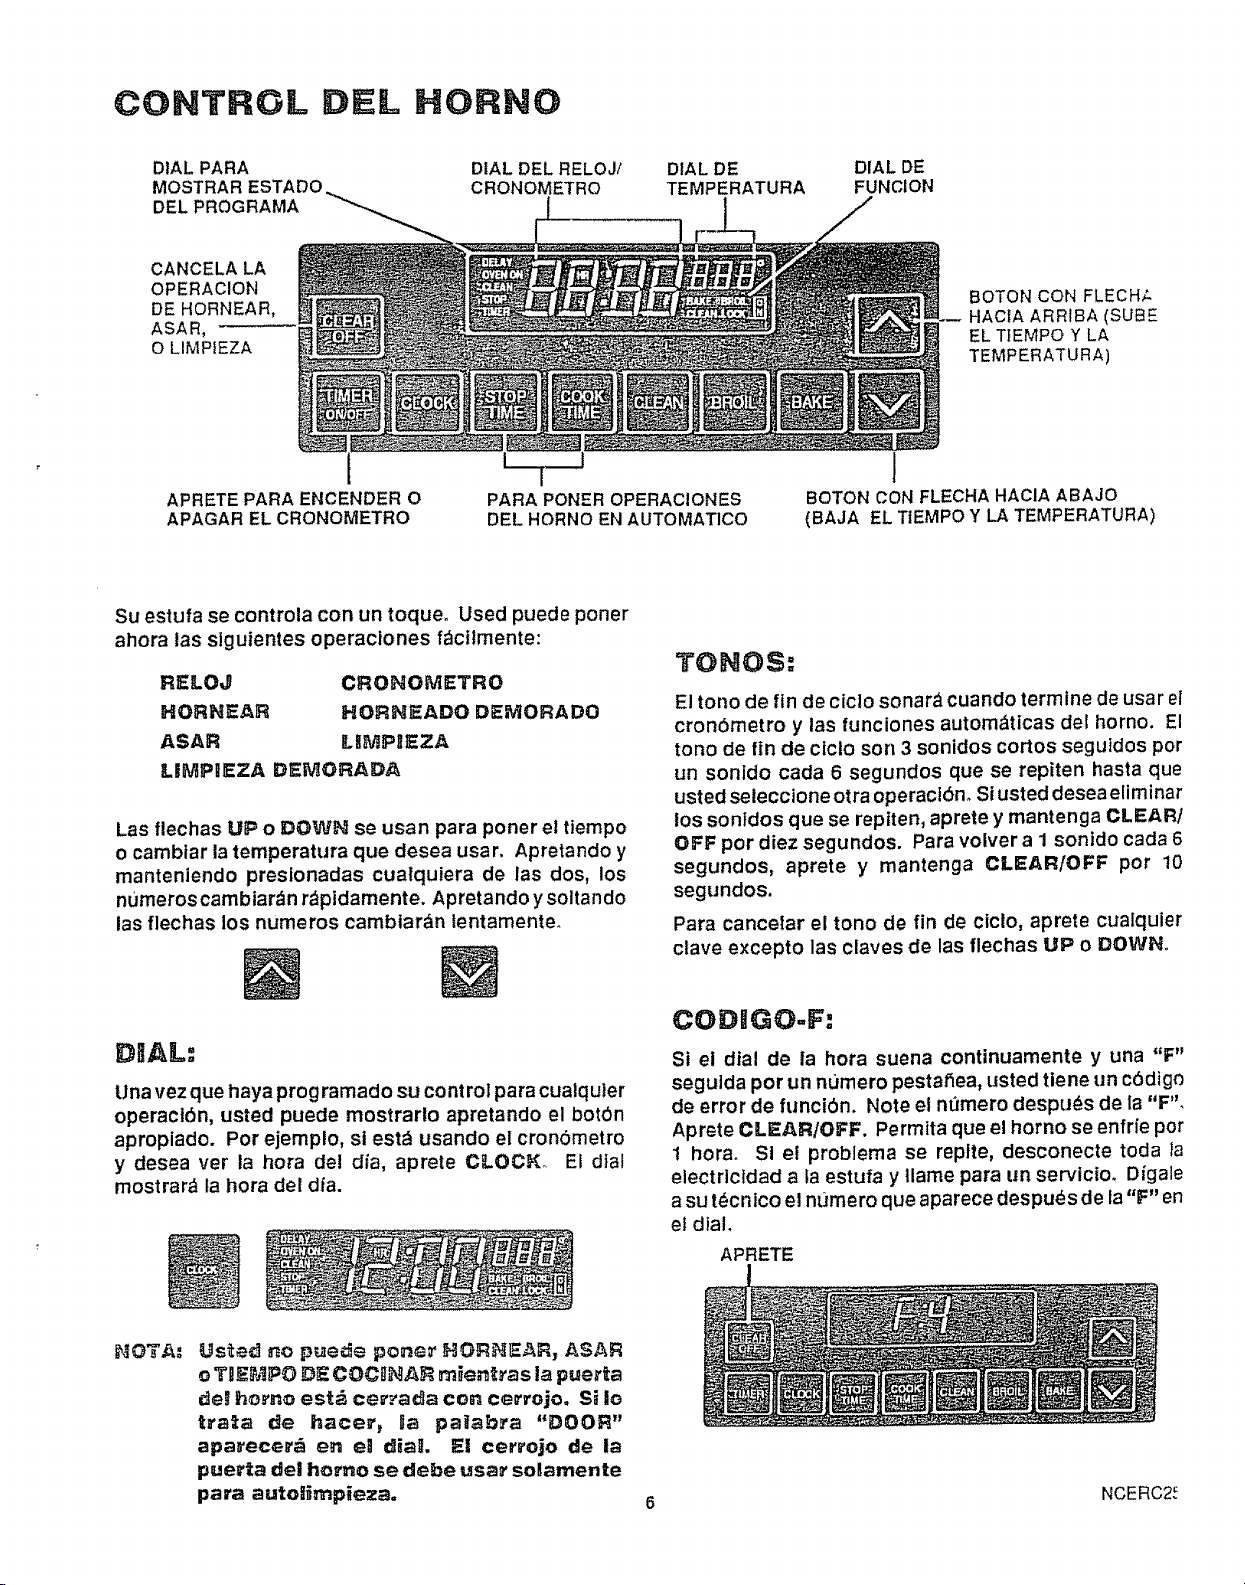
COHTRGL DElL HORNO
DIAL PARA
MOSTRAR ESTADO
DEL PROGRAMA
DIAL DEL RELOJ!
CRONOMETRO
DIAL DE
TEMPERATURA
DIAL DE
FUNCION
CANCELA LA
OPERACION
DE HORNEAR,
ASAR,
O LIMPIEZA
BOTON CON FLECH_
HACIA ARRIBA (SUBE
EL TIEMPO Y LA
TEMPERATURA)
APRETE PARA ENCENDER O
APAGAR EL CRONO_,,tETRO
PARA PONER OPERAClONES
DEL HORNO EN AUTOMATlCO
1
BOTON CON FLECHAHAClA ABAJO
(BAJA EL TtEMPOY LA TEMPERATURA)
Su estufa se controla con un toque. Used puede poner
ahora tas slguientes operaclones f_cilmente:
RELOJ CROHOMETRO
HORNEAR HORHEADO DEMORADO
ASAR LI_MPIEZA
UMPIEZA DE_ORADA
Las flechas UP o DOWH se usan para poner el tiempo
o cambiar la temperatura que desea usar. Apretando y
manteniendo presionadas cualquiera de las dos, los
numeros cambiar_n r_pidarnente. Apretando y soltando
las flechas los numeros cambtar_n tentamente_
TONOS:
El tono de fin de ciclo sonar_ cuando termine de usar et
cron6metro y las funciones autom_ticas del horno. El
tono de fin de ciclo son 3 sonidos cortos segutdos por
un sonido cada 6 segundos que se repiten basra que
usted selecctone otra operacl6n. Siusted desea eliminar
los sonldos que se repiten, aprete y mantenga CLEAR/
OFF por diez segundos. Para volver a I sonido cada 6
segundos, aprete y mantenga CLEAR/OFF por 10
segundos.
Para cancelar el tono de fin de ciclo, aprete cualquier
clave excepto las claves de las flechas UP o DOWN°
DIAL:
Una vez que haya programado su control para cualquter
operacl6n, usted puede mostrarlo apretando el bot0n
aproplado. Por ejemplo, si est_ usando el cronometro
y desea ver ta hora del dia, aprete CLOCK_ El dial
mostrar_ ta hora del dfa.
CODIGO-F:
Si el dial de la hora suena continuamente y una "F"
seguida por un numero pestaflea, usted tiene un c6digo
de error de funciOn. Note el numero despu_s de la "F".
Aprete CLEAR/OFF. Permita que el homo se enfn'e pot
1 horao Si et problema se replte, desconecte toda ia
electrictdad a la estufa y Ilame para un servicio, Digale
a su t_cnico el numero que aparece despuds de la"F" en
et dial.
APRETE
HOTA: Usted no puede pQne_" HOR_EAR, ASAR
oT_EMPO DE COCgIRAR m_en_'as la puerta
r_e!ho_'no est_ ce='_ada con cerrojo, SJio
trala de hacer, lla pailab_'a "DOOR"
apa_-ecer_ en eli dliaL Eli cerrojo de lia
puerta del homo se debe usar soliamente
para autot_mpieza.
NCERC2_
COMO PONER EL RELOJ:
t, Aprete el botbn CLOCK. "SET"y"TIME"
aparecerdn en el dialo
2. Aprete cualqutera de los botones con las
flechas UP o DOWN hasta que el dial
muestre la hora correcta del dia.
La flecha UP camblard los n_lmeros hacia adelante, tal
como i, 2, 3. La flecha DOWN camblar_ los numeros
hacla atrbs, tal como 3, 2, 1.
El relloj empeza_'_ autorn_ticamente dentro
de u- minuto; ousted puede apretar el boi6n
del reloj (clock) para que empiece
inrnediatamente.
@OMO POHER NUEVAMENTE ElL
CRONOMETRO:
Cuando est_ poniendo el cronbmetro, stusted hace una
pausa de m_s de 4 segundos mlentras apreta cualquiera
de los botones con tas flechas UP o DOWN, "TIMER"
dejard de pestaflear en el dial y el cron6metro empezar_
a contar hacla atr_s autom;_ttcamente. Si esto ocurre
aprete solamente el botbn TIMER ON/OFF y usted
podr_ contlnuar seleccionando su tlempo.
COMO CANCELAR EL
CRONOMETRO:
Mlentrasel cron6metro est_ contando hacta atrds,aprete
y mantenga el botbn TII'aER ON/OFF por 4 segundos,
o hasta que "TIMER" deje de pestafiear y ia hora
correcta del dia vuelva al dial.
COMO PONER EELCROHOMETRO:
El cron6metro no controla tas operaciones del horno,
tales como hornear, asar, Ilmpieza o cualquler funci6n
demoradao Le permtte poner una canttdad de tiempo y
le avtsa cuando el tiempo ha terminado. Un ejemplo
seria poner un huevo a tres mtnutos. La cantidad de
tiempo m&xima que puede poner es 9 horas y 55 minutos.
1. Aprete el bot(_n TIMER ON/OFF. "SET"
y "TIMER" se mostrarbn y "HR"
aparecer_ en el dial.
2. Apretecualqutera de los botones con las
flechas UP o DOWN para seleccionar la
cantidad de tiempo que necestta.
Et cron6metro empezar_ a contar hacla atr_s
autom_ticamente dentro de 4 segundos.
3_ Cuando el cron6metro llegue a cero
sonar_ un tono. Aprete el botbn del reloj
(clock} para volver a la hora correcta de l
dia.
7 NCCTL44-1
COMO COCINAR EN EL HORNO
REGLAS GENERALES
• Cuando coclne por primera vez un al]mento en su
nuevo homo, use como guta los tiempos que se dan
en las recetas.
Su nuevo homo ha sido ajustado de manera correcta
en la l_brlca yes m_s preciso que el homo al cuat
reemplaza.
Una vezque haya usado su homo durante un tiempo,
sl consldera que debe operar m_s caliente o m_s
fr|o, puede ajustarlo usted mtsmo. Consulte la
seccibn AJUSTES DE TEMPERATURA de este
manual°
. NO MIRE DEMASIADO m Si abre el homo con
demasiada frecuencta durante el horneado de los
alimentos, permltlr_ que haya p_rdlda de calory que
los resultados del horneado no sean satlsfactorlos.
• Puede salir algun olor cuando el horno se usa pot
prtmera vez. Esto es causado pot el calentamtento
de las partes nuevas y el alslante.
• No cubra por completo con papel de aluminto una
parrilta del homo° El papel de aluminio puede
obstrulr el flujo normal de calor y originar malos
resuttados al hornear. No coloque papel de aluminlo
directamente encima del elemento que genera el
calor del homo. E1pape! de aluminio que se utilice
en el tondo del homo, debajo del elemento puede
dafiar la superficie. Por Io tanto, no debe utilizarse..
PRECALENTAIVIIENTO
Cuando las recetas requleran precalentamiento,
tenga cerca los allmentos antes de abrir lapuerta del
homo. St deja ablerta la puerta del homo durante
mucho tiempo, se perder& la temperatura de
precalentamiento.
Permita que el horno se precaliente por completo
antes de cocinar productos horneados. Espere que
ta luz lndlcadora de precalentado se encienda y
ponga la comida en et homo°
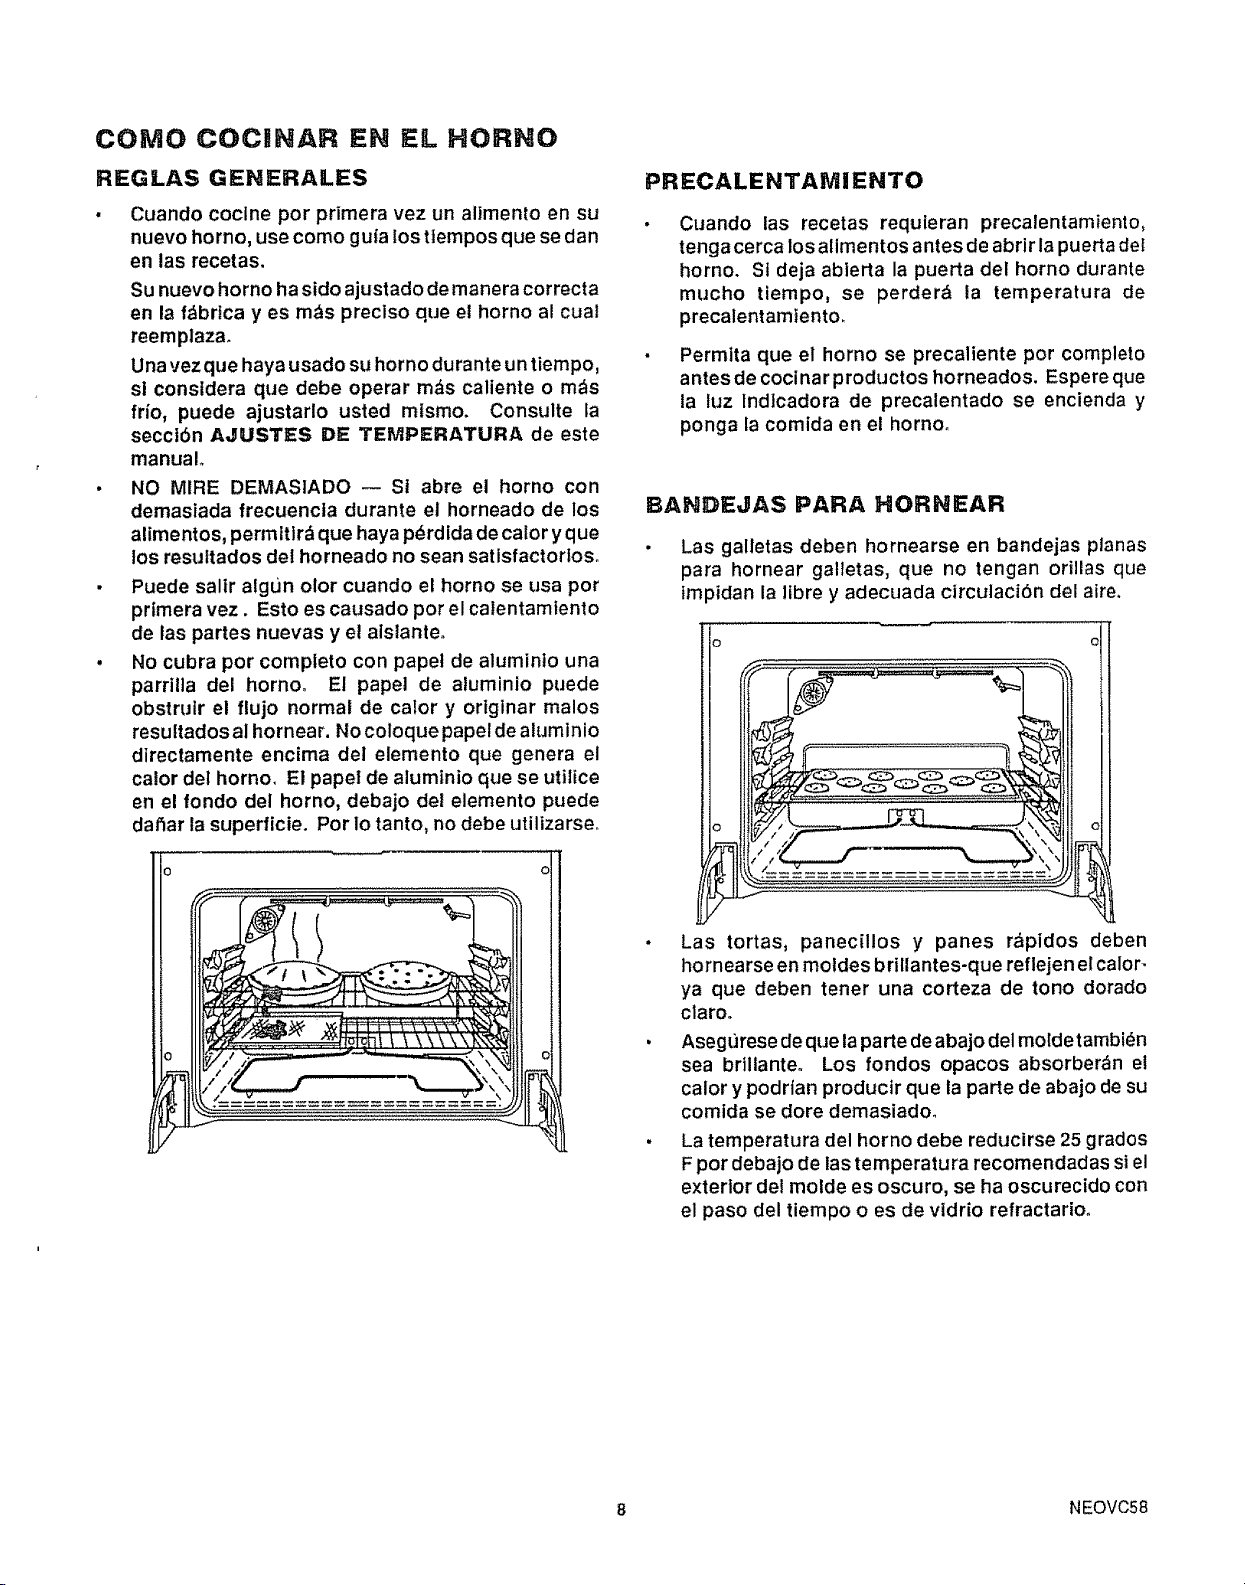
BAHDEJAS PARA HORNEAR
Las galletas deben hornearse en bandejas planas
para hornear gatletas, que no tengan orillas que
tmpidan la libre y adecuada clrculaci6n del aire.
o o
Las tortas, panecillos y panes rapidos deben
hornearse en moldes brillantes-que refiejen el calor-
ya que deben tener una corteza de tono dorado
ctaro°
Asegt)rese deque laparte deabajo del moldetambi_n
sea brtllante° Los fondos opacos absorber_n el
calory podrtan productr que la parte de abajo de su
comida se dote demasiadoo
La temperatura del horno debe reducirse 25 grados
F pot debajo de las temperatura recomendadas si el
exterior del motde es oscuro, se ha oscurecido con
el paso del tiempo o es de vldrio refractario°
8 NEOVC58
HORHEADO
• Siga slempre ia receta con todo cuidado.
, iViida los lngredtentes de manera correcta°
• Utilice el molde adecuado y la postcl6n correcta de
la parrilla para obtener los mejores resultados del
horneado.
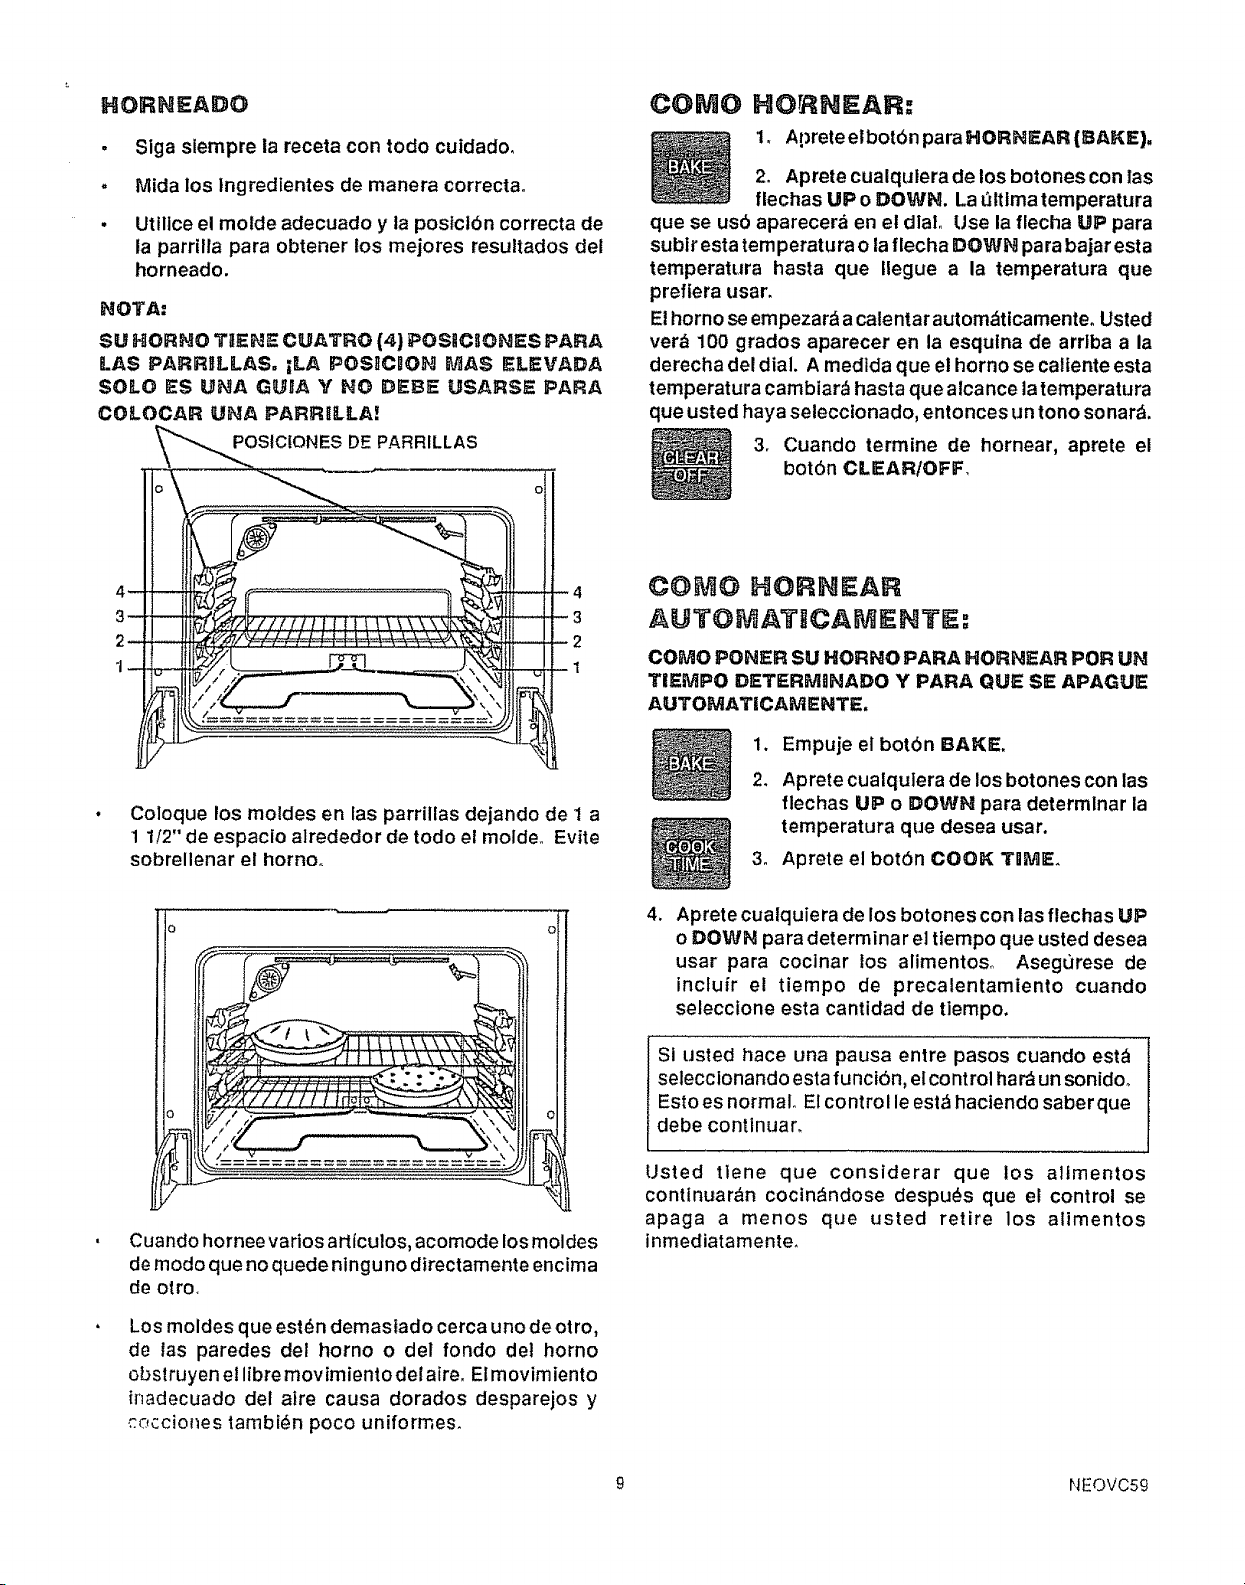
NOTA:
SU HORNO "i'HEHE CUATRO (4} POSiCltONIES PARA
ILAS PARRIILILAS, ;LA POSnCI!ON MAS EILEVADA
SOILO ES UNA GUBA Y NO DIEBE USARSE PARA
COLOCAR UNA PARRRILILA!
POSIClONE$ DE PARRILLAS
4
--3
--2
--1
• Coloque los moldes en las parrillas dejando de I a
1 1/2" de espacio alrededor de todo el moldeo Evite
sobrellenar el homo°
COMO HORNEAR:
1_ Apreteelbotbn para HORNEAR (BAKE).
2. Aprete cualqulera de los botones con ias
flechas UP o DOWN. La elt|matemperatura
que se us6 aparecera en el dial Use la flecha UP para
sublr esta ternperatura o laflecha DOWN parabajar esta
temperatura hasta que Ilegue a la temperatura que
prefiera usar.
Elhomo se empezar_ acalentar autom_ticamente. Usted
ver_ 100 grados aparecer en la esqulna de arriba a la
derecha del dial. Amedida que el horno se catiente esta
temperatura cambiar_ hasta que atcance la temperatura
que usted haya seleccionado, entonces un tono sonar&.
3r Cuando termine de hornear, aprete el
bot6n CLEAR/OFF,
COMO HORNEAR
AUTOMATICAMEHTE:
COMO PONER SU HORNO PARA HORNEAR POR UN
T|IEMPO DSTERM, NADO Y PAR,O,QUE SE APAGUIE
AUTOMAT|CAMENTE,
,
2.
3_
Empuje el botOn BAKE.
Aprete cualqulera de los botones con las
tlechas UP o DOWN para determlnar la
temperatura que desea usar.
Aprete el botbn COOK TgM_E_
_/xi iI I / / / t__-'z---:!___ \ __,
{
Cuando hornee varios artlculos, acomode los moldes
de modo que no quede ninguno directamente encima
de otto.
Los moldes que est_n demasIado cerca uno de otro,
de las paredes del horno o del fondo det horno
obstruyen el libre movimiento delaire. El movimiento
inadecuado del atre causa dorados desparejos y
c.occiones tambl_n poco uniformes.
4_
Aprete cualquiera de los botones con las flechas UP
o DOWN para determinar el tiempo que usted desea
usar para coclnar los alimentoso Asegurese de
inclufr et tiempo de precalentamiento cuando
selecclone esta cantidad de tiempo.
Si usted hace una pausa entre pasos cuando est_
selecclonando esta funci6n, el control ha_ un sonidoo
Esto es normal El control le esl_ haciendo saber que
debe contlnuar.
Usted tlene que considerar que los altmentos
contlnuar_n cocin_ndose despu_s que et control se
apaga a menos que usted retire los alimentos
inmediatamente.
9 NEOVC59
COlVlO HACER PARA QUE SU HORNO
EIViPIECE IEH UNA FORMA DEtVIORADA Y
SE APAGUE AUTOMATICAIVIENTE:
Mientras seleccione esta operaci6n usted no
necesttar_ catcular cuando se encender_ el horno; e!
control 1o hard por usted. Usted necesitar_
seteccionar 1oslguiente:
1. Temperatura
2. Tiempo de Cocinar
3. Hora de Parada
14
2o
3_
,
,
6_
7_
Aprete el botbn para HORNEAR (BAKE).
Aprete el bot6n con la flecha UP o DOWN
para seleccionar la temperatura que desea.
Aprete el bot6n TIEMPO DE COCINAR
(COOK TRME)_,
Aprete la flecha UP para selecclonar por cu&nto
tiempo usted desea cocinar el alimentoo AsegfJrese
de incluir et tiempo de precalentamiento.
Aprete el bot6n HORA DE PARADA
(STOP TIME)_
Aprete la flecha UP para poner la hora del dia en lacual
usted desee que el horno se apague, El homo se apagar&
autom_ticamentecuando llegue a laHORA DE PARADA
(STOP TIME) preselecclonada.
Aprete el botbn RELOJ (CLOCK) para
que el dial vuelva a la hora corriente del
dia.
St usted hace una pausa entre pasos cuando est_
seleccionando esta funclbn, el control har& un
sonido. Esto es normal. El control teest_ haciendo
saber que debe continuar.
Si desea cancelar la selecclbn de esta funcl6n, aprete el
botSn CLEAR/OFF.
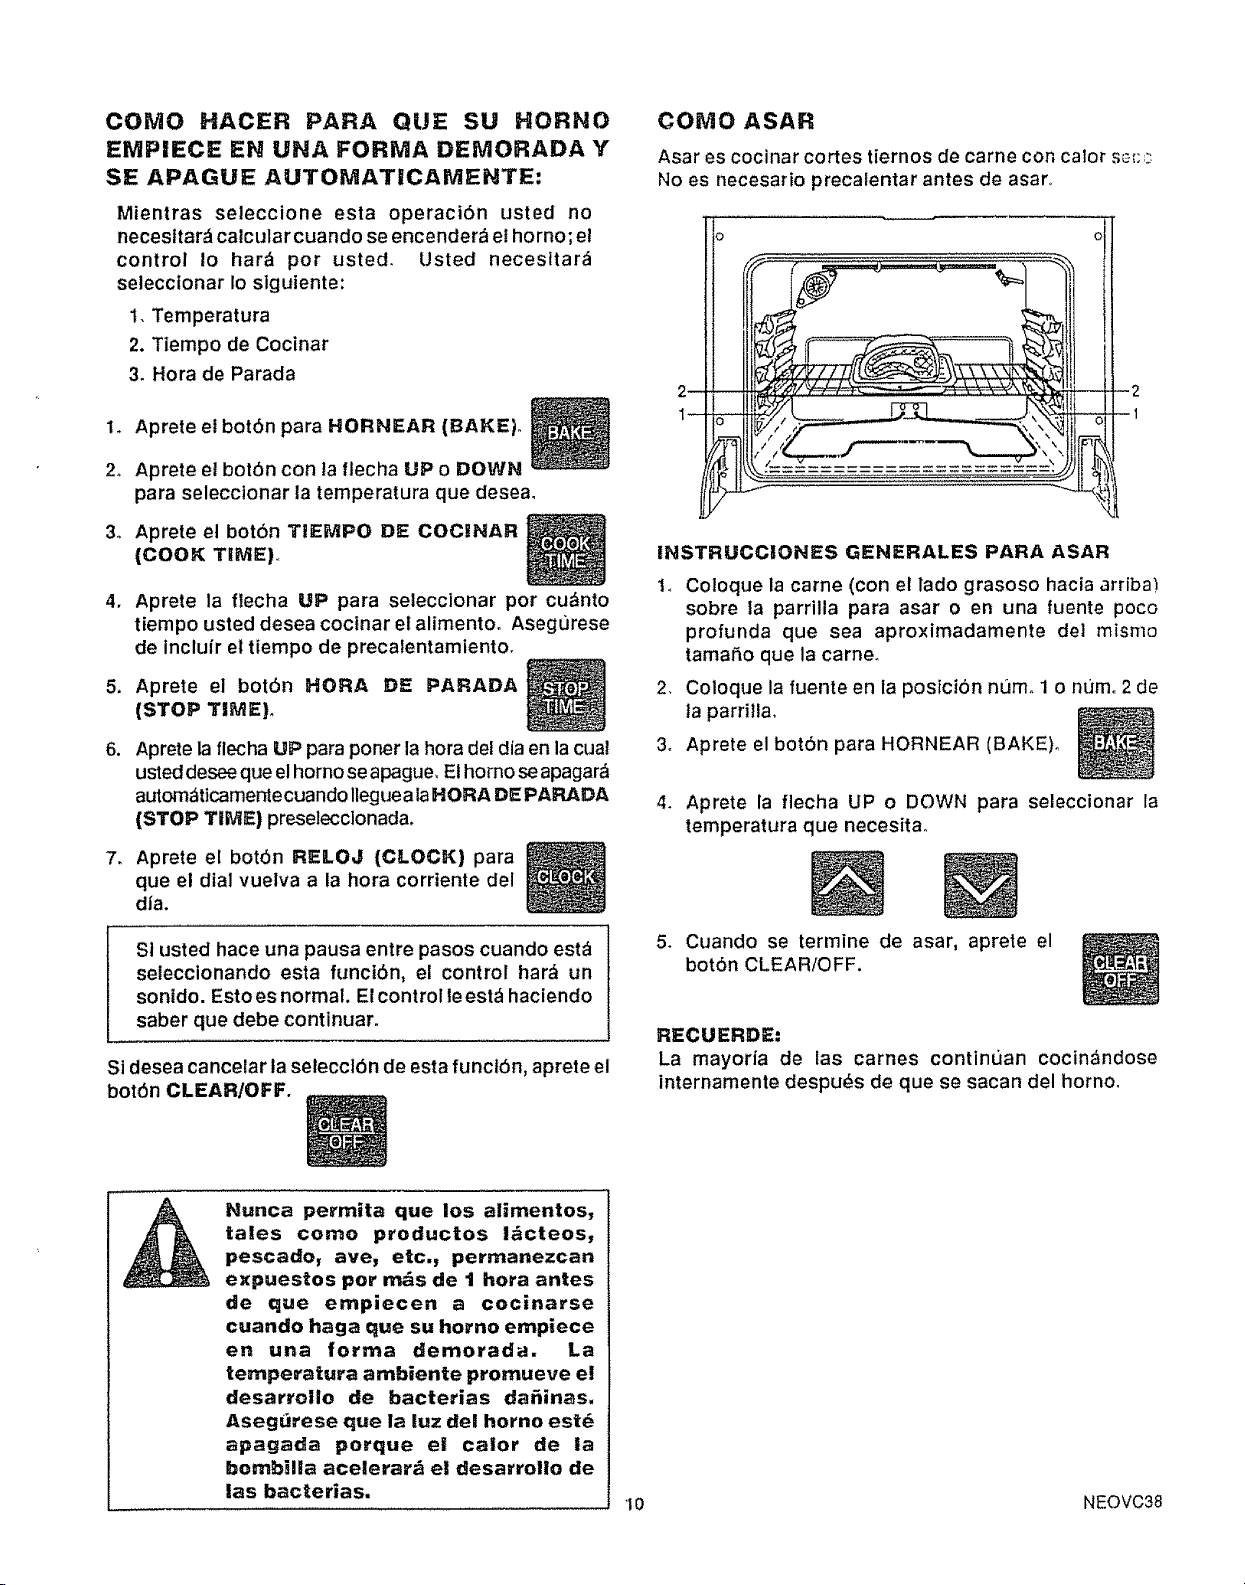
COMO ASAR
Asar es cocinar cortes tiernos de carne con calor s_::::
No es necesario precalentar antes de asaro
INSTRUCCIONES GENERALES PARA ASAR
3_
14 Coloque la came (con el lado grasoso hacia arriba)
sobre la parrilla para asar o en una fuente poco
profunda que sea aproximadamente de] mismo
tamaho que la came,
2_ Coloque la fuente en ta postci6n nLimo1 o mJmo2 de
ta parritla,
Aprete el botOn para HORNEAR (BAKE)°
4. Aprete la flecha UP o DOWN para seleccionar la
temperatura que necesita_
5. Cuando se termine de asar, aprete el
bot6n CLEAR/OFF.
RECUERDE:
La mayoHa de las carnes continuan cocinandose
internamente despu_s de que se sacan del homo,
Nunca permita que los alimentos,
tales como productos ldcteos,
pescado, ave, etc., permanezcan
expuestos pot rods de 1 hora antes
de que empiecen a cocinarse
cuando haga que su homo empiece
en una forma demorada. La
temperatura ambiente promueve el
desarrollo de bacterias da_inas.
Aseg_irese que la luz del horno estd
_pagada porque e! calor de la
bembilla acelerard el desarrollo de
las bacterias.
I 0
NEOVC38
COMO ASAR A LA PARRILLA
CONSEJO$ PAPA ASAR A LA
PARRnLLA=
Pot f_vor no_e:
La pue_'_a dell homo de_e
estar ab_erta cuando se
asa alla parriHa,
Use solamente la fuente y ia parrilla para asar que
viene con su estufa, Est;&n diset_adas para drenar
grasa y liquidos adecuadamente y prevenir
satpicaduras, hurno o fuego,.
No precaliente cuando ase a la parrSllla. Para
asar en forma uniforme en ambos tados, empiece en
una fuente fria,
Corte elexceso de grasa de lacame y las chuletas, Haga
cortes en la came para prevenir que se enrosque
Para que la came quede bien jugosa, p_)ngale sal al
primer lado al mornento de darla vuetta. POngate sal
al segundo lado al momento de servirta.
Aplique mantequilla al polio y al pescado varias
veces con una brocha mientras se asa. Cuando ase
pescado, engrase ta parrilla para prevenir que se
pegue y _seto con ta piel hacla abajo. No es
necesario dar vuelta el pescado.
Nunca deje una fuente para asar suc_a en la
estufa. La grasa en la fuente podria causar humo o
quemarse ta pr6xima vez que el homo se use,
Cerci6rese de que sepa el procedimtento correcto para
apagar un incendio de g_., Vea ta secci6n de
seguHdad.
POS; ICIION LA FU NTi PA]RA ASAIR
Asar a la parrilta es asar a luego directo del elemento
para asar. Los cortes tlernos de came o came marinada
deben set seleccionadas para ser asadas. Para mejores
resultados, los bistecs y las chuletas deben tenet
menos de 3/4" de grosor.
D_spues de poner la comida sobre la fuente y Iaparrilla,
cotoque la fuente en la parri]la del horno en la posicion
r_:.o,mendada. La posicion recomendada para las
;_,=i!Ias y el tiempo de cocinar se encuentran en la tabla
-':_:!o_asabajo_
11
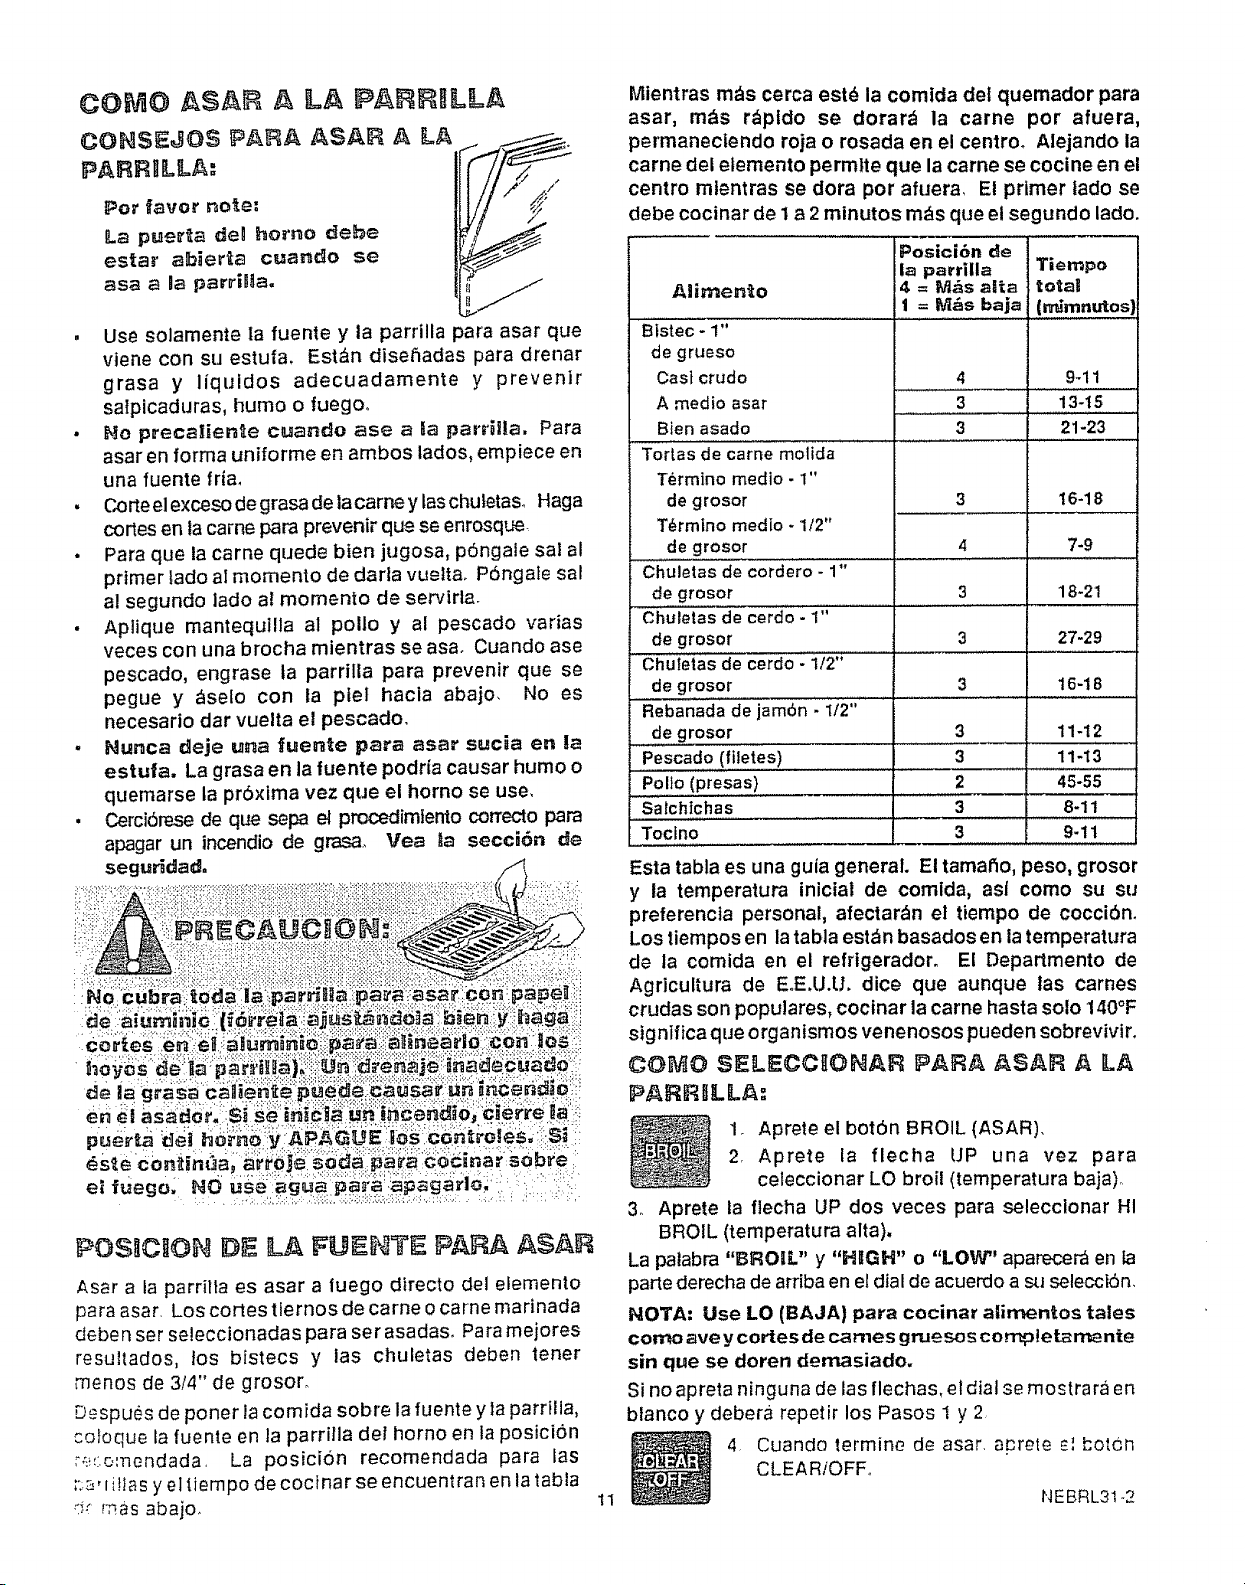
Mientras m_s cerca estd la comtda dei quemador para
asar, m_s r_pldo se dorar_ la came por afuera,
permanectendo roja o rosada en el centro. Alejando la
carne del elemento permlte que la came se cocine en el
centro mtentras se dora por afuera. El primer lado se
debe cocinar de 1a 2 minutos m_s que el segundo lado.
Allimen_o
Btstec - 1"
de grueso
Cast crudo
A medio asar
Bien asado
Tortas de came motida
Termino medio - 1"
degrosor
T6rmlno medio - 1/2"
de grosor
Chuletas de cordero- 1"
de grosor
Chuletasde cerdo - 1"
de grosor
Chuleta"s""d'e'cerdo - i/2"
de grosor
Posici6n de
la parrilla Tiempe
4 = tVl,_sal_a tota_
1 = _s baja
(_m..t_
4 9_11
16-18
7-9
18-21
27-29
3 13-15
3 21-23
3
4
3
3
3 16-18
3 11-12
3 11-13
2
3 8-11
3 9-1t
de grosor
Pescado (filetes)
.................................. =,
Polio (presas)
Saichichas
To foo........................I
Esta tabla es una gufa general. El tamal_o, peso, grosor
y la temperatura inicial de comlda, asl como su su
preferencla personal, afectar_n el tiempo de coccibn.
Los tiempos en la tabla est_n basados en la temperatura
de la comida en el refrigeradoh El Departmento de
Agricultura de EoE,U.U. dice que aunque tas carnes
crudas son populares, cocinar la came hasta solo 140°F
signlfica que organismos venenosos pueden sobrevivtr.
COCO $F..LECCIIONAR PARA ASAR A LA
PARR_LLA:
1_ Aprete el botdn BROIL (ASAR),
2, Aprete la flecha UP una vez para
celeccionar LO broil (temperatura baja).
3. Aprete la flecha UP dos veces para selecclonar HI
BROIL (temperatura alta).
La palabra "BROIL" y "H_GH" o "LOW _' aparece_ en ta
parle derecha de arriba en eldial de acuerdo a _l seleccidn,
NOTA: Use LO (BAJA) para cecinar allirnentos tales
corno ave y cortes de cames gruesos completarnente
sin que se doren demasiado,
Si no apreta ninguna de las flechas, eldial se mostrara en
blanco y debera repetir los Pasos 1 y 2
4 Cuando termine de asar acrete £__:otcn
CLEARiOFF_
I'JEBRL31 2

CICLO DE AUTOLI TiPIEZA (3 HORAS-
TIEMPO NORMAL DE LIMPJEZA)
ANTES DE UH CIICLO DE LiMP EZA
Saquela parriHa y la fuente para asar ala parrilla, las
parrillas del homo, todos los utenstiios y cualquier
trozo de papel de aluminio que pueda haber en el
homo,. No irate de limpiar utensilios u otros objetos
en el homo durante el clclo de auto-lirnpieza. Si las
parriltas se quedan en el horno durante un ciclo de
limpieza, se oscurecer_n, perderan su brilto y ser_
difictl desltzarlas. Si elige dejar las parrillas dentro
del homo, puede pulir las orillas de las parrillas con
lana de acero y aplicar una pequef_a cantidad de
aceite vegetal en las orillas de las parrillas despu_s
del clclo de autolimpieza_ Esto facilitara el
deslizamiento de las parrillas.
LUZ DEL HORNO
Para prolonger la vlda del foco, aseg_Jrese
de que la luz del homo est_ APAGADA (OFF)
DURANTE LA AUTOLIMPIEZA..
MARCO
DELANTERO
Si observe que el sello sa desgasta, se parte o _ '_
de cualquier rnodo o si se ha rnovido de su sitio er,__,
puerta, debiera reemplazar el selio.
Pot favor observe;
El selto de la puarta est_ diseifiado para tener un abertura
de 5"- 6" en el rondo de la puerta del homo. Esto es pare
parmitir que haya una correcta circulacion de aire.
PANEL DE LA PUERTA SELLO
I
REVESTIM1ENTO DE LA PUERTA
PARA LLEVAR A CABO UN C CLO
DE AUTOLIMPIJEZA:
1,.Aprete el botbn CLEAN, El dial mostrar_ "CLEAN'_
"TIME", y (.... ).
SELLO DE
LA PUERTA
REVESTIMIEHTO DE LA PUERTA
"-%,
2. Durante el ciclo de lirnpieza no saldr& la suciedad del
marco delantero del homo, de debajo de la orilla
delantera de la cublerta, del revestirniento de la
puerta fuera del selto y de la orilla delantera de la
cavtdad del horno (alrededor de 1" dent ro del homo).
Vea las tlustraclones de abajo. Lirnpie esas _reas a
rnano antes de cornenzar el ciclo de iirnpiezao Use
agua caliente con lana de acero empapada en jab6n_
Recomendarnos un limptador corno "Soft Scrub" o
una rnarca similar de productos de lirnpieza para que
las superficies blancas se sigan viendo limpias y
nuevas. Despu_s de la limpteza, enjuague blen para
evitar que se forrne un residuo caf_ cuando et horno
se catiente, Frote estas _reas con una tale seca.
3. Ltrnpie los derrames grandes del rondo del homo,,
Un exceso de sucledad puede causar humo durante
et ctclo de limpieza.
4. No frlegue etsello de la puerta. Elmaterial de fibra de
vidrio det sello es extremadarnente poco resistente a
la abrasi6n. Un sello de la puerta del homo intacto y
que ajuste bien es esencial pare el uso de energia
eftciente del homo y buenos resultados al hornear.
2_ Aprete los botones de las llechas UP o DOWN pare
seleccionar la cantidad de tiempo qua usted desea
para limpiar el homo° El cicto normal as de 3 horas,
pero usted puede elegir entre 2 y 4 horaso
Usted puede apretar el bot6n HORA DE PARO (STOP
TIME) para ver a qu_ hora terrninar_ el cicloo Aprete el
bot6n CLEAN para volver a la cuenta hacia aires.
Asegurese de que ta luz del homo est_ apagada durante
el ciclo de autolirnpieza para prolongar la vtda det foco.
12
(Laautolimpieza conlinua en la siguienle p&gina, _,)
NESCL64
(continuaciSn de ALrtoiimpieza ......)
CUAHDO TERMINA UN C CLO DE
AUTOUMPIIEZA:
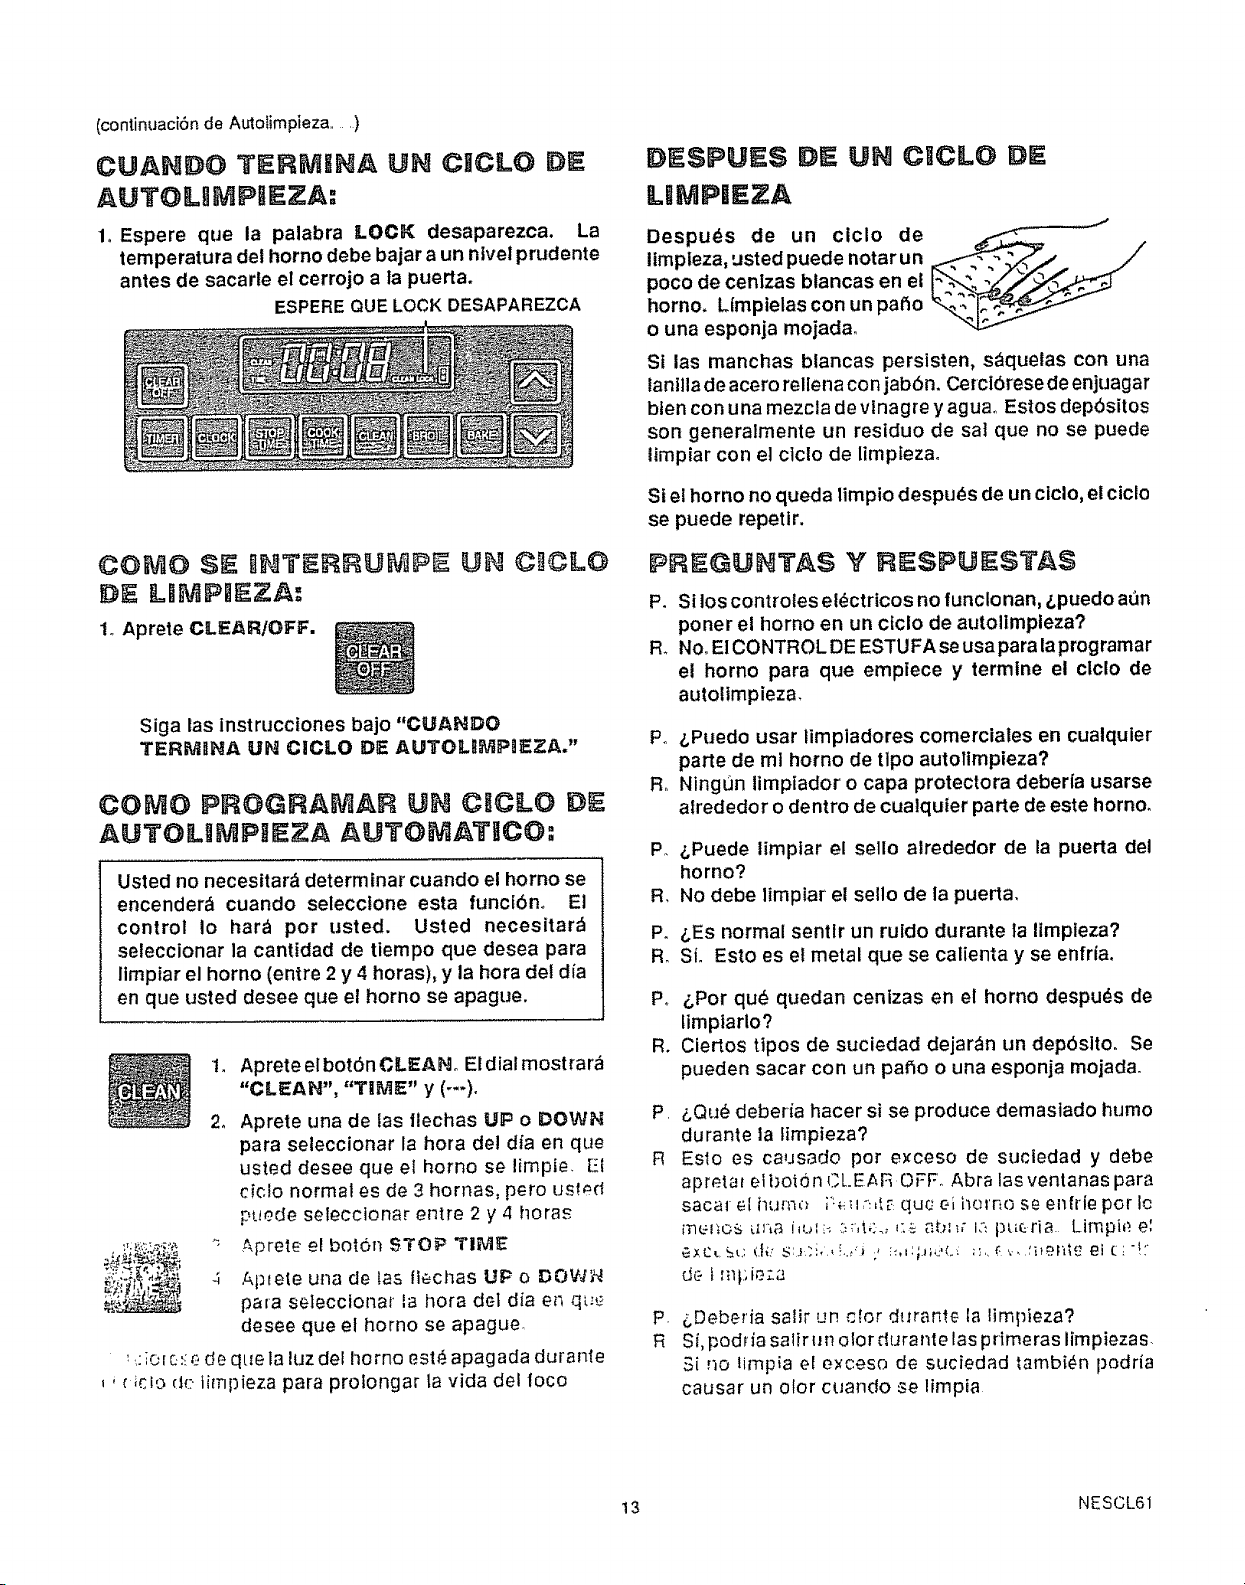
1oEspere que la palabra LOCK desaparezca. La
temperatura del homo debe bajar a un ntvel prudente
antes de sacarte el cerrojo a ta puerta.
ESPEREQUELOCKDESAPAREZCA
COMO SE _,_TERRU_PE UH C_CLO
DE LIMPmEZA:
1. Aprete CLEARIOFF,
Siga las instrucciones bajo "CUAHDO
TERM_NA UN CICLO DIE AUTOLRMPgEZA."
COMO PRGGRA_AF_ UH CICLO DE
AUTOLIIMPIt_:ZA AUTOMATICO:
Usted no necesitar_ determinar cuando e! homo se
encender_ cuando selecclone esta funct6n. El
control Io har_ por usted. Usted necesitar_
seleccionar la cantidad de tiempo que desea para
limpiar el horno (entre 2 y 4 horas), y la hora del dia
en que usted desee que el horno se apague.
1. Aprete el bot6n CLF__AHoEldial mostrara
"CLEAN", "TIME" y (---)o
2_
4
Aprete una de las flechas UP o DOWN
para seleccionar la hora del dia en que
usted desee que el homo se limpie. El
cic!o normal es de 3 hornas, pero us!_d
puede seleccionar entre 2 y 4 horas
¢_prete el bot6n STOP TIME
Ap=ete una de tas fiecl_as UP o DOWN
para selecctonar la hora det dia ez_que
desee que el homo se apague.
'...:;o_e:ie de que la luz del I_orno est_ apagada duranle
, _icio de timpieza para prolongar la vida del foco
LIMPi ZA
Despu_s de un cicio de
llmpleza, usted puede notar un
poco de cenlzas blancas en el
homo, Lfmpielas con un patio
o una esponja mojada°
St las manchas blancas persisten, s_quetas con una
lanilla de acero rellena con jabdn. Cerctbrese de enjuagar
bten con una mezcla de vlnagre y agua.. Estos depbsitos
son generalmente un residuo de sa] que no se puede
limpiar con el ciclo de limpiezao
Si et horno no queda timpio despu_s de un ciclo, el ciclo
se puede repetir.
PRAGUHTA$ Y RIASP_I_$TA$
P. Stlos controtes el_ctricos no funclonan, &puedo aQn
poner el homo en un ctclo de autolimpteza?
R. No°E! CONTROL DE ESTUFA seusa para laprogramar
el horno para que emplece y termlne el clclo de
autollmpieza.
Po _,Puedo usar limpiadores comerciales en cualquier
parte de ml homo de tlpo autollmpieza?
Ro Ningun limpiador o capa protectora debeda usarse
alrededor o dentro de cualquier parte de este horno.
P. &Puede limptar el sello alrededor de ta puerta del
homo?
R, No debe limpiar el setlo de la puerta,
P° &Es normal sentlr un ruido durante la limpieza?
R. SL Esto es el metal que se calienta y se enfria,
Po &Por qu_ quedan cenizas en el homo despu_s de
limplarlo?
R. Ciertos ttpos de suciedad dejar_n un depSslto. Se
pueden sacar con un patio o una esponja mojada.
P,
R
&Qu6 deberia hacer si se produce demastado humo
durante la lirnpieza?
Es_o es causado pot exceso de sucledad y debe
apreta_ el boron CLE i_ROFF. Abra las ventanas para
sacar el humo ;1._I_:,_:quc.'ei i_orno se enfrle por Ic
iTlet_OS btr_a i_ulb :::.,!._:., _:,_ a[_;_; IQ t)[icria. Lirnpit_. e:
e_C_.S_;d{.'S:J;:i,.,!.._t , :_,,:p;,_'(.- ;,,.,r_v,.f]_gr,_ ei c:-!:
de i mf:;ieza
p.
R
_,Deberia salir uP.c[or durartte la limpieza?
Si,podria salir un olor durante las primeras limpiezas.
Si no Iirnpia el exceso de suciedad tambi_n podria
causar un olor cuando se lirnpia
13 NESCL61
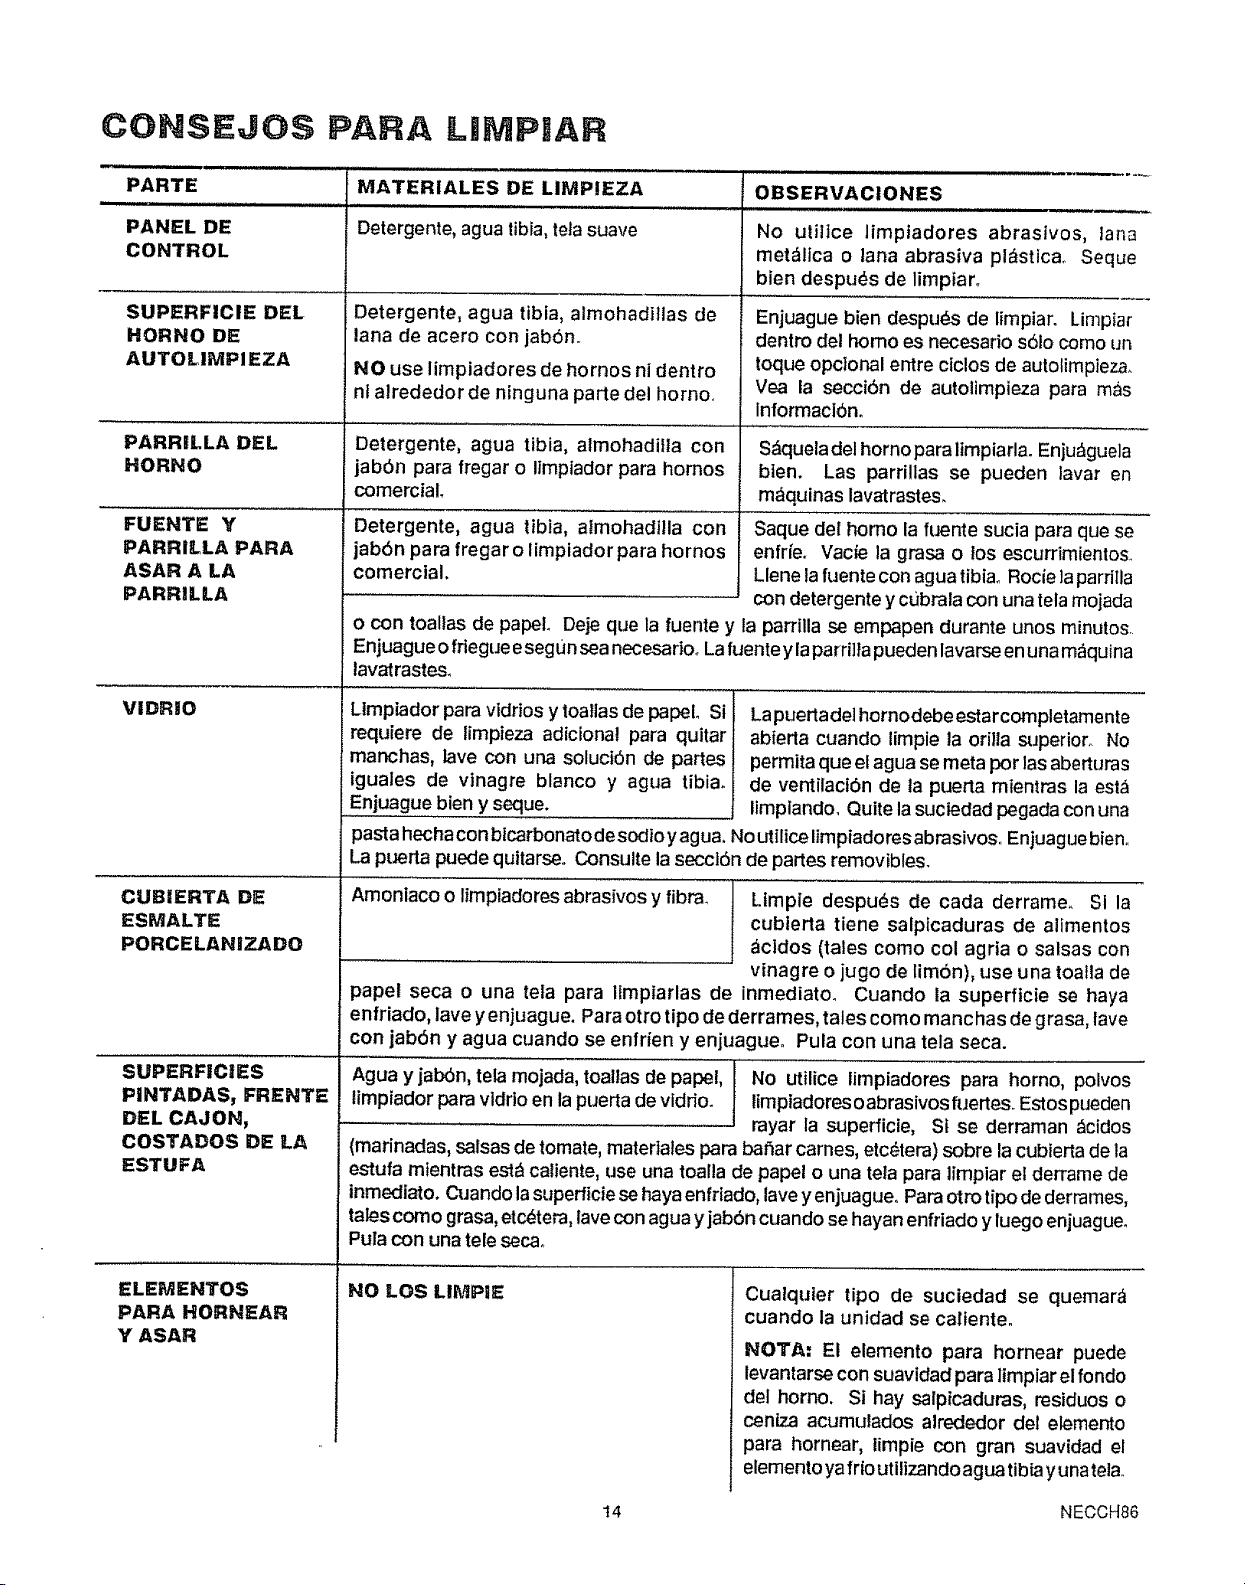
CONSEJOS PARA LIMPIAR
PARTE
PANEL DE
CONTROL
SUPERFIClE DEL
HORNO DE
AUTOLIMPIEZA
MATERIALES DE LIMPIEZA
Detergente, agua tibia,tela suave
Detergente, agua tibia, almohadilias de
lana de acero con jab6n.
NO use limpiadores de hornos ni dentro
nt alrededor de ninguna parte del homo,
OBSERVAClONES
J_J,..,i .i
No uliitce limptadores abrastvos, lana
met_llca o lana abrasiva pl_stica,. Seque
bien despu_s de limpian
Enjuague bien despuc_sde limpiar. Limpiar
dentro del homo es necesario s61ocomo un
toque opclonal entre ciclos de autolimpieza.
Vea la secci6n de autotimpieza para mas
lntormacl6n.
PARRILLA DEL Detergente, agua tibia, almohadifla con S_queladelhornoparalimpiarla. Enju_guela
HORNO jab6n para fregar o limpiador para homos bten. Las parrillas se pueden )avar en
comerciaL m_quinas lavatrastes.
FUENTE Y
PARRILLA PARA
ASAR A LA
PARRILLA
VIDRIO
Detergente, agua tibia, atmohadilla con
jabbn para fregar o limpiador para hornos
comerclal.
CUB|ERTA DE
ESMALTE
PORCELANIZADO
Saque del homo la fuente sucia para que se
enfrfe. Vacie la grasa o los escurrimientos.
Llene lafuente con agua tibia_ Rocie laparrilla
con detergente y c_Jbralacon una tela mojada
SUPERFICIES
PINTADAS, FRENTE
DEL CAJON,
COSTADOS DE LA
ESTUFA
ELEMENTOS
PARA HORNEAR
Y ASAR
o con toallas de papeL Deje que la fuente y la parrilla se empapen durante unos minutos.
Enjuague o frtegue esegun sea necesario_ Lafuente ylaparri]la pueden lavam_ en una maquina
lavatrastes_
Llmpiador para vidrios y toallas de papeL Si Lapuertadel hornodebeestarcompletamente
requiem de limpieza adiciona! para quitar abierta cuando limpie la orilla superior. No
manchas, lave con una soluci6n de partes permita que etagua se meta pot las aberturas
iguales de vinagre blanco y agua tibia, de ventilacibn de la puerta rnientras la esta
Enjuague bien y seque+ limplando. Quite la sucledad pegada con una
pasta hechacon blcarbonato desodio yagua. Noutilice limpiadores abrasivos,. Enjuague bien,.
La puerta puede quitarseo Consulte la seccl6n de partes removibles.
Amoniaco o limpiadores abrasivos y fibra_ Ltmpie despu_s de cada derrame. SI la
cubterta tiene salplcaduras de allmentos
_cldos (tales como col agria o salsas con
vinagre o jugo de lim6n), use una toatla de
papel seca o una tela para ltmpiarlas de inmediato° Cuando la superficie se haya
enfriado, lave yenjuague. Para otro tipo de derrames, tales como manchas de grasa, lave
con jab6n y agua cuando se enfden y enjuagueo Pula con una tela seca.
Agua y jal:K)n,tela mojada, toallas de Pal)e!, I No utilice limpiadores para homo, polvos
limpiador para vldrioen ta puertade vlddo. I limpiadoresoabrasivosfuertes,.Estospueden
rayar la superficie, St se derraman &cidos
(marinadas, salsas de tomate, materlales para bafiar carnes, etc_tera) sobre la cubierta de la
estufa mIentms est_ caliente, use una toalla de papel o una teta para ]impiar et derrame de
inmediato. Cuando lasuperficie sehaya enfdado, lave y enjuague,. Paraotto tipo de derrames,
tales como grasa, etc_tera, lavecon agua y jab6n cuando se hayan enfriado y luego enjuagueo
Pula con una tele secao
NO LOS LllVIPIE
Cualquler tipo de suciedad se quemar_
cuando la unidad se caliente.
NOTA; El elemento para hornear puede
levantarse con suavidad para ltmpiar elrondo
del horno. Si hay salptcaduras, residuos o
centza acumulados alrededor del elemento
para hornear, limpie con gran suavidad el
elemento yafrloutilizandoagua tibb yunatela,.
t4 NECCH86
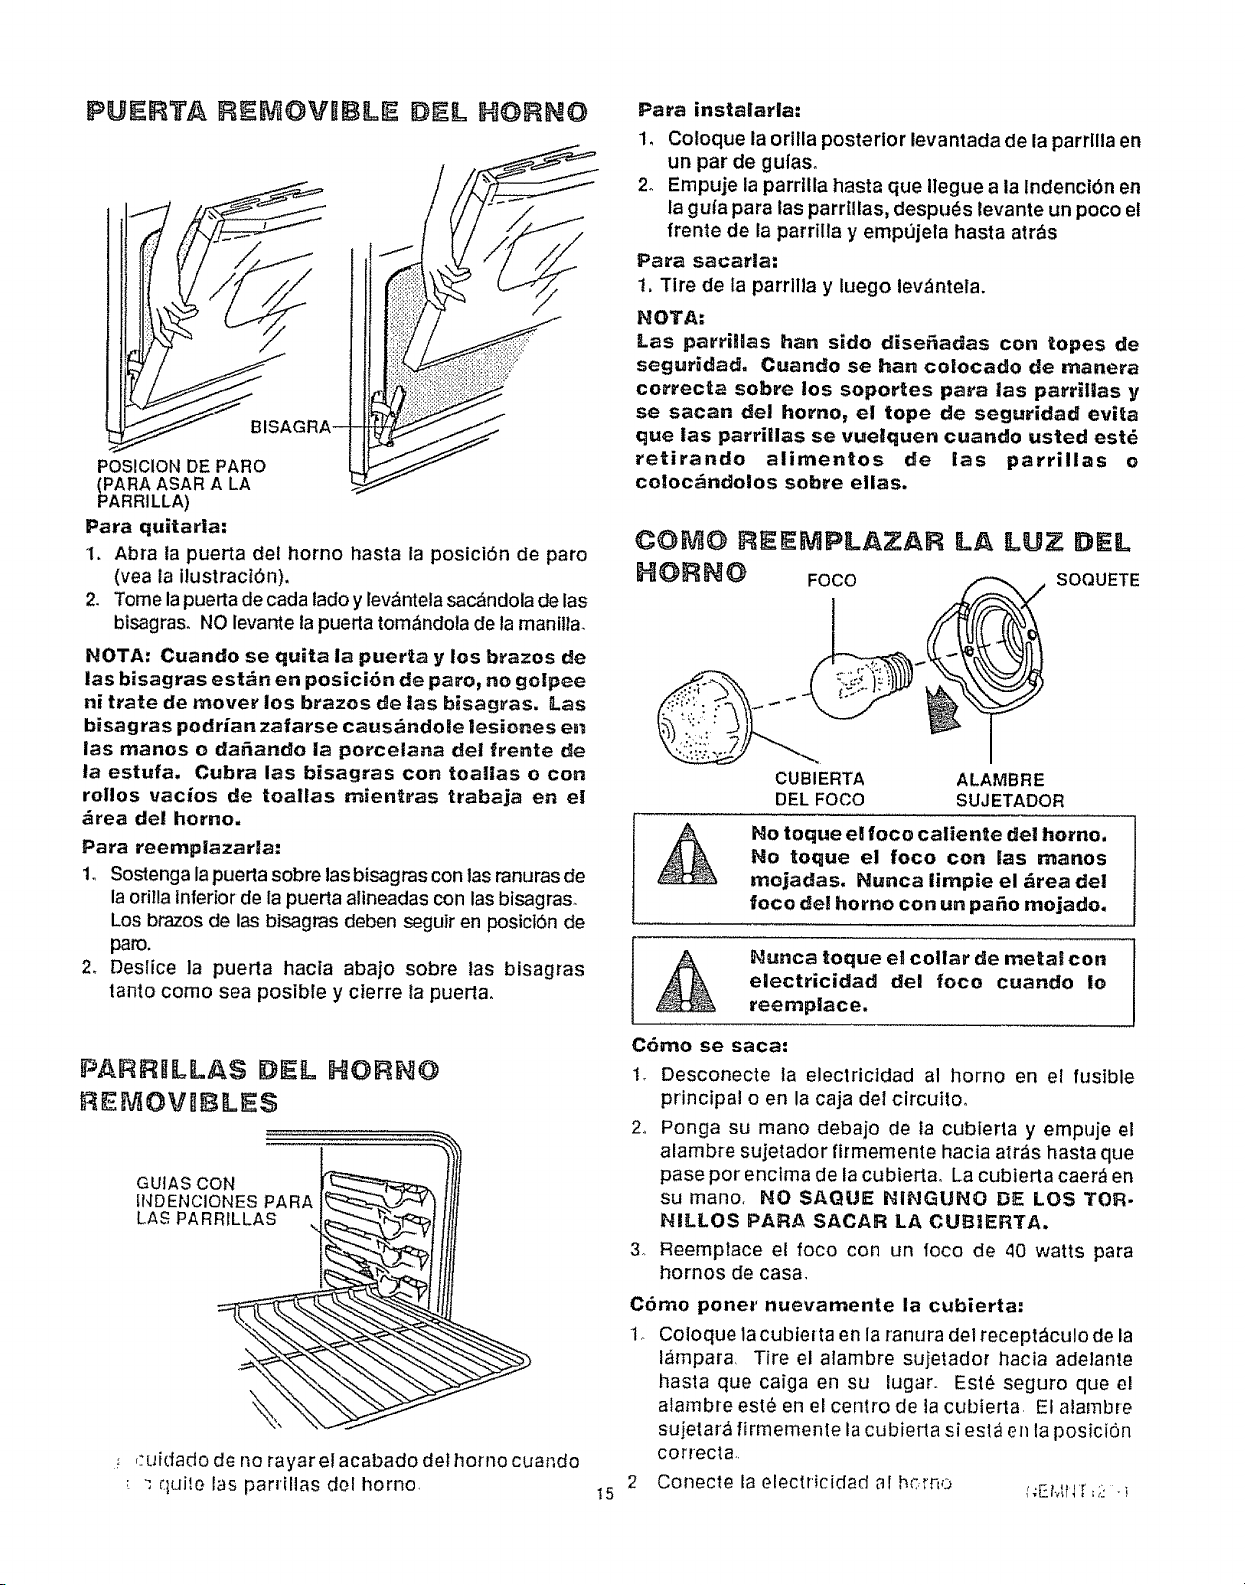
PUERT_ REMOVBBL HORNO
BISAGRA--
POSIClONDE PARe
PARA ASAR A LA
RRILLA)
Para quitarla:
1. Abra ia puerta del horno hasta la posici6n de pare
(Yea la ilustract6n),
2. Tome lapuerta de cada lade y lev&ntela sac_ndola de las
bisagras. NO levante la puerta tom_ndola de la manil/a_
HOTA: Cuando se quita la puerta y los brazes de
las bisagras estdn en posici6n de pare, no gelpee
nitrate de mover los brazes de |as bisag_as. Las
bisagras pedrian zafarse causdndole lesienes en
las manes e dla_ando la porcelana del frente de
la estufa. Cubra las bisagras con toallas o con
rol!os vacios de toallas rnien_ras trabaja en el
drea del homo.
Para reemplazarla-"
1, Sostenga lapuertasobre lasbisagras con lasranurasde
laorillainferior de lapuerta alineadas con lasbisagras.
Los brazes de las bisagras deben seguiren posictOn de
pare.
2_ Deslice la puerta hacia abajo sobre las bisagras
tanto come sea posible y cterre la puerta.
PARRULLA$ DEL HORHO
REMOVABLES
GUtAS CON
tNDENCIONES PARA
LAS PARRILLAS
\
,:uidado de no rayar el acabado del llorno cuando
_ qui!e las parrillas del homo.
Para instalarla:
1, Coloque la orilla posterior levantada de la parrllla en
un par de gufaso
2_ Empuje la parrllla hasta que liegue a la Indenci6n en
la guia para tas parrillas, despuds levante un poco et
frente de la parrilla y emp_Jjela hasta arras
Para sacaria:
t, Tire de la parrilla y luego lev_ntela.
NOTA:
Las parriHas ban sido dise_adas con topes de
seguridad. Cuando se hart colocado de rnanera
correcta sobre los sopor_es para las parrillas y
se sacan del homo, el tope de seguridad evita
que las parriilas se vuellquen cuando usted estd
retirando alirnentos de las parrillas e
colocdndolos sobre elias.
t5
CUBIERTA ALAMBRE
DEL FOCO SUJETADOR
He toque ell |oco caliente del home.
He toque el foco con las manes
rnojadas. Nunca limpie el drea del
foco dell homo con un pa_o mojado.
F,_unca _oque e! collar de nletali con
electricidad del foco cuando lie
reernplace.
C6mo se saca:
1, Desconecte ta electrictdad al homo en el fusible
principal o en la caja del circuitoo
2o Ponga su mane debajo de ia cubierta y empuje el
alambre sujetador firmemente hacia atr_s hasta que
pase per encima de fa cubierta_ La cubierta caer_ en
su mano, NO SAQUE HINGUNO DE LOSTOR.
HILLOS PAR_ SACAR LA CUBIERTA.
3. Reemplace el foco con un foco de 40 watts para
hornos de casa.
C6mo ponei' nuevamente la cubierta:
1_ Coloque la cubieita en la ranura del recept&culo dela
lampara Tire el alambre sujetador hacia adeiante
hasta que caiga en su lugar. Est6 seguro que el
alambre est_ en el centro de la cubierta. El alambre
sujetar_ firmemente la cubierta si esl_ en la posicion
correcta.
2 Conecte la electricidad al hcrno t;EMtlI,2-
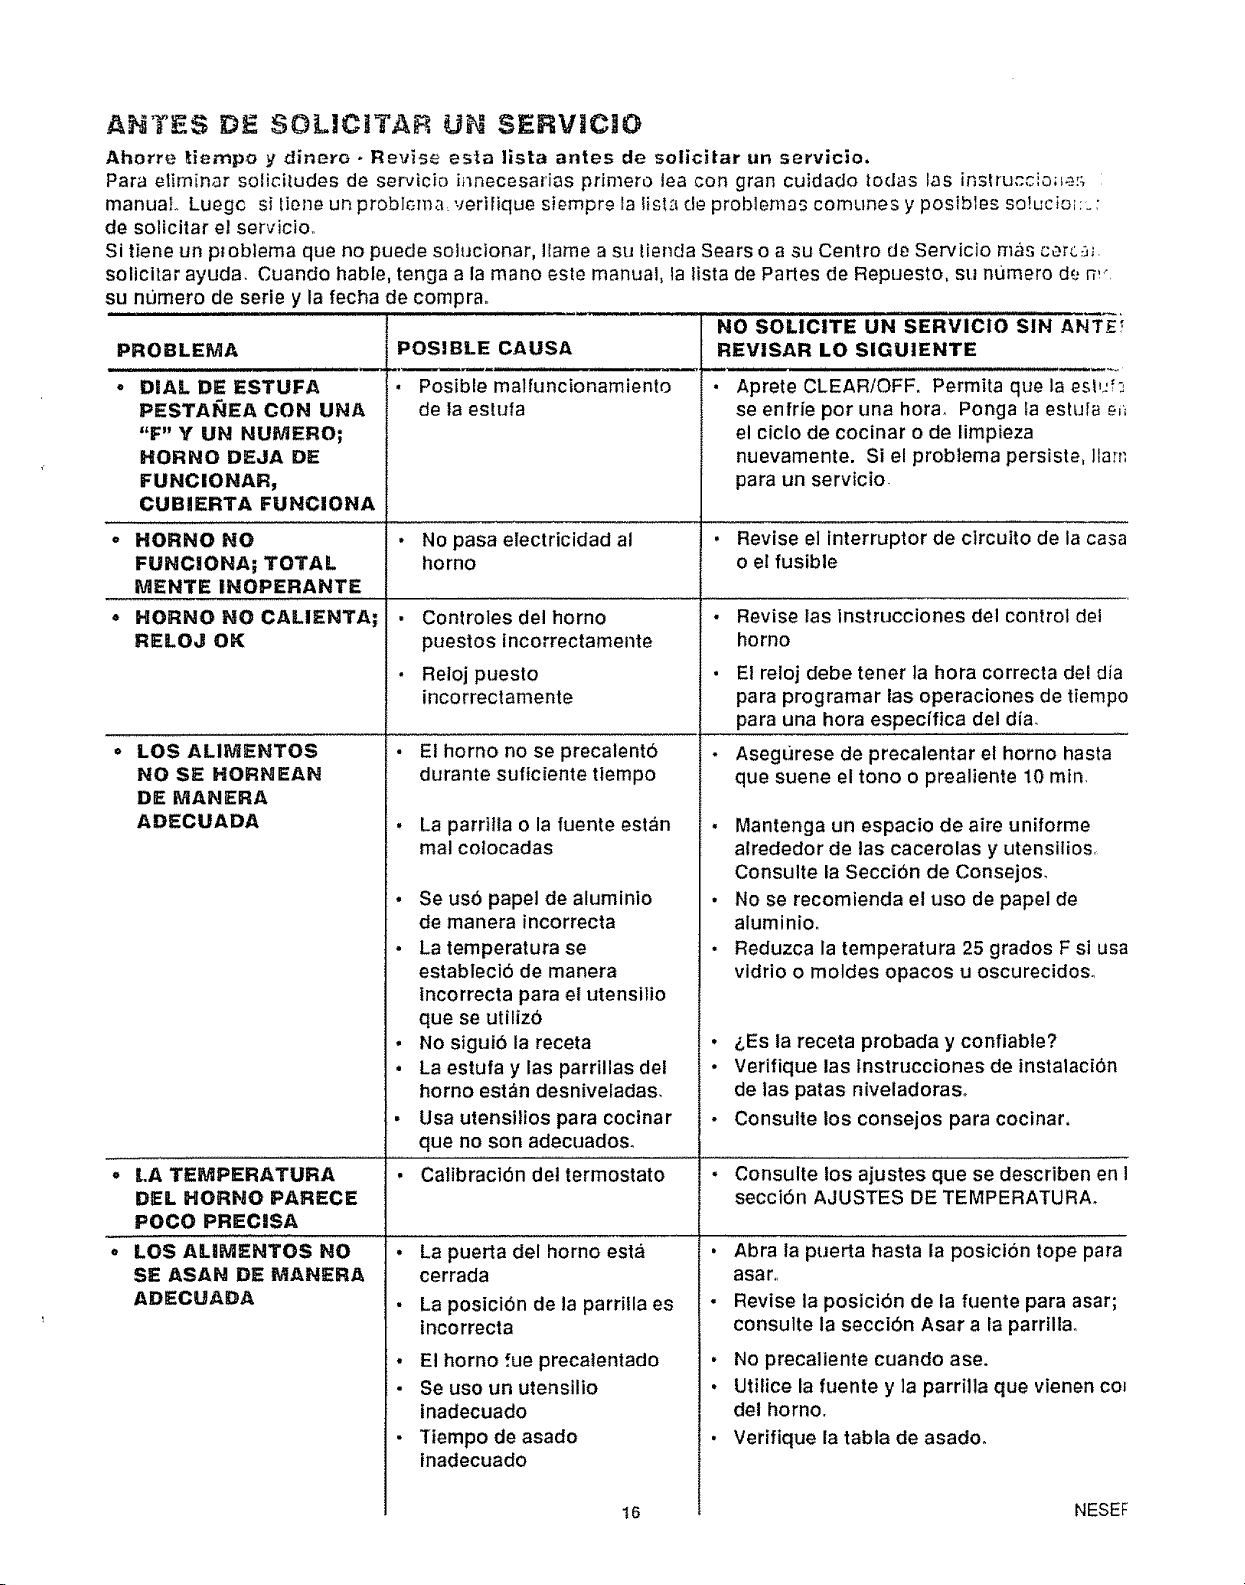
ANTES; DE SGL]CIlTAR UH SERVJCIG
Ahorre _iempo _/dinero • Revise esta |ista antes de solicitar un servic]o.
Para etiminar solicitudes de servicio i_necesarias primero lea con gran cuidado to(J_tslas instruccio;_;,,
manual Luegc si tior]e un probl_ma veririque siempre la tist_ de problemas comunes y posibles so!ucio=:_
de solicitar el servicioo
Si tiene un ptoblema que no puede soiucionar, Ilame a su lienda Sears o a su Centro de Servicio m&s cerc_
solicitar ayuda Cuando hable, tenga a la mano este manual, la lista de Partes de Repuesto. su numero de _
su numero de serie y la fecha de compra
NO SOLICITE UN SERVIClO SIN ANTE,"
PROBLEMA REVISAR LO SlGUIENTE
• =
DIAL DE ESTUFA
PESTAI_EA CON UNA
"F" Y UN NUMERO;
HORNO DIEJA DE
FUNCIONAR,
CUBIERTA FUNCIONA
HORNO NO
FUNCIONA; TOTAL
MENTE INOPERANTE
HORNO NO CALIIENTA;
RELOJ OK
LOS ALIM"=NTOS
NO SE HORHEAN
DE MAHERA
ADECUADA
, ILA TEMPERATURA
DEL HORHO PARECE
POCO PRECISA
• LOS ALIMEHTOS NO
SIE ASAN DE MANIERA
ADFtCUADA
POSIBLE CAUSA
• Posible malfuncionarniento
de la estufa
• No pasa electricidad al
homo
• Controles del homo
puestos incorrectamente
• Reloj puesto
incorrectarnente
• El horno no se precalent6
durante sufIciente tIempo
, La parrilia o la fuente estan
mal colocadas
• Se us6 papel de aluminio
de manera incorrecta
• La temperatura se
estableci6 de manera
incorrecta para el utensilio
que se utiliz6
• No sigui6 la receta
• La estufa y las parrillas del
horno est_n desniveladas
• Usa utenstllos para cocinar
que no son adecuados.
• Cattbraci6n det termostato
• La puerta del homo esta
cerrada
• La posici6n de la parriila es
tncorrecta
El horno rue precalentado
Aprete CLEAR/OFF, Permita que la es!,:f_
se enfrie por una hora Ponga la estu[a _J,
el ciclo de cocinar o de limpieza
nuevamente Si el problema persiste, Ilarr_
para un servicio
Revise el interruptor de clrcuito de la casa
o el fusible
. Revise tas lnstrucciones del control del
homo
, El reloj debe tener la hora correcta del dia
para programar las operaciones de tiempo
para una hora especffica del dia
- AsegtJrese de precalentar el homo hasta
que suene el tono o prealiente 10 mtn
• Mantenga un espacio de aire uniforme
alrededor de las cacerolas y utensilios
Consutte la Secci6n de Consejos.
• No se recomienda el uso de papel de
aluminio
• Reduzca la temperatura 25 grados F si usa
vidrio o moldes opacos u oscurecidoso
• _,Es la receta probada y confiable?
• Verifique las instrucciones de tnstalaci6n
de las paras niveladoraso
• Consuite los consejos para cocinar,
° Consulte los ajustes que se describen en I
secci6n AJUSTES DE TEMPERATURA_
. Abra la puerta hasta la posicion tope para
asar
. Revise la posici6n de la fuente para asar;
consulte la secci6n Asar a la parrtlla.
• No precaliente cuando ase.
• Se uso un utensilio
inadecuado
• Ttempo de asado
tnadecuado
• Utilice la fuente y la parrilla que vienen coJ
del horno
, Verifique la tabla de asadoo
16 NESEF
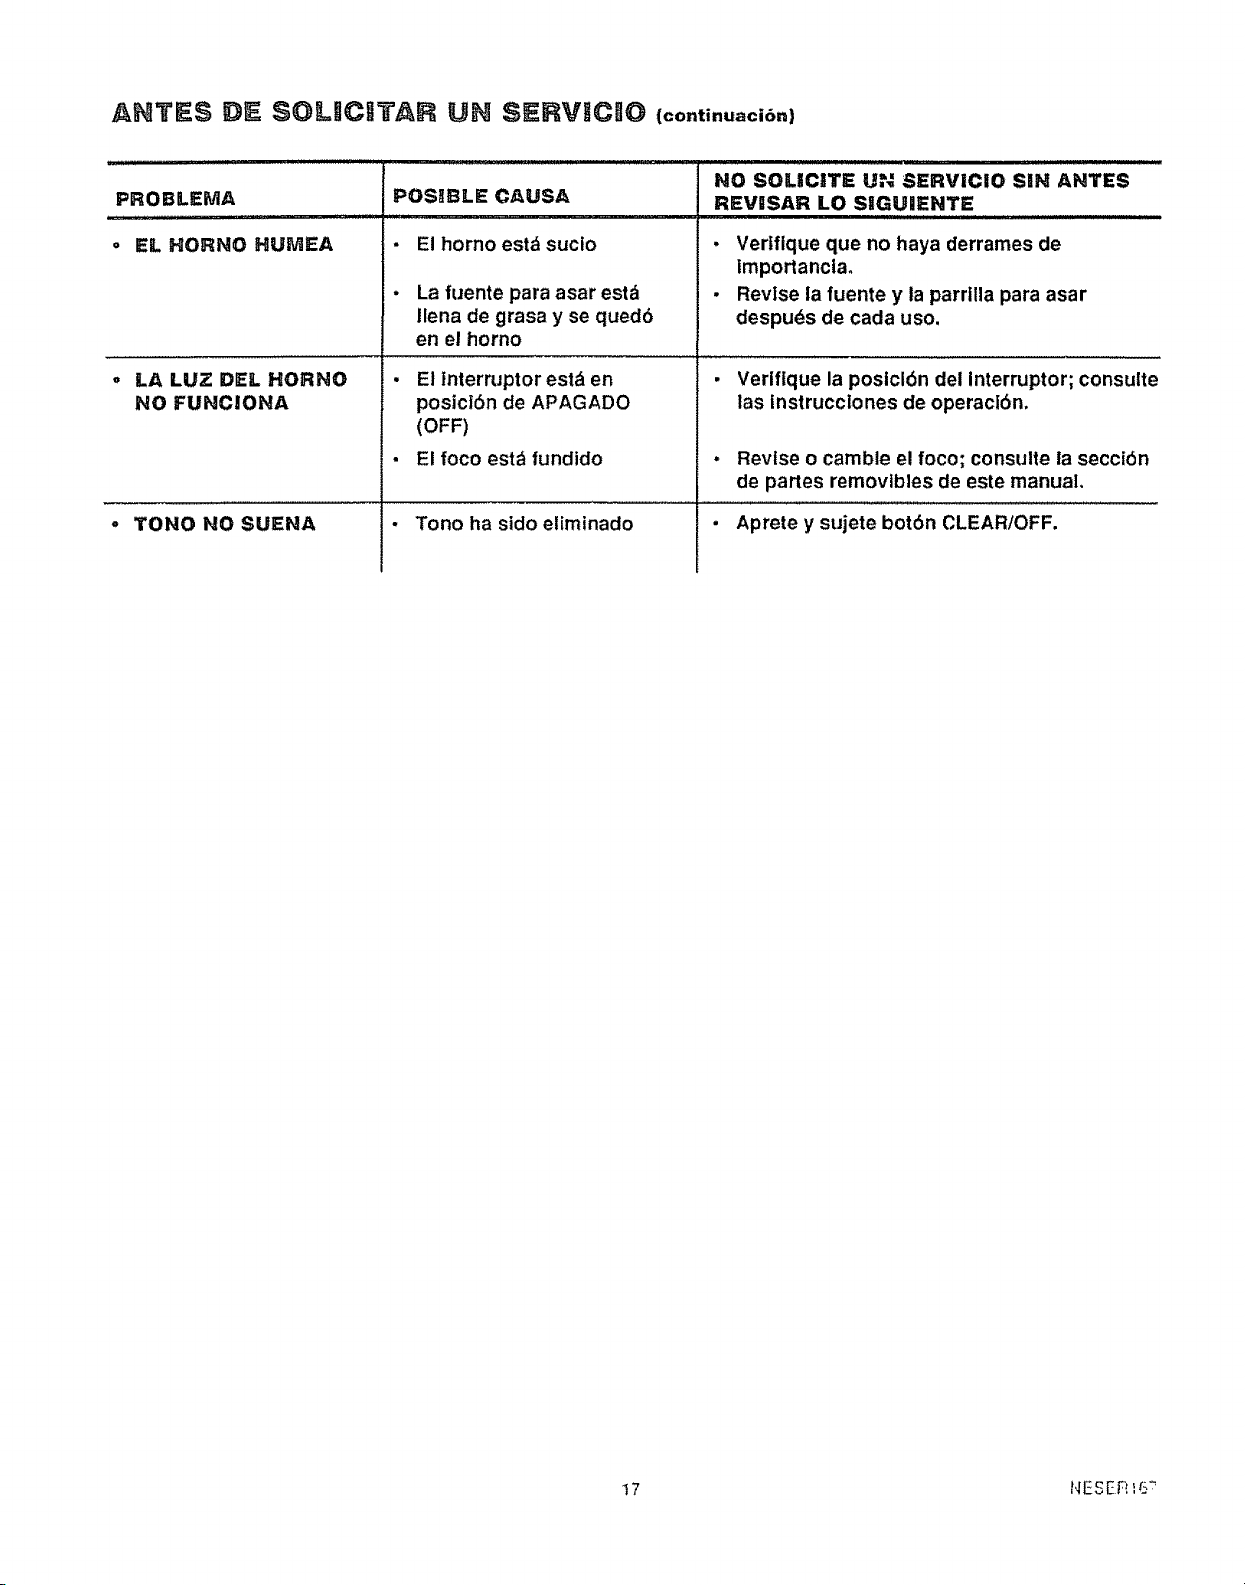
NO SOLICITE U,%=SERVICIO SIN ANTES
PROBLEMA POS_BLE CAUSA REViSAR LO SiGUIENTE
• EL HORNO HUMEA - El homo est_ sucio
o LA LUZ DEL HORHO
NO FUNCIONA
o TONO NO SUENA
. La fuente para asar estd
ilena de grasa y se quedb
en el homo
• El tnterruptor est_ en
posici6n de APAGADO
(OFF)
• El foco est_ fundido
• Tono ha sido eliminado
Vertfique que no haya derrames de
lmportancta.
Revise la fuente y la parrllla para asar
despu_s de cada uso.
• Verifique la posiclbn dei Interruptor; consulte
las instrucclones de operaci6n.
• Revise o camble el foco; consuite la seccibn
de partes removtbles de este manual,
• Aprete y sujete bot6n CLEAR/OFF.
17 HESER _6_
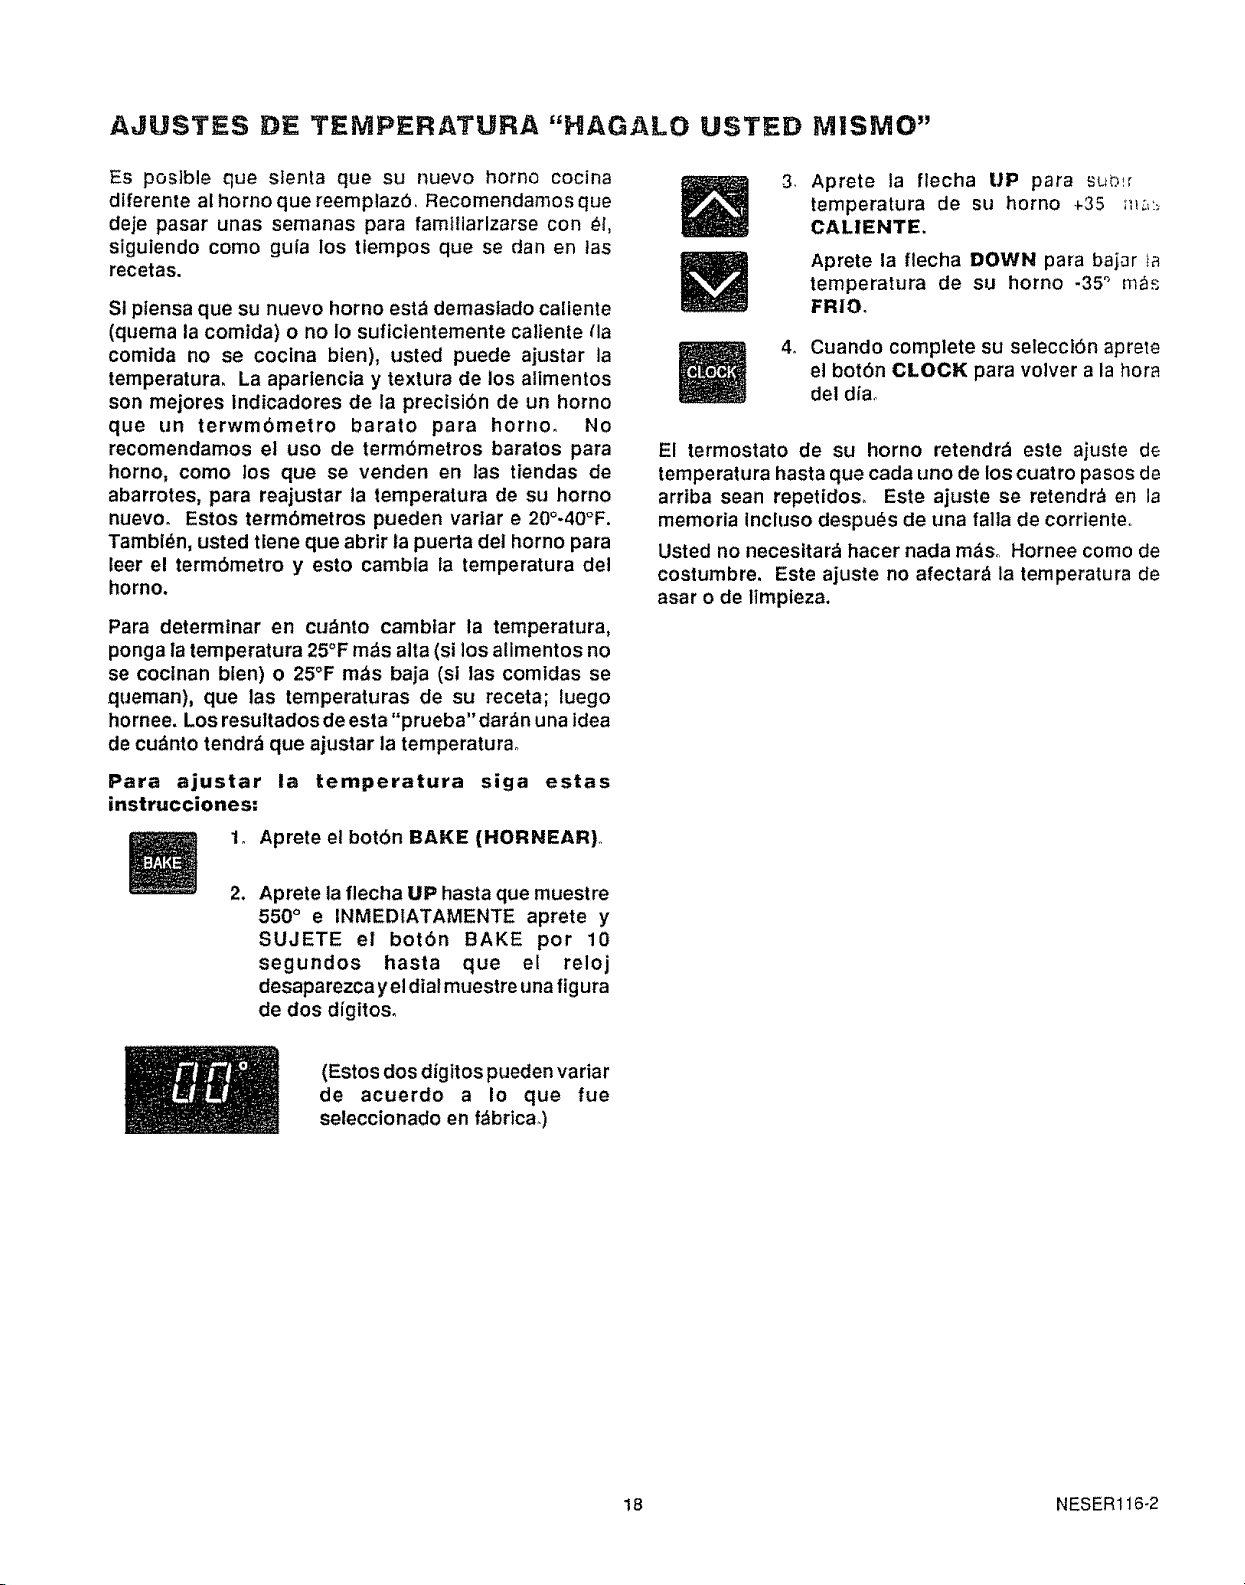
AJUSTES DE TEMPERATURA "HAGALO USTED MiSMO"
Es posible que stenta que su nuevo horno cocina
diferente al homo que reemplaz6, Recomendamos que
deje pasar unas semanas para famtllarlzarse con 61,
siguiendo como gula los tlempos que se dan en tas
recetas.
Sl ptensa que su nuevo homo est_ demasfado caliente
(quema la comlda) o no !o sufictentemente caltente (la
comida no se cocina bien), usted puede ajustar la
temperatura, La aparlencta y textura de los alimentos
son mejores tndicadores de la precisi6n de un homo
que un terwm6metro barato para horno. No
recomendamos el uso de term6metros baratos para
horno, como los que se venden en las tiendas de
abarrotes, para reajustar ta temperatura de su horno
nuevoo Estos term6metros pueden varlar e 20°-40°F.
Tambt_n, usted tiene que abrir la puerta del horno para
leer el term6metro y esto cambla ta temperatura del
horno.
Para determinar en cu_nto cambtar la temperatura,
ponga la temperatura 25°F m_s alta (si los allmentos no
se coclnan blen) o 25°F m_s baja (sl las comidas se
queman), que las temperaturas de su receta; luego
hornee. Los resultados de esta "prueba" darwinuna idea
de cu_nto tendr_i que ajustar la temperaturao
Para ajustar la temperatura siga estas
instrucciones:
1_ Aprete el bot6n BAKE (HORN==ARL
3, Aprete la flecha UP para sub_r
temperatura de su horno ÷35 ;_:,:_
CALIENTE.
Aprete la flecha DOWN para bajar ta
temperatura de su homo -35° mas
FRIO,
4, Cuando complete su seleccl6n aprete
e! bot6n CLOCK para votver a la hora
del diao
El termostato de su horno retendr_ este ajuste de
temperatura hasta que cada uno de los cuatro pasos de
arriba sean repetidos, Este ajuste se retendr_ en la
memoria Incluso despu_s de una falta de corriente..
Usted no necesltar_ hacer nada m_iSo Hornee como de
costumbre. Este ajuste no afectar_ la temperatura de
asar o de Itmpieza.
2_
Aprete la flecha UP hasta que muestre
550 ° e INMEDIATAMENTE aprete y
SUJETE el botdn BAKE por 10
segundos basra que el reloj
desaparezca y el dial muestre una fig ura
de dos digitos.
(Estos dos digitos pueden variar
de acuerdo a Io que rue
seleccionado en f_brica.)
18 NESER116-2
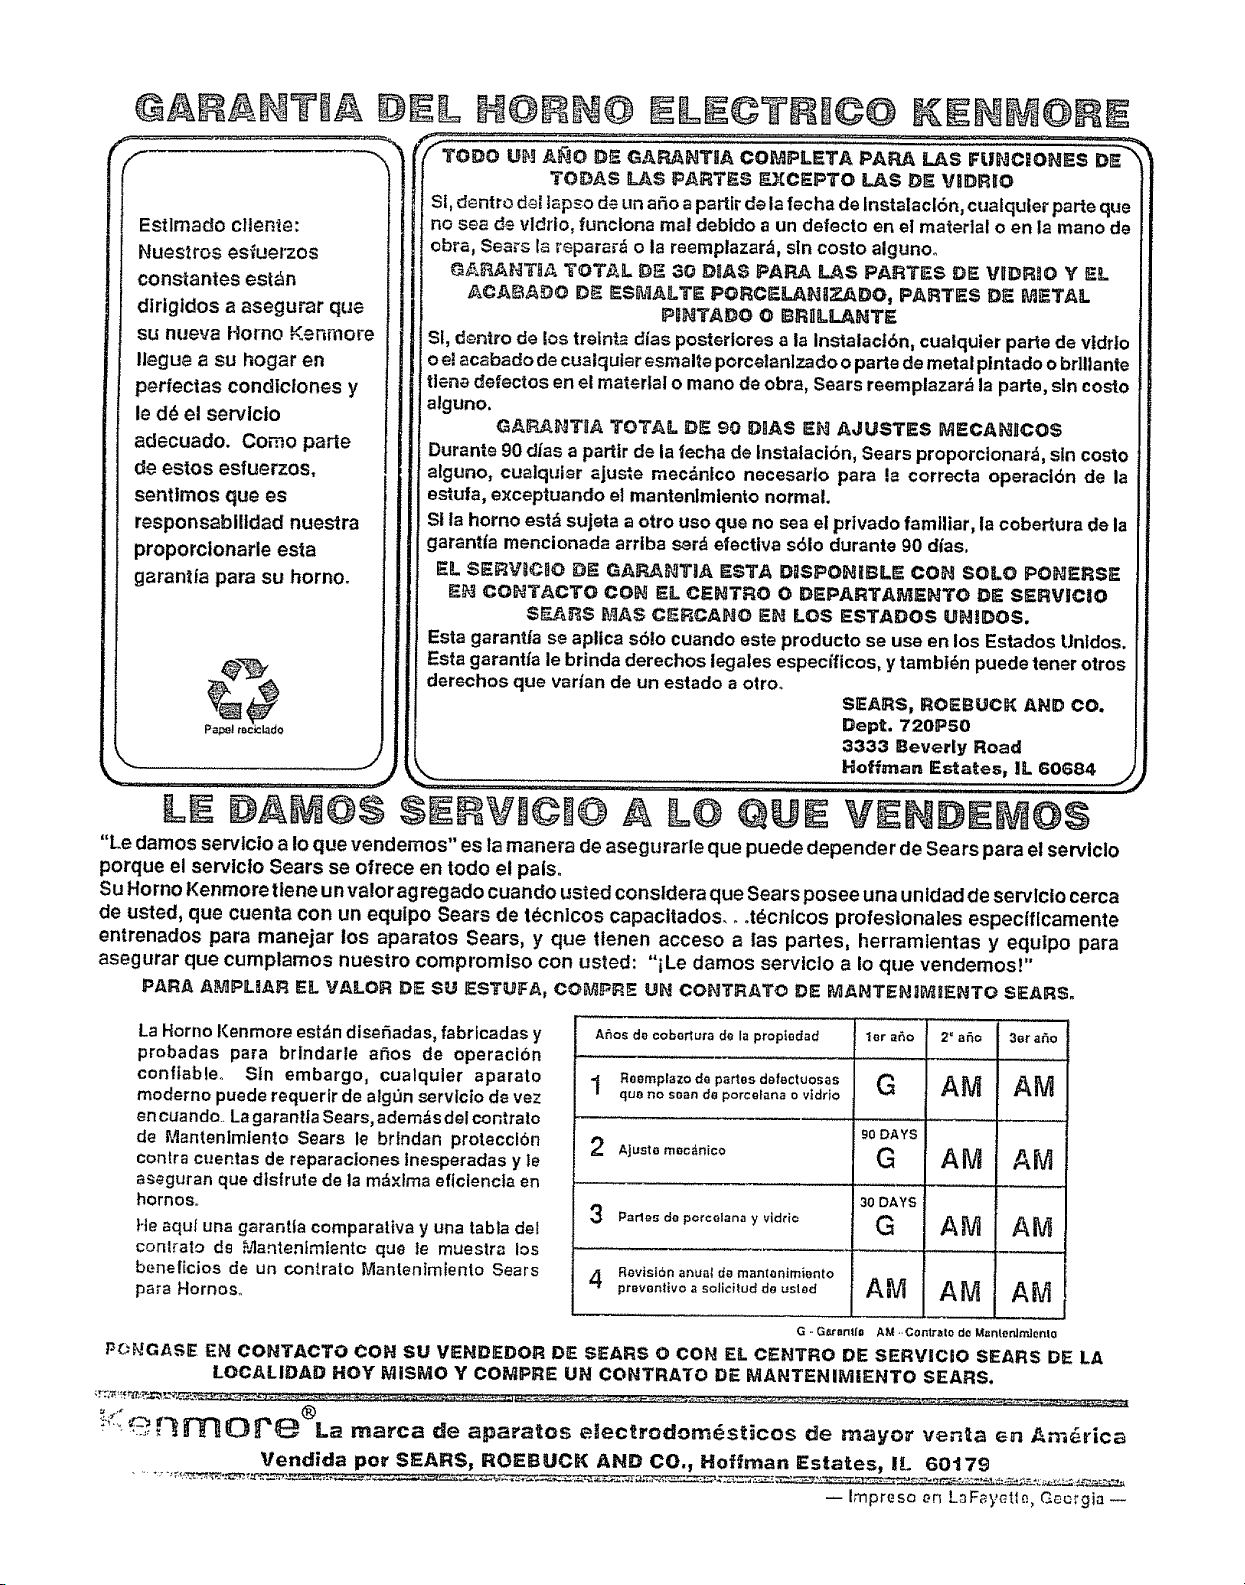
1Estlrnadocltente:
J Nuestros esiuerzos
I constantes est_n
t dlrfgtdos a asegurar qua
lsu nueva Horno Kenrnore
I llegue a su hogar en
I perfectas condtclones y
I le d_ el serviclo
I adecuado. Como parte
ld_ estos esfuerzos,
I sentimos qua es
I responsabllldad nuestra
I proporclonarle esta
I garantia pare su homo.
Pe4_e_rocicbdo
DIL H@IH@ ILI©TI I©@ III!III ©I ii
fTODo UH A_'_O DE GAP_NTIA COMPLETA PARA LAS FUNCIONES DE "_
TODAS LAS PART_S _.XC_-PTO LAS DE VIDRIO
SI, dentro d_ ]ap_o de un argoapartk de la fecha de lnstalack_n, cualquier parte que
no sea de vldrlo, funclona real debido a un defecto en el material o en ia mano de
obra, Sears la rsparard o la reemplazar,-f, sin costo algunoo
G/_PJ_t_Ti/_ TOTAL DE ,30 DIAS PARA LAS PARTES DE VIDRIO Y EL
ACAB_DO D_ !_S_ALT_ PORCI_LANIZADO, PARTIES DE t_ETAL
PtNTADO 0 E;RILLANTE
SI, dentro de los tre|nf._ dies post°floras a la Instalact<Sn, cualquter part° de vtdrlo
o et acabado de cu_iquter esmale porcelanizado o part° de metal pintado o brlllante
tlene defectos en el material o mano de obra, Sears reemplazarzi la parts, sin costo
alguno.
GAR_TIA TOTAL DE _O DIAS EH AJUSTES _ECANICOS
Durante 90 dies a partir de la ;echa de lnstalacibn, Sears proporctonard, sin costo
alguno, cualqul_r ajuste mecdnlco necesado pare !a correct° operach_n de la
estufa, e×ceptuando el mantanlmlento normal.
Si la homo estzi sujeta a otto uso qua no sea el prtvado familiar, la eobertura de la
garant_a mencionada arriba s_r,'f erectly° sSio durante 90 dlas.
EL _ERVtC!O _ GARA_TIA _TA D_SPOHi_L_ CO_ SOLO PO_RSE
I_ COF_TACTO COH EL CENTRO O DIEPARTAMENTO DiE SERVICIO
SF=_RS _JAS CERCAHO iEN LOS ESTADOS UHIDOS,
Esta garanta se apllca s_lo cuando este producto se use en los Estados Unldos.
Esta garantfa le brinda derechos iegales especticos, y tambt_n puede tener otros
derschos que varian de un estado a otro.
SEARS, ROEBUCK AND CO.
Dept. 720P50
3333 Beverly Road
Hoffman Estates_ ]L60684 J
"Le demos servtcio a Io que vendemos" es la man°re de asegurarle que puede depender de Sears para el serviclo
porque el ser¢lcto Sears se ofrece en todo el pals,
Su Homo Kenmore tlene unvalor ag rag°do cuando usted consider° que Sears pose° una unidad de servtcio cerca
de usted, qua cuenta con un equlpo Sears de t_cnlcos capacltados,, ot_cnlcos profesionales especlflcamente
entrenados pare rnanejar los aparatos Sears, y qua ttenen acceso alas part°s, herramlentas y equlpo para
asegurar qua cumplarnos nuestro cornpromiso con usted: "iLe damos servlc]o a Io que vendemos!"
PARA A_PLIAR EL VALOR DE SU EST_FA, CO_PRE UN CONTRATO DE WL_NTEN_ENTO SEARS.
La Horno Kenmore est&n disefiadas, fabricadas y
probadas para brlndarte a_os de operacibn
confiabte. Sin embargo, cualquler °par°to
moderno puede requerir de alg_3n servlcio de vez
_n cuando. La garanlta Sears, adem_s del contralo
de Mantenlmlento Sears le brlndan protecclbn
contra cuentas de reparaclones in°spar°des y le
aseguran qua dfslrute de la mztxtma eflclencfa an
hornoso
He aquf una garantla comparative y una tabla de!
conlrato de Mantentmtente qua le muestra los
benelicios de un contrato Mantenlmiento Sears
para Hornos.
A_fiosdo cobortu_a la proptodad l_r a_,o 2=aS_ 3or afio
quo no soan de l: orcefana o vtdrio
2
3
4
Ajuste rnec_nico
30 DAYS
P-_rles de porcelana y vtdric G
Rovision anual d_ rnan{animionto
pr_ventivo a sol, _iluc_de usted A
G .. Garan_f=
90 DAYS ..........
G AM [Vl
All AM
AM AiVI
AM ,, Conlrat_ de M_ntonlm]0nl0
POHGASE EN CONTACTO CON SU VENDEDOR DE SEARS O CON EL CENTRO DE SERViCIO SEARS DE LA
LOCALIDAD HOY MISMO Y COMPRE UN CONTRA¥O DE MANTENIMIENTO SEARS,
"!_:I__!_F'1JOI_E_®La marc° de aparatos elec!rodomis_icos de mayor venla en Amiric_
Vendida pot SEARS_ ROEBUCK AND CO. Hofiman Estates, IL 60"179
-- Irnpreso or] L_F_,y_t_., Ge_,_gia