Loading ...
Loading ...
Loading ...
Winding/Installing the Bobbin 29
1
— — — — — — — — — — — — — — — — — — — — — — — — — — — — — — — — — — — — — — — — — — — — — — — — — — — —
f
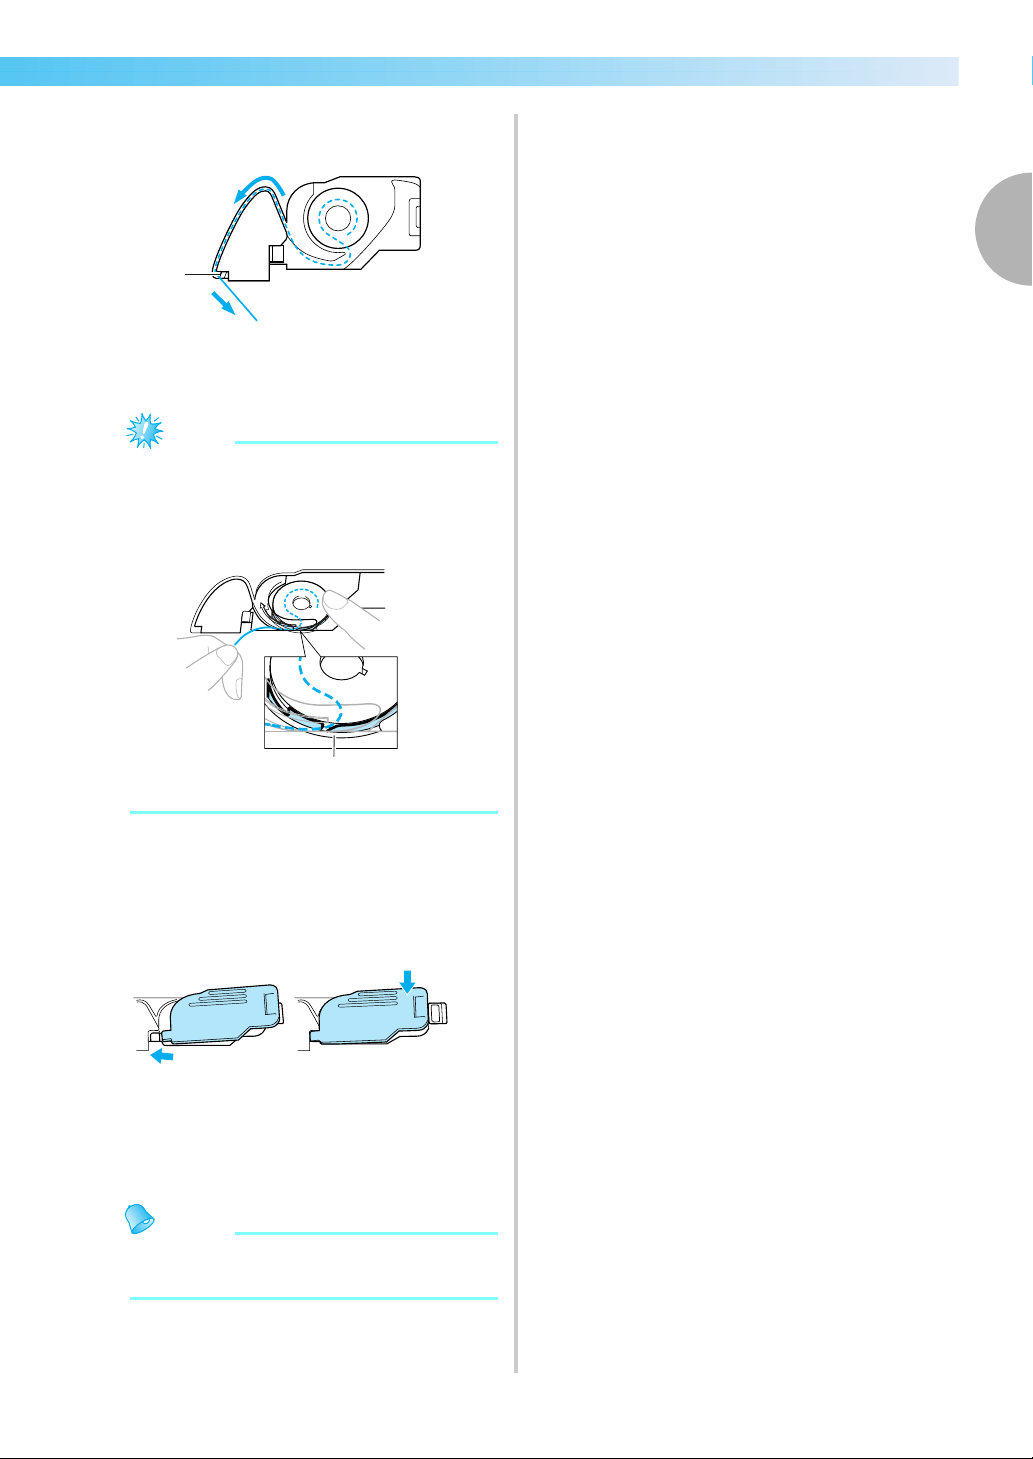
Pass the thread through the slot as shown, and
then pull the thread out toward the front.
a Cutter
X The cutter cuts the thread.
Note
z Make sure that the thread is correctly
inserted through the tension-adjusting spring
of the bobbin case. If it is not inserted
correctly, reinsert the thread.
a Tension-adjusting spring
g
Reattach the bobbin cover.
Insert the tab in the lower-left corner of the
bobbin cover, and then lightly press down on
the right side.
X The lower threading is finished.
Next, thread the upper thread. Continue with
the procedure in “Upper Threading” (page 30).
Memo
z You can start embroidering without pulling
up the bobbin thread.
1
1
1
2
Loading ...
Loading ...
Loading ...