User Manual Frigidaire FRT21S6JS 21 cu. ft. top freezer refrigerator

Documents for Frigidaire FRT21S6JS

The following documents are available:
User Manual Other Documents Installation Instruction
  • Installation Instructions - (English) Download
Energy Guide Photos
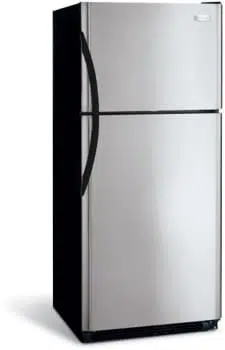
FRT21S6JS photo
P/N 241857201 (Sept 2007)
Important Safety Instructions ........... 2
Installation .......................................... 3
Connecting Water Supply ................. 4
Door Removal Instructions ............... 5
Temperature Controls ....................... 8
Ice Service .......................................... 9
Normal Operating Sounds & Sights . 10
Care and Cleaning ............................. 10
Warranty ............................................. 12
Before you Call .................................. 13
Use & Care Manual
Refrigerator
Top Mount
Got Questions?
Need Parts or Service?
Before Calling Your
Local Repair Service - CALL:
(United States)
1-800-944-9044
(Canada)
1-800-668-4606
Resolve many service issues over the
phone at your convenience!
If we can’t resolve your service issue,
we’ll schedule a reputable local
service technician for you!
Order Genuine Electrolux Parts &
Accessories
Purchase Extended Warranty
Protection
Solutions Hotline
READ AND SAVE THESE INSTRUCTIONS
Loading ...
Loading ...
Loading ...
Specifications

Frigidaire FRT21S6JS Questions and Answers


#1 What is the best setting for my crisper drawers?

Setting the humidity control on your crisper drawers is not hard but we often forget what the best setting is based on the food type. Here are some helpful tips:

Leafy vegetables keep best when stored with the humidity control set on HIGH, or in a drawer without a humidity control. This keeps incoming air to a minimum and maintains maximum moisture.
Non-leafy vegetables and fruits still in their skin should be stored with the humidity control set on LOW. It’s best to wash items and remove any excess water before placing in the crisper drawers.
Items with strong odors or high moisture content should be wrapped before storing.
If you have a refrigerator model with the Auto CrispSealTM Drawer, they are equipped with an auto humidity control on the side of each crisper under the humidity control cover. Good news – no settings needed!

#2 Why does my refrigerator run most of the time? Is this normal?

Depending on the type of compressor your refrigerator has could impact how frequently it runs. It is normal for the compressor to go on and off frequently.

The thermostat keeps the refrigerator at a constant temperature. Single speed compressors (most Top-Freezer and Side-by-Side refrigerator models)

It is normal for the refrigerator to work longer when the room or outside weather is too warm or hot.If the refrigerator doors are opened too frequently or too long allows warm air to enter the product and therefore causes it to run more often.

Freezer temperature may be set too cold. It is recommended to set the refrigerator section to a warmer setting – this will adjust the freezer temperature.

Allow 24 hours for the temperature to stabilize.

Check the door seal/gasket. Air leaks in the door seal/gasket will cause the refrigerator to run longer in order to maintain desired temperatures.

Condenser may be dirty. See the Care and Cleaning section of your Owner’s Manual.

Variable speed compressor (most French-Door and Multi-Door refrigerator models). Your variable speed compressor is designed to run 100% of the time except during the defrost cycle. At times it may even run faster, such as after a defrost cycle.

#3 How do I use my ice maker in my Top-Freezer refrigerator?

Not all Top-Freezer refrigerators have an ice maker – most are installed separately. However, if you have an ice maker, there are a few things to keep in mind if it's just been installed.

Minimal ice will be produced during the first 24 hours of operation because air in the new plumbing lines may cause the ice maker to cycle 2 or 3 times before making a full tray of ice.
With no ice usage, it may take approximately 1 to 2 days to fill the ice container/bin. New plumbing connections may also cause the first production of ice cubes to be discolored or have an odd flavor. If this happens, just discard the ice made during the 1st 24 hours and then you should be good to go.
Wondering how to turn ON your ice maker? Ensure the plumbing connections are secure and the water valve is opened. NOTE: If the ice maker is ON and the water supply is not connected, the water valve will make loud chattering noises. Place the ice container/bin under the ice maker, pushing it as far back as possible. Lower the wire signal arm to its “down” or ON position. Normal ice production is about 2.5 to 3 pounds of ice every 24 hours depending on usage (unless just installed – may take a little longer) or about 8 cubes every 80-160 minutes.
Wondering how to turn OFF your ice maker? To stop the ice maker, simply lift the wire signal arm until it clicks and locks in the “up” or OFF position. Keep in mind the ice maker will also turn off automatically when the ice container/bin is full. TIP: You may want to turn off your ice maker if you will be away from the home for an extended period of time. If you have any questions, please contact us.