Loading ...
Loading ...
Loading ...
12
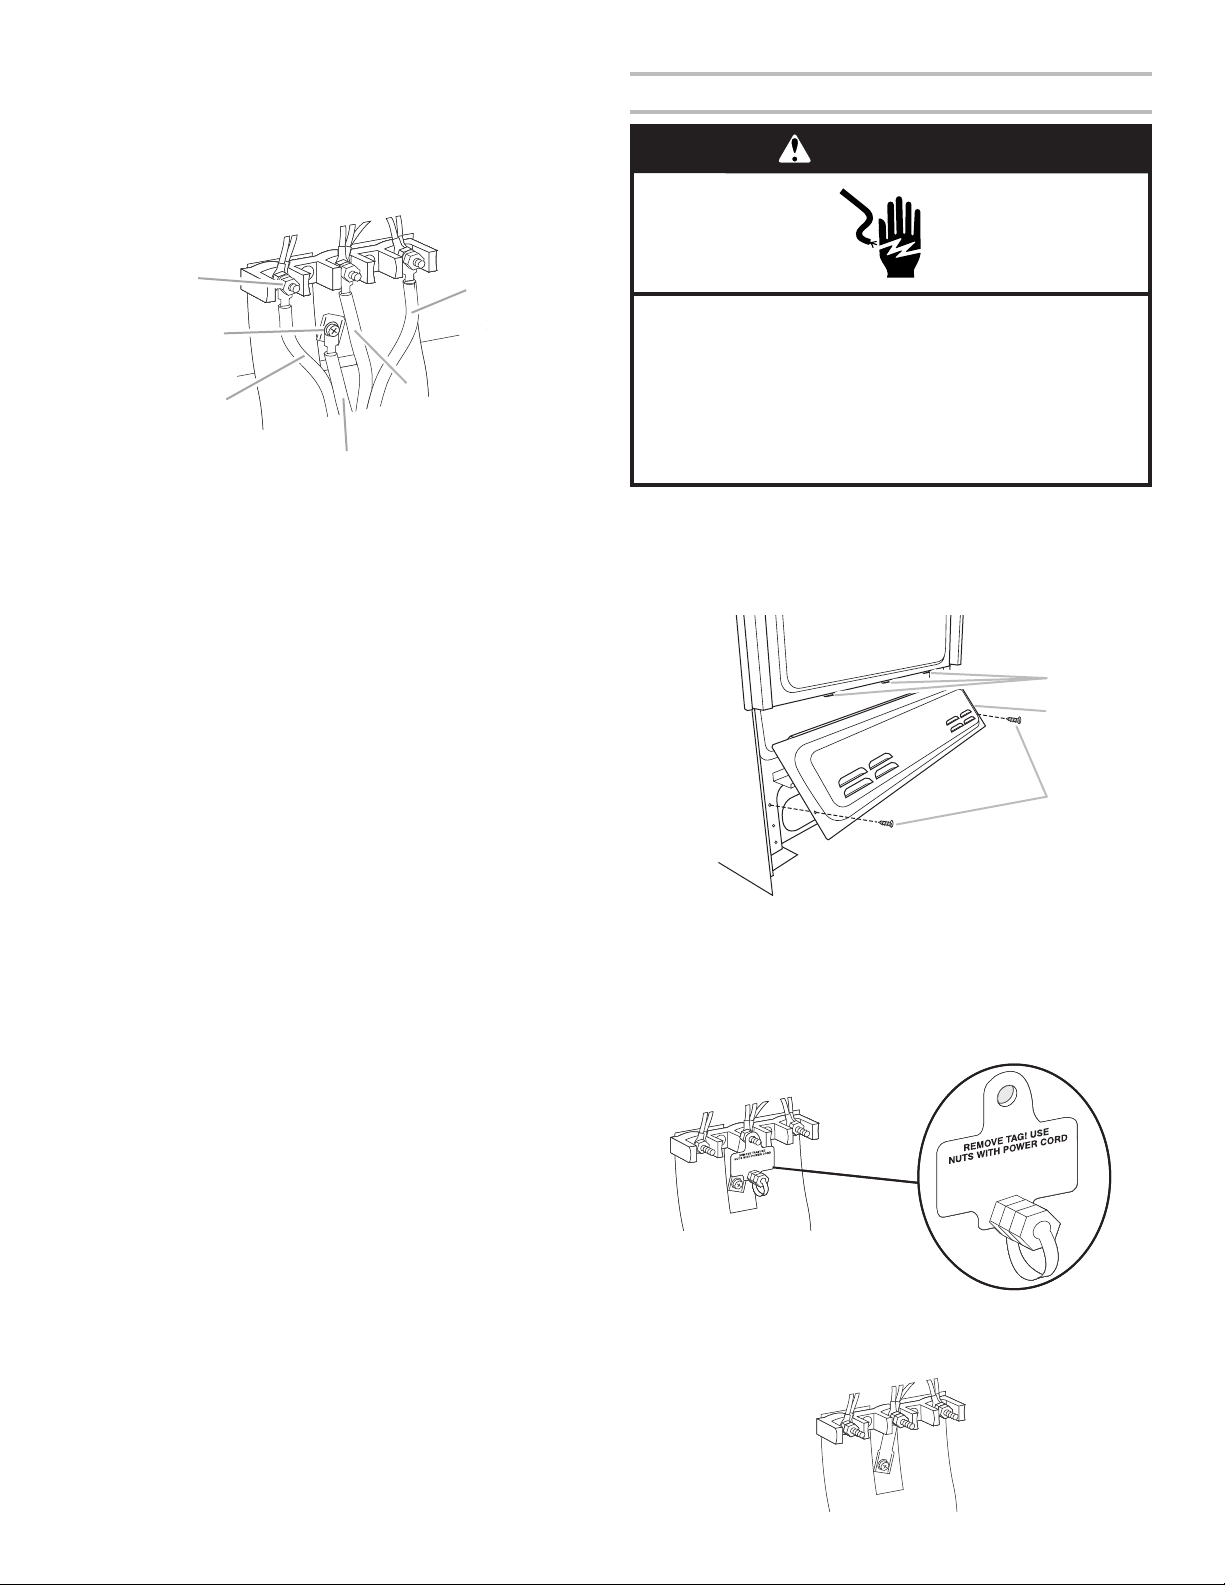
4. Use a Phillips screwdriver to connect the green ground wire
from the power supply cord to the range with the ground-
link screw and ground-link section. The ground wire must be
attached over the ground-link section.
5. Use 3/8" (9.5 mm) nut driver to connect the neutral (white)
wire to the center terminal block post with one of the 10-32
hex nuts.
6. Connect line 2 (red) and line 1 (black) wires to the outer
terminal block posts with 10-32 hex nuts.
7. Firmly tighten hex nuts.
NOTE: For power supply cord replacement, use only a
power cord rated at 250 volts minimum, 40- or 50-amps,
that is marked for use with nominal 1
3
/
8
" (3.5 cm) diameter
connection opening, with ring terminals and marked for use
with ranges.
8. Tighten strain relief screws.
IMPORTANT: Verify the tightness of the hex nuts.
9. Replace lower access cover.
Install Using Direct Wire
Direct Wire Strain Relief
1. Disconnect power.
2. Remove the lower access cover screws located on the back
of the range. Pull the bottom of the cover toward you and out
to remove cover from range.
3. Depending on your model, remove plastic tag holding three
10-32 hex nuts from the middle post of the terminal block.
Remove the top 10-32 hex nut from each of the 3 terminal
blocks and set aside.
OR
Remove the top 10-32 hex nut from each of the 3 terminal
blocks and set aside.
A
B
C
F
D
E
A. 10-32 hex nut
B. Ground-link screw
C. Line 2 (red) wire
D. Green ground wire
E. Neutral (white) wire
F. Line 1 (black) wire
WARNING
Electrical Shock Hazard
Disconnect power before servicing.
Use 8 gauge copper or 6 gauge aluminum wire.
Electrically ground range.
Failure to follow these instructions can result in death,
fire, or electrical shock.
A
B
C
A. Mounting tabs (3)
B. Lower access cover
C. Screws (2)
Loading ...
Loading ...
Loading ...