Loading ...
Loading ...
Loading ...
17
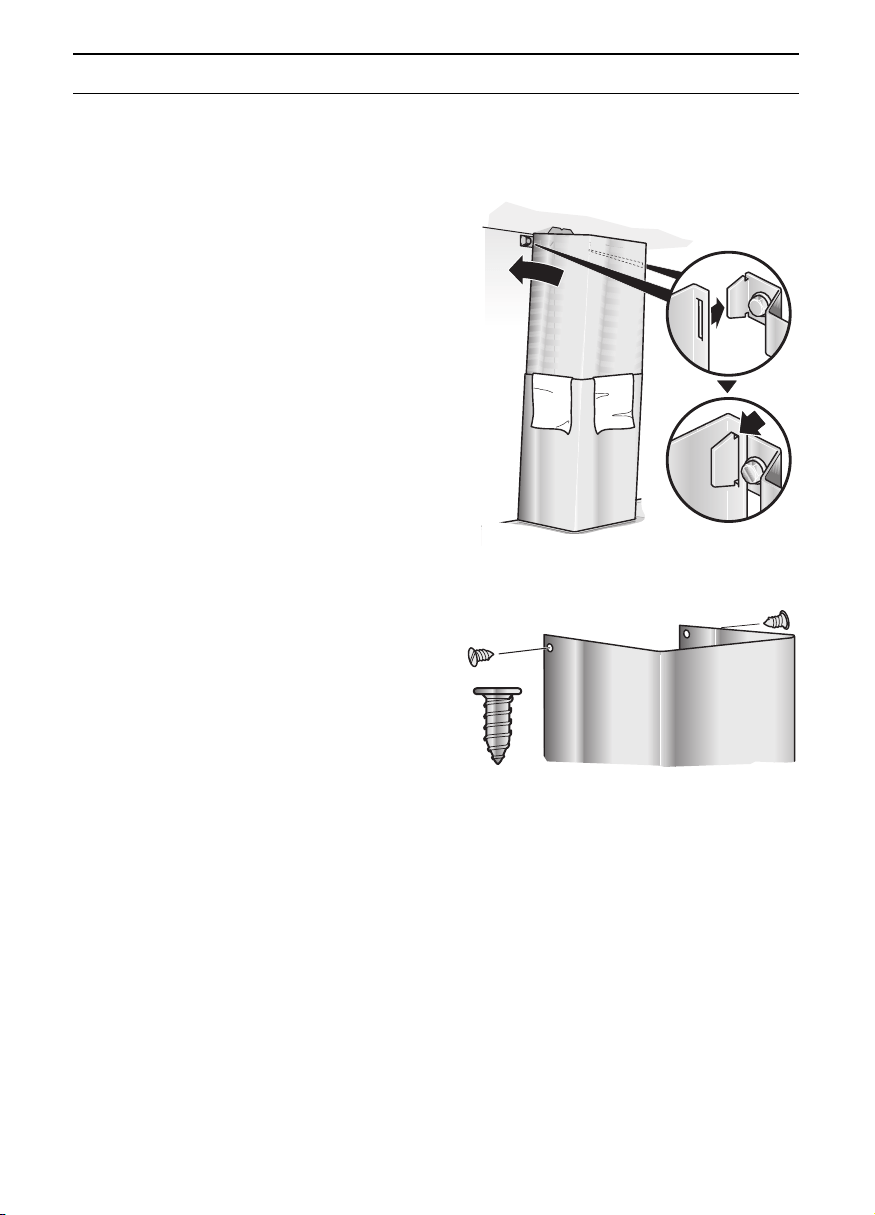
Installing the flue ducts
4. Place flue ducts on the extractor hood,
push the inner flue duct upwards and
attach the left and right sides to the
fixing bracket.
1. Separate the flue ducts by removing the
adhesive tape.
2. Remove the protective film from the two
flue ducts.
Avoid damage to the sensitive
surface.
Warning: The interior walls of the flue
panelling can have sharp edges – Risk of
injury –.
We recommend that you wear gloves when
installing.
3. Insert one flue duct into the other.
Avoid scratching the flue ducts
when inserting them, e.g. by placing the
installation template as protection over
the edge of the outer flue duct.
Exhaust-air mode: Slots of the inner
flue duct downwards.
Circulating-air mode: Slots of the inner
flue duct upwards.
5. Use 2 screws to attach the sides of the
inner flue duct to the fixing bracket.
6. Insert the grease filter (refer to
Operating Instructions).
Loading ...
Loading ...
Loading ...