User Manual for Fridge
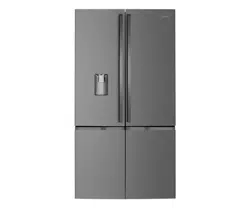
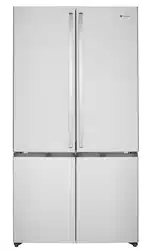
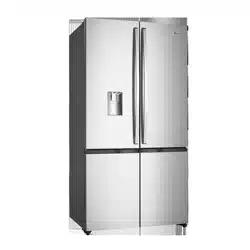
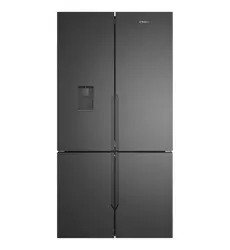
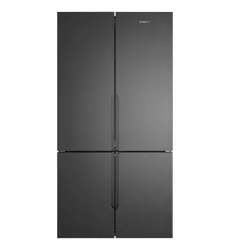
FRENCH DOOR REFRIGERATOR FEATURES

Refrigerator/freezer control panel

From this panel you can control the temperature of the refrigerator and freezer compartments as well as setting the quick freeze function or resetting the door alarm.
For further information on how to use this feature refer to the section “About the User Interface”.
Features may vary depending on model. Not all models will have features listed.
USING YOUR REFRIGERATOR
Refrigerators work by transferring heat from the food inside to the outside air. This operation makes the back and sides of the refrigerator feel warm or even hot particularly at start-up and on warm days – this is normal.
Avoid placing food against the air vents in the refrigerator as it affects efficient circulation. If the door is opened frequently, a light frosting will occasionally occur on the freezer’s interior. This is normal and will clear after a few days. If the freezer door is accidentally kept open, a heavy frost will coat the inside walls and should be removed.
Your new refrigerator uses a high-speed compressor, along with other energy-efficient components, which may make unusual sounds and be more noticeable at night and quieter times. These sounds simply indicate your refrigerator is working how it should. They include:
• Compressor running noises;
• Air movement noise from the small fan motor;
• A gurgling sound, similar to water boiling;
• A popping noise, heard during automatic defrosting; and
• A clicking noise, prior to compressor start-up.
Further details can be found in the Troubleshooting Guide.
IMPORTANT
For top mount refrigerators (where the freezer is on top of the fresh food compartment).
• Don’t place food forward of the ribs on the freezer floor, as it will keep the door open.

For bottom mount refrigerators (where freezer is below the fresh food compartment):
• Ensure all freezer drawers and shelves are pushed back completely to prevent them from keeping the door open.

CAUTION
LED lighting
Your appliance is fitted with long life LED lighting. In the unlikely event the LED lights should fail, then the LED lights should be serviced by the service agent, to avoid a safety hazard. Refer to the warranty page for contact details.
REMOVING FEATURES
Crisper Bin
Removal (standard Crisper Bins):
1. Empty food from the crisper. On some models it will be necessary to remove the bottle storage bins.
2. Remove the crisper bin(s) by pulling forward, then up and forward again.
3. For top mount and single door, remove the crisper shelf by lifting the catches on the left and right underside of the shelf and pulling the shelf forward.

SpillSafe™ glass shelves
To remove the shelves, gently pull them forward until the shelf comes clear of the shelf guides. To return the shelf, make sure there is nothing behind that may obstruct movement. Gently push the shelf, into the cabinet and back into position.

Freezer shelf
Remove the freezer shelf by lifting the catches on the right and left underside of the shelf to release the shelf then pull the shelf toward you.

Drawers fitted with telescopic slides
To remove the drawer for cleaning.
1. Empty food from the drawer.
2. Remove the drawer by pulling it forward and lifting the front to unhook it from the slides. Once you have removed the drawer, ensure the slides are pushed back so they are fully closed.
WARNING
Never close the door while the telescopic slides are extended. This may damage the slide and/or refrigerator or cause the slide to become disengaged from the refrigerator.
To replace the drawer:
1. Ensure the telescopic slides are pushed in all the way.
2. Slide the drawer into place over the slides and push the bin in until it stops.
3. Drop drawer into position.
Freezer bottom bin
To remove the bin, pull the drawer out until it is open all the way then lift bin out from the front of the bin. When refitting insert the rear of the bin first then lower into position.
When replacing the bins after cleaning, we recommend fitting the lower bin first.

CAUTION
Never close the door while the telescopic slides are extended. It may damage the slide and/or the refrigerator or cause the slide to become disengaged from the refrigerator.
Twist and Serve Ice
Mounting the twist & serve dispenser to the other side of the freezer.
NOTE: this is only possible on Top mount models.
1. Remove the ice bin and ice cube tray. If the ice tray assembly is frozen too the carriage , simply squeeze the tray and shelf together to break the ice.
2. Before you remove the ice carriage, remember to disengage it from the glass shelf as it may result in damage to the assembly.

3. Remove the centre runner by disengaging it at the front of the shelf, and removing it from the rear.
4. Refit the runner into the rear of the shelf on the right hand side and then engage the front.

5. Fit the carriage by sliding it into the runners until the front if the carriage engages with the shelf.
6. Refit the ice tray and ice bin.
WARNING
Fill the ice cube tray with potable water only.
TEMPERATURE CONTROL
The factory default settings;
Top mount
Refrigerator Mid
Freezer Mid
Bottom mount & French door
Refrigerator 3°C
Freezer -18°C
All Refrigerator Mid
All Freezer -18°C
If you want to change the temperature, follow the instructions in the section about the user interface for your model. Ensure that you make only small adjustments and wait 24 hours to see if it’s correct to your liking.
IMPORTANT
NOTE: When you set a temperature, you set an average temperature for the whole refrigerator cabinet.
Checking the softness of ice cream is a good indication that your freezer is the right temperature, while checking the temperature of water kept in the refrigerator is a good way of checking the temperature of the food compartment. Temperatures inside each compartment may vary, depending on how much food you store and where you place it.
High or low room temperature may also affect the actual temperature inside the refrigerator.
TOP MOUNT FREEZER TEMPERATURE ADJUSTMENT

ABOUT THE USER INTERFACE
Controls – Bottom mount and French door

|
DESCRIPTION
|
OPERATION / PRIMARY FUNCTION |
| Quick Freeze on/ off icon |
• Indicates the status of the Quick Freeze function. |
| Quick Freeze button |
Use the Quick Freeze function when you add a large amount of food to the freezer compartment.
• Press the ‘Quick Freeze’ button. The Quick Freeze icon will flash indicating that the quick freeze is active and the compressor will run continuously for 90 minutes.
• After 90 minutes the freezer will automatically return to normal mode.
• The Quick Freeze function can be cancelled anytime by pressing the button again.
|
| Refrigerator / Freezer temperature scale icons |
• Indicates the temperature setting of the refrigerator compartment.
• Indicates the temperature setting of the freezer compartment.
|
| Temperature adjust button |
• Touch any button to awaken control.
• Touch the ‘Temp’ button to decrease the selected compartment temperature. There are 8 temperature settings indicated by the illumination sequence on the display. Once the coldest temperature is reached the display will return to the warmest setting with the next press.
|
| Refrigerator/Freezer indication icon |
• Indicates the selected zone. |
| Compartment select button |
• Press to select the desired compartment.
•The refrigerator / freezer indication icon will show which zone is selected.
|
IMPORTANT
The factory default settings for the refrigerator is “3°C” and “-18°C” for the freezer. If you want to change the temperature, remember to make only small adjustments and wait 24 hours to see if it’s correct.
Controls – French door ice & water models

|
BUTTON / ICON DESCRIPTION
|
PRIMARY FUNCTION |
| 1. Compartment Selector button |
Selects controllable compartment. |
| 2. Lock Icon |
Indicates if the user interface is locked. |
|
3. Compartment Icon
|
Indicates controllable compartment. |
| 4. ECO Icon |
Indicates if the appliance is operating in its most energy efficient mode. |
| 5. Digital display |
Indicates temperature of selected compartment. |
| 6. Increase button |
Increases temperature of selected compartment. |
| 7. Decrease button |
Decreases temperature of selected compartment. |
| 8.Mode indicators (Shopping, Quick Freeze, Holiday) |
Indicates appliance operation mode. |
| 9.Display Lock button |
Selects lock state of user interface. |
| 10. Mode select button |
Selects operation mode of appliance.
|
| 11. Drinks Chill button |
Selects drinks chill timer. |
| 12. Filter status indicators |
Indicates filter replacement timing. |
| 13. Icemaker and Water on off indicators |
Shows operational status . |
| 14.Ice & Water on/off button |
Selects operational status.
|
| 15. Door sensor |
Senses door state (open or closed). |
FUNCTIONS OF THE USER INTERFACE
French door ice & water models
| FUNCTION |
ICON |
OPERATION |
| Setting the freezer temperature |
 |
• Press button 1 until freezer is displayed on icon 3.
• Press buttons 6 or 7 to adjust temperature up or down.
|
| Setting the refrigerator temperature |
 |
• Press button 1 until the refrigerator is displayed on icon 3.
• Press buttons 6 or 7 to adjust temperature up or down.
|
|
Shopping mode
Increases the chill rate of the refrigerator for 90mins before returning to pre-set mode.
|
 |
• Press button 10 until the shopping icon is illuminated.
• Shopping mode can be deselected using button 10.
|
|
Quick freeze mode
Decreases the freezer temperature to -23°C for 12 hours before returning to pre-set mode.
|
 |
• Press button 10 until the freeze icon is illuminated.
• Quick freeze mode can be deselected using button 10.
|
|
Holiday mode
The refrigerator minimises defrosting to save energy when doors remain closed for an extended period.
|
 |
• Press button 10 until the holiday icon is illuminated.
• Holiday mode can be deselected using button 10 or opening the door.
|
|
Display Lock
Deactivates the user interface controls.
|
 |
• To turn on/off press and hold button 9 for 3 seconds, the lock icon is illuminated when activated. |
|
Drinks Chill
Sets a timer for between 1 and 30 minutes as a reminder for when drinks are placed in the freezer for quick chill.
|
 |
• To turn on press button 11 and initial time of 20 mins will appear on digital display. To adjust time use buttons 6 and 7.
• Alarm will sound when time is finished.
• Press button 11 to turn off during or after countdown. The time taken to chill depends on the size of your bottle.
• Do not leave the bottle inside the freezer longer than the time needed for chilling.
|
|
Ice & Water on/off
Enables/disables ice maker and water dispensing features.
|
 |
• To enable/disable press button 14 to cycle through on/off modes.
• Indicator 13 will illuminate when either the ice maker or water dispenser are deactivated.
|
|
Ice Cube Size
Ice cube size can be adjusted to suit supply water pressure.
|
 |
• Press and hold buttons 10 and 14 for 3 seconds.
• Press button 6 to cycle through cube sizes, small (S), medium (M), large (L) & extra large (EL). Medium symbol shown.
• To confirm the setting press button 10.
|
|
Sabbath Mode
Disables all lights and other electrical activity from occurring when the refrigerator door is opened.
|
 |
• To enable and disable Sabbath mode, press and hold buttons 7 and 9 for 3 seconds.
• When enabled/disabled an alarm will beep 4 times and “Sb” will appear on digital display when active.
|
| INDICATOR |
ICON
|
OPERATION |
|
Eco Mode
Enabled when appliance set to energy efficient operating temperatures.
|
 |
• ECO icon automatically appears when refrigerator is set between +3°C and +7°C and freezer is set between -14°C and -18°C |
|
Order Filter
Reminder when the water filter periodically requires replacement.
|
 |
• Order filter icon will appear as a reminder to order a replacement water filter.
• When the filter has been replaced press and hold button 14 for 3 seconds to reset the filter replacement timer.
|
|
Replace Filter
Reminder when the water filter requires replacement.
|
 |
• Replace filter icon and alarm will activate as a reminder to replace the water filter.
Mute alarm for 1 week by pressing any button on the user interface.
• When the filter has been replaced press and hold button 14 for 3 seconds to reset the filter replacement timer.
|
IMPORTANT
The factory default settings for the refrigerator is “3°” and “-18°C” for the freezer. If you want to change the temperature, remember to make only small adjustments and wait 24 hours to see if it’s correct.
ERROR CODES & ALARMS
Alarms
| ALARM ICON |
WHAT IT MEANS |
OPERATION |
 |
Freezer Temperature Alarm
Activates if the freezer temperature is 10°c over set temperature for a period of 50 minutes (except during a defrost).
An alarm will sound the temperature icons will flash.
|
• To deactivate the alarm for 50 minutes press any button.
• To deactivate alarm for 12 hrs on the ice & water model press and hold Select Mode for 10 seconds for non ice and water models press and hold any button for 10 seconds.
|
 |
Door Alarm
Activates if the refrigerator or freezer doors are left open for longer than 2 minutes.
An alarm will sound and the affected compartment icon will flash and the temperature and icons will fade on and off.
|
• Alarm will sound and icon will flash indicating which door is open. (Ice & water models)
• To silence the alarm for 8 minutes while the door is open press any button (the icons will continue to flash until door is closed).
|
Error codes
| ERROR CODE |
WHAT IT MEANS… |
WHAT TO DO… |
|
Communication Error

|
If you see this icon displayed (Ice & Water model) or the top temperature icon is flashing it means that the control has lost contact with the main control board.
The appliance will operate at its last known setting, all auxiliary functions will not work.
|
Turn the unit off at the power point for 5 minutes and then turn it back on.
Under most circumstances this will reset the display enabling normal function to continue.
If the error re-occurs then call for service.
|
|
Sensor – Open Circuit / Short Circuit

|
If you see this icon displayed (Ice & Water model) or any combination of the second and fourth temperature icons are flashing it means that an error has been detected on a sensor.
The refrigerator will run in a default cycle to prevent food spoilage.
|
Call for service. |
|
Ice cube tray water fill not detected

|
This error indicates that when an ice harvest occurred and a tray water fill was attempted, that the tray sensor did not get above 0°C. |
Check the following:
Water turned on at tap, water filter not blocked, no kinks in water tube.
If after checking these items and they do not appear to be the cause of the error, call for service.
|
CLEANING YOUR REFRIGERATOR
WARNING
BEFORE CLEANING: Turn the refrigerator off at the power point and unplug the cord to prevent any chance of electrocuting yourself.
Doors and exterior (white and silver):
You should only clean the doors with lukewarm soapy water and a soft cloth.
Stainless steel and dark stainless
Your stainless steel refrigerator is manufactured from markresistant stainless steel. This stainless steel has a special advanced protective coating that eases the removal of marks such as fingerprints and water spots. To keep its appearance, clean it regularly with lukewarm soapy water and a soft cloth.
CAUTION
Never use stainless steel cleaners, abrasive pads or other cleaners that will scratch the surface. Damage to the appliance after delivery is not covered by your warranty.
Interior
Clean the inside of your refrigerator regularly with a soft cloth, unscented mild soap and lukewarm water. Thoroughly dry all surfaces and removable parts and avoid getting water on the controls. Replace removable parts, plug power cord in and switch the power on before returning the food.
Door seals
Always keep door seals clean by washing them with a mild detergent and warm water, followed by a thorough drying. Sticky food and drink can cause seals to stick to the cabinet and tear when you open the door.
Never use hot water, solvents, commercial kitchen cleaners, aerosol cleaners, metal polishes, caustic or abrasive cleaners, or scourers to clean your refrigerator. Many commercially available cleaning products and detergents contain solvents that will damage your refrigerator. Use only a soft cloth with an unscented mild soap and lukewarm water.
CAUTION
To clean a crisper or freezer bin with telescopic extension slides, simply wipe with a damp cloth and warm soapy water. Never immerse the cover in water, as this could affect the operation of the slide.
Switching off your refrigerator
If you switch off your refrigerator for an extended period, follow these steps to reduce the chances of mould:
1. Remove all food.
2. Remove the power plug from the power point.
3. Thoroughly clean and dry the Interior.
4. Ensure that all the doors are wedged open slightly for air circulation.
FOOD STORAGE GUIDE

IMPORTANT
Please note, use this information as a guide only, actual storage times will vary depending on how you use your refrigerator, climatic conditions and the freshness of the food.
TROUBLESHOOTING
Appliance does not operate at desired temperature
In a modern frost free refrigerator / freezer, cold air is circulated around the various compartments through air vents using a high efficiency fan.
| CONCERN |
WHAT TO DO |
| Refrigerator is too warm |
- Adjust the refrigerator to a colder setting
- Ensure food is allowed to cool before placing inside the refrigerator.
- Ensure the appliance is set up as per instructions on P11.
- Ensure that contents are not obstructing the cooling vents.
- Ensure the door is not held open or is being opened too frequently.
- If you have a Top Mount check the temperature setting guidelines on P17
|
| Freezer is too warm |
- Adjust temperature to a colder setting.
- Ensure food is allowed to cool before placing inside the freezer.
- Ensure the appliance is set up as per instructions on P11.
- Ensure that contents are not obstructing the cooling vents.
- Ensure the door is not held open or is being opened too frequently.
- If you have a Top Mount check the temperature setting guidelines on P17
|
| Food is freezing in the refrigerator |
- Adjust temperature to a warmer setting.
- Ensure that fruit and vegetables are stored in the crisper. Items with a high water content should not be placed near the cooling vents.
|
| Unable to change temperature settings |
- Refer to Refer to sections “temperature control” and “about the user interface”.
- Ensure that user interface is in "awake" mode before trying to adjust temperature settings.
|
Appliance noise
Your new refrigerator may make sounds that your old one didn’t make. Because the sounds are new to you, you might be concerned about them. Most of the new sounds are normal. Hard surfaces, like the floor, walls and cabinets, can make the sounds seem louder than they actually are. The following describes the kinds of sounds and what may be making them.
| CONCERN |
WHAT TO DO |
| Motor noise (compressor) |
- Nothing. This is normal as your new refrigerator uses a high-speed compressor which switches on and off during operation.
- Note that the compressor noise may seem louder at the start of the on cycle.
|
| Motor noise (compressor); WTB4600, WTB4604, WTB5400, WTB5404, WBE4500, WBE4504, WBE5300, WBE5304, WRB5004, WFB4204, WHE5204, WHE5264, WQE6060, WQE6000, WHE6060, WHE6000 only |
- These refrigerators are fitted with a variable speed compressor and fan. At start up and on warm days they run at a higher speed to provide additional cooling. When less cooling is required the compressor and fan will run at a lower speed. As a result it is normal for sound levels to change depending on operating conditions.
|
| A clicking noise heard just before the compressor starts. |
- Nothing. This is normal as your new refrigerator has an automatic switching action of the temperature control, turning the compressor on and off.
|
|
Occasional gurgling, similar to water boiling.
Airflow noise.
|
- Nothing. As each cycle ends, you may hear a gurgling sound due to the refrigerant flowing in your refrigerator system.
- Nothing, this is normal as your new refrigerator uses high efficiency fans to circulate air. Fan speed and noise may increase during periods of heavy usage or hot weather.
|
| Rattling and other noises. |
- Ensure that the cabinet is level and stable, refer to Installation Instructions on P11.
- Check the surrounds of the appliance to ensure there is nothing touching or placed on top of the appliance.
- Ensure that contents of the appliance are not placed in such a way that they are vibrating (such as bottles).
|
Crisper Operation
| CONCERN |
WHAT TO DO |
|
Excess moisture build up in crisper
It is normal for there to be some moisture and humidity in the crisper bin.
|
- Ensure that the crisper is not over packed.
- Adjust crisper humidity slides.
|
| Crisper bin can not be removed |
- If crisper bin interferes with the door bins, remove door bins before removing crisper.
- Position cabinet so that the door can be fully opened.
|
| Freezing items in the crisper |
- Adjust temperature to a warmer setting.
|
Refrigerator operation
| CONCERN |
WHAT TO DO |
|
Appliance will not run
It is normal for the freezer fan not to operate during the automatic defrost cycle, or for a short time after the appliance is switched on.
|
- Ensure that the cord is plugged into a live power outlet and outlet is switched on.
- Ensure that the household circuit breaker has not tripped or that the fuse has not blown.
- The appliance maybe in defrost mode, check again in half an hour.
|
|
Compressor motor seems to run too long
At normal room temperatures, expect your motor to run about 40% to 80% of the time. Under warmer conditions, expect it to run more often.
|
- Ensure that the doors are not held open
- Check that large amounts of warm food have not just been placed inside the appliance.
- Note that the appliance will run more than normal just after you install it or when adjusting the temperature setting changes.
|
| Compressor motor seems to run too long for WTB4600, WTB4604, WTB5400, WTB5404, WBE4500, WBE4504, WBE5300, WBE5304, WRB5004, WFB4204, WHE5204, WHE5264, WQE6060, WQE6000, WHE6060, WHE6000only. These appliances use a variable speed compressor, which by design can run for long periods of time, this is normal |
- The variable speed compressor and fan that at start up and on warm days, runs at high speeds to provide additional cooling. When less cooling is required the compressor and fan will run at a lower speed, but still may not switch off. This is normal.
- It is possible that the only time the compressor and fan will stop is when the refrigerator is defrosting which is approximately once per day.
|
|
The exterior of the appliance is warm or hot to touch
This is normal because the appliance transfers heat from the inside out through the outer panels and the divider between the doors.
|
- Ensure the appliance has the external clearances recommended in the section “Installing your new appliance”.
- The exterior of the cabinet will be much warmer on warmer days it may even feel hot to touch, as the appliance is working harder.
|
|
User interface will not respond
To ensure settings are not accidentally changed the user interface will go into sleep mode when not in use. Press any button to wake user interface
|
- Check that the user interface is in awake mode, refer to section “About the user interface”.
- Check that the user interface is not locked, refer to section “About the user interface”.
- If the user interface is frozen turn the appliance off for five minutes for the memory to clear, then turn back on.
- Check that the user interface is not in Sabbath Mode, refer to control instructions. (I&W models only).
|
| Alarms Sounding |
- Check that all doors are fully closed.
- Ensure that the over temperature alarm is not being activated by hot food placed in the freezer.
- Check if the drinks timer has ended, refer control instructions.
- Check if the Filter Replacement alert is activated, refer control instructions. (I&W models only)
|
| Frost build up |
- Check that all doors are fully closed.
- Ensure that the doors are not opened too often.
- Ensure that the return air vents are not blocked with packaging.
- Ensure the seals are clean and not obstructed.
|
| Odours |
- The interior may need cleaning, refer to cleaning guide.
- Ensure that food is stored correctly as some food, containers and wrapping can produce odours.
- Check appliance for old or unusual food.
|
|
Lights not working
The LED lighting is designed to turn on gradually. The LED lighting is designed to dim automatically if the door is left opened for more than 5 minutes and turn off completely if the door is open for more than 7 minutes. Closing the door will reset the timer.
|
- Ensure that the cord is plugged into a live power outlet and outlet is switched on.
- Ensure that the household circuit breaker has not tripped or that the fuse has not blown.
- Check that the user interface is not in Sabbath Mode, refer to control instructions.
- Check the appliance features section to determine lighting configuration for your model.
|
Door operation
| CONCERN |
WHAT TO DO |
| Freezer door pops open. |
- This is normal and should re-close. This happens when the refrigerator door is closed too quickly.
- If the freezer door stays open, it indicates that the appliance needs to be tilted backwards a little further. Refer to section “Installing your new appliance”.
|
| Self close not working. |
- Check if your appliance has self closing hinges as not all models do.
- It indicates that the appliance needs to be tilted backwards a little further. Refer to section “Installing your new appliance”.
|
| Door not sealing properly |
- Ensure there is nothing that is preventing the door from closing such as appliance contents or items placed near the appliance.
- Ensure that the crisper/freezer bin is closed completely. Refit if required as referred to in the section "Using your refrigerator".
- Ensure the appliance is set up as per recommendations.
|
| Door difficult to open and close |
- If the door is difficult to open just after you have closed it this is due to the pressure equalising, the door will open normally after a few minutes.
|
Ice & Water system
| CONCERN |
WHAT TO DO |
|
Ice maker does not produce ice or not enough ice
The icemaker is designed to produce a tray of ice approximately every 3 hours, depending on the conditions.
|
- Ensure that the cord is plugged into a live power outlet and outlet is switched on.
- Ensure that water is connected and turned on and there are no kinks in the water line.
- Ensure that the Ice Maker is switched on at the user interface refer to "About the User Interface" for details.
- Check that the water filter is not blocked or out of date.
- Check the water supply flow rate.
- If the freezer compartment is too warm, refer to "freezer is too warm" then wait 24 hours for the freezer to reach ideal temperature.
- Turn (this the unit off at the mains and leave for 2 minutes then turn the appliance back on will reset the icemaker unit). Check for ice production after 24 hours.
- Check that there is no obstruction under the ice maker and ensure the ice bin is fitted correctly.
|
| Water dispenser not functioning |
- Ensure that the cord is plugged into a live power outlet and outlet is switched on. Ensure that water is connected and turned on and there are no kinks in the water line. Ensure that the Water Dispenser is switched on at the user interface refer to "About the User Interface" for details.
- Ensure water line is purged refer to “Ice & Water installation”.
- Check that the water filter is not blocked or out of date.
- Check the water pressure, refer to “Ice & Water installation”.
|
| Ice or water has bad odour or taste |
- Cover food to ensure ice does not absorb foreign odours.
- Check that the water filter is not out of date.
- Interior of appliance or ice bin may require cleaning, refer to “Cleaning your refrigerator”.
- Discard stale ice monthly and allow ice maker to produce a fresh supply.
|
If you still require service
If you have a problem, and the problem persists after you have made the checks mentioned, contact your nearest Electrolux approved Service Centre or the dealer you bought the refrigerator from. Be ready to quote the model number, the 9-digit PNC and 8-digit serial number, which is stated on the label inside the refrigerator compartment.