User Guide
LG 305C
MFL68062901 (1.0)
ENGLISH
www.lg.com
t
Screen displays and illustrations may differ from
those you see on actual phone.
t
Actual displays and the color of the phone may vary.
t
Some of the contents of this guide may not apply
to your phone, depending on the software and your
service provider. All information in this document is
subject to change without notice.
t
This handset is not suitable for people who have a
visual impairment due to the touch screen keyboard.
t
Copyright
©
2014 LG Electronics, Inc. All rights
reserved. LG and the LG logo are registered
trademarks of LG Group and its related entities.
All other trademarks are the property of their
respective owners.
6TFS(VJEF
ENGLISH

2
Contents
Contents ........................................... 2
Phone Overview ............................... 5
:PVS)PNF4DSFFO 7
1FSTPOBMJ[F:PVS)PNF4DSFFO 9
Getting Started with Your Phone ... 13
5IF#BUUFSZ 13
$IBSHJOHUIF#BUUFSZ 14
)PXUP*OTUBMM:PVSNJDSP4%
$BSE 15
)PXUP3FNPWF:PVSNJDSP4%
$BSE 16
#BUUFSZ$IBSHF-FWFM 16
5VSOJOHUIF1IPOF0OBOE0GG 17
4JHOBM4USFOHUI 17
4DSFFO*DPOT 17
.BLJOH$BMMT 18
$PSSFDUJOH%JBMJOH.JTUBLFT 18
3FEJBMJOH$BMMT 18
3FDFJWJOH$BMMT 18
Quick Access to Convenient
Features ......................................... 20
-PDL.PEF 20
4QFBLFSQIPOF'VODUJPO 20
2VJDL7PMVNF"EKVTUNFOU 20
$BMM8BJUJOH 21
$BMMFS*% 21
4QFFE%JBMJOH 21
5FYU*OQVU 22
Contacts in Your Phone’s Memory 23
5IF#BTJDTPG4UPSJOH$POUBDU
&OUSJFT 23
1IPOF/VNCFST8JUI1BVTFT 23
4FBSDIJOH:PVS1IPOFT.FNPSZ 24
"DDFTTJOH0QUJPOT 25
.BLJOHB$BMM'SPN:PVS1IPOFT
.FNPSZ 25
Using the Phone Menus ................. 27
1SFQBJE 27
1. Add Airtime ............................. 27
2. Buy Airtime ............................. 27
3. My Phone Number .................. 27
4. My Airtime Info ....................... 27
5. Airtime Display ........................ 28
6. Serial Number......................... 28
7. Code Entry Mode .................... 28
$POUBDUT 29
1. New Contact ........................... 29
2. Contact List ............................ 29
3. Groups ................................... 30

3
4. Speed Dials ............................ 30
5. My vCard ................................ 31
.FTTBHFT 32
1. New Text Message .................. 32
2. New Media Message ............... 33
3. Inbox ...................................... 34
4. Outbox ................................... 36
5. Drafts ..................................... 37
6. Voicemail ................................ 37
7. Templates ............................... 38
8. Delete All ................................ 38
9. Message Settings ................... 38
3FDFOU$BMMT 40
1. Missed Calls ........................... 40
2. Received Calls ........................ 40
3. Dialed Calls ............................ 41
4. All Calls .................................. 41
5. Call Timer ............................... 41
(BNFT"QQT 42
.VMUJNFEJB 42
1. Camera .................................. 42
2. Video Camera ......................... 43
3. Voice Recorder........................ 44
4. Images ................................... 45
5. Video...................................... 45
6. Sounds................................... 45
7. Music Player ........................... 46
.Z4DIFEVMF 49
1. Alarm ..................................... 49
2. Calendar ................................ 49
#SPXTFS 50
1. Start Browser.......................... 50
5PPMT 52
1. Voice Command ...................... 52
2. Calculator ............................... 53
3. Tip Calculator.......................... 54
4. Unit Converter ......................... 54
5. Stopwatch .............................. 54
6. Notepad ................................. 55
4FUUJOHT 56
1. Sound Settings ....................... 56
2. Display Settings ...................... 58
3. Call Settings ........................... 60
4. Touch Settings ........................ 61
5. Phone Settings ....................... 62
6. USB Mass Storage .................. 65
7. Memory ................................. 65
8. Phone Info .............................. 66
#MVFUPPUI
®
67
1. Power .................................... 67
2. Add New ................................ 68
3. Paired Devices ........................ 68

4
Contents
4. Settings .................................. 69
8J'J 70
"DDFTTJCJMJUZ 71
1. Menu Readout ....................... 71
2. Dial Readout ........................... 71
3. Large Text .............................. 71
4. Invert Color ............................ 71
5. Mono Sound ........................... 72
6. TTY ....................................... 72
7. Caller ID Readout .................... 72
Accessories .................................... 73
Safety ............................................. 74
5
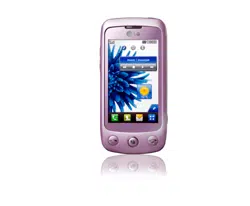
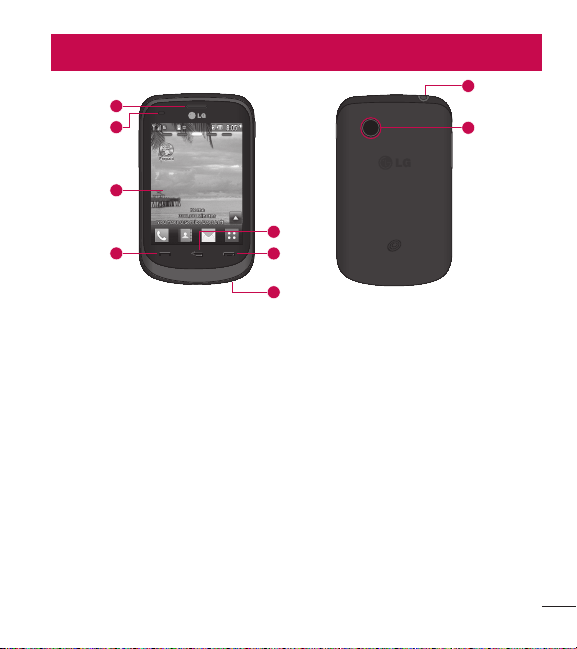
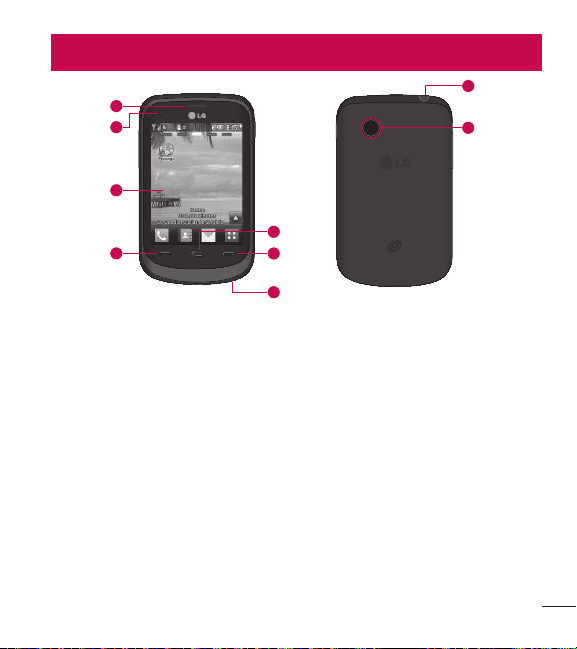
Phone Overview
1 Earpiece Lets you hear the caller.
2 Proximity Sensor
3 Home Screen Displays incoming calls, messages and status icons as well as a
wide variety of content you select to view.
4 Send Key Use to place or answer calls. You can also press to access your
recent calls.
5 Microphone Allows other callers to hear you clearly when you are speaking to
them.
6 End Key Ends or rejects a call. Touch once to return to the Home screen from
any other screen.
7 Back Key Allows you to return to the previous screen.
8 Camera Lens Use to take photos. Keep it clean for optimal photo quality.
9 Earphone Jack Allows the use of a headset to hear caller's voice.
1
2
3
5
7
4
6
8
9

6
Phone Overview
NOTE: Proximity sensor
When receiving and making calls, the proximity sensor automatically
turns the backlight off and locks the touch screen by sensing when the
phone is near your ear. This extends battery life and prevents you from
unintentionally activating the touch screen during calls.
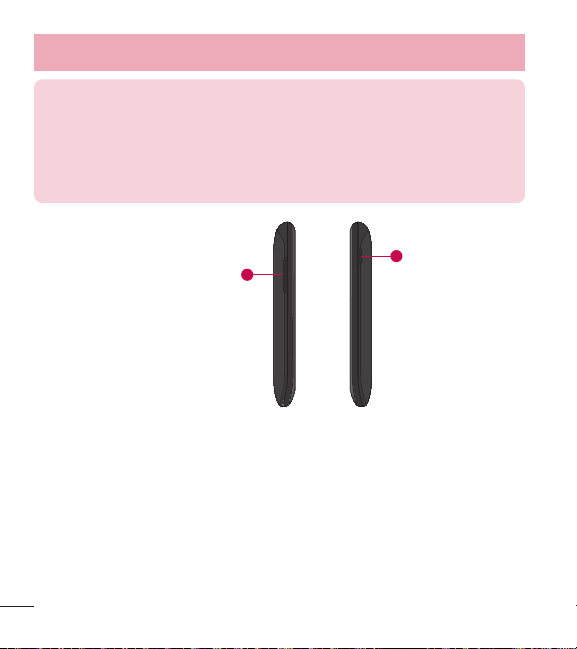
1
2
1 Volume Keys Use to adjust the Master Volume from the Home screen and the
earpiece volume during a call.
2 Power/Lock Key Use to turn the screen on and off. Press and hold to turn the
phone off.

7
Your Home Screen
From the Home screen, you can access all menu options, make a quick call and
view the status of your phone - as well as many other things.
Touch Screen Tips
t
The Home screen is also a great place to get accustomed to the touch screen.
t
To select an item, touch the icon accurately.
t
To scroll through lists, touch the last item visible and slide your finger up the
screen. The list will move up so more items are visible.
t
There’s no need to press hard, the touchscreen is sensitive enough to pick up
on a light yet firm touch.
t
Use the tip of your finger to touch the desired option. Do not use your fingernail.
t
When the screen light is off, press the Power/Lock Key along the right
side of the phone once to turn the screen on.
t
Don’t cover the phone with a case or cover as the touch screen will not work
with any material covering it.
8
Phone Overview
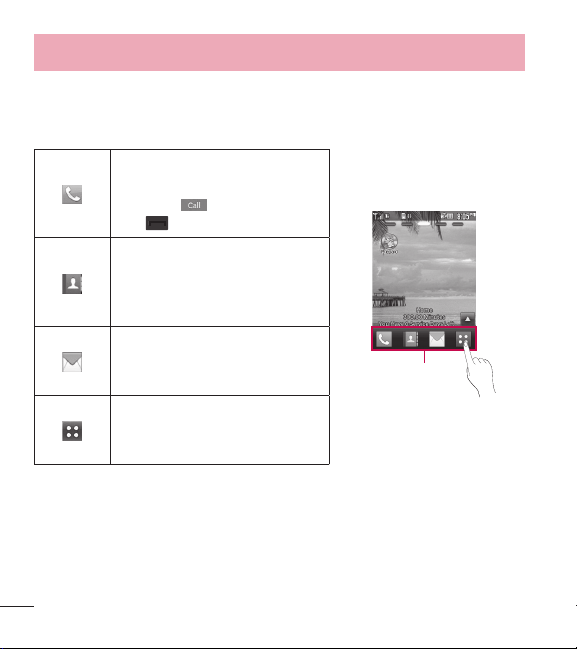
The Quick Keys
The Quick Keys on your Home screen provide easy, one-touch access to your
most used functions.
Touch to display the dial pad to
make a call. Enter the number
and touch
or touch the Send
Key
.
Quick Keys
Touch to open your contacts and
search for the number you want
to call. You can also create new
contacts and edit existing ones.
Touch to access the Messages
menu. From here you can view
and create messages.
Touch to open the main menu.
Swipe the screen to the left or
right to view additional options.
9
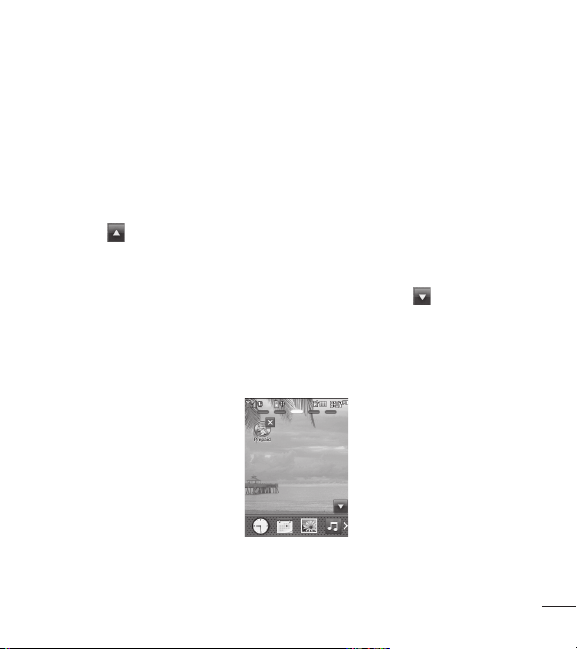
Personalize Your Home Screen
Your phone provides five Home screen panels. To view the Home screen panels,
just swipe the screen from left to right and vice versa.
Widget
You can use Widgets and even add them to your Home screen for a personalized
feel.
1 Touch
at the bottom right corner of the Home screen to view the available
options.
2 Touch the Widget button.
3 Drag a widget from the widget panel to the screen. Touch
to close the
widget panel.
t
You can play songs, add memos, check the calendar, play a slide show, set an
alarm or add calendar events directly from the Home screen using the available
widgets.

10
Phone Overview
Favorite Contacts
Allows you to easily contact your friends and family by displaying your favorite
contacts on the Home screen.
1 Touch
at the bottom right corner of the Home screen, then touch the
Contact button.
2 Touch the contacts you want to add, then touch to register your favorite
contacts.
t
If you want to delete a contact from this screen, touch .
3 Touch
to finish editing the contacts on this screen.
11
t
To access your contacts, simply touch their corresponding icon. Touch to call,
to send a message and to edit contact information.
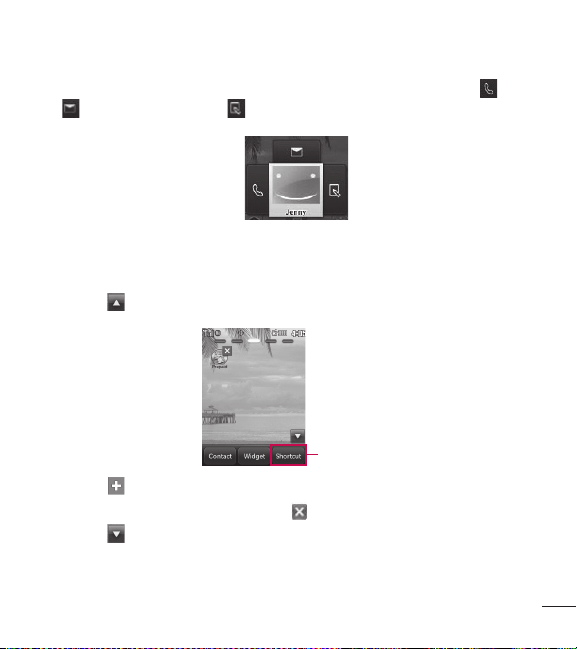
Shortcuts
Add your favorite menus on the Home screen.
1 Touch
at the bottom right corner of the Home screen, then touch the
Shortcut button.
Shortcuts
2 Touch next to the desired shortcut to add it to the Home screen.
t
If you want to delete a shortcut, touch .
3 Touch
to finish editing the shortcuts on this screen.
12
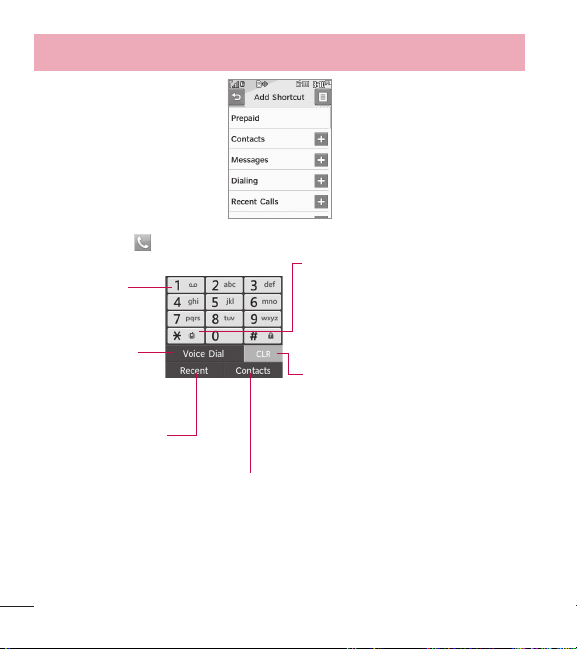
Phone Overview
When you touch , the following dial pad is displayed:
Touch and hold
this key to call your
voicemail box.
Touch this key to
dial using Voice
Commands.
Touch this key to view
the recent call history.
Touch this key to display your Contact List
to view or call a Contact.
Touch this key to
delete digits entered
one by one. Hold
down to delete the
entire entry.
Touch and hold this
key to toggle your
phone between
Vibrate Mode and
Normal Mode.
13
Getting Started with Your Phone
The Battery
NOTE: It is important to fully charge the battery before initial use of the
phone.
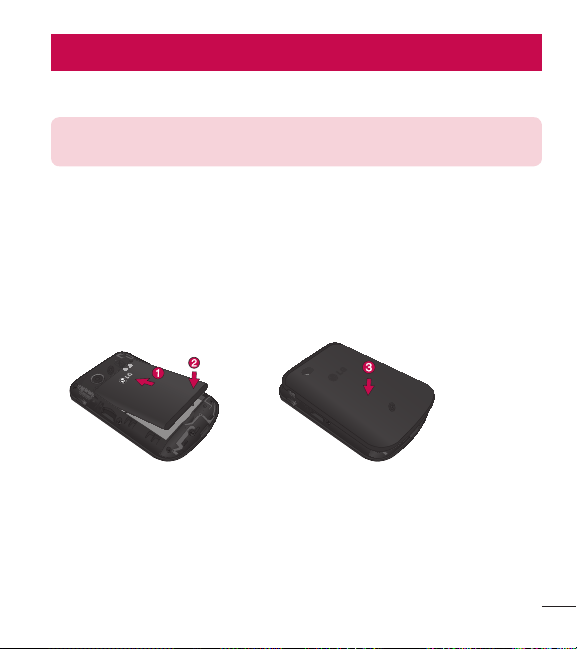
Installing the Battery
1 Remove the battery from its packaging.
2 Insert the battery into the battery compartment in the back of the phone. Make
sure the connectors align (see step 1 in the illustration below).
3 Gently press down to secure the battery (see step 2 in the illustration below).
4 Position the back cover over the battery compartment and press down until you
hear a click (see step 3 in the illustration below).
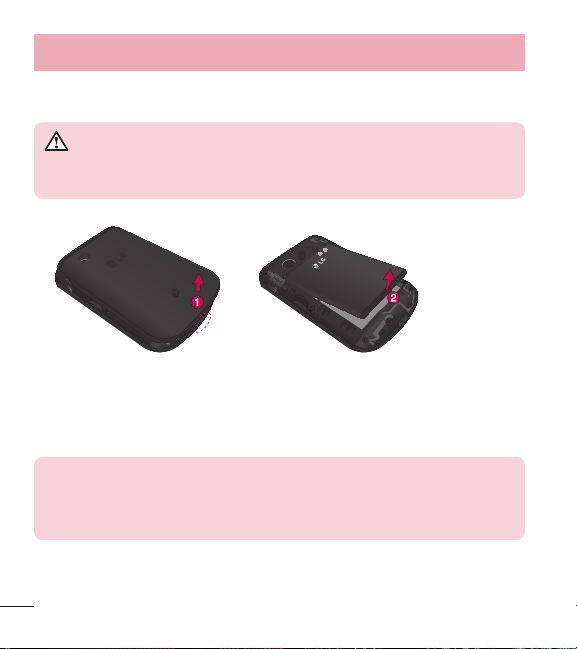
Removing the Battery
1 Turn the power off.
2 Lift the back cover using the fingertip cutout located at the bottom of the cover
and remove it.
14
Getting Started with Your Phone
3 Lift the battery using the fingertip cutout located at the bottom of the battery
compartment and remove it from the phone.
WARNING
Do not handle a damaged or leaking Li-Ion battery as you can be
burned.
Charging the Battery
Your phone comes with a travel adapter and a USB cable which connect together
to charge your phone. To charge your phone:
NOTE: Please use only an approved charging accessory to charge your
LG phone. Improper handling of the Accessory/Charger Port, as well as
the use of an incompatible charger, may cause damage to your phone
and void the warranty.
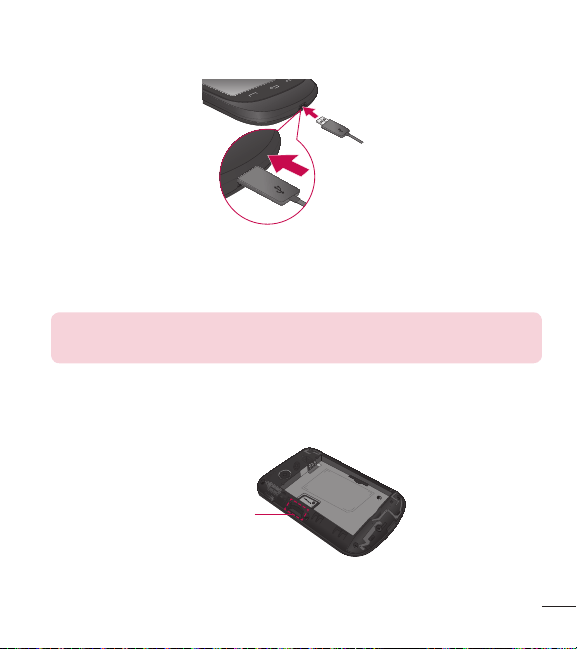
15
Plug one end of the USB cable into the phone’s Accessory/Charger Port and the
other end into an electrical outlet.
The charge time varies depending upon the battery level.
NOTE: Always unplug the charger from the wall socket after the phone
is fully charged to save unnecessary power consumption of the charger.
How to Install Your microSD™ Card
1 Remove the back cover and locate the microSD™ slot (refer to the image
below).
microSD
TM
card slot
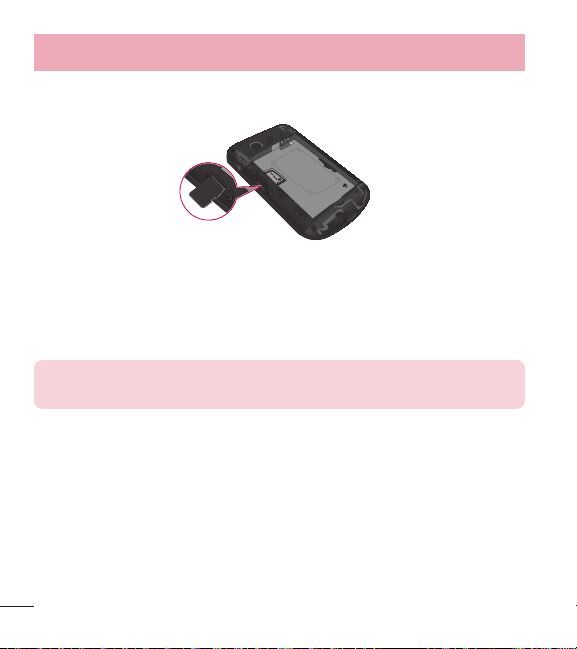
2 Insert the microSD™ card with the label side facing upwards and the gold
16
Getting Started with Your Phone
contact area downwards. Then gently push in until it clicks into the slot. If you
insert the card in the wrong direction, it may damage your phone or your card.
How to Remove Your microSD™ Card
1 Remove the back cover and locate the microSD™ card slot. Then gently pull the
exposed edge of the microSD™ card to remove it.
2 Replace the back cover.
NOTE: Do not attempt to remove the microSD™ card while reading or
writing to the card.
Battery Charge Level
The battery charge level is shown at the top right corner of the Home screen.
When the battery charge level becomes low, the low battery sensor alerts you in
three ways: sounding an audible tone, blinking the battery icon, and displaying a
warning message.
If the battery charge level becomes exceedingly low, the phone automatically
switches off and any function in progress is not saved.

17
Turning the Phone On and Off
Turning the Phone On
1 Install a charged battery or connect the phone to an external power source if
the battery level is low.
2 Press the Power/Lock Key
for about 3 seconds until the LCD screen
lights up.
Turning the Phone Off
1 Press and hold the Po
wer/Lock Key
until the pop-up message is
displayed.
2 Touch Yes to confirm.
Signal Strength
Call quality depends on the signal strength in your area. The signal strength is
indicated on the screen as the number of bars next to the signal strength icon
. The more bars, the better the signal strength. If the signal quality is poor,
move to an open area. If you are in a building, the reception may be better near a
window.
Screen Icons
To see the icon glossary, touch > Settings > Phone Info > Icon Glossary.
Then choose the type of icons you want to see.

18
Getting Started with Your Phone
Making Calls
1 Touch and enter the phone number (include the area code if needed).
2 Touch the Send Key
or touch .
3 Touch the End Key
to end the call.
Correcting Dialing Mistakes
If you make a mistake while dialing a number, touch once to erase the last
digit entered, or hold down
for at least 2 seconds to erase all the digits you
have entered.
Redialing Calls
1 Touch the Send Key twice to redial the last number you dialed. If you
touch the key once, the most recent (missed, received and dialed) calls in your
history list will display. You can select any of these calls to place an outgoing
call.
Receiving Calls
1 When the phone rings and/or vibrates, touch the Send Key to answer.
TIP! The Call Settings menu allows you to choose your answer options.
To access the Answer Options, touch > Settings > Call Settings >
Answer Options. The following options are available:
Any Key, Auto With Handsfree.

19
NOTE: If you touch the End Key or the Volume Keys ,
while the phone is ringing, the ringing or vibration is muted for that call.
2 Touch the End Key to end the call.
20
Quick Access to Convenient Features
Lock Mode
Sets your phone to require a 4-digit Lock Code in order to use the phone. To
activate Lock Mode each time you turn on the phone, touch
> Settings
> Phone Settings > Security > Enter your Lock Code > Lock Phone > On
Power Up. To lock the phone immediately, touch Lock instead of On Power Up.
NOTE: Until you change it, the default Lock Code is the last 4 digits of
your phone number.
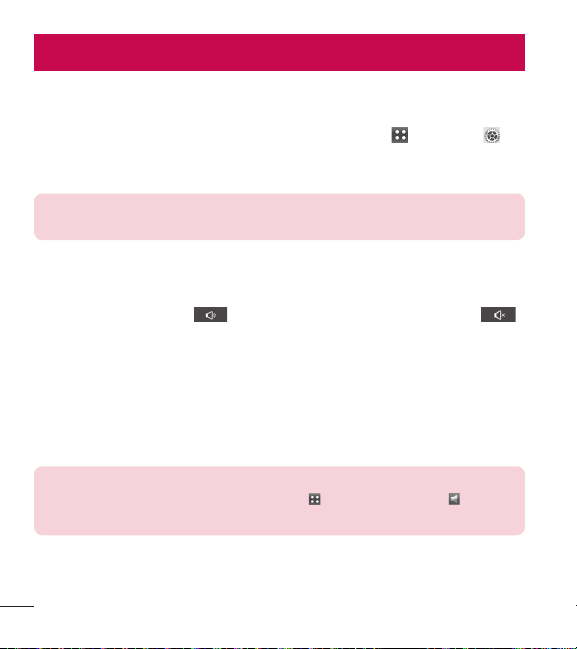
Speakerphone Function
This function can be accessed during a phone call.
During a phone call, touch
once to activate the speakerphone. Touch
again to deactivate the speakerphone function.
Quick Volume Adjustment
Use the Volume Keys to adjust the Master Volume from the Home screen, and the
earpiece volume during a call. The upper Volume Key increases the volume and
the lower Volume Key decreases the volume.
NOTE: The keypad volume is adjusted through the Button Sounds
submenu of the Sounds Settings menu. ( > Sound Settings >
Button Sounds).

21
Call Waiting
Your cellular service may offer call waiting. While a call is in progress, two beep
sounds indicate another incoming call. When call waiting is enabled, you may put
the active call on hold while you answer the other incoming call. Check with your
cellular service provider for information about this function.
1 Touch the Send Key
to answer a waiting call.
2 Touch the Send Key
again to switch between calls.
Caller ID
Caller ID displays the phone number or name of the incoming call. If the caller’s
identity is stored in Contacts, the name will appear along with the phone number.
Check with your service provider to ensure they offer this feature.
Speed Dialing
Speed dialing is a convenient feature that allows you to make phone calls quickly.
A number key can be assigned to a specific phone number. By touching and
holding down a number key, your phone will recall the phone number associated
from the Contact List and dial that phone number for you. Speed Dial Number 1 is
set to Voicemail by default and is unchangeable.
Dialing Single Digit Speed Dials (from 2 to 9)
Enter and hold the Speed Dial number.
OR
Enter the Speed Dial number and touch the Send Key
.

22
Quick Access to Convenient Features
Dialing Double Digit Speed Dials (from 10 to 99)
Enter the first digit and then touch and hold the key of the second digit.
OR
Enter the first and second digits and touch the Send Key
.
Text Input
Each time you touch a data entry field, the touchscreen automatically displays a
keypad allowing you to enter text, numbers, and symbols. For example, in a text
field, an alphabet keypad appears, but you can also switch to number mode to
enter digits.
Touch to change the text input mode.
Touch to hide the keyboard.
Touch to delete text.
Touch to access additional options.

23
Contacts in Your Phone’s Memory
The Basics of Storing Contact Entries
1 Enter the phone number you want to save (up to 48 digits).
2 Touch Save and select either Add New Contact or Update Existing on the
pop-up screen.
3 Touch the desired phone label. Choose from Mobile 1, Home 1, Office 1,
Mobile 2, Fax, Home 2, Office 2, Email 1, and Email 2.
NOTE: Use Update Existing to add another phone number to a
contact already stored in memory.
4 Touch the Name field and enter a name for the contact (up to 32 characters).
Then touch Done and Save. A confirmation message is displayed briefly.
Phone Numbers With Pauses
When you call automated systems such as voicemail or credit billing numbers, you
often have to enter a series of numbers to navigate through the system. Instead
of entering these numbers by hand, you can store the numbers in your contacts
separated by special pause characters (Wait and Pause). There are two different
types of pauses you can use when storing a number:
Wait (W)
The phone stops dialing until you touch Release to advance to the next number.
Pause (P)
The phone waits 2 seconds before sending the next string of digits.

24
Contacts in Your Phone’s Memory
Storing a Number with Pauses
1 Touch
> Contacts > New Contact.
2 Enter a name (up to 32 characters) and touch the number field to enter a
number.
3 Touch
and select Add Wait or Add 2-Sec Pause.
4 Enter the additional number(s), touch Done and then Save.
Adding a Pause to an Existing Number
1 Touch
> Contacts > Contact List.
2 Scroll through the list and touch the contact entry you wish to edit.
3 Touch Edit.
4 Touch the number.
5 Touch
.
6 Touch Add Wait or Add 2-Sec Pause.
7 Enter the additional number(s), touch Done and then Save.
Searching Your Phone’s Memory
Your phone is able to perform a dynamic search of the contents in your phone’s
memory. A dynamic search compares entered letters or numbers against the
entries in your contacts. A matching list is displayed in descending order. You can
then select a number from the list to call or edit.
Searching by Letter
1 Touch to display your contacts.
2 Touch Go To followed by the key(s) on the alphanumeric keypad that

25
corresponds with the letters in the contact's name. The matching contacts will
be displayed.
Scrolling Through Your Contacts
1 Touch
to display your contacts.
2 Use your finger to scroll up and down through the list.
Accessing Options
1 Touch to display your contacts.
2 Touch
.
3 Touch one of the following options:
Send Via Bluetooth: Send a contact (name card) via Bluetooth
®
.
Delete: Delete the selected entry from your contacts list.
Message: Send a text message or picture message to the selected contact.
Lock/Unlock: Lock or unlock your contacts to prevent them from getting
deleted.
Copy To Card: Copies your contacts to your memory card.
Making a Call From Your Phone’s Memory
Once you have stored phone numbers in your Contacts, you can place calls to
those numbers quickly and easily.
t
By touching a phone number in Contacts or Call History and touching the Send
Key
or .
t
By using Speed Dialing.

26
Contacts in Your Phone’s Memory
From Contacts
1 Touch
to display your contacts.
2 Touch the contact entry.
3 Touch the phone number.
From Recent Calls
1 Touch
> Recent Calls .
2 Touch the type of recent call. Choose from Missed Calls, Received Calls,
Dialed Calls, and All Calls.
3 Touch the phone number.
4 Touch Call or touch the Send Key
to place the call.
Speed Dialing
For a single-digit Speed Dial, touch and hold the digit then touch the Send Key
.
For a double-digit Speed Dial, touch the first digit and hold the second digit or
touch the first and second digits, then touch the Send Key
.

27
Using the Phone Menus
Prepaid
For prepaid services, this menu provides shortcut access to the following items
among others:
1. Add Airtime
Allows you to add airtime.
1 Touch
> .
2 Touch Add Airtime, enter the airtime PIN and touch OK.
3 Read the displayed message, then select Yes or No.
2. Buy Airtime
This menu allows you to choose from 4 different quantities of airtime to buy.
Choose from 60 mins., 120 mins., 200 mins., and 450 mins.
3. My Phone Number
This menu displays your phone number.
4. My Airtime Info
This menu displays your available minutes and service end date.

28
Using the Phone Menus
5. Airtime Display
You can choose to display or hide the balance and service end date on your Home
screen.
6. Serial Number
This menu simply displays the information of your phone’s MEID.
7. Code Entry Mode
Code Entry Mode will allow the phone to accept TracFone-related codes in order
to add units, modify specific data and troubleshoot the phone. In using the Code
Entry Mode, you can’t receive incoming calls or use events alert.
29
Contacts
The Contacts menu allows you to store names, phone numbers and other
information in your phone’s memory.
1. New Contact
Allows you to add a new contact to your Contact List.
NOTE: Use Update Existing to add another phone number to a
contact already stored in memory.
1 Touch > Contacts > New Contact.
2 Enter the name.
3 Continue entering the contact's information by touching the corresponding
fields and entering the desired information.
4 Touch Save to save the new contact.
2. Contact List
Allows you to view your Contact List.
1 Touch
> Contacts > Contact List.
2 Choose from the following options:
t
Scroll through your contacts alphabetically.
t
Touch to select one of the following options:
Send via Bluetooth/ Delete/ Message/ Lock/Unlock/ Copy to Card

30
Using the Phone Menus
3. Groups
Allows you to view your grouped contacts, add a new group, change the name of
a group, or delete a whole group.
1 Touch
> Contacts > Groups.
2 Choose from the following options:
t
Touch a group to view its members.
t
Touch a group, then touch to choose from the following options:
Remove/ New Text Message/ New Media Message/ Mark All/ Unmark All/
Remove All
4. Speed Dials
Allows you to view your Speed Dials list, designate new Speed Dials, or remove
Speed Dial designations entered in your contacts.
1 T ouch
> Contacts > Speed Dials.
2 Touch the desired unassigned number from the list.
3 Touch the contacts you would like to assign a Speed Dial to. Then touch Yes. A
confirmation message is displayed.
NOTE: Your Voicemail is already set to speed dial 1. This is a default
setting and cannot be changed.

31
5. My vCard
Allows you to view all of your personal Contact information including name and
phone numbers.
1 Touch
> Contacts > My vCard.
2 Touch Edit.
3 Touch the field you want to edit.
4 Edit the information as necessary and touch Save.
NOTE: You cannot edit your mobile phone number, but you can add an
additional phone number.

32
Using the Phone Menus
Messages
Your phone can store up to 600 messages and notifications (SMS 300/CMAS
100/MMS 100/MMS Notification 100). Other limits, such as available characters
per message, may exist. Please check with your service provider for system
features and capabilities.
1. New Text Message
Allows you to send text messages and e-mail. Each message will be formatted
and sent according to the destination address.
The Basics of Sending a Text Message
1 Touch Messages
> New Text Message.
2 Touch Enter Number to manually enter the address or Add Contact to add the
address from your Contacts List.
3 Touch the Text field to enter text.
4 Type your message.
5 Touch Done, then touch Send.
Text Message Options
1 Touch Messages
> New Text Message.
2 Touch
.
3 Touch the option(s) to customize.
t
Preview Allows you to preview the message before sending it. You can touch
Edit to continue editing or Send to send it.
t
Save As Draft Save the current message as a draft.

33
t
Priority Level Choose High or Normal to set the priority level of your message.
t
Callback # Choose On or Off to set your callback number to be sent with the
message.
t
Cancel Message Allows you to cancel the message.
4 Complete the message and send it.
Text Options
While you are composing a message, you have various options to customize the
text.
1 Touch Messages
> New Text Message.
2 Touch the Text field to enter text.
3 Touch
.
4 The following options are available:
Keyboard/ Insert Template/ Save As Draft/ Add/ Copy Text/ Priority Level/
Callback #/ Save Template/ Cancel Message
5 Complete your message and send or save it.
2. New Media Message
Allows you to send messages with text, pictures, sounds, and a subject.
1 Touch Messages
> New Media Message.
2 Touch Enter Number to manually enter the address or Add Contact to add the
address from your Contacts List.
3 Touch the corresponding field to add Text, Image/ Video, Sound and Subject
to your message.
4 Touch the file you want to add.

34
Using the Phone Menus
5 When you touch the sound field, you have the option of attaching a saved
sound file, or recording a new one.
6 The following options are available by touching
:
Keyboard/ Preview/ Save As Draft/ Copy Text/ Insert Template/ Add Slide/
Priority Level/ Call Back #/ Save Template/ Cancel Message
7 Touch Send to send the message.
3. Inbox
The phone alerts you in 3 ways when you receive a new message:
t
Displaying a notification message on the screen.
t
Displaying the message icon .
t
Playing an audio tone or vibrating, depending on your personal sound settings.
Received text messages and media messages may be searched and the contents
viewed. Received messages are displayed from newest to oldest.
Viewing Your Inbox
Up to 600 Messages (300 SMS, 100 CMAS, 100 MMS, and 100 MMS
notifications) can be stored in the Inbox.
1 Touch Messages
> Inbox.
2 Touch a message thread, then select the desired message.
t
Touch Reply to reply to the message.
t
Touch Delete to delete the message.
- OR -
Touch
to choose from the following options:
Sort by/ Delete/ Lock/ Unlock/ Delete Inbox/ Message Settings
35
3 While viewing a message, touch for the following options:
Play Again Allows you to play the attached file again.
Forward Forwards a received message to other destination address(es).
Reply With Copy Allows you to reply with a copy of the message that was sent
to you.
Save Picture Allows you to save the pictures you received.
Sa
ve As Ringtone Allows you to save the sound as your ringtone.
Save Sound Allows you to save the attached media to your phone. (Only for
messages with audio attached.)
Save Templates Allows you to save the template.
Lock/Unlock Locks or unlocks the selected message.
Go To URL Accesses the website by starting the Browser. (Only for
messagescontaining a URL.)
Add To Contacts Choose Add New Contact/ Update Existing to save the
phone number in your Contacts.
Extr
act Address Allows the address included in the message to be extracted
for viewing.
Message Info Shows the message's Type, Priority, Status Subject, Size and
Attachment name.
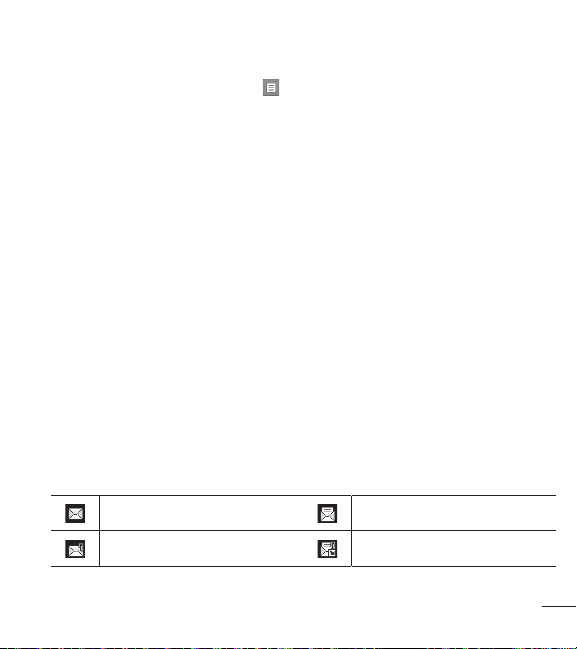
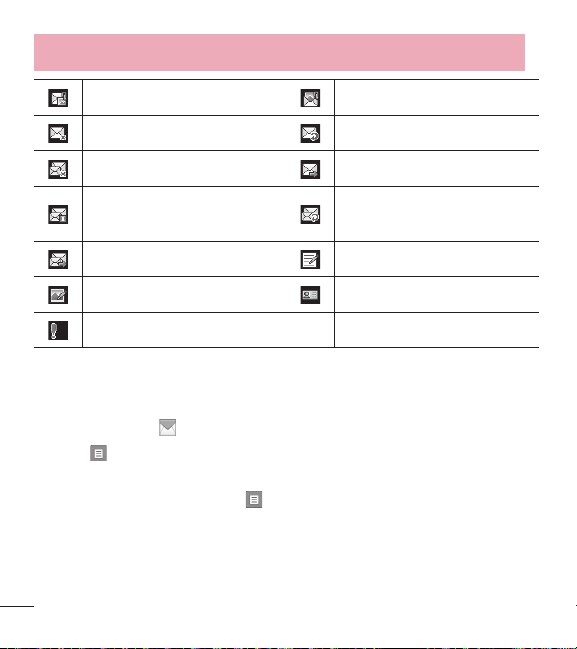
Message Icon Refer
ence
New Text Message Text Message Read
New MMS Message New MMS Message Received
36
Using the Phone Menus
MMS Message Unread MMS Message Read
Message Delivered Message Failed
Multiple Messages Delivered Message Sent
Multiple Messages Delivery
Incomplete
Multiple Messages Failed
Multiple Messages Sent Text Message Draft
MMS Message Draft Namecard
High Priority
4. Outbox
The Outbox is a place where you can find your sent messages.
1 Touch Messages
> Outbox.
2 Touch to choose from the following options:
Sort by/ Delete/ Lock/ Unlock/ Delete Outbox
3 While viewing a message, touch
for the following options:
Play Again/ Forward/ Lock/ Save Templete/ Add To Contacts/ Extract
Address/ Message Info

37
5. Drafts
Displays saved draft messages.
1 Touch Messages
> Drafts.
2 Touch
to choose from the following options:
Delete Deletes the selected message from Drafts.
Lock/Unlock Locks or unlocks the selected message(s).
Delete Draft Deletes all Draft messages at one time.
Message Settings Allows you to adjust the following settings: Reply Settings/
Entr
y Mode/ Signature/ CMAS Alert
3 Touch a Draft message to edit it.
6. Voicemail
Allows you to view how many new voice messages are recorded in your voicemail
box. Your phone will alert you when you receive a new voice message.
Checking Your Voicemail Box
1 Touch Messages
> Voicemail.
2 Choose from the following options:
t
Touch Clear to clear the voicemail counter.
t
Touch Call to listen to the message(s).

38
Using the Phone Menus
7. Templates
Allows you to display, edit, and add text templates. These text templates allow you
to reduce manual text input into messages.
1 Touch Messages
> Templates.
2 Touch New to create a new template.
3 After editing the new template, touch Sa
ve to save it.
8. Delete All
Allows you to erase all the messages stored in your Inbox, Outbox, or Drafts
message folders. You can also erase all messages at the same time.
1 Touch Messages
> Delete All.
2 Touch Delete Inbox/ Delete Outbox/ Delete Drafts/ Delete All Messages.
3 Confirm in the pop-up message.
9. Message Settings
Allows you to configure settings for Messaging.
1 Touch Messages
> Message Settings.
Message Settings Sub-Menu Descriptions
1 Reply Settings (Text Message Only/ Selection)
Allows you to choose what reply option is allowed when replying to messages.
Choose Text Message Only to only reply with text messages or choose
Selection to have the option to reply with a text or picture message.

39
2 Entry Mode (T9, Abc, ABC, 123)
Allows you to select the default input method.
3 Signature (On/ Off)
Allows you to create/edit a signature and choose to automatically send it with
your messages.
4 CMAS Alert
Allows you to opt in/out of Emergency Alerts. Presidential alert are mandatory.
For more information, touch Help.

40
Using the Phone Menus
Recent Calls
The Recent Calls menu is a list of the last phone numbers or contact entries for
calls you missed, received, and dialed. It is continually updated as new numbers
are added to the beginning of the list and the oldest entries are removed from the
bottom of the list.
NOTE: To view a quick list of all your recent calls, touch the Send Key
from the Home screen.
1. Missed Calls
Allows you to view the list of missed calls; up to 90 entries.
1 Touch
> Recent Calls > Missed Calls.
2 Touch an entry and touch
for the following options:
Save To Contacts (Contact Info)/ Delete/ Lock/ Unlock/ Call Timer
3 Touch the End Key
to return to the Home screen.
2. Received Calls
Allows you to view the list of received calls; up to 90 entries.
1 Touch
> Recent Calls > Received Calls.
2 Touch an entry and touch
for the following options:
Save To Contacts (Contact Info)/ Delete/ Lock/ Unlock/ Call Timer
3 Touch the End Key
to return to the Home screen.
41
3. Dialed Calls
Allows you to view the list of dialed calls; up to 90 entries.
1 Touch
> Recent Calls > Dialed Calls.
2 Touch an entry and touch
for the following options:
Save To Contacts (Contact Info)/ Delete/ Lock/ Unlock/ Call Timer
3 Touch the End Key
to return to the Home screen.
4. All Calls
Allows you to view a list of the most recent missed, received, and dialed calls.
1 Touch
> Recent Calls > All Calls.
2 Touch an entry and touch
for the following options:
Save To Contacts (Contact Info)/ Delete/ Lock/ Unlock/ Call Timer
3 Touch the End Key
to return to the Home screen.
5. Call Timer
Allows you to view the duration of selected calls.
1 Touch
> Recent Calls > Call Timer.
2 C all times are displayed for the following types of calls:
Last Call/ Dialed Calls/ Received Calls/ Roaming Calls/ All Calls/ Last
Reset/ Lifetime Calls
3 Touch
to reset an individual timer or to reset all timers.
42
Using the Phone Menus
Games & Apps
Allows you to download and play Java games and applications to your enjoyment.
1 Touch
> Games & Apps .
2 Touch Buy Games to search for and buy your favorite games. The following
games are preloaded in your phone.
Bejeweled Demo/ Facebook/ Nimbuzz/ Opera Mini 7/ Tetris Demo
Multimedia
View, take, and share your digital pictures and audio right from your wireless
phone.
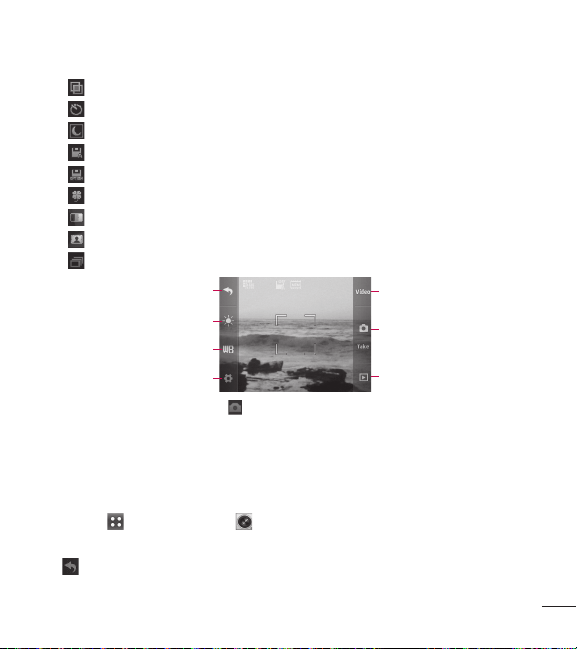
1. Camera
1 Touch > Camera .
The following Camera options are available:
Back To return to the menu.
Brightness To adjust the brightness.
White Balance Auto/ Sunny/ Cloudy/ Fluorescent/ Glow
Video Changes to video camera mode.
Take Takes a picture.
My Images To view the photos in the Images folder.
Settings
Resolution 1600X1200/ 1280X960/ 640X480/ 320X240
Shutter Sound Shutter 1/ No Sound/ Shutter 2/ Cllick
43
Color Effects Normal/ Negative/ Aqua/ Sepia/ Black & White
Self Timer Off/ 3 Seconds/ 5 Seconds/ 10 Seconds
Night Mode On/ Off
Auto Save On/ Off
Save Option Internal/ External
Send Reminder On/ Off
Quality Normal/ Fine/ Super Fine
FunFrame Allows you to choose fun frames for your pictures.
Multishot Off/ 3 Shots/ 6 Shots
Back
Video
Brightness
Take
White Balance
My Images
Settings
2 Take a picture by touching .
3 A menu with options to send the image is displayed. You can choose from
Send to send the photo via picture message, or View to view the image.
2. Video Camera
1 Touch > Video Camera .
The following Video Camera options are available:
Back To return to the menu.

44
Using the Phone Menus
Brightness To adjust the brightness.
White Balance Auto/ Sunny/ Cloudy/ Fluorescent/ Glow
Camera Changes to camera mode.
Rec Starts recording a video.
Videos To view the videos in the Videos folder.
Setting
Recording Time For Send/ For Save
Resolution 320X240/ 176X144
Color Effects Normal/ Negative/ Aqua/ Sepia/ Black & White
Auto Save On/ Off
Save Option Internal/ External
Back
Camera
Brightness
Rec
White Balance
My Videos
Settings
2 Touch to start recording.
3 Touch Stop to stop the video.
3. Voice Recorder
Allows you to record voice and sounds.
1 Touch
> Voice Recorder .
2 Touch
to start recording.

45
3 Once recording has started, the following options are available:
t
Touch to stop the recording.
t
Touch to pause the recording.
Once the recording has stopped, the audio file will be automatically saved.
4. Images
1 Touch > Images .
2 Touch My Images to view pictures you've taken, touch Default Images to view
pre-loaded images, and touch Buy Graphics to buy some images.
5. Videos
Allows you to view video files saved in your phone.
1 Touch
> Videos .
2 Touch a video to view it.
6. Sounds
1 Touch > Sounds .
2 Touch My Ringtones to view and listen to the ringtones you've created, touch
Default Ringtones to view and listen to pre-loaded ringtones, and touch Buy
Ringtones to buy some ringtones.

46
Using the Phone Menus
7. Music Player
Allows you to listen to songs stored in your memory card.
To access this feature, there should be stored music in your memory card.
Notes:
t
Be sure to use only recommended microSD™ cards. Using non-
recommended microSD™ cards could cause data loss and damage
your phone.
t
The microSD™ card and its adapter can be easily damaged by
improper operation. Please be careful when inserting, removing, or
handling it.
t
Do not remove a microSD™ card while files are being accessed or
transferred. It may result in loss or damage of data.
t
Supported music formats: MP3, WMA, AAC, M4A
7.1 Last Played Song
Allows you to play the last played song.
1 Touch
> Music Player > Last Played Song.
7.2 All Songs
Allows you to play all songs.
1 Touch
> Music Player > All Songs.
2 Touch a music file to play it or touch
for the following options:
Add To Playlist/ Move To Card/ Move To Phone/ Send/ Delete/ Song Info.
t
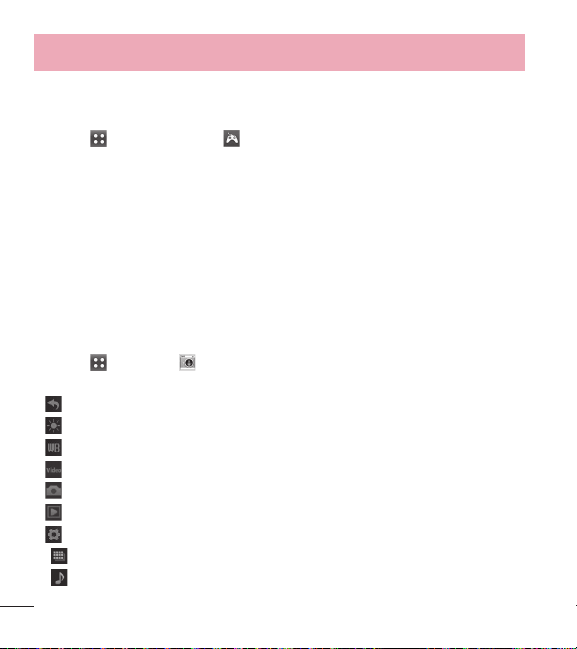
The following options are available while playing music:

47
– Shuffle off
– Shuffle on
– Repeat off
– Repeat one song
– Repeat all
– Rewind
– Fast forward
– Play
– Pause
t
Or touch for the following options: Exit Player/ Add To Playlist/ Song Info
7.3 Artists
Allows you to view and listen to your music by artists.
1 Touch
> Music Player > Artists.
2 Touch the artist that you want to listen to and choose the song to play.
7.4 Albums
Allows you to view and listen to your music by albums.
1 Touch
> Music Player > Albums.
2 Touch the album that you want to listen to and choose the song to play.
7.5 Genres
Allows you to view and listen to your music by genres.
1 Touch
> Music Player > Genres.
2 Touch the genre that you want to listen to and choose the song to play.

48
Using the Phone Menus
7.6 My Playlists
Allows you to view and listen to your music by playlist.
1 Touch
> Music Player > My Playlists.
2 When the pop- up appears to ask you whether to create a new playlist, touch
Yes or No.
3 Name the playlist and touch Save.
4 Touch the playlist and then touch Add Songs to select the songs you want to
add.
5 Touch Done when you finish selecting the songs you want to add.
7.7 Settings
Allows you to customize the Music Player settings.
7.7.1 Repeat
Allows you to set the repeat setting.
1 Touch
> Music Player > Settings.
2 Touch Repeat to alternate between the following options:
Repeat All/ Repeat One Song/ Repeat Off
7.7.2 Shuffle
Allows you to set the music player to shuffle your songs.
1 Touch
> Music Player > Settings.
2 Touch Shuffle to turn the feature On or Off.

49
My Schedule
1. Alarm
Allows you to set up to ten alarms. At the alarm time, any set alarm will sound
and/or vibrate the tone of your choice (depending on your sound settings), and a
notification message will be displayed on your screen.
1 Touch
> Alarm .
2 Touch Add.
3 Touch the Set Time field to set the alarm time.
4 Touch Repeat to set the recurrence for the alarm. Available options are:
Once/ Daily/ Mon - Fri/ Weekends/ Select Days
5 Touch Ringtone to set the ringtone for the alarm.
6 Touch Save to save the alarm.
2. Calendar
Allows you to store and access your agenda(s). Simply store your appointments in
your Calendar and your phone will alert you with a reminder.
1 Touch
> Calendar .
2 Touch the day you wish to edit.
3 Touch Add.
4 Enter your schedule information including:
t Subject t Start Time
t End Time t Repeat

50
Using the Phone Menus
t Until t Alerts
t Tones t Vibrate
5 Touch Save.
Browser
The Browser feature allows you to view Internet content. Accessibility and
selections within this feature are dependent upon your service provider. For
specific information on the Web, contact your service provider.
1. Start Browser
Allows you to initiate a Web session.
1 Touch
> Browser .
Ending an Web Session
End a web session by touching the End Key
.
Browser Menu
The Browser Menu provides the following toolbar options:
t
Home Returns you to the Homepage.
t
Back To go back to the previous page.
t
Forward If available, takes you back to the next page.
t
Bookmarks Takes you to the Bookmarks menu where you can add, edit,
and delete your bookmarks.
t
Go To URL Allows you to enter a Web address to visit.
t
Refresh Allows you to reload the current Web page.

51
t
History Displays a list of visited web pages.
t
Clear Memory Allows you to clear the memory.
t
Send Link Allows you to send the link of the current page via a text
message.
t
Show URL Shows you the current URL.
t
Save Items Allows you to save items from the web page.
t
Settings Allows you to configure the following Browser settings:
Downloads Allows you to configure whether you want to enable or disable
image, background, and object downloads.
Restart Browser Allows you to restart the Browser.
Send Referrer Allows you to turn the HTTP Send Referrer Header on or off.
Key Press Timeout Set the key press timeout.
Connection Timeout Set the connection timeout.
t
Advanced Shows you the information of the Browser, including the version
and license information.
t
Exit Allows you to exit the Browser.

52
Using the Phone Menus
Tools
Your phone’s tools include: Voice Command, Calculator, Tip Calculator, Unit
Converter, Stopwatch and Notepad.
1. Voice Command
Allows you to make phone calls quickly and easily by voice. Your phone recalls the
number from your Contacts and then dials it. This menu is useful for those who
are driving or are blind. It delivers time and date information by voice and allows
you to check missed calls, messages and voicemails etc.
1.1 Call <Name Or Number>
1 Touch > Voice Command .
2 Touch or say Call <Name Or Number>.
3 Say the name as it is saved in your Contact List or say the number.
1.2 Send Msg To <Name Or Number Or Group>
1 Touch > Voice Command .
2 Touch or say Send Msg To <Name Or Number Or Group>.
3 Touch or say Text Message or Media Message and then say the Contact’s
name.
1.3 Check <Item>
1 Touch > Voice Command .
2 Touch or say Check <Item>.
3 Touch or say one of the available options.

53
1.4 Contacts <Name>
1 Touch > Voice Command .
2 Touch Contacts <Name> or say ‘Contacts’ followed by the Contact’s name.
1.5 Play
1 Touch > Voice Command .
2 Touch or say Play.
3 Say the name of the music playlist.
1.6 Help
Allows you to view more information about the features in Voice Control.
1 Touch
> Voice Command .
2 Touch or say Help.
2. Calculator
Allows you to perform simple mathematical calculations. You can enter numbers
up to the tenth decimal place.
1 Touch
> Calculator .
2 Enter data.
t
Touch the keypad to enter numbers.
t
Touch to enter decimals.
t
Touch to delete the last digit entered, or touch and hold to erase the entire
entry.
t
Touch the corresponding touch keys to enter functions ( +, -, x, ÷ ).

54
Using the Phone Menus
t
Touch to complete the equation.
3. Tip Calculator
Allows you to quickly and easily estimate the tip and total amount of a bill by
inputting the bill amount before tip, the tip percentage, and divide it by the number
of people paying.
1 Touch
> Tip Calculator .
2 Enter the variable fields (Total Bill ($), Tip (%), Split). The corresponding
calculation fields (Tip ($) and You Owe ($)) are automatically calculated.
3 Touch Reset to begin another calculation.
4. Unit Converter
Allows you to convert units of measurement.
1 Touch
> Unit Converter .
2 T ouch the unit of measurement you want to convert:
Area/ Length/ Mass/ Temperature/ Volume/ Velocity
3 Choose the types of measurement you would like to convert and change the
Rate, if applicable.
4 The conversion will be automatically calculated.
5. Stopwatch
Allows you to use your phone as a Stopwatch.
1 Touch
> Stopwatch .

55
2 Touch Start to start the stopwatch, and touch Stop to stop it.
t
You can use the Lap function by touching Lap to record up to 20 laps and lap
times.
3 Touch Reset to reset the stopwatch or Resume to resume it.
6. Notepad
Allows you to add, read, edit, and erase notes to yourself.
1 Touch
> Notepad .
2 Touch Add to write a new note.
3 Type the note, then touch Save.
A confirmation message displays briefly, then displays your list of notes.
Managing Notepad Entries
1 Access Notepad.
2 To erase a note, touch it to open it. Then, touch
.
- OR -
To add a note or erase all of the notes, touch Add or Delete All.

56
Using the Phone Menus
Settings
This menu allows you to configure various phone settings.
1. Sound Settings
This menu allows you to customize the phone’s sounds.
1.1 Master Volume
Allows you to configure the master volume level.
1 Touch
> Sound Settings > Master Volume.
2 Touch the bars to set the volume level, then touch Set.
1.2 Call Sounds
Allows you to configure your phone’s call sounds.
1 T ouch
> Sound Settings > Call Sounds.
2 Touch Call Ringtone, Call Vibrate, or Caller ID Readout and configure it.
1.3 Alert Sounds
Allows you to select the alert tones for new messages.
1 Touch
> Sound Settings > Alert Sounds.
2 Touch Text Message, Media Message, Voicemail, Emergency Tone, or
Missed Call.
3 Configure the setting.

57
1.4 Button Sounds
Allows you to configure the button sounds for the touch keyboard.
1 Touch
> Sound Settings > Button Sounds.
2 Touch the bars to set the volume level, then touch Set.
1.5 Service Alerts
Allows you to configure the 2 available Service Alerts.
1 Touch
> Sound Settings > Service Alerts.
2 Touch an alert option.
Call Connect
Alerts you when the call is connected.
Low Battery
Allows you to choose the alert type between Announce and Tone.
1.6 Power On/Off
Allows you to set the phone to sound a tone when the phone is powered on and
off.
1 Touch
> Sound Settings > Power On/ Off.
2 Toggle the setting between ON/OFF for the available options.

58
Using the Phone Menus
2. Display Settings
This menu allows you to customize your phone's display screen.
2.1 Display Backlight
Allows you to set the display backlight timer.
1 Touch
> Display Settings > Display Backlight.
2 Touch a duration time:
7 Seconds / 15 Seconds / 30 Seconds / 1 Minute
2.2 Brightness
Adjust your screen‘s brightness to suit your surroundings.
1 Touch
> Display Settings > Brightness.
2 Touch a brightness level bar (Level 1~4) to select it and touch Set.
2.3 Wallpaper
Allows you to choose the kind of background to be displayed on the phone.
1 Touch
> Display Settings > Wallpaper.
2 Touch the desired image, then touch Set.
2.4 Font Settings
Allows you to select the type of font displayed on the LCD screen.
1 Touch
> Display Settings > Font Settings.
2 Touch a setting.
LG Gothic/ LG Serif/ LG Joy/ LG Mint
2.5 Dial Font Size

59
Allows you to set the font size on the dial pad when dialing a number.
1 Touch
> Display Settings > Dial Font Size.
2 Touch a setting.
Small/ Normal/ Large
2.6 Menu Font Size
Allows you to set the font size on the Menu screen.
1 Touch
> Display Settings > Menu Font Size.
2 Touch a setting.
Small/ Normal/ Large/ Very Large
2.7 Name Match For Dialing
Matches a saved contact entry with the corresponding letters entered on the dial
pad.
1 Touch
> Display Settings .
2 Touch the Name Match For Dialing button to toggle the setting between ON
and OFF.
2.8 Pattern Lock
Allows you to set the Pattern Lock.
1 Touch
> Display Settings > Pattern Lock.
2 Touch to toggle the setting between ON and OFF.
3 After turning the feature on, draw your pattern and touch Continue.
4 Redraw the pattern and touch Continue.
5 Enter the Phone Lock Code.

60
Using the Phone Menus
3. Call Settings
The Call Settings menu allows you to designate how the phone handles both
incoming and outgoing calls.
3.1 Answer Options
Allows you to determine how to answer an incoming call.
1 Touch
> Settings > Call Settings > Answer Options.
2 Touch a setting.
Any Key/ Auto with Handsfree
3 Touch Done.
3.2 TTY Mode
Allows you to attach a TTY (Teletype writer) device enabling you to communicate with
parties also using a TTY device. A phone with TTY support is able to translate typed
characters to voice. Voice can also be translated into characters and then displayed
on the TTY.
1 Touch
> Settings > Call Settings > TTY Mode.
2 Touch a setting.
TTY Full/ TTY + Talk/ TTY + Hear/ TTY Off
3.3 One Touch Dial
Allows you to initiate a Speed Dial call by touching and holding the Speed Dial
digit. If set to Off, Speed Dial numbers designated in your Contacts will not
function.
1 Touch
> Settings > Call Settings

61
2 Touch the One Touch Dial button to toggle the setting between ON and OFF.
3.4 Voice Privacy
Allows you to set the voice privacy feature for CDMA calls as Enhanced or
Standard. CDMA offers inherent voice privacy. Check with your service provider for
availability.
1 Touch
> Settings > Call Settings > Voice Privacy.
2 Touch a setting.
Enhanced/ Standard
4. Touch Settings
The Touch Settings menu allows you to configure various touchscreen settings.
4.1 Auto Touch Lock
Allows you to set the screen to automatically lock to prevent accidental presses on
the external screen when the backlight turns off.
1 Touch
> Settings > Touch Settings > Auto Touch Lock.
2 Touch a setting.
On/ Off
4.2 Tone Type
Allows you to set the tone type that is used when touching items on the screen.
1 Touch
> Settings > Touch Settings > Tone Type.
2 Touch a setting.
Click/ Wood Block/ Beep/ Off

62
Using the Phone Menus
5. Phone Settings
The Phone Settings menu allows you to configure various phone and security
settings.
5.1 Airplane Mode
Airplane Mode turns off the phone's wireless signal and allows you to use features
on your phone that do not require wireless communications.
1 Touch
> Settings > Phone Settings > Airplane Mode.
2 Touch a setting.
On/ Off
5.2 Languages (Idiomas)
Allows you to set the bilingual feature according to your preference. Choose
between English and Spanish.
1 Touch
> Settings > Phone Settings > Languages (Idiomas).
2 Touch English or Español.
5.3 Location
Allows you to set your settings for GPS (Global Positioning System: Satellite
assisted location information system) mode.
1 Touch
> Settings > Phone Settings > Location.
2 Touch a setting.
Location On/ E911 Only
NOTE: GPS satellite signals are not always transmitted, especially under
bad atmospheric and environmental conditions, indoors etc.

63
5.4 Security
The Security menu allows you to change Security and Restriction settings.
5.4.1 Change Lock Code
Allows you to enter a new four-digit Lock Code.
1 Touch
> Settings > Phone Settings > Security.
2 Enter the four-digit Lock Code.
3 Touch Change Loc
k Code.
4 Touch Phone Only or Call & Applications.
5 Enter the current Lock Code followed by a new 4-digit Lock Code.
6 For confirmation, it will ask you to enter the new Lock Code again.
5.4.2 Restrictions
Allows you to restrict incoming and/or outgoing calls and messages. Also provides
the option to restrict data.
1 Touch
> Settings > Phone Settings > Security.
2 Enter the four-digit Lock Code.
3 Touch Restrictions and enter the Lock Code.
4 Touch a Restrictions submenu, then the setting.
Incoming Calls/ Outgoing Calls (Allow All/ Contacts Only/ Block All)
Incoming SMS/ Outgoing SMS (Allow All/ Block All)
Incoming MMS/ Outgoing MMS (Allow All/ Block All)
5.4.3 Auto Device Lock
Allows you to set your phone automatically locked after certain amount of time.
1 Touch
> Settings > Phone Settings > Security.

64
Using the Phone Menus
2 Enter the four-digit Lock Code.
3 Touch Auto Device Lock.
4 Touch a setting.
5 Minutes/ 10 Minutes/ 15 Minutes/ 30 Minutes/ 1 Hour/ Off
5.4.4 Lock Phone
Keeps your phone from unauthorized use. Once the phone is locked, it is in
restricted mode until the Lock Code is entered. You can still receive phone calls
and make emergency calls.
You can modify the Lock Code by navigating to the Change Lock Code menu
within the Security menu.
1 Touch
> Settings > Phone Settings > Security.
2 Enter the four-digit Lock Code.
3 Touch Lock Phone.
4 Touch an option.
Unlock The phone is never locked (Lock mode can still be used using the
options below).
Lock The phone is immediately locked.
On Power Up The phone is locked when it is turned on.
5.4.5 Reset Default
Allows you to reset your phone to the factory default settings.
1 Touch
> Settings > Phone Settings > Security.
2 Enter the four-digit Lock Code.
3 Touch Reset Default.

65
4 Touch OK.
5 A message will pop up that says "All settings will revert to factory default."
6 Touch Revert or Cancel. If you touch Revert, enter the four-digit Lock Code.
The phone returns to the configuration default.
5.5 System Select
Allows you to set up the phone producer’s management environment. Leave this
setting as the default unless you want to alter system selection as instructed by
your service provider.
1 Touch
> Settings > Phone Settings > System Select.
2 Touch a setting.
Home Only/Automatic
6. USB Mass Storage
Allows you to select the PC connection mode for your device.
1 Touch
> Settings > USB Mass Storage.
2 Touch a setting.
On/ Off.
7. Memory
Allows you to check out the memory status of your phone.
1 Touch
> Settings > Memory.
2 Touch an option.
Phone Memory/ Card Memory/ Save Options

66
Using the Phone Menus
3 Touch a type of memory to view its status.
4 Touch Save Options to change the storage location of Images, Video and
Ringtones to the Phone Memory or Card Memory.
8. Phone Info
The Phone Info menu provides you with specific information pertaining to your
phone model.
1 Touch
> Settings > Phone Info.
9.1 My Number
Allows you to view your phone number.
1 Touch
> Settings > Phone Info > My Number.
9.2 ESN/MEID
Allows you to view the ESN/ MEID information of your phone.
1 Touch
> Settings > Phone Info > ESN/ MEID.
9.3 Icon Glossary
Allows you to view all the icons and their meanings.
1 Touch
> Settings > Phone Info > Icon Glossary.
2 Touch a submenu to view that type of icon.
Status/ Multimedia/ Messaging/ Contacts/ Recent Calls/ Settings & Tools
9.4 SW/HW Version
Allows you to view the versions of various applications.

67
1 Touch > Settings > Phone Info > SW/HW Version.
Bluetooth
®
Your phone is compatible with devices that support the Bluetooth
®
headset, handsfree, stereo,
phonebook access, basic printing, object push, and file transfer profiles. You may create and
store 20 pairings within your phone and connect to one device at a time. The approximate
communication range for Bluetooth
®
wireless technology is up to 30 feet (10 meters).
Notes
t
Read the user guide of each Bluetooth
®
accessory that you are trying
to pair with your phone because the instructions may be different.
t
The Bluetooth
®
features of this handset may not be compatible with
all Bluetooth
®
enabled devices. Your service provider or handset
manufacturer cannot be held responsible for compatibility issues with
devices not sold by the service provider or handset manufacturer.
1. Power
Allows you to turn the power on or off.
1 Touch
> Bluetooth.
2 Touch Turn On or Turn Off.
NOTE: By default, your device’s Bluetooth
®
functionality is turned off.

68
Using the Phone Menus
2. Add New
Pairing is the process that allows the handset to locate, establish and register a
1-to-1 connection with the target device.
Pairing a new Bluetooth
®
device
1 Touch
> Bluetooth > Add > Start.
2 Follow the Bluetooth
®
accessory instructions to set the device to pairing mode.
3 If Bluetooth
®
power is set to off, you will be prompted to turn power on. Touch
Yes.
4 The device will appear on the screen once it has been located. Touch the
device name.
5 T he phone may prompt you for the passkey
. Consult the Bluetooth
®
accessory
instructions for the appropriate passkey (typically “0000” - 4 zeroes). Enter the
passkey and touch OK. Or it may prompt you to confirm matching passkeys on
both handsets.
6 Once pairing is successful, you will be asked to choose Always Ask or Always
Connect. This sets connection preferences for the Paired Device.
7 Once connected, you will see the device listed in the Paired Devices menu.
3. Paired Devices
Allows you to view the list of paired devices with your phone.
1 Touch
> Bluetooth and your Paired Devices list will display.

69
4. Settings
Allows you to configure Bluetooth settings.
4.1 My Device Info
Allows you to edit the name of the Bluetooth
®
device.
1 Touch
> Bluetooth > > My Device Info.
2 Touch Rename Device.
3 Touch and hold down the Delete Key
to clear the existing name.
4 Enter a new alias.
5 Touch Save to save and exit.
4.2 Discovery Mode
Allows you to set the visibility of your Bluetooth
®
feature.
1 Touch
> Bluetooth > > Discovery Mode.
2 Touch a setting.
On/ Off
NOTE: If you turn on Discovery Mode, your device is able to be
searched by other in-range Bluetooth
®
devices.
4.3 Supported Profiles
Allows you to view the Bluetooth profiles your phone supports.
1 Touch
> Bluetooth > > Supported Profiles.

70
Using the Phone Menus
Wi-Fi
Choose the Wi-Fi network you want to connect to. If you see , you need to enter
a password to connect.
1 Touch
> Wi-Fi .
2 If Wi-Fi is off, touch Turn On to view available networks.
3 Touch
next to the desired network.
- OR -
t
Touch Add to manually add a Wi-Fi network.
t
Touch Refresh to refresh the list of available networks.
t
Touch to access Connection Logs, My MAC Address, and Wi-Fi Sleep
Setting.
Notes
t
If you are outside the Wi-Fi coverage area and use a 1X connection,
additional charges may apply.
t
When the Wi-Fi sleep setting is set to 'When Screen Turn off' and
your phone goes into sleep mode when connected to Wi-Fi, the Wi-Fi
connection is automatically disabled.
t
In this case, if your phone has access to 1x data, it may connect to
the 1x network automatically and additional charges may apply.
t
Your phone supports WEP, WPA/WPA2-PSK security.
t
If your Wi-Fi service provider or network administrator sets encryption
for network security, enter the key into the pop-up window. If
encryption is not set, this pop-up window is not shown. Obtain the key
from your Wi-Fi service provider or network administrator.
71
Accessibility
This menu allows you to easily control various accessibility options.
1. Menu Readout
This option allows the phone to read out menus that are accessed.
1 Touch
> Accessibility .
2 Touch
to toggle the setting between ON and OFF.
2. Dial Readout
This option allows the phone to read out digits that are entered on the dial pad.
1 Touch
> Accessibility .
2 Touch
to toggle the setting between ON and OFF.
3. Large Text
This option allows you to increase the font size for the phone.
1 Touch
> Accessibility .
2 Touch
to toggle the setting between ON and OFF.
4. Invert Color
This option allows the you to invert the screen color.
1 Touch
> Accessibility .
2 Touch
to toggle the setting between ON and OFF.

72
Using the Phone Menus
5. Mono Sound
Activating this menu changes the phone's sound type to mono tone.
1 Touch
> Accessibility .
2 Touch
to toggle the setting between ON and OFF.
6. TTY
Please refer to page 60 for more information.
7. Caller ID Readout
This menu allows you to adjust various settings for Caller ID Readout.
1 Touch
> Accessibility .
2 Touch a setting.
Ring Only/ Caller ID + Ring/ Name Repeat
73
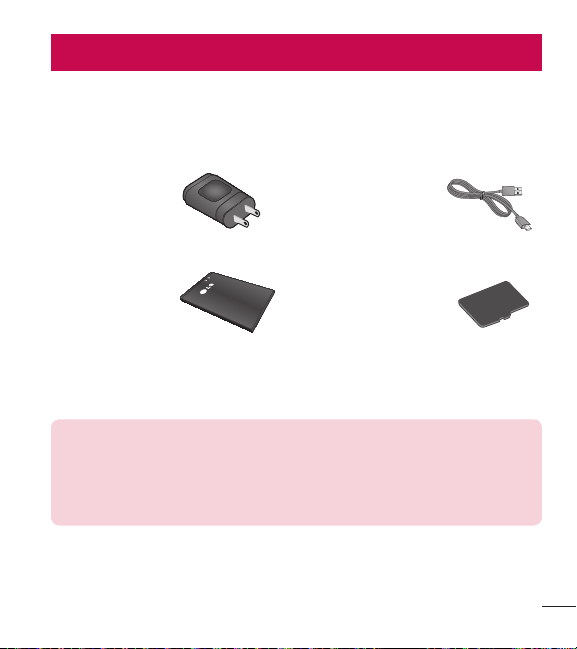
Accessories
There are a variety of accessories available for your mobile phone, some of which
may be sold separately. You can select these option according to your personal
communication requirements. Consult your local dealer for availability.
Travel Adapter
This adapter allows
you to charge the
battery.
USB cable
This cable allows you
to charge the battery.
Battery
Standard battery
available.
microSD
TM
Memory
Card
4 GB microSD
TM
memory card is
provided (up to 32GB
supported).
NOTE:
t
Always use genuine LG accessories. Failure to do this may invalidate
your warranty.
t
Accessories may be different in different regions; please check with our
regional service company or agent for further inquiries.

74
Safety
The highest SAR value for this model phone when tested for use at the ear is
1.27 W/kg and when worn on the body, as described in this user guide, is
0.79 W/kg (body-worn measurements differ among phone models, depending
upon available accessories and FCC requirements).
While there may be differences between SAR levels of various phones and at
various positions, they all meet the government requirement for safe exposure.
The FCC has granted an Equipment Authorization for this model phone with
all reported SAR levels evaluated as in compliance with the FCC RF emission
guidelines. SAR information on this model phone is on file with the FCC and can
be found under the Display Grant section of http://www. fcc.gov/oet/ea/fccid/ after
searching on FCC ID ZNFLG305C.
t
To reduce risk of fire or burns, do not expose to temperature above 45°C (113
°F), or dispose of in fire.
t
To reduce risk of fire or burns, do not dispose of in fire or water.
t
Do not disassemble or open crush, bend or deform, puncture or shred.
t
There is a danger of explosion if battery is incorrectly replaced. To reduce risk
of fire or burns, do not disassemble, crush, puncture, short external contacts,
expose to temperature above 45°C (113°F), or dispose of in fire or water. Keep
this product away from excessive moisture and extreme temperatures. Keep the
battery or device dry and away from water or any liquid as it may cause a short
circuit.
t
Avoid using your phone near strong electromagnetic sources, such as
microwave ovens, sound speakers, TV and radio.
t
Use only original manufacturer-approved accessories, or accessories that do not
contain any metal. Please only use an approved charging accessory to charge

75
your LG phone. Improper handling of the Accessory/Charger Port, as well as the
use of an incompatible charger, may cause damage to your phone and void the
warranty.
t
Only use the approved battery charger. Otherwise, you may cause serious
damage to your phone.


Guía del usuario
LG 305C
MFL68062901 (1.0)
ESPAÑOL
www.lg.com

t
Las visualizaciones e ilustraciones de la pantalla
pueden variar de las que ve en el teléfono.
t
Las pantallas reales y el color del teléfono pueden
variar.
t
Es posible que parte del contenido de esta guía no
se aplique al teléfono, en función del software o del
proveedor de servicios. Toda la información de este
documento está sujeta a cambios sin previo aviso.
t
Este teléfono no es adecuado para personas con
alguna discapacidad visual ya que cuenta con un
teclado en pantalla táctil.
t
Copyright
©
2014 LG Electronics, Inc. Todos los
derechos reservados. LG y el logotipo de LG son
marcas comerciales registradas de LG Group y las
entidades relacionadas.
Las demás marcas comerciales son propiedad de
sus respectivos propietarios.
(VÓBEFMVTVBSJP
ESPAÑOL

2
Contenido
Contenido .......................................... 2
Descripción general del teléfono ..... 5
-BQBOUBMMBQSJODJQBM7
1FSTPOBMJ[BSTVQBOUBMMBQSJODJQBM9
Introducción al teléfono .................13
#BUFSÓB13
$BSHBEFMBCBUFSÓB 15
*OTUBMBDJØOEFMBUBSKFUB
NJDSP4%16
$ØNPSFUJSBSMBUBSKFUBNJDSP4%16
/JWFMEFDBSHBEFMBCBUFSÓB17
&ODFOEFSZBQBHBSFMUFMÏGPOP17
1PUFODJBEFMBTF×BM18
*DPOPTEFMBQBOUBMMB18
)BDFSMMBNBEBT18
$PSSFDDJØOEFFSSPSFTEFNBSDBEP18
3FNBSDBSMMBNBEBT19
3FDJCJSMMBNBEBT19
Acceso rápido a funciones
prácticas .........................................20
.PEPEFCMPRVFP20
'VODJØOEFBMUBWP[20
"KVTUFSÈQJEPEFWPMVNFO20
-MBNBEBFOFTQFSB21
*EFOUJmDBEPSEFMMBNBEB21
.BSDBDJØOSÈQJEB21
&OUSBEBEFUFYUP 22
Contactos en la memoria de su
teléfono ...........................................23
"TQFDUPTCÈTJDPTEF
BMNBDFOBNJFOUPEFFOUSBEBTEF
DPOUBDUP23
/ÞNFSPTEFUFMÏGPOPTDPO
QBVTBT23
$ØNPCVTDBSFOMBNFNPSJBEFM
UFMÏGPOP 24
$ØNPBDDFEFSBMBTPQDJPOFT 25
3FBMJ[BSVOBMMBNBEBEFTEFMB
NFNPSJBEFMUFMÏGPOP26
Uso de los menús del teléfono .......27
1SFQBHP27
1. Añadir Tiempo Celular ..............27
2. Comprar Tiempo Celular ...........27
3. Mi Número Telefónico ...............27
4. Mi Saldo de Tiempo Celular ......27
5. Mostrar Tiempo Celular ............28
6. Número de Serie ......................28

3
7. Modo Ingreso de Código ...........28
$POUBDUPT29
1. Nuevo Contacto .......................29
2. Lista de Contactos ...................29
3. Grupos ....................................30
4. Marcado Veloz .........................30
5. Mi vCard .................................31
.FOTBKFT32
1. Nuevo Mensaje Texto ...............32
2. Nuevo Medias Mensaje ............33
3. Entrada ...................................34
4. Enviado ...................................36
5. Borradores ..............................37
6. Buzón de Voz ...........................37
7. Plantillas .................................38
8. Borrar Todos ............................38
9. Config de Mensaje ...................39
-MBNBEBT3FDJFOUFT40
1. Perdidas ..................................40
2. Recibidas ................................40
3. Marcadas ................................41
4. Todas ......................................41
5. Tiempo de Llamadas ................41
+VFHPT42
.VMUJNFEJB 42
1. Cámara ...................................42
2. Videocámara............................44
3. Grabadora de voz .....................45
4. Imágenes ................................45
5. Vídeos .....................................45
6. Sonidos ...................................46
7. Reproductor de Música ............46
.J"HFOEB50
1. Alarma ....................................50
2. Calendario ...............................50
"DDFTP8FC51
1. Iniciar el navegador ..................51
)FSSBNJFOUBT53
1. Comando de Voz ......................53
2. Calculadora .............................54
3. Calculadora de Propinas ...........55
4. Conversor de Unidad ................55
5. Cronómetro .............................56
6. Bloc de Notas ..........................56
$POmHVSBDJØO57
1. Config. de Sonidos ...................57
2. Config. de Pantalla ...................58
3. Prog. de Llamada .....................61
4. Prog. de Toque .........................62
5. Prog. de Teléfono .....................63

4
Contenido
6. Almacenamiento Masivo USB ...67
7. Memoria..................................67
8. Info de Teléfono .......................67
#MVFUPPUI
®
69
1. Encender .................................69
2. Agregar nuevo .........................70
3. Dispositivos emparejados .........70
4. Configuración ..........................71
8J'J72
"DDFTJCJMJEBE
73
1. Lectura del Menú .....................73
2. Lectura de Marcado .................73
3. Texto Grande ...........................73
4. Inversión de Color ....................74
5. Sonido Monofónico ..................74
6. TTY ........................................74
7. Lectura de ID de Llam. .............74
Accessories .....................................75
Seguridad ........................................76
5
Descripción general del teléfono
1 Auricular Le permite escuchar a quien llama.
2 Sensor de proximidad
3 Pantalla principal Muestra llamadas entrantes, mensajes e iconos de estado,
así como una amplia variedad de contenido que usted seleccione para ver.
4 Tecla Enviar Úsela para hacer llamadas o contestarlas. También puede tocarla
para acceder a las llamadas recientes.
5 Micrófono Permite que sus interlocutores le escuchen con claridad cuando les
habla.
6 Tecla Fin Finaliza o rechaza una llamada. Toque una vez para regresar a la
pantalla principal desde cualquier otra pantalla.
7 Tecla Atrás Permite regresar a la pantalla anterior.
8 Lente de la cámara Úsela para tomar fotografías. Manténgala limpia para
obtener una calidad óptima de las fotografías.
9 Conector del auricular Permite utilizar el auricular para escuchar la voz de
quien llama.
1
2
3
5
7
4
6
8
9
6
Descripción general del teléfono
NOTA: Sensor de proximidad
Cuando recibe y realiza llamadas, el sensor de proximidad detecta
cuando el teléfono está cerca del oído y automáticamente apaga la
luz de fondo y bloquea la pantalla táctil. Esto prolonga la vida útil de la
batería y evita la activación involuntaria de la pantalla táctil durante las
llamadas.
1
2
1 Teclas de Volumen Úselas para ajustar el volumen general desde la pantalla
principal y del volumen del auricular durante una llamada.
2 Tecla Encender/Bloquear Enciende y apaga la pantalla. Manténgala
presionada para encender o apagar el teléfono.

7
La pantalla principal
Desde la pantalla principal podrá acceder a todas las opciones de menú, hacer
llamadas rápidas y ver el estado del teléfono, entre muchas otras cosas.
Sugerencias sobre la pantalla táctil
t
La pantalla principal también es fantástica para habituarse a la pantalla táctil.
t
Para seleccionar un elemento, toque el icono con precisión.
t
Para desplazarse por las listas, toque el último elemento visible y deslice el dedo
hacia arriba por la pantalla. La lista se mueve hacia arriba para mostrar otros
elementos.
t
No es necesario presionar con fuerza, ya que la pantalla táctil es tan sensible
que detecta los toques delicados, pero precisos.
t
Utilice la punta del dedo para tocar la opción que desee. No utilice la uña.
t
Cuando la luz de la pantalla esté apagada, presione la Tecla Encender/
Bloquear
en el borde derecho del teléfono una vez para encender la
pantalla.
t
No use el teléfono con una funda o cubierta porque la pantalla táctil no funciona
si la cubre algún material.
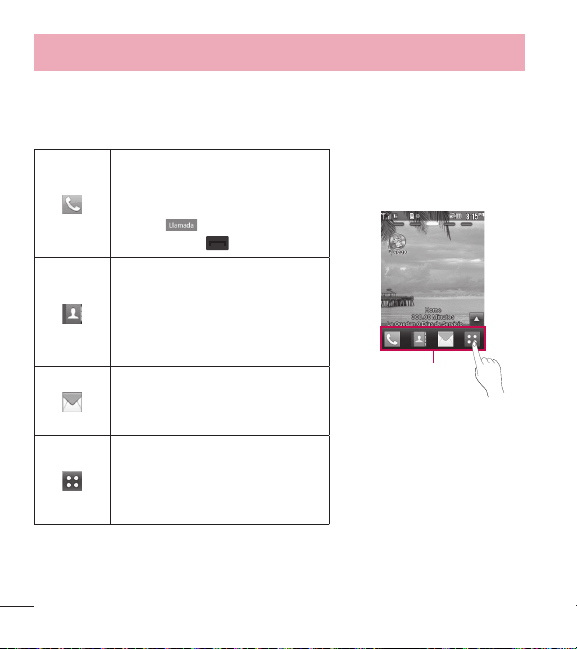
8
Descripción general del teléfono
Teclas rápidas
Las teclas rápidas de la pantalla principal proporcionan un acceso fácil en un
toque a las funciones que usted más utiliza.
Toque para mostrar el teclado
de marcación para realizar una
llamada. Introduzca el número
y toque
o toque la Tecla
Enviar Enviar
.
Teclas rápidas
Toque esta tecla para abrir sus
contactos y buscar el número al
que desea llamar. También puede
crear nuevos contactos y editar
los existentes.
Toque esta tecla para acceder
al menú Mensajes. Desde aquí
puede ver y crear mensajes.
Toque esta opción para abrir el
menú principal. Deslice la pantalla
hacia la izquierda o la derecha
para ver opciones adicionales.
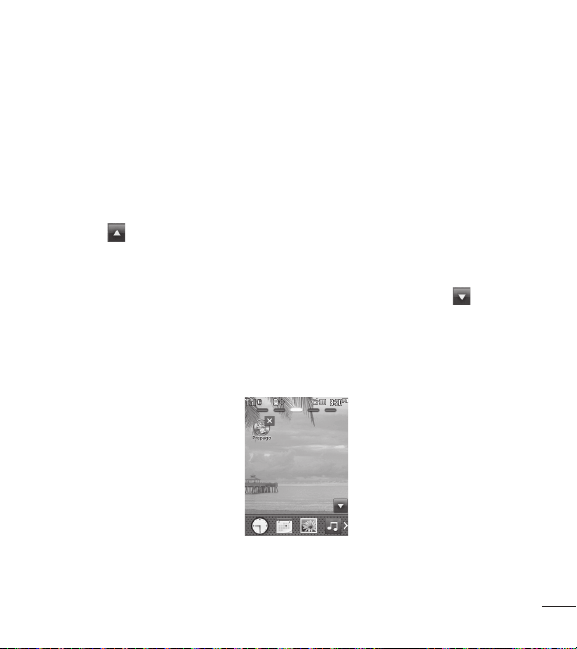
9
Personalizar su pantalla principal
El teléfono brinda cinco paneles de pantalla principal. Para ver los paneles de la
pantalla principal, deslice la pantalla de izquierda a derecha y vice versa.
Widget
Puede guardar Widgets e incluso añadirlos a la pantalla principal para personalizar
la experiencia de usuario.
1 Toque
en la esquina inferior derecha de la pantalla principal para ver las
opciones disponibles.
2 Toque el botón Widget.
3 Arrastre un widget desde el panel de widget a la pantalla. Toque
para cerrar
el panel de widget.
t
Puede reproducir canciones, agregar notas, consultar el calendario, reproducir
una presentación con diapositivas, establecer una alarma o agregar eventos de
calendario desde la pantalla principal usando los widget disponibles.
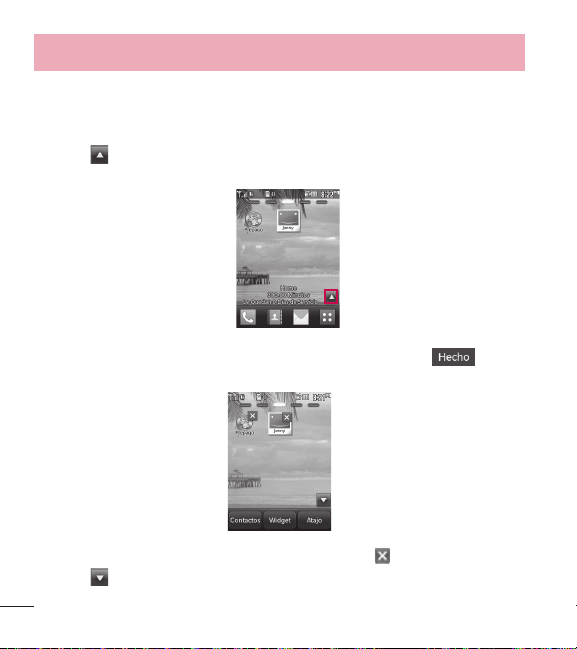
10
Descripción general del teléfono
Contactos favoritos
Le permite comunicarse fácilmente con sus amigos y familiares, ya que muestra
sus contactos favoritos en la pantalla principal.
1 Toque
en la esquina inferior derecha de la pantalla principal y, a
continuación, toque el botón Contactos.
2 Toque los contactos que desee agregar y, a continuación, toque para
registrar sus contactos favoritos.
t
Si desea borrar un contacto desde esta pantalla, toque .
3 Toque
para finalizar la edición de los contactos en esta pantalla.
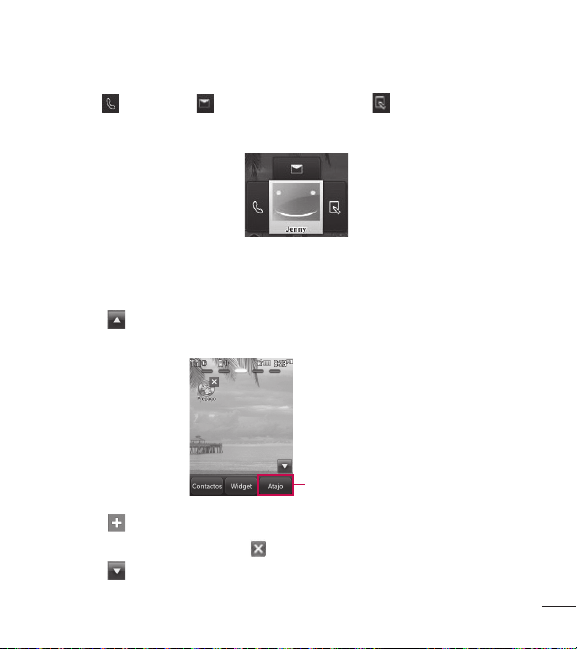
11
t
Para acceder a los contactos, simplemente toque el icono correspondiente.
Toque
para llamar, para enviar un mensaje y para editar información
del contacto.
Atajos
Agregue sus menús favoritos a la pantalla principal.
1 Toque
en la esquina inferior derecha de la pantalla principal y, a
continuación, toque el botón Atajo.
Atajos
2 Toque
junto al atajo que desee para agregarlo a la pantalla principal.
t
Si desea borrar un atajo, toque .
3 Toque
para finalizar la edición de los atajos en esta pantalla.
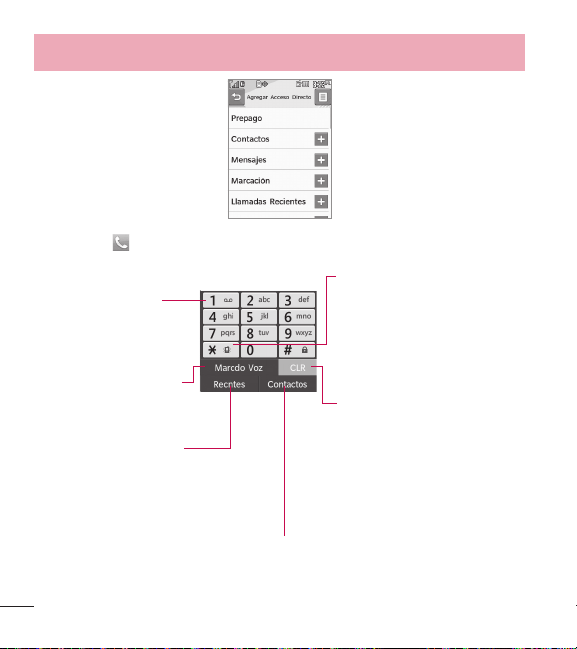
12
Descripción general del teléfono
Cuando toca , se muestra el siguiente teclado de marcación:
Toque y mantenga
presionada esta tecla
para llamar al buzón
de correo de voz.
Toque esta tecla para
marcar mediante los
comandos de voz.
Toque esta tecla para
ver el historial de
llamadas recientes.
Toque esta tecla para mostrar la lista de
contactos y ver o llamar a un contacto.
Toque esta tecla para
borrar los dígitos
introducidos uno
por uno. Mantenga
presionada la tecla si
desea borrar la entrada
completa.
Toque y mantenga
presionada esta tecla
para alternar el teléfono
entre el modo de
vibración y el modo
normal.
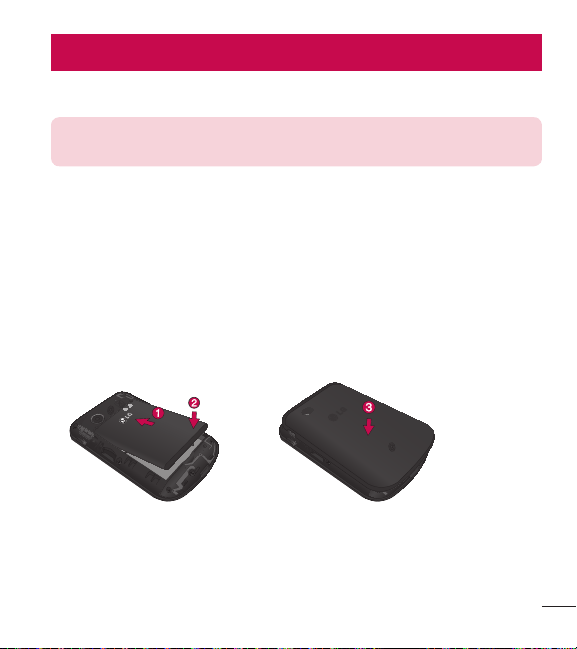
13
Introducción al teléfono
Batería
NOTA: Es importante cargar la batería por completo antes de usar el
teléfono por primera vez.
Instalar la batería
1 Retire la batería del paquete.
2 Inserte la batería en el compartimiento correspondiente en la parte posterior del
teléfono. Asegúrese de que los conectores estén alineados (vea el paso 1 en la
imagen abajo).
3 Presione con suavidad para asegurar la batería (vea el paso 2 en la imagen
abajo).
4 Coloque la tapa posterior sobre el compartimiento de la batería y presione
hacia abajo hasta que escuche un clic (vea el paso 3 en la imagen abajo).
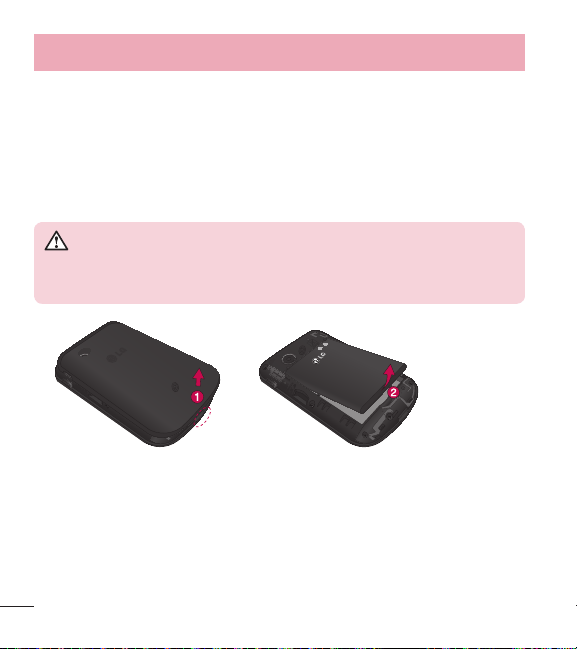
14
Introducción al teléfono
Extraer la batería
1 Apague el teléfono.
2 Levante la tapa posterior con la punta de los dedos desde la ranura provista en
la parte inferior de la tapa y retírela.
3 Levante la batería con la punta de los dedos desde la ranura provista en la
parte inferior del compartimento de la batería y retírela del teléfono.
ADVERTENCIA
No manipule baterías de iones de litio dañadas o con fugas porque se
puede quemar.

15
Carga de la batería
El teléfono viene con un adaptador de viaje y un cable USB que se conectan en
conjunto para cargar el teléfono. Para cargar el teléfono:
NOTA: Sólo use un accesorio de carga aprobado para cargar su
teléfono LG. La manipulación inadecuada del puerto de carga/
accesorios y el uso de un cargador no compatible pueden ocasionarle
daños al teléfono y anular la garantía.
Enchufe un extremo del cable USB en el puerto de carga/accesorios del teléfono y
el otro extremo en un tomacorriente.
El tiempo de carga varía según el nivel de la batería.
NOTA: Una vez que el teléfono esté totalmente cargado, siempre
desenchufe el cargador del tomacorriente para que el cargador no
consuma energía de manera innecesaria.

16
Introducción al teléfono
Instalación de la tarjeta microSD™
1 Retire la tapa posterior y localice la ranura para microSD™ (vea la imagen a
continuación).
Ranura para la
tarjeta microSD
TM
2 Inserte la tarjeta microSD™ con la etiqueta hacia arriba y el área de contactos
dorados hacia abajo. A continuación, oprímala suavemente hasta que encaje
en la ranura. Si inserta la tarjeta en la dirección equivocada, podría dañar su
teléfono o su tarjeta.
Cómo retirar la tarjeta microSD™
1 Retire la tapa posterior y ubique la ranura de la tarjeta microSD™. Luego
oprima tire el borde expuesto de la tarjeta microSD para retirarla.
2 Reemplace la tapa posterior.

17
NOTA: No intente retirar la tarjeta microSD™ mientras se esté leyendo o
escribiendo en la tarjeta.
Nivel de carga de la batería
El nivel de carga de la batería se muestra en la parte superior derecha de la
pantalla principal. Cuando el nivel de carga de la batería es bajo, el sensor de
batería baja le avisa de tres formas: con un tono audible, mediante el parpadeo
del icono de batería, y mostrando un mensaje de advertencia.
Si el nivel de carga de la batería es excesivamente bajo, el teléfono se apaga
automáticamente y no se guarda ninguna función que esté en curso.
Encender y apagar el teléfono
Encender el teléfono
1 Instale una batería cargada o conecte el teléfono a una fuente de alimentación
externa si el nivel de batería es demasiado bajo.
2 Presione la T
ecla Encender/Bloquear
durante unos 3 segundos hasta
que la pantalla LCD se encienda.
Apagar el teléfono
1 Mantenga presionada la Tecla Encender/Bloquear
hasta que el
mensaje desplegable se muestre.
2 Toque Sí para confirmar.

18
Introducción al teléfono
Potencia de la señal
La calidad de la llamada depende de la potencia de la señal de su área. La
potencia de la señal se indica en la pantalla mediante el número de barras que
aparecen junto al icono de potencia de la señal
. Mientras más barras se
muestren, mejor será la potencia de la señal. Si la calidad de la señal es baja,
muévase hasta un área descubierta. Si se encuentra en un edificio, la recepción
posiblemente sea mejor cerca de una ventana.
Iconos de la pantalla
Para ver el glosario de iconos, toque > Configuración > Info de Teléfono
> Glosario de Iconos. A continuación, elija el tipo de iconos que desee ver.
Hacer llamadas
1 Toque e introduzca el número de teléfono (incluya el código de área, de ser
necesario).
2 Toque la Tecla Enviar
o toque .
3 Toque la Tecla Fin
para terminar la llamada.
Corrección de errores de marcado
Si comete un error mientras marca un número, toque una vez para borrar el
último dígito introducido, o toque y mantenga presionada
durante al menos 2
segundos para borrar todos los dígitos que ha introducido.

19
Remarcar llamadas
1 Toque la Tecla Enviar dos veces para remarcar el último número que
llamó. Si toca la tecla una vez, las llamadas más recientes (perdidas, recibidas
y realizadas) de la lista del historial se muestran. Puede seleccionar cualquiera
de estas llamadas para realizar una llamada saliente.
Recibir llamadas
1 Cuando el teléfono suene y/o vibre, toque la Tecla Enviar para responder.
SUGERENCIA El menú Ajustes de llamada le permite elegir las
opciones de respuesta. Para acceder a las opciones de respuesta,
toque > Configuración > Prog. de Llamada > Opciones de
Contestar. Están disponibles las siguientes opciones: Cualquier Tecla,
Auto con Manos Libres.
NOTA: Si toca la Tecla Fin o las Teclas de Volumen
mientras el teléfono está sonando, se silenciará el timbre o la vibración
de dicha llamada.
2 Toque la Tecla Fin para terminar la llamada.
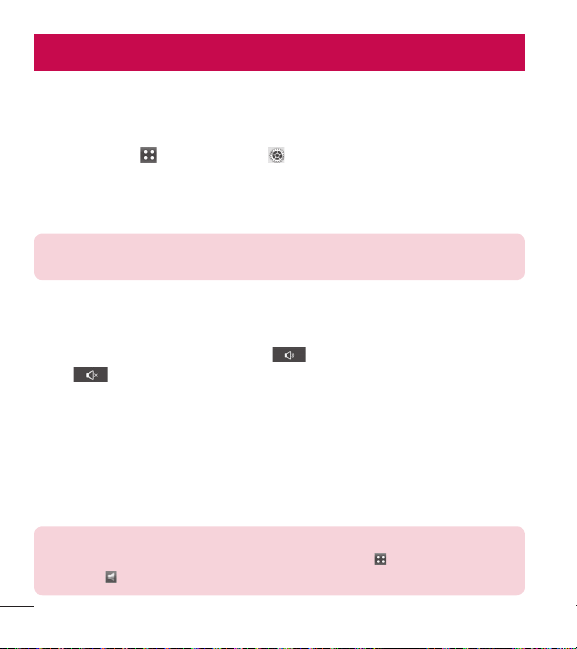
20
Acceso rápido a funciones prácticas
Modo de bloqueo
Configura el teléfono para que requiera un código de bloqueo de 4 dígitos para
poder usar el teléfono. Para activar el modo de bloqueo cada vez que enciende
el teléfono, toque
> Configuración > Prog. de Teléfono > Seguridad >
Introduzca el código de bloqueo > Bloq. Teléfono > Al Encender El Teléfono.
Para bloquear el teléfono inmediatamente, toque Bloq. en lugar de Al Encender
El Teléfono.
NOTA: Hasta que lo cambie, el código de bloqueo predeterminado
serán los últimos 4 dígitos de su número de teléfono.
Función de altavoz
Esta función puede usarse durante una llamada de teléfono.
Durante una llamada de teléfono, toque
una vez para activar el altavoz.
Toque
de nuevo para desactivar la función de altavoz.
Ajuste rápido de volumen
Utilice las Teclas de Volumen para ajustar el volumen general desde la pantalla
principal y el volumen del auricular durante una llamada. La Tecla de Volumen
superior aumenta el volumen, mientras que la Tecla de Volumen inferior reduce el
volumen.
NOTA: El volumen del teclado numérico se ajusta desde el submenú
Volumen de Teclado del menú Config. de Sonidos ( > Config. de
Sonidos > Volumen de Teclado).

21
Llamada en espera
Su servicio celular podría ofrecerle la función de llamada en espera. Mientras
hay una llamada en curso, los dos tonos indican que hay otra llamada entrante.
Cuando esta función está habilitada, puede colocar la llamada activa en espera
mientras responde la otra llamada entrante. Consulte con su proveedor de
servicios de celular información sobre esta función.
1 Toque la Tecla Enviar para responder a una llamada en espera.
2 Toque la Tecla Enviar
de nuevo para cambiar entre llamadas.
Identificador de llamada
El Identificador de llamada muestra el número de teléfono o el nombre de
la llamada entrante. Si la identidad de la persona que llama se encuentra
almacenada en Contactos, aparecerá el nombre junto con el número de teléfono.
Consulte con su proveedor de servicios para asegurarse de que ofrece esta
función.
Marcación rápida
La marcación rápida es una función práctica que le permite realizar llamadas
de teléfono rápidamente. Es posible asignar una tecla numérica a un número de
teléfono concreto. Al tocar sin soltar una tecla numérica, el teléfono recuperará el
número de teléfono asociado de la Lista de contactos y marcará ese número de
teléfono. El número de marcación rápida 1 está configurado en el Correo de voz
de forma predeterminada, y no puede cambiarse.
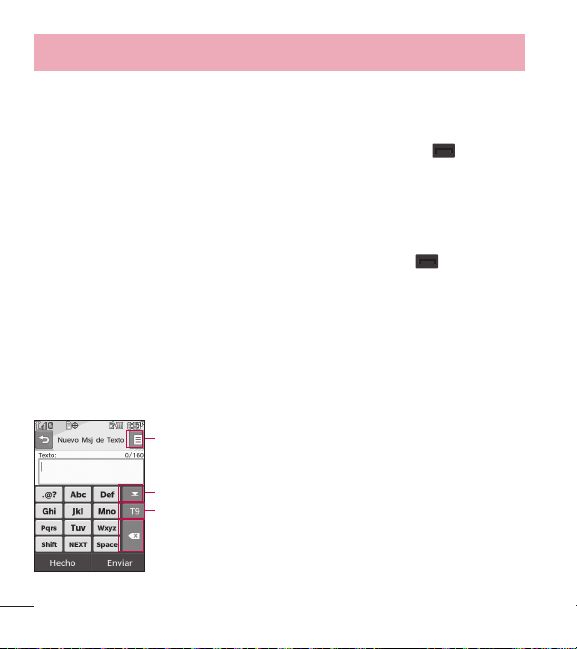
22
Acceso rápido a funciones prácticas
Marcación rápida de un solo dígito (del 2 al 9)
Introduzca y mantenga el número de marcación rápida.
- O -
Introduzca el número de marcación rápida y toque la Tecla Enviar
.
Marcación rápida de doble dígito (del 10 al 99)
Introduzca el primer dígito y, a continuación, toque y mantenga presionada la tecla
del segundo dígito.
- O -
Introduzca el primer y el segundo dígito y toque la Tecla Enviar
.
Entrada de texto
Cada vez que toque un campo de entrada de texto, en la pantalla táctil se muestra
automáticamente un teclado numérico que le permite ingresar texto, números
y símbolos. Por ejemplo, en un campo de texto aparecerá un teclado alfabético,
pero también puede cambiar al modo de números para introducir dígitos.
Toque para cambiar el modo de entrada de texto.
Toque para borrar texto.
Toque para acceder a opciones adicionales.
Toque para ocultar el teclado.

23
Contactos en la memoria de su teléfono
Aspectos básicos de almacenamiento de entradas
de contacto
1 Introduzca el número de teléfono que desee guardar (hasta 48 dígitos).
2 Toque Grdr y seleccione Añadir Nuevo Contacto o Actualizar Existente en
la pantalla emergente.
3 Toque la etiqueta deseada. Elija entre Móvil 1, Casa 1, Trabajo 1, Móvil 2,
Fax, Casa 2, Trabajo 2, Email 1 y Email 2.
NOTA: Use Actualizar Existente para agregar otro número de teléfono
a un contacto que ya esté almacenado en memoria.
4 Toque el campo Nombre e introduzca el nombre del contacto (hasta 32
caracteres). A continuación, toque Hecho y Grdr. Aparece brevemente un
mensaje de confirmación.
Números de teléfonos con pausas
Al llamar a sistemas automatizados, como por ejemplo correos de voz o números
de facturación por crédito, es frecuente tener que introducir una serie de números
para navegar por el sistema. En lugar de tener que introducir estos caracteres
a mano, puede almacenar los números en los contactos por separado mediante
caracteres de pausa especiales (Espera y Pausa). Al guardar un número, son dos
los tipos de pausa diferentes que puede introducir:

24
Contactos en la memoria de su teléfono
Espera (W)
El teléfono deja de marcar hasta que toque Release para avanzar al siguiente
número.
Pausa (P)
El teléfono espera dos segundos antes de enviar la siguiente cadena de dígitos.
Almacenar un número con pausas
1 Toque
> Contactos > Nuevo Contacto.
2 Introduzca un nombre (hasta 32 caracteres) y toque el campo de número para
introducir un número.
3 Toque y seleccione Añadir Espera o Añadir 2-Seg Pausa.
4 Introduzca los números adicionales, toque Hecho y, a continuación, Grdr.
Cómo agregar una pausa a un número existente
1 Toque
> Contactos > Lista de Contactos.
2 Desplácese por la lista y toque la entrada de contacto que desee editar.
3 Toque Crrgr.
4 Toque el número.
5 Toque
.
6 Toque Añadir Espera o Añadir 2-Seg Pausa.
7 Introduzca los números adicionales, toque Hecho y, a continuación, Grdr.
Cómo buscar en la memoria del teléfono
Su teléfono es capaz de realizar una búsqueda dinámica del contenido
almacenado en la memoria del teléfono. La búsqueda dinámica compara las

25
letras o números introducidos con las entradas de sus contactos. La lista
de coincidencias se muestra en orden descendente. A continuación puede
seleccionar de la lista un número, para editarlo o realizar una llamada.
Búsqueda por letra
1 Toque
para ver sus contactos.
2 Toque Ir A y luego toque de las teclas del teclado alfanumérico que
corresponden a las letras del nombre del contacto. Se mostrarán los contactos
que coincidan.
Desplazarse por los contactos
1 Toque
para ver sus contactos.
2 Use el dedo para recorrer la lista hacia arriba y hacia abajo.
Cómo acceder a las opciones
1 Toque para ver sus contactos.
2 Toque
.
3 Toque una de las siguientes opciones:
Enviar vía Bluetooth: Envía un contacto (tarjeta de nombre) a través de
Bluetooth
®
.
Borrar: Borra la entrada seleccionada de la lista de contactos.
Mensaje: Envía un mensaje de texto o de imagen al contacto seleccionado.
Bloq/Desbloq: Bloquea o desbloquea los contactos para prevenir que no sean
borrados accidentalmente.
Copiar a Tarjeta: Copia los contactos a la tarjeta de memoria.

26
Contactos en la memoria de su teléfono
Realizar una llamada desde la memoria del teléfono
Una vez que haya almacenado los números de teléfono en sus contactos, puede
realizar llamadas a estos números de una forma rápida y sencilla.
t
Al tocar un número de teléfono en los contactos o el historial de llamadas y
tocar la Tecla Enviar
o .
t
Utilizando la marcación rápida.
Desde Contactos
1 Toque
para ver sus contactos.
2 Toque la entrada del contacto.
3 Toque el número de teléfono.
Desde Llamadas recientes
1 Toque
> Llamadas Recientes .
2 Toque el tipo de llamada reciente. Elija entre Perdidas, Recibidas, Marcadas,
y Todas.
3 Toque el número de teléfono.
4 Toque Llamada o toque la Tecla Enviar
para realizar la llamada.
Marcación rápida
En el caso de una marcación rápida de un solo dígito, toque y mantenga
presionado el dígito y, a continuación, toque la Tecla Enviar
. En el caso
de una marcación rápida de doble dígito, toque el primer dígito y toque y
mantenga presionado el segundo dígito, o toque el primer y el segundo dígito y, a
continuación, toque la Tecla Enviar
.

27
Uso de los menús del teléfono
Prepago
Para servicios prepagos, este menú brinda accesos directos hacia los siguientes
elementos (entre otros):
1. Añadir Tiempo Celular
Le permite añadir tiempo celular.
1 Toque
> .
2 Toque Añadir Tiempo Celular, introduzca el PIN de tiempo celular y toque OK.
3 Lea el mensaje y seleccione Sí o No.
2. Comprar Tiempo Celular
Este menú le permite elegir de 4 diferentes cantidades de tiempo celular para
comprar. Elija entre 60 mins., 120 mins., 200 mins., y 450 mins.
3. Mi Número Telefónico
Este menú muestra su número de teléfono.
4. Mi Saldo de Tiempo Celular
Este menú muestra sus minutos disponibles y la fecha de vencimiento del servicio.

28
Uso de los menús del teléfono
5. Mostrar Tiempo Celular
Permite elegir si desea mostrar u ocultar el balance y la fecha de vencimiento del
servicio en su pantalla principal.
6. Número de Serie
Este menú simplemente muestra la información de MEID de su teléfono.
7. Modo Ingreso de Código
Modo de entrada de código permite que el teléfono acepte los códigos
relacionados con TracFone a fin de agregar unidades, modificar datos específicos
y solucionar problemas del teléfono. Al usar el Modo de ingreso de código, no
puede recibir llamadas entrantes ni usar la alerta de eventos.

29
Contactos
El menú Contactos le permite guardar nombres, números de teléfono y otra
información en la memoria del teléfono.
1. Nuevo Contacto
Le permite agregar un nuevo contacto a la lista de contactos.
NOTA: Use Actualizar Existente para agregar otro número de teléfono
a un contacto que ya esté almacenado en memoria.
1 Toque > Contactos > Nuevo Contacto .
2 Escriba el nombre.
3 Toque los campos correspondientes e introduzca la información deseada.
4 Toque Grdr para guardar el nuevo contacto.
2. Lista de Contactos
Le permite ver su lista de contactos.
1 Toque
> Contactos > Lista de Contactos.
2 Elija entre las opciones siguientes:
t
Desplazarse por los contactos alfabéticamente.
t
Toque para seleccionar una de las siguientes opciones:
Enviar vía Bluetooth/ Borrar/ Mensaje/ Bloq/Desbloq/ Copiar a Tarjeta

30
Uso de los menús del teléfono
3. Grupos
Le permite ver los contactos agrupados, agregar un nuevo grupo, cambiar el
nombre de un grupo o eliminar un grupo completo.
1 Toque
> Contactos > Grupos.
2 Elija entre las opciones siguientes:
t
Toque un grupo para ver sus miembros.
t
Toque un grupo y, a continuación, toque para elegir entre las siguientes
opciones:
Borrar/ Nuevo Mensaje de Texto/ Nuevo Mensaje de Multimedia/ Marcar
Todo/ Desmarc Todo/ Quitar Todo
4. Marcado Veloz
Le permite ver la lista de marcación rápida, designar nuevas marcaciones rápidas
o eliminar las designaciones de marcación rápida introducidas en los contactos.
1 Toque
> Contactos > Marcado Veloz.
2 Toque el número no asignado que desee de la lista.
3 Toque el contacto al que desee asignar una marcación rápida. A continuación,
toque Sí. Aparecerá un mensaje de confirmación.
NOTA: El buzón de voz ya está establecido en la opción de marcación
rápida 1. Esta es una configuración predeterminada y no se puede
modificar.

31
5. Mi vCard
Le permite ver toda su información personal de contacto, incluidos nombres y
números de teléfono.
1 Toque
> Contactos > Mi vCard.
2 Toque Crrgr.
3 Toque el campo que desee editar.
4 Edite la información que considere necesaria y toque Grdr.
NOTA: No puede editar su número de teléfono móvil, pero sí puede
agregar un número de teléfono adicional.

32
Uso de los menús del teléfono
Mensajes
Su teléfono puede almacenar hasta 600 mensajes y notificaciones (300 SMS/100
CMAS/100 MMS/100 notificaciones de MMS). Pueden existir otros límites, como
por ejemplo de caracteres disponibles por mensaje. Compruebe con su proveedor
de servicio las funciones y capacidades del sistema.
1. Nuevo Mensaje Texto
Le permite enviar mensajes de texto y correos electrónicos. Cada mensaje se
compone y se envía de acuerdo con la dirección de destino.
Conceptos básicos para enviar un mensaje de texto
1 Toque Mensajes
> Nuevo Mensaje Texto.
2 Toque Intro Número para introducir manualmente la dirección o Añadir
Contacto para agregar la dirección desde su línea de contactos.
3 Toque el campo Texto para introducir texto.
4 Escriba el mensaje.
5 Toque Hecho y, a continuación, toque Enviar.
Opciones de mensajes de texto
1 Toque Mensajes
> Nuevo Mensaje Texto.
2 Toque
.
3 Toque la(s) opción(es) para personalizarlo.
t
Avance Le permite previsualizar el mensaje antes de enviarlo. Puede tocar
Corrgr para seguir editando o Enviar para enviarlo.
t
Guardar Como Borrador Guarda el mensaje actual como borrador.

33
t
Prioridad Elija Alto o Normal para definir el nivel de prioridad de su mensaje.
t
Dev Llmda # Elija Encendido o Apagado para definir el número de
devolución de llamada que desea enviar con el mensaje.
t
Cancelar Mensaje Le permite cancelar el mensaje.
4 Complete el mensaje y envíelo.
Opciones de texto
Usted tiene varias opciones para personalizar el texto mientras redacta un
mensaje.
1 Toque Mensajes
> Nuevo Mensaje Texto.
2 Toque el campo Texto para introducir texto.
3 Toque
.
4 Están disponibles las siguientes opciones:
Teclado Extendido/Insertar Plantillas/Guardar Como Borrador/Añadir/
Copiar Texto/Prioridad/Dev Llmda #/Grdr Plantillas/Cancelar Mensaje
5 Complete el mensaje y envíelo o guárdelo.
2. Nuevo Medias Mensaje
Le permite enviar mensajes con texto, imágenes, sonidos y un asunto.
1 Toque Mensajes
> Nuevo Medias Mensaje.
2 Toque Intro Número para introducir manualmente la dirección o Añadir
Contacto para agregar la dirección desde su línea de contactos.
3 Toque el campo correspondiente para agregar Texto, Imagen/Vídeo, Sonido y
Asunto a su mensaje.
4 Toque el archivo que desee agregar.

34
Uso de los menús del teléfono
5 Cuando toque el campo Sonido, tiene la opción de adjuntar un archivo de
sonido guardado o grabar uno nuevo.
6 Toque
para mostrar las siguientes opciones:
Teclado Extendido/Avance/Guardar como Borrador/Copiar Texto/Insertar
Plantillas/Añadir Diapositiva/Nivel de Prioridad/Dev Llmda #/Grdr
Plantillas/Cancelar Mensaje
7 Toque Enviar para enviar el mensaje.
3. Entrada
El teléfono le avisa de tres formas cuando recibe un nuevo mensaje:
t
Mostrando un mensaje de notificación en la pantalla.
t
Mostrando el icono de mensaje .
t
Reproduciendo un tono de audio o mediante vibración, según las
configuraciones de sonido personales.
Es posible buscar los mensajes de texto y multimedia recibidos, y visualizar sus
contenidos. Los mensajes recibidos se muestran de más reciente a más antiguo.
Ver la carpeta Entrada
Se pueden almacenar hasta 600 mensajes (300 SMS, 100 CMAS, 100 MMS y
100 notificaciones de MMS) en la carpeta Entrada.
1 Toque Mensajes
> Entrada.
2 Toque un hilo de mensajes y, a continuación, seleccione el mensaje que desee.
t
Toque Cont para responder el mensaje.
t
Toque Borrar para eliminar el mensaje.
- O -
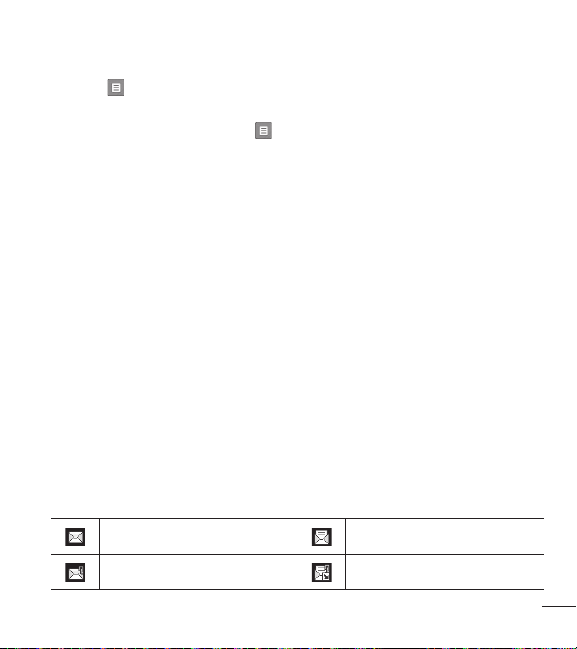
35
Toque para elegir entre las siguientes opciones:
Ordenar por/Borrar/Asegurar/Abrir/Borrar buz/Config de Mensaje
3 Mientras ve un mensaje, toque
para acceder a las siguientes opciones:
Volver a Escu Le permite reproducir de nuevo el archivo.
Adelantar Reenvía un mensaje recibido a otras direcciones de destino.
Responder con Copia Permite responder con una copia del mensaje que se le
envió.
Guardar Foto Le permite guardar las imágenes recibidas.
Guardar c Timbrado Permite guardar el sonido como tono de timbre.
Guardar Sonido Le permite guardar el multimedia anexo en su teléfono. (sólo
para mensajes con audio).
Guardar Plantillas Le permite guardar el mensaje como plantilla.
Asegurar/Abrir Bloquea o desbloquea el mensaje seleccionado.
Ir a Sitio Web Accede a la página Web iniciando el navegador. (Solamente para
mensajes que contengan un URL).
Añadir a Contactos Elija Añadir Nuevo Contacto/Actualizar Existente para
guardar el número de teléfono en sus contactos.
Extrída Le permite extraer la dirección incluida en el mensaje para visualizarla.
Info. Mensaje Muestra el tipo de mensaje, la prioridad, el estado, el asunto, el
tamaño y el nombre del adjunto.
Referencia del icono de mensaje
Nuevo mensaje de texto Mensaje de texto leído
Nuevo mensaje de foto Nuevo mensaje de foto recibido

36
Uso de los menús del teléfono
Mensaje de foto no leído Mensaje de foto leído
Mensaje entregado Falla en el envío del mensaje
Mensajes múltiples entregados Mensaje enviado
Entrega de mensajes múltiples
incompleta
Falla en el envío de múltiples
mensajes
Mensajes múltiples enviados Borrador de mensaje de texto
Borrador de mensaje de foto Tarjeta de contacto
Alta prioridad
4. Enviado
La carpeta Enviado muestra todos los mensajes enviados.
1 Toque Mensajes
> Enviado.
2 Toque para elegir entre las siguientes opciones:
Ordenar por/Borrar/Bloquear/Desbloq./Borrar Enviado
3 Mientras ve un mensaje, toque
para acceder a las siguientes opciones:
Volver a Escu/Adelantar/Asegurar/Grdr Plantillas/Añadir A Contactos/
Extrída/Info. Mensaje

37
5. Borradores
Muestra borradores de mensajes guardados.
1 Toque Mensajes
> Borradores.
2 Toque
para elegir entre las siguientes opciones:
Borrar Borra el mensaje seleccionado de Borradores.
Bloquear/Desbloq. Bloquea o desbloquea los mensajes seleccionados.
Borrar Borradores Elimina todos los borradores de mensajes de una sola vez.
Config de Mensaje Le permite ajustar las siguientes opciones: Config
. de
Respuestas/Modo de Ingreso/Firma/Alerta CMAS
3 Toque un borrador de mensaje para editarlo.
6. Buzón de Voz
Este menú le permite ver cuantos mensajes de voz nuevos tiene grabados en su
buzón de correo de voz. El teléfono le avisará cuando reciba un nuevo mensaje
de voz.
Cómo consultar su buzón de correo de voz
1 Toque Mensajes
> Buzón de Voz.
2 Elija entre las opciones siguientes:
t
Toque Borrar para borrar el contador de correos de voz.
t
Toque Llamada para escuchar los mensajes.

38
Uso de los menús del teléfono
7. Plantillas
Le permite visualizar, editar y agregar plantillas de texto. Estas plantillas de texto lo
ayudan a disminuir la entrada de texto manual en los mensajes.
1 Toque Mensajes
> Plantillas.
2 Toque Nuevo para crear una nueva plantilla.
3 Después de editar la nueva plantilla, toque Guar
dar para guardarla.
8. Borrar Todos
Le permite borrar todos los mensajes almacenados en la carpeta Entrada, Enviado
o Borradores. También, puede borrar todos los mensajes de una vez.
1 Toque Mensajes
> Borrar Todos.
2 Toque Borrar Entrada/Borrar Enviado/Borrar Borradores/ Borrar Todos
Mensajes.
3 Confirme en la ventana emergente.

39
9. Config de Mensaje
Le permite establecer los parámetros de Mensajería.
1 Toque Mensajes
> Config de Mensaje.
Descripciones del submenú Configuración de mensajes
1 Config. de Respuestas (Sólo Mensaje de Texto/Selección)
Le permite elegir qué opción de respuesta se permite al responder mensajes.
Elija Solo Mensaje de Texto para responder únicamente con mensajes de
texto, o elija Selección para tener la posibilidad de responder con un mensaje
de texto o de imagen.
2 Modo de Ingreso (T9, Abc, ABC, 123)
Le permite seleccionar el método de introducción predeterminado.
3 Firma (Apagado/Encendido)
Le permite crear/editar una firma y optar por enviarla automáticamente con sus
mensajes.
4 Alerta CMAS
Le permite elegir si desea recibir las alertas de emergencia. Las Alertas
Presidenciales son obligatorias. Para más detalles, toque Ayuda.
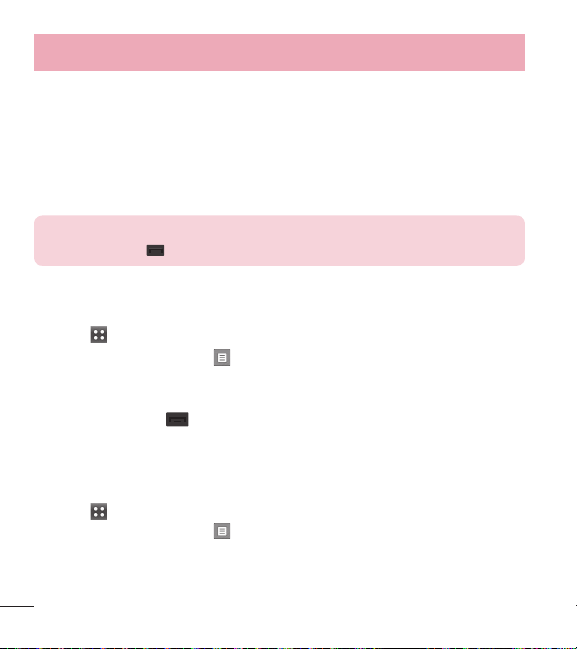
40
Uso de los menús del teléfono
Llamadas Recientes
El menú Llamadas Recientes muestra una lista de los últimos números de teléfono
o las últimas entradas de contactos de llamadas perdidas, recibidas y realizadas.
Se actualiza continuamente a medida que se agregan nuevos números al principio
de la lista y se eliminan las entradas más antiguas desde la parte inferior de la
lista.
NOTA: Para ver una lista rápida de todas las llamadas recientes, toque
la Tecla Enviar en la pantalla principal.
1. Perdidas
Le permite ver la lista de llamadas perdidas; hasta 90 entradas.
1 Toque
> Llamadas Recientes > Perdidas.
2 Toque una entrada y toque
para acceder a las siguientes opciones:
Guardar en Contactos (Info de Contacto)/Borrar/Bloquear/Desbloq./
Tiempo de Llamadas
3 Toque la Tecla Fin
para volver a la pantalla principal.
2. Recibidas
Le permite ver la lista de llamadas recibidas; hasta 90 entradas.
1 Toque
> Llamadas Recientes > Recibidas.
2 Toque una entrada y toque
para acceder a las siguientes opciones:
Guardar en Contactos (Info de Contacto)/Borrar/Bloquear/Desbloq./
Tiempo de Llamadas

41
3 Toque la Tecla Fin para volver a la pantalla principal.
3. Marcadas
Le permite ver la lista de llamadas realizadas; hasta 90 entradas.
1 Toque
> Llamadas Recientes > Marcadas.
2 Toque una entrada y toque
para acceder a las siguientes opciones:
Guardar en Contactos (Info de Contacto)/Borrar/Bloquear/Desbloq./
Tiempo de Llamadas
3 Toque la Tecla Fin
para volver a la pantalla principal.
4. Todas
Le permite ver una lista de las llamadas perdidas, recibidas y realizadas más
recientes.
1 Toque
> Llamadas Recientes > Todas.
2 Toque una entrada y toque
para acceder a las siguientes opciones:
Guardar en Contactos (Info de Contacto)/Borrar/Bloquear/Desbloq./
Tiempo de Llamadas
3 Toque la Tecla Fin
para volver a la pantalla principal.
5. Tiempo de Llamadas
Le permite ver la duración de las llamadas seleccionadas.
1 Toque
> Llamadas Recientes > Tiempo de Llamadas
2 Se muestra la duración de los siguientes tipos de llamadas:

42
Uso de los menús del teléfono
Última Llamada/Llamadas Marcadas/Llamadas Recibidas/Llamadas
Roaming/Todas las Llamadas/Último Restablecimiento/Todas de
Llamadas
3 Toque
para restablecer un temporizador individual o para restablecer
todos los temporizadores.
Juegos
Le permite descargar y jugar juegos de Java y aplicaciones para disfrutar.
1 Toque
> Juegos .
2 Toque Comprar Juegos para buscar y comprar sus juegos favoritos. Los
siguientes juegos están precargados en su teléfono.
Bejeweled Demo/Facebook/Nimbuzz/Opera Mini 7/Tetris Demo
Multimedia
Vea, tome y comparta sus imágenes y audio digitales desde su teléfono
inalámbrico.
1. Cámara
1 Toque > Cámara .
Están disponibles las siguientes opciones de cámara:
Volver Para volver al menú.
Brillo Permite ajustar el brillo.
Equil Blanco Auto/Soleado/Nublado/Fluorescente/Brillo

43
Video Cambia al modo de cámara de video.
Tomar Permite tomar una foto.
Imágenes Permite ver las fotos de la carpeta Imágenes.
Configuración
Resolución 1600X1200/1280X960/640X480/320X240
Sonido Dispa Obturador 1/Sin Sonido/Obturador 2/Clic
Efectos Color Normal/Negativo/Agua/Sepia/Negro & Blan.
Disparo Auto Apagado/3 segundos/5 segundos/10 segundos
Modo De Noche Encendido/Apagado
Excepto Automático Encendido/Apagado
Excepto Opción Interna/Externa
Enviar Aviso Encendido/Apagado
Calidad Normal/Fino/Super Fino
Cuadro Divertido Permite elegir cuadros divertidos para sus fotos.
Multishot Apagado/ 3 fotos/6 fotos
Atrás
Video
Brillo
Tomar
Equil Blanco
Imágenes
Configuración
2 Tome una foto tocando .
3 Aparecerá un menú con opciones para enviar la imagen. Puede elegir entre
Enviar para enviar la imagen mediante un mensaje de imagen o Ver para ver
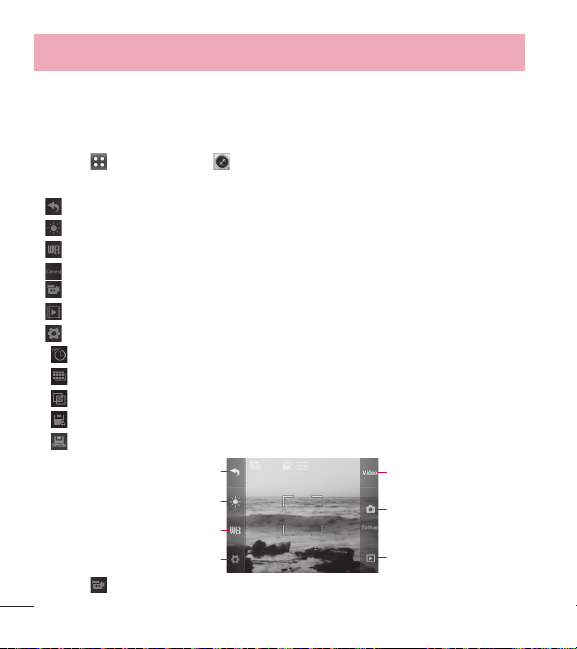
44
Uso de los menús del teléfono
la imagen.
2. Videocámara
1 Toque > Videocámara .
Las siguientes opciones de la videocámara están disponibles:
Volver Para volver al menú.
Brillo Permite ajustar el brillo.
Equil Blanco Auto/Soleado/Nublado/Fluorescente/Brillo.
Cámara Cambia al modo de cámara.
Grabar Inicia la grabación.
Videos Permite ver los videos de la carpeta Imágenes.
Configuración
Grabación Hora Para enviar/Para guardar
Resolución 320X240/176X144
Efectos Color Normal/Negativo/Agua/Sepia/Negro & Blan.
Excepto Automático Encendido/Apagado
Excepto Opción Interna/Externa
Atrás
Cámara
Brillo
Grabar
Equil Blanco
Videos
Configuración
2 Toque para iniciar la grabación.
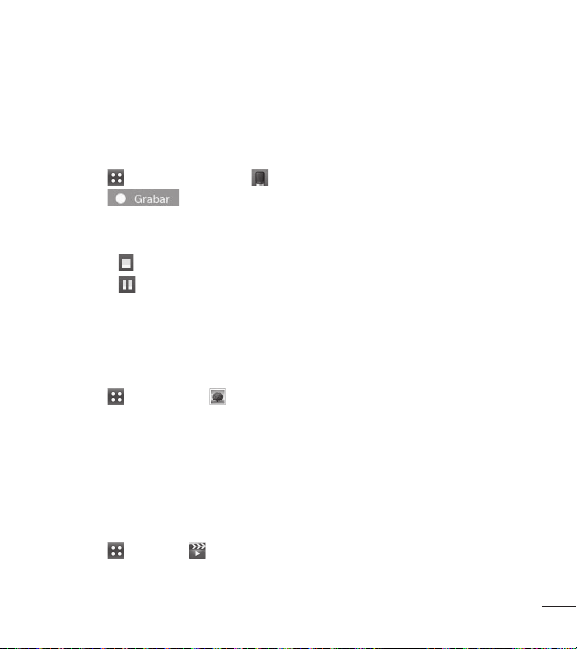
45
3 Toque Pare para detener el video.
3. Grabadora de voz
Le permite grabar voz y sonidos.
1 Toque
> Grabador de Voz .
2 Toque
para iniciar la grabación.
3 Cuando la grabación haya comenzado, están disponibles las siguientes
opciones:
t
Toque para detener la grabación.
t
Toque para pausar la grabación.
Una vez que la grabación se haya detenido, el archivo de audio se guardará
automáticamente.
4. Imágenes
1 Toque > Imágenes .
2 Toque Mis Imágenes para ver las imágenes que ha tomado, toque
Predetermin. Imágenes para ver las imágenes precargadas, y toque Comprar
Gráficos para comprar imágenes.
5. Vídeos
Le permite ver los archivos de vídeo guardados en su teléfono.
1 Toque
> Vídeos .
2 Toque un video para verlo.

46
Uso de los menús del teléfono
6. Sonidos
1 Toque > Sonidos .
2 Toque Mis Timbres para ver y escuchar los tonos de timbre que ha creado,
toque Predetermin. Timbres para ver y escuchar los tonos de timbre
precargados, y toque Comprar Timbres para comprar tonos de timbre.
7. Reproductor de Música
Le permite escuchar las canciones almacenadas en la tarjeta de memoria.
Para acceder a esta función, debe tener música almacenada en su tarjeta de
memoria.
Notas:
t
Asegúrese de usar sólo las tarjetas microSD™ recomendadas. El uso
de tarjetas microSD™ no recomendadas podría generar pérdida de
datos y dañar el teléfono.
t
Si se utilizan de manera inadecuada, la tarjeta microSD™ y su
adaptador pueden dañarse con facilidad. Inserte, quite o manipule con
cuidado.
t
No quite la tarjeta microSD™ mientras se está accediendo a archivos
o se están transfiriendo archivos. Podrían producirse pérdida o daños
de los datos.
t
Formatos de música admitidos: MP3, WMA, AAC, M4A

47
7.1 Últ. Canción Repro.
Le permite reproducir la última canción reproducida.
1 Toque
> Reproductor de Música > Últ. Canción Repro.
7.2 Todas las Canciones
Le permite reproducir todas las canciones.
1 Toque
> Reproductor de Música > Todas las Canciones.
2 Toque un archivo de música para reproducirlo o toque
para acceder a las
siguientes opciones:
Agregar a la Lista/Mover a Tarjeta/Mover al Teléfono/Enviar/Borrar/Info de
Canción
t
Las siguientes opciones están disponibles mientras reproduce música.
– Desactivar selección aleatoria
– Activar selección aleatoria
– Repetir apagado
– Repetir una vez
– Repetir todo
– Rebobinar
– Avance rápido
– Reproducir
– Pausar
t
Toque para acceder a las siguientes opciones:
Salga del Jugador/Agregar a la Lista/Info de Canción

48
Uso de los menús del teléfono
7.3 Artistas
Le permite ver y escuchar su música por artista.
1 Toque
> Reproductor de Música > Artistas.
2 Toque el artista que desee escuchar y elija la canción que desee reproducir.
7.4 Álbumes
Le permite ver y escuchar su música por álbum.
1 Toque
> Reproductor de Música > Álbumes.
2 Toque el álbum que desee escuchar y elija la canción que desee reproducir.
7.5 Géneros
Le permite ver y escuchar su música por género.
1 Toque
> Reproductor de Música > Géneros.
2 Toque el género que desee escuchar y elija la canción que desee reproducir.
7.6 Listas de Repro.
Le permite ver y escuchar su música por lista de reproducción.
1 Toque
> Reproductor de Música > Listas de Repro.
2 C uando aparezca el mensaje emergente en el que se le pregunta si desea
crear una nueva lista de reproducción, toque Sí o No.
3 Nombre la lista de reproducción y toque Guardar.
4 T oque la lista de reproducción y, a continuación, toque AñdR Cancs para
seleccionar las canciones que desee agregar.
5 T oque Hecho cuando haya terminado de seleccionar las canciones que desee
agregar.

49
7.7 Ambiente
Le permite personalizar los ajustes del Reproductor de Música.
7.7.1 Repetir
Le permite configurar el ajuste de repetición.
1 Toque
> Reproductor de Música > Ambiente.
2 Toque Repetir para alternar entre las siguientes opciones:
Todol/Uno/Apag
7.7.2 Aleatorio
Le permite configurar el reproductor de música para reproducir las canciones de
forma aleatoria.
1 Toque
> Reproductor de Música > Ambiente.
2 Toque Aleatorio para cambiar la función a Encdd o Apag.

50
Uso de los menús del teléfono
Mi Agenda
1. Alarma
Le permite configurar hasta diez alarmas. A la hora de la alarma, la alarma
que se haya definido emitirá el sonido y/o vibrará con el tono que haya elegido
(dependiendo de las configuraciones de sonido), y se mostrará un mensaje de
notificación en la pantalla.
1 Toque
> Alarma .
2 Toque Añadir.
3 Toque el campo Fijar Tiemp para ajustar la hora de la alarma.
4 Toque Periodicidad para definir la recurrencia de la alarma. Las opciones
disponibles son: Una Vez/Diario/Lun - Vie/ Fines de Semana/Seleccionar
Días.
5 Toque Timbre para definir el tono de timbre de la alarma.
6 Toque Grdr para guardar la alarma.
2. Calendario
Le permite almacenar y acceder a sus agendas. Sólo tendrá que almacenar sus
citas en su calendario y el teléfono le avisará con un recordatorio.
1 Toque
> Calendario .
2 Toque el día que desee editar.
3 Toque Añadir.
4 Introduzca la información del evento, incluyendo:

51
t Asunto t Hora de Comienzo
t Hora de Término t Repetir
t Hasta t Alerta
t Tonos t Vibrar
5 Toque Grdr.
Acceso Web
La función Acceso Web le permite ver contenido de Internet. El acceso y las
selecciones dentro de esta función dependen de su proveedor de servicios.
Para obtener información específica sobre la Web, póngase en contacto con su
proveedor de servicios.
1. Iniciar el navegador
Le permite iniciar una sesión web.
1 Toque
> Acceso Web .
Finalizar una sesión web
Para finalizar una sesión web, toque la Tecla Fin.
.
Menú del navegador
El Menú del navegador ofrece las siguientes opciones de la barra de herramientas:
t
Inicio Le lleva de nuevo a la página de inicio.
t
Atrás Le lleva a la página anterior.
t
Reenviar Si está disponible, le lleva a la página siguiente.
t
Favoritos Le lleva al menú Favoritos, donde puede agregar, editar y borrar

52
Uso de los menús del teléfono
favoritos.
t
Ir a URL Permite introducir una dirección web que desee visitar.
t
Recargar Permite volver a cargar la página web actual.
t
Historial Muestra una lista de páginas web visitadas.
t
Borrar Memoria Permite borrar la memoria.
t
Enviar Enlace Permite enviar el enlace de la página actual por mensaje de
texto.
t
Mostrar URL Permite ver la dirección de web actual.
t
Guardar Elementos Permite guardar elementos desde la página web.
t
Ajustes Permite configurar los siguientes parámetros del navegador:
Descargas Permite configurar si desea habilitar o deshabilitar la descarga de
imágenes, fondos y objetos.
Reiniciar Navegador Permite reiniciar el navegador.
Remitente del Envío HTTP Permite activar o desactivar el envío de encabezado
de referencia HTTP.
Tiempo de Espera de Pulsación de la Tecla Establece el tiempo de espera
para oprimir teclas.
Tiempo de Espera Conexión Establece el tiempo de espera de la conexión.
t
Avanzado Muestra información del navegador, incluida la versión e
información de la licencia.
t
Salir Permite salir del navegador.

53
Herramientas
El teléfono incluye las siguientes herramientas: Comando de voz, Calculadora,
Calculadora de propinas, Conversor de unidades, Cronómetro y Bloc de notas.
1. Comando de Voz
Permite realizar llamadas de teléfono de una forma rápida y sencilla utilizando la
voz. El teléfono recupera el número de los contactos y lo llama. Este menú resulta
útil para las personas que conducen o que son ciegas. Ofrece información de
fecha y hora por voz, y le permite consultar las llamadas perdidas, los mensajes y
los correos de voz, etc.
1.1 Llamar <Nombre o Número>
1 Toque > Comando de Voz .
2 Toque o diga Llamar <Nombre o Número>.
3 Diga el nombre tal y como está guardado en la lista de contactos, o diga el
número.
1.2 Enviar Msj a <Nombre, Número o Grupo>
1 Toque > Comando de Voz .
2 Toque o diga Enviar Msj a <Nombre o Número o Grupo>.
3 Toque o diga Mensaje de Texto o Mensaje de Medio y, a continuación, diga
el nombre del contacto.
1.3 Verificar <Elemento>
1 Toque > Comando de Voz .

54
Uso de los menús del teléfono
2 Toque o diga Verificar <Elemento>.
3 Toque o diga una de las opciones disponibles.
1.4 Contactos <Nombre>
1 Toque > Comando de Voz .
2 Toque Contactos <Nombre> o diga "Contactos" seguido del nombre del
contacto.
1.5 Reproducir
1 Toque > Comando de Voz .
2 Toque o diga Reproducir.
3 Diga el nombre de la lista de reproducción de música.
1.6 Ayuda
Le permite ver más información sobre las funciones de Control de Voz.
1 Toque
> Comando de Voz .
2 Toque o diga Ayuda.
2. Calculadora
Le permite realizar cálculos matemáticos simples. Puede introducir números hasta
la décima posición decimal.
1 Toque
> Calculadora .
2 Introduzca los datos.
t
Toque el teclado para introducir números.
t
Toque para introducir decimales.

55
t
Toque para borrar el último dígito introducido, o toque y mantenga
presionado para borrar toda la entrada.
t
Toque las teclas táctiles correspondientes para introducir funciones ( +, -, x,
÷ ).
t
Toque para completar la ecuación.
3. Calculadora de Propinas
Le permite calcular con rapidez y facilidad la propina de una cuenta al introducir el
monto de la cuenta antes de la propina, el porcentaje de propina y dividirlo por la
cantidad de personas que pagarán.
1 Toque
> Calc. de Propinas .
2 Introduzca los campos variables (Cuenta ($), Propina (%), Dividir). Los campos
correspondientes (Propina($) y Cada($)) se calculan automáticamente.
3 Toque Reajustar para iniciar otro cálculo.
4. Conversor de Unidad
Le permite convertir unidades de medida.
1 Toque
> Conversor de Unidad .
2 Toque la unidad de medida que desee convertir:
Área/Longitud/Masa/ Temperatura/Volumen/Velocidad
3 Elija los tipos de medida que desee convertir, y cambie la Tasa, si es necesario.
4 La conversión se calculará automáticamente.

56
Uso de los menús del teléfono
5. Cronómetro
Permite usar el teléfono como un cronómetro.
1 Toque
> Cronómetro .
2 Toque Cmnzr para iniciar el cronómetro, y toque Alto para pararlo.
t
Puede usar la función Vuelta tocando Vuelta para registrar hasta 20 vueltas y
tiempos de vuelta.
3 Toque Reaj para reiniciar el cronómetro o Reanudar para reanudarlo.
6. Bloc de Notas
Le permite agregar notas para usted mismo, leerlas, editarlas y borrarlas.
1 Toque
> Bloc de Notas .
2 Toque Añadir para escribir una nueva nota.
3 Escriba la nota y, a continuación, toque Grdr.
Se muestra brevemente un mensaje de confirmación y luego se muestra la lista
de notas.
Administración de notas
1 Acceda al Bloc de notas.
2 Para borrar una nota, tóquela para abrirla. A continuación, toque
.
- O -
Para agregar una nota o borrar todas las notas, toque Añadir o Borrar Todo.

57
Configuración
Este menú permite configurar los diferentes ajustes del teléfono.
1. Config. de Sonidos
Este menú también le permite personalizar los sonidos del teléfono.
1.1 Volumen Maestro
Permite configurar el nivel de volumen general.
1 Toque
> Config. de Sonidos > Volumen Maestro.
2 Toque las barras para definir el nivel de volumen y, a continuación, toque Fijar.
1.2 Sonidos de Llamada
Permite configurar los sonidos de las llamadas del teléfono.
1 T oque
> Config. de Sonidos > Sonidos de Llamada.
2 Toque Timbre de Llamada, Vibrar de Llamada o Lectura de ID de Llam. y
configure la opción.
1.3 Sonidos de Alerta
Permite seleccionar los tonos de alerta de nuevos mensajes.
1 Toque
> Config. de Sonidos > Sonidos de Alerta.
2 Toque Mensaje de Texto, Mensaje de Medio, Correo de Voz, Tono de
Emergencia o Llamada Perdida.
3 Configure el ajuste.

58
Uso de los menús del teléfono
1.4 Volumen de Teclado
Le permite configurar los sonidos de las teclas del teclado táctil.
1 Toque
> Config. de Sonidos > Volumen de Teclado.
2 Toque las barras para definir el nivel de volumen y, a continuación, toque Fijar.
1.5 Alertas de Servicio
Le permite configurar las 2 alertas de servicio disponibles.
1 Toque
> Config. de Sonidos > Alertas de Servicio.
2 Toque una opción de alerta.
Conexión de Llamada
Le avisa cuando la llamada se conecta.
Batería Baja
Permite seleccionar el tipo de alerta entre anuncio y tono.
1.6 Encender/Apagar
Permite establecer que el teléfono suene al encender o apagar el teléfono.
1 Toque
> Config. de Sonidos > Encender/Apagar.
2 Alterne la opción entre Encendido/Apagado para las opciones disponibles.
2. Config. de Pantalla
Este menú permite personalizar la pantalla de visualización del teléfono.
2.1 Pantalla Luz de Fondo
Permite definir el temporizador de luz de fondo de la pantalla.

59
1 Toque > Config. de Pantalla > Pantalla Luz de Fondo.
2 Toque un tiempo de duración:
7 Segundos/15 Segundos/30 Segundos/1 Minuto
2.2 Brillo
Ajuste el brillo de la pantalla para que se adapte a su entorno.
1 Toque
> Config. de Pantalla > Brillo.
2 Toque una barra de nivel de brillo (Nivel 1 al 4) para seleccionarlo, y toque Fijar.
2.3 Fondo de Pantalla
Le permite elegir la clase de fondo de pantalla que se mostrará en el teléfono.
1 Toque
> Config. de Pantalla > Fondo de Pantalla.
2 Toque la imagen que desee y, a continuación, toque Fijar.
2.4 Configuraciones de Fuente
Permite seleccionar el tipo de fuente mostrada en la pantalla LCD.
1 Toque
> Config. de Pantalla > Configuraciones de Fuente.
2 Toque una configuración.
LG Gothic/LG Serif/LG Joy/LG Mint
2.5 Tamaño de Fuente de Marcación
Permite definir el tamaño de fuente en el teclado de marcación al marcar un
número.
1 Toque
> Config. de Pantalla > Tamaño de Fuente de Marcación
2 Toque una configuración.
Pequeña/Normal/Grande

60
Uso de los menús del teléfono
2.6 Menú Tamaño de Fuente
Permite definir el tamaño de fuente de la pantalla Menú.
1 Toque
> Config. de Pantalla > Menú Tamaño de Fuente.
2 Toque una configuración.
Pequeña/Normal/Grande/Muy Grande
2.7 Coincidencia de Nombre de Marcación
Hace coincidir una entrada de contacto con las letras correspondientes
introducidas en el teclado de marcación.
1 Toque
> Config. de Pantalla .
2 Toque el botón Coincidencia de Nombre de Marcación para alternar el botón
entre Encendido y Apagado.
2.8 Bloqueo del Patrón
Permite establecer el patrón de bloqueo.
1 Toque
> Config. de Pantalla > Patrón del bloqueo.
2 Toque para cambiar el ajuste entre Encendido y Apagado.
3 Después de encender la función, dibuje su patrón y toque Continuar.
4 Dibuje el patrón una vez más y toque Continuar.
5 Introduzca el código de bloqueo del teléfono.

61
3. Prog. de Llamada
El menú Prog. de Llamada permite designar la forma en la que el teléfono
administra las llamadas entrantes y salientes.
3.1 Opciones de Contestar
Permite determinar la forma de responder una llamada entrante.
1 Toque
> Configuración > Prog. de Llamada > Opciones de
Contestar.
2 Toque una configuración.
Cualquier Tecla/Auto Con Manos Libres
3 Toque Hecho.
3.2 Modo TTY
Permite conectar un dispositivo TTY (máquina de escribir a distancia), para
comunicarse con personas que también esté usando uno de ellos. Un teléfono
con compatibilidad TTY puede traducir los caracteres escritos en voz. También se
puede traducir la voz a caracteres y después mostrarse en el TTY.
1 Toque
> Configuración > Prog. de Llamada > Modo TTY.
2 Toque una configuración.
TTY Llena/TTY + Charla/TTY + Oír/TTY Apagada
3.3 Marcación de 1 toque
Le permite iniciar una llamada de marcación rápida tocando sin soltar el dígito de
marcación rápida. Si la opción está apagada, los números de marcación rápida
designados en sus contactos no funcionarán.

62
Uso de los menús del teléfono
1 Toque > Configuración > Prog. de Llamada
2 Toque el botón Marcación de 1 toque para alternar el ajuste entre Encendido
y Apagado.
3.4 Privacidad de Voz
Permite establecer la función de privacidad de voz de las llamadas CDMA como
Mejorada o Estándar. CDMA ofrece privacidad de voz inherente. Consulte con su
proveedor de servicios la disponibilidad.
1 Toque
> Configuración > Prog. de Llamada > Privacidad de Voz.
2 Toque una configuración.
Mejorado/Normal
4. Prog. de Toque
El menú Prog. de Toque permite configurar varios ajustes de la pantalla táctil.
4.1 Auto-Bloqueo de Toque
Permite configurar la pantalla para que se bloquee automáticamente y así evitar
presionar de forma accidental la pantalla externa cuando la luz de fondo se
desactiva.
1 Toque
> Configuración > Prog. de Toque > Auto-Bloqueo de Toque.
2 Toque una configuración.
Encendido/Apagado
4.2 Tipo de Tono
Permite definir el tipo de tono que se usa al tocar elementos en la pantalla.

63
1 Toque > Configuración > Prog. de Toque > Tipo de Tono.
2 Toque una configuración.
Clic/Bloque de Madera/Bip/Desactivado
5. Prog. de Teléfono
El menú Prog. de Teléfono permite configurar varios parámetros relacionados con
el teléfono y la seguridad.
5.1 Modo Avión
El Modo Avión desactiva la señal inalámbrica del teléfono, y le permite usar
funciones en su teléfono que no requieren comunicaciones inalámbricas.
1 Toque
> Configuración > Prog. de Teléfono > Modo Avión.
2 Toque una configuración.
Encendido/Apagado
5.2 Idiomas (Languages)
Permite definir la función bilingüe según sus preferencias. Puede elegir entre
inglés y español.
1 Toque
> Configuración > Prog. de Teléfono > Idiomas (Languages).
2 Toque English o Español.
5.3 Ubicación
Permite ajustar los parámetros del modo de GPS (Sistema de posicionamiento
global: sistema de información de ubicación asistido por satélite).
1 Toque
> Configuración > Prog. de Teléfono > Ubicación.

64
Uso de los menús del teléfono
2 Toque una configuración.
Ubicación Encendido/Sólo E911
NOTA: Las señales del satélite GPS no siempre se reciben,
especialmente bajo condiciones atmosféricas y medioambientales
adversas, en interiores, etc.
5.4 Seguridad
El menú Seguridad permite cambiar los parámetros de seguridad y de restricción.
5.4.1 Cambiar Código de Bloqueo
Permite introducir un nuevo código de bloqueo de cuatro cifras.
1 Toque
> Configuración > Prog. de Teléfono > Seguridad.
2 Introduzca el código de bloqueo de cuatro dígitos.
3 Toque Cambiar Código de Bloqueo.
4 Toque Sólo Teléfono o Llamadas & Servicios.
5 Introduzca el código de bloqueo actual, seguido del nuevo código de bloqueo
de cuatro dígitos.
6 Para su confirmación, el teléfono pedirá que introduzca el nuevo código de
nuevo.
5.4.2 Restricciones
Permite restringir las llamadas y los mensajes salientes. Ofrece también la opción
de restringir los datos.
1 Toque
> Configuración > Prog. de Teléfono > Seguridad.
2 Introduzca el código de bloqueo de cuatro dígitos.

65
3 Toque Restricciones e introduzca el código de bloqueo.
4 Toque el submenú y luego la configuración.
Llamadas Entrantes/Llamadas Salientes(Permitir todo/Sólo contactos/
Bloquear todo)
SMS Entrante/SMS Salientes(Permitir todo/Bloquear todo)
MMS Entrantes/MMS Salientes(Permitir todo/Bloquear todo)
5.4.3 Auto Bloqueo del Dispositivo
Permite establecer que el teléfono se bloquee automáticamente después de cierto
tiempo.
1 Toque
> Configuración > Prog. de Teléfono > Seguridad.
2 Introduzca el código de bloqueo de cuatro dígitos.
3 Toque Auto Bloqueo del Dispositivo.
4 Toque una configuración.
5 Minutos/10 Minutos/15 Minutos/30 Minutos/1 Hora/Apagado
5.4.4 Bloq. Teléfono
Protege su teléfono de uso no autorizado. Una vez que bloquee su teléfono,
estará en modo restringido hasta que se introduzca el Código de Bloqueo. Todavía
puede recibir llamadas telefónicas y realizar llamadas de emergencia.
Puede modificar el código de bloqueo al desplazarse al menú Código de bloqueo
del menú Seguridad.
1 Toque
> Configuración > Prog. de Teléfono > Seguridad.
2 Introduzca el código de bloqueo de cuatro dígitos.
3 Toque Bloq. Teléfono.

66
Uso de los menús del teléfono
4 Toque una opción.
Abrir El teléfono nunca se bloquea (el modo de bloqueo puede usarse con las
opciones indicadas a continuación).
Bloq. El teléfono se bloquea inmediatamente.
Al Encender El Teléfono El teléfono se bloquea cuando se enciende.
5.4.5 Reinicio Principal
Le permite restaurar el teléfono a la configuración predeterminada de fábrica.
1 Toque
> Configuración > Prog. de Teléfono > Seguridad.
2 Introduzca el código de bloqueo de cuatro dígitos.
3 Toque Reinicio Principal.
4 Toque Bueno.
5 Aparecerá un mensaje que le advertirá que todos los parámetros volverán a la
configuración predeterminada de fábrica.
6 Toque Revertir o Cancelar. Si toca Revertir, introduzca el código de bloqueo
de cuatro dígitos. El teléfono vuelve a los valores predeterminados de
configuración.
5.5 Selección de Sistema
Permite configurar el entorno de administración del fabricante del teléfono. No
modifique este parámetro a menos que desee alterar selecciones de sistema
indicadas por el proveedor de servicios.
1 Toque
> Configuración > Prog. de Teléfono > Selección de
Sistema.
2 Toque una configuración.

67
Sólo Base/Automático A/Automático B
6. Almacenamiento Masivo USB
Le permite seleccionar el modo de conexión de la PC para el dispositivo.
1 Toque
> Configuración > Almacenamiento Masivo USB.
2 Toque una configuración.
Encendido/Apagado.
7. Memoria
Le permite comprobar el estado de la memoria del teléfono.
1 Toque
> Configuración > Memoria.
2 Toque una opción.
Memoria del Teléfono/Memoria de la Tarjeta/Opciones de Memoria
3 Toque un tipo de memoria para ver su estado.
4 Toque Opciones de Memoria para cambiar la ubicación de almacenamiento
de Imágenes, Video y Timbres en la memoria del teléfono o la tarjeta de
memoria.
8. Info de Teléfono
El menú Info de Teléfono contiene información específica relativa al modelo del
teléfono.
1 Toque
> Configuración > Info de Teléfono.
9.1 Mi Número

68
Uso de los menús del teléfono
Le permite ver su número de teléfono.
1 Toque
> Configuración > Info de Teléfono > Mi Número.
9.2 ESN/MEID
Permite ver la información del ESN y el MEID del teléfono.
1 Toque
> Configuración > Info de Teléfono > ESN/MEID.
9.3 Glosario de Iconos
Le permite ver todos los iconos y su significado.
1 Toque
> Configuración > Info de Teléfono > Glosario de Iconos.
2 Toque un submenú para ver dicho tipo de icono.
Estado/Multimedia/Mensajería/Contactos/Llamadas Recientes/
Programación y Herramientas
9.4 Versión SW/HW
Le permite ver las versiones de las diferentes aplicaciones.
1 Toque
> Configuración > Info de Teléfono > Versión SW/HW.

69
Bluetooth
®
Su teléfono es compatible con dispositivos que admitan los perfiles Bluetooth de auricular,
manos libres, estéreo, acceso a agenda telefónica, impresión básica, push de objeto y
transferencia de archivos. Puede crear y almacenar 20 emparejamientos dentro de
su teléfono y conectarse con un dispositivo a la vez. El alcance de comunicación
aproximado de la tecnología inalámbrica Bluetooth
®
es de hasta 10 metros (30 pies).
Notas
t
Lea la guía del usuario de los accesorios Bluetooth
®
que desea
conectar a su teléfono, puesto que es posible que las instrucciones
sean diferentes.
t
Las funciones Bluetooth
®
de este terminal podrían no ser compatibles
con todos los dispositivos habilitados para Bluetooth
®
. No puede
responsabilizarse al proveedor de servicios ni al fabricante del
dispositivo de los problemas de compatibilidad que pudieran surgir
con dispositivos no comercializados por el proveedor de servicios o el
fabricante del dispositivo.
1. Encender
Permite encender o apagar la conexión.
1 Toque
> Bluetooth.
2 Toque Encender o Apagado.
NOTA: De forma predeterminada, la funcionalidad Bluetooth
®
del
dispositivo está apagada.

70
Uso de los menús del teléfono
2. Agregar nuevo
El emparejamiento es el proceso que permite al teléfono localizar, establecer y
registrar una conexión 1 a 1 con el dispositivo de destino.
Emparejar un nuevo dispositivo Bluetooth
®
1 Toque > Bluetooth > Añadir > Cmnzr.
2 Siga las instrucciones del accesorio Bluetooth
®
para establecer el dispositivo en
el modo de emparejamiento.
3 Si Bluetooth
®
está desactivado, se pedirá que lo active. Toque Sí.
4 El dispositivo aparece en la pantalla cuando se ubique. Toque el nombre del
dispositivo.
5 El teléfono puede solicitarle por un código. Consulte las instrucciones del
accesorio Bluetooth
®
para conocer el código de acceso correcto (normalmente
“0000” - 4 ceros). Introduzca el código de acceso y toque Aceptar. También
podría pedírsele que confirme códigos de acceso que coincidan en ambos
terminales.
6 Cuando el emparejamiento se haya realizado correctamente, se le pedirá que
elija entre Preguntar siempre o Conectar siempre. De esta forma se definen
las preferencias de conexión del dispositivo emparejado.
7 Cuando esté conectado, verá el dispositivo en el menú Dispositivos
emparejados.
3. Dispositivos emparejados
Le permite ver la lista de dispositivos en par con su teléfono.
1 Toque
> Bluetooth y se mostrará la lista Dispositivos emparejados.
71
4. Configuración
Le permite configurar los ajustes de Bluetooth.
4.1 Mi Info de Dispositivo
Permite editar el nombre del dispositivo Bluetooth
®
.
1 Toque
> Bluetooth > > Mi Info de Dispositivo.
2 Toque Renombrar de Dispositivo.
3 Toque y mantenga presionada la Tecla Borrar
para borrar el nombre
existente.
4 Introduzca un nuevo nombre.
5 Toque Guardar para guardarlo y salir.
4.2 Modo de Descubrimiento
Le permite establecer la visibilidad de la función Bluetooth
®
.
1 Toque
> Bluetooth > > Modo de Descubrimiento.
2 Toque una configuración.
Encendida/Apagado
NOTA: Si activa el modo de descubrimiento, el dispositivo podrá ser
buscado por otros dispositivos Bluetooth
®
que lo tengan dentro de su
alcance.
4.3 Perfiles Soportados
Permite ver los perfiles Bluetooth admitidos por el teléfono.
1 Toque
> Bluetooth > > Perfiles Soportados.

72
Uso de los menús del teléfono
Wi-Fi
Seleccione la red Wi-Fi a la que desea conectarse. Si aparece , deberá
especificar una contraseña para conectarse.
1 Toque
> Wi-Fi .
2 Si Wi-Fi está apagado, toque Activando para ver las redes disponibles.
3 Toque
al lado de la red deseada.
- O -
4 Toque Agregar para agregar una red Wi-Fi manualmente.
t
Toque Actualiz to refresh the list of available networks.
t
Toque para acceder a Registros de Conexión, Mi Dirección MAC y Wi-Fi
en Suspensión.
Notas
t
Si se encuentra fuera del área de cobertura de la conexión Wi-Fi y
utiliza la conexión 1X, podrían aplicarse cargos adicionales.
t
Cuando el ajuste de inactividad de Wi-Fi se configura a “Cuando
la Pantalla se Apaga” y el teléfono pasa al modo de inactividad
cuando está conectado a la conexión Wi-Fi, las conexiones Wi-Fi se
deshabilitan automáticamente.
t
En este caso, si su teléfono tiene acceso a datos 1x, podría
conectarse a la red 1x automáticamente y aplicarse cargos
adicionales.
t
Su teléfono admite los siguientes tipos de seguridad: WEP, WPA/WPA2-
PSK.

73
t
Si su proveedor de servicio Wi-Fi o administrador de red configuran la
codificación para la seguridad de la red, usted debe introducir la clave
en la ventana emergente. Si la encriptación no está configurada, la
ventana emergente no se muestra. Puede obtener la clave a través de
su proveedor de servicio Wi-Fi o su administrador de red.
Accesibilidad
Este menú le permite controla varias opciones de accesibilidad fácilmente.
1. Lectura del Menú
Esta opción permite que el teléfono lea menús en voz alta.
1 Toque
> Accesibilidad .
2 Toque
para cambiar el ajuste entre Encendido y Apagado.
2. Lectura de Marcado
Esta opción permite que el teléfono lea dígitos introducidos en el teclado de
marcación en voz alta.
1 Toque
> Accesibilidad .
2 Toque
para cambiar el ajuste entre Encendido y Apagado.
3. Texto Grande
Esta opción le permite cambiar el tamaño de fuente del teléfono a un tipo más
grande.

74
Uso de los menús del teléfono
1 Toque > Accesibilidad .
2 Toque
para cambiar el ajuste entre Encendido y Apagado.
4. Inversión de Color
Esta opción le permite invertir el color de la pantalla.
1 Toque
> Accesibilidad .
2 Toque
para cambiar el ajuste entre Encendido y Apagado.
5. Sonido Monofónico
Activando este menú cambia el tipo de sonido del teléfono a un sonido
monofónico.
1 Toque
> Accesibilidad .
2 Toque
para cambiar el ajuste entre Encendido y Apagado.
6. TTY
Por favor consulte la página 61 para más información.
7. Lectura de ID de Llam.
Este menú permite ajustar varios parámetros de Lectura del identificador de
llamadas.
1 Toque
> Accesibilidad .
2 Toque una configuración.
Solo Timbre/ID de llam. + Timbre/Repetir Nombre
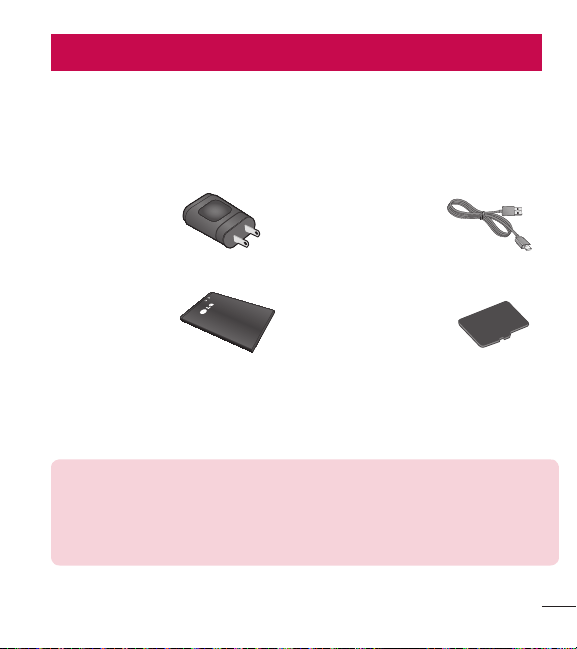
75
Accessories
Hay varios accesorios disponibles para su teléfono celular, y es posible que algunos
se vendan por separado. Puede seleccionar esas opciones según sus requisitos
de comunicación en particular. Consulte con su distribuidor local para conocer la
disponibilidad.
Adaptador de viaje
Este adaptador
permite cargar la
batería.
Cable USB
Este cable permite
cargar la batería.
Batería
Batería estándar
disponible.
Tarjeta de memoria
microSD
TM
Tarjeta de memoria
microSD de 4 GB
proporcionada
(admite hasta 32
GB).
NOTA:
t
Utilice siempre accesorios LG originales. Si no lo hace, la garantía puede
quedarse invalidada.
t
Los accesorios pueden variar según la región; para mayor información,
consulte con la empresa o el agente de servicio técnico de su región.

76
Seguridad
El valor más elevado de la SAR para este modelo de teléfono cuando se lo probó
para usarse en el oído es de 1,27 W/kg y cuando se lo usa sobre el cuerpo,
según lo descrito en esta guía del usuario, es de 0,79 W/kg (las mediciones del
uso en el cuerpo varían en función de los modelos de los teléfonos y dependen de
los accesorios disponibles y los requisitos de la FCC).
Aun cuando puede haber diferencias entre los niveles de SAR de varios teléfonos
y en varias posiciones, todos ellos cumplen el requisito gubernamental para una
exposición segura.
La FCC ha otorgado una Autorización de equipo para este modelo de teléfono
con todos los niveles de SAR reportados y evaluados en cumplimiento de los
lineamientos de emisión de RF de la FCC. La información de la SAR sobre este
modelo de teléfono está archivada en la FCC y puede encontrarse en la sección
Display Grant de http://www. fcc.gov/oet/ea/fccid/ después de buscar FCC ID
ZNFLG305C.
t
Para reducir el riesgo de incendios o quemaduras, no exponga el dispositivo a
una temperatura mayor que 45°C (113°F) ni deseche en fuego o agua.
t
Para reducir el riesgo de incendios o quemaduras, no deseche el dispositivo en
fuego o agua.
t
No desarme, abra, aplaste, doble, deforme, perfore ni raye el teléfono.
t
Existe peligro de explosión si se reemplaza la batería en forma inadecuada.
Para reducir el riesgo de incendios o quemaduras, no desarme, aplaste, perfore,
cause cortocircuito a los contactos externos, exponga a una temperatura mayor
que 45°C (113°F) o deseche en fuego o agua. Mantenga este producto alejado
de la humedad excesiva y de temperaturas extremas. Mantenga la batería o
el dispositivo secos y alejados del agua o cualquier líquido, dado que puede

77
ocasionar un cortocircuito.
t
Evite usar el teléfono cerca de fuentes electromagnéticas intensas como hornos
microondas, altoparlantes, televisores y radios.
t
Use solo accesorios originales aprobados por el fabricante o accesorios que
no contengan metales. Utilice solamente accesorios de carga aprobados
para cargar el teléfono LG. La manipulación inadecuada del puerto de carga/
accesorio y el uso de un cargador no compatible pueden ocasionarle daños al
teléfono y anular la garantía.
t
Use sólo el cargador de batería aprobado. De lo contrario, podría ocasionar un
daño grave en su teléfono.