Loading ...
Loading ...
Loading ...
5
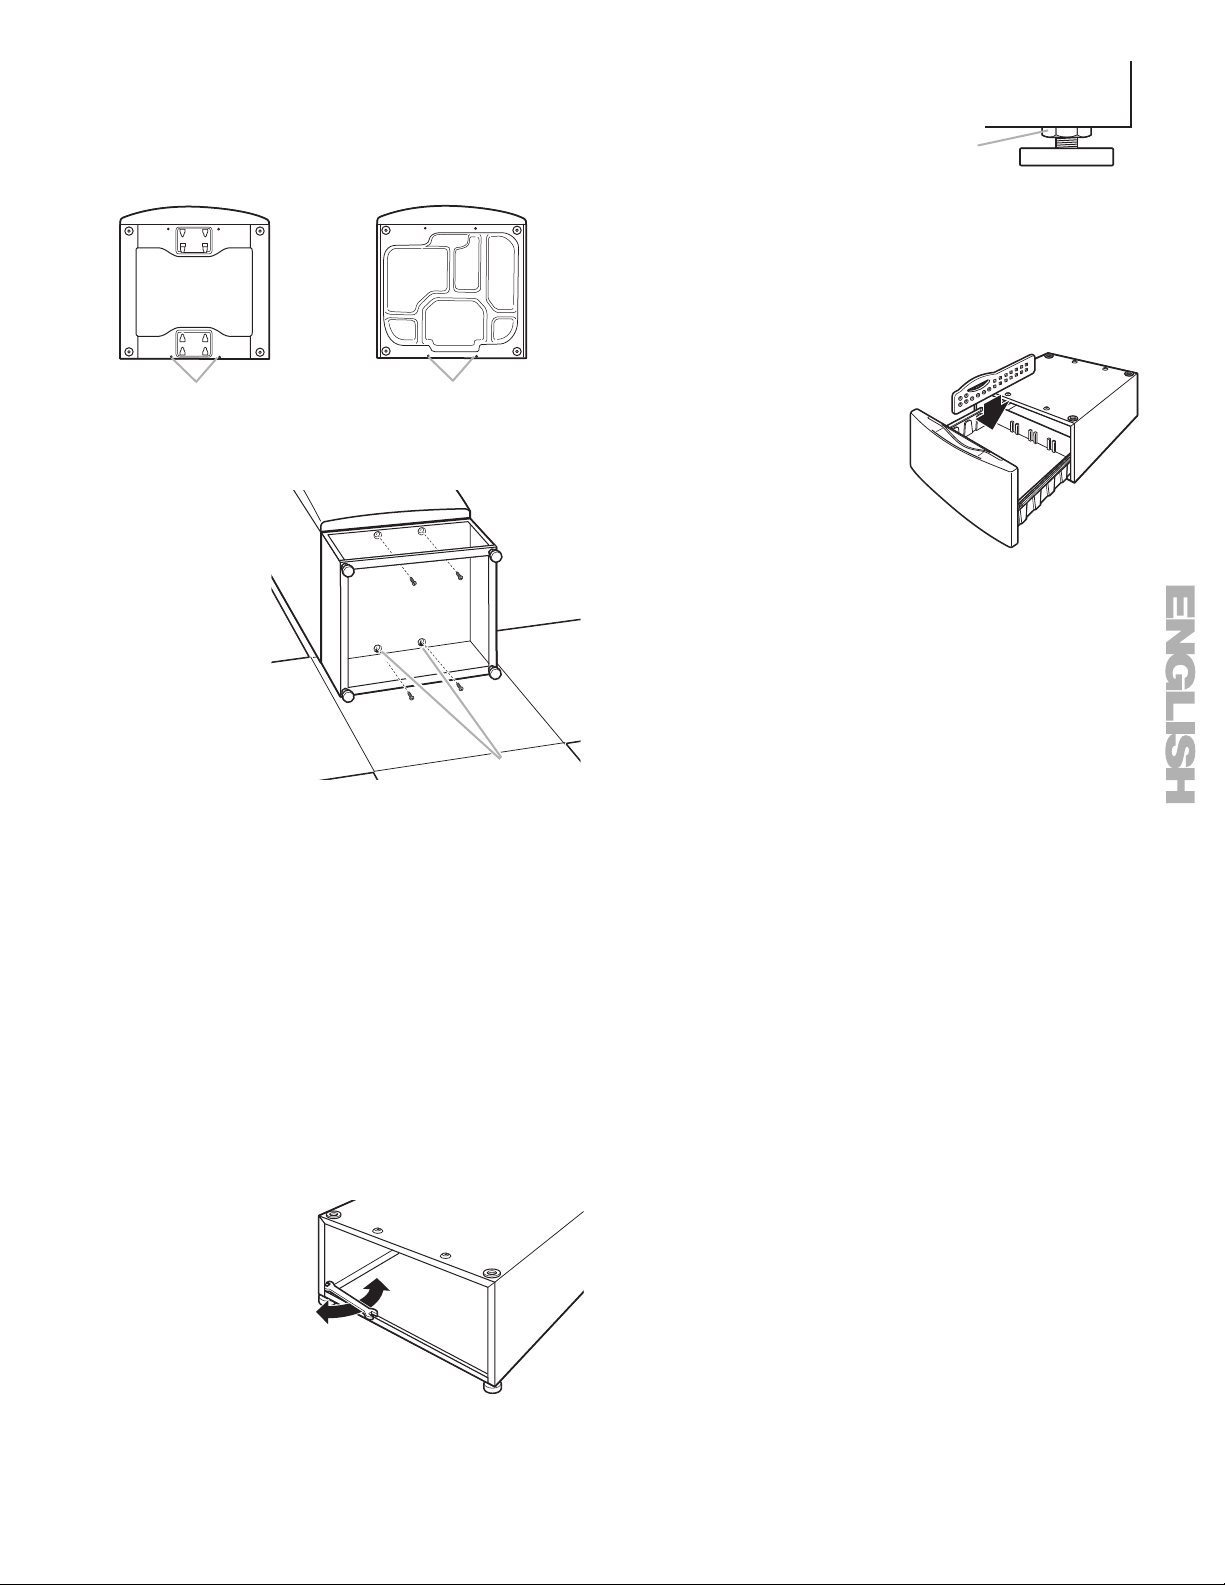
4. If your washer or dryer has feet installed, remove them. Do
not install the feet that came with a new washer or dryer.
5. Partially install 2 of the #12 x
5
⁄8" hex head sheet metal screws
in the lower holes. Leave a space of about
3
⁄8" (1 cm) between
the screw head and the bottom of the washer or dryer.
6. Tip the pedestal on
its back and move it
against the washer
or dryer bottom.
Slide the pedestal’s
keyhole slots over
the lower 2 partially
installed screws.
7. Position the
pedestal toward the
front of the washer
or dryer and install
the 2 remaining hex-
head sheet metal
screws. Do not
tighten completely.
8. Align the sides of
the pedestal so that they are even with the sides of the
washer or dryer. Reach inside the pedestal drawer opening
and securely tighten all 4 pedestal screws.
9. Tip the washer or dryer back to its upright position. Remove
and discard packaging including washer’s plastic film, corner
posts and top cap.
10. Slide the washer or dryer close to its final location.
11. Follow the Installation Instructions that came with your model
to finish installing or reinstalling your washer or dryer (hoses,
vents, etc.).
12. Level the washer or dryer from side to side and front to back.
NOTE: Make sure all 4 pedestal feet are in solid contact with
the floor.
Place a level on the top. Locate the
1
⁄4" hex-head screws on
the top of each pedestal foot. Reach inside the pedestal and
use a
1
⁄4" hex-head
ratchet or open-end
wrench to adjust the
feet up or down as
needed to level the
washer or dryer.
The washer or dryer
should not move
front to back, side to
side, or diagonally
when pushed on its
top edges.
A. Washer bottom
B. Dryer bottom
C. Install screws
C
AB
C
A. Lower screws in keyhole slots.
A
13. When the washer or dryer is level,
use a
9
⁄16" open-end wrench to
securely tighten all 4 locknuts
against the pedestal. The locknuts
must be tightened to prevent
vibration. Recheck that the washer
or dryer is level. The washer or
dryer should not move front to back, side to side, or
diagonally when pushed on its top edges.
14. Pull both drawer slides out and reassemble the drawer to the
drawer slides with the 2 hex-head screws.
NOTE: Use of the divider is optional.
1
5. Remove the divider from
the bag.
16. Place the divider in the
drawer at the desired
location.
17. Close the drawer.
A
A. Locknut
Loading ...
Loading ...
Loading ...