Loading ...
Loading ...
Loading ...
8 49-1000422 Rev. 0
INSTALLATION
Preparing to Install the Freezer
Read these instructions completely and carefully.
Freezer Location
Your freezer should be conveniently located for
day-to-day use in a dry, well-ventilated room.
'RQRWLQVWDOOWKHIUHH]HUZKHUHWKHWHPSHUDWXUHZLOOJR
EHORZ)&RUDERYH)&EHFDXVHLWZLOO
not maintain proper temperatures.
Be sure to install your freezer on a floor strong enough
to support it when it is fully loaded.
'RQRWLQVWDOOWKHIUHH]HULQDORFDWLRQH[SRVHGWRUDLQ
water or direct sunlight.
The freezer must be solidly positioned on the floor if it is
to function at its best. Your freezer has adjustable leveling
legs that can be turned to be solidly positioned wherever
the floor is too uneven. If the place selected for the freezer
is damp or moist, place 2 x 4’s (51 mm x 102 mm) under
its entire length to assure adequate support.
Clearances
On all models, allow 3" (76 mm) on top, back and sides
for proper air circulation. Allow sufficient space on top for
lid to open.
Lid Removal
CAUTION
LIFTING HAZARD
7KHOLGLVKHDY\8VHERWKKDQGVWRVHFXUHWKHOLGEHIRUH
lifting.
CAUTION
HINGE SPRING UNDER TENSION
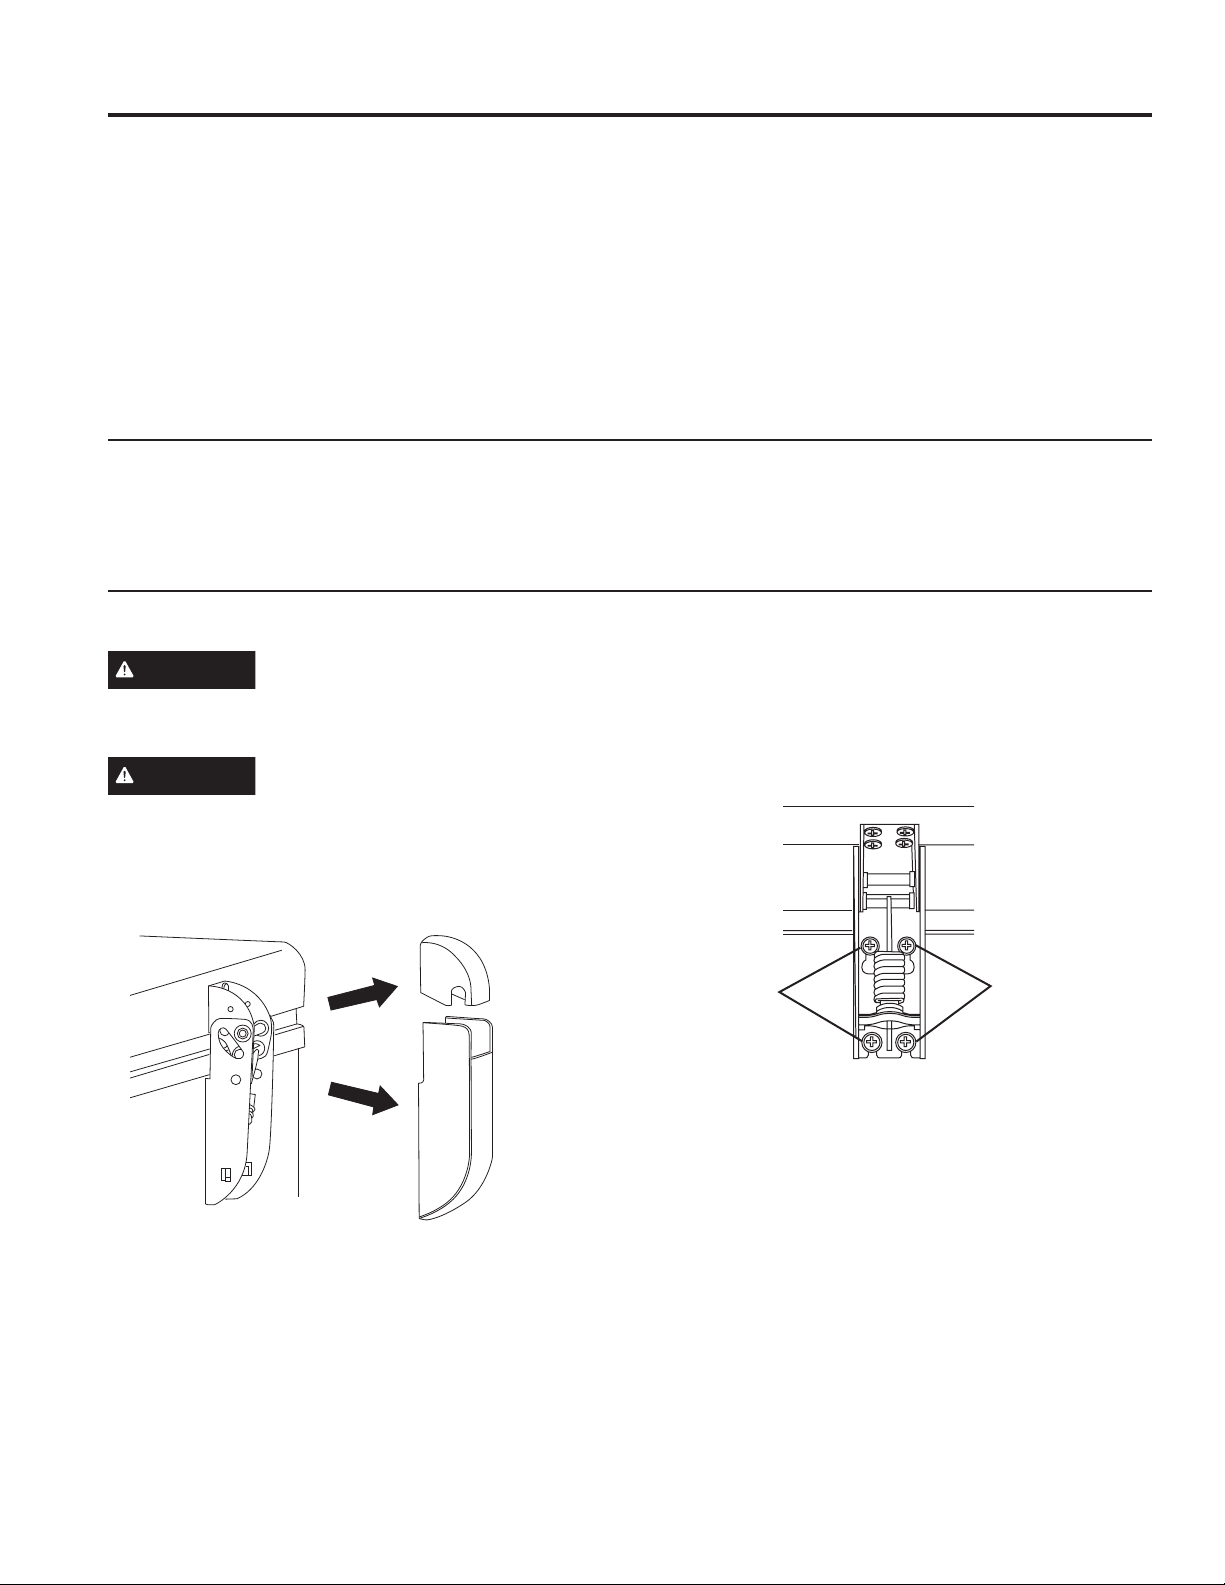
If it is necessary to remove the lid, follow these steps:
1. Remove each upper hinge cover by grasping on the
sides and pulling upwards. Remove each lower hinge
cover by grasping on the sides and pulling down.
2. Open the lid to the maximum position. (The hinges are
loosest at this position.)
3. Loosen, do not remove, the 4 screws from the lower
part of the hinge that are mounted to the cabinet.
4. Raise/lift the lid until the screws align with the larger
slotted openings in the bottom of the hinge. Each
hinge is still attached to the lid with 4 screws.
5. To reinstall lid follow steps in reverse. Tighten all
hinge screws but avoid over-tightening to prevent
stripping. Reinstall hinge covers.
8SSHU+LQJH
Cover
Lower Hinge
Cover
Hinge screws to
be loosened
Hinge screws
to be loosened
Loading ...
Loading ...
Loading ...