Loading ...
Loading ...
Loading ...

49
* Dependent on model
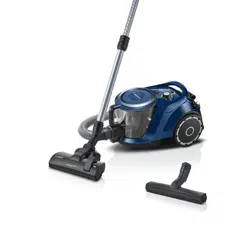
Vacuuming with accessories
Figure
12*
Attach the nozzles to the suction pipe or handle as re-
quired:
a) Hard-floor nozzle*
- with clip-in edge-cleaning bristles:
of hard floor coverings (tiles, parquet, etc.)
- without edge-cleaning bristles:
For cleaning dirt in gaps and cracks
The edge-cleaning bristles can be removed by
pushing the two catches in the direction of the ar-
rows.
b) Crevice nozzle* for vacuuming crevices and corners,
etc.
c) Upholstery nozzle* for vacuuming upholstered furni-
ture, curtains, etc.
After each use, reinsert the combination nozzle into
the accessories holder.
d) Furniture brush
For cleaning window frames, cabinets, mouldings,
etc.
e) Mattress nozzle*
For cleaning mattresses, upholstery, etc.
Drill dust nozzle
Figure
13*
Fasten the drill dust nozzle onto the handle and po-
sition it on the wall so that the drill hole opening on
the nozzle is placed directly over where the hole is
to be drilled.
Set the appliance to the lowest power level and then
switch it on.
The drill dust nozzle is held in the required position
by suction. Depending on the condition of the wall to
be drilled, you may need to adjust to a higher power
setting to ensure that the drill dust nozzle remains
in place.
During drilling, the fine dust is automatically vacu-
umed up.
Figure
14
You can use the parking aid on the side of the appliance
if you want to stop vacuuming for a short time.
After switching off the appliance, slide the hook on
the floor nozzle into the parking aid.
Figure
15
When vacuuming stairs, the appliance must be positi-
oned at the bottom of the stairs. If it does not reach
far enough, the appliance can also be carried using the
carrying handle.After vacuuming
Figure
16
a) Switch off the appliance.
Unplug the mains plug.
b) Briefly pull on the mains cable and then let go. (The
mains cable retracts automatically.)
Figure
17*
Release the telescopic tube by moving the sliding
switch or adjusting sleeve in the direction of the ar-
row, and slide one tube into the other.
Figure
18
To store/transport the appliance, you can use the sto-
rage aid on the underside of the appliance.
a) Prop up the appliance on the hose or dust container
handle.
b) Slide the hook on the floor nozzle into the storage
aid.
In order to save space and to facilitate transport,
wind the suction hose around the appliance and the
telescopic tube.
c) The appliance can also be transported using the
handle on the dust container.
Disassembly
Figure
19
To remove the suction hose, press the two catches
together and pull out the hose from the appliance's
air intake opening.
Figure
20*
a) Telescopic tube without accessory connection:
To release the connection, turn the handle slightly
and pull it out of the telescopic tool.
b) Telescopic tube with accessory connection:
To release the connection, press the locking collar
on the telescopic tube and and pull out the handle.
Figure
21*
a) Nozzle without accessory connection:
To release the connection, turn the telescopic tube
slightly and pull it out of the floor nozzle.
b) Nozzle with accessory connection:
To release the connection, press the locking collar
and pull the telescopic tube out of the floor nozzle.
Cleaning and maintenance
Emptying the dust container
Figure
22
In order to achieve the best possible vacuuming results,
the dust container should be emptied after every use
or, at the latest, when dust in the dust container has
reached the marking at any point.
The display lights up red (SmartSensor Control) if the
dust container has to be emptied.
Figure
24
!
Caution
The dust container can only be removed when the
appliance is in a horizontal position. Therefore,
place the appliance on the floor to unlock the re-
lease button.
Figure
23
a) Hold the dust container at the handle and press on
the release button to remove it from the appliance.
b) Release the lid from the dust container by pulling on
the tab, and open the dust container.
c) Remove the lid from the dust container and empty
the dust container.
d) Check the fluff filter and rinse it under running wa-
ter, if necessary. Allow to dry before putting it back
in the dust container. Close and lock the lid.
Loading ...
Loading ...
Loading ...
