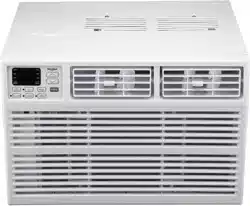
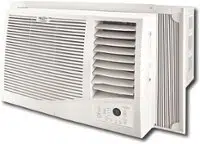
Owner 's Manual for Air Conditioner
USING YOUR AIR CONDITIONER
Operating your air conditioner properly helps you to obtain the best possible results.
This section explains proper air conditioner operation.
IMPORTANT:
■ If you turn off the air conditioner, wait at least 3 minutes before turning it back on. This prevents the air conditioner from blowing a fuse or tripping a circuit breaker.
■ Do not try to operate your air conditioner in the Cool mode when outside temperature is below 65°F (18°C). The inside evaporator coil will freeze up, and the air conditioner will not operate properly.
NOTE: In the event of a power failure, your air conditioner will operate at the previous settings when the power is restored.
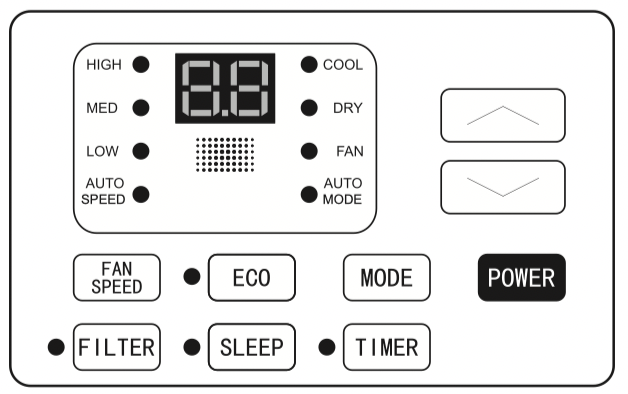
Turning on the Air Conditioner
1. Press POWER to turn on air conditioner.
2. Press POWER again to turn off the air conditioner.

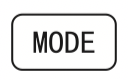
Selecting the Mode
1. Press MODE to cycle through modes.
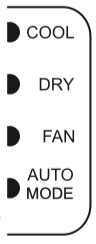
2. Choose Cool, Dry, or Fan.
■ Cool—Cools the room and reduces air humidity. Press MODE to activate the cooling function. Press the up or down arrow button to adjust the temperature.
■ Dry Mode—Reduces the humidity of the air. Press MODE to set the Dry mode. An automatic function of alternating cooling cycles and air fan is activated.
■ Fan—Only the fan runs. Press MODE to set the SPEED Fan mode. Press FAN SPEED to select High, Med, and Low. The remote control stores the speed set in the previous mode of operation. In Auto mode, the unit automatically chooses the fan speed and the mode of operation (Cool, Dry, or Fan).
NOTE: After 5 seconds, display will show the current room temperature.
Features
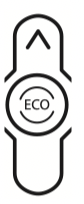
■ Eco—Conserves energy by turning off compressor when room reaches desired temperature. The fan motor will run for 10 minutes, stop for 20 seconds, then run again. The compressor will turn back on when the room temperature rises above the set temperature. Press ECO to turn Eco feature on and off. When the unit is in Eco mode, the light will turn on.
■ Sleep—Automatically adjusts the temperature and fan speed to make the room more comfortable during the night. Press and hold the SLEEP button for 10 seconds until the sleep light turns on. All of the left lights will turn off. The set temperature will automatically raise by 1.8°F (1°C) every 30-60 minutes. At most, the temperature will change six times until the temperature reaches 82°F (28°C). Running time depends upon the set temperature.
NOTE: After 5 seconds, display will show the current room temperature.
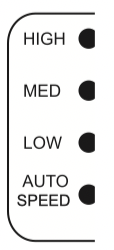
Selecting the Fan Speed
1. Press FAN until the LED indicator for the desired setting is lit.
2. Choose Low, Med, or High.
■ Low—Low fan speed
■ Med—Normal fan speed
■ High—Maximum fan speed
NOTES:
■ Auto fan speed and temperature cannot be selected in Fan Only mode.
■ In Eco and Sleep modes, Auto fan speed is selected automatically.
■ After 5 seconds, the display will show the current room temperature.
Adjusting the Temperature
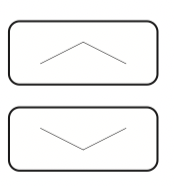
Press the up arrow button to increase the set temperature.
Press the down arrow button to decrease the set temperature.
NOTE: After 5 seconds, the display on the air conditioner control panel will show the current room temperature.
Using the Timer
Delayed Shutoff:
Use the timer to set the air conditioner to turn off automatically after a 0.5- to 24-hour delay (the air conditioner must be on):
1. Press TIMER. The display will show remaining time before the air conditioner will turn off.
2. Press the up or down arrow button to change the delayed shut-off time from 0.5 to 24 hours. The time can be set in 0.5-hour increments below 10 hours and 1-hour increments for 10 hours or above.
3. Press TIMER again to confirm setting.
NOTE: The Set light will turn on while setting.

Delayed Start:
You can also set the air conditioner to turn on automatically after a 0.5- to 24-hour delay.
NOTE: After the set delay, the air conditioner will turn on with the previous settings. Change the mode, fan speed, and/or temperature before setting the timer, if desired.
1. Turn off the air conditioner.
2. Press TIMER. Set the temperature by pressing the up or down arrow button.
3. Press TIMER a second time to set the rest time. Press the up or down arrow button to change the delay time from 0.5 to 24 hours, then press TIMER again.
4. Press TIMER again while the time remaining is shown on the display.
To Cancel Timer:
After the timer has been set, press TIMER.
Changing Air Direction
Use tab to adjust air direction
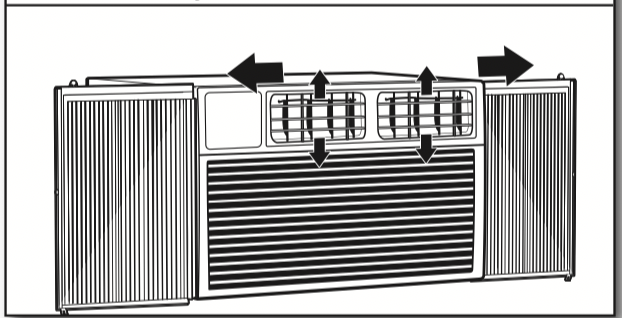
Use the thumb wheel on the vent louvers to adjust the air direction left or right.
Normal Operating Sounds
When your air conditioner is operating normally, you may hear sounds such as:
■ Droplets of water hitting the condenser, causing a pinging or clicking sound.The water droplets help cool the condenser.
■ Air movement from the fan.
■ Clicks from the thermostat cycle.
■ Vibrations or noise due to poor wall or window construction.
■ A high-pitched hum or pulsating noise caused by the modern high-efficiency compressor cycling on and off.
■ Water will collect in the base pan during rain or days of high humidity. The water may overflow and drip from the outside part of the unit.
Clean Filter Reminder
To help maximize energy efficiency, this air conditioner features a Clear Filter reminder. After 500 hours of operation, FILTER will illuminate as a reminder that it is time to clean the filter. Once the light is illuminated, it can be turned off by pressing the FILTER button. See the “Air Conditioner Care” section for instructions on how to clean the filter.

Using the Remote Control
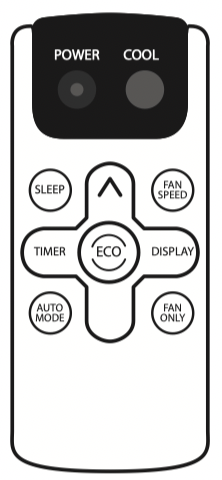
Power
1. Press POWER to turn on air conditioner.
2. Press POWER again to turn off the air conditioner.
Cool
Press COOL to enter Cool mode.

Fan Speed
1. Press FAN SPEED until you see the bar LED on the air TIMER SLEEP conditioner control panel display for the desired setting. SLEEP
2. Choose Low, Medium, or High.

NOTES:
■ Auto fan speed and Temperature cannot be selected in AUTO mode. MODE
■ In Energy Saver (on some models) and Cool modes, speed is selected automatically.
Eco
■ Conserves energy by turning off compressor when room reaches desired temperature. The fan motor will run for 10 minutes, stop for 20 seconds, then run again. The compressor will turn back on when the room temperature rises above the set temperature. Press ECO to turn Eco feature on and off. When the unit is in Eco mode, the light will turn on.

Adjusting Temperature
Press the up arrow button to increase the set temperature. Press the down button to decrease the set temperature.
NOTE: After 5 seconds, the display on the air conditioner control panel will show the current room temperature.
Sleep
Automatically adjusts the temperature and fan speed to make the room more comfortable during the night. Press and hold the SLEEP button for 10 seconds until the Sleep light turns on. All of the left lights will turn off. The set TIMER temperature will automatically raise by 1.8°F (1˚C) every 30-60 minutes. At most, the temperature will change six times until the AUTO temperature reaches 82°F (28°C). Running time depends upon MODE the set temperature.

Timer
Delayed Shutoff:
Use the timer to set the air conditioner to turn off automatically SLEEP after a 0.5- to 24-hour delay (the air conditioner must be on):
1. Press TIMER. The display will show remaining time before the air conditioner will turn off.
2. Press the up or down arrow button to change the delayed shut-off time from 0.5 to 24 hours. The time AUTO MODE can be set in 0.5-hour increments below 10 hours and 1-hour increments for 10 hours or above.
3. Press TIMER again to confirm setting.

NOTE: The Set light will turn on while setting.
Delayed Start:
You can also set the air conditioner to turn on automatically after a 0.5- to 24-hour delay.
NOTE: After the set delay, the air conditioner will turn on with the previous settings. Change the mode, fan speed, and/or temperature before setting the timer, if desired.
1. Turn off the air conditioner.
2. Press TIMER. Set the temperature by pressing the up or down COOL arrow button. POWER
3. Press TIMER a second time to set the rest time. Press the up or down arrow button to change the delay time from 0.5 to 24 hours, then press TIMER again.
4. Press TIMER again while the time remaining is shown on the display.
To Cancel Timer:
After the timer has been set, press TIMER.
Auto:
Press AUTO MODE to enter into Auto mode. In this mode, the fan speed and temperature are set automatically according to the room temperature as tested by the indoor temperature sensor.

Display:
Press DISPLAY to switch on/off all lights or the LED display.

Fan only:
Press the Fan Only button to enter Fan Only mode.

Replacing the battery
Remove and replace batteries
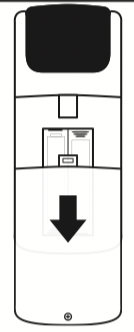
Use a small Phillips screwdriver to loosen the battery cover screw. Slide the battery cover down with two thumbs to remove. Remove and properly dispose of old batteries, then replace with two new AAA batteries. Replace the battery cover and tighten the screw.
AIR CONDITIONER CARE
Your new air conditioner is designed to give you many years of dependable service. This section tells you how to clean and care for your air conditioner properly.
Air Filter Removal—Top Insert
On some models, the air filter is located behind the intake grille of air conditioner.
1. Removing the intake grille
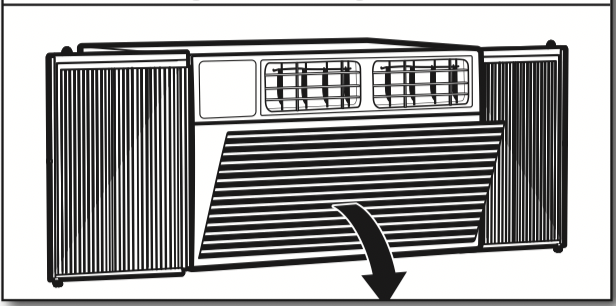
Turn off the air conditioner.
Remove the air filter by pressing down on the tabs on the air intake grille and pulling the grille away from the air conditioner.
2. Removing the air filter
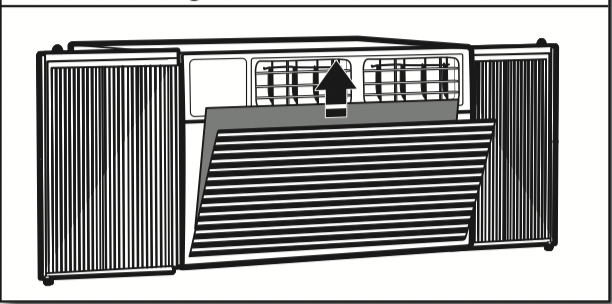
Remove the filter from the grille by lifting to release the slotted tabs on the top and bottom of the grille.
Reinstalling the air filter:
1. Reattach the air filter to the air intake grille.
2. Insert the air intake grille into the slots on the air conditioner and snap into place.
Air Filter Removal—Side Insert
On some models, the air filter slides out the side of the intake grille.
1. Removing the air filter
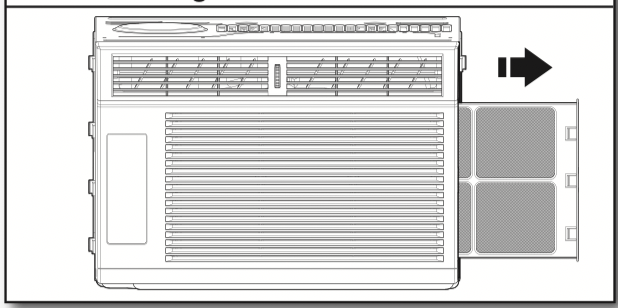
Remove the filter by grasping the tab on the filter and pulling it out of the grille to the side.
Reinstalling the air filter:
1. Slide the filter back into the grille.
Cleaning the Air Filter
The air filter is removable for easy cleaning. A clean filter helps remove dust, lint, and other particles from the air and is important for best cooling and operating efficiency. Check the filter at least once per month to see whether it needs cleaning.
NOTE: Do not operate the air conditioner without the filter in place. Doing so will degrade the unit performance over time. Use a vacuum cleaner to clean air filter. If the air filter is very dirty, wash it in warm water with a mild detergent.
NOTE: Do not wash the air filter in the dishwasher or use any chemical cleaners; it may damage the filter. Air dry the air filter completely before replacing to ensure maximum efficiency.
Cleaning the Front Panel
1. Unplug the air conditioner to prevent shock or a fire hazard.
2. Wipe the front panel with a soft, damp cloth.
3. Air dry the front panel completely.
Repairing Paint Damage
Check once or twice a year for paint damage. This is very important, especially in areas near saltwater or where rust is a problem. If needed, touch up with a good grade enamel paint.
Winter Storage
1. Remove the air conditioner according to the installation instructions.
2. Cover the air conditioner with plastic or place it back into the original box.
TROUBLESHOOTING
Before calling for service, try the suggestions below to see whether you can solve your problem without outside help.
WARNING Electrical Shock Hazard
Plug into a grounded 3 prong outlet.
Do not remove ground prong.
Do not use an adapter.
Do not use an extension cord.
Failure to follow these instructions can result in death, fire, or electrical shock.
|
PROBLEM
|
POSSIBLE CAUSES
|
RECOMMENDED SOLUTIONS
|
|
The Air Conditioner Will Not Start
|
The air conditioner is unplugged.
|
Make sure the power supply cord is plugged into a grounded 3 prong outlet.
|
|
The fuse is blown/circuit breaker is tripped.
|
Check the house fuse/circuit breaker box and replace the fuse or reset the breaker.
|
|
Power failure
|
The unit will automatically restart when power is restored. There is a protective time delay (approximately 3 minutes) to prevent tripping of the compressor overload. The unit may not start normal cooling for 3 minutes after it is turned back on.
|
|
The power cord reset button is tripped.
|
Press the reset button located on the power cord plug. If the reset button will not stay engaged, discontinue use of the air conditioner and contact a qualified service technician.
|
|
The Air Conditioner Is Not Cooling Properly
|
Airflow is restricted.
|
Make sure there are no curtains, blinds, or furniture blocking the front of the air conditioner.
|
|
The temperature control is not set correctly.
|
Lower the set thermostat temperature.
|
|
The air filter is dirty.
|
Clean the filter. See the “Air Conditioner Care” section.
|
|
The room is too warm.
|
Allow time for the room to cool down after turning on the air conditioner.
|
|
Cold air is escaping.
|
Close all open doors and/or windows where warm air may be entering.
|
|
The cooling coils are frozen.
|
See “The Air Conditioner Is Freezing Up” below.
|
|
The Air Conditioner Is Freezing Up
|
Ice is blocking the airflow.
|
Turn off the unit and allow it to thaw until the ice has melted, then operate on a higher fan speed. If this continues to occur, contact customer service for additional help.
|
|
The Remote Control Is Not Working
|
Batteries are inserted incorrectly.
|
Check that the batteries are inserted in the correct direction.
|
|
Batteries are dead.
|
Replace the batteries and dispose of them in a responsible manner.
|
|
PROBLEM
|
POSSIBLE CAUSES
|
RECOMMENDED SOLUTIONS
|
|
Water Is Dripping From the Unit on the Outdoor Side
|
The weather is hot and humid.
|
This is normal during periods of high humidity.
NOTE: Do not drill a hole into the bottom of the metal base pan; doing so will reduce cooling performance.
|
|
Water Is Dripping Inside the Room
|
The air conditioner is not properly leveled.
|
The air conditioner should slope slightly downward toward the outside. Level the air conditioner to provide a downward slope toward the outside to ensure proper drainage. See the “Installation Instructions” section.
NOTE: Do not drill a hole into the bottom of the metal base pan; doing so will reduce cooling performance.
|
|
Water Collects in the Base Pan
|
Moisture removed from the air is collecting in the base pan.
|
This is normal. Water that collects in the base pan will evaporate to the outside air. This helps with the unit's cooling process.
NOTE: Do not drill a hole into the bottom of the metal base pan; doing so will reduce cooling performance.
|