Loading ...
Loading ...
Loading ...
WARNING!
● The remote control contains a Li-ion battery. Follow all instructions in this document and on the device
label. Otherwise you risk personal injury or property damage due to fire, explosion, electric shock, and
other dangers.
● Not user serviceable. To replace the battery, contact Segway (page 21).
● Only use a Ninebot or Segway approved charge cable. Please use it properly within the rated range.
● Always use a power supply that meets SELV and IEC60950-1 Limited Power Source requirements.
06 07
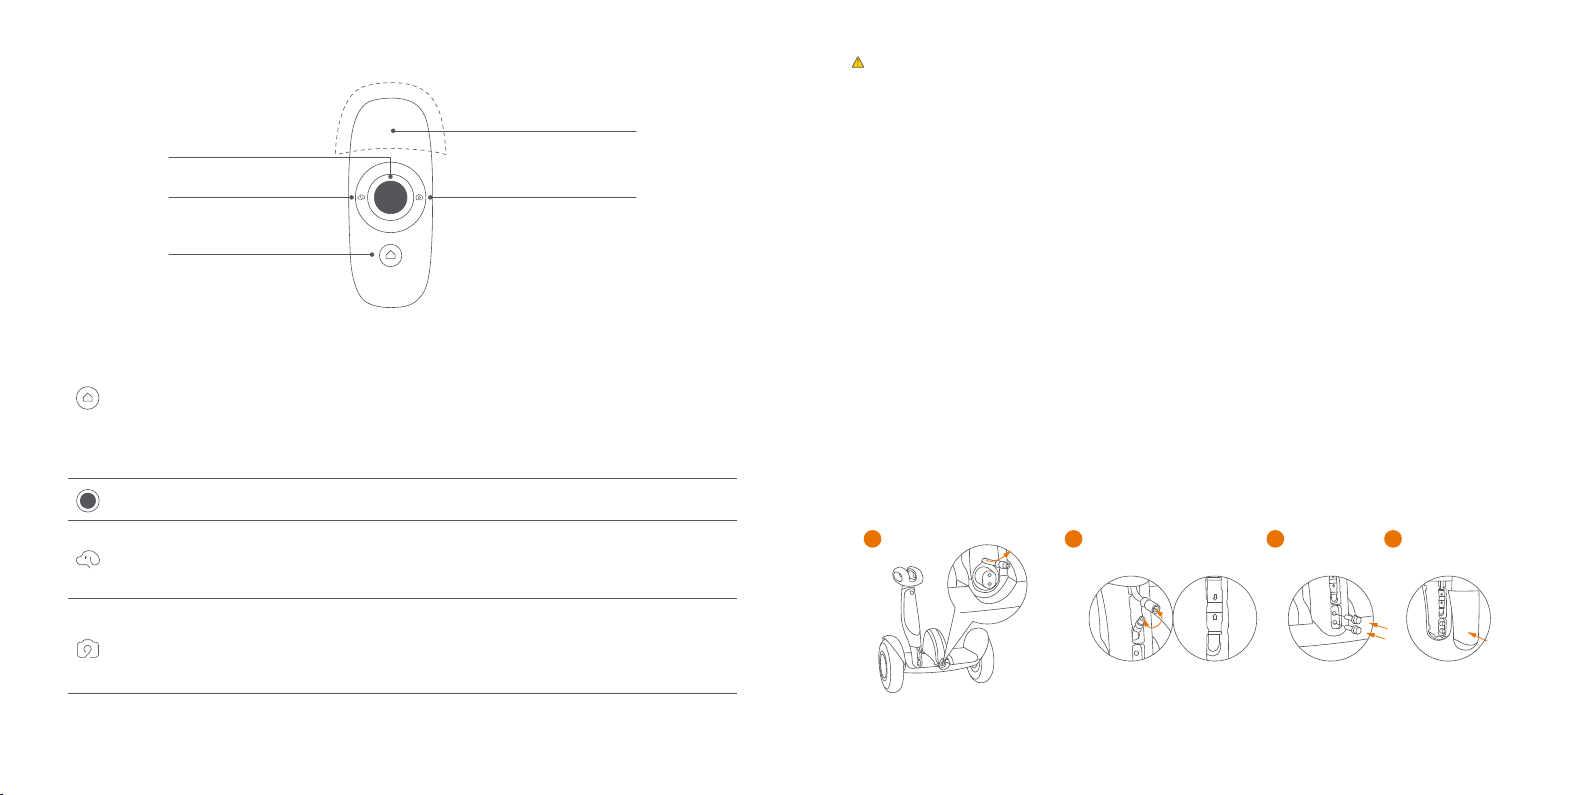
Remote Control
When using the remote control, do not shield the antenna area; do not cover the antenna area with any part of your body.
Turn off the remote control and stow it in the storage compartment when not in use. Please note that the remote control
cannot control the movement of your miniPLUS when in Riding Mode.
With the App, you can customize what this button does. By default it enables/disables Lock Mode.
When a camera is detected, short press the Camera Mode button to take a photo. Long press
(1 sec) to start recording video, and then short press to stop recording. The button blinks blue
while recording.
Camera
Follow
Home
Power switch. Short press the Home button to power on the remote control. Long press to turn it off.
The remote control will turn off when idle for two minutes.
Home mode. Short press the Home button to tell your miniPLUS to hold position.
Remote control battery indicator light.
> 20% power Blue Charging Red, Breathing
< 20% power Red Fully Charged Blue
< 10% power Red, Blinking
< 5% power The remote control powers off automatically.
1)
2)
3)
Move the joystick to turn on Remote Control Mode. Use the App to adjust the maximum vehicle
speed.
Joystick
1)
1)
2)
Short press the Follow Mode button to enable/disable Follow Mode. Use the App to adjust the
following speed and distance (from vehicle to controller).
Long press (1 sec) the Follow Mode Button to use the joystick to control the pitch and yaw
position of the attached camera.
1)
2)
4 Assembling Your Segway miniPLUS
Ensure the cables are firmly connected.
1. Slide the steering bar onto to the mounting bracket. Route the cable through the hole.
2. Align the tab on one connector with the notch on the other. Connect the cables.
3. Install the two M5 screws. Tighten securely with the included hex wrench.
4. Power on the unit for self check to ensure the cables are connected properly. The miniPLUS beeps if
the cable is not installed correctly. Press the cap onto the steering bar until it snaps in place.
1
2
3
4
Antenna Area
Camera Mode
(Customizable)
Follow Mode
Joystick
Home
Refer to the camera instructions for more information.
Loading ...
Loading ...
Loading ...