Loading ...
Loading ...
Loading ...
To Slice
1. Plug cord into polarized two pronged two wire 120V, AC
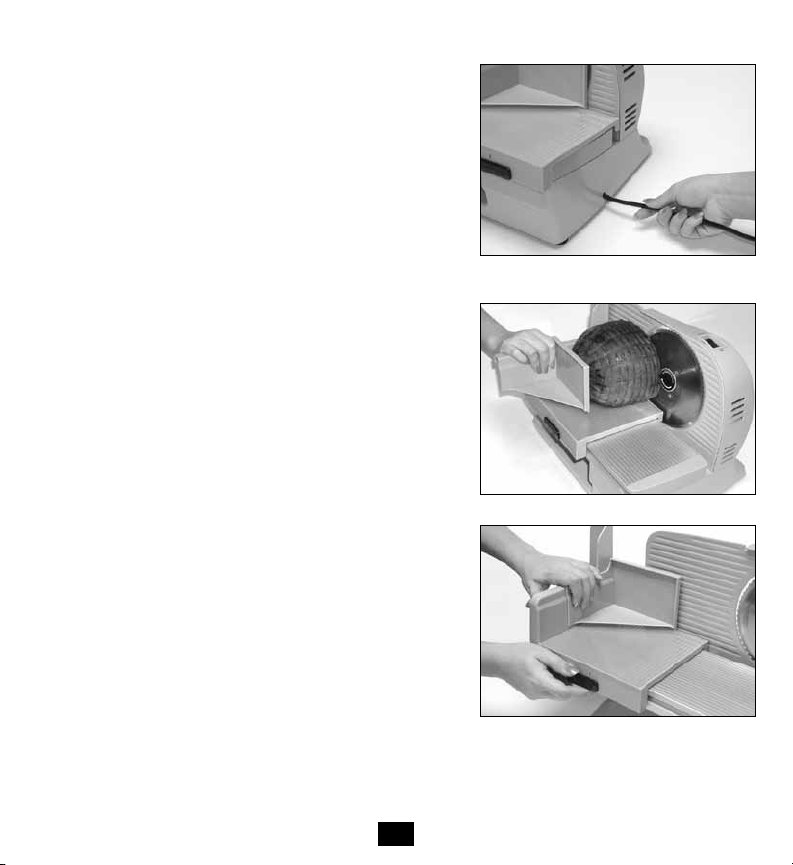
outlet. Push excess cord into the cord storage compartment
(Fig. 3).
Cord Safety: A short power cord is provided with this appliance
to reduce the possibility of someone becoming entangled in
it or tripping over it. While EdgeCraft does not recommend it,
extension cords may be used. Use only 2-wire extension
cords with two prong polarized plugs. Extension cords should
have an electrical rating not less than the rating on the
electrical appliance.
Do not use damaged extension cords. Keep cord away from
heat, sharp edges and water.
2. Place food in the corner of the carriage and pull the
carriage toward you. Hold food pusher with your right hand,
keeping thumb protected behind thumb guard (Fig. 4).
3. Press down on the “ON” side of the on/off switch.
4. To slice, slide the carriage toward the blade. Move the
carriage back and forth steadily. Using the food pusher,
keep food pressed against the thickness guide plate for
even slices. For best results, do not apply excess pressure
on thickness guide plate during slicing. When finished
slicing, turn off motor, unplug slicer, set the slice thickness
to “0” (not below “0”) and secure the carriage in the “Lock”
position (Fig. 1).
Cleaning
Unplug the slicer cord from outlet
Slicer parts in contact with food can be removed for
thorough cleaning. Wash with a soft cloth or sponge and
a mild soap or spray cleaner. Rinse and dry.
Never use steel wool or scouring powder on any part of slicer.
DO NOT IMMERSE SLICER IN WATER. DO NOT WASH ANY
PART OF THE SLICER IN DISHWASHER.
Food carriage
To remove the carriage, set the thickness control knob to 0, slide the carriage control button to the “Remove”
position (Fig. 5). Slide carriage away from blade until it comes off its track. Clean carriage guide and lubricate
6
Figure 3. Push excess cord into the cord
storage compartment.
Figure 4. Hand on food pusher, slicing.
Figure 5. Removing the food carriage.
Loading ...
Loading ...