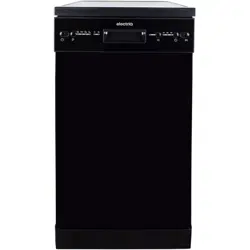
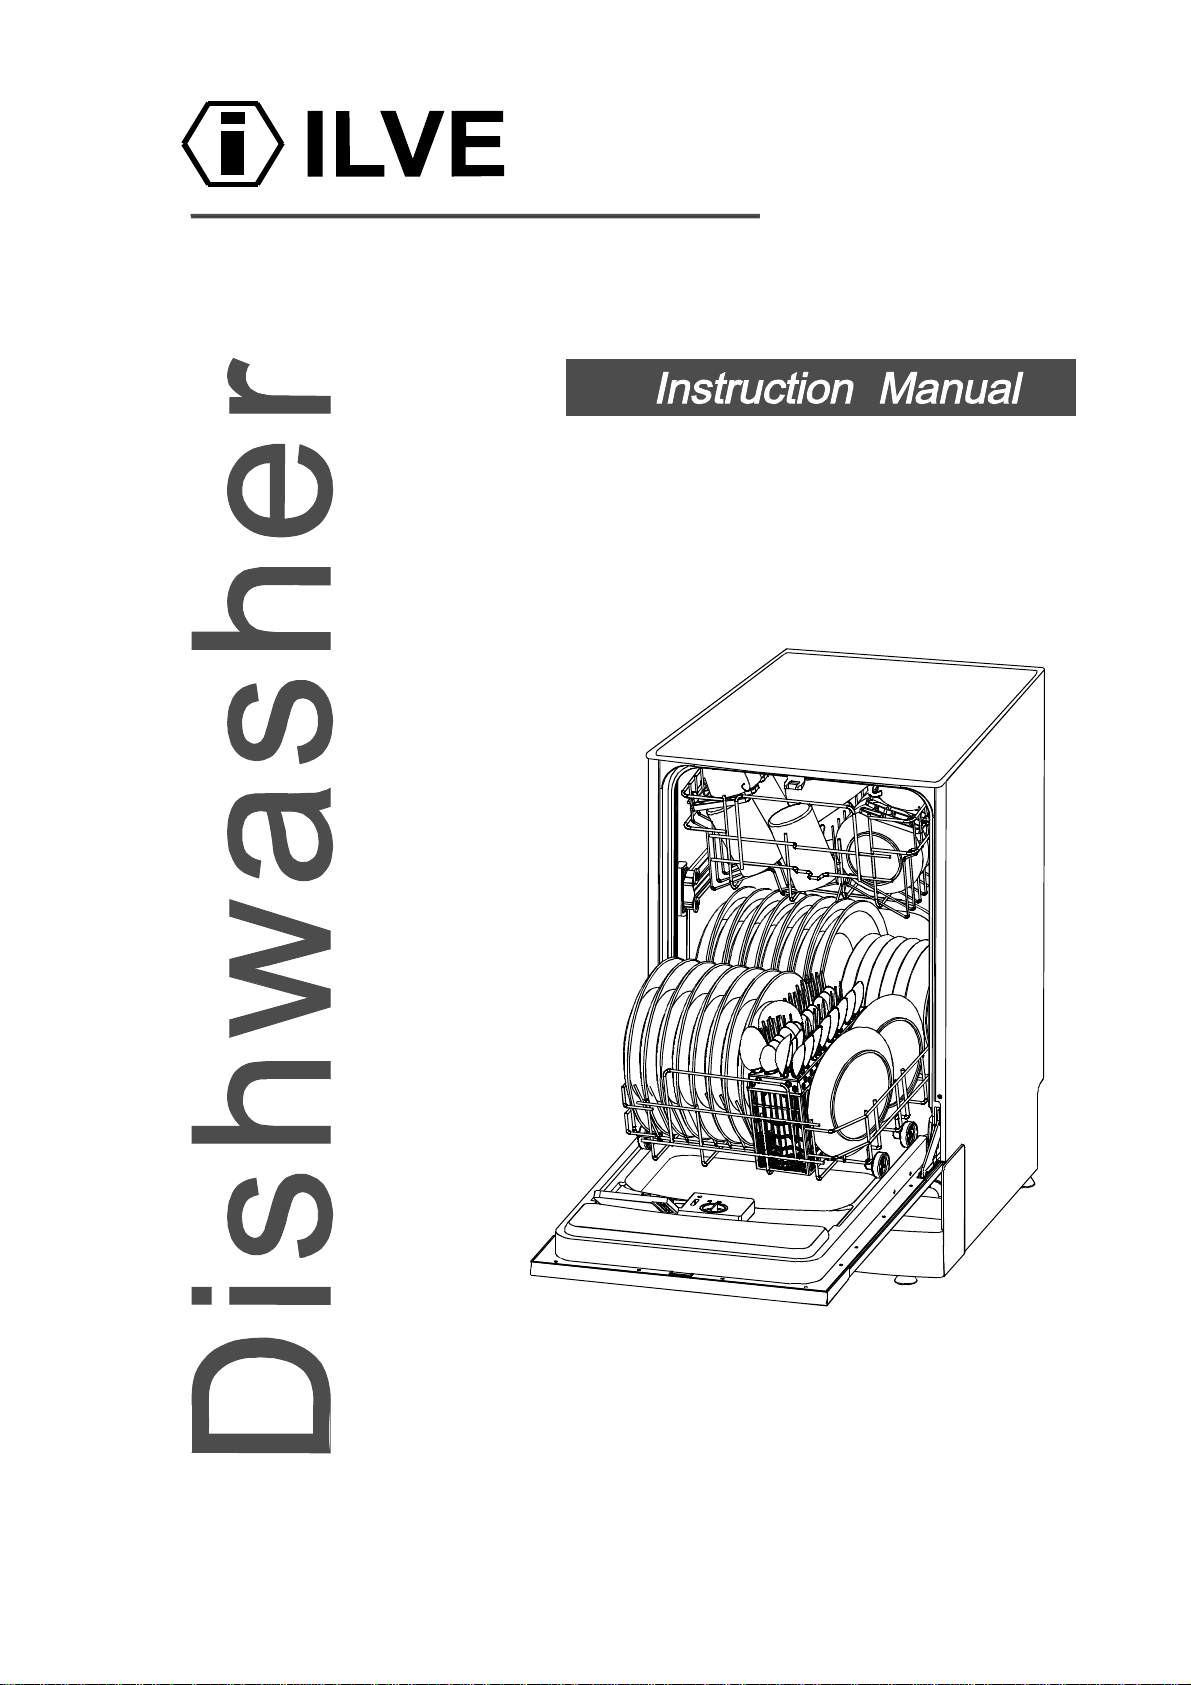
IVDBI458
Compartment
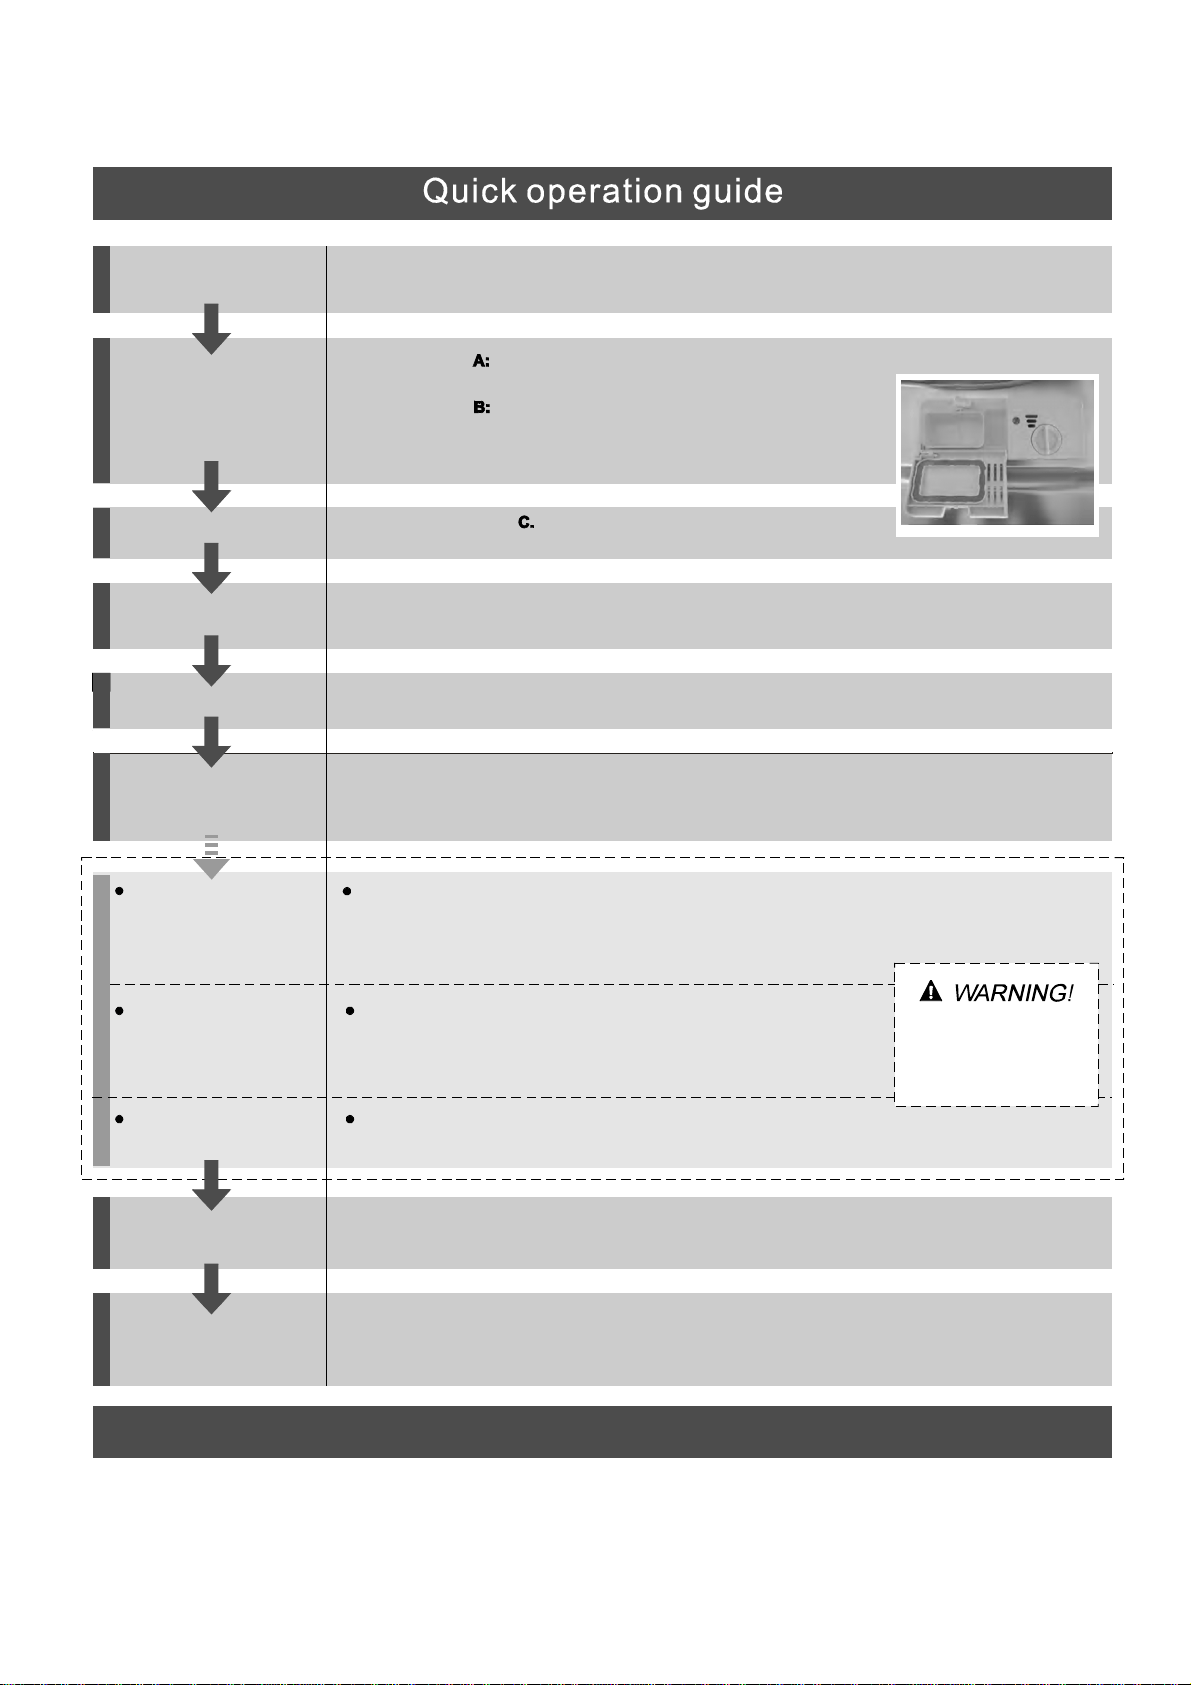
Fill main-wash detergent.
Compartment
Fill pre-wash detergent.
(Follow the user instr uctions!)
Mechanical indicator
Check the rinse aid level
Load the baskets
Select a programme
Close the door, turn on the water tap . The machine will start working
after a bout 10 seconds.
Running the dishwasher
Switch off the applia nce
Turn off the water tap,
unload the baskets
Fill the detergent dispenser
Warning: wait a few m inutes (about 15 minutes) before unload ing the dishwasher to avoid handling
the dishes and utensils while they are still hot an d more susceptible to break.
They will also dry better. Unload the appliance, starting from the lower basket.
Changing theprogramme
Add forgottendishes in the
dishwasher.
Scrape off any large amount of leftover food. Soften remnants of burnt foodin pans,
then load the baskets. Refer to the dishwasher loading instruct ions.
Press the Programme button until the selected programme lights up.
( See the section entitled Operation instruction )“”
When the working cycle has finished, the buzzer of the dishwasher will sound 8 times, th e n stop.
Turn off the appliance using the ON/OFF button.
If the appliance is switched
off during a wash cycle.
Op en t he do or caref ull y.
Hotst eammay esc ape
when thedoorisopened!
If the appliance is switched off during a wash cycle, when switched
on again, please re-select the washing cycle and operate the dishwasher
according to the original Power-on state.
Switch on the appliance Press the On/Off button to switch on the appliance, Open the door.
1.Open the doo r a litt le to st o p the dishwasher.
2.After the spray arms stop working, you can ope n the door completely.
3.Add the forgotten dishes.
4.Close the door, the dishw asher w ill start running again after 10 seconds.
Electricindicator on control pane l (if provided).
For detailedoperating methodread thecorresponding contenton the instruction manual.
1. A running cycle can o nlybe modified if it has been running fo r a short time. O therwise the detergent
m ay have already been released a nd the water already drained. If this is the case, the detergent
dispenser must be refilled.
2. Press the running program button more than 3 second to cancel to cancel the ru nning programme .
3. Select a new programme.
4. The dishwasher will r estart after10second.
A
B
C
To review the section on troubleshooting Tips
will help you to solve some common problems
by yourself .
The manufacturer, following a policy of constant
development and updating of the product, may
make modifications without giving prior notice.
If you can not solve the problems by yourself ,
please ask for the help of professional technicians.
Dishwasher Features............................ ........ ...3.
Attention before or after loading the Dishwasher
Baskets..........................................................6
Filtering System.............................................11
Caring for the Dishwasher...............................12
Loading the upper Basket.................................7
Loading the Lower Basket....................... .......8...
Cutlery Basket........................................... ..8...
Wash Cycle Table...........................................9
Turning on the Appliance................................9
Change the Programme...................... ...........10..
At the end of the Wash Cycle...................... .....10.
Before calling for service.................................21
Error codes...................................................22
Technical information.....................................23
Control Panel...................................................3
Water Connection...................................... .....20.
14
Please carefully read the installation instruction
.....................................................................
....14Aesthetic panel's dimensions and installation
Tension adjustment of the door spring .16..............
Connection of drain hoses................................... ....17.
Dishwasher installation steps...................... ....18.
Dear Customer,
Please carefully read this manual before using the
dishwasher, it will help you to use and maintain the
dishwasher properly.
Pass it on to any subsequent owner of the appliance.
This manual contains sections on safety Instructions,
Operating Instructions, Installation Instructions and
Troubleshooting Tips, etc.
Keep it as a refer in the later days.
This appliance is intended to be used in household
and similar applications such as:
-staff kitchen areas in shops, offices and other
working environments;
-farm houses;
-by clients in hotels, motels and other residential
type environments;
-bed and breakfast type environments.

This appliance must be grounded. In the event of a
malfunction or breakdown, grounding will reduce
the risk of anelectric shock by providing a path of
least resistance of electric current. This appliance
is equipped with a cord having an equipment-
grounding co nductor and a grounding plug.
The plug must be plugged into an appropriate outlet
that is installed and grounded in accordance with
all local codes and ordinances.
Improper connection of the equipment-grounding
conductor can result in the risk of an electric shock.
Check with a qualified electrician or service
representative if you are in doubt whether the
appliance is properly grounded. Do not modify the
plug provided with the appliance; If it does not fit
the outlet. Have a proper outlet installed by a
qualified electrician.
Keep children away from detergent and rinse aid, keep
child away fromthe open door of the dishwasher,
there could still be some detergent left inside.
ren
Do not abuse, sit on, or stand on the door or dish
rack of the dishwasher.
Do not touch the heat ing element during or
immediately after use.
(This instruction is only applicable to machines
with a visual heating element.)
Do not wash plastic items unless they are marked
dishwasher safe or the equivalent. For plastic items
n
ot so marked, che ck the manufacturer's
recommendations.
Us eo nly deter gent and rinse additiv es
design ed for an automatic dishwash er.
Ne ver u se s oap, l aundr yde terg ent, or h and
wa shin gdeterg en t in your dishwash er.Keep
these produ cts out ofth ere ach ofchi ld ren.
During installation, thepowersupply mustnot
be excessively ordangerouslybentorflattened.
Do not tamper with controls.
Do not operate your dishwasher unless all
enclosure panels are properly in place. Open
the door very carefully if the dishwasher is
operating, there is a risk of water squirting out.
Do not place any heavy objects the
door when it is open. The appliance could tip
forward.
on or stand on
When load in g ite ms to b e w ash e d:
1) Locatesharp itemssothat theyarenotlikely
todamagethedoorseal;
2 Warning: Kni ves and othe ru te nsil swi th
sh a rp p oin ts m u st be l oa de d i n t h e bas k et
w it h their poi ntsd own orp lace din a
horizontalposition.
)
When using your dishw asher, yo ushoul d
preve ntplast ic items from comin gint oco ntac t
wit ht hehe ating elem ent.(This instru ction i s onl y
applica ble to machines with a vi sualheat ing
ele ment.)
I fth es upply cord i sdam aged, it must be repl aced
by them anu facturer or itsse rvic eagent ora
si mi larly qual ifi ed person i n or de rt o a void a
hazar d.
Pl ease d is pos e of pack ing mat erials pr oper ly.
U se the dishwasher only for its intended function.
Remove the door to the washingcompartment when
removing an old dishwasher from service or discarding it.
Dishwasherdetergentsarestronglyalkaline, they
can be e xtre m ely dang erou s if s wa l lowe d.Avoi d
contact with skin and eyes an dke ep child ren awa y
from th e di shwasher w hen t he door is op en.
Check that the detergent comparment isempty
aft er com pletio no f the w ashcycle.
The app lian ceis to be co nne cted to t hewater
mainsusingnew hosesets andthatoldhose-sets
shoul d n ot be reused.
The maximumnumber of place settingstobe
was hed i s8 .
The maximumpermissibleinletwaterpressureis
1Mpa .
The minimumpermissibleinlet waterpressureis
0.04Mpa.
Children should be supervised to ensure that they do
not play with the appliance.
T his appliance is not intended for use by persons
(including children with reduced physical, sensory or
ment al capabilities, or lack of experience and
knowledge ,unless they have been given supervision
o r instruction concerning use of the a ppliance by a
person responsible for their safety.
)
When usin g your dishwas he r, fo l low the p rec aut ions lis ted below:
Th e doo rsh ould not be left o pen,
since th iscould incr ease the risk of trippi ng.

10 11
Ba ck Vie w
Front view
2
beforeusingit for the firsttime.
To g etthe best perform ance fromyourdi shwas her,read all operatinginstructions
MainFilter
Dete rg entD ispenser
Cup She lf
CutleryBasket
CoarseFilter
Rins e Ai d Disp enser
Inlet pipeconnector
Drainpipeconnector
Lower Baske t
SprayA rms
Up per Baske t
1
5
6
7
8
9
10
11
3
2
4
5 P rogramB utton:To select washing pro gra m
when pressthebutton.
6 D elay ed Start But ton: Pres sth isbu tton tos etth e
delayed hours for washing.There are4 choices.
2 Power Lig ht :To be on when th e ON/ OF FB utton is
Press eddown .
3 R inseAid Warning Light :To be on w hen the
rinseaiddispenser needstobe refilled.
1 ON/O FFBu tton: To tu rn on /off the po wer supply.
4 Pro gram i ndic ator li ght.
7 D elay ind icator: different i ndicator mea ns d iff erent d elay
time.
1
2
3
4
5
6
7
8
9
ON
OFF
2h 4h 6h 8h
Delay
3in1Inten. Heavy Rinse
Rapid
Normal
1
2
3
6
7
4
5
Bef o r e us ing your di s hwa she r fo r th e fi rst ti m e :
3
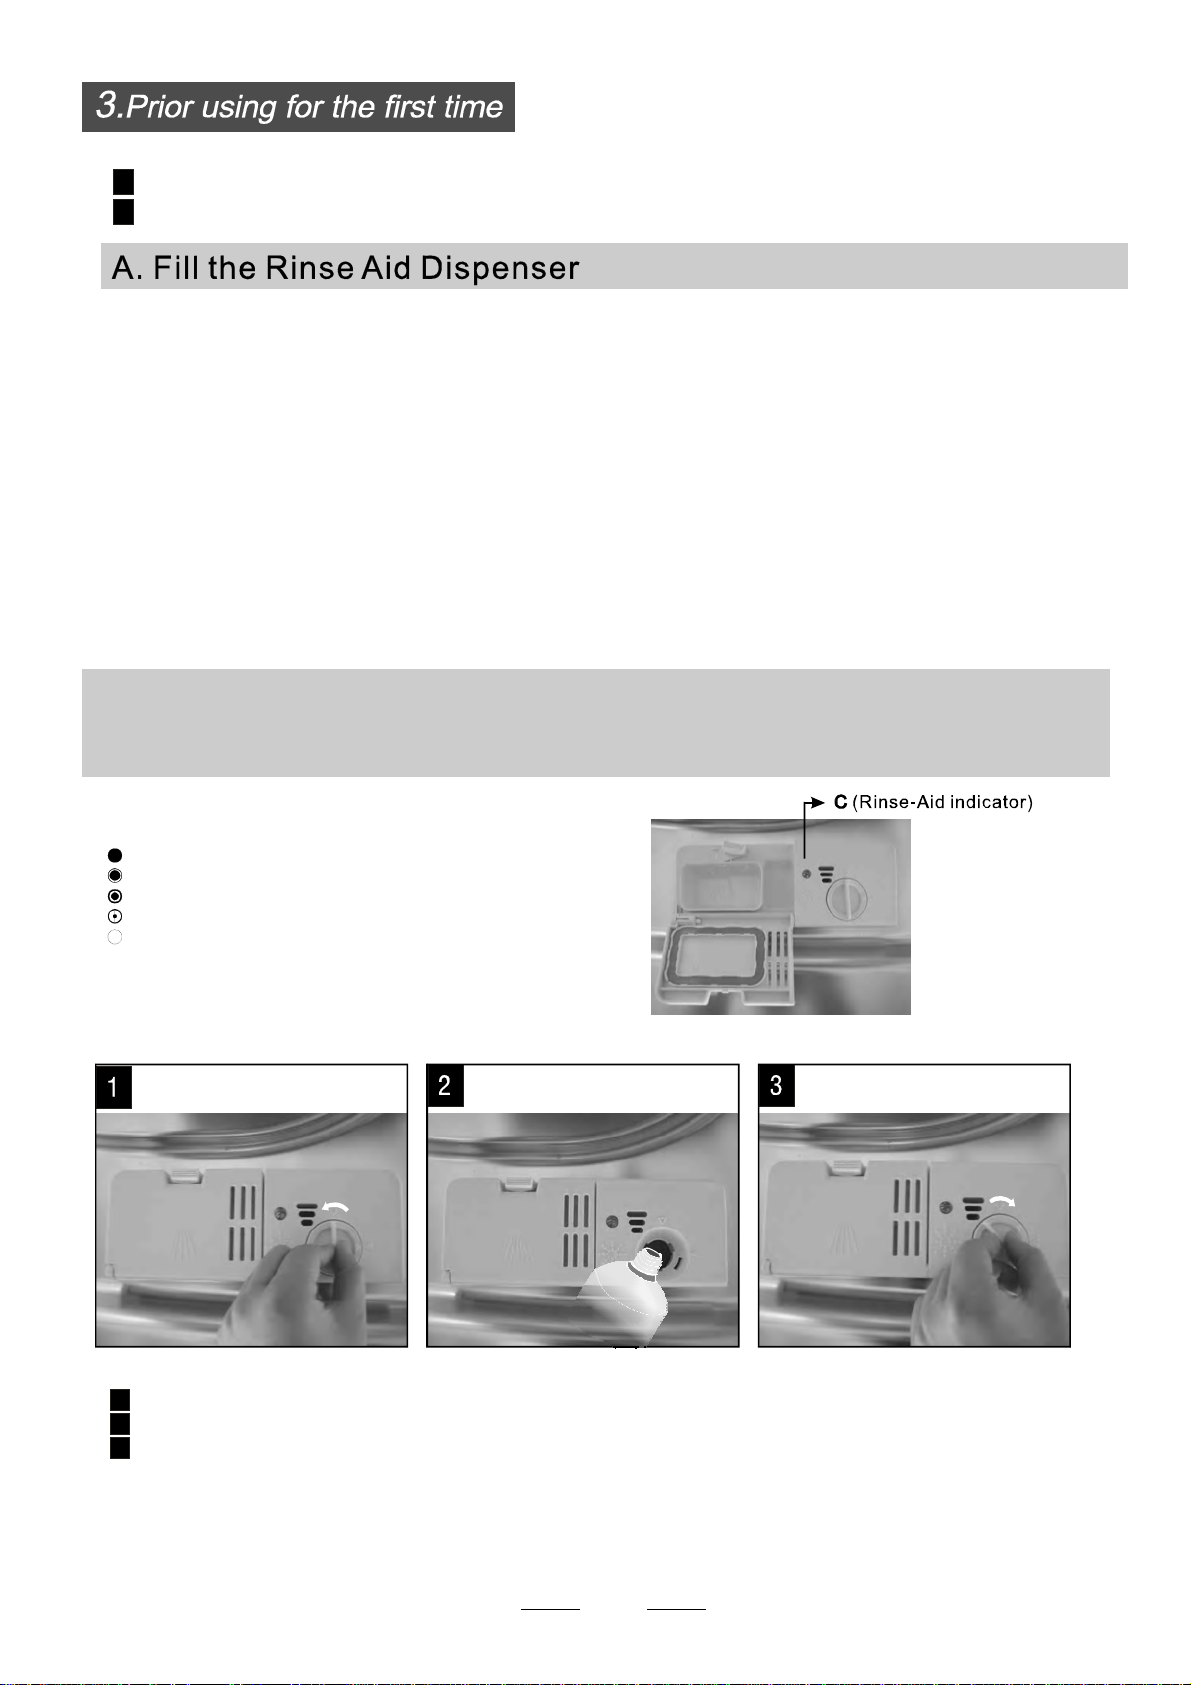
A. Filltherinseaid dispenser
B. Fill in deter gent
Therinseaidisreleasedduring thefinalrinse toprevent waterfromforming droplets onyour dishes,which can
leavespotsand streaks.Italsoimproves dryingbyallowingwater toroll offthe dishes.Your dishwasher is
de signed to use l iquid rinse aids. The rinse aid dispense ris located in sid e t hed oor next to t he de ter gentdi spenser.
To fill the dis penser, o penthe c apa ndpo ur t her in se aid into the dispen ser unti l the l evel indicato r tur nsc ompletel y
black.The volumeof therinse aidcontainerisabout110ml.
RinseAid Dispenser
Function of RinseAid
Rin se aid is automat ical ly a dded d urin g th elas t r inse, ensur ing thor ough rin sing, and sp ot and st rea kfree dr yi ng .
Attention!
Onl yus e b randed rin se aid for di shwas her. Never fil l t he rins e a id di spense r with any othe r substan ces
(e .g. D ishwa sher clean ing agen t, li quid de te rgen t). This wo uldd amag ethe ap plianc e.
As therinse aid diminishes,thesize oftheblackdot
on the rinse aid leve l i nd icat orc hange s, as i llustr ated belo w.
Fu ll
3/4full
1/2full
1/ 4full - Shoul drefill to eliminate spotting
Emp ty
I f th er e i s nor in s e - ai d war n i ng l i ght in th e c on tr ol pan el, yo u can j u dg e t he a mo u nt of rin s e-a i d by th e c olo r of the
op tical leve l
indicator "C" locatednext to the cap.Whentherinse-aidcontainer isfull,thewhole indicator will bedark .Asthe
rinse-aid
dim inis hes, the size of the da rk d ot de cre ases .You sho uld neve rlet the rinse aid get below 1 / 4 ful l.
When to Ref ill the RinseAid D ispen ser
RINSEAID DISPENSER
To open the di spenser, turn t he cap to the "open" (left) arrow a nd li ft i tout.
Pour therinseaidinto thedispenser,being careful notto overfill.
Replace thecapby insertingitaligned with "open"arrow and turning it tothe closed(right) arrow.
Be c are ful no t t oove rfi ll t he dis pens er,bec a use t hi scould c au se over s udsin g. W ipe aw ay any s pil ls
witha damp cloth.Don'tforgettoreplacethecapbeforeyouclose dishwasherdoor.
Attention!
C le an up any r inse aid spilt during filli ngw it h an absorbe nt clot h toa voi dexce ssf oaming
during the next w ash .
1
2
3
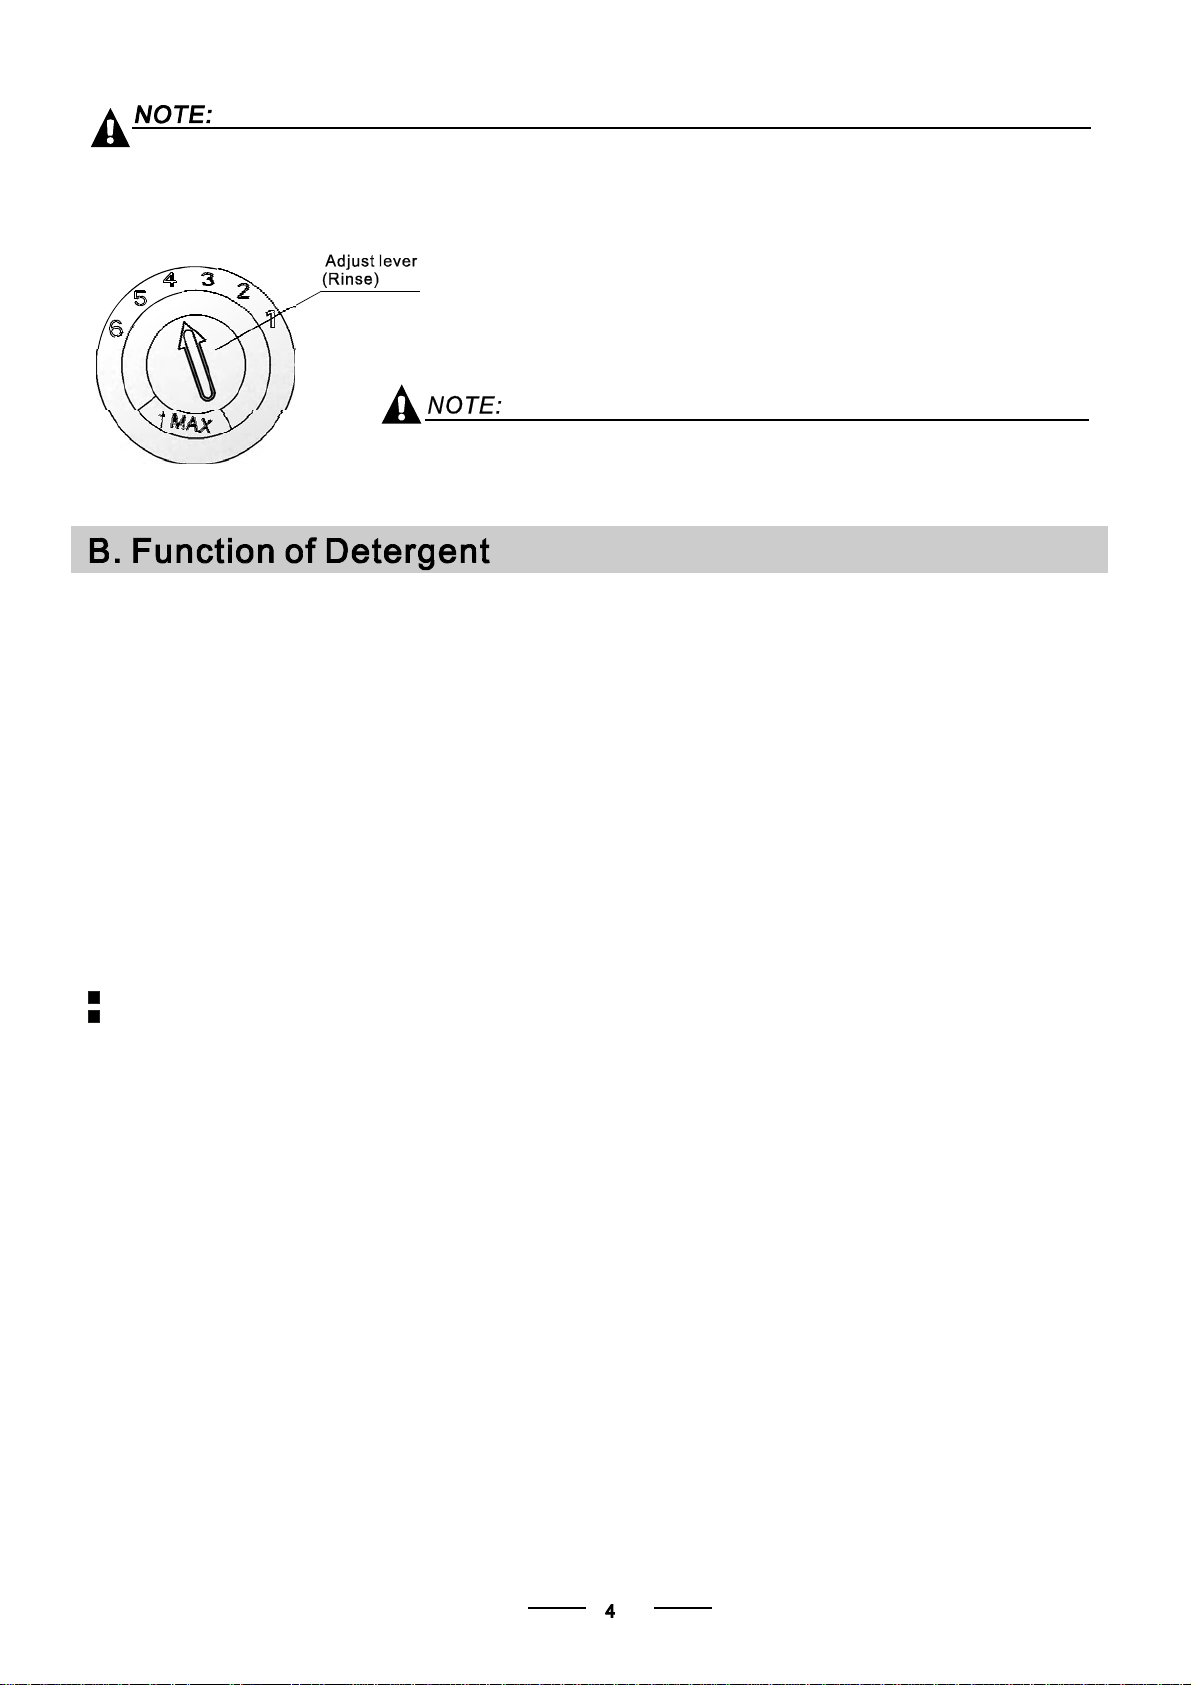
Adjusting RinseA id Dispenser
The rins eaid dispe nser has six or four s ett ings.Al ways star twith the d ispens er
set on " 4". I fspots and p oor drying are a p rob lem, increa se t he amoun to fr i nse
aid d ispensed by remov in g the d ispe nserli dand rotatin gthe d ial to "5". If t he
dishes are stil l not d rying prope rlyo r show spots, adjust the d ial t ot he ne xt
highe r lev eruntil your dish es are sp ot-free. The recomm en ded set ting is "4".
(Factory value is "4".)
Increasethedoseif thereare drops of waterorlimespotsonthedishes afterwashing.
Reduceitifthere aresticky whitis hstains on your dish esora bluishfilmon glasswareor
knife blades.
durin gthe nex tw ash.
Don' tf orget t ore plac ethe cap be fore you clos edis hwa she rdo or.
Clean up an y r inse ai d sp i ll ed whi le du rin g f illi ng with an ab sor be nt cl oth t o a void excessi v e foam in g
Deterge nts w ith its chem ical ingredie nts ar ene cessary to r emove dirt ,crus hdir tan d tr ansport it o ut of the di shw as her.
Mostofthecommercial qualitydeterge ntsare suitableforthisp urpose.
Detergents
The re ar e 3 sor t s of detergent s
1.Withphosphateandwithchlorine
2.Withphosph ate andwithout c hlorine
3.Wit hou tph osphate and without chlor ine
Ba sed on the ir che mic alc ompo sitio n, dete rge nts c an b e spl it in two bas ic typ es:
Th euse of no rm al wash ing pro gra msin com bin atio n with concent rated d etergents
r edu ces p ollu tion a nd is g ood for y our dishes; these was hp rogr ams are spec ifica lly mat ched
toth e dirt -diss olving prope rt ies o f the e nz ymes of the conc entra ted det ergent. For t his r eason
normal washprogramsinwhichconcentrateddetergentsare usedcanachievethesame
resultsthatcan otherwise onlybe achievedusing intensive programs.
“”
“”
“”
Dete rgent tablets ofdifferent brandsdissolveatdifferentspeeds.Forthisreason some
dete rgent tablets cannot d issolve and devel op thei rful lcleanin g pow er d uring short
programs.Therefore pleaseuselongprogramswhenusing detergenttablets,to
ensu ret he co mplete remov al ofde terg ent residual s.
Th edispe nser mus tb e refi lled before thes tart o fe ach w as h cycle f ollowi ng the instru cti ons
provided inthewash cycle table.Your dishwasher uses less detergent andrinseaid than
C onvent iona l dis hwa sher.General ly, only one table spo on of det er gent is neede d for
a norm al wash lo ad.M or e h eavi ly soile dit ems need mo re d etergen t.Alw ays add the
dete rgent just be fore st ar ting thed ish wash er, otherwis eit could get dam pand w ill n ot
dissolve properly.
Concentrated Detergent
DetergentTablets
Detergent Dispenser
co nventi on al,a lkal ined ete rgent sw ithc aust icco mponen ts
low alk alin eco ncen trat edd etergen ts wi thn atural enzymes
Norma lly new pulveris edd eterg ent is with outp hosphate.Thus the water softene r fu nction of
phospha te is not given. In this case we recomme nd to fi ll salt inthe salt con taine reven when
the hardne ssof water is onl y6 dH. If detergent switho ut pho sphate are used inthe case of ha rd w ater
oft en white sp otsappear on dishes and glasses. In this case pl easeadd more detergen t to reach
better resu lts.Det ergents witho ut ch lorine do on lybleac ha li ttle. Strong a nd colo ured sp ots w ill not
be rem oved com pletely. In thi sc ase ple ase choo sea progra mwit ha higher te mper ature.
°

AmountofDetergenttoUse
Prop erUseof Detergent
Use only d eter gen t spe c ifi cal ly madefor the u se i n dishw ash ers. Kee p yo ur det ergent fr esh and dr y.
D on't put powdere dde tergent into the di sp enseru ntily ou're re ady t o wa shdishes.
Dishwash erdeterge ntis corrosive! Tak e care tokee pi tou tof r each of c hildren.
Alw aysadd the d etergen tj ustb efore star ting ea chw ash cycle.
Only use bran ded deter gent and r in sea id fo rdishw asher.
Ifthe lid i scl osed: pr ess rele ase but ton.T he li d wi ll sp ring open.
Fill t he de tergent dispenser with deter gent.
The marking ind icates the dosing levels , as
illustratedonthe right:
The pl ace o fmainwa sh cycle d eterg ent pl ac ed.
The pl ace o fpre-wa shcy cle deterge ntp laced .
Pleaseobserve themanufacturersdosingandstorage
Recomm endations as stated o nt he deter gent pac kaging.
Close the lid and press until i tloc ks in pl ace.
If th edish esare hea vily soiled ,p la cean additiona l
deterge nt do sei nthe pre-w ash d eter gent ch amber. T his det ergent wil lta keeffect during the pr e-wash phas e.
A
B
Fillin Detergent
The inform ation abo ut the amount o f deterg ent f orthe single program ple aserefe rto t he Wa shCycle
Table on page 9.
Plea seaware, tha taccordi ng t othe level soil ingand the spec ific hardn ess of water d ifference sare possible.
Plea seobserv ethe m anufact urer's recom mendat ions on the deterg entp ackaging.
A
B
Cutlery withwooden,horn china or
mother -of-pearl handle s
Plast icite ms that are n ot h eat resis tant
Older cutl erywith glued parts t hat aren ot
temperatureresistant
Bonded c utl er y i te m sor dish es
Pewter or cooper ite ms
Crystal glass
Steel item ssubj ec t t orusti ng
Wooden p latters
Items madefromsynthetic fibres
So me ty pes ofgl as sesc an b ecome
dull aft era large number of washes
Silv er an d a l umi num pa rts ha ve a
tendencyto discolourduringwashing
Glazedpatternsmay fadeifmachine
washed frequent ly
Are not suitable
Are of limited suitability
Dishesanditemsofcutlerymustnotlie insideoneanother, orcover eachother.
To avoi dda mage to gl asse s,th eym us tnot touc h.
Lo ad large ite msw hich ar e most difficult to c lea n into th e l owe rbasket.
The uppe rbasket is de signed to ho ldm ore d eli cate and lighter dishwa re such as glasses , coffee
andteacups
Lo ng blad edkni ves sto red in a n upr igh tposit ion are a potent ial haza rd !
Lo ng and/ ors harp itemso f cut lery such as carvi ng kniv esm ust bepositi oned
ho rizon ta lly in t he upp erb asket .
P lease do n ot ove rload yo ur di shwashe r. T his is i mportant for g ood r esults a ndfo r
r easonab leconsu mpti ono f en ergy.
Load holl owite ms suc has cup s,glasses, pans etc. With the openi ng facing downwa rds s o t hat
w a t er c ann o t c o llec t in the cont a i n e r or a deep ba se.
Usea mild detergentthatisdescribedas'kindtodishes'.Ifnecessary, seek further
informationfromthedetergentmanufacturers.
Forparticular items,selectaprogramwithaslowa temperature aspossible.
To pr ev en t da ma ge, ta ke g l ass and cut ler y ou t of the dis hwa sher as so on a sp ossi ble
aft er thepr ogram h as ende d.
Considerbuyingutensilswhich are identifiedasdishwasher-proof.
(For best per formance of t he di shwasher, follow the sel oading guide li nes.
Featu res and ap pearance of baske ts and cutler yba sket smay vary fr om yourmod el.)
Scrape off any larg ea mounts o f le ft over foo d. Sof ten remnan ts of b urnt f ood in pans.
It is no t necess ary tor inse thed ishesu nder running water.
Pl ace objects in t he dis hwasher i n foll owing way :
1.I tem ssuch a scups, g lasses, pots /pans, etc. a re fa ced dow nw ards.
2.Cu rv edi tems, or ones wit hr ecess es, shoul db eloade dasla ntso that w ater can run off.
3.All u tensils a re stacked secu rely and can not ti pov er.
4.All utensils are placed in t heway t hat the spray arms can r otate f reely during w ashin g.
Ve rysm all items s houldn otbe washed in the dish was he r as they c ould ea silyfal lout o f the basket.
To prevent water drippi ngfr om t he uppe rba sketinto the lower baske t, w e re commend that you
empty the lower basket first and t he nthe upp erbask et.
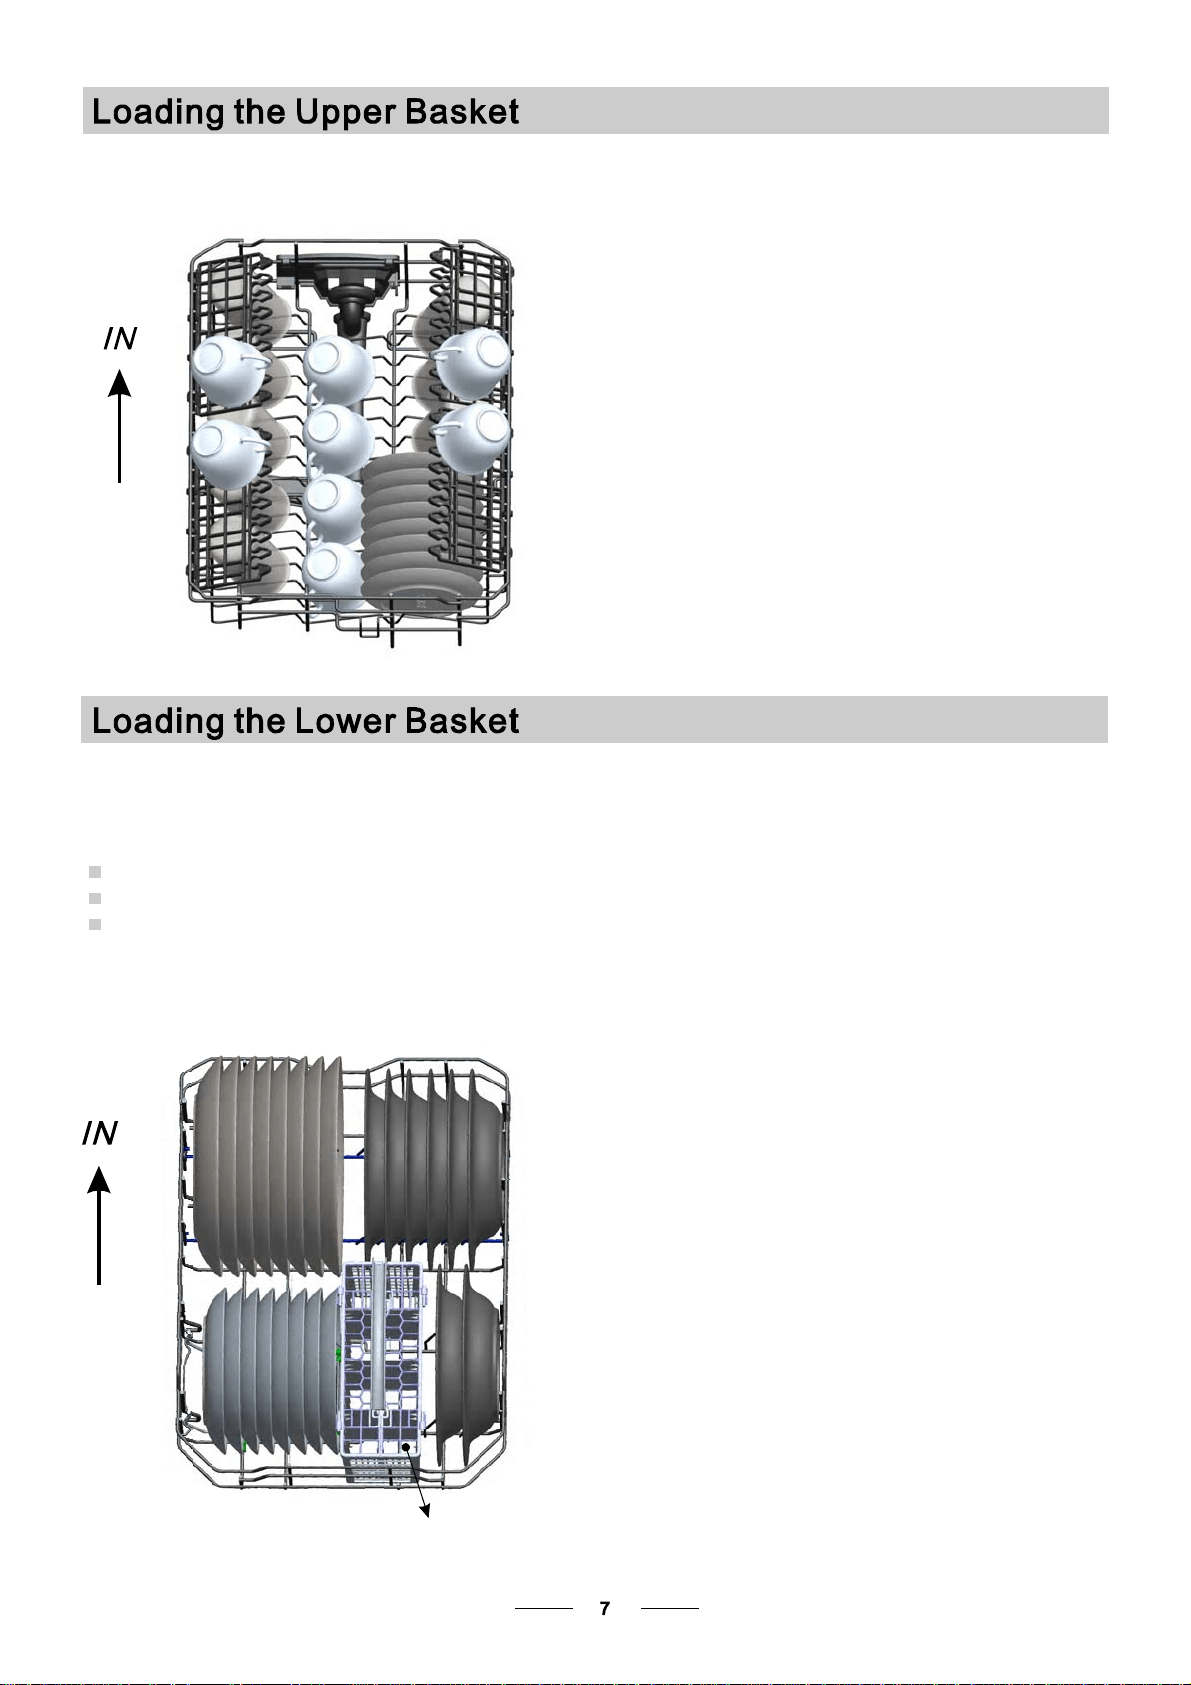
The upper basket is designe dto hold more delica te and l ighter dishwar esuch as g lasses, coffee
and tea cups and sau cers, as we llas plates, small bowls and shallow pans (as long as th eya re
no t to o di r ty ).
Positi on the dishe sand co okware so that t hey will not be move db yt he spray of water.
Wesug gestthat you place l arge i tems and items that are the most di fficult to cleani nto the lower basket
such as: pots, pa ns, l ids, servin g di shesand bowl s,as shown i n the figure below.
It is pref erable to pl aceservi ngdish esa nd lids ont he si de of the r acks in or der t oa void bl ocking the rotation of t he
top spray arm.
Pots , servin g b o w ls, e tc, must alw ays be place d top dow n.
Deep pots s h ould be slanted to al lo w wat e r to f low out .
Plea sebe r eminded that:
The B ot to mBaske tf eatures folding spikes so th atla rg er or more pots and pans ca nbe l oaded .
1
Cups
2
3
Gl a ss es
Saucers
5
7
Soupplates
Des ser t dis hes
4
6
Dinner plates
Silverware basket
1
1
3
2
4
1
6
1
1
1
2
3
5
4
6
4
7
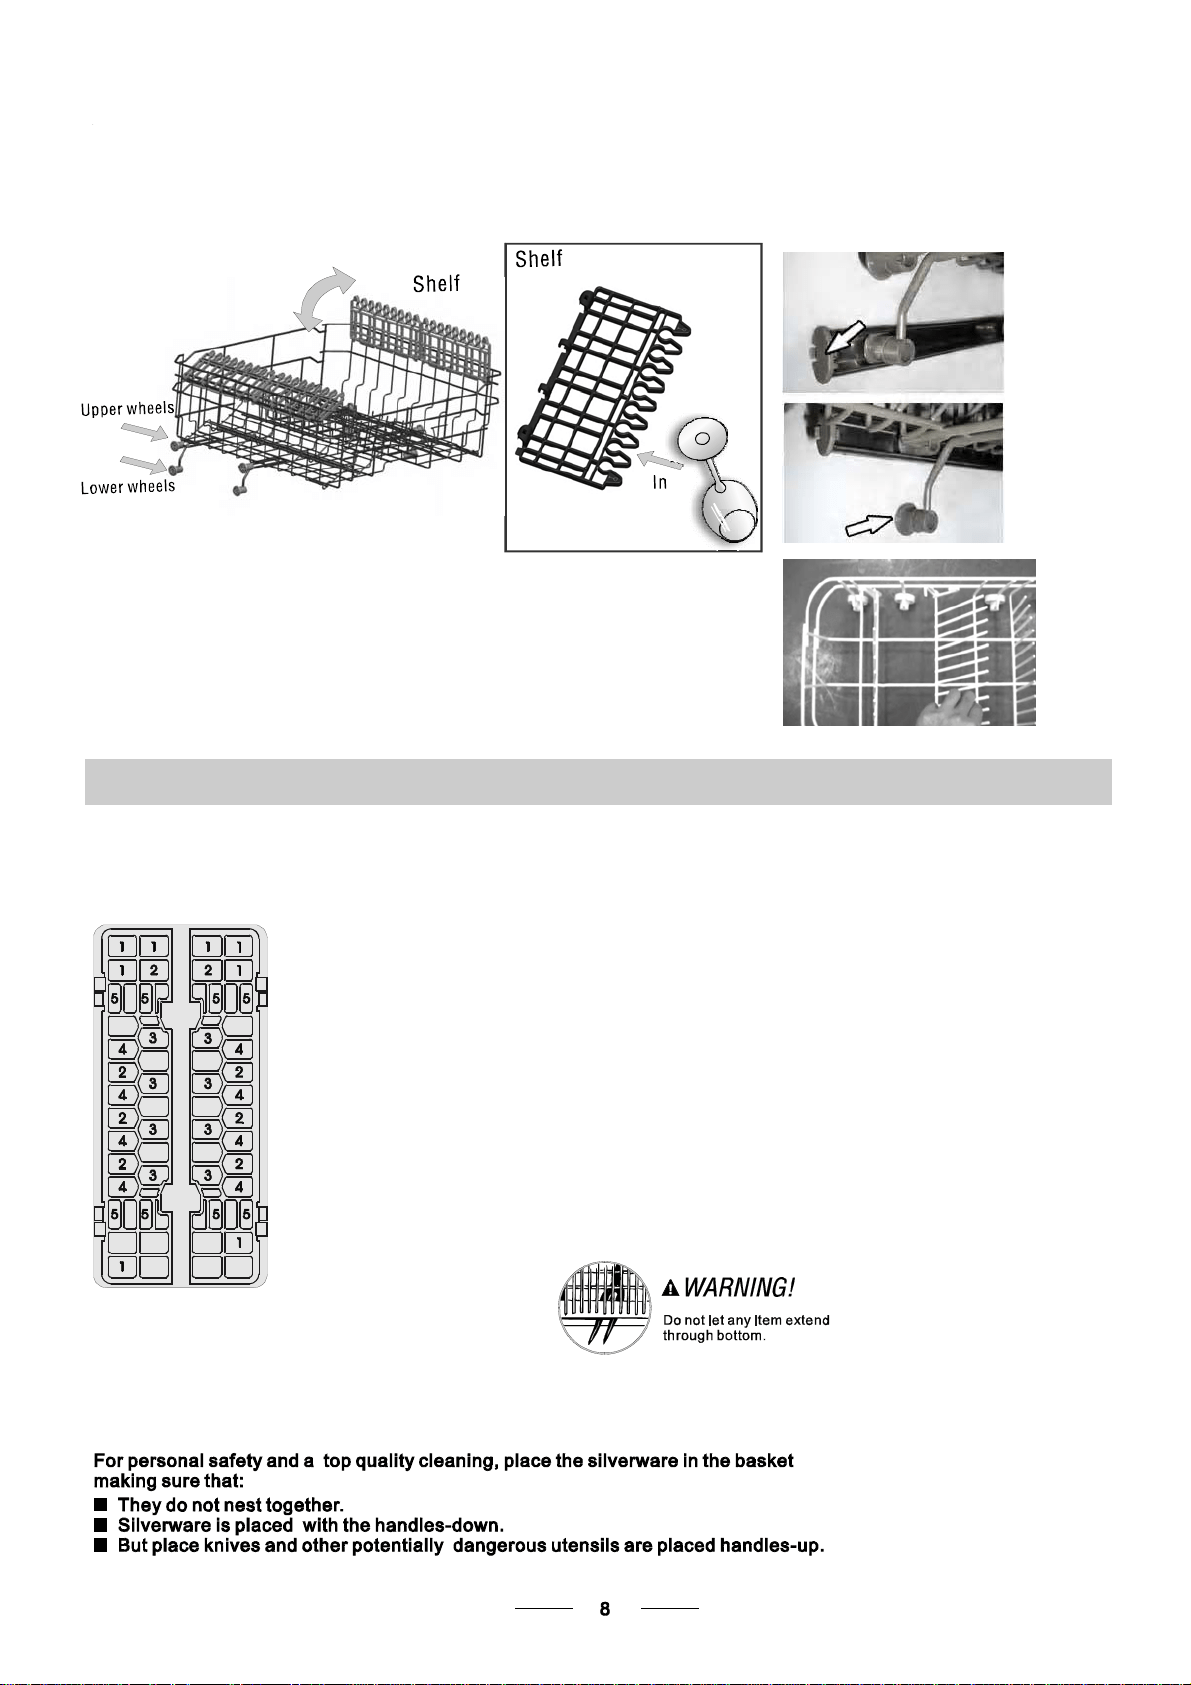
Folding Spikes of Lower Basket
Fo r better stacki ng o fpo tsand pans,
the spi kescan b efol ded dow nas
sho w in the p ic t u re ri gh t.
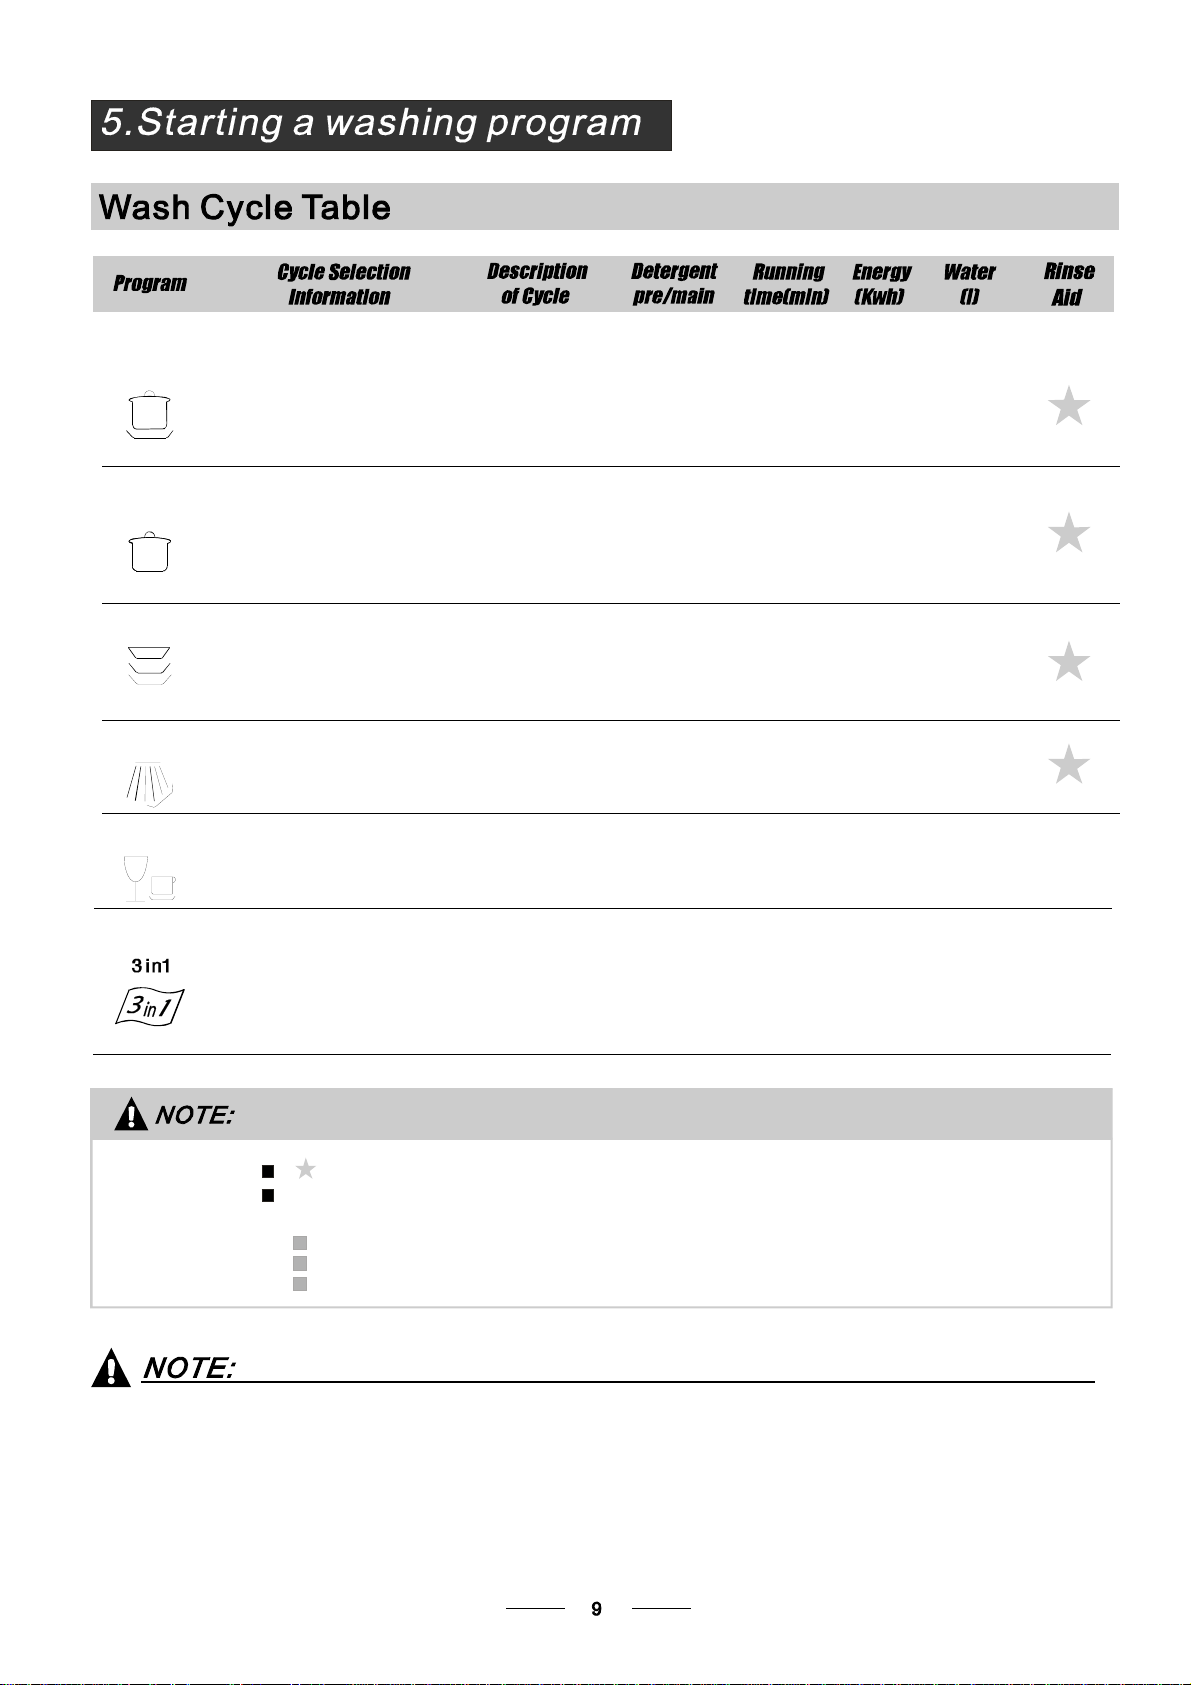
Adjusting the Upper Basket
Th e height of t he upp erbasket can be ad justed i n order to crea te more spacefo rl arge u tensils
both f or the upper/l owe rbasket. The he ight of th eupp er b asket can be adj usted by placi ngthe
wheels o nd ifferent h eight of the r ai ls.Long items, serving cutlery, salad servers and kn ives
should b eplaced on the shelf so that they do not o bstruct t herotati ono fth espr ay a rms.
Th e she lf ca nbe fold ed back or be remov edwhen not r equired for use .
Cutlery Basket
Cutlery should be placed in the cutlery basket with the handles at the bottom. If the rack has side baskets, the
spoons should be loaded separately into the appropriate slots, especially long utensils should be placed in the
horizontal position at the front of the upper basket as shown in the picture.
Teaspoons
4
Soup spoo ns
2
Forks
1
3
Dessert spoons
5
Knives
We recommend you openthe doorslightly50mmtoassistindrying of thedishesaftereverywash.
*AS/N ZS 2 007.1: Thi s program meis the test cycl e. T he inform ation f orcom parabilit ytest
in acc ordance withAS /NZS 2007. 1, as foll ows:
C apa city: 8settin g
Position Upperbasket:upper wheelsonrails
Rinseaidsetting:6
Meaning: needto fillrinse into theRinse-AidDispenser.
()
For heavily soiled loads,
such as , plates,glasses
and lightly soiled pans.
standard daily cycle.
pots
Sfornormally
soiled loads,such as plates,
glasses,bowls and
soiled pans.
tandard daily cycle
normally
For the heaviest soiled loads,
such as pots,pans,casserole
dishes and dishes that have
been sitting with dried food
on them for a while.
A shorter wash for lightly
soiled loads that do not
need drying.
For dishes that need to be
rinsed and dried only.
-wash( 0℃
Wash (65 ℃)
Rinse
Rinse (55 ℃)
Drying
Pre 5 )
Pre-wash
Rinse
Pre-wash(50℃)
Wash (50 ℃)
Rinse
Rinse (65 ℃)
Drying
Pre-wash
Wash (55 ℃)
Rinse (50 ℃)
Drying
Wash (40 ℃)
Rinse (45 ℃)
Rinse
5/20 g.
5/20 g.
5/20 g.
15 g.
150
120
120
30
60
12
12.2
18
9
Wash(65 )
℃
Rinse (50 ℃)
Drying
For commonly soiled loads,
such as pots, plates,glasses
and lightly soiled pans.
Pre-wash(50℃)
Wash(50℃)
Rinse
Rinse(70℃)
Drying
3in1
150
12
10
1.0
0.64
1.20
0.4
0.6
1.0
In te nsi v e
Heavy
Normal
(*AS/NZS2007.1 )
Ra p i d
Rinse
Pre-wash
15 g.
It is dangerous toopenthedoorwhen washing,becausethe hot water may s cald you.
Whenth e wo rking cycle has finished, the buzzer o f thedishwa sher will soun df or 8 seco nds , t he n st op.Turn off
theappliance using theON/OFFbutton,shut offthewater supplyandopen the doorofthedishwasher.
Waitfor afewminutesbefore unloadingthedishwasherto avoidhandlingthedishes and utensilswhilethey
are still hot a ndm ore suscep tible to b reak age. Theyw illal sod rybet ter.
Switch Off the Dishwasher
1.Switch off th e dishwasher by pressing the ON/OFF button.
2.Turn o ff the water tap!
The buzzer of the dishwasher moos for 8 seconds, only in this case the programme has ended.
Openthedoor carefully.
H ot d ishes ar e se nsi tive to kno cks. The dis hes shou ld there fore bea llow ed t o co ol d own arou nd 1 5mi nut es
before r em o vi ng fr om t he a ppl ian ce .
Open t h e di s hwa she r 's door, l eave i t a jar and wait a fe w min utes be for e r em ov in g t h e di sh es . I n t his way th ey
w ill be co oler and the dryin gwillb e imp roved.
Unloadingthedishwasher
It is n orm alt hatth edis hwa she ris wet insid e.
Emptythelowerbasketfirstandthentheupperone.Thiswillavoid waterdrippingfromtheupper Basket onto
th edishe sin t hel ower one .
the m achine wi ll keep on wor king aft er 10 s econds .
of fthe main po wer and wat ers upply bef ore callin ga serv ice.
Ifyo uop en thed oor d uri ng wash ing, the mac hine will pau se. Whe ny ouclose the door ,
.
If allt heli ghts begi nto glim mer, that i ndi cat es t hem achine i sou t of o rde r, please turn
.
1 Drawout the lower andupperbasket ,l oad thedishes and push themback.
It iscommendedtoloadthelowe rbasketfirst, thenthe upper one(seethe section entitled
Loadingthe Dishwasher ).
2 Pourint hedetergent(see the sectionentitled DetergentandRinseAid ).
3 Inse rt the pluginto the socket.The power supplyis 220-240VAC/50HZ,the specificationof the
socketis 10A 25 0VAC. Makesure thatthewater supplyis turned onto full pressure.
4 Closethedoor,andselect the desiredprogramme bypressingthecorrespondingbutton,then the
dishwasherwillstart towork in 3 second.
“”
“”
Premise:
You canmodify thewashingprogr am,Whe nthe dishwasher just runs for a short time.
Otherwise,thedetergentmayhavealready bee nreleased, andtheappliance mayhave
alreadydrained the wash water. If this is thecase,thedetergent dispensermustbe
refilled(seethe section entitled"Load ingtheDetergent" ).
ntitled " Sta rting aw ash c ycle. . . " ).
1
2 Pressthe buttonofdesiredpro grammoret han 3 secondsuntilit's Indicatoris on , after
10secondsthemachinewill keepworking. E
Aforgo tten dish can be added at any time before the detergent cup opens.
Load the forgo tten dishes.
Close the door, the dishwasher will start running again
after 10 seconds.
After the spray arms stop working, you can open the door
completely.
2
Open the door a little to s top the washing.
1
3
4
The pro gram lightsshow the stateof thedishwasher:
a) A llprogram lightsoff---------------stand by
b) One of the prog ram ligh ts o n---- ----- -pause
c ) O ne of the pro g ram l ig ht s b l ink in g- - --- r un
The fil ter prev ent slar ger remn ant s of food or o ther objects from getting insi deth epu mp.
Theresiduesmay block thefilter, inthiscase they mustbe removed.
The fi lter system c on sists of a coar se fi lter, aflat (M ain filter)
A n da mi c ro fi lter( F i ne f i lter) .
Food and soil particles trapped inthis filterarepulverizedby a
specia l jet ont hel owe r spr ayar ma ndw ashe dd own tod rain.
Larger items, s uc h as pie c es of bo ne s or gl ass, t hat cou ld b lock
thedrainaretrappedinthe coarse filter.To removetheitems
caugh t by the fil ter, gen tly sque eze the tapo nth eto p of this
filterandliftout.
Thisfilter holdssoil andfoodresiduesinthe sumpareaand
preventsitfrombeingredepositonthe dishes duringwashcycle.
Main filter
1
Coarse filter
2
Fine filter
3
2
3
1
Filterassembly
Thefilterefficiently
For best perf orm ance and res ults, the filte rmust b e cle aned re gular ly. t hisr easo n, i t isa goo dide ato
r emo ve t hel arger fo od pa rticl estr app edin the filter aft ere ach was hcyc leby ri nsing the semicirc ular f il ter an d
c up u nderru nnin gw ater. Tore moveth efil ter d evice, p ullt hec up handle in t heu pwardd irection.
re mo vesf oodpart icle sfrom t he wa shw ater,all owing it to be rec ycle dd ur ing t he cycle.
For
T he di sh was her mus t ne ver be us ed w i thout th e filter s.
Imp ro per replace mentof the f ilter may red uc e the perform anc elevel o fthe applia nce
and damage dishesandutensils.
When following this procedure from step1 to step 3, the filter system will be removed;
when following it from Step 3 to Step 1, the filter system will be installed.
The cont rol p ane l can be clea ned by u sing a l ightly dampened cloth .
Afte rcle aning, m ake sureto dry i t tho roughly.
For the e xterior, us e a go od a pp li ance po li s h wax .
Neveru ses harp objects, scouring pa ds o rh arsh c lean ers ona ny p art o fthe dis hwa sher.
ProtectAgainst Freezing
1.Cutoffthe electricalpower tothedishwasher.
2.Tur noff th ewater suppl yand disconnec t th ew ater i nlet pi pe from the water valve.
3.Drainthewater fromthe inletpipeandwater valve.(Useapanto catch thewater)
4.Reconnect the water i nl et pipe to t he water valve.
5.Remove the fil ter at the bott omo f the tub and use a sponge to soak up water in t hesump.
pl ease t akefros tprotect io n m easures o nt he dishwasher in winter. Ev ery fter washi ngc ycles,
pl ease op erate as foll ows
time a
:
- Ins pect the filter sfor blo ckin ga fter e ver ytimet hedis hwa sher has been u sed.
- By uns crew ing the c oar sefi lter, you can rem ove the filter syst em .Re movean yf oo dre mna nts and
cleanthefilters underrunningwater.
Remarks:
Cleaning the Filter
CleaningThe Door
To c lean th e co a rs e filt er and the fi n e filt e r, use a clean i n g bru sh. Reas se mbl e t hef il t er par ts as shown in t h e f i gur es
on t he las t pa ge a nd r ein sert t he e nti re assem bly in the dis hwa sher, po s itio ning i tin i tss eat and press ing dow nwa rds .
Theentirefilter assemblyshouldbe cleanedoncea week.
Whencleaning the filters, don't knock onthem.Otherwise, thefilters could b e
contorted andtheperformance ofthe dishwashercouldbedecreased.
To cle an thee dge around t hedoor, you sho uld u seonly a sof twarm, dam pcl oth.
To av oid pene trat iono f wa te rin to t hed oorlock and electr ica lcomponen ts,d o not
usea spray cle aner of any ki nd.
Never u sea spray cl ean er t ocl ean t he d oor panel asit m ay dam age the door loc k
and electricalcomponents.
Abr asiv eag entso r som epa per towels shou ldnot b euse dbecau seof th eri skof
sc r a t c hi ng or leavin g s pots on the s tainles s st e el sur fa ce.
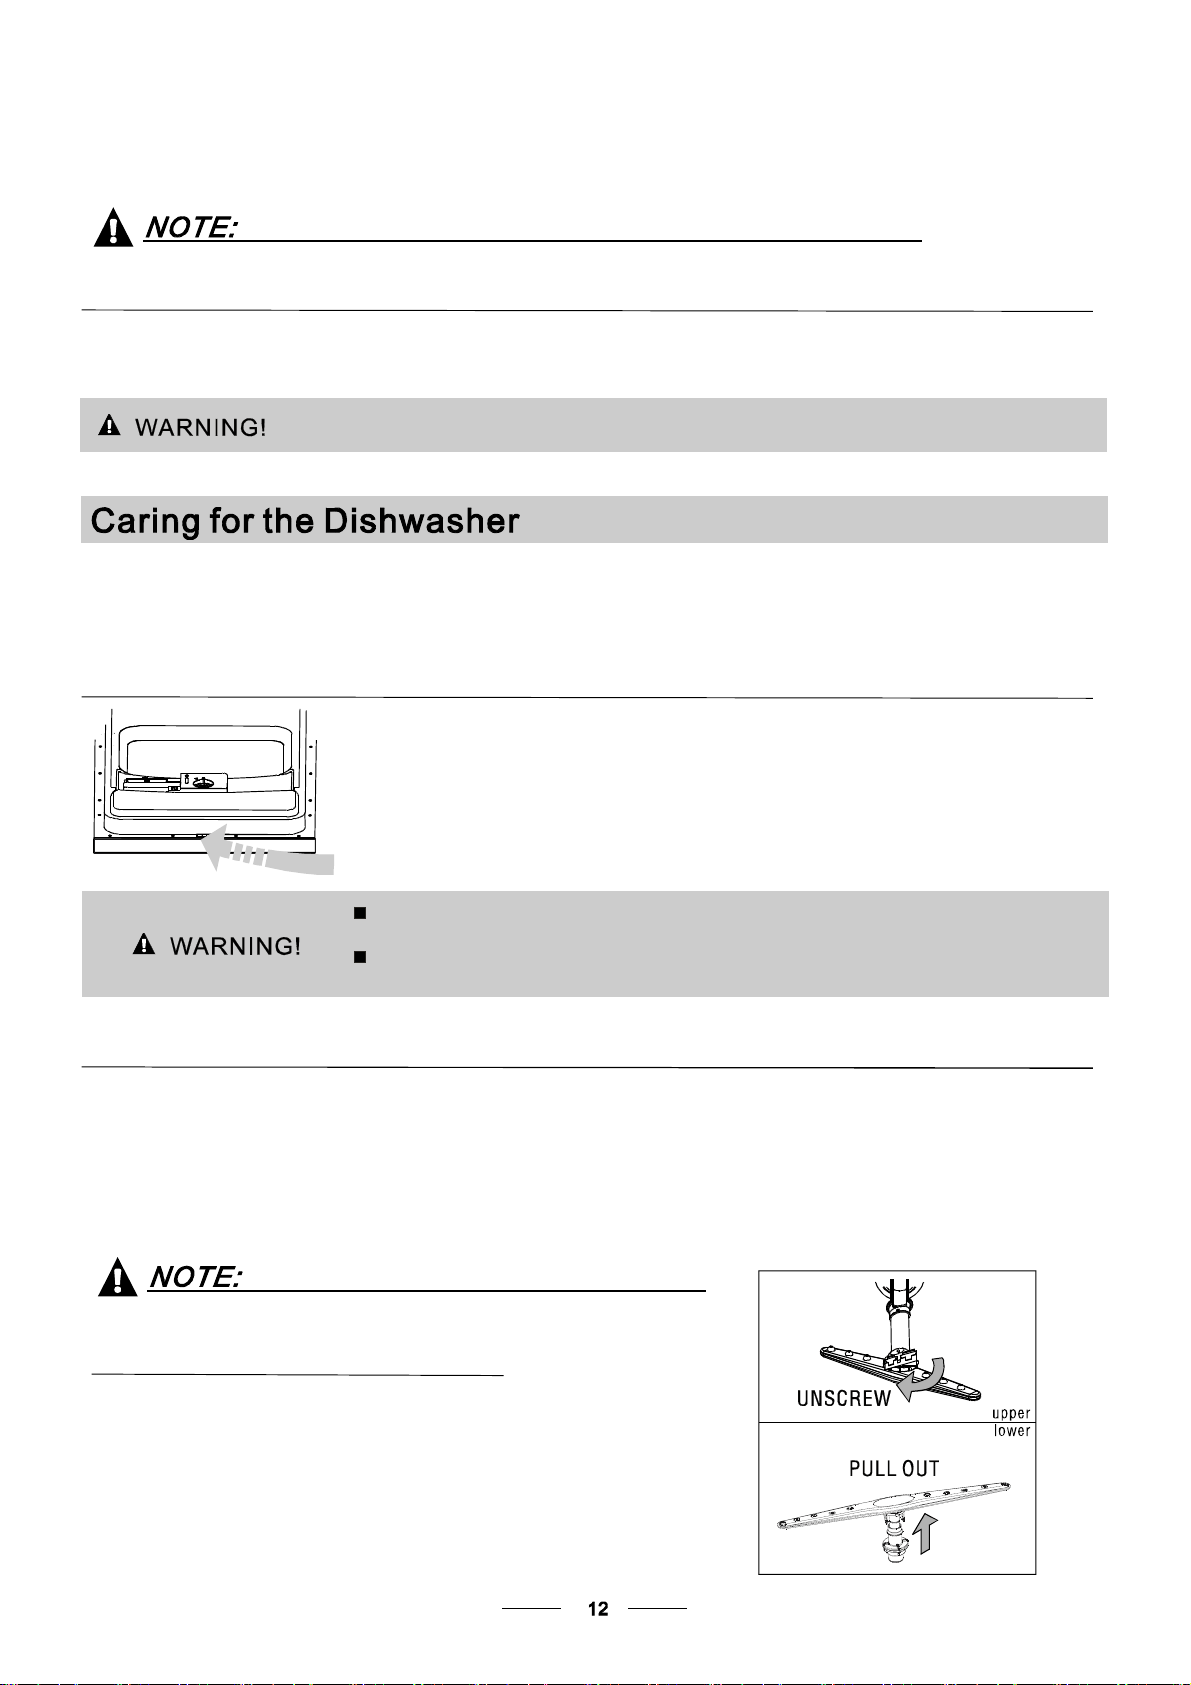
Cleaning the SprayArms
I fyour dishwa shercannot wor k beca use of
t he ice ,please contact pro fes sional servi ceperson s.
It is ne cess ary to clean t h e sp r ay a rms reg ular l y for har d
waterchemicalswillclogthesp ray
ar mj ets a ndb earin gs. Tor emove the spr aya rms , scre w
o f f t he nut cl o ckwise to take ou t t he
w asher on top of thesp ray ar ma ndr emov eth ear m.
Washthearmsinsoapyandwarmwater
a n d use a soft bru sh t o c l ean the j e t s. Rep l ace them aft er
rinsingthemthoro ughly.
Itisrecommend that yourun a washcycle withthe
dish washer e mptyan dthe nre move th epl ugf rom the
socket, turn o ff th ewa te r supply and l eave the door of
t he a pp li a n c e sl i ght ly ope n. T h is will h elp t he doo r
sealstolastlongerandpreventodoursfromforming
withinth eappliance.
If the appliance must be mo ved,tr yt o keepit in the
verticalposition. Ifabsolutelynecessary,itcanbe
positi oned on its back.
Oneofthefactorsthatcauseodourstoforminthe
dishwasher is f ood th atre main str app edi n the seal s.
Periodic clea ning with a damp sponge will preve ntt his
f r o m occurrin g.
Aft er ever ywash, turn off t he w ater supp lyto the
applia nce and leave the doo rs light lyop en soth at
m oisturea ndodou rsa ren ottra ppedin side.
Befo re cleaning or perfo rming mainten ance, always
remove the p lug from t hesocket.
Tocleanthe exteriorandrubberpartsofthedishwasher,
donotuse solventsor abrasivecleaningproducts.
O nly use a cloth with war m so apy wate r.
Tor em ove s pots o r st a ins f rom the sur face of t he
interi or, usea cloth dampened withwaterana little
v inega r, o r a c leaning pro duct mad es peci fical lyf or
dishwashers.
After EveryWash
Remove the Plug
No Solvents orAbrasiveCleaning
Mov ing theAp plia nce
Seals
Whennot inUse foraLongTime
The installation of the pipes
and electrical equipments
should be done by professionals.
Electrical Shock Hazard
Disconnect electrical power before
installing dishwasher.
Failuretodosocanresultindeathor
electrical shock.
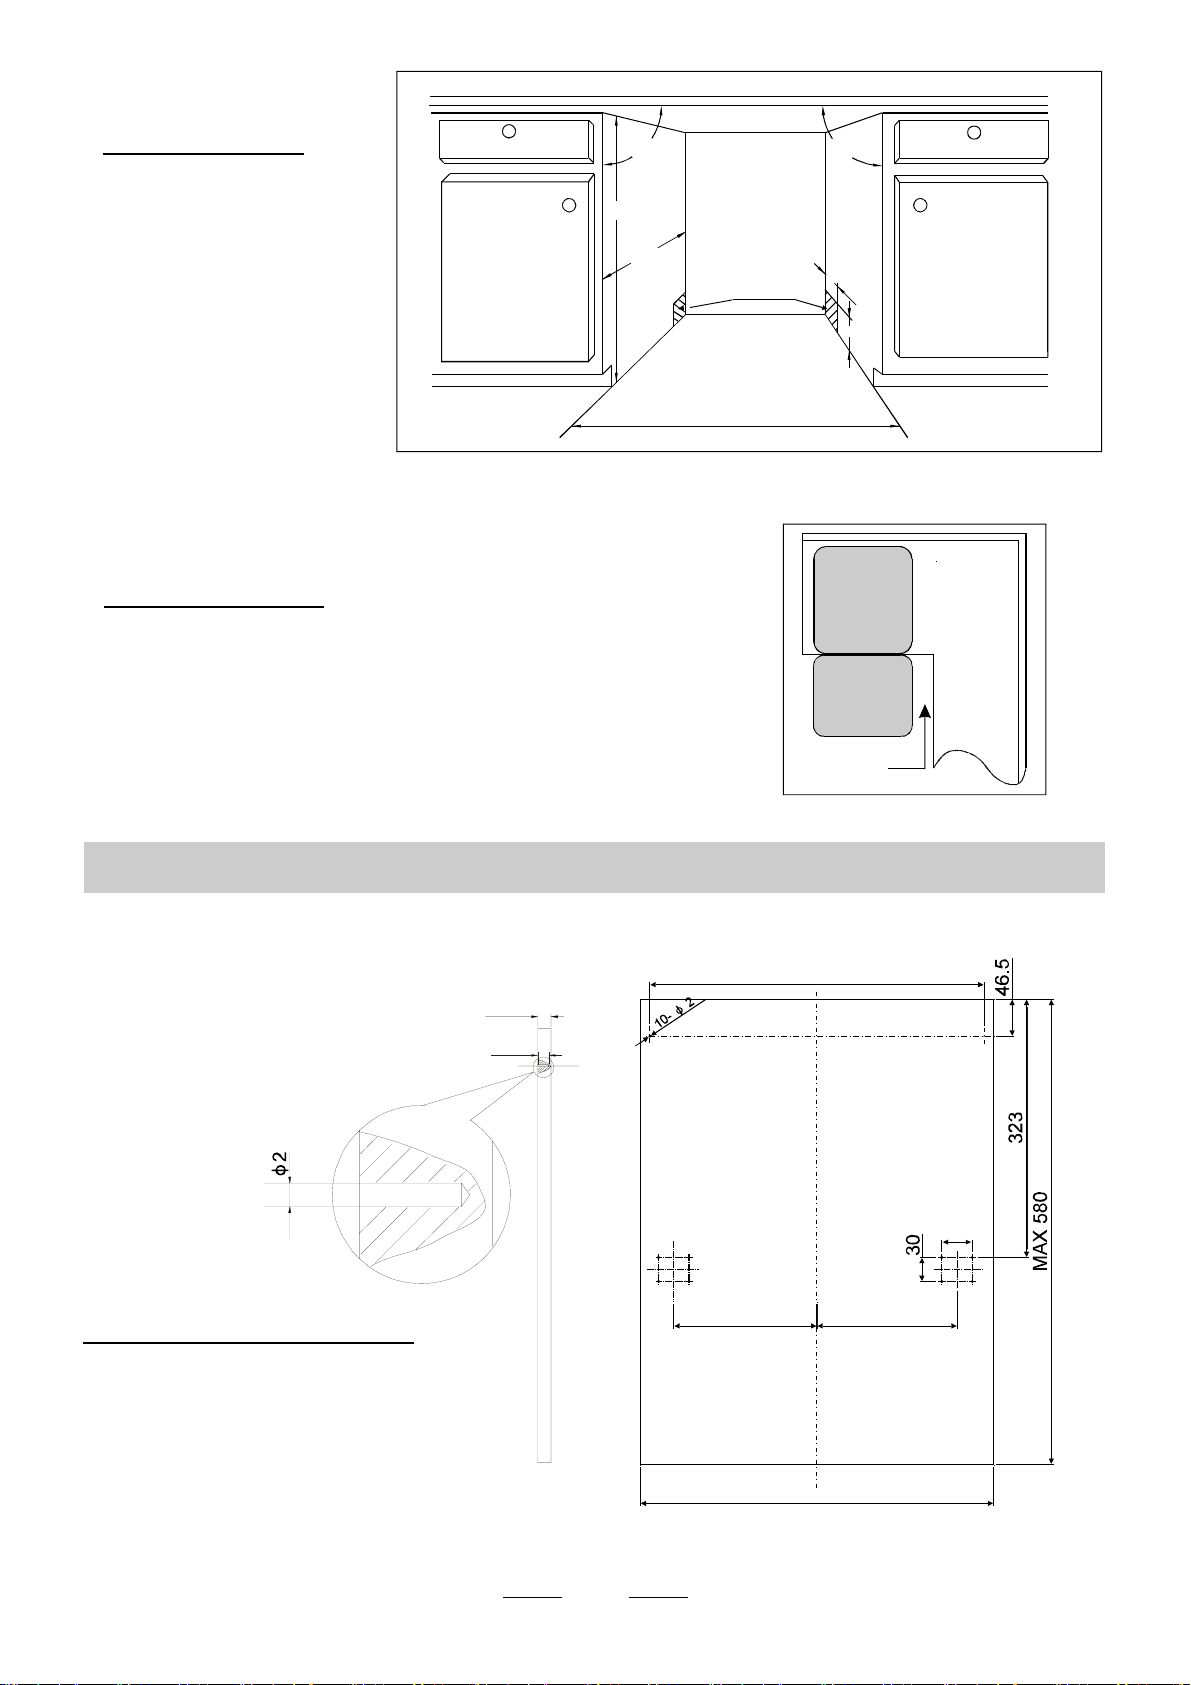
The installation position of dishwasher should be near the existing inlet and drain hoses and
power cord.
One side of the cabinet sink should be chosen to facilitate the connection ofdrainhosesof
the dishwasher.
Installation preparation
Note: please check the accompanying installation accessories(hook for aesthetic panel
,screw)
●
14
Minimum space when
thedoorisopened
【Figure
2】
Cabinet dimensions
【Figure1】
Cabinet
Dishwasher
Door of
dishwasher
Minimum space of 50mm
1
The aesthetic wooden panel could be processed according to the Figure 3.
● Aesthetic panel's dimensions and installation
Less than 5mm
between the top
of dishwasher and
cabinet and the
outerdooraligned
to cabinet.
The aesthetic panel should
be processed in accordance
with the illustrated dimensions
【Figure3】
(Unit: mm)
90 °
90 °
450 mm
820mm
100
580mm
80
Space between cabinet
bottom and floor
Electrical, drain
and water supply
line entrances
5~12
10~17
The length of thepanel should be within
therange of 506--580 mm,not more
than580mm.
442
179 175
38
418

15
Hook for aesthetic panel
Installation of aesthetic panel
【Figure4a】
2
Install the hook on the aesthetic wooden panel and put the hook into the slot of the outer door of
dishwasher(see figure 4a). After positioning of the panel , fix the panel onto the outer door by
screws and bolts(See figure 4b) .
Installation of aesthetic
wooden panel
【Figure4b】
1
2
3
.Takeawaythecover
.Pinupthescrew
. Get back the cover
1
1
22
Outer door
The hook is lifted from position 1 to the appropriate place,
then pushed right to the position 2 , making the
panel and the outer door align.
Outer door of
dishwasher
Aesthetic panel
Hook for aesthetic panel
ST4 screw
Spacer for aesthetic panel
ST4 screw
Cover
16
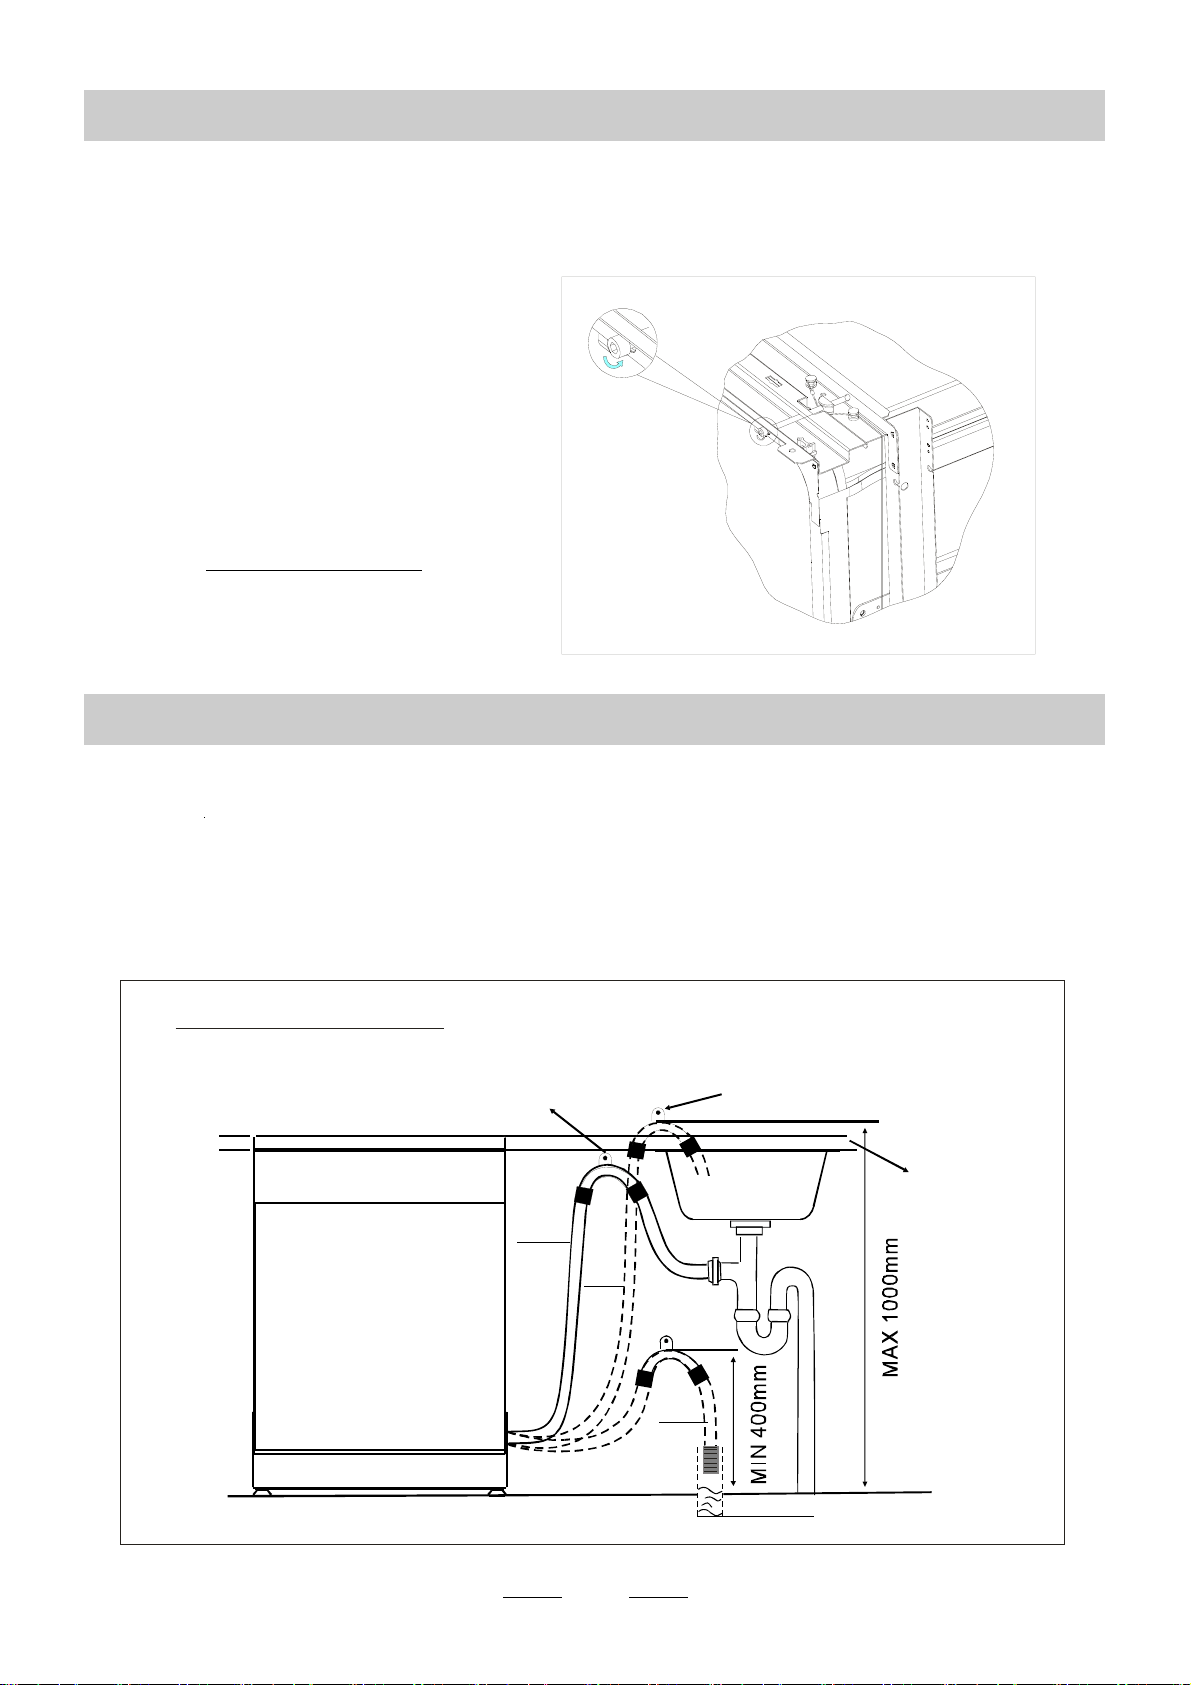
Tension adjustment
of the door spring
【Figure
5】
Tension adjustment of the door spring
●
Connection of drain hoses
●
The door springs are set at the factory to the proper tension for the outer door. If aesthetic
wooden panel are installed, you will have to adjust the door spring tension. Rotate the adjusting
screw to drive the adjustor to strain or relax the steel cable(see figure 5).
relax
Drain pipe connection
【Figure6】
Adjust the door spring
tension until the door
remains balance in the
fully-opened position.
φ 40mm
A
B
C
Counte r
Front
Drain pipe
Drain hose hook
Close the drain hose hook to the counter
NOTE
The top of the hose
must be at a height
between
40 and 100cm.
The free end of the
hose must not be
immersed in water.
Insert the drain hose into a drain pipe with a minimum diameter of 4cm, or let it
run into the sink, making sure to avoid bending or crimping it. Use the speical
plastic support that comes with the appliance (figure 6).The top of the hosemustbeat
a height between 40 and 100cm. The free end of the hose must not be immersed in
water to avoid the back flow of it. ATTENTION: The special plastic hose supportmustbe
solidly fastened to the wall to prevent the drain hose from moving and allowing water
to spill outside the drain.
17
【】
Figure 7
6
5
7
2
RUBBER
SCREW
COVER
8
SCREW
CONE GEA R
6B
1
6A
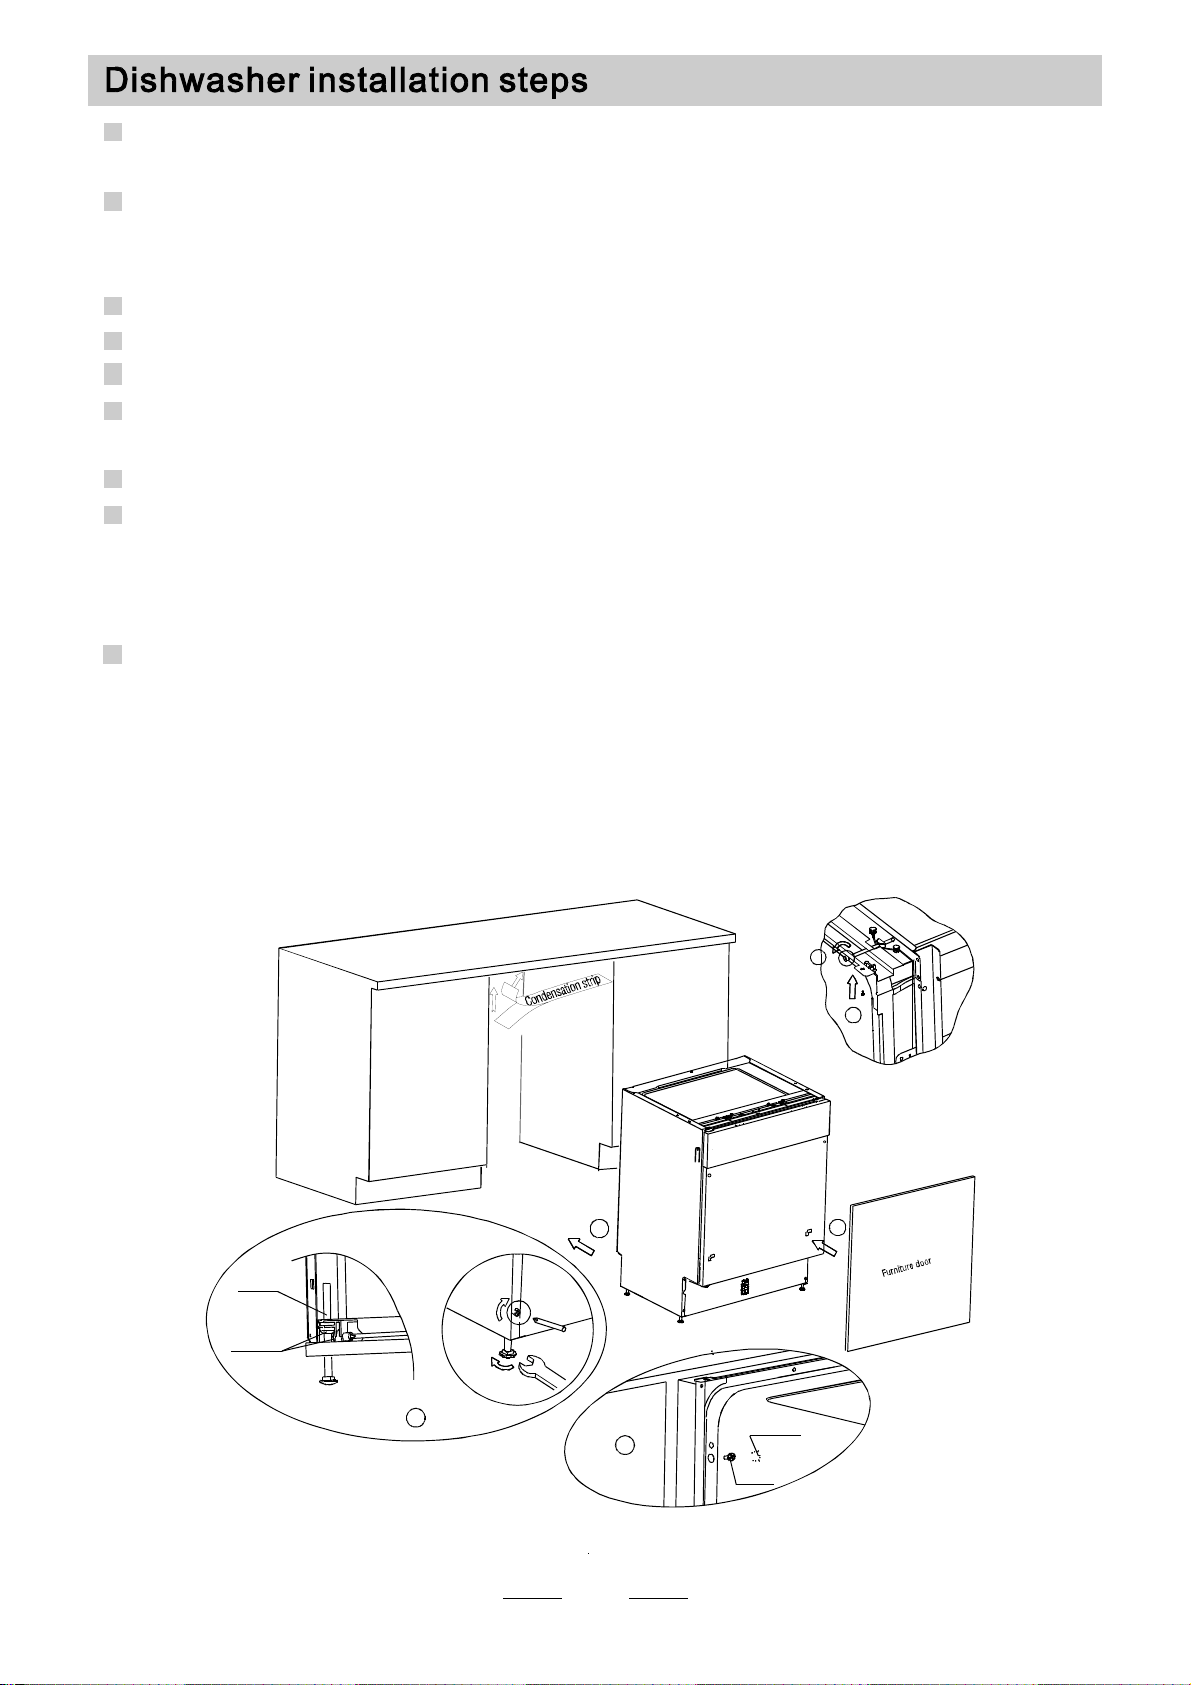
1 Installthe furniture doorto the outer doorofthe dishwasherusing thebrackets
provided.Refer tothe templateforpositioningofthe brackets.
2 Ad just th e te nsio no f th e do or s pring s by u sing anAll en ke y tu rni ng in a c lo ckw ise
mot ion to ti ghten the l eft an d rig ht d oor spri ngs. Fa ilu re to d o th is cou ld ca use
damage to yourdishwasher(Illustration2).
3 Connectthe inlet hose tothe coldwatersupply .
4 Connectthe drain hose. Refer todiagram.(Figure 6)
5 Connectthepower cord.
6 Affix thecondensationstrip underthe worksurfaceof cabinet.Pleaseensure the
condensation stripis flushwith edgeof work surface.
7 Place the dishwasherintoposition.
8 Level the dishwasher. Therearfeetcan be adjusted fromthefrontof the
dishwasherby turning thescrews ontheleft and righthand side ofthe cabinet
(Illustration 6A).Toadjustthefrontfeet,usea wrenchandturn thefront feetuntil
thedishwasher islevel(Illustration 6B).
9Thedishwashermust be secured inplace.Therearetwo ways to do this:
A.Normal worksurface-secureto theworksurfacebyusing twowoodscrews
ens uri ng the d ishwas her wei ght is n ot b ein g hi tby t he s urfa ce (Il lustr ati on 7).
B. Marbl e or gr anite w ork t op-se cure t he bra cket to the s ide pa nel of th e
dishwasher andsecure the dishwasher to the furniturehousing.Put therubbercap
overthescrew(Illustration 8).
Dishwasher must be level for proper dish rack operation and wash performance.
Place on door and rack track inside the tub as shown to check that the
dishwasher is level.
level the dishwasher by adjusting the four leveling legs individually.
When level the dishwasher, please pay attention not to let the dishwasher tip over.
1
2
3
a spirit level
Illustration of feet adjustment
【Figure 8】
Check level
side to side
Level
to Back
Front
Check
NOTE:
The maximum adjustment
height of the feet is 60 mm.
18
This appliance must be earthed. In the event
of a malfunction or breakdown, earthing will
reduce the risk of electric shock by providing a
path of least resistance for the electric current. This
appliance is equipped with a cord having an
equipment-earthing conductor and an earthing
plug. The plug must be plugged into an appropriate
outlet that is installed and earthed in accordance
with all local standards and requirements.
Improper connection of the equipment-
grounding conductor can result in the risk
of an electric shock. Check with a qualified
electrician or service representative if you
are in doubt whether the appliance is
properly grounded. Do not modify the plug
provided with the appliance; If it is not fit
for the outlet. Have a properoutlet installed
by a qualified electrician.
Ensure the voltage and frequency of the power being corresponds to
those on the rating plate. Only insert the plug into an electrical socket which is earthed
properly. If the electrical socket to which the appliance must be connectedisnot
appropriate for the plug , replace the socket, rather than using a adaptors or the like as
they could cause overheating and burns.
Please look at the rating label to know the rating voltage and connect the dishwasher to the appropriate power supply.
Use the required fuse 10 amp, time delay fuse or circuit breaker recommended and provide separate circuit serving
only this appliance.
WARNING!
For personal safety:
DO NOT USE AN EXTENSION CORD OR AN ADAPTER PLUG WITH THIS APPLIANCE.
DO NOT, UNDER ANY CIRCUMSTANCES, CUT OR REMOVE THE EARTHING
CONNECTION FROM THE POWER CORD.
for personal safety:
DO NOT USE AN EXTENSION CORD OR AN ADAPTER PLUG WITH THIS APPLIANCE.
DO NOT, UNDER ANY CIRCUMSTANCES, CUT OR REMOVE THE
FROM THE POWER CORD.
EAR THING
CONNECTION
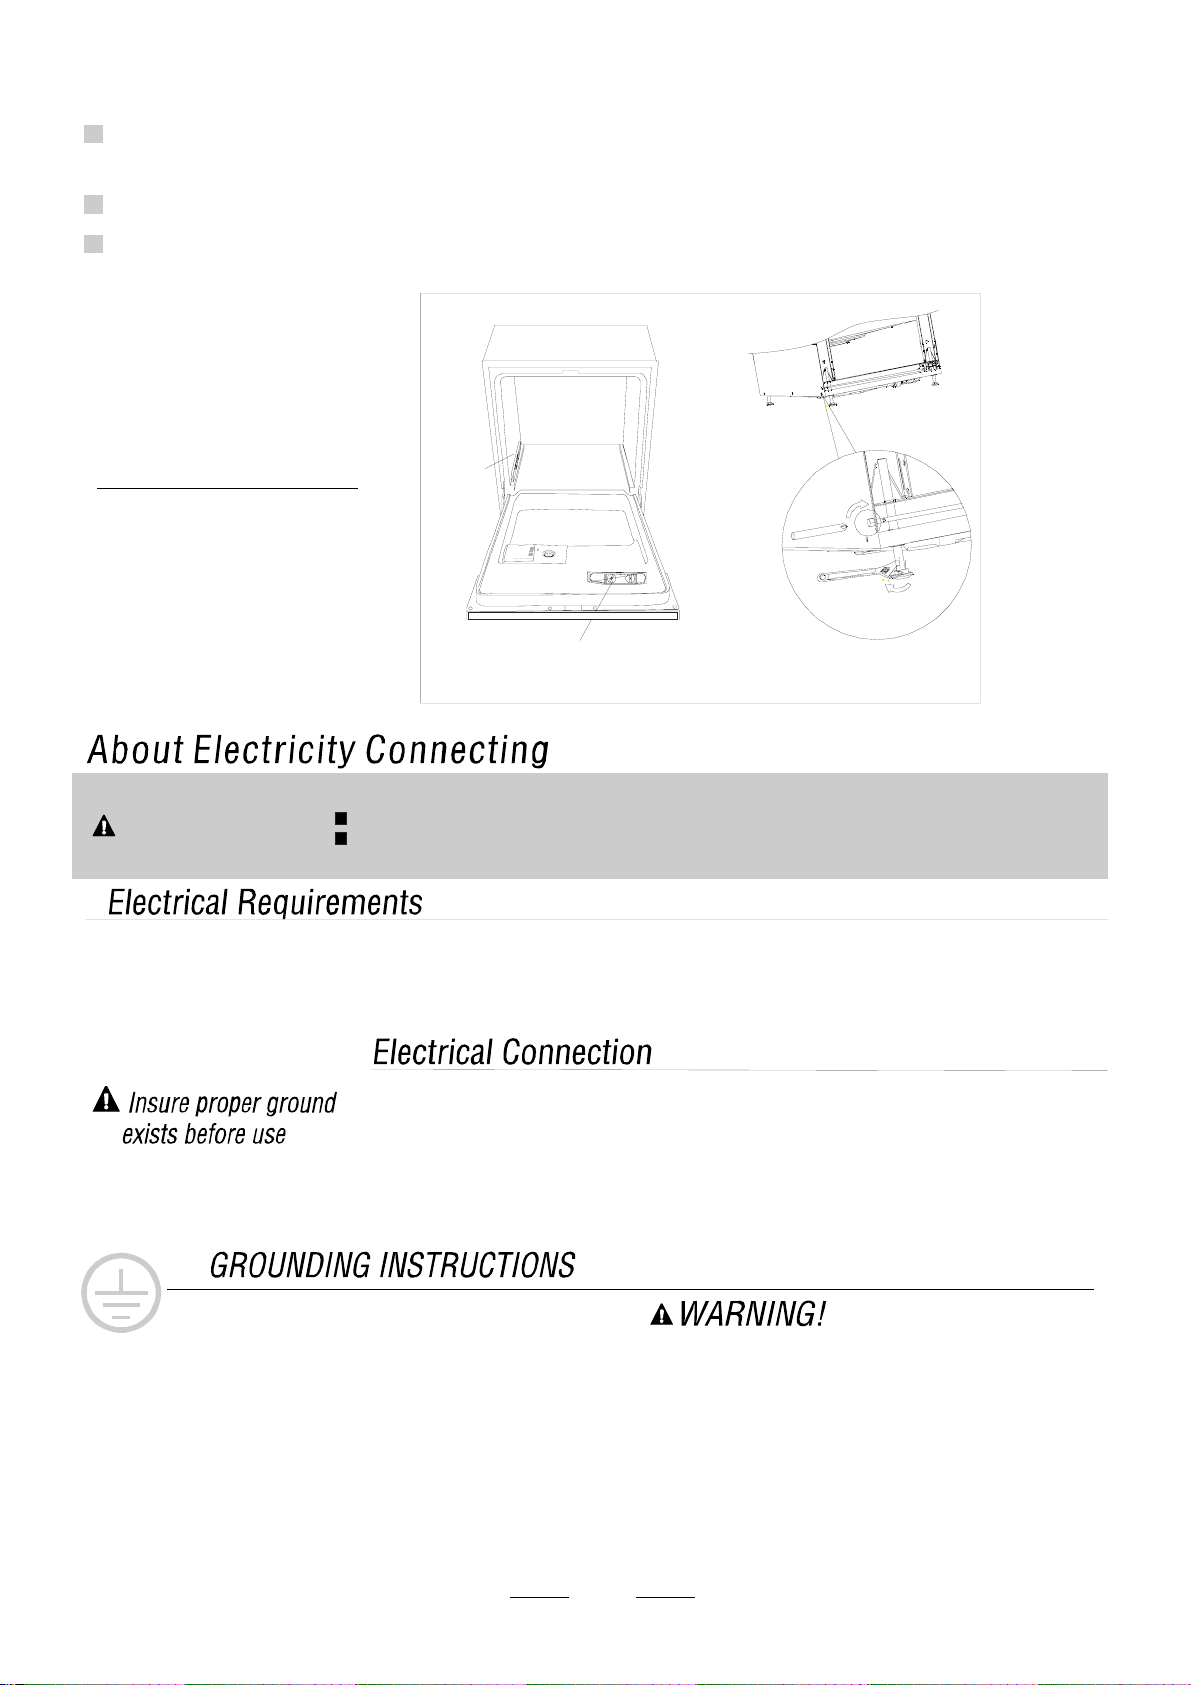
C onne ct the c old water supply hose to a thre aded 3/4 (inch ) conne ctor an dmake su re
t hatit isf astened tight ly in pl ac e.
I fthe w at er pipe sare new or have no t been used for ane xtended period of ti me , let the
w ate rrun to make sure that the w at eris clear. Th isp recaut ion is needed to avoid the
r isk o f t he wate rin letto be blocked an dd amage thea pplian ce.
Improper connection of the equipment earthing conductor can result in the risk of an
electric shock.
Check with a qualified electrician or service representative if you are in doubt whether the
appliance is properly earthed.
Do not modify the plug provided with the appliance. If the plug does not fit properly to the
outlet, please have a qualified electrician to install a proper outlet.
Please close the hydrant afterusing.
Insert the dra inh ose into a dra inpi pewi tha mini mu mdi ameter o f 4c m,o r let it run i nt o t he sink, making sure to
avoidbendingor crimping. Use thespecial plastic supportthat comes withtheappliance. The top ofthehose
must be at aheig htbe tween 40 and 100 cm.The free end ofth ehose m ust not bei mme rsed i nw ater.
FRONT V IEW
Inlet pipe connector Drain pipe connector
POWER OUTLET
SINK
DISHWASHER
Min 100mm
Thefollowingthingsshould becheckedbeforestarting the dishwasher.
The content of this manual is very he lpf ulto the u sers.
After installation, please make sure tokeep this manual.
1
Thedishwasher is leveland fixed properly
2
T he i nlet va lv eis o pen
3
There is aleakage at theconnectionsoftheconducts
4
Thewires aretightlyconnected
5
The poweris switched on
6
The inl et and dr ain hoses a re knott ed
7
Allpackingmaterialsand printingsshouldbe taken outfromthe dishwasher
Syphon Connection
Extension Hose
Ifyouneeda drainhoseextension,make sure tousea similar drain hose.
It mustbe no longer than 4 met res ;otherw ise the c leaning effe ctof t he dishw asher coul d be reduced .
Wa t e r O u t l e t
Connect the wat erdr ainh os e.The drain hose mu stbe cor rect lyf ittedt o av oid w ate r lea ks.
Ensur ethat the w ater dra inh ose i sno tkin ked orsq uas hed.
Thewasteconnectionmustbe at a height ofbetween40cm(minimum) and100 cm(maximum)
f ro m t he b ott o m of t he di sh. Th e w a t er drain h os e shoul d be fix e d by a ho se c li p. Th e fr ee en d of
the hose must n o t be imm ers ed in wat er.
If th e sink is 1000 mm higher from the floor, the excess wat er in hose sc annot be d ra ined d ire ctly
into the sink.Itwillbenecessary todrainexcesswaterfromhosesinto abowlorsuitable
conta ine r th at is held out side and lower th ant he s ink.
How toDrain ExcessWater From Hoses
Fuse blown, or the
circuit bre aker triggered
Replace fuse or reset circuit breaker. Remove any other
appliances sharing the same circuit with the dishwasher
Spil led rinse- aid
Always wipe up rinse-aid spills immediately.
Hard water minerals
The affec ted item s are
notcorrosion resistant.
Aspayarmis
knockin g against
an item in a basket
r
Items of crockery
are loose in the
wash cabinet
This m ay be caused
by on-site installation
or the cross-section of
the piping.
To clean the interior, use a damp sponge with
dishwasher detergent and wear rubber gloves.
Never use any other cleaner than dishwasher
detergent for the r isk of foaming or suds.
Interrupt the programme, and rearra nge the items
which ar e obstructing t he s p ay arm.r
Interrupt the programme,
and rearrange the items of crockery .
This has no influence on the dishwasher function.
if in doubt, contact a suitably qualified plumber.
Detergent with
co lourant was used
Make sure that the detergent is the one without
colourant.
Improper detergent
Make sure the dishwasher is turned on a nd the door is
closed securely.
Chec k that the water supply is connected p roperly and
the water is turned on.
Make sure to close the door properly and latch it.
Make sure the power cord is properly plugge d into the
wall socket.
Power supply is not
turned on
Error code:E1;
Water pressure is low
Door of dishwasher
not properly closed.
Kink in drain hose
Filt er clogge d
Kitchen sink clogged
Check drain hose.
Check coa rse the filter
(see sectio n titled )" Cl eaning The Filter "
Check the kitchen sink to make sure it is draining well.
If the problem is the kitchen sink not draining ,you may
need a plumber rather than a serviceman for dishwashers.
Use only the special dishwasher detergent to avoid
suds. If this occurs, open the dishwasher and let suds
evaporate.Add 1 gallon of cold water to the tub. Close
and lat ch the dishwasher, then Start the "soak" wash
cycle to drain out the water . Repeat if necessary.
The items should be corrosion resistant.
The dishes were not
loaded correctly.
See notes in " Loading the Dishwasher Baskets ".
Select a more intensive programme.
See" Wash Cycle Table ."
Use more detergent, or change your detergent.
Rearrange the items so that the sp ay can rotate freely.r
Clean and/or fit the filter combination correctly.
Clean the sp ay arm jets. See "Cleaning the Spray
Arms".
r
Use less detergent if you have sof t water and select
a shortest cycle to wash the glassware and to get
them clean.
Use a mild abrasive cleaner to eliminate those marks.
Re-loading the dishes properly.
Load the dishwasher as suggested in the directions.
Increase the amount of rinse-aid/refill the rinse-aid
dispenser.
Do not empty your dishwasher immediately after
washing. Open th e door slightly so that the steam can
escape. Begin unloading the dishwasher only once t
he dishes are barely warm to the touch. Empty the low
basket first. This prevents water form dropping off
dishes in the upper basket.
In short pro gram th e washing temperature is lower.
This also lowers cleaning per formance. Choose
a program with a long washing time.
Water drainage is more d ifficult with these items.
Cutlery or dishes of this type are not suitable for
washing in the dishwasher.
The programme was
notpowerf ul enough.
Not eno ugh detergent
was dispensed.
Items are blocking
the path of sp ay arms.r
The filter combination
inthebaseofwash
cabinet is not clean or
is not correctly fitted.
This m ay cause
the sp ay arm jet s
to get blocked.
r
Combination of soft
water and too much
detergent.
Aluminum utensils
have rubbed against
dishes.
Dishes block
detergent cups.
Improper loading
Too little rinse-aid
Dishes are removed
too soon
Wrong program
has been selected
Use of cutlery with
a low-quality coa ting
If overflow occurs, turn of f the main water supply before calling a service.
If there is water in the base pan because of an overfill or small leak,
the water should be removed before restarting the dis hwasher.
Longer inlet time.
Faucets is not opened, or water intake is restricted,
or water pressure is too low.
Some element of dishwasher leaks .
Overflow .
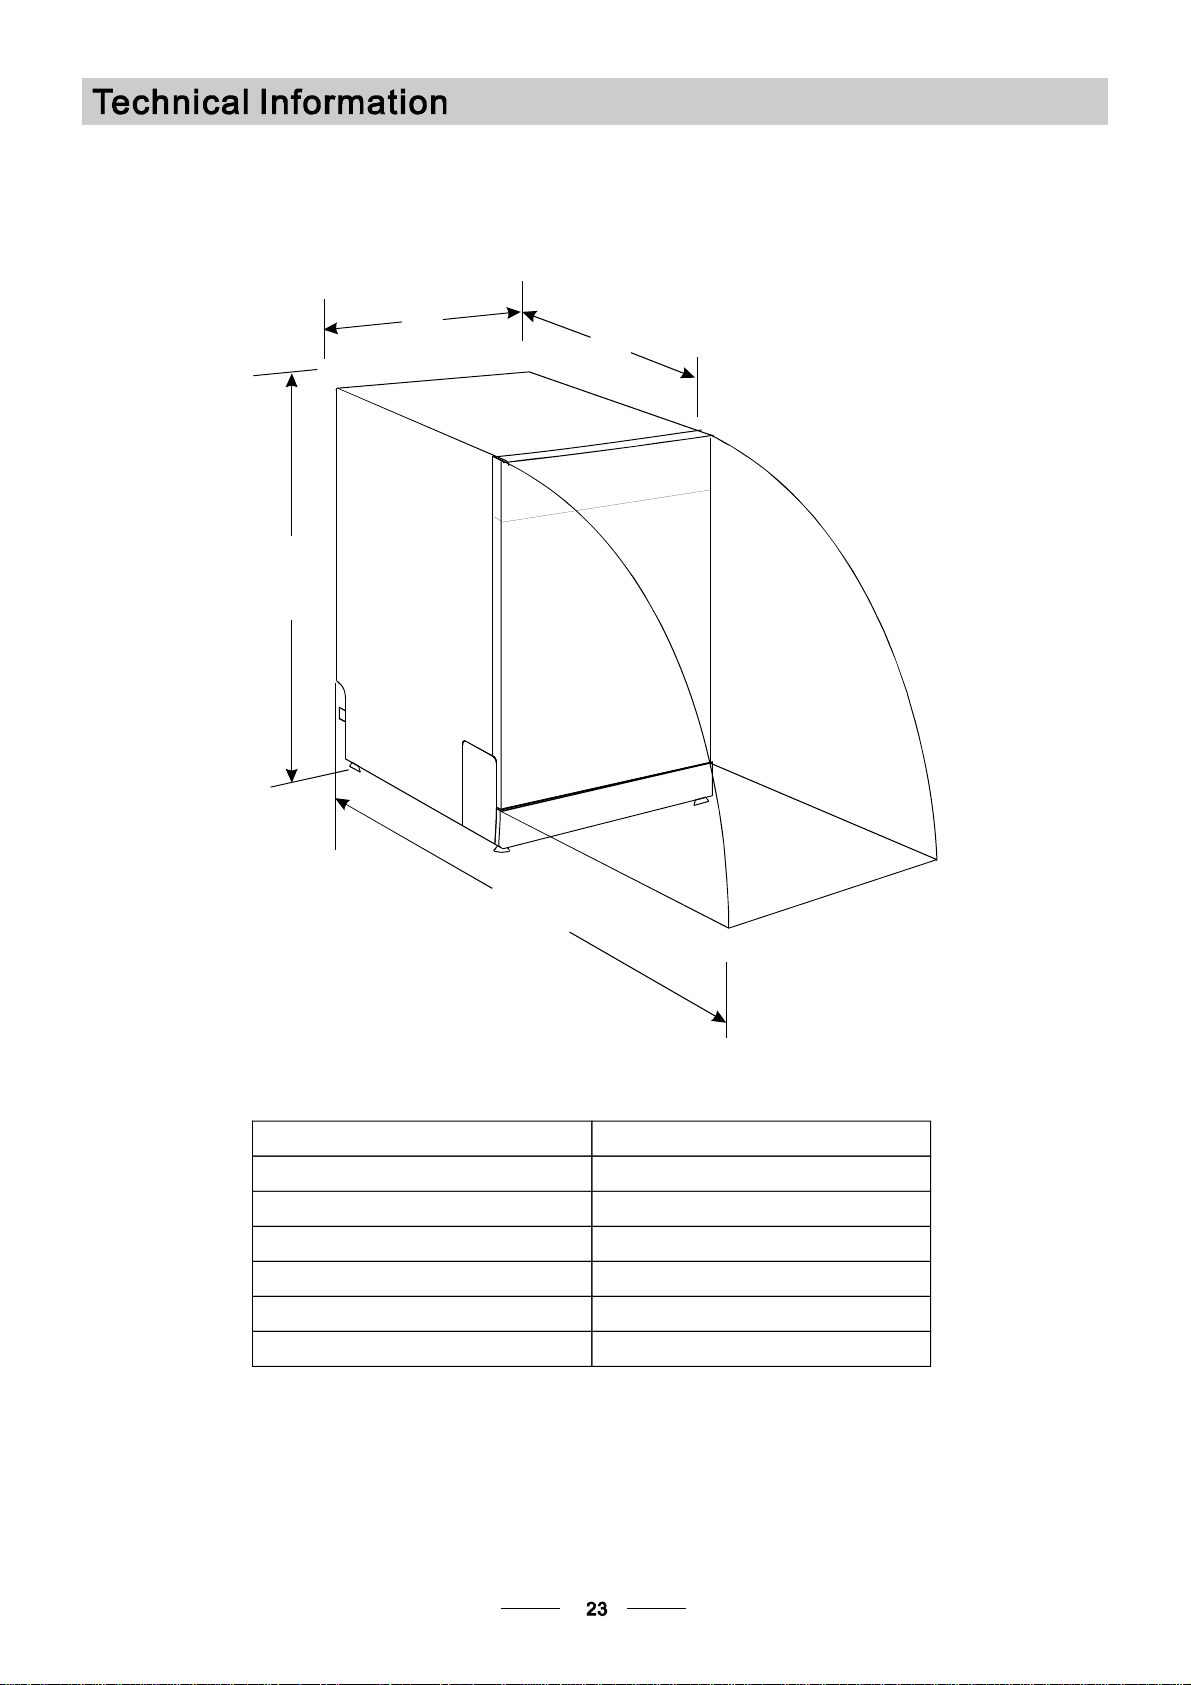
Height : 820mm(adjustable+60mm)
Width : 445mm
Depth : 540mm
Voltage connected Load : see rating label
Water pressure: 0.04-1.0MPa
Power supply: see rating label
Capacity: 8 Place settings
445
540
820
1145

Warranty Card
Eurolinx Pty Limited A.B.N. 50 001 473 347
trading as ILVE (“ILVE”)
Ofce:
48-50 Moore Street, Leichhardt N.S.W 2040
Post:
Locked Bag 3000, Annandale, N.S.W 2038
P: 1300 856 411
WARRANTY REGISTRATION
Your ongoing satisfaction with your ILVE product
is important to us. We ask that you complete the
enclosed Warranty Registration Card and return
it to us so that we have a record of the ILVE
product purchased by you.
PRIVACY
ILVE respects your privacy and is committed
to handling your personal information in
accordance with the National Privacy Principles
and the Privacy Act 1988 (Cth). A copy of the
ILVE Privacy Policy is available at www.ilve.
com.au. ILVE will not disclose any personal
information set out in the Warranty Registration
Card (“Personal Information”) without your
consent unless required by:
1. law;
2. any ILVE related company;
3. any service provider which provide services
to ILVE or assist ILVE in providing services
(including repair and warranty services) to
customers. Our purpose in collecting the
Personal Information is
to keep a record of the ILVE product purchased
by you, in order to provide a better warranty
service to you in the unlikely event that there
is a problem with your ILVE product. ILVE may
contact you at any one or more of the address,
email address or telephone numbers set out in
the Warranty Registration Card. Please contact
ILVE on 1300 694 583 should you not wish to be
contacted by ILVE.
WARRANTY
1. Warranty
ILVE warrants that each ILVE product will
remain, for a period of twenty four (24) months
computed from the date of purchase of the
ILVE product, free from defects arising in the
manufacture of the ILVE product (“Warranty”).
Except for consumer guarantees set
out in the Competition and Consumer Act 2010
(Cth) (“Act”), ILVE does not make any further
warranties or representations in relation to ILVE
products.
2. What is not Covered by the Warranty.
The Warranty does not apply if an ILVE product
is defective by a factor other than a defect
arising in the manufacture of the ILVE product,
ilve.com.au
including but not limited to:
(a) damage through misuse (including failure
to maintain, service or use with proper care),
neglect, accident or ordinary wear and tear
(including deterioration of parts and accessories
and glass breakage);
(b) use for purpose for which the ILVE product
was not sold or designed;
(c) use or installation which is not in accordance
with any specied instructions for use or
installation;
(d) use or operation after a defect has occurred or
been discovered;
(e) damage through freight, transportation or
handling in transit (other than when ILVE is
responsible);
(f) damage through exposure to chemicals, dusts,
residues, excessive voltage, heat, atmospheric
conditions or other forces or environmental
factors outside the control or ILVE;
(g) repair, modication or tampering by the
purchaser or any person other than ILVE, an
employee of ILVE or an authorised ILVE service
contractor*;
(h) use of parts, components or accessories
which have not been supplied or specically
approved by ILVE.
(i) damage to surface coatings caused by cleaning
or maintenance using products not recommended
in the ILVE product handbook provided to the
purchaser upon purchase of the ILVE product;
(j) damage to the base of an electric oven due to
items having been placed on the base of the oven
cavity or covering the base, such as aluminium
foil (this impedes the transfer of heat from the
element to the oven cavity and can result in
irreparable damage); or
(k) damages, dents or other cosmetic
imperfections not affecting the performance of the
ILVE in respect of an ILVE product purchased as a
“factory second” or from display
The Warranty does not extend to light globes
used in ILVE products.
3. Domestic Use
Each ILVE product is made for domestic use. This
Warranty may not extend to ILVE products used
for commercial purposes.
4. Time for Claim under the Warranty
You must make any claim under this Warranty
within twenty eight (28) days after the occurrence
of an event which gives rise to a claim pursuant
to the Warranty, by booking a service call on the
telephone number below.
Continued over...
62 ILVE Operating Manual

5. Proof of Purchase
Customers must retain proof of purchase in order
to be eligible to make a warranty claim in respect
of an ILVE product.
6. Claiming under the Warranty
Customers will bear the cost of claiming under this
Warranty unless ILVE determines the expenses
are reasonable, in which case the customer
must claim those expenses by providing written
evidence of each expense to ILVE at the address
on the Warranty Registration Card.
7. Statutory Rights
(a) These terms and conditions do not affect your
statutory rights.
(b) The limitations on the Warranty set out in this
document do not exclude or limit the application
of the consumer guarantees set out in the Act or
any other equivalent or corresponding legislation
in the relevant jurisdiction where to do so would:
(i) contravene the law of the relevant jurisdiction;
or
(ii) cause any part of the Warranty to be void.
(c) ILVE excludes indirect or consequential loss
of any kind (including, without limitation, loss of
use of the ILVE product) and (other than expressly
provided for in these terms and conditions)
subject to all terms,
conditions and warranties implied by custom, the
general law, the Act or other statute.
(d) The liability of ILVE to you for a breach of any
express or non-excludable implied term, condition
or warranty is limited at the option of ILVE to:
(i) replacing or repairing the defective part of the
ILVE product;
(ii) paying the cost of replacing or repairing the
defective part of the ILVE product;
(iii) replacing the ILVE product; or
(iv) paying the cost of replacing the ILVE product.
(e) Our goods come with guarantees that cannot
be excluded under the Australian Consumer
Law. You are entitled to a replacement or refund
for a major failure and for compensation for any
other reasonably foreseeable loss or damage.
You are also entitled to have the goods repaired
or replaced if the goods fail to be of acceptable
quality and the failure does not amount to a
major failure.
8. Defects
Any part of an ILVE product deemed to be
defective and replaced by ILVE is the property of
ILVE. ILVE reserves the right to inspect and test
ILVE products in order to determine the extent of
any defect and the validity of a claim under the
Warranty.
*To locate your closest ILVE authorised service
agent please contact ILVE on 1300 856 411 or
visit http://support.ilve.com.au/
ALL SERVICE CALLS MUST BE BOOKED
THROUGH THE ILVE SERVICE AND
WARRANTY DEPARTMENT ON 1300 856 411
01012013
Warranty Card continued
ilve.com.au
63ILVE Operating Manual
Please complete and send to ILVE at: REPLY PAID 83617
LEICHHARDT NSW 2040
Last Name: First Name:
Address:
State: Postcode: Email:
Home Phone: Mobile:
Purchase Date: / /
(Please attach proof of purchase to validate warranty)
MODEL NUMBER
SERIAL NUMBER
(if you cannot locate the serial number please call ILVE on 1300 85 64 11)
1
2
3
4
WARRANTY REGISTRATION CARD
01012013
01012013
Warranty Card tear off