Loading ...
Loading ...
Loading ...
10
Setting the oven
There are various ways in which you can set your oven. Here
we will explain how you can select the desired type of heating
and temperature or grill setting. You can select the oven
cooking time and end time for your dish. Please refer to the
section on Setting the time-setting options.
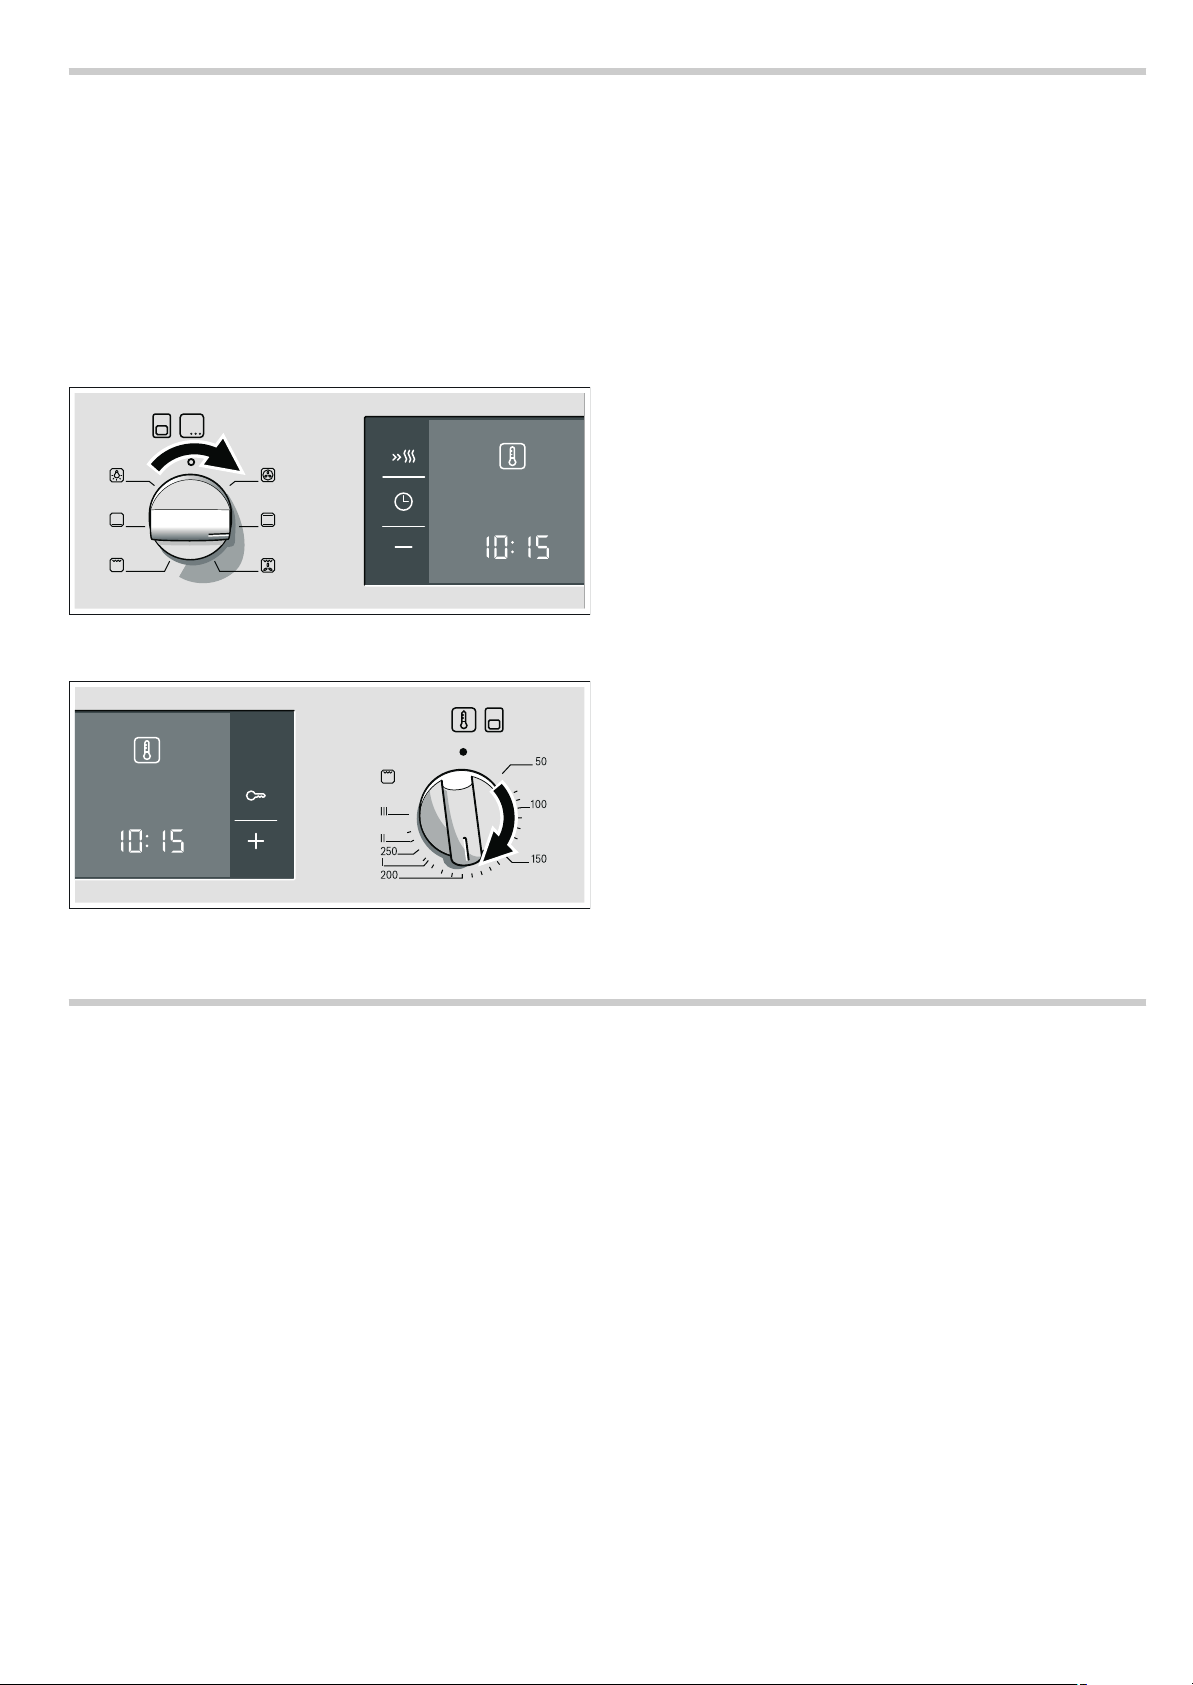
Switching on the oven
Example shown below: Setting the top/bottom heating to
190° C in the
ó main oven.
1.Use the function selector to set the type of heating.
2.Set the temperature or grill setting using the temperature
selector.
The oven begins to heat up.
Changing the settings
The type of heating and temperature or grill setting can be
changed at any time with their respective selector.
Switching off the oven
Turn the function and temperature selector to the off position.
Rapid heating
You can switch on c rapid heating for the ó main oven. The
main oven will then reach the set temperature particularly
quickly.
Use rapid heating when temperatures above 100 °C are
selected. The following heating types are suitable:
■ 3D hot air <
■ % Top/bottom heating
To ensure an even cooking result, do not place your dish in the
cooking compartment until rapid heating is complete.
1.Set the heating type and temperature for the main oven.
2.Press the c button.
The
c symbol lights up in the display. The main oven
begins to heat up.
The rapid heating process is complete.
A signal sounds. The
c symbol in the display goes out. Place
your dish in the main oven.
Cancelling rapid heating
Press the
c button. The c symbol in the display goes out.
Setting the time-setting options
The ó main oven has various time-setting options. You can use
the
0 button to access the menu and switch between the
individual options. All the time symbols are lit during the time
when you can make settings. The [ ] brackets show you which
time-setting function you have currently selected. A time-setting
option which has already been set can be changed directly
using the
@ or A button, when its time symbol is in brackets.
Timer
You can use the timer as a kitchen timer. It runs independently
of the oven. The timer has its own signal. In this way, you can
tell whether it is the timer or a cooking time which has elapsed.
1.Press the 0 button once.
The time symbols light up in the display and the brackets are
around
U.
2.Use the @ or A button to set the timer duration.
Default value for
@button = 10 minutes
Default value for
Abutton = 5 minutes
After a few seconds, the time setting is adopted. The timer
starts. The [
U] symbol lights up in the display and the timer
duration counts down. The other time symbols go out.
The timer duration has elapsed
A signal sounds. 00:00 is shown in the display. Use the
0
button to switch off the timer.
Changing the timer duration
Use the
@ or A button to change the timer duration. After a few
seconds, the change is adopted.
Cancelling the timer duration
Use the
A button to reset the timer duration to 00:00. The
change will be adopted after a few seconds. The timer is
switched off.
Checking the time settings
If several time-setting options are set, the relevant symbols are
illuminated on the display. The symbol for the time-setting
option that is visible in the display is shown in brackets.
To call up the
U timer, r cooking time, p end time or 0
clock, press the
0 button repeatedly until the brackets are
around the relevant symbol. The display shows the value for a
few seconds.
Loading ...
Loading ...
Loading ...