Remove the cassette cover by pressing the above indicated area.
If a tape cassette is already installed, remove it by pulling it straight up. Also, if batteries are already installed, remove them.
• Make sure that the power is turned off when replacing batteries or tape cassettes.
Insert four new AAA alkaline batteries (LR03), making sure that their poles point in the correct directions.
• Always replace all four batteries at the same time using brand new ones
Insert a tape cassette, making sure that it snaps into place.
• Make sure that the end of the tape feeds under the tape guides.
• Use only Brother M tapes with this machine.
Insert the two hooks at the bottom of the cassette cover into the slots on the machine (1), and then close the cover securely until it snaps into place (2).
After you have installed the tape, feed the tape (see “Feeding”) once and then push in the tape cutter lever to cut the tape.
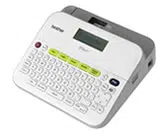
Changeable Faceplates
The PT-90 comes with a variety of different faceplates - enabling users to customize the machine. To change the faceplates, follow the steps below.
Remove the cassette cover by pressing the above indicated area. Slide the front cover back and lift up from machine.
• Make sure that the power is turned off when replacing the faceplate.
Remove the inserted faceplate, and then replace it with another one.
• Be sure to remove the protective film from the front side of the faceplate before replacing.
• Do not insert more than one faceplate at a time. If the front cover is forcedly closed with more than one faceplate inserted, the faceplates may get wrinkled or the front cover will not be able to be closed firmly
Insert the hooks on the front cover into the slots on the machine, and slide back the cover into place.
Insert the two hooks at the bottom of the cassette cover into the slots on the machine (1), and then close the cover securely until it snaps into place (2).
LCD Display & Keyboard
Initial Settings
1. Start your machine.
Supply power by using four AAA batteries, and then press .
2. Set the language.
The default setting is [English].
• You can also display [Language] by pressing and
3. Set the unit of measurement.
The default setting is [inch].
• You can also display [Unit] by pressing and .
Entering Text and Symbols
Switching Upper Case/Lower Case
Entering Numbers
Making a Two Line Label
1. Enter the text for the first line and press .
2. Enter the text for the second line and press .
• Do not press after the second line; otherwise “Line Limit!” error message will appear.
• Use either 3/8" (9mm) or 1/2" (12mm) wide tape for two line text.
Entering Symbols
Example: Entering
• Pictographs are displayed on the LCD display with the corresponding alphabet and number of the Pictograph table. For the Pictograph table and Pictograph List, refer to “Symbols”.
Entering Accented Characters
• To cancel operations, press .
• The order of accented characters differs by the selected LCD language.
To Clear ( + )
By pressing , the letters will be deleted one by one.
To delete all text and settings :
To delete text only :
Designing Labels
1. Press , use to select a function under column [A], and then press . (The function can also be selected with the shortcut keys listed under column [C]. ( + to ))
2. Use to select a setting listed under column [B], and then press .
Printing Labels
Text Preview
You can preview the text before printing.
• The LCD shows the whole text and the label length (inch/ mm), then returns to the original text.
• Only the text can be previewed, not the style, size, underline/frame or any additional features.
Feeding (Tape Feed)
The machine will feed 1.0" of tape, which may be needed when installing a new tape cassette.
Printing
• To prevent damage to the tape, do not touch the cutter lever while the message “Printing…” or “Feeding…” is displayed.
• To cut off the label, push in the tape cutter lever on the upper-left corner of the machine.
• Peel the printed label from backing and apply the label.
Making Copies ( + )
You can print up to 9 copies of each label.
• You can also select the number of copies by entering with the Number Keys ~ .
Removing the Label Backing
This machine is equipped with a peeler that allows you to easily remove the backing from labels.
1. Insert the label, with the printed surface facing down, as far as possible into the built-in peeler.
2. Fold back the label to the right and quickly pull out the label. The end of the backing is separated from the label.
Resetting the P-touch
You can reset the P-touch labeler when you want to initialize the settings, or in the event that the P-touch is not working properly
1. Press to turn off the power.
2. While holding down and , press to turn on the power.
3. Release , and then release and .
The internal memory is reset, and all text, settings and stored files are cleared.
DECO MODE
This function allows you to create unique labels by using some built-in templates. You can choose from 8 types of templates
Saving Label Files
Memory ( + )
You can save your original labels on to your machine. Up to three labels can be saved and recalled for printing at a later time. You can also edit and overwrite the stored label.
Symbols
The following symbols are available.
Basic
Pictograph
• To display the next group, press .
To cancel operations, press .
• Symbols surrounded by a box in the Basic table are available in DECO MODE.
• The rows of symbols (A to L) in the Pictograph table can be selected by pressing the corresponding character.
The batteries are weak. Replace them with new ones
Full!
The maximum number of characters (80 characters for regular text, or 50 characters for DECO MODE) have already been entered.
No Text!
• You tried to print a text file when there is no data stored in the memory.
• is pressed when no text is entered.
• is pressed when no text is entered.
• You tried to select [Copies] when no text is entered.
• is pressed when no text is entered in the text entry screen of DECO MODE.
Line Limit!
• You tried to enter a 3rd line by pressing (Maximum printable lines is 2).
Invalid!
Invalid number is selected for [Label Length].
Text Limit!
• The text length exceeds the selected label length.
• The text length exceeds 7.8" (200mm) when [Label Length] is set to [Auto] in DECO MODE.
• If the minimum label length (1.2"/30mm) is selected, some frame types (Leaf or Star) will not allow you to enter additional text.
Cooling XXX
If the print head becomes too hot, your machine will stop printing and automatically start to cool down. The cool down time will be displayed. Once the print head is cool, printing will automatically continue. Do not touch the P-touch labeler while cooling.
What to do when...
Problem
Solution
The display stays blank after you have turned on the machine.
• Check that the batteries are correctly inserted.
• If the batteries are weak, replace them.
The machine does not print, or the printed characters are not formed properly.
• Check that the tape cassette has been inserted correctly.
• If the tape cassette is empty, replace it.
• Check the cassette cover is properly closed.
The setting has cleared on its own.
• The batteries may be weak. Replace them.
• When power is disconnected for more than three minutes, all text & formats in the display will be lost. Language and Unit settings will also be cleared.
A blank horizontal line appears through the printed label.
There maybe some dust on the print head. Remove the tape cassette and use a dry cotton swab to gently wipe the print head with an up-and-down motion.
The machine has “locked up” (i.e., nothing happens when a key is pressed, even though the machine is on.)
Refer to “Resetting the P-touch”.
The power turns off when you try to print.
• The batteries may be weak. Replace them.
• Check that the batteries are correctly inserted.
The tape does not feed properly or the tape gets stuck inside the machine.
• Check that the end of the tape feeds under the tape guides.
• The cutter lever is used while printing. Do not touch the cutter lever during printing.
All text and format settings need to be cleared to create a new label.
Press while holding down , or go into Function mode and select .
#1 Every time I hit the print button the power goes off. The batteries were just inserted. How can I get it to print?
I am sorry you are having this problem. They are very handy little machines; the one I had before this one lasted almost 15 years. It sounds to me as though your machine is broken. As long as you are pressing the button marked Print, you seem to be doing everything correctly. You need to return the machine. Sorry I could not be more helpful
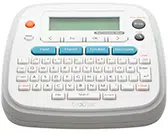
Push the red button in the upper right hand corner...It says 'Clear' underneath it, but Clear refers to the BS (Backspace) button below the red button. Red button is the Power button.
I don't believe that any of the media would be sturdy enough to effectively mark clothing. I doubt the labels would stay on cloth very well at all. This labeler, I believe, is only meant to be mark flat metallic, paper, or cardboard type surfaces. I think finished wood could take one of these labels but even that might be a stretch.
#4 What are the dimensions of this product (it is listed as 9x10", but I believe that is incorrect)?
Greetings. You are right, looking at the product in blister pack from the front, the width of the label is 5.5" and it's height is 4.5".
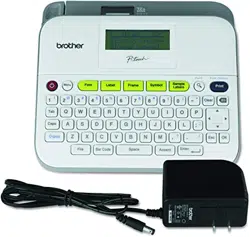
It uses 4 AAA alkaline batteries. The battery power lasts a VERY short time and the machine does not have plug in capability. This was a waste of money. It asks for battery replacement after maybe 4 labels are printed and you do not have the option of AC power. A friend bought the same one and has the same problems.


 .
.
 and
and 

 .
.

 .
.  .
.


 .
.  +
+  )
)


 to select a function under column [A], and then press
  to
to  ))
)) 


 ~
~  .
.
 to turn off the power.
  and
and  , press
 )
)


 .
.  .
. 
 is pressed when no text is entered.
  while holding down
  , or go into Function mode and select
  .
.