Loading ...
Loading ...
Loading ...
4. Turn the crank on the vehicle jack counter‐
clockwise to retract the jack and lower the
vehicle.
5. Remove the vehicle jack.
After the wheel change
1. Tighten the lug bolts crosswise. The tight‐
ening torque is 101 lb ft/140 Nm.
2. Stow the nonworking wheel in the cargo
area.
The nonworking wheel cannot be stored
under the cargo floor panel because of its
size.
3. Check tire inflation pressure at the next op‐
portunity and correct as needed.
4. Reinitialize the Flat Tire Monitor.
Reset the Tire Pressure Monitor.
5. Check to make sure the lug bolts are tight
with a calibrated torque wrench.
6. Have the damaged tire replaced at the
nearest dealer’s service center or another
qualified service center or repair shop.
emergency wheel
General information
In the event of a flat tire, the emergency wheel
can be used in place of the wheel with the de‐
fective tire. The emergency wheel is only in‐
tended for temporary use until the defective
tire/wheel is replaced.
Removing the emergency wheel
The emergency wheel is housed in a well on
the underbody of the vehicle. The screw con‐
nection of the emergency wheel is in the cargo
area underneath the floor mat, on the floor of
the storage compartment for the onboard vehi‐
cle tool kit.
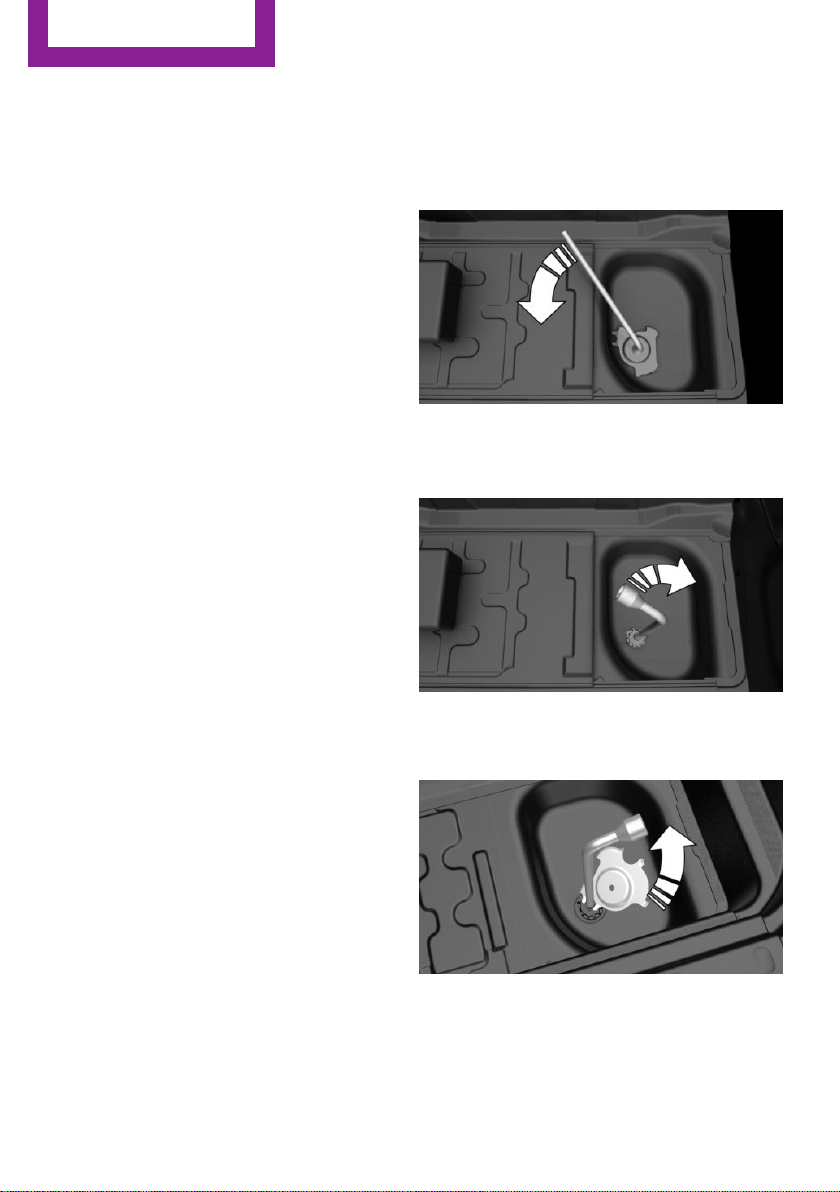
1. Loosen the nut using the wheel wrench
from the onboard vehicle tool kit.
2. Remove the retaining plate.
3. Screw wheel lug wrench onto the thread
and hold in place with one hand.
4. Unlock the locking hexagon of the emer‐
gency wheel well using the hexagon at‐
tached to retaining plate.
5. Lower the emergency wheel with the wheel
wrench.
6. Unscrewing the wheel wrench
7. Pull out the well with emergency wheel un‐
der the vehicle toward the rear.
Seite 208
MOBILITY
Wheels and tires
208
Online Edition for Part no. 01 40 2 915 044 - X/16
Loading ...
Loading ...
Loading ...