Loading ...
Loading ...
3
INSTALLATION REQUIREMENTS
Tools and Parts
Gather the required tools and parts before starting installation.
Read and follow the instructions provided with any tools listed
here.
Tools needed
■ Phillips screwdriver
Parts supplied (600 CFM models)
Remove parts from packages. Check that all parts are included.
■ Blower assembly
■ Motor support bracket
■ Motor spring clip
■ 2 - 6 x 1 mm nuts
■ 5 - 4.2 x 8 mm screws
■ 2 - 6 x 16 mm screws
■ 2 - 6.4 x 11 mm lock washers
■ T-20 Torx
®†
adapter
Parts supplied (1200 CFM models)
Remove parts from packages. Check that all parts are included.
■ Blower assembly
■ Motor support bracket
■ Motor spring clip
■ 5 - 6 x 1 mm nuts
■ 5 - 4.2 x 8 mm screws
■ 5 - 6 x 16 mm screws
■ 5 - 6.4 x 11 mm lock washers
■ T-20 Torx
®†
adapter
INSTALLATION INSTRUCTIONS
Prepare Internal Blower System
IMPORTANT: Perform steps 1-4 before mounting the range
hood.
1. Remove grease filters from range hood. See the “Range
Hood Care” section in the Use and Care Guide.
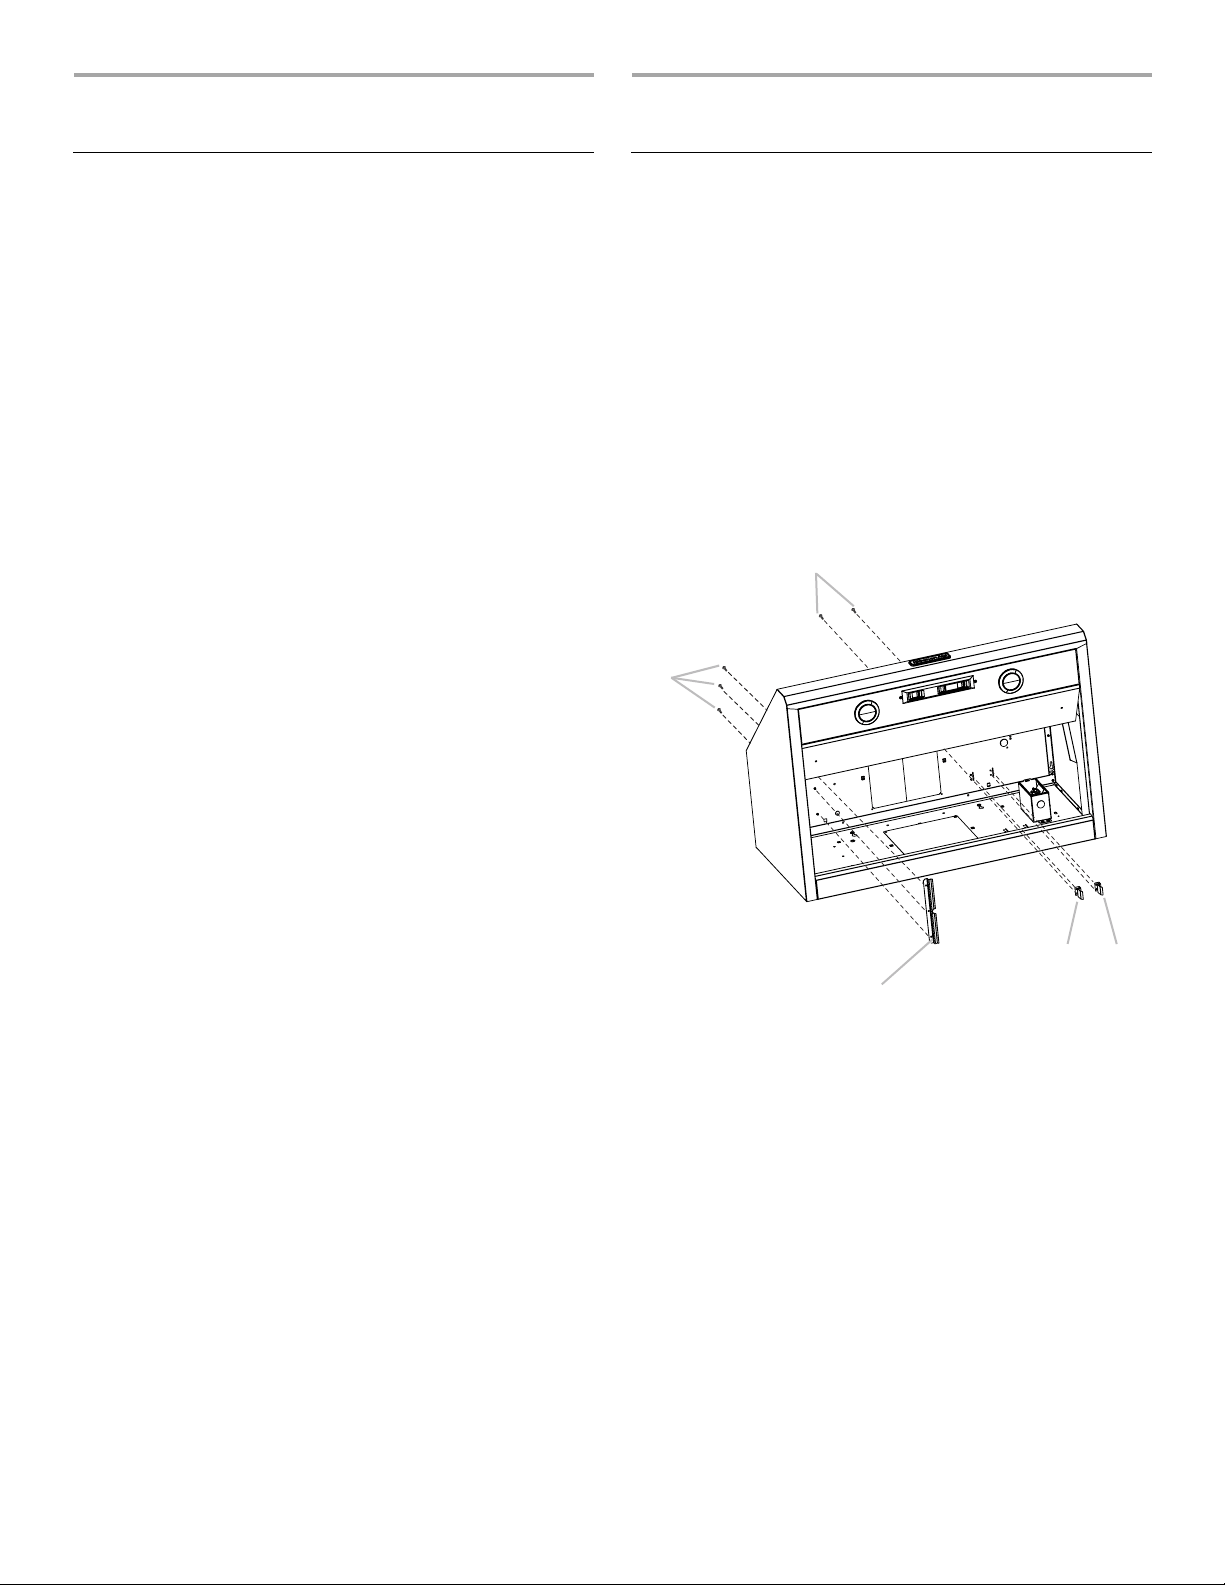
2. Install the motor support bracket using three 4.2 x 8 mm
screws. Screw bracket to the inside top or back (alternate
location on some models), toward the left side of the range
hood.
3. Install motor spring clip using two 4.2 x 8 mm screws. Screw
spring clip to the inside top or back (alternate location on
some models) of the range hood at the proper location for the
selected motor system. Slide the mounting tab of the spring
clip through the slot in the panel and secure with the screws.
Use the inside set of mounting holes for the single motor
system. Use the outside set of mounting holes for the dual
motor system.
†®TORX is a registered trademark of Saturn Fasteners, Inc.
A. 4.2 x 8 mm screws (3) for motor support bracket
B. 4.2 x 8 mm screws (2) for motor spring clip
C. Motor support bracket
D. Motor spring clip (single motor assembly location)
E. Motor spring clip (dual motor assembly location)
C
A
D
E
B
Loading ...
Loading ...
Loading ...