Loading ...
Loading ...
Loading ...
TOOLS YOU WILL NEED
Installation Instructions
REVERSING THE DOOR SWING
(Single Door Refrigerator Models only)
IMPORTANT NOTES
When reversing the door swing:
NOTE: Door swing is not reversible on some
stainless steel models.
• Read the instructions all the way through
before starting.
• Handle parts carefully to avoid scratching
paint.
• Set screws down by their related parts to
avoid using them in the wrong places.
• Provide a non-scratching work surface for
the doors.
IMPORTANT: Once you begin, do not move
the cabinet until door-swing reversal is
completed.
These instructions are for changing the
hinges from the right side to the left side—if
you ever want to change the hinges back to
the right side, follow these same instructions
and reverse all references to left and right.
• Once door swing is finalized, ensure
the logo badge is properly aligned and
permanently secured to the door by
removing the adhesive cover on the back
side. NOTE: If necessary call Customer
Service for a replacement badge.
Unplug the refrigerator from its electrical
outlet.
Empty all door shelves, including the dairy
compartment.
Putty Knife or
Thin-blade Screwdriver
Masking Tape
Adjustable Wrench
3/8″ and 10 mm Socket
Ratchet/Driver
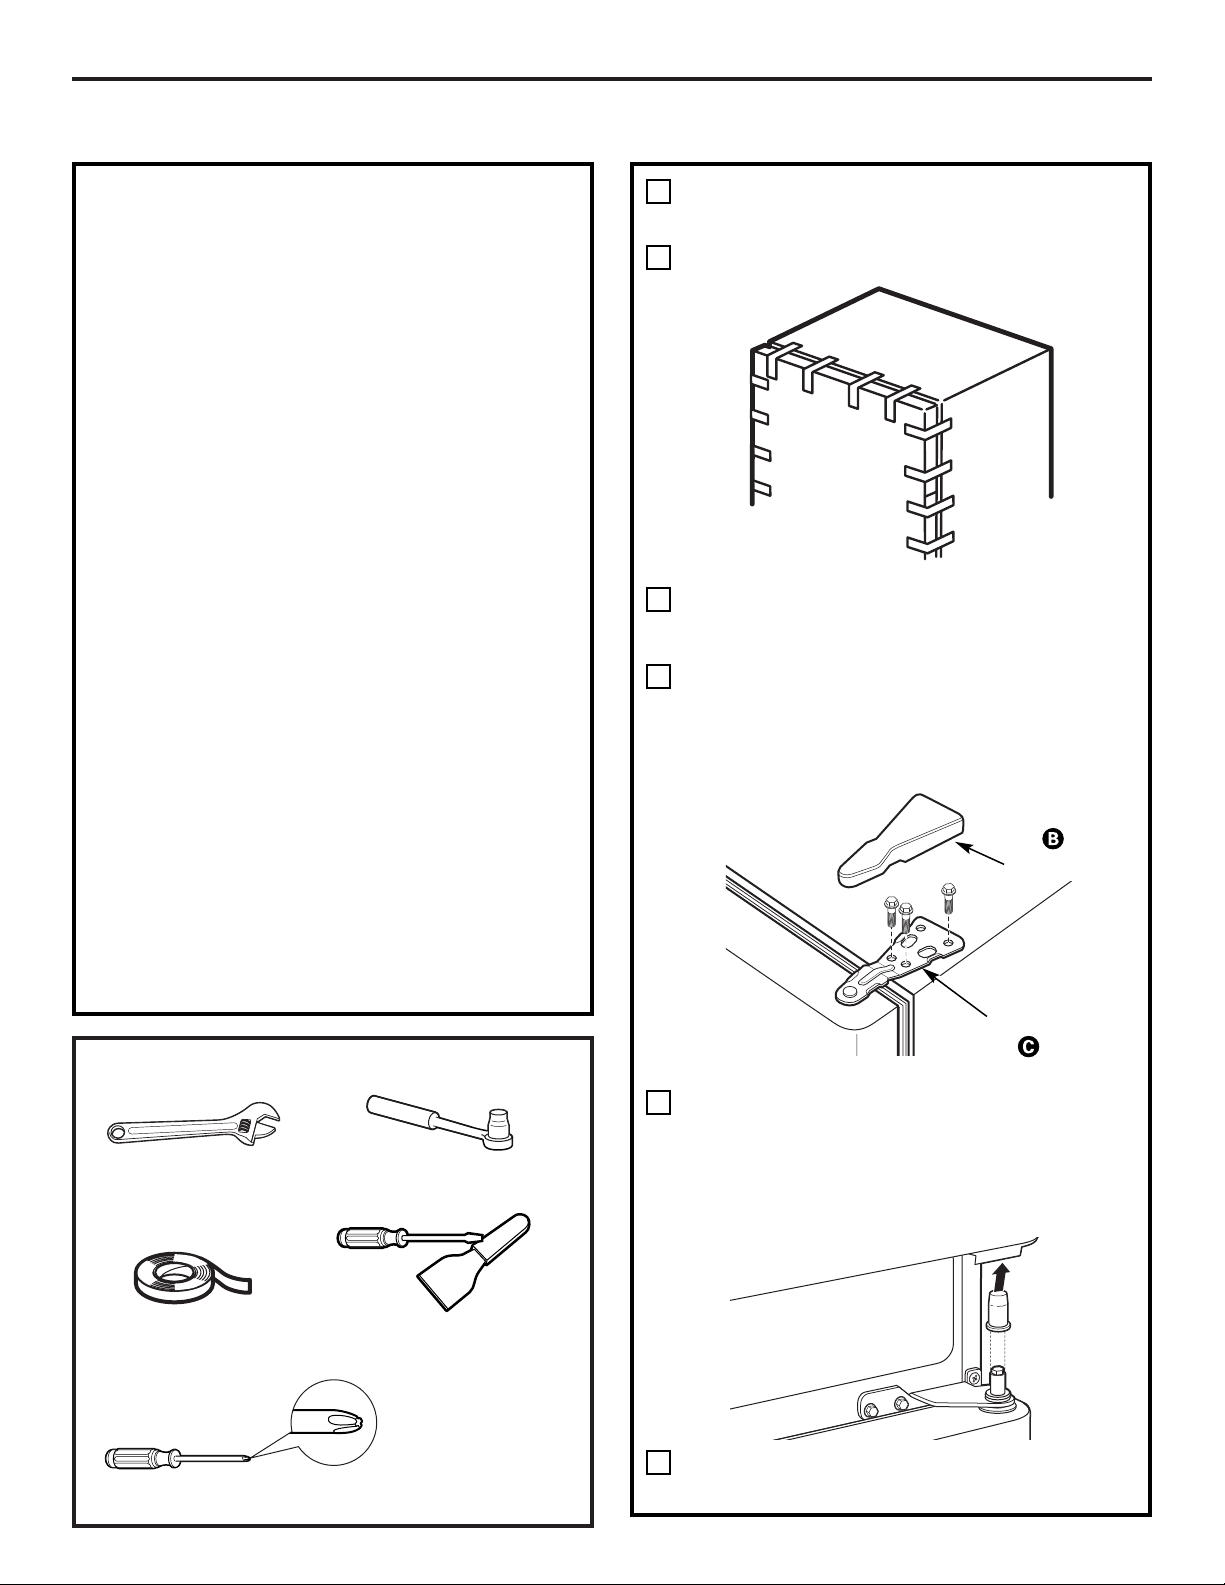
REMOVE THE
REFRIGERATOR DOOR
Tape the door shut with masking tape.
Remove the hinge cover on top of the
refrigerator door by squeezing it and
pulling it up.
Using a 3/8″ or 10 mm socket
ratchet/driver, remove the bolts securing
the top hinge to the cabinet. Then lift the
hinge straight up to free the hinge pin
from the socket in the top of the door.
Remove the tape and tilt the door away
from the cabinet. Lift the door off the
center hinge pin. Ensure that the white
hinge pin thimble remains on the hinge pin
or inside door hinge pin hole located in the
bottom of the door.
Set the door on a non-scratching surface
with the inside up.
1
A
B
C
D
E
Hinge Cover
Top Hinge
Phillips Screwdriver
24
Loading ...
Loading ...
Loading ...