Loading ...
Loading ...
Loading ...
INSTALLATION INSTRUCTIONS
INSTALLATION
Cut the regular foam seal to fi t the area of the
window sill that the air conditioner will rest on.
Place the air conditioner into the window with the
“L” shaped mounting bracket positioned in front of
the upper sash. The bottom of the cabinet should be
positioned on the recessed portion of the window
frame. Pull the upper window sash down until it
rests just behind the front fl ange of the “L” shaped
mounting bracket.
Expand the side curtains on each side and secure
the top of the frames to the window sash using one
13 mm (1/2 inch) screw on each side of the “L”
shaped mounting bracket.
Attach the clamps on the lower part of each curtain
to the window sill using one 13 mm (1/2 inch)
screw on each side of the cabinet.
Place the adhesive foam seal into the opening
between the inside and outside windows and
attached the safety lock to the outside window frame
using two 13 mm (1/2 inch) screws.
4
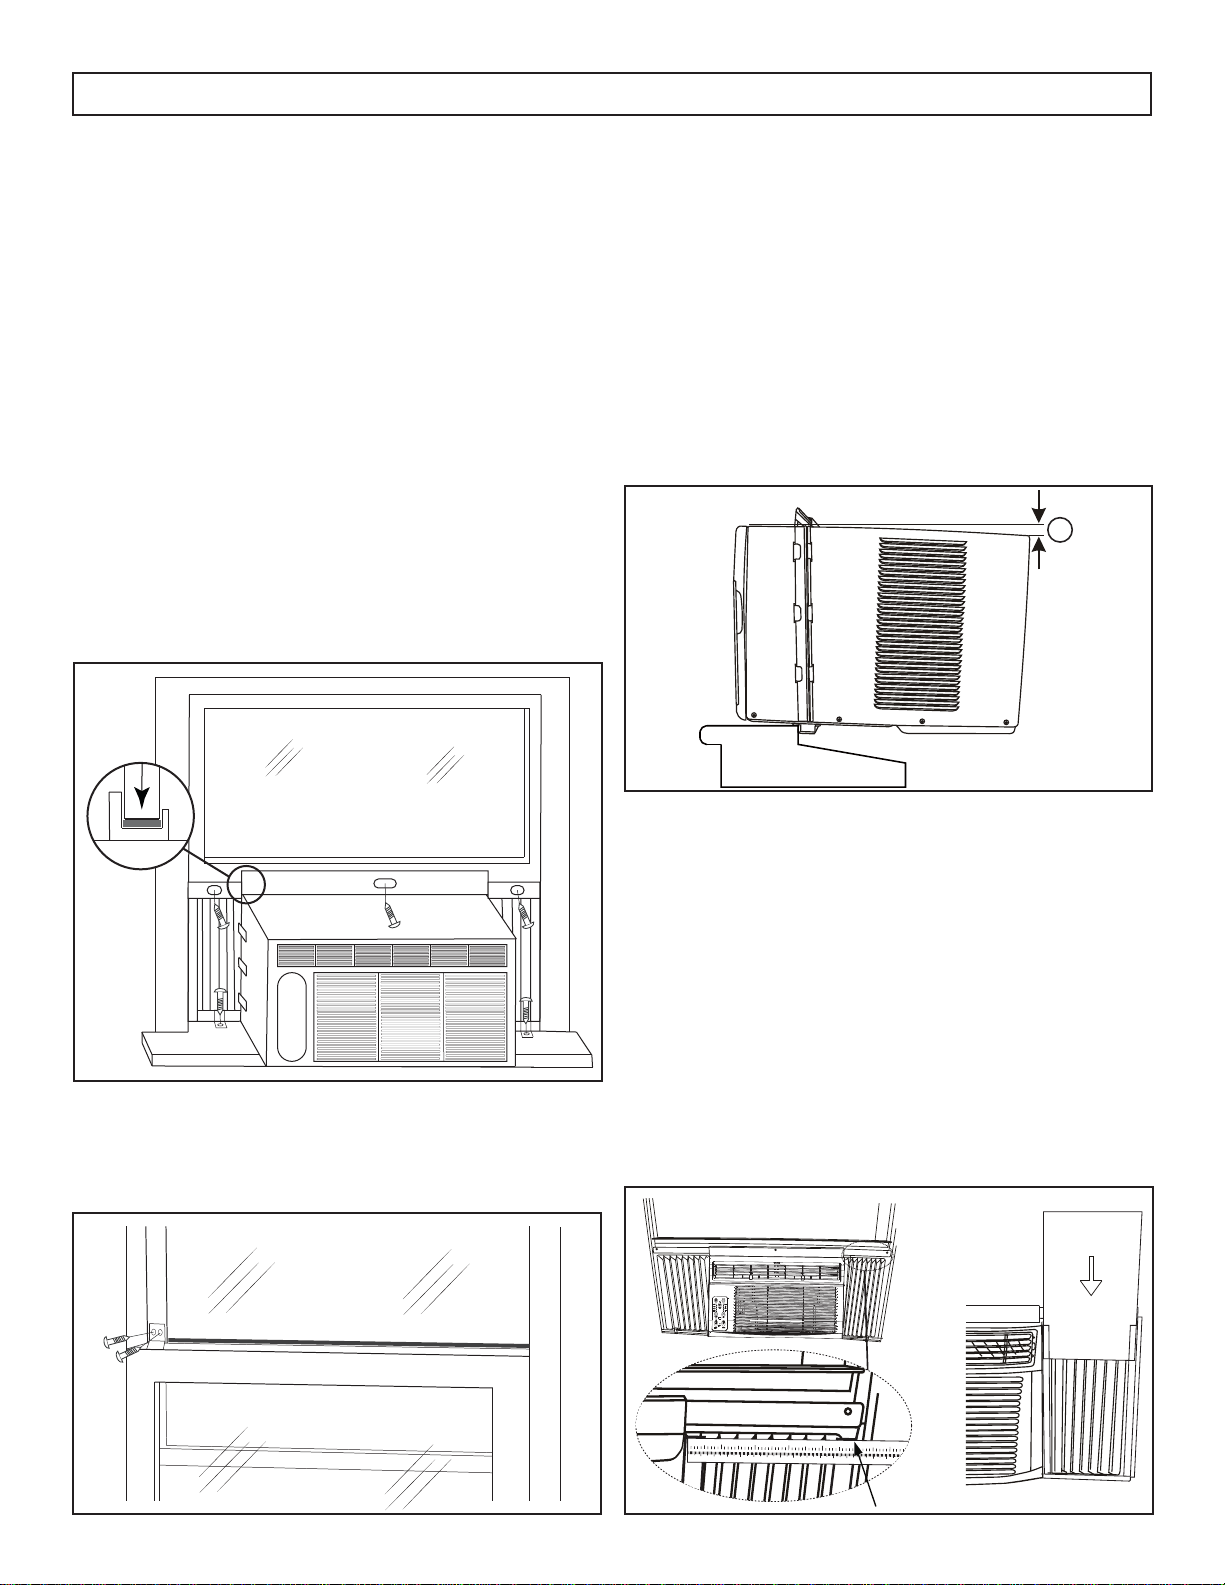
Check the Tilt Angle
The air conditioner should be tilted downward
towards the outside approximately 3° to 4°. This
tilt will encourage any condensed water to drain
to the outside. If any condensed water leaks to the
inside of the house, check the tilt angle and adjust
as necessary.
Measure the tilt angle from the front of the cabinet’s
edge. The difference in height between the front and
the back of the appliance, labeled “A” on the image
below, should be approximately 19 mm - 2.5 cm
(3/4 inch - 1 inch).
A
Install the Foam Inserts
The foam inserts can block any cracks or spaces
in the side curtains and help maintain the energy
effi ciency of the appliance.
After the appliance is installed in the window,
measure the width of the side curtains from the side
of the appliance to the edge of the curtain.
If necessary, cut the foam insert to the correct size
and then slide the foam insert into the slots in the
side curtain. The supplied weather stripping can
be used to block any other cracks or spaces as
required.
12
3
45678
9
10
12
1
113
14
15
5
6
12
3
4
Loading ...
Loading ...
Loading ...