Loading ...
Loading ...
3
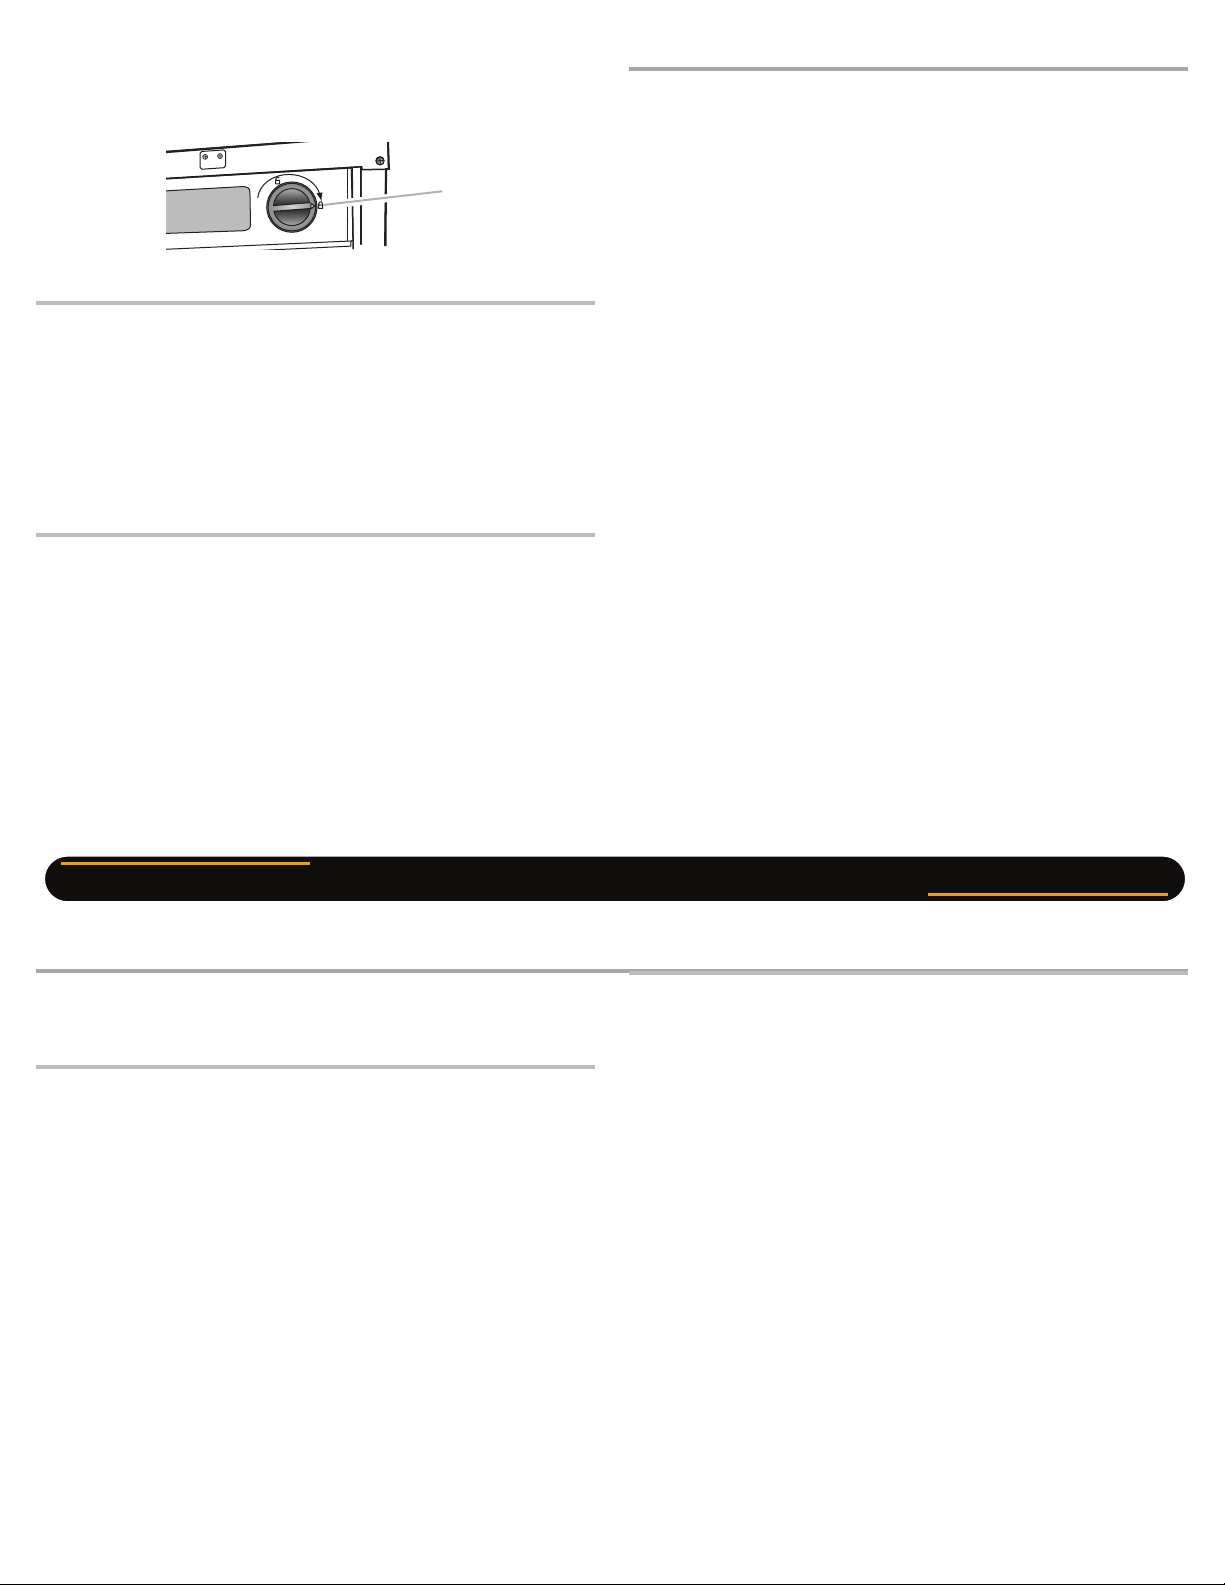
5. Turn the lter clockwise until it locks into the housing. Ensure
that the alignment arrow on the lter head aligns with the locked
symbol on the control box housing.
NOTE: If the lter is not correctly locked into the housing, the ice
maker will not produce ice.
The Water Filter Status Light
The water lter status lights will help you know when to change your
water lter.
■ The “Order Filter” status light will be illuminated when it is time to
order a replacement lter.
■ The “Replace Filter” status light will be illuminated when it is time
to replace the lter.
■ Replacing the disposable water lter with a new lter will
automatically reset the lter status tracking feature. See “Using
the Controls.”
Replace the Water Filter
To purchase a replacement water lter, see “Accessories.”
Replace the disposable water lter when indicated on the water
lter status display or at least every 9 months. If the ice making rate
decreases before the Replace Filter light illuminates, then replace the
lter.
1. Locate the water lter compartment in the right-hand side of the
control housing. See Step 3 in the “Install Water Filter” section.
2. Turn the water lter counterclockwise (to the left), and pull it
straight out of the compartment.
NOTE: There may be some water in the lter. Some spilling may
occur.
3. Install the replacement water lter by following steps 2 through 5
in the “Install the Water Filter” section.
Normal Sounds
Your new ice maker may make sounds that are not familiar to you.
Because the sounds are new to you, you might be concerned about
them. Most of the new sounds are normal. Hard surfaces such as
oors, walls and cabinets can make the sounds seem louder than
they actually are. The following describes the kinds of sounds that
might be new to you and what may be making them.
■ You will hear a buzzing sound when the water valve opens to ll
the water pan for each cycle.
■ Rattling noises may come from the ow of the refrigerant or the
water line. Items stored on top of the ice maker can also make
noises.
■ The high-efciency compressor may make a pulsating or high
pitched sound.
■ Water running over the evaporator plate may make a splashing
sound.
■ Water running from the evaporator plate to the water pan may
make a splashing sound.
■ As each cycle ends, you may hear a gurgling sound due to the
refrigerant owing in your ice maker.
■ You may hear air being forced over the condenser by the
condenser fan.
■ During the harvest cycle, you may hear a “thud” when the ice
sheet slides from the evaporator onto the cutter grid.
■ When you rst start the ice maker, you may hear water running
continuously. The ice maker is programmed to run a rinse cycle
before it begins to make ice.
■ If the ice maker is connected to a water supply pressure in excess
of 60 psi, you may hear a loud sound during water lling
associated with the ow of water through the inlet valve. Call a
licensed, qualied plumber to determine the best method to
reduce the supply water pressure (50 psi is recommended).
Cleaning
The ice making system and the air-cooled condenser need to be
cleaned regularly for the ice maker to operate at peak efciency and
to avoid premature failure of system components. See the “Ice Maker
System” and the “Condenser” sections.
Exterior Surfaces
Wash the exterior surfaces and gaskets with warm water and mild
soap or detergent. Wipe and dry. We recommend using a clean micro
ber cloth or a soft clean cloth to polish and dry.
For products with a painted or colored exterior, regular use of a good
household appliance cleaner and polish will help protect the nish.
Using paper towels may scratch and/or dull the clear coat of the
painted door.
For products with a ngerprint resistant stainless steel exterior, do
not use soap-lled scouring pads, abrasive or harsh cleaners, any
cleaning product containing chlorine bleach, steel-wool pads, gritty
wash cloths or paper towels. Using these types of products may
scratch and/or dull the clear coat of the ngerprint resistant stainless
steel door.
Ice Maker System
Minerals that are removed from water during the freezing cycle will
eventually form a hard scaly deposit in the water system. Cleaning the
system regularly helps remove the mineral scale buildup. How often
you need to clean the system depends upon how hard your water is.
With hard water of 15 to 20 grains/gal. (4 to 5 grains/liter), you may
need to clean the system as often as every 9 months.
NOTE: Use one 16 oz (473 mL) bottle of approved ice maker cleaner.
To order, see “Accessories.”
1. Press the ON/OFF button.
2. Wait 5 to 10 minutes for the ice to fall into the storage bin.
Remove all ice from the storage bin.
3. Unscrew the drain cap from the bottom of the water pan located
inside the storage bin as shown. Allow the water to drain
completely.
A
A. Alignment arrow aligned with locked symbol
CARING FOR YOUR ICE MAKER
11-Jun-2018 15:29:29 EDT | RELEASED
In some European factories the letter "W" of the part code mentioned herein will be automatically
replaced by the number "4000" (e.g. "W12345678" becomes "400012345678")
Loading ...
Loading ...
Loading ...