Loading ...
Loading ...
Loading ...
14
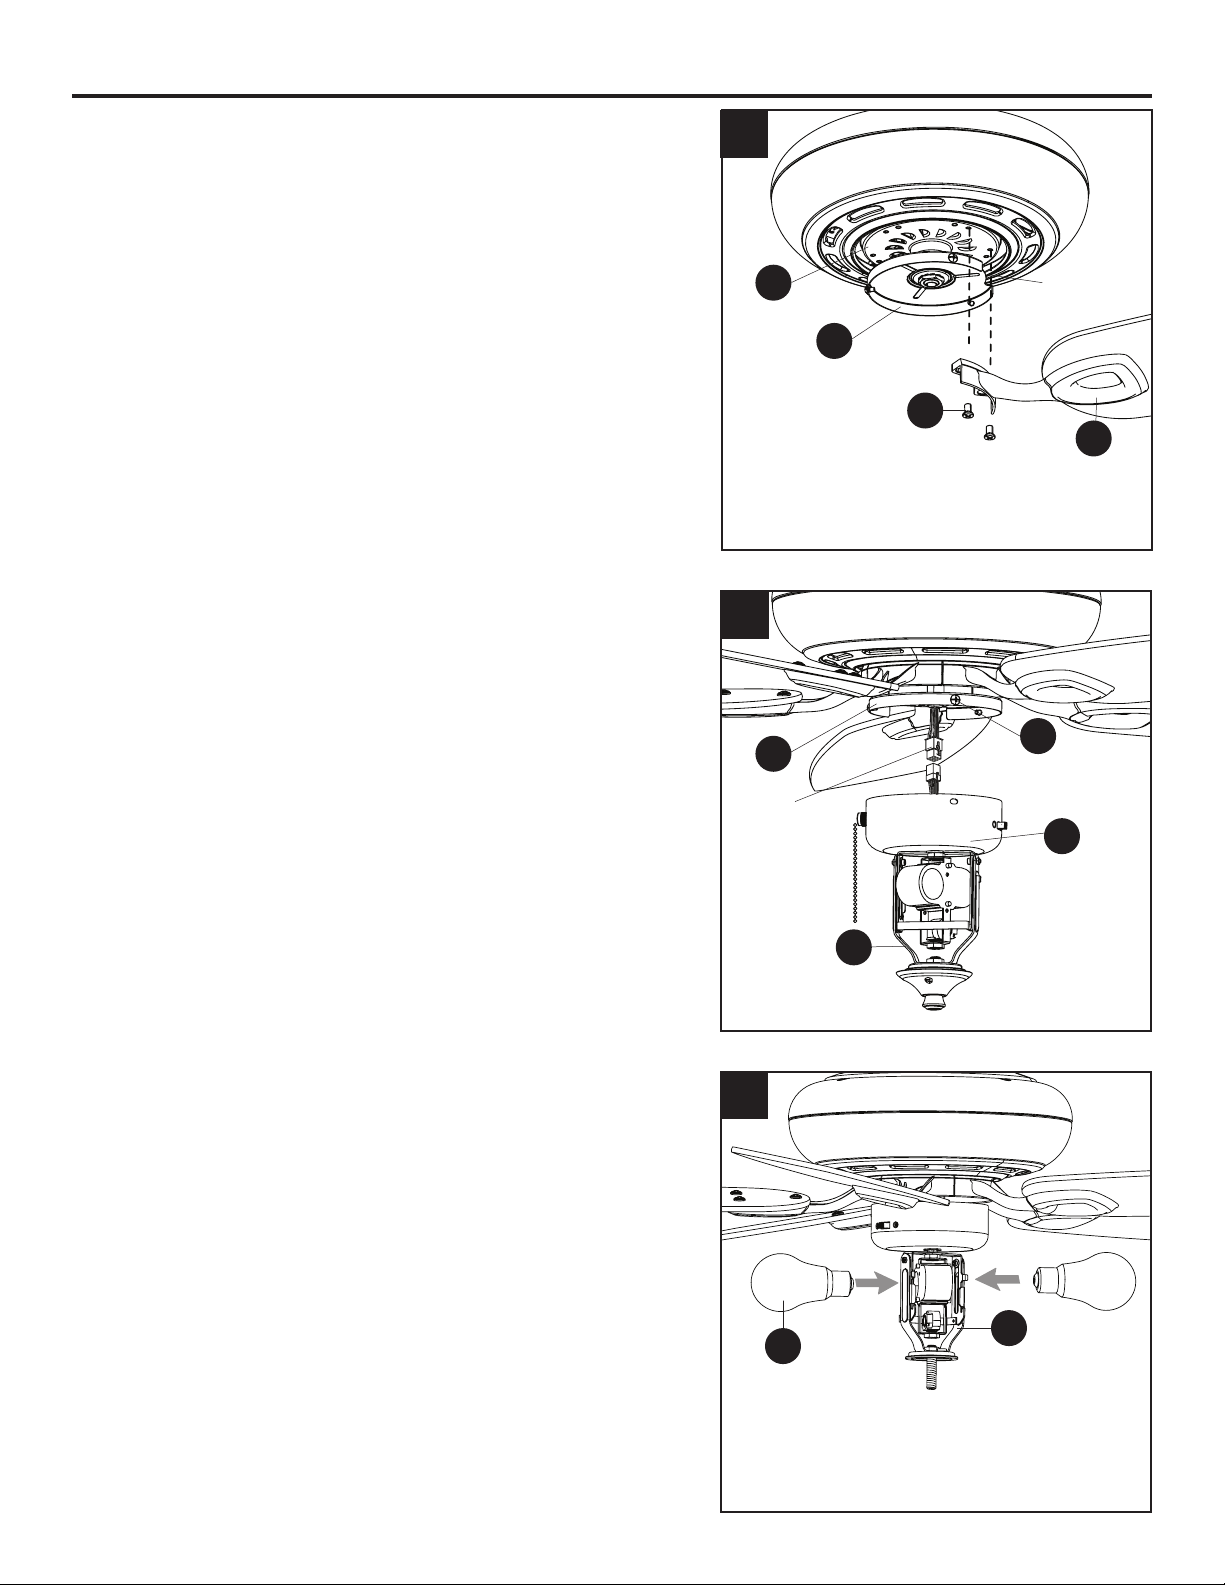
FINAL INSTALLATION
4. Install the blade arm (P) to the underside of the motor
assembly (G) with motor screws (R) previously removed
(Step 6, page 8). Tighten with Phillips screwdriver.
Repeat for each blade arm (P).
Note: Thenotchinthetterplate(H)allowsscrewdriver
access to the motor screw holes.
Note: If you wish to install the fan without the light kit
(J), proceed to Step 8.
5. To install the light kit (J),rstremovethethreeswitch
housingscrews(X)fromthetterplate(H).Then,
connect the 9-pin connector from the fan to the 9-pin
connector from the switch housing (I). Secure the switch
housing(I)alongwithlightkit(J)tothetterplate(H)
using the previously removed switch housing screws
(X).
6. Install the bulbs (M) into the sockets on the light kit (J).
IMPORTANT: Make sure to allow the bulbs (M) and
light kit (J) to cool before replacing the bulbs.
4
5
P
G
H
J
I
X
R
H
6
M
J
9-pin
Connector
Notch
Loading ...
Loading ...
Loading ...