Loading ...
Loading ...
Loading ...
3-8
Chapter 3: General Instructions
DisplayPort cable (optional), HDMI cable
(optional), DVI (Dual-Link) cable (optional), Audio
cable, power adapter, power cord, Driver and
Manual disc, Quick start guide, warranty card
UL/cUL, CB, CE, ErP, FCC, CCC, CU, RCM,
BSMI, VCCI, RoHS, J-MOSS, WEEE, Windows 7
& 8.1 & 10 WHQL, CEL, MEPS, PSE, ISO9241-
307, UkrSEPRO, KCC, E-Standby, TUV-Flicker
Free, TUV-Low Blue Light
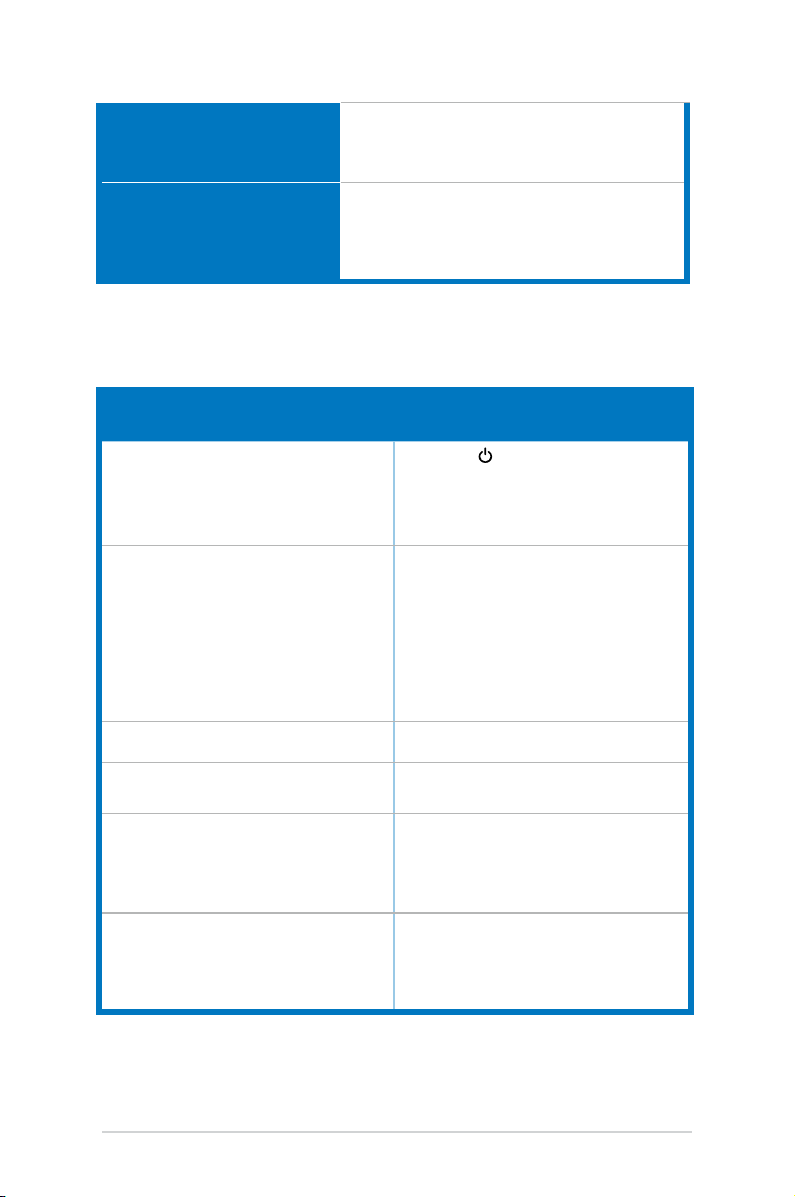
3.3 Troubleshooting (FAQ)
Power LED is not ON
• Press the
button to check if the monitor
is in the ON mode.
• Check if the power cord is properly
connected to the monitor and the power
outlet.
The power LED lights amber and there is
no screen image
• Check if the monitor and the computer are
in the ON mode.
• Make sure the signal cable is properly
connected the monitor and the computer.
• Inspect the signal cable and make sure
none of the pins are bent.
• Connect the computer with another
available monitor to check if the computer
is properly working.
Screen image is too light or dark • Adjust the Contrast and Brightness
settings via OSD.
Screen image is not centered or sized
properly
• Adjust the H-Position or V-Position
settings via OSD.
Screen image bounces or a wave pattern is
present in the image
• Make sure the signal cable is properly
connected to the monitor and the
computer.
• Move electrical devices that may cause
electrical interference.
Screen image has color defects (white does
not look white)
• Inspect the signal cable and make sure
that none of the pins are bent.
• Perform All Reset via OSD.
• Adjust the R/G/B color settings or select
the Color Temperature via OSD.
Loading ...
Loading ...
Loading ...