To ensure reliability, each LG dishwasher goes through thorough quality control before it leaves the factory.
You may find water droplets or water spots from this process inside your new dishwasher.
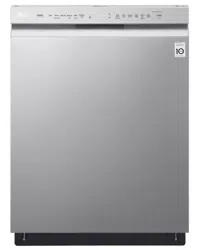
SignaLight™ (Front Display)
The top-control models have 3 indicator LEDs centered at the top of the front cover.
Red : Error (See the Error Codes in Troubleshooting section.)
White (steady): Normal operation.
White (blinking): Cycle has been paused. (After four minutes in pause mode, the machine turns off.)
Green: Cycle finished normally.
The default “ON” setting keeps the green light on until the door is opened. If the setting is changed to “OFF”, the green light turns off after 90 seconds. To change the setting, turn the power on and press and hold the High Temp button for 3 seconds until “ON” or “OFF” appears in the display. The setting is stored until you change it.
Interior Parts
NOTE
The silverware basket ships installed at the back of the bottom rack. For best performance, install it along the right side as shown in the Interior Parts section.
Remove all packing materials from the exterior and interior of the dishwasher before installing the appliance.
Press the tab to remove the cable tie by hand. Cutting the tie with a knife or scissors may damage the rack or the silverware basket.
OPERATION
Using the Appliance
Before Using the Appliance
Read the Important Safety Instructions.
Connect to the hot water supply only. The water supply temperature should be a minimum of 120°F (49°C) for better washing performance and shorter cycle time.
Follow the instructions for loading the dishwasher to ensure effective cleaning.
Remove insoluble items such as bones, toothpicks, and pieces of paper while loading the dishwasher.
When loading the dishwasher
1 Only load items that are dishwasher-safe. 2 Remove solid, burned-on scraps from dishes prior to loading in the dishwasher. 3 Place items with deep dish bottoms at an angle to help water run off and speed the drying process.
NOTE
• Do not load utensils that are not heat-resistant or have decorative metal trim.
Quick Start 1 Load the Dishes
Scrape the dishes free of excess food, bones, and any other hard, non-soluble residue. Pull each rack out and load the dishes as described in this manual.
2 Measure the Detergent
Using the guidelines in this manual, fill the detergent cup with the recommended amount of detergent and close the lid. If a prewash is desired, the recess on top of the lid should also be filled with detergent.
3 Close the Door 4 Turn on the Dishwasher
To turn on the display panel, press the Power button.
5 Check the Rinse Aid
The Rinse Aid icon will flash if the level of rinse aid in the dishwasher is low. Add rinse aid if the level is low to maintain the effectiveness of the dry cycle.
6 Select the Cycle and Options
Select the cycle and options that best fit the load by referring to the Cycle guide. The display will show the estimated time for the cycle and options selected.
7 Operate the Dishwasher Method 1
• Press the Start button and then close the door in less than four seconds to operate the dishwasher. If the door is not closed within four seconds, the white LED with time flashes, an audible tone is heard, and the cycle does not start.
Method 2
• Close the door first and then press the Start button to operate the dishwasher.
If the door is opened during the cycle, the dishwasher will stop. To resume the cycle, see methods 1 and 2 above.
NOTE
• If the door is opened during the cycle and is not closed within four seconds after selecting the Start button, or if the door is closed without pressing the Start button, the white LED with time flashes, an audible tone is heard, and the cycle does not start.
8 End of Cycle
When the cycle is complete, a chime will sound and the display will show End until the door is opened or Power is pressed. To save energy, press and hold High Temp for three seconds to set the End display to automatically turn off a few minutes after the cycle ends.
CAUTION
• Do not open the door during operation or immediately after it has completed the wash cycle as the steam build up may cause scalding as the door is opened.
NOTE
• Empty the lower rack first and then the upper rack. This will avoid water dripping from the upper rack onto dishes in the lower rack.
Auto-Off
The dishwasher automatically turns off after four minutes of inactivity if paused or if no cycle is started.
Cycle time may vary depending on the soil level of your load.
• : Control Lock
The Control Lock feature helps prevent settings from being changed during a cycle. Selecting this feature locks all of the buttons, except for the Power button, on the control panel. This feature does not lock the door.
Control Panel
1 Power
Press the Power button to turn power on and off.
After the cycle is complete, the power automatically turns off for purposes of safety and economy.
If there is a power surge, power outage, or disruption of any kind, power is automatically turned off for safety.
When power is connected again, it will turn on automatically and resume the cycle.
: Rinse Aid Icon
This icon illuminates when the rinse aid level is low. The LED automatically shuts off when the rinse aid is refilled or the level is set to 0.
Refer to the Rinse Aid Dispenser Adjustment section.
• : Digital Display
- The digital display on the control panel shows the ESTIMATED cycle time. When the cycle and options are selected, the display shows the total estimated time to complete those selections. During operation, the display shows the remaining estimated operating time.
NOTE
The estimated time shown on the display does not include delay times for heating water, etc.
If Delay Start is selected, the display shows the delay time in hours.
Cycle time may vary depending on the soil level of your load.
• : Control Lock
The Control Lock feature helps prevent settings from being changed during a cycle. Selecting this feature locks all of the buttons, except for the Power button, on the control panel. This feature does not lock the door.
While a cycle is running, press and hold Half Load and Energy Saver simultaneously for three seconds to activate or deactivate Control Lock.
To start a new cycle, deactivate Control Lock.
3 Cancel
The drain pump activates and the cycle cancels. Once the dishwasher finishes draining, the power turns off.
Press and hold Start for three seconds to activate.
4 Start
To operate the machine, either press Start and close the door within four seconds or close the door and press Start.
If Start button is not pressed to start the cycle, an alert will sound.
Chime On/Off
• To activate or deactivate the button sounds, press and hold Dual Zone and Energy Saver simultaneously for three seconds. The error alert sound cannot be turned off.
Cycles
Select your desired cycle.
Auto
This cycle senses the soil amount and soil toughness and is optimized to achieve the best cleaning.
Heavy
This cycle is for heavily soiled dishes and dishes with hardened on soil. The Heavy cycle defaults to the strongest spray intensity and uses it to wash heavily soiled dishes.
Delicate
Use this cycle to clean delicate items such as fine china and stemware.
Normal
This cycle is for moderately soiled, everyday loads. Select the Night Dry option if leaving dishes overnight. Press and hold Extra Dry for three seconds to activate Night Dry.
• After the cycle ends, the fan runs for an hour to help vent the warm, moist air in the tub. You can stop the fan by opening the door after the cycle ends.
Turbo
This cycle will clean heavily soiled dishes in an hour using slightly more energy and water.
• This cycle does not have drying. Select the Extra Dry and Night Dry option or another cycle for better drying.
Download Cycle
Use a dedicated cycle downloadable via Wi-Fi or NFC.
NOTE
• Only the cycle code for the current Download cycle appears on the appliance. See the smartphone app for cycle codes, names, and more information about the available cycles.
- Default Cycle : P1. Pots & Pans
Machine Clean
This cycle is for cleaning the inside of the dishwasher. Use the cycle without dishes in the machine. It eliminates residual soils, odor, white spots, and other dirt. Add citric acid or another cleaning agent for more effective results.
• Press and hold Heavy for three seconds to activate.
NOTE
• The Machine Clean icon flashes every 30 cycles. To activate or deactivate the icon, press the Delicate button for three seconds.
Rinse
This cycle is a quick rinse for dishes that will not be washed immediately. The cycle rinses dishes that have excess soil to soften dried on residue. Rinsing the dishes helps prevent odors in the dishwasher. No detergent should be used.
This cycle does not have drying.
Press and hold Normal for three seconds to activate.
Express
This cycle will quickly clean lightly soiled dishes. (Time : 33 minutes)
This cycle does not have drying. Select the Extra Dry and Night Dry option or another cycle for better drying.
Press and hold Turbo for three seconds to activate.
Options
Select the desired cycle button and then select the options for that cycle.
Dual Zone
This option automatically sets the spray intensity to soft for the upper spray arm and strong for the lower spray arm. Place heavily soiled dishes like plates and bowls in the lower rack and lightly soiled dishes like cups and small plates in the upper rack to get the best results.
Half Load
This option washes intensively by selecting the upper or lower racks. For small loads, use just the upper or lower rack to save energy and time. By pressing the Half Load button, the settings and the cancellation of the Half Load option are available.
Energy Saver
This option saves energy by reducing the wash and rinse temperatures. Wash time is increased to maintain wash performance. Do not use this cycle with heavily soiled dishes.
High Temp
Raises the main wash temperature to improve cleaning.
Extra Dry
Select the Extra Dry option for better drying performance. This option adds extra drying time to the cycle and raises the heated rinse temperature.
• When the rinse aid is empty, the Extra Dry option is selected automatically.
Night Dry
Dishes are often left in the dishwasher overnight after the cycle ends. This can result in the steam inside the tub condensing on dishes, leaving them wet. The Night Dry option runs the ventilation fan periodically to help vent the steam from the tub.
Press and hold Extra Dry for three seconds to activate.
The Night Dry option is selected by default for all cycles for which it is available, except the Normal cycle.
To add the Night Dry option to the Normal cycle, press and hold Extra Dry for 3 seconds.
Delay Start
The Delay Start feature delays the start of a selected cycle. Each time the Delay Start button is pressed, the delay time increases by an hour. The delay time can be set from 1 to 12 hours, in one-hour increments.
Cycle/Option Guide
The cycle guide below shows the available options for each cycle.
Cycle
Auto
Heavy
Delicate
Normal
Turbo
Express
Rinse
Machine Clean
Soil Level
all levels
heavy
light
all levels
heavy
light
light
*Water Usage
13.1-
20.1 L
3.4- 5.3 gal
20.3 L
5.4 gal
19.7 L
5.2 gal
9.2- 19.5 L
2.4- 5.2 gal
27.5 L
7.3 gal
20.4 L
5.4 gal
6.8 L
1.8 gal
12.3 L
3.2 gal
**Wash Time with Options (Mins.)
90 - 180
139 - 214
95 - 133
98 - 190
59 - 121
33 - 103
12
82
Available Options
Dual Zone
Half
Load
***Energy Saver
High Temp
Extra Dry
Night Dry
Delay Start
* Actual water consumption will vary depending on soil level and hardness of water.
** The actual running time and cycle time displayed may change depending on options chosen, soil level, water temperature, and hardness of water. Therefore, display time and actual running time can be different.
*** Energy Saver cannot be used at the same time as Extra Dry or High Temp.
: Extra drying time only, no added high-temperature rinse.
: ON by default.
NOTE
• Options are not available for Download Cycle.
Loading the Dishwasher
The extra tall tub allows loading of dishes, pans, or other utensils up to 14" high.
For effective washing performance, always follow the following instructions.
Remove large particles of food debris from plates including bones etc. before loading.
Items with burnt on food should be soaked prior to loading in the dishwasher.
Deep pots or dishes should be placed upside down.
Make sure that all items do not touch each other.
Non-Dishwasher Safe Items
The combination of high water temperature and dishwasher detergents may damage certain items. Do not wash the following items in the dishwasher.
Copper or anodised aluminium
Hand painted silver or gold leaf crockery
Wood or bone handled utensils
Iron or non rust proof utensils
Plastic items which are not dishwasher safe
Expensive ware such as silver and dishes with golden rings
Fragile item such as crystal glasses
CAUTION
Do not place pots or pans with plastic handles in the appliance as the handles may deteriorate due to the heat and detergent.
Water proof or long lasting lipstick smudges on glasses may not be removed during the wash.
Loading the Lower Rack
Loading 10 Place Settings
Loading 12 Place Settings
Lower Rack Loading Tips:
Plates should be positioned upright and facing the center of the rack and pots, pans and large dishes must be turned upside down.
Load dinner plates, dishes, soup bowls etc. between the tines.
Load cookie sheets, cake pans and other large items on the sides or back of the rack. Loading these items in the front of the dishwasher can prevent the water spray from reaching the detergent dispenser.
Make sure that pot handles and other large items do not stop the rotation of the spray arms.
The lower rack should not be used for small items such as cups, wine glasses, or small plates. These items should be loaded in the upper rack.
Make sure that large items do not interfere with the rotation of the spray arms, and do not prevent the detergent dispenser from opening.
Folding Down the Lower Tines Loading Pots & Bowls
Fold tines down to fit larger dishes; pull tines back up to fit smaller dishes.
Case 1
Case 2
NOTE
• The silverware basket ships installed at the back of the bottom rack. For best performance, install it along the right side as shown.
Loading Dishes & Pots
Loading the Silverware Basket
The silverware basket has separators to avoid scratching and tarnishing of delicate silverware.
Loading 10 Place Settings
Loading 12 Place Settings Silverware Loading Tips:
For best cleaning results, use the top separators in the basket when loading silverware. The separators will prevent nesting of silverware.
Load sharp items, such as knives, pointing down.
When unloading the dishwasher, it is best to start with the silverware basket. Doing so will prevent water droplets from falling on your silverware from the upper rack.
Loading the Upper Rack
Loading 10 Place Settings
Loading 12 Place Settings
Upper Rack Loading Tips:
Place cups and glasses in the rows between the rack tines. Placing them over the rack tines can lead to breakage and water spots.
To avoid chipping, do not let stemware touch other items.
Place items so that the open end faces down for cleaning and drying.
Do not stack items on top of each other.
Use the upper rack for small or delicate items such as small plates, cups, saucers, glasses, and dishwasher-safe plastic items.
Cups, glasses, and bowls must be positioned upside down.
Make sure items do not interfere with the rotation of the spray arms above and below the upper rack.
When loading larger items in the upper rack, such as wine glasses or taller cups, it may be necessary to remove the cutlery rack if one is present.
Folding Down the Upper Tines Height Adjustable Upper Rack
Fold tines down to fit larger dishes; pull tines back up The upper rack adjusts up and down. Raise the
to fit smaller dishes. upper rack to allow items up to 14” tall in the lower
rack. Lower the upper rack to allow dishes up to 12” tall in the upper rack. The dishwasher ships with the upper rack raised.
There are three available positions for adjusting the height of the upper rack to create more space.
Loading Dishes & Pots
Lowering the Rack:
Hold the rack at the center of each side to support its weight. Then, push the button on each side to release the rack and lower it to the lower position.
Raising the Rack:
Lift the rack at the center of each side until the rack locks into place in the upper position. It is not necessary to lift the lock levers to raise the rack.
WARNING
• Before adjusting, ensure the rack is empty of all dishes. Otherwise dishes may get damaged or you may get injured.
NOTE
Raise the upper rack without pushing the buttons on each side. Pushing the buttons when raising the rack will prevent the rack from locking into position.
To set the rack to the middle position, it may be easier to lower the rack all the way down and then raise each side of the rack individually until it clicks into place.
Before pushing the upper rack into the dishwasher, ensure the rack height is the same on both sides. If the height is not the same on both sides, the dishwasher door will not shut and the upper spray arm will not connect to the water inlet.
There is a 24 5/8 inches (56 mm) gain in height when the upper rack is moved to the lower position.
After adjusting the rack levels, check that the spray arms are free to rotate.
With the lower position of the upper rack, check if the bottom part of upper rack including spray arm is not disturbing items on the lower rack.
When the upper rack is in the lower position, push in the upper rack first, and the lower rack later.
Pull out the lower rack first, and the upper rack later.
Raise the upper rack without pushing the buttons on each side. Pushing the buttons when raising the rack will prevent the rack from locking into position.
To set the rack to the middle position, it may be easier to lower the rack all the way down and then raise each side of the rack individually until it clicks into place.
Adding Cleaning Agents
Adding Detergent to the Dispenser
Remove the label on the dispenser prior to running the dishwasher for the first time.
The amount of detergent needed depends on the cycle, load size, and soil level of dishes.
Put detergent into the detergent compartment before starting any cycle, except the Rinse cycle. 1 Push the button on the dispenser lid to open the cover.
Add dishwashing detergent to the main wash compartment until the level is between the lines marked 15 and 25.
Fill to over the 25 line for hard water or heavily soiled loads.
Fill to the 15 line for soft water or lightly soiled loads.
Push the detergent lid to slide the lid closed until it clicks.
If a prewash is desired, fill the recessed prewash compartment area on the lid with detergent.
NOTE
After completion of the wash program, check whether the detergent was completely washed out.
Some dishwasher detergent tablets may become stuck in the dispenser due to their excessive size. Tablets can be placed onto the base of the wash tub next to the filter before starting the cycle.
Too much detergent can leave a film on dishes and in the dishwasher, resulting in poor wash performance.
If dishwasher detergent tablets are used without liquid rinse aid, the dishes and dishwasher interior will have excessive moisture. Select the Extra Dry option for better drying performance.
Using liquid rinse aid improves drying performance by allowing water to drain off of dishes after final rinse.
Do not use detergent tablets for shorter wash cycles. The tablet may not dissolve completely, causing detergent residue on dishes and inefficient cleaning.
Using a wash booster helps remove spots, residue, and the white film caused by hard water. It does not help remove excess detergent residue.
Adding Rinse Aid to the Dispenser
The Rinse Aid indicator appears in the display when more rinse aid is needed.
The use of rinse aid is recommended to prevent water spots on dishes and to enhance drying performance.
Open the rinse aid lid by lifting up the flap.
Add a liquid rinse aid to the maximum fill level. The rinse aid should be settled in the dispenser while filling, or air bubbles may result in poor drying performance. Avoid overfilling the dispenser.
Close the lid to lock the dispenser. Rinse aid is dispensed automatically during the final rinse cycle.
NOTE
Only use liquid rinse aid in the dishwasher.
Do not overfill the rinse aid dispenser.
Wipe off any spilled rinse aid around the dispenser.
Rinse Aid Dispenser Adjustment
The dispenser has five adjustment levels. The dishwasher is programmed at the factory for a rinse aid dispenser level of 2. This can be checked and altered by using the buttons on the control panel. 1 Ensure the appliance is off.
Press Dual Zone and Power simultaneously to check the current setting.
Press Delay Start to change the rinse aid dispenser setting. Each press of the button changes the setting one step from L0 to L4. 4 Once the desired rinse aid dispenser setting is selected, press Start to save.
NOTE
Adjust the setting higher if you have hard water and notice calcium buildup on your dishes.
Setting the rinse aid control too low will contribute to spotting and streaking on dishes and poor drying performance.
Setting the control too high can cause foaming, which will cause poor wash performance.
Refilling the Rinse Aid
How often the dispenser needs to be refilled depends on how often dishes are washed and the rinse aid setting used.
• The Rinse Aid icon flashes when more rinse aid is needed, unless the rinse aid dispenser setting is set to L0.
SMART FUNCTIONS
SmartThinQ Application
The SmartThinQ application allows you to communicate with the appliance using a smartphone.
Installing SmartThinQ Application
Search for the LG SmartThinQ application from the Google Play Store on a smart phone. Follow instructions to download and install the application.
SmartThinQ Application Features
For appliances with the logo
The Tag On function can only be used with most smart phones equipped with the NFC (Near Field Communication) function and based on the Android OS (operating system).
Download Cycle
Download new and special cycles that are not included in the basic cycles on the appliance.
Appliances that have been successfully registered can download a variety of specialty cycles specific to the appliance.
Only one cycle can be stored on the appliance at a time.
Once cycle download is completed in the appliance, the appliance keeps the downloaded cycle until a new cycle is downloaded.
Machine Clean Coach
This function shows how many cycles remain before It is time to run the Machine Clean cycle.
Smart Diagnosis™
This function provides useful information for diagnosing and solving issues with the appliance based on the pattern of use.
Settings
Set the Rinse Aid Dispenser Level, Machine Clean Reminder, Chime On/Off and Clean Indicator Light.
NOTE
Press in the LG SmartThinQ application for a more detailed guide on how to use the Tag On function.
The location of the smartphone’s NFC module may vary depending on the phone, and NFC use may be restricted on some smartphones due to differences in transmission methods. Because of the characteristics of NFC, if the transmission distance is too far, or if there is a metal sticker or a protective case on the phone, transmission will not be good. In some cases, NFC-equipped phones may be unable to transmit successfully.
The content found in this manual may differ from the current version of the LG SmartThinQ application, and the software may be modified without informing customers.
NFC function would vary depending on smart phones.
Smart Diagnosis™ Function
Should you experience any problems with the appliance, it has the capability of transmitting data via your telephone to the LG Customer Information Center. NFC or Wi-Fi equipped models can also transmit data to a smartphone using the LG SmartThinQ application.
Smart Diagnosis™ through the Customer Information Center
• For appliances with the logo
This gives you the capability of speaking directly to our trained specialists. The specialist records the data transmitted from the appliance and uses it to analyze the issue, providing a fast and effective diagnosis.
1 Call the LG Electronics Customer Information Center at:
(LG U.S.A.) 1-800-243-0000
(LG Canada) 1-888-542-2623 2 When instructed to do so by the call center, place the mouthpiece of the phone close to the Smart Diagnosis™ icon. Do not press any other buttons.
3 Press and hold Download Cycle until a countdown displays on the appliance. 4 Keep the phone in place until the tone transmission has finished.
5 Once the countdown is over and the tones have stopped, resume your conversation with the call center agent, who will then be able to assist you using the information transmitted for analysis.
NOTE
Smart Diagnosis™ cannot be activated unless the appliance can be turned on using the Power button. If the appliance cannot be turned on, troubleshooting must be done without using Smart Diagnosis™.
For best results, do not move the phone while the tones are being transmitted.
If the call center agent is not able to get an accurate recording of the data, you may be asked to try again.
The Smart Diagnosis™ function depends on the local call quality.
Bad call quality may result in poor data transmission from your phone to the call center, which could cause Smart Diagnosis™ to malfunction.
SMART FUNCTIONS
SmartThinQ Smart Diagnosis™
• For appliances with the logo
Use the Smart Diagnosis feature in the SmartThinQ application for help diagnosing issues with the appliance without the assistance of the LG Customer Information Center.
Follow the instructions in the SmartThinQ application to perform a Smart Diagnosis using your smartphone.
NOTE
• Smart Diagnosis™ cannot be activated unless the appliance can be turned on using the Power button. If the appliance cannot be turned on, troubleshooting must be done without using Smart Diagnosis™.
MAINTENANCE
To maintain performance and prevent trouble, it is important to check the outside and inside of the dishwasher, including filters and spray arms, at regular intervals.
WARNING
When cleaning the outside and inside of the dishwasher, do not use benzene or thinner. Otherwise, it may cause fire or explosion.
To prevent injury during care and maintenance or cleaning, wear gloves and/or protective clothing.
NOTE
• If you have not used the dishwasher for a long time, refresh the inside by running the Machine Clean cycle without detergent. When the cycle is finished, clean the inside and outside of the dishwasher according to the Maintenance instructions.
Cleaning the Exterior
• In most cases, the exterior of the dishwasher can be cleaned with a soft damp cloth or sponge, then dried with a soft cloth. If the dishwasher has a stainless steel exterior, use a stainless steel cleaner.
CAUTION
• If cooking oil is spilled on the exterior of the product, wipe it off immediately. Do not clean the exterior of the product with cleaners which contain alcohol, thinners, bleach, benzene, flammable liquids, or abrasives. These substances may discolor or damage the appliance.
Cleaning the Interior
Clean the interior of the dishwasher periodically with a soft, damp cloth or sponge to remove food and dirt particles.
To remove white spots and odor from inside the dishwasher, run an empty cycle, without detergent, with one cup of white vinegar in a dishwasher safe glass or bowl placed on the upper rack. (Vinegar is an acid and with constant use it could damage the appliance.)
Seasonal Maintenance and Storage
If you will be absent for an extended period of time during warmer months, close the water valve and disconnect the power supply line, or turn off the circuit breaker. Clean the filter, tub and dispenser to prevent odor.
If you will be absent for an extended period of time during colder months and there is a possibility of freezing temperatures, winterize the water supply lines and the dishwasher itself. Winterization must be performed by qualified service personnel.
MAINTENANCE
Clogged Drain Air Gap or In-Sink Disposal
Check the drain air gap or in-sink disposal if the dishwasher is not draining well.
Cleaning the Air Gap
Turn off the dishwasher.
Remove the air gap cover and the plastic cap underneath it.
Clean out any debris with a toothpick or brush.
Replace the plastic cap and air gap cover.
NOTE
The drain air gap and disposal are external plumbing devices that are not part of the dishwasher.
The warranty provided with the dishwasher does not cover service costs directly associated with the cleaning or repair of the external drain air gap and disposal.
Cleaning the Filters
1 Remove the lower rack and position the bottom spray arm so a wider vee is open to the front. 2 Turn the inner filter counter-clockwise and take out the assembled inner filter and stainless steel filter.
With the filters removed, check the sump opening and remove any foreign materials, if needed.
Clean the filters with a soft brush under running water. Reassemble the filters before reinstalling them.
To replace the assembled filters, position the spray arm so the wider vee is toward the front. Fit the filters back into the filter holder and secure them by turning the inner filter clockwise until it clicks into place.
Recommended Filter Cleaning Schedule
NOTE
For best wash performance, clean the filter after each load. If food debris remains in the filter, it may cause an odor.
In areas with hard water, clean the filter at least once a month with a soft brush.
Clean the filters using non-abrasive materials and warm running water.
Make sure the filter is assembled correctly before starting a cycle. When assembling, rotate it firmly until it clicks.
Number of Loads Per Week
If you wash dishes before loading
If you scrape and rinse dishes before loading
If you only scrape dishes before loading
If you do not scrape or rinse dishes before loading
1-3
Every 6 months
Once a year
Four times a year
Once a month
4-7
Every 6 months
Once a year
Four times a year
Twice a month (every 15 days)
8-12
Every 6 months
Every 6 months
Every 1.5 months
Every week
13-14
Every 6 months
Every 6 mont
Every 1.5 months
Twice a week
Cleaning the Spray Arms
If the spray arm holes are blocked by any food residue, dishes may not be cleaned well due to improper water spray.
It is recommended that the spray arms be cleaned once every two weeks.
Cleaning the Lower Spray Arm
Make sure that the water jet holes are not blocked by food particles.
If any food residue blocks the spray arm holes, remove it with a pin or any sharp tool.
Cleaning the Upper Spray Arm
Pull the upper rack forward. Make sure that the water jet holes are not blocked by food particles.
When cleaning is necessary, remove the upper spray arm by turning the nut on the bottom of the spray arm 1/8 turn counter-clockwise and pulling down.
Remove food particles by rinsing or shaking the spray arm.
If any food residue blocks the spray arm holes, remove it with a pin or any sharp tool.
After removing the food residue, clean the spray arms holes under running water.
After cleaning the upper spray arm, press it 1 up into place. Turn the nut /8 turn clockwise to make sure that the nut locks back into place.
After assembly, check whether the spray arms rotate freely.
TROUBLESHOOTING
FAQs: Frequently Asked Questions
Q:
Does this dishwasher require a rinse aid to be used?
A:
Rinse aid is strongly recommended to enhance the drying performance of the dishwasher. In order to be more energy efficient, the hybrid drying system does not use a heating element to assist in drying, so a rinse aid plays an integral role in the drying process. If a rinse aid is not used, water may remain on the dishes and the tub. Rinse aid helps to ensure that the majority of the water has been sheeted off of the dishes at the end of the rinse and that the load is ready for the dry cycle.
Q:
What can be done if my dishes have a cloudy, white film on them after a wash?
A:
The cloudy film is usually caused by minerals in the water reacting with the dishwasher detergent. First, be certain not to use too much detergent. Refer to Adding Detergent to the Dispenser section for recommended detergent amounts. Add an extra rinse to the cycle. LG Dishwashers use less water than traditional dishwashers, so adding an extra rinse aids in rinsing the film away. If the water supply is hard, it may be necessary to add a performance booster that addresses the hard water condition.
Q:
How do I remove white film on the tub?
A:
Measure 3 tbsp. (40 g) of citric acid powder and use it to fill the main detergent compartment.
Run a Machine Clean cycle. Do not use detergent.
Q:
What steps can I take to improve drying results?
A:
Drying performance is directly affected by the amount of heat that remains in the tub after the heated rinse is performed. If your dishwasher is far away from your home’s hot water heater, it may be necessary to run the hot water tap in the sink before starting a wash cycle, to ensure that cool water is purged from the hot water lines. This will ensure your dishwasher has a consistent supply of hot water from start to finish. Using the High Temp setting also aids in keeping the inner drum temperature and dishes hotter before drying begins.
LG dishwashers are designed to be used in conjunction with a rinse aid. Using a rinse aid will maximize the amount of water that has already been sheeted away from the dishes before the dry cycle begins. If a rinse aid is used and the performance still needs a boost, adjust the amount of rinse aid used. 2 is the default setting, but if necessary set the level to 3 so more rinse aid is used.
Water tends to bead rather than sheet off plastic and nonstick surfaces, making them more difficult to dry. If washing plastic items in a Normal cycle, select the Extra Dry or Night Dry option or both for better drying results. When the rinse aid is empty, the Extra Dry option is selected automatically.
Allow the dishwasher to completely finish the dry cycle before opening the door. If the door is opened in the middle of the dry cycle, the heat that is necessary for the hybrid dry system to work will escape. This will cause all of the dishes inside to remain wet once the cycle finishes.
Q:
What is the hybrid drying system?
A:
The dishwasher does not rely on a heating element for the drying process; instead, it relies on the heat that is retained by the dishes and the tub during the wash and rinse cycles to turn the moisture in the tub into humidity.
Warm, moist air in the dishwasher is then pulled into a condensing duct in the door by a fan. The air then cools, which causes the humidity to condense. Room temperature air is also drawn into the duct to help the air cool down faster. When this moisture condenses into a liquid, it is drained out.
NOTE
• Rinse aid is required to enhance the drying performance. If no rinse aid is used, water may remain on the dishes and the tub.
Q:
Why am I hearing a whistling sound from the dishwasher?
A:
It is important to determine the duration of the noise and when it happens (what part of the cycle). When water is drawn into the dishwasher, a whistling noise can be heard. This is normal. If the water pressure is too high, it will be louder, so it may be necessary to adjust the water valve to lower the pressure if the noise is too loud.
Q:
What kinds of dishes can be placed in the dishwasher?
A:
Ensure that the dishes you place in the dishwasher are dishwasher safe. Plastic dishware will not dry as effectively as glass and metal dishware. Plastic items do not retain heat as well as glass and metal dishware. Plastic cups and dishes may require some hand drying before being put away at the end of the cycle.
Q:
Can I perform a drain only cycle?
A:
To drain standing water, press and hold Start for three seconds until the cycle stops. Once the dishwasher finishes draining, the power turns off.
Q:
Why does my dishwasher continuously chime if I open the door during a cycle or right after the cycle has finished?
A:
This is normal. The dishwasher is letting you know that the interior temperatures of the unit are hot and to use caution when placing your hands inside. Once the unit has cooled down, the chiming will stop.
Q:
What is Control Lock and how is it activated?
A:
Control Lock is a feature that prevents the controls from being changed during the cycle. It does not prevent the door from being opened or the unit from being powered off. To activate or deactivate, press and hold Half Load and Energy Saver simultaneously for three seconds.
Q:
Can I add an extension to the drain hose?
A:
If an extension drain hose is required, use 5/8" or 7/8" inside diameter, 2-3 ft. length hose and a coupler for connecting the two hose ends.
Q:
An LED is blinking, the machine is chiming, and the dishwasher won't start. What is wrong with the dishwasher?
A:
This is a safety feature. The door must be closed within four seconds of pressing the Start button. If the door is not closed within four seconds, an LED flashes, an audible alert sounds, and the dishwasher does not operate. To start the dishwasher, open the door and either close the door and press Start (front controls) or press Start and close the door within four seconds (top controls).
Q:
Before loading dishes, should I pre-rinse dishes?
A:
No, you don't need to pre-rinse the dishes before loading especially if using the Normal and Auto cycles. The dishwasher washes dishes clean without pre-rinsing.


 : Digital Display
 icon flashes every 30 cycles. To activate or deactivate the icon, press the Delicate button for three seconds.